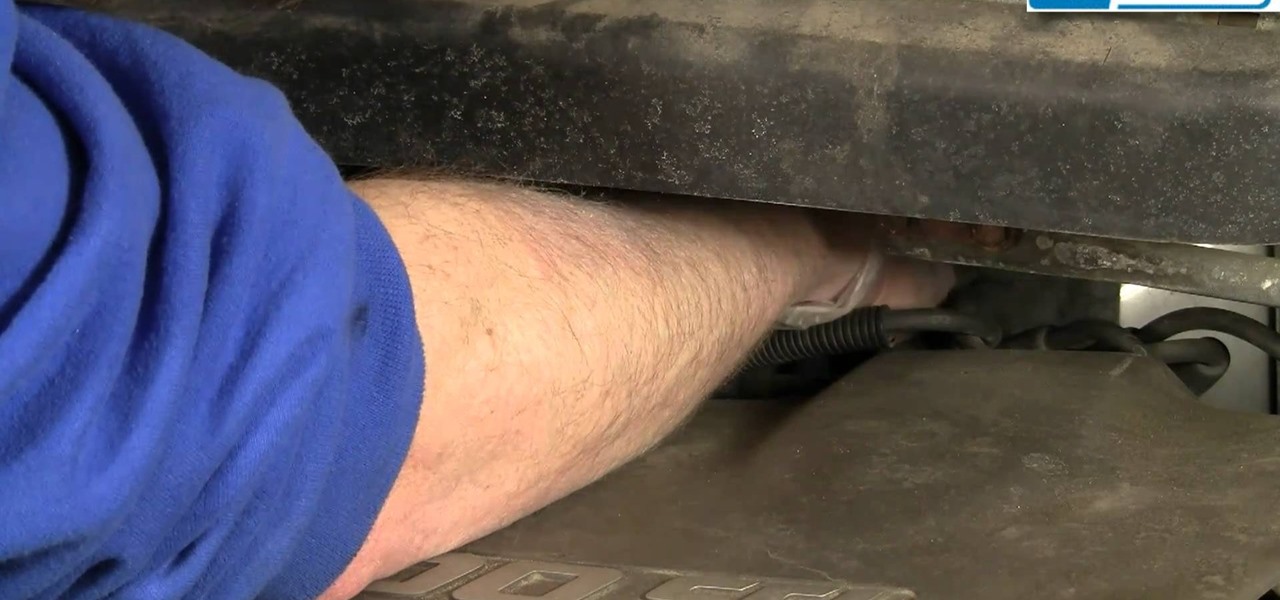
Every van is put together in a different way, so make sure that the car you want to fix is either a Chevy Venture or Pontiac Montana. You will need a quarter inch ratchet, a two inch extension for the ratchet and a 732 socket.
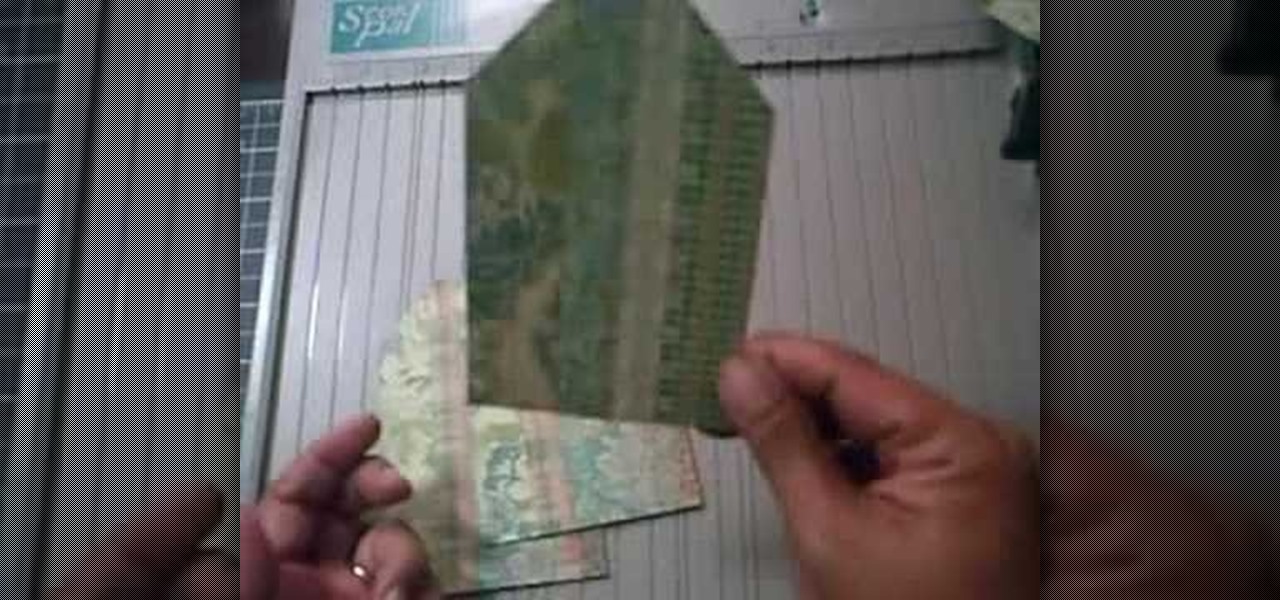
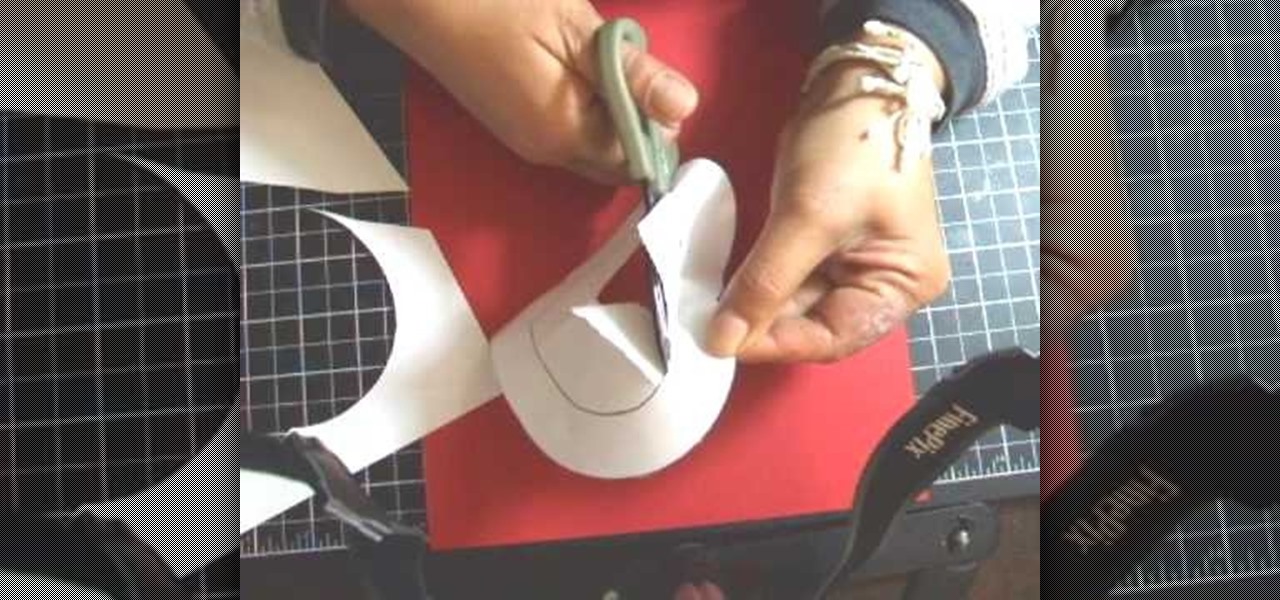
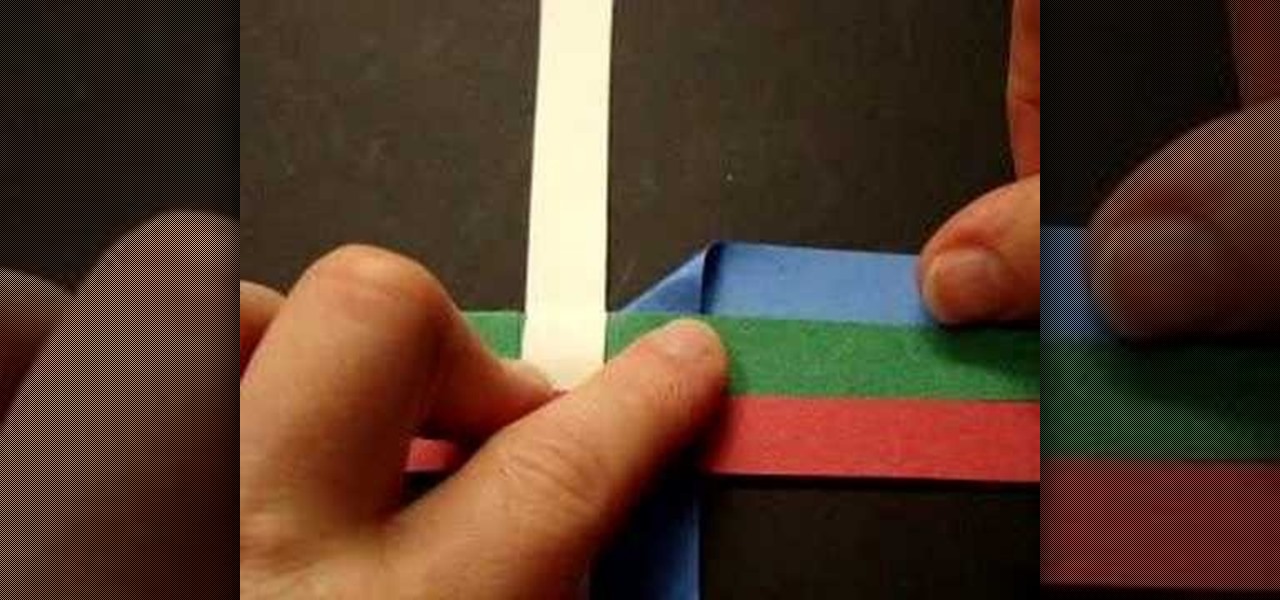
This video explains how to create a 4z4 tri-fold mini album. The first step is to score your designer paper at four inches and then fold along the score mark. The previous step is completed three more times until you have four score marks along your paper. Three separate pieces of paper are then cut measured at three and half inches. Your chosen picture is then glued into the center of your original twelve inch panel. using the three individual pieces of paper you must glue them around the pi...
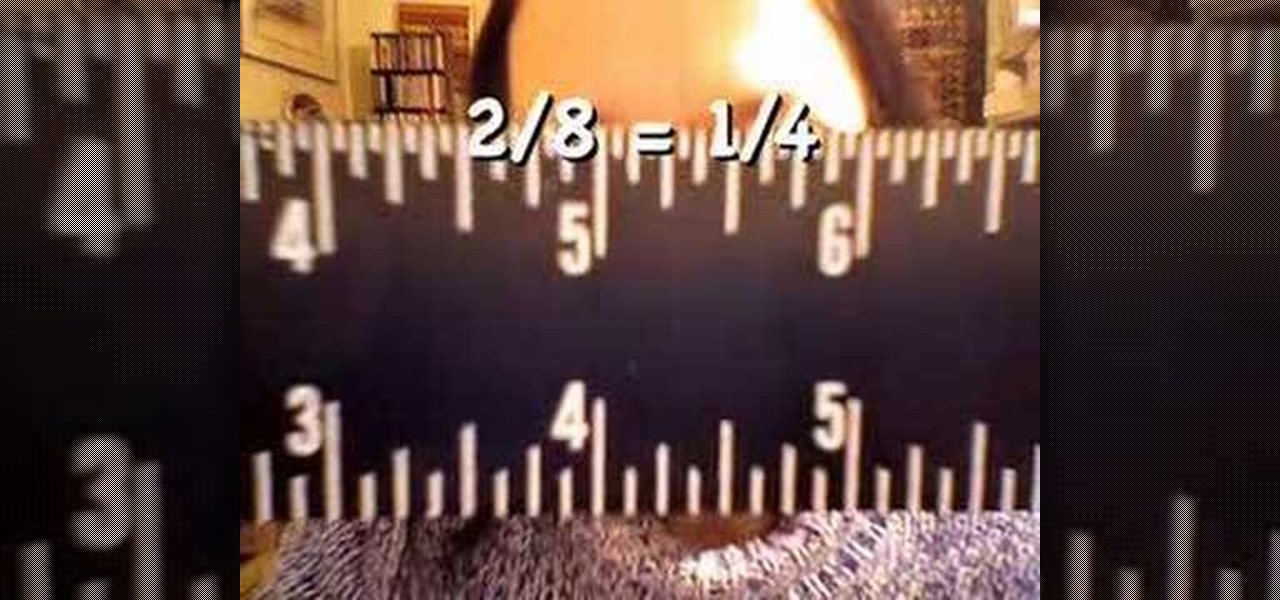
In this video, we learn how to read a ruler. First, grab you ruler and look on the top and the bottom of it. The top is divided into different marks that shows inches, half inches, and quarter inches. If you aren't familiar with reading this, just use the markers at the top to help you count between 1/4, 1/2, 1/8, etc. The other side of the ruler is used for centimeters, which you usually will not use in the United States very often. Learning how to read a ruler can help you get better with f...
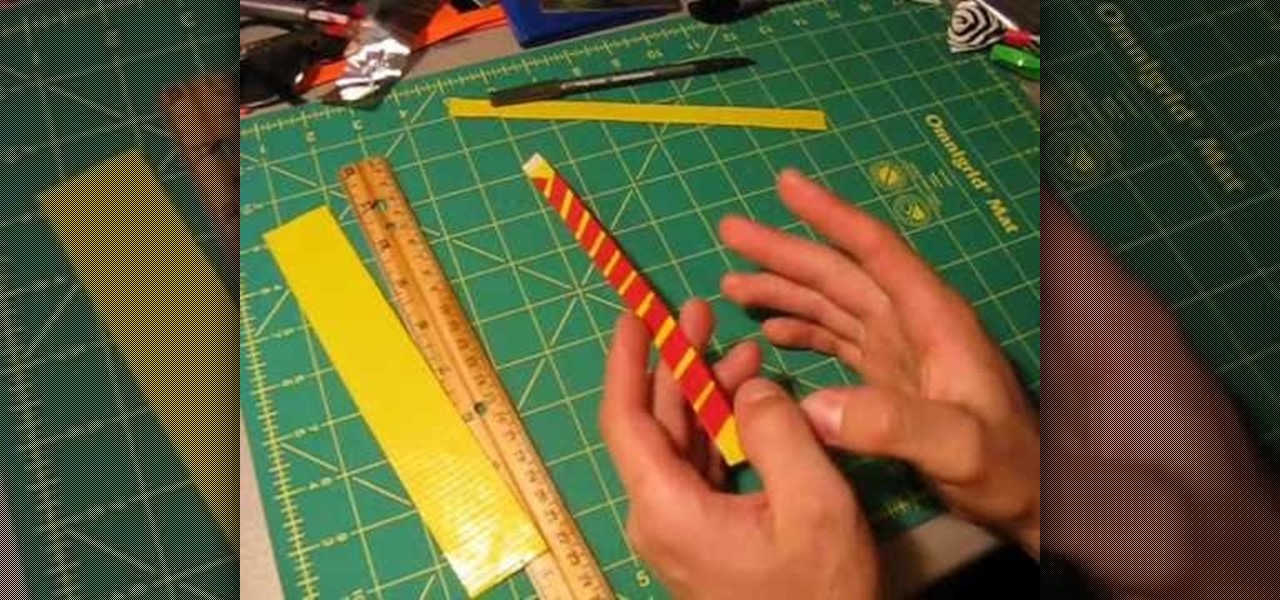
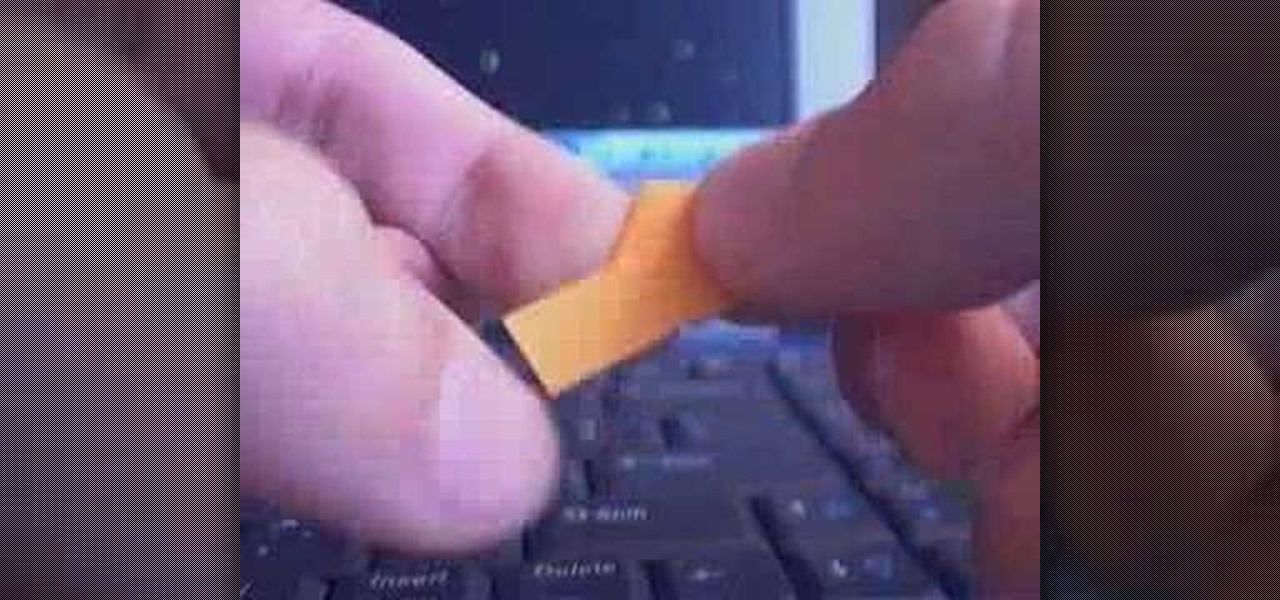
Accessorize with duct tape! This tutorial shows you how to make a bracelet or wristband out of two eight inch strips of yellow duct tape. They end up a little less than half an inch wide and look like charity silicone wristbands.
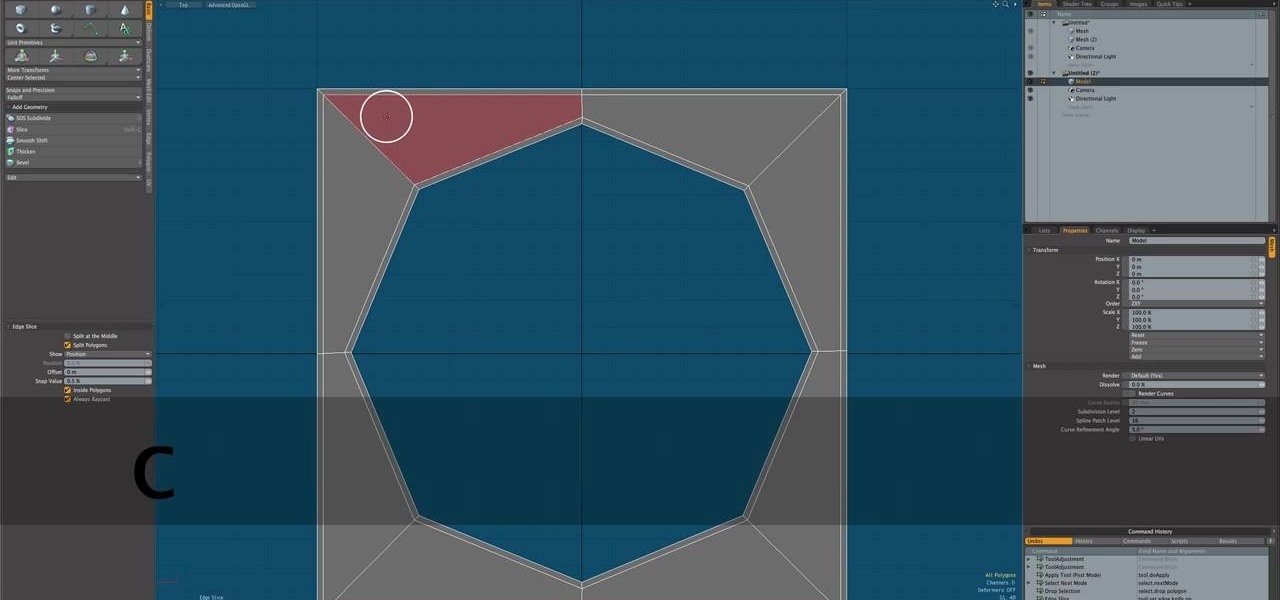
This tutorial shows you how to use the 3-D modeling software Modo 401 3D to create hard or inorganic surfaces for your models. Using an eight sided cylinder as the base example, you're shown various techniques to create hard surfaces for your models.
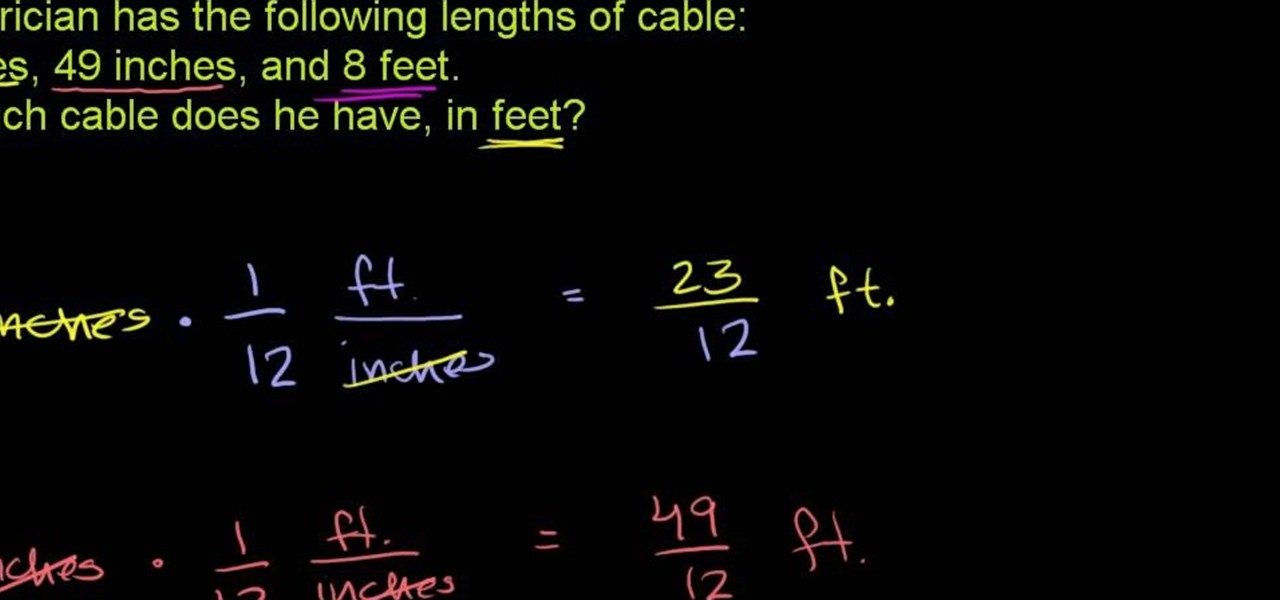
From Ramanujan to calculus co-creator Gottfried Leibniz, many of the world's best and brightest mathematical minds have belonged to autodidacts. And, thanks to the Internet, it's easier than ever to follow in their footsteps. With this installment from Internet pedagogical superstar Salman Khan's series of free math tutorials, you'll learn how to sum inches and feet, expressing your result in feet.

If you're building an office model, or are looking to add a little something extra to a street model, you might give this great vending machine model a try! In this detailed video from brickboys518 you will get brief over view of the bricks that you will need for the model and then a great tutorial on the building process and build order.
The great thing about owning a car is the ability to do whatever you want with it. This ranges from adding a certain type of brake pads to an awesome looking spoiler.
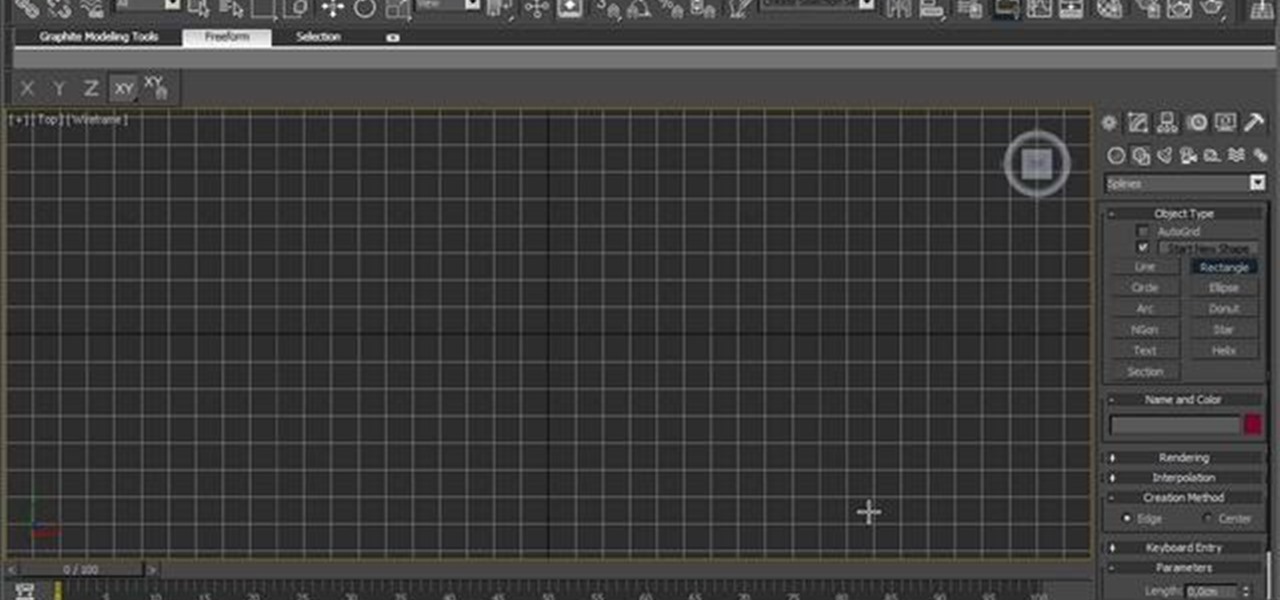
3D modeling is one of the most challenging and lucrative things that can be done on a computer. If you can do it well, someone will most likely pay you good money to do so. This video will help you start by teaching you how to model using 3D Studio Max, using an axe as an example. Over three videos, this creator will give you step-by-step instructions and help you create your very own digital axe. Model on!
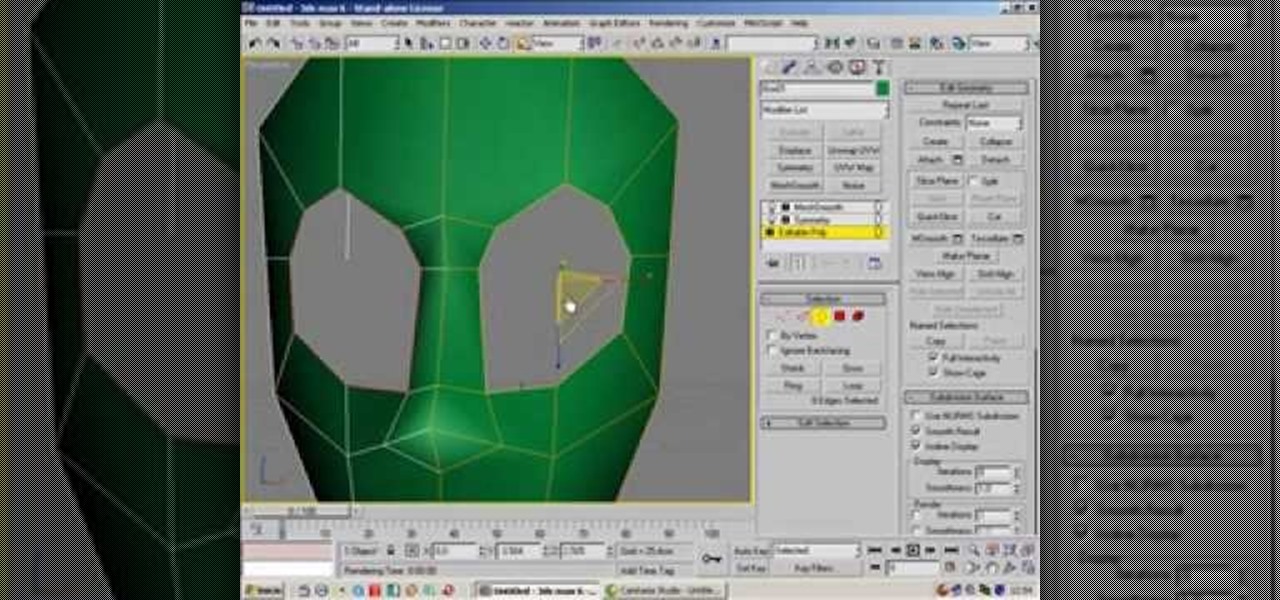
Creating a realistic human face in any artistic medium is the greatest of all art's challenges. This video will teach you how to make a model of a face using the popular 3D Studio Max 6 3D modeling software. The video's five parts cover all phases of the process, and should have you well on you way to mastering the hardest part of digital art in no time.
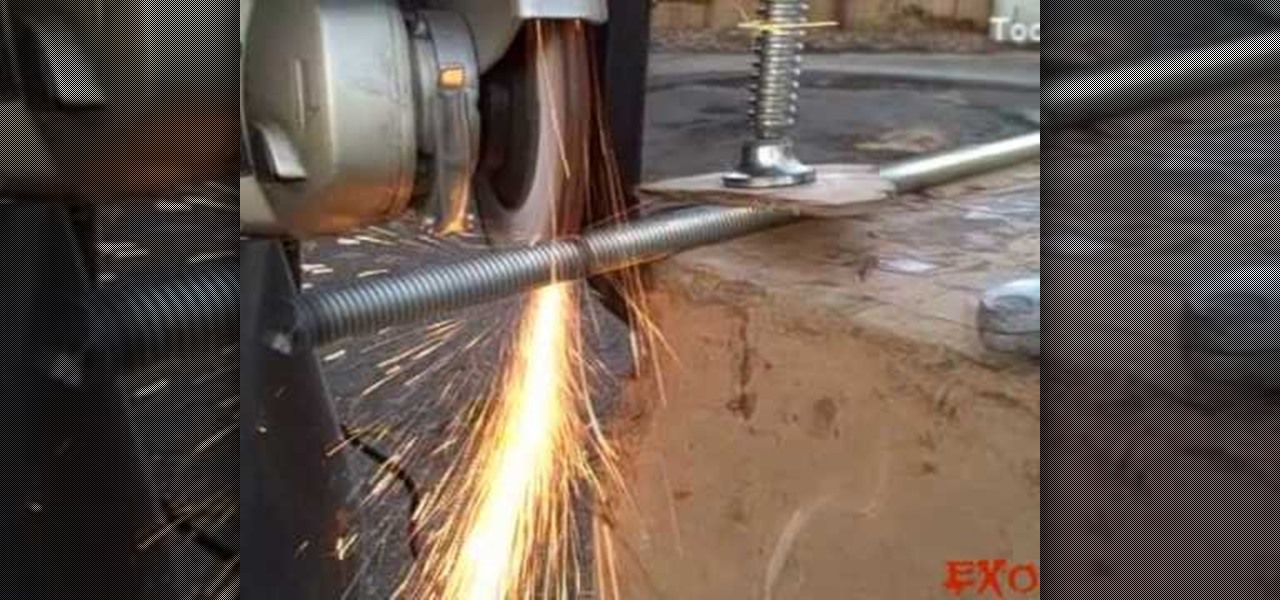
If you have ever found yourself working on a car project at your home and ran out of fuses, this tutorial is for you. Instead of going out and paying around $30 to $40, make your very own. It's wasy and saves you time and money.
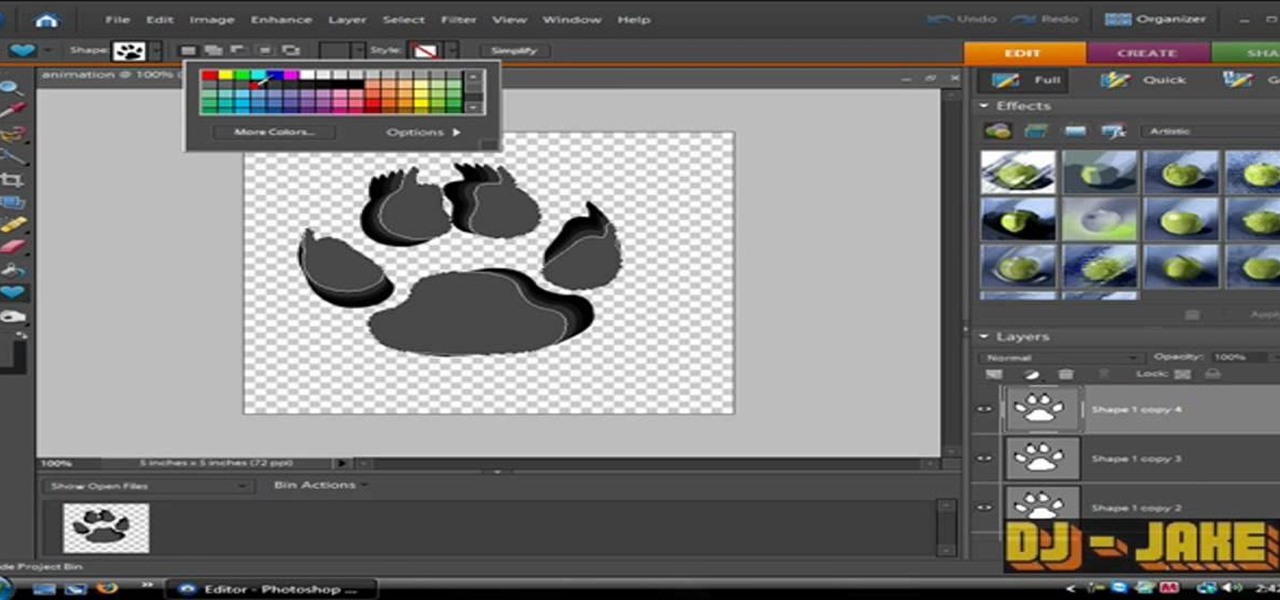
An animated GIF is a great addition to any website. By animating your image, you will draw someone's eye to it almost immediately. This is especially useful if you are creating an advertisement or a logo.
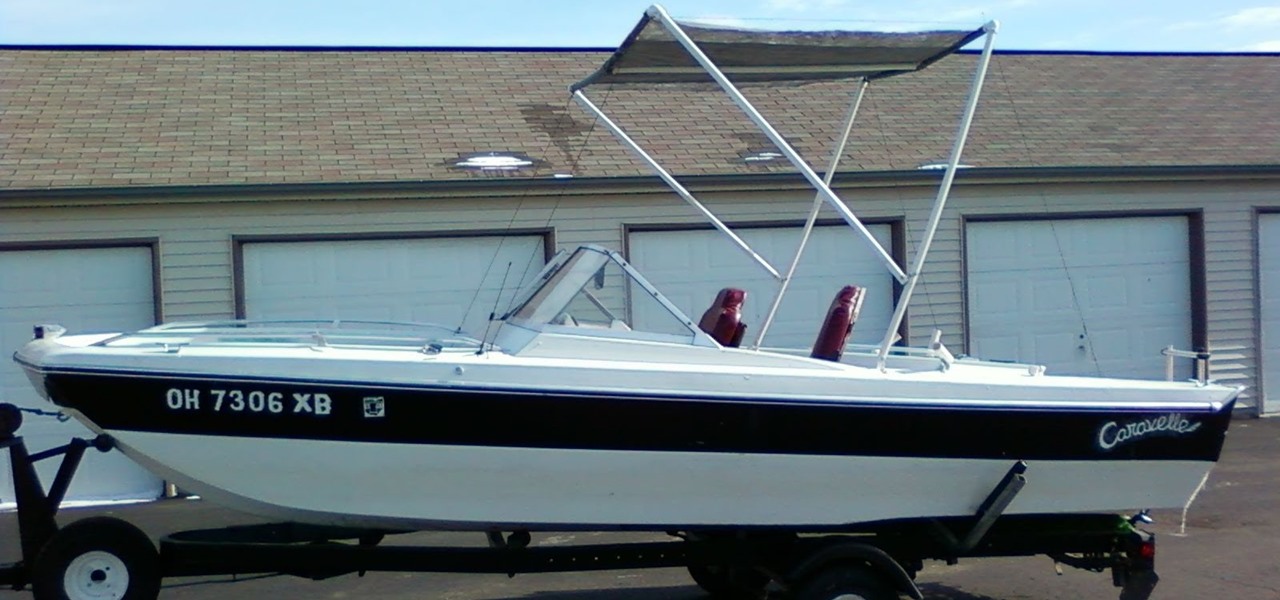
You can make your own canopy for your boat and save hundreds of dollars from the store bought ones. You’ll need 1 inch pvc pipe, some nuts and bolts and you‘re set. You’ll set you’re canopy off of some swivel brackets that secure on the pvc pipe with 2 inch screws. This video will show you how to rig everything and you’ll be sitting in the shade in no time.
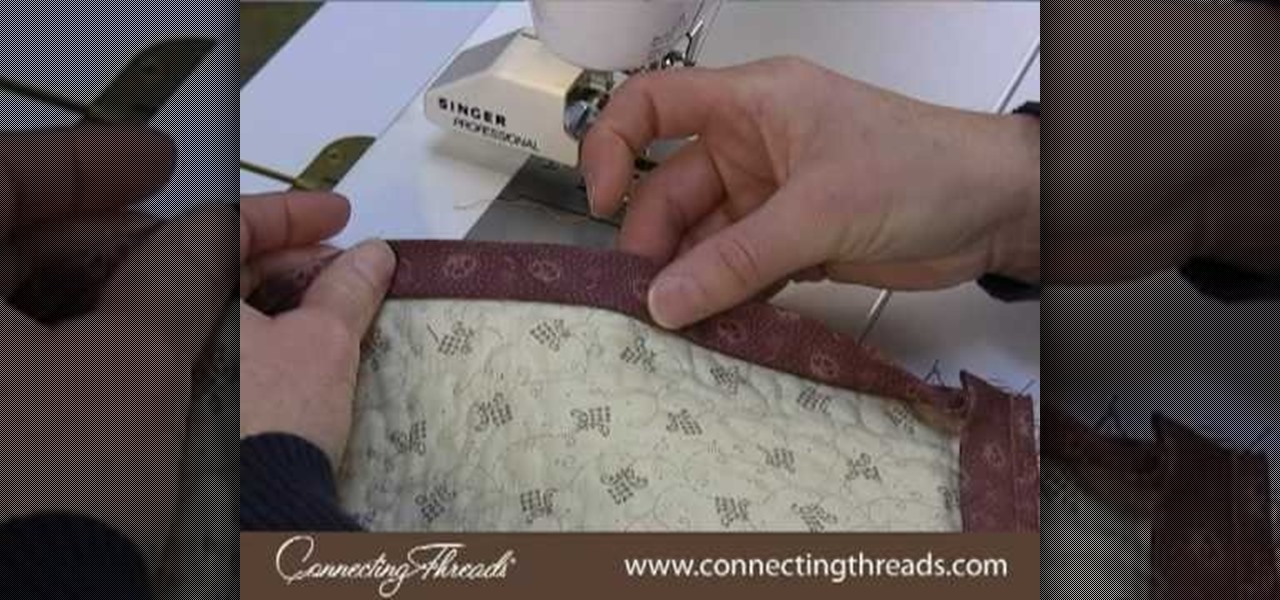
In this video we are shown how easy it is to complete the finishing join on a quilt binding. Just before the final join 6 inches of binding should be left over at the beginning and the end, while the rest of the binging should already be sewn down. The two ends of the binding should overlap by at least 6 inches. You will then need to cut the thread and remove the quilt from the machine, then measure the binding width and overlap the two pieces and cut off the excess binding to match the width...
Julie Figuera shows how to make a no-sew ballerina or princess tutu for little girls. 1. Get a 1/2-inch wide satin ribbon. Cut the ribbon about 20 inches long. 2. Measure 20 inches from each end of the ribbon. Tie a knot on the 20-inch mark. 3. Unfold a yard of tulle and roll, making sure there is no wrinkle. Cut the ends of the tulle to make it even. 4. Measure every 3 inches and cut. 5. Take each cut piece of tulle. Fold it in two and cut. 6. Take the smaller piece of the tulle, fold it in ...
Catherine demonstrates how to create an eclectic, sunset-inspired necklace in this video. To create the necklace you must gather 40 yellow bugle beads, 18 orange chip beads, 3 mm red round beads, a barrel clasp, 2 crimp beads, 2 bead covers, about 20 inches of beading wire, clippers and pliers. The design is to start by threading a clap and a crimp bead onto the wire, leaving a 2 inch tail. Then thread on 15 yellow beads, remembering to cover the tail you left with the beads, 3 orange beads, ...
Those interested in learning how to make their own jewelry, can learn how to make a floating illusion necklace by following the steps in this video tutorial. You will need a beading board, beading wire, crimp beads, beads of your choice, a barrel clasp, wire cutters, and crimping/flat-nosed pliers. First measure out how much wire you will need. The tutorial is making a 16-inch necklace. Make sure to cut extra wire. For a 16-inch necklace, this means you should cut approximately 20 inches of w...
This video is about making a mummy type sleeping bag or an over bag for a hammock with a woolen blanket. The first task is to make coat rings and hooks. Take a piece of flexible wire and bend it into a ring of diameter 1 3/4 inch or 2 inches with a overlap of about 1 1/2 inches make 6 or 7 rings. Now take a small straight wire and make a hook of 1 or 1 1/2 inch, make the tips of the wire pointed so that it can penetrate. Overlap the edges of the blanket by 2to3 inches. Fix the rings with the ...
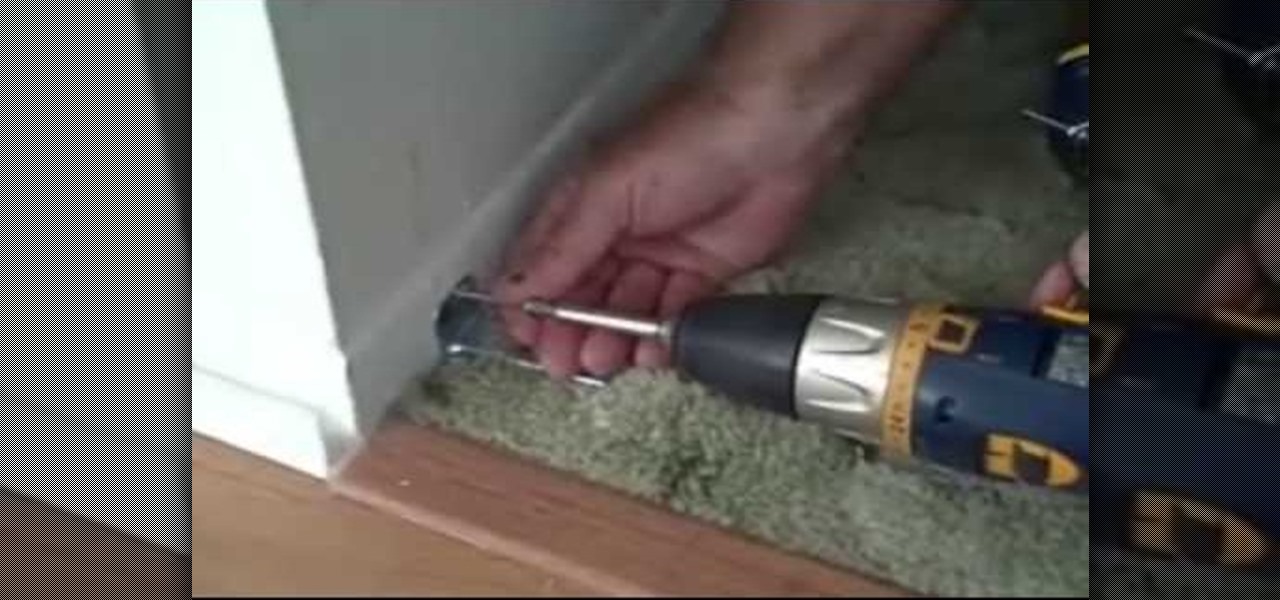
This video shows the method to install bifold closet doors. The doors are of two sizes. They include a thirty inch and a twenty four inch door. The video first demonstrates the installation of the thirty inch door. This is then repeated for the other door. The middle line of the upper part is drawn over the opening. The middle line is extrapolated to the sides to put the bottom support. The tracks are installed on the top. The floor bracket is fitted at the bottom. The top glides are installe...
The template for this heart-shaped window card can be found at [www.stampininspirations.blogspot.com stampininspirations.blogspot.com]. You will need the template and cardstock and the other usual materials needed to make a card. You can re-size the template to about 5 1/2 inches across by about 5 1/2 inches high. Cut out the heart and remove the center heart as well. Take an 8 1/2 by 11 inch piece of red card stock and fold it in half, then trace the inside and outside of the heart-shaped te...
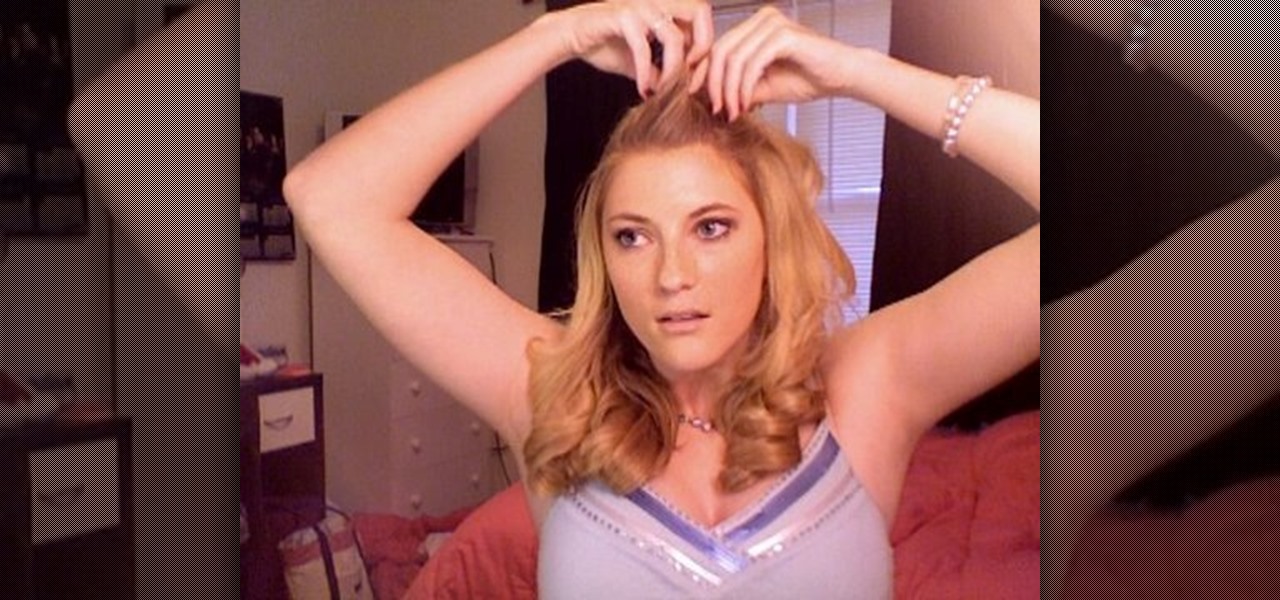
This video author explains how to curl hair with a curling iron. She uses a 2 inch curling iron for flipping the ends of her hair out, or to cover up frizziness at the ends. The next curling iron she shows is a one inch curling iron, and she explains how it snags her hair. The one she's going to use for the video is a different one inch curling iron. She uses two clips to split her hair into two sections. She curls the bottom layer first, and then uses hairspray to prolong the curls. She does...
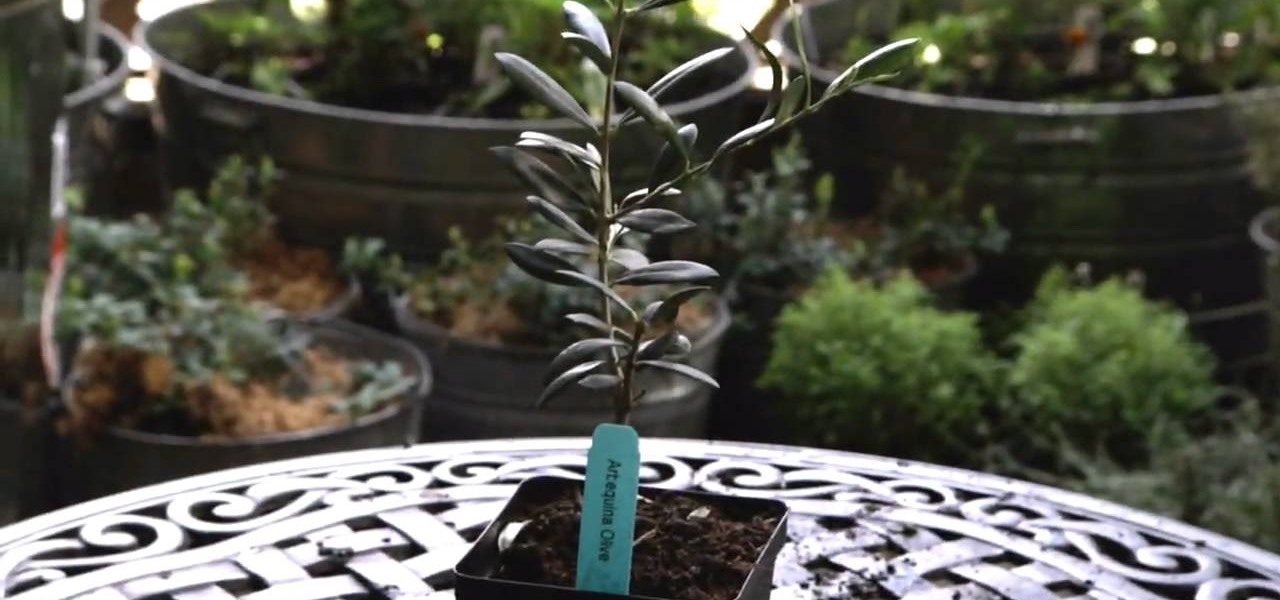
Patti Moreno, the Garden Girl, describes how to grow an olive tree in a patio container garden. She will be able to bring the trees indoors for the fall and winter. If the sapling comes in a 4-inch pot, plant it in a 10-inch container. If your container does not already have drainage holes, use a hammer and nail to poke holes in the container bottom. Put a layer of crushed stone in the bottom of the container for drainage. Fill the container with organic soil and a trowel full of organic fert...
If necessary, cut kimchi into desirable size (about 2-inch lengths) Cut green onion into 2 to 3-inch length pieces
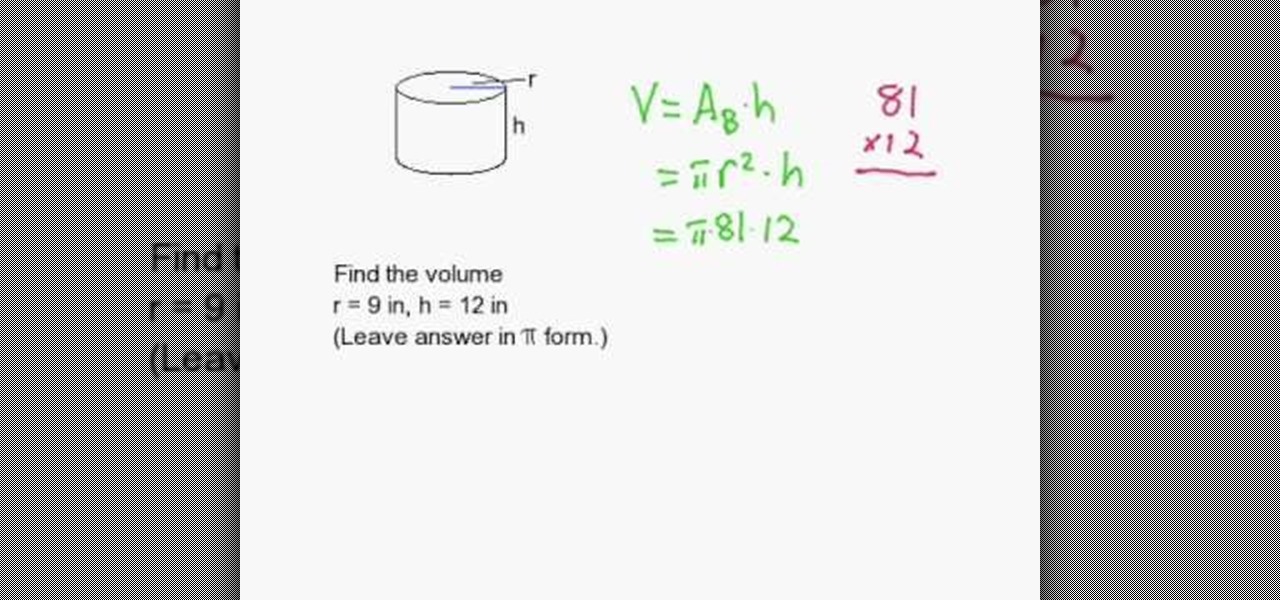
This is an excellent educational video on mathematics. This video teaches you how to find the volume of cylinder with an example. The volume of cylinder is the bottom area multiplied by the height. Here, the height is 12 inches and the radius is 9 inches. The bottom area is Pi r square=piix81 sq inches. volume = piix81x12 = piix972
The difference between a good fashion shoot and a great one isn’t the model — it’s the lighting. Learn how to expertly light a fashion shot with this how to video.
It’s like a personal photo, except classier, and you can make the model look slightly more attractive than they really are.
Add inches to your appearance without wearing 12-inch platform shoes. You will need: -the right length jacket
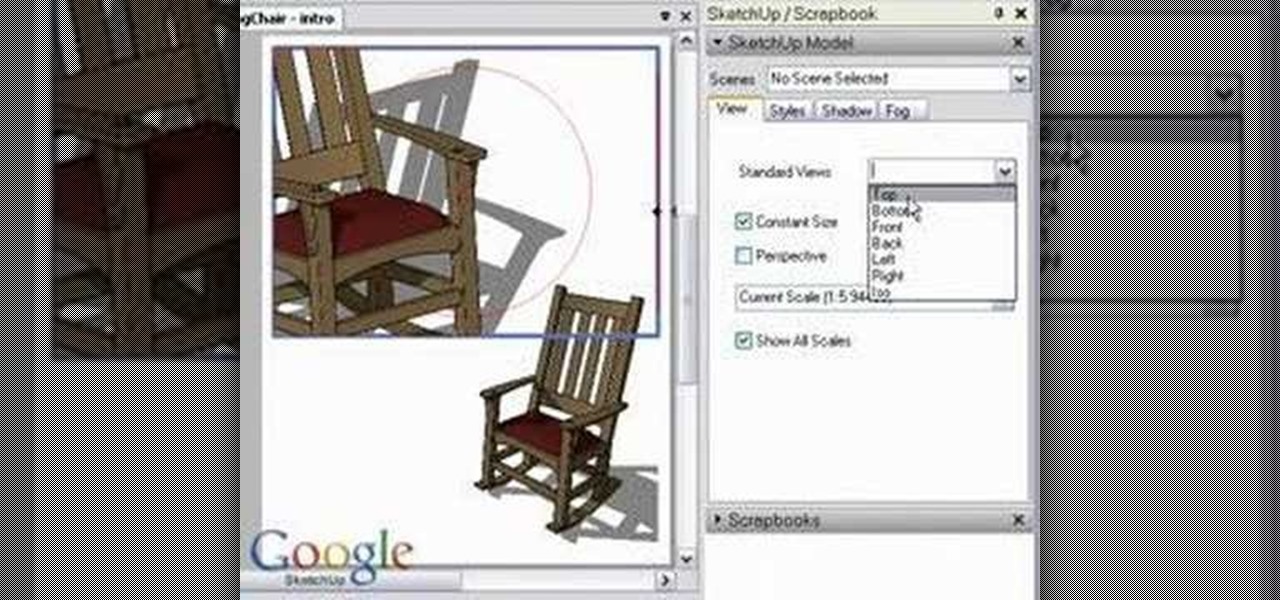
Working closely with SketchUp models is key to LayOut and the primary feature that makes LayOut so unique. Take a look at this instructional video and learn how to place a SketchUp model in LayOut. To place the model, go to file and simply click insert. Find your model and then open it. The great thing about viewing a model in LayOut, is that it is presented in 3D form and you can build complex documents with infinite views of your model all with just one SketchUp model.
While embossing machines are marketed to be used brand specifically, all those QuicKutz 12 inch border dies and embossers are completely compatible with a Cuttlebug embossing machine. Make the most of your stamping materials without having to purchase to much of everything. Watch this video crafting tutorial and learn how to use QuicKutz 12 inch border dies in a Cuttlebug embossing machine.
Make a German paper star. You need 4 strips of paper that are 17 inches long and 1/2 and inch wide. Part 1 of 2 - How to Make a German paper star.
This video will teach you how to make an origami paper star. The paper in the video is 6 inches long by 1/4 inch wide. But any size paper can be used, as long as it fits a similar ratio, and the paper is not too thick.
In this series you will first learn how to break down a character or idea when drawing into shapes. Then learn how to draw your character in a front view, clean it up, then draw an accurate side view. These front and side views are then used on image planes in a 3D modeling software to actually create a 3D character.
Watch as Manjula prepares mattar paneer, a popular North Indian dish. You will need:
Steve walks us through rigging a 9" Slug-go. You can't deny that he knows what he's talking about. You just can't. See it in this two-part video.
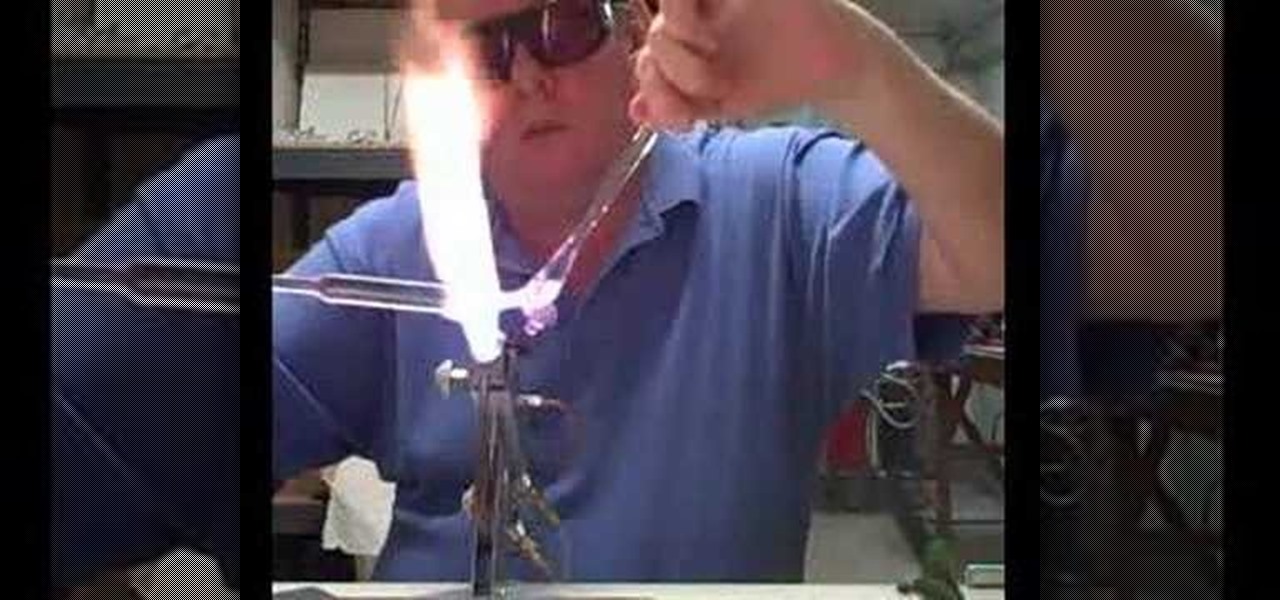
Learn how to make a glass sculpted sea lion in this lampworking tutorial. I used 16 mm rod for this larger piece. It measures about 4 inches long and 1 inch diameter.
John Cannon shows you how to install a one inch bracket lift on an Outlander.
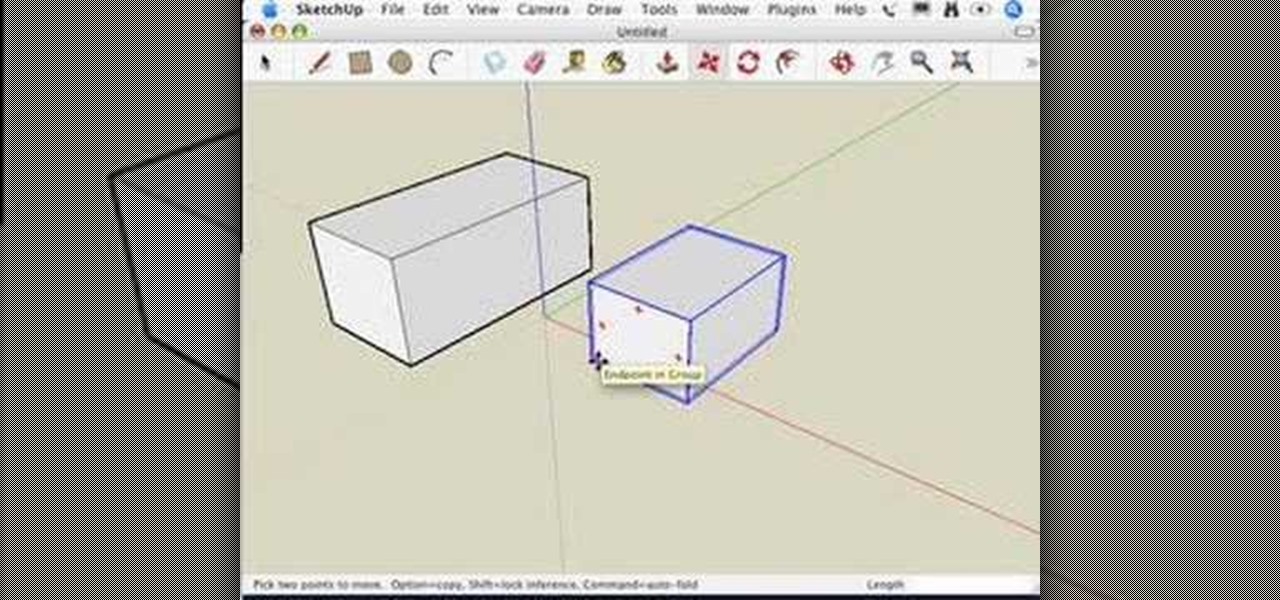
This video series explains how to keep your SketchUp model organized. The videos correspond to Chapter 5 of the book Google SketchUp for Dummies. PART 1 explains how to group things together. PART 2 shows you how to select and replace instances. PART 3 covers making new components (like groups but changing one changes them all). PART 4 shows you how to make your own doors and windows. The last part, PART 5, shows you how to put it all together.
This video series shows you everything you need to know about completing a model from photographs in SketchUp. It follows Chapter 7 of the book Google SketchUp for Dummies. PART 1 shows you how to add photos to faces. PART 2 explains how to move, scale, rotate, shear and distort your texture. PART 3 shows you how to stretch a photo over a face (of your object that is)! PART 4 shows you how to stretch or scale the model until the photo texture looks right. PART 5 covers how to map photos to fa...
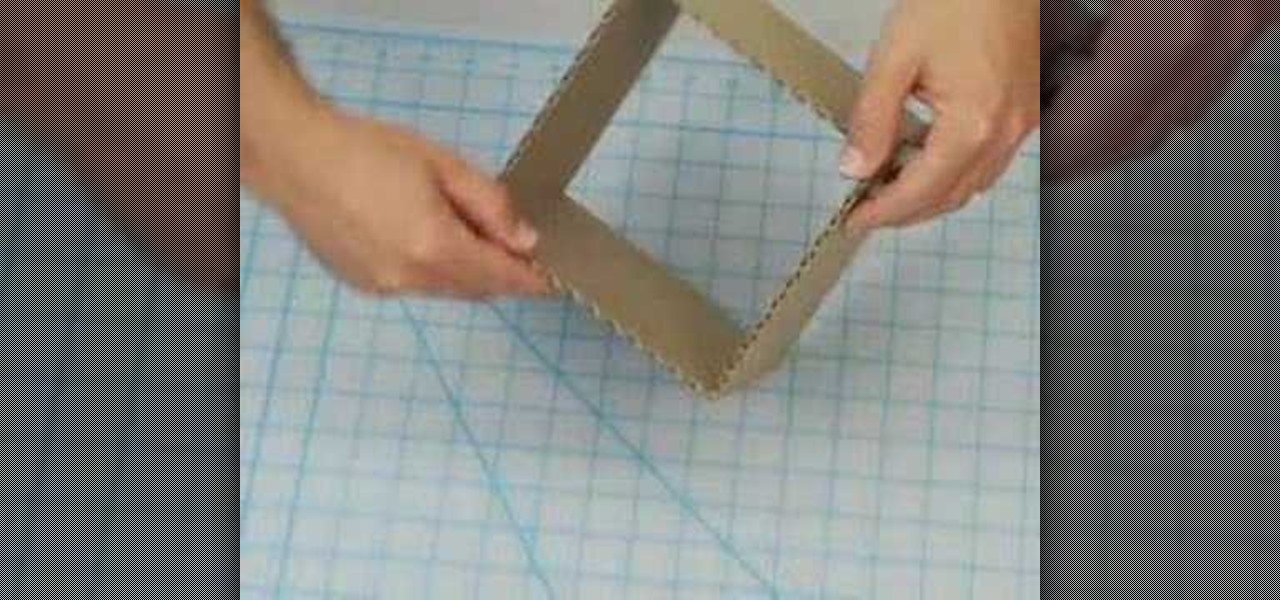
Learn the basic steps to build a 6 inch cube for the Form and Space Foundation class at Otis College of Art and Design. This video is great for any beginning design and art students.
In this free video software tutorial from CG Cookie, you'll learn how to model a photorealistic modern bathroom environment within Autodesk 3ds Max. Whether you're new to Autodesk's popular modeling software or a seasoned 3D artist just looking to better acquaint yourself with the application, you're sure to be well served by this video tutorial. For more information, and to get started modeling your own 3d background, take a look!