In this tutorial, we learn how to set up the L drill in pool. To do this, you will place all of your balls in an "l" shape on the pool table starting from the middle of one side of the table. Place the balls about two inches apart, then star to make the horizontal line for the balls. Place these two inches apart as well. After this, you can place your shooting ball next to the balls and hit each of them into the same corner pocket as the last one. This is a great way to practice hitting balls...
In this tutorial, we learn how to make Thai sticky rice. First, soak your rice for a minimum of two hours or overnight in water. Make sure the water covers the rice by an inch or more. After the rice has soaked, fill a pot with two inches of water, then place your rice into a steam basket. After this, place the pot on medium heat and bring it to a boil. Then, place your basket on top of the pot with the rice inside of it and then place a lid over the basket. Let this steam for around 10 minut...
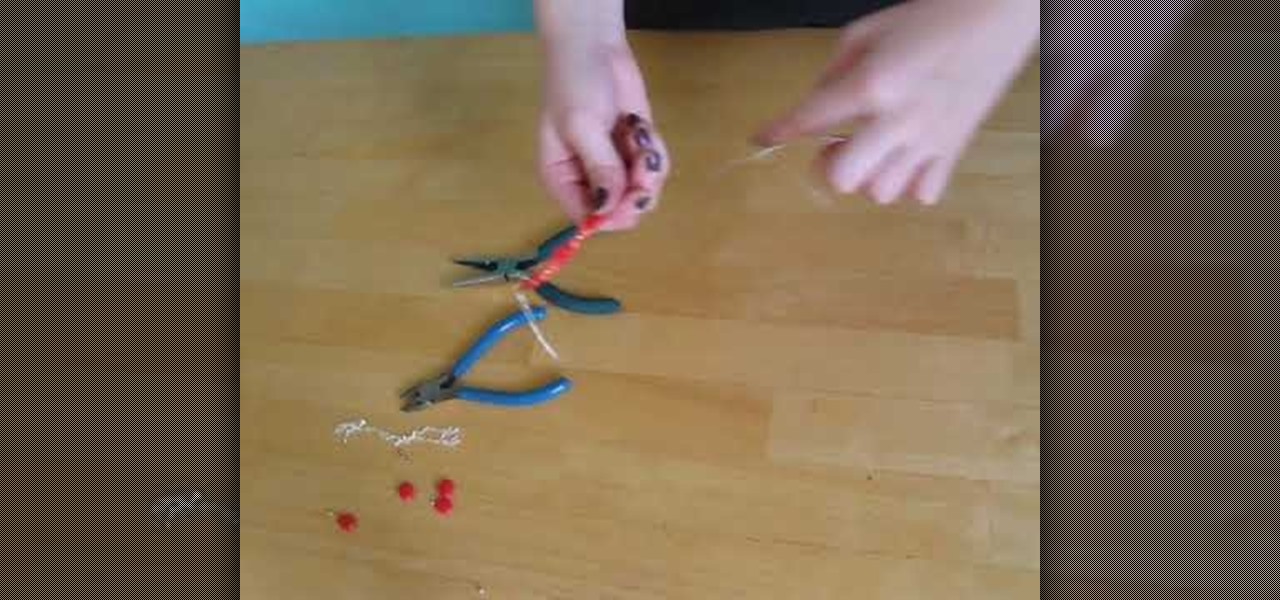
Missa teaches us how to create a claspless lariat necklace in this video. First, cut your wire so it's 20 inches long and then make a loop on one of the ends, and attach a chain to it. Now put on the end bead and attach the chain to the metal wire. Now make a loop around the end where the bead is. Now take pliers and clamp the wire on the end down. You can now take wire cutter and cut an inch down on the chain and cut it off. You can now apply your favorite beads to the wire, and any pendants...

Rolling straight out of bed without brushing your hair and into a comfy pair of sweats may be an okay look for going to a college lecture (you can continue to catch up on your sleep after all), but when Friday night hits it's time to amp up your glamour game.
Webbing is not only used in sports like rock climbing and caving, but it also comes in handy in camping and hiking. This video shows you how to tie two webbing ends together to make a loop that will not come off. A square knot does not work for webbing as it will slip through, therefore a water knot is used. Take 4 inches (10 cm) from one marked end and tie an overhand loop. Ensure that the webbing is not twisted. Slip the other end in the knot and trace the second end around the overhand kno...

This video describes how to make a fancy-looking stationery card set holder. First, take a card and cut it down to 10*6.5 dimensions. On the 6.5 inch sides, score 1" each. On the 10 inch sides, score 1", 7" and 8". Using a pair of scissors, cut flaps on the 10" side on the scores upto 1". After cutting these slits, you can do any designs on the card in order to make the holder look beautiful. Now fold the card along all the scores to make creases. Now, using glue, stick the flaps together. Fo...

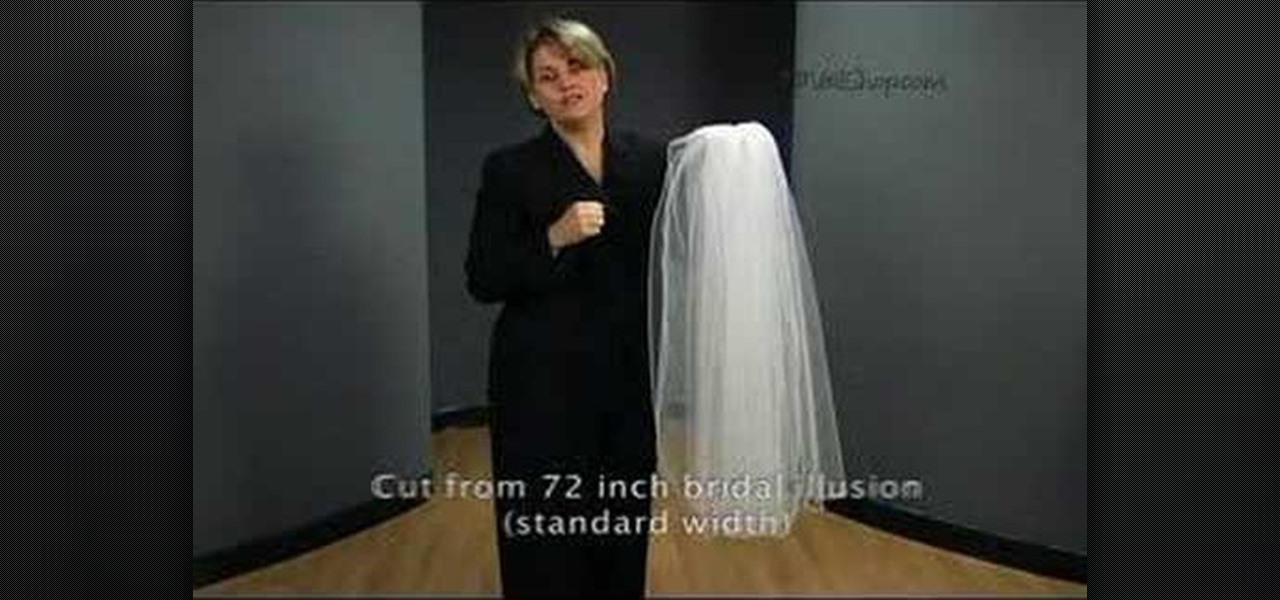
In this video tutorial, viewers learn how to cut an oval style wedding veil. The oval cut veils are exactly like the standard cut, except the sides are straight and the corners are curved. Only begin cutting 72 inches from the bridal illusion. Do not cut the veil any less than that. The standard width is 72 inches. The oval cut veil creates a more angular/squared off look. The oval cut style is only available in 2 layer styles. This video will benefit those female viewers who are getting marr...
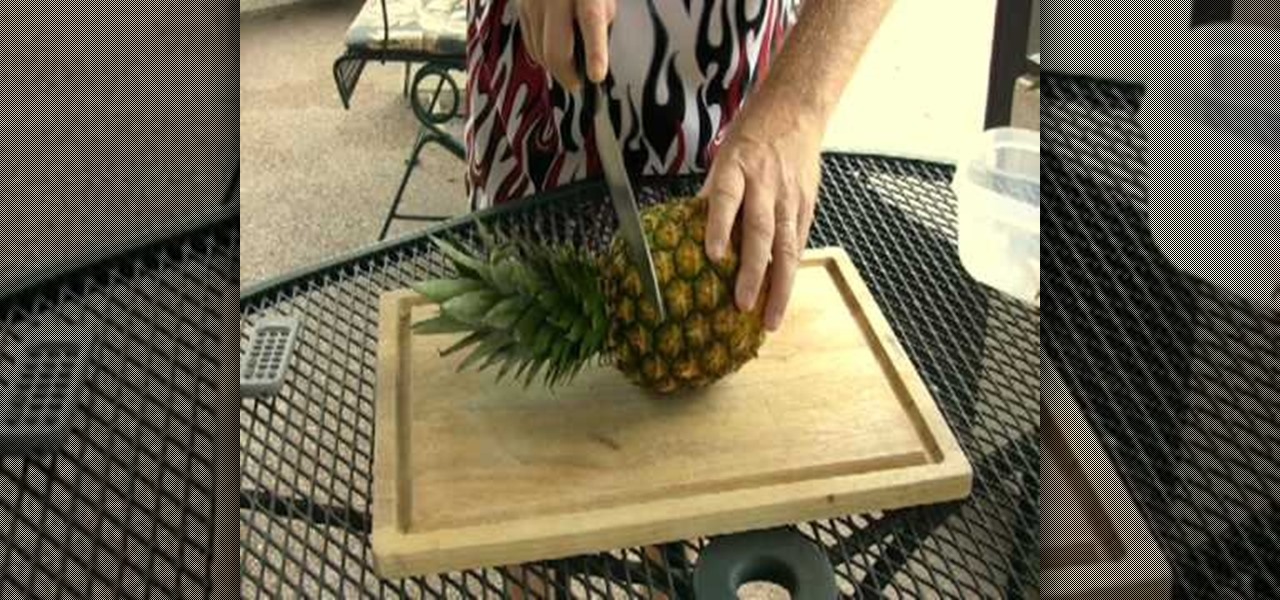
In this video Jack in the Net shows how to grow your own pineapple using just the crown. Find a nice firm, strong pineapple with no brown leaves. With a very sharp knife, cut straight through about an inch down from the crown. Then trim the flesh all the way around, leaving only the solid round core in the middle, being careful not to cut into the crown. The roots will grow off of the crown so all the fruit needs to be removed.
In this Arts & Crafts video tutorial you will learn how to create a box to hold a mini album or small cards. Take a shiny card stock 10.5 x 6 inches. On the 6" side, score at .5" and 1" on both sides. On the longer side, score at 3, 3.5, 7.5 and 8 inches. Cut out the corners on the flap side of the card as shown in the video. Do a step cut on the other side of the card as in the video. Round the four corners with a corner rounder. You can do some stamping now if you want or you can also glue ...
In this video tutorial, viewers learn how to make a toy parachute. The materials required are: lightweight fabric, ruler, scissors, string, 4 hole button and a toy army man. Begin by measuring a 10x10 inch square on the fabric and cut it out. Fold over each of the 4 corners and cue a small hole. Measure and cut 2 lengths of 36 inch string. Take the string and tie it to one end of the hole on the fabric. Run the other end through the button hole and tie it to the diagonally opposite hole on th...
This video teaches you how to focus on your abs with breathing exercises. If you can do this exercise in small increments throughout the day you will lose inches and see dramatic results. She first tells you to places your hands on your stomach. Then breath in through you nose, pushing your chest up and out. Exhale through your mouth, pulling your belly button in toward your spine. Your shoulders should come forward and your hips should come forward a little bit, like the closing of a clam-sh...
This video will show you how to make motor casings. You’ll need parallel wound paper tubes ¾ inch outside diameter, ½ inch inside diameter. You can make the same thing out of poster board and glue. In this video shows how to use the store bought ones. Use bentonite clay which is volcanic ash which is like a fine powder that when compressed down it becomes hard. This way you don’t need to wet and wait for it to . Add 1 ¼ clay and then ¾ increments, dump into tube and pound it down with a rubbe...
How to grow sweet potatoes
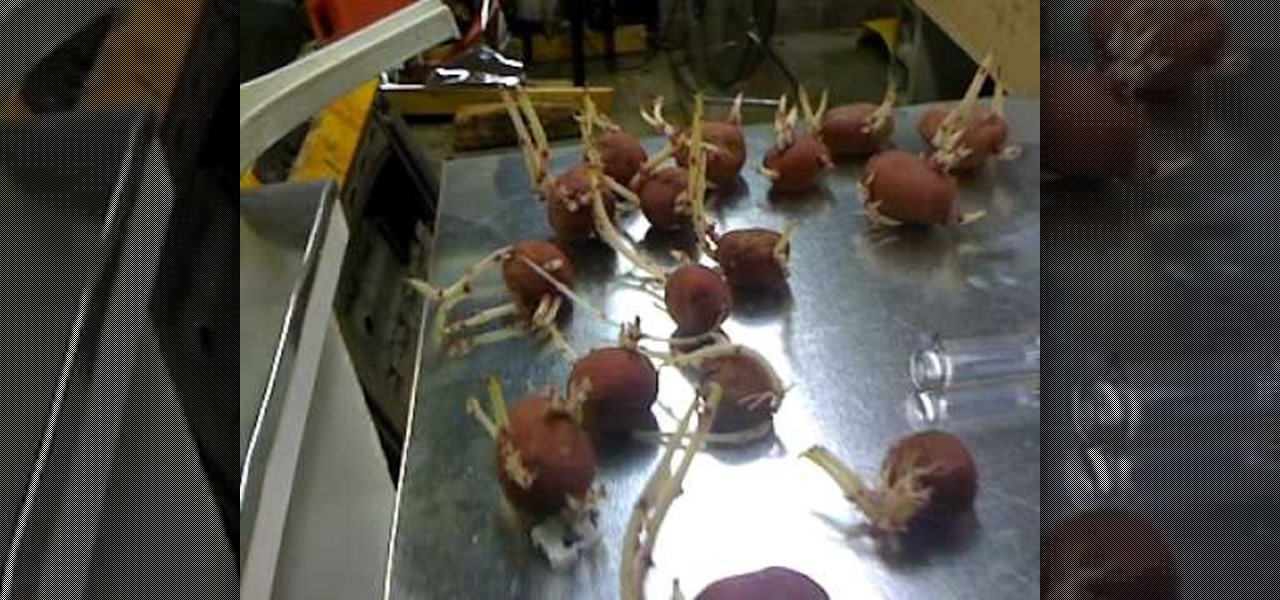
In this video you will learn how to get your potato plant growing using a 5 gallon bucket. Start by taking your 5 gallon bucket and drilling a series of small holes at the bottom for draining. Next line the bottom of your bucket with about 2 inches of rocks to help with drainage and top with a layer of weed block and a couple inches of soil. Now your bucket is ready to add a budded potato. To make your potatoes bud out simply leave them in a bag and place them in the dark for about a month un...
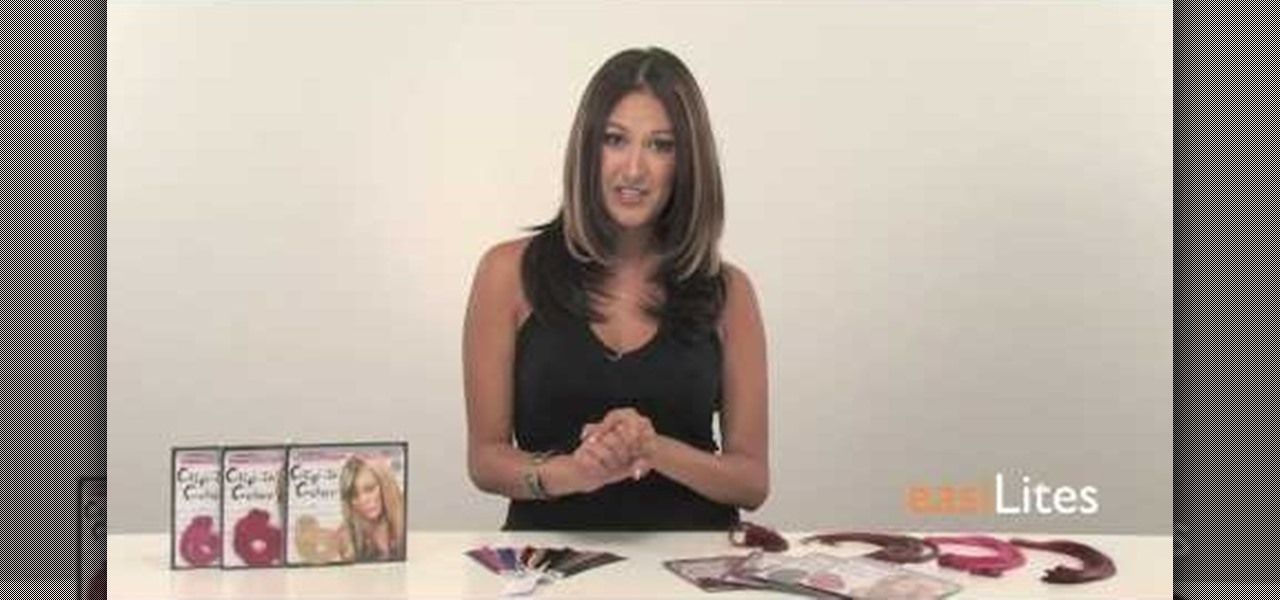
In this video, Jennifer Pompa teaches us how to use click in color extensions using Easilites clip-in color extensions. These extensions are about 1 inch wide and 16 inches long. They are also 100% human hair so you can use heat tools on them without damaging them. To use, grab a piece of your hair close to your hair line and pull it over to the other side of your head. Next, take the hair extension and slide it into the hair underneath. Make sure it is clipped in well and put your real hair ...
When measuring for borders on your quilt, begin by spreading your quilt out on your work surface making sure that it is laying flat but not pulled tight. With a tape measure, measure from one edge to the opposite edge across the length of the quilt. You should measure along two or three different seam lines and cut the border material to correspond with your longest measurement.If you would like a two-inch wide finished border then you should cut your border material two-and-a-half inches wid...
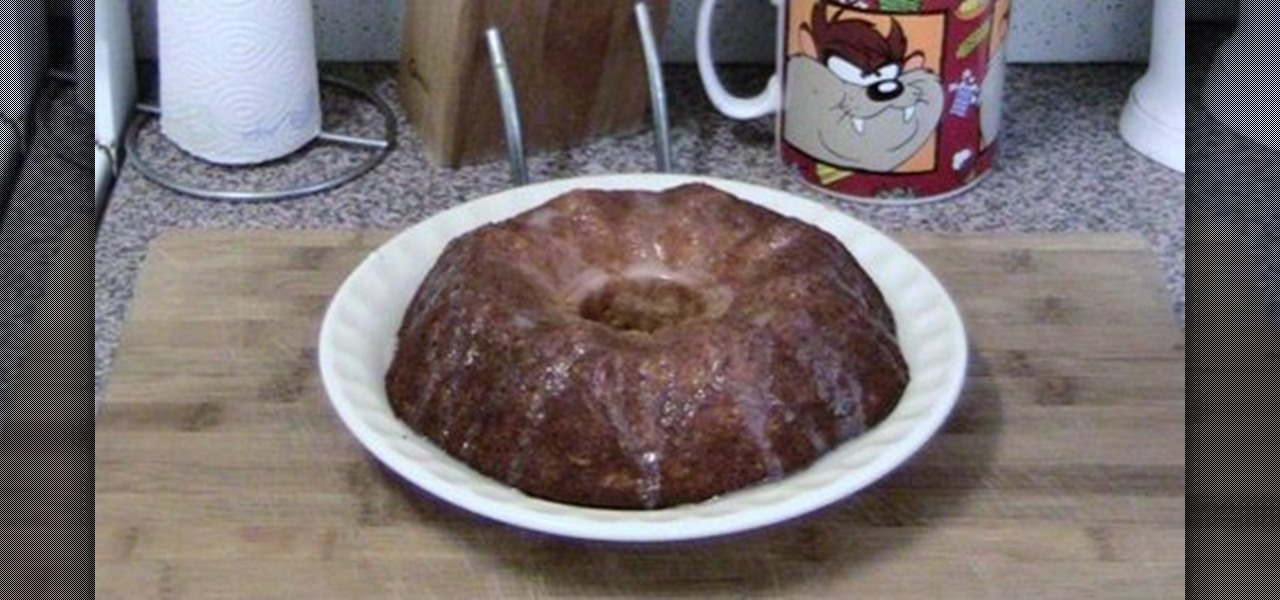
USA Fire and Rescue Favorite Recipes demonstrates how to make peach cobbler. First, preheat the oven to 350 degrees. Then, add 3/4 of a cup of sugar, 1 cup of flour, 2 teaspoons of baking powder, a pinch of salt, 2 tablespoons of melted butter and 1/2 of a cup of milk to a mixing bowl. Mix the ingredients together until it is well combined. Coat an 8 inch by 8 inch baking dish with butter and pour the mixture into the dish. Pour two small cans of drained peaches over the mix. Pour half of a c...
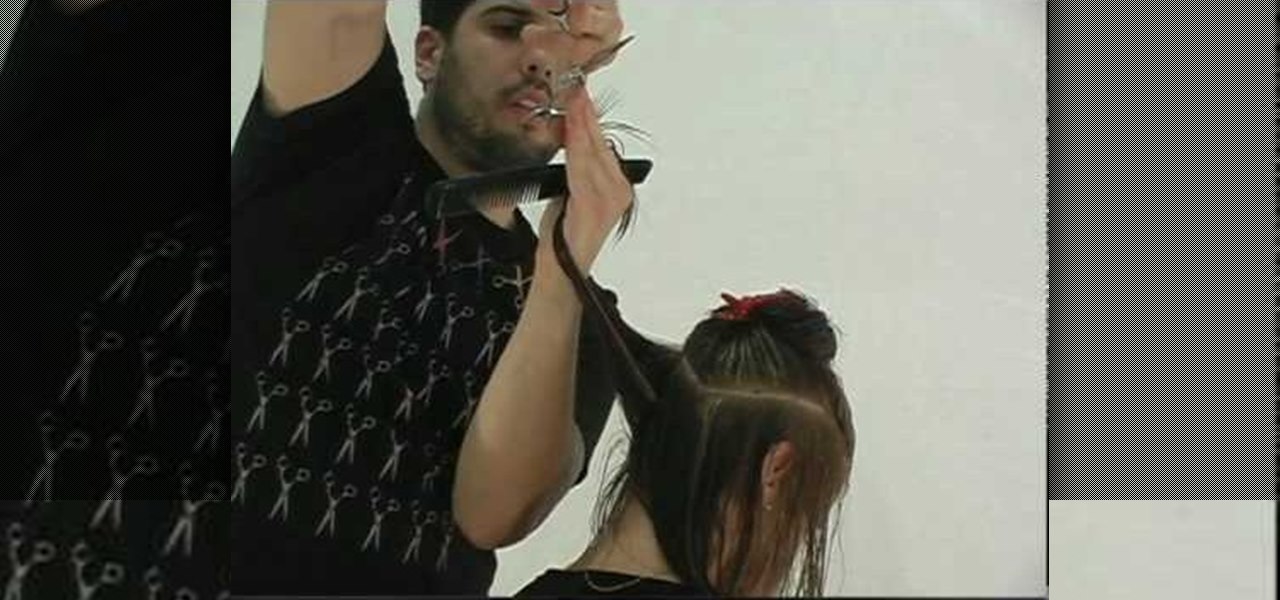
This video illustrate how to do long layered hair cut step by step. Here are the following steps:Step 1: First of all clean your hair and then take all your hair and hold them through a clip.Step 2: Now release a inch of your hair from the lower bottom and cut it.step 3: Now release the upper inch layer and cut it slightly above the lower most layer.Step 4: Similarly take the next layers and cut them so that each layer has sharp cutting and is differentiated easily.Step 5: Release hair on the...
Hairtalk TV demonstrates how to instantly get color highlights with hair extensions. Put On Pieces offers Clip In Color which is a very thin, nine inch wide, sixteen inches long weft of hair that clips into your hair to give you highlights, low lights or bright, fun colors. The weft contains three pressure sensitive clips which slide into your own hair without causing damage. Unlike permanent coloring, Clip in Color causes no damage to your hair, does not fade over time and provides the versa...
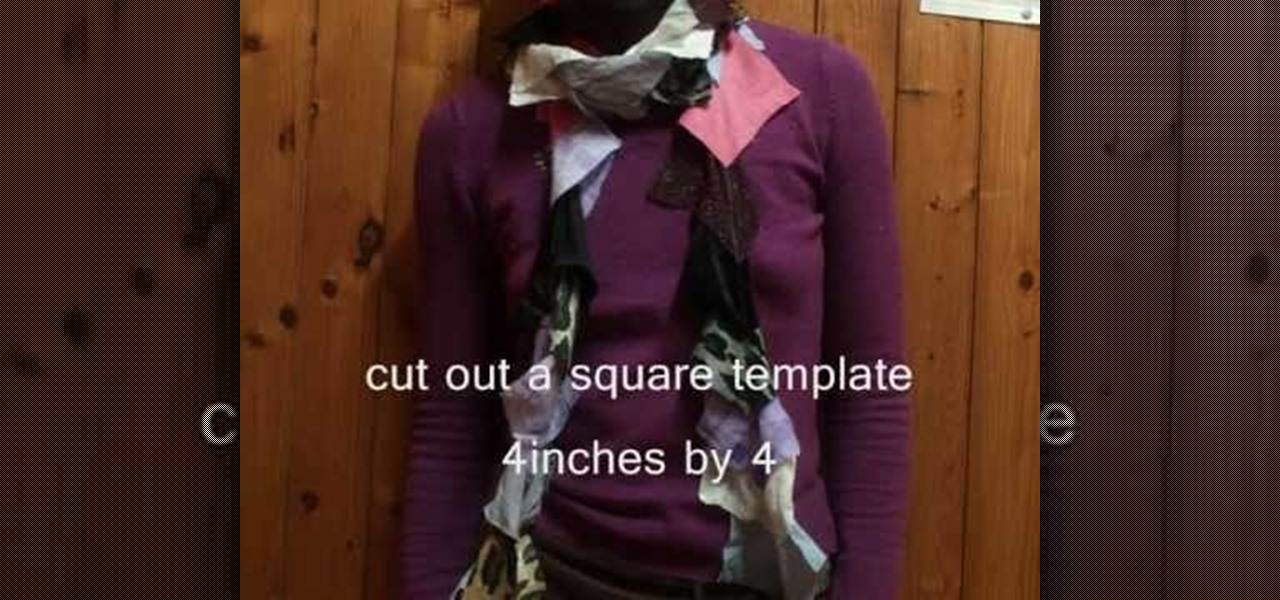
Chantelle Fashion demonstrates how to make a lucky scrap scarf. First, cut out a four inch by four inch square template. Gather all of your fabric scraps and put them in a bag. Close your eyes, think thoughts of luck and pick out a color. Use the template to cut the scrap fabric into a square. Repeat the process until you have between 60 to 70 squares. Keep the squares in the order you picked them. Layer the squares on top of each other, pinning them together. Then, sew the scarf straight dow...
This video teaches you how to make glitter wands using a simple and fast method. For a wand measuring about 18 inches long, you will need a sheet of A4 printer paper, glue, 2 strips of 1 inch wide 2 ply tissue paper, a pair of scissors, black and gold paint, an old sponge and glitter. First roll the sheet of paper and stick it so you have one small end tapering towards a slighter bigger end. Stick tissue rolls on the rolled paper and seal off the ends by twisting gently. When the glue dries a...
In this video tutorial, viewers learn how to tie a fly fishing line to the backing. Users will need a nail knot tool. Put the backing into the tool, leaving about 6 inches sticking out. The wrap the line around the tool 5 times, pushing the loops together. Take the end of the line and run it through the groove of the tool. Put the fly line through the other end about 2-3 inches. Then hold the loops in your hand, remove the tool and pull on the backing to tie it. This video will benefit those ...
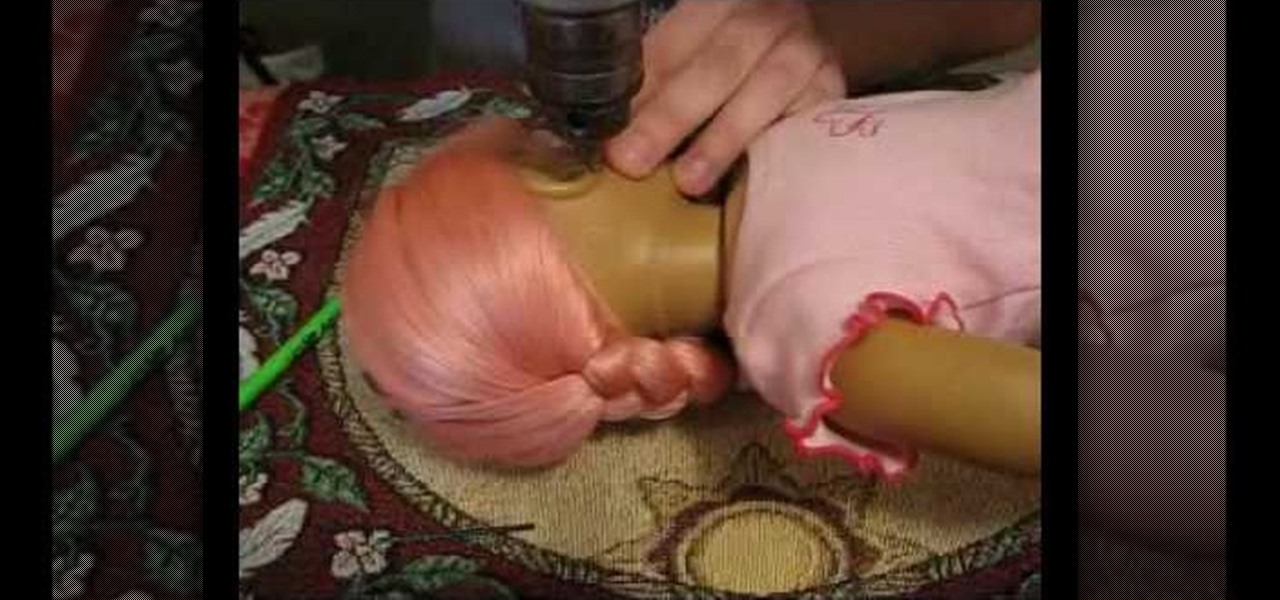
This video shows you how to pierce your American Doll's ears. Lay the doll on the table and mark the piercing spots with a normal pencil, making sure that they are even on both sides. Lie the doll on her back and turn the head to the side. Insert a 1/16 inch bit to your drill for the pilot holes and tighten the chuck. Drill down into the hole. Brush away any vinyl that is extruded. Set the drill to reverse to bring the bit back out. Do this on both ears. Insert a 3/32 inch bit to the drill an...
Dragontrap uses 1/2 a yard of three different colors of fleece for this scarf project. She cuts the fleece into strips of twelve to sixteen inches in length and two to three inches wide. Then she sews the strips together lengthwise, rotating the colors of fleece. Once the strips are sewn together, she has a large rectangle of pieced together fleece This is folded in half with outsides together. She sews one edge of the scarf closed and sews all the way down the long edge of the scarf. Finally...
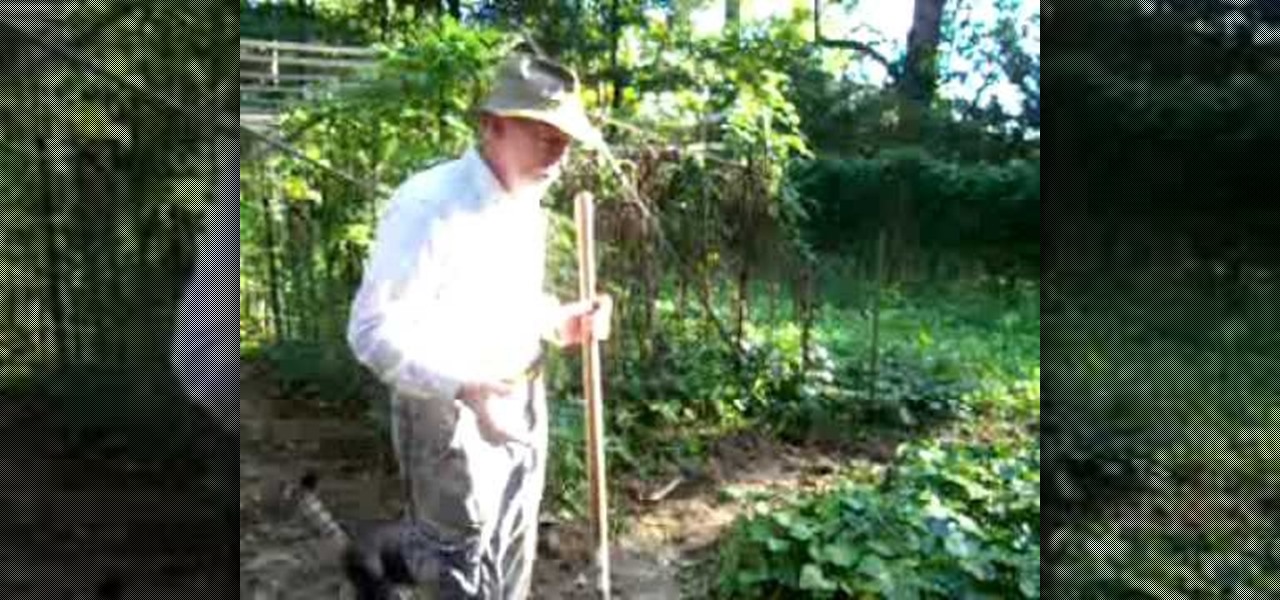
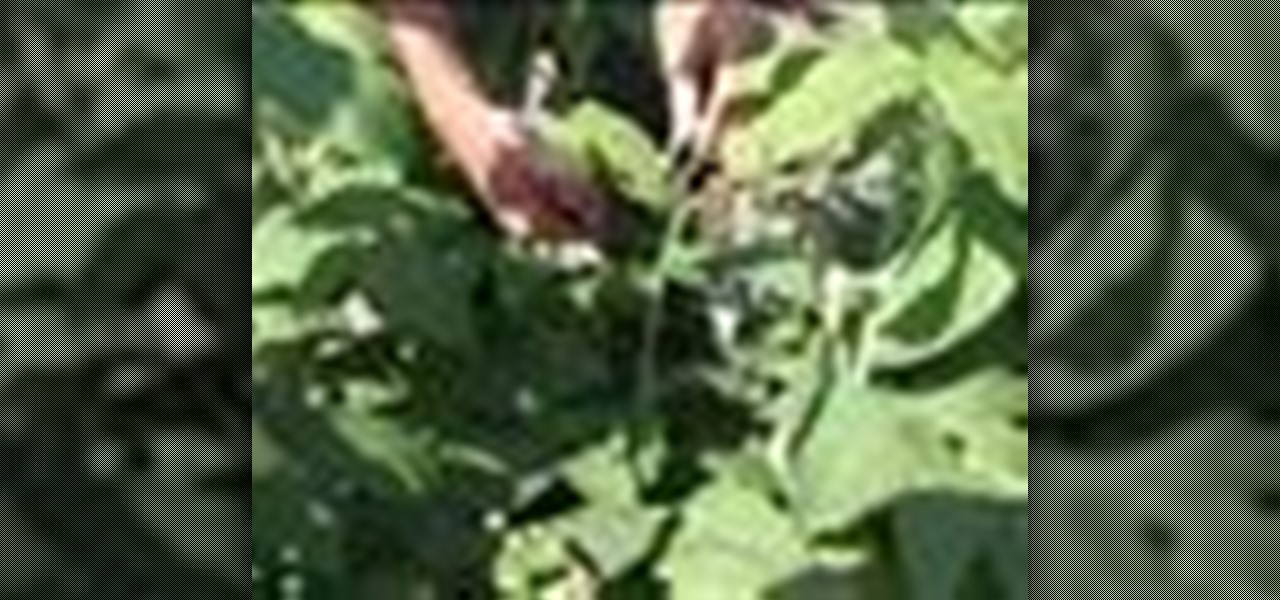
Follow along as we learn how to grow healthy tomato plants. -When you plant tomato plants you need to get a strip of tinfoil, about two inches wide, and wrap it around the stem.
This is a very quick and easy step by step guide to drawing a flower. First, you want to take a sheet of plain white paper and a writing utensil of your choice and draw a large circle. Second, you want to make large parenthesizes shapes about an inch and a half apart and put four of those on the circle separating each by less than half an inch. Lastly, you want to finish off the petals of the flower by just creating lines outside of the ones you just made and connecting at a tip to create fou...
Take one large newspaper sheet that consists of two pages on each side. Fold in half lengthwise (the way it comes in the newspaper). Fold in half again (bringing the top of the paper to the bottom). Fold corners (on folded side) to middle. This will make a pointed top to paper. Fold one piece of bottom of paper up to the bottom of the pointed fold. Fold bottom again until it overlaps a little of the pointed part. Turn hat over. Fold sides in about 1 1/2 to 2 inches (it will look like a house)...
BBQTalk teaches the secrets to grilling the perfect salami appetizer, every time. Cut Genoa salami into 1/8 inch thick slices. Brush the salami with oil (EVOO preferred). Cut French baguette into 1/4 inch slices. Brush the bread slices with oil (EVOO preferred). Place the salami and bread over medium heat with oil side down. When the salami has cooked properly, place the slices on the bread. Top it with jalapeno, pepperoncini, and Havarti cheese. Leave on the grill on medium heat until cheese...
This video demonstrates an easy exercise, that anyone can do at home to get rid of love handles and improve overall physique. Lying down on the floor, you must bend your knees and keep your feet 18 to 24 inches apart. With your arms straight down on the side of your body, crunch forward and to the side a few inches, reaching for your left heel with your left hand. Return to the starting position and repeat the exercise to the other side. This is one repetition. This video is a good visual dem...
Heat the broiler and arrange the rack so it's about 6 inches from the heat. Peel the pineapple, cut it into rounds about 1/2 inch thick, and use a paring knife to cut out the core.
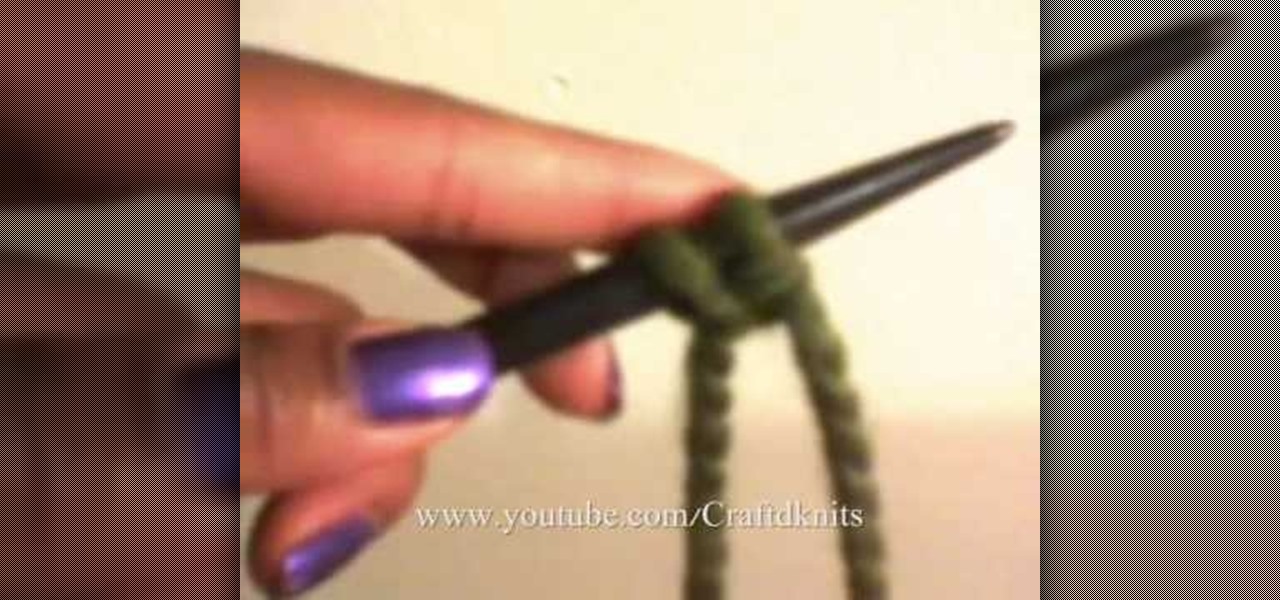
The video opens up with the young, perky and energetic woman from CraftDknits talking about her first "Fall Fashion Line" for knitting which is a Zigzag pattern. She shows how to knit the correct stitch and number of knitted stitches on her correctly sized 13 inch Rosewood knitting needles. Plus 1 large big Eye Needle with 2 skeins of correct weight Lionbrand Thick and Quick yarn.
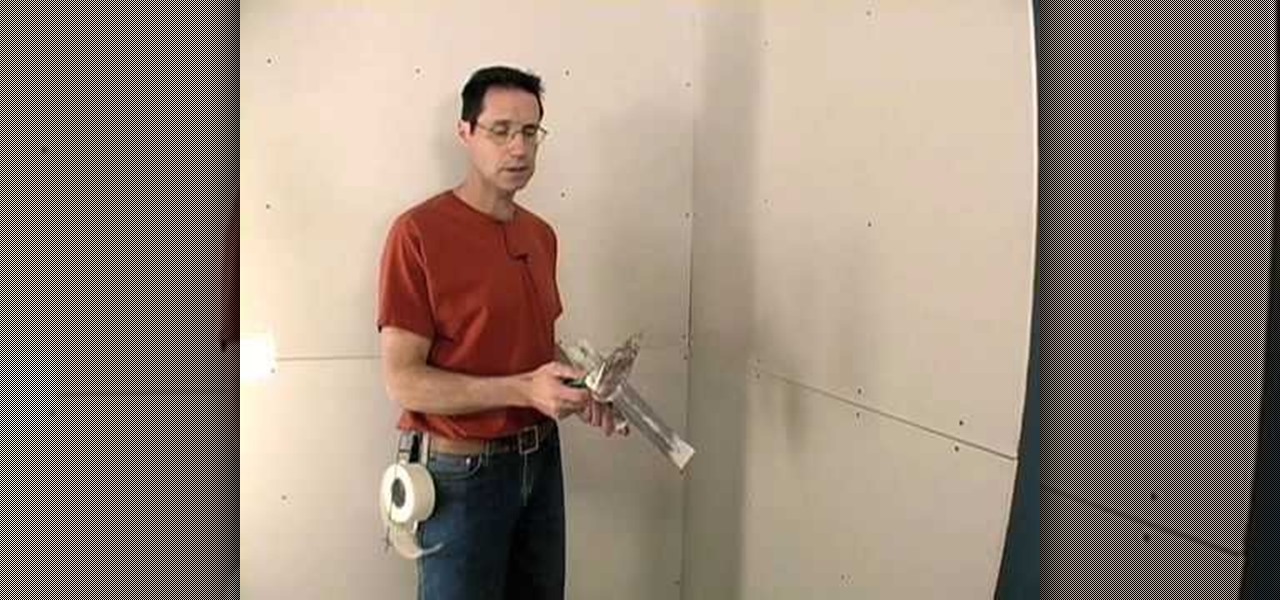
This video shows the viewer how to use paper tape to cover the joint between panels on a dry wall. The creator of the video does this using a 6-inch dry wall knife and a curved trowel. He first applies standard compound to the joint using the trowel. The compound should be applied evenly and the thickness shown is said to be around 1/8 inch. After applying the compound he then gently presses the tape over the joint. He then smoothes the tape on the wall, using a dry wall knife. While doing th...
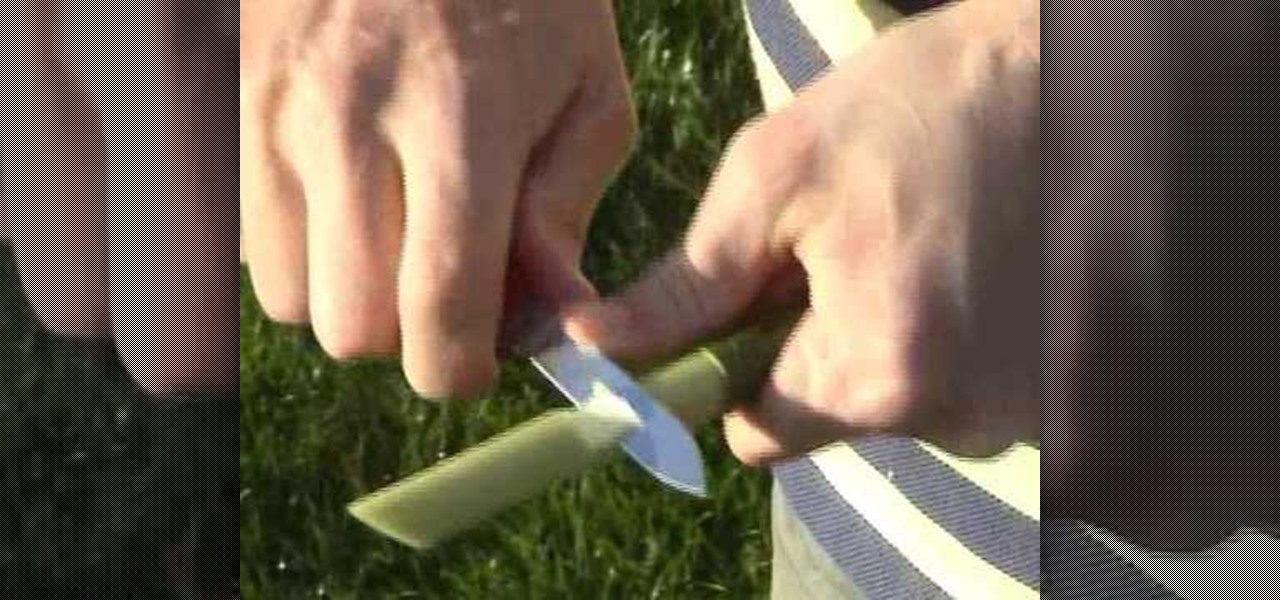
The video guide shows us how to make our very own willow whistle. -Find a willow branch with green bark, cut a small wedge into the bark and in the wood.
Make your own birdbath and spend hours enjoying the antics of birds in your yard. You Will Need
A piece of paper and some common household supplies are all you need to make yourself a wallet. Inspired by the Instructables project: http://www.instructables.com/id/Paper-Wallet/
Ok, shutterbug, you need to keep your camera from shaking, but there’s no tripod in sight. Relax--you can still get the perfect shot. Here a couple easy tricks to help you get a steady shot without a tripod.
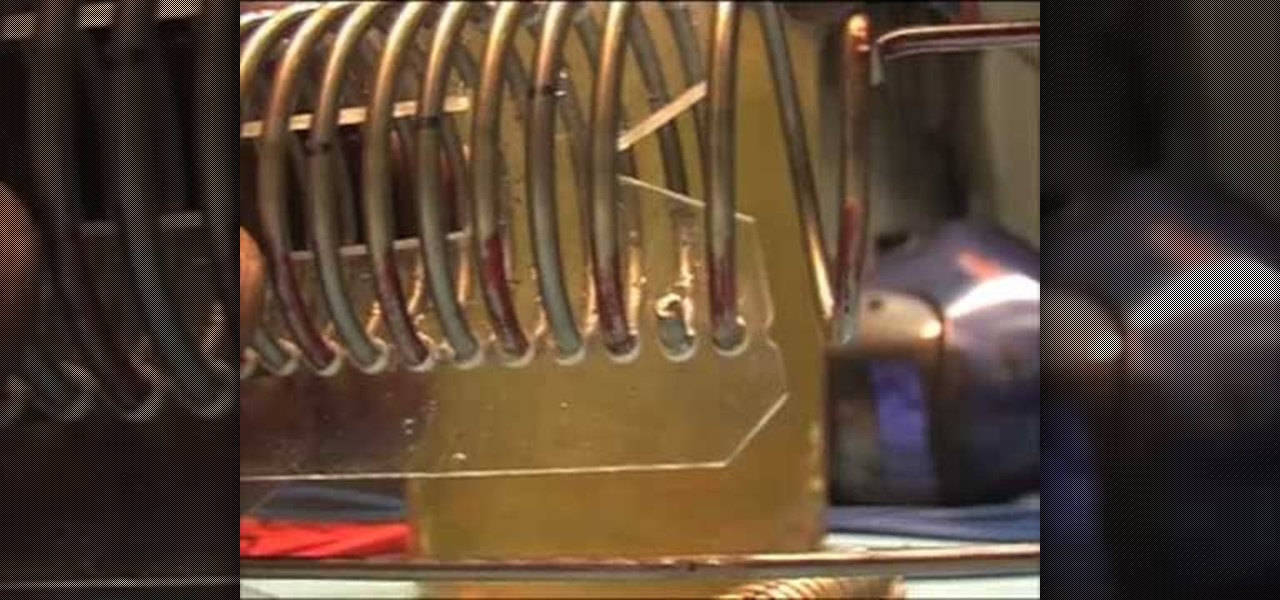
Check out this instructional science video that demonstrates how to make high production spirals. Since for many people it is much easier to buy 1/12 of an inch 316 L Stainless Steel welding wire or a 1/8 of an inch wire (instead of plates or tubes), then for those of you who do not have the practical skills this video might just be a little hint and a aid on how to proceed. There are so many details needed involved in order to make it simple and replicable. Learn how to build production spir...
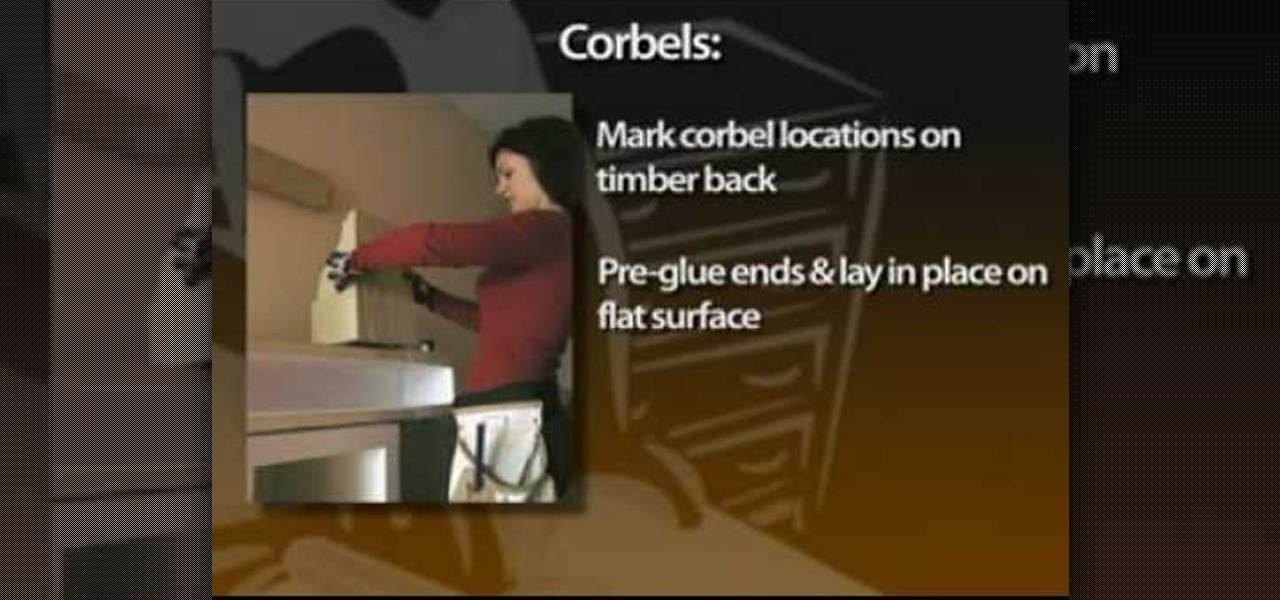
While mantel shelves provide a big visual impact, their installation is very low impact. The first piece of information you need before you can begin laying out the pieces and parts for a mantel (or "mantle" as it's sometimes misspelled) is to know exactly where you want the finished shelf to go: left, right, up and down—and what its proportions are. If it's working as a mantel, you'll want the shelf and corbels to extend proportionally past the left and right sides of your hearth. As a rule ...
One of the few raspberry pests is the raspberry cane borer. It is an easy pest to control organically because all you do is clip it out, no spraying and no one gets harmed. It's simple to find, look at your cane, you'll see where it is dead, then go down about 6 inches and you'll see 2 little girdle lines. The adult has girdled the cane and laid an egg in between. If you don't clip this out that egg will hatch, the worm will go down that cane and kill the whole cane. So as soon as you see the...
Watch Monty Don as he creates a scented garden using a variety of lavender plants, with suggestions for encouraging bushy growth.