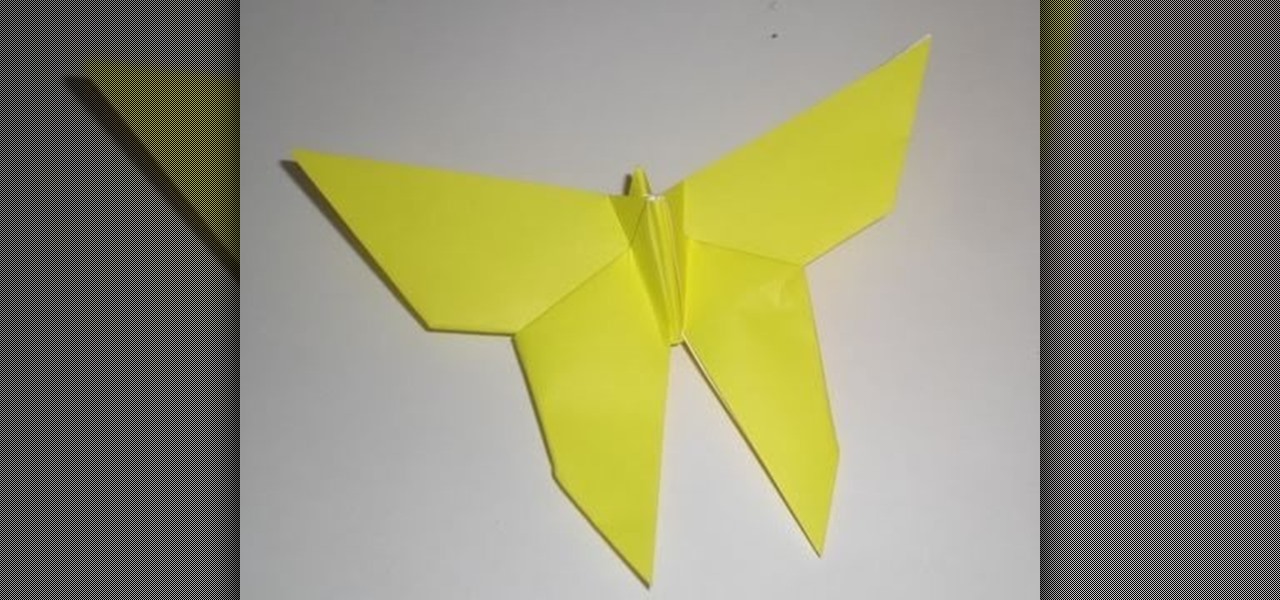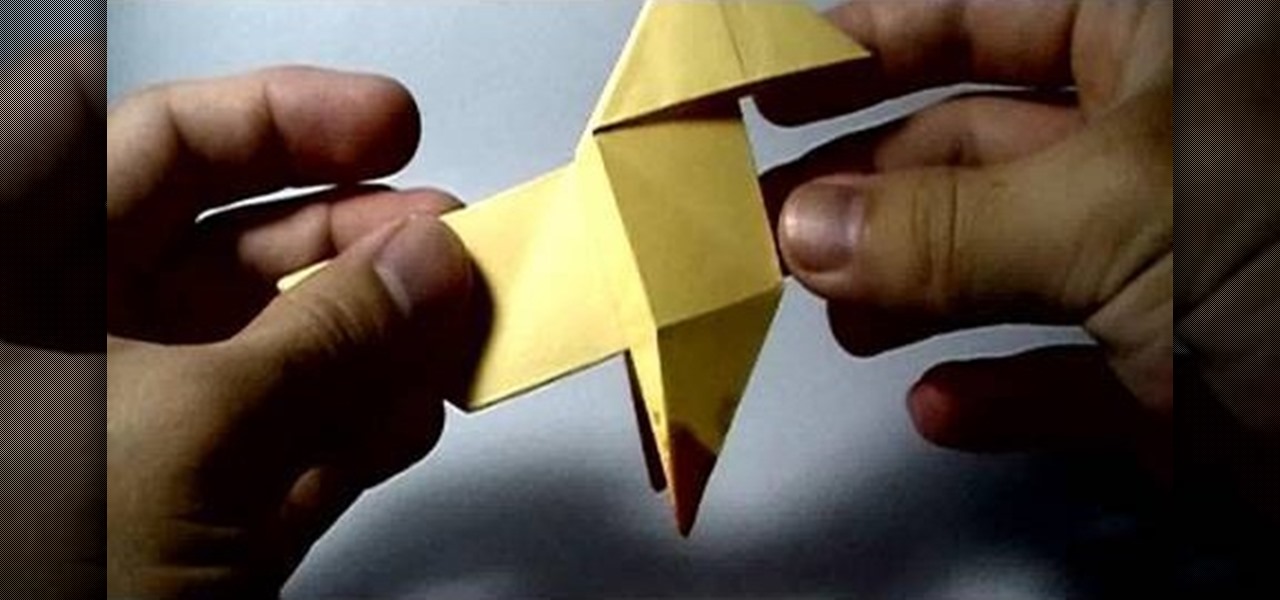
This video explains how, with the help of paper, we can make a beautiful butterfly. Now take a square paper; you can have a nice one so that it looks beautiful. Now fold the paper into half and again fold the paper in half. Now make triangles by folding again. Now open from between and shape up the wings. This nice butterfly can be used to decorate cards and folders and gifts, too. This looks so beautiful just like real one.
Ana Maria, an art student and origami expert, delicately explains and exhibits how to fold an origami cicada. The only material required is a perfectly square piece of paper, which is also known as origami paper. There are only seven easy steps or folds to create the paper-crafted bug; all of which are shown in plain detail by the artist. Every fold has another fold or edge to use as a guideline, so this simple creation should result in being very neatly accomplished.

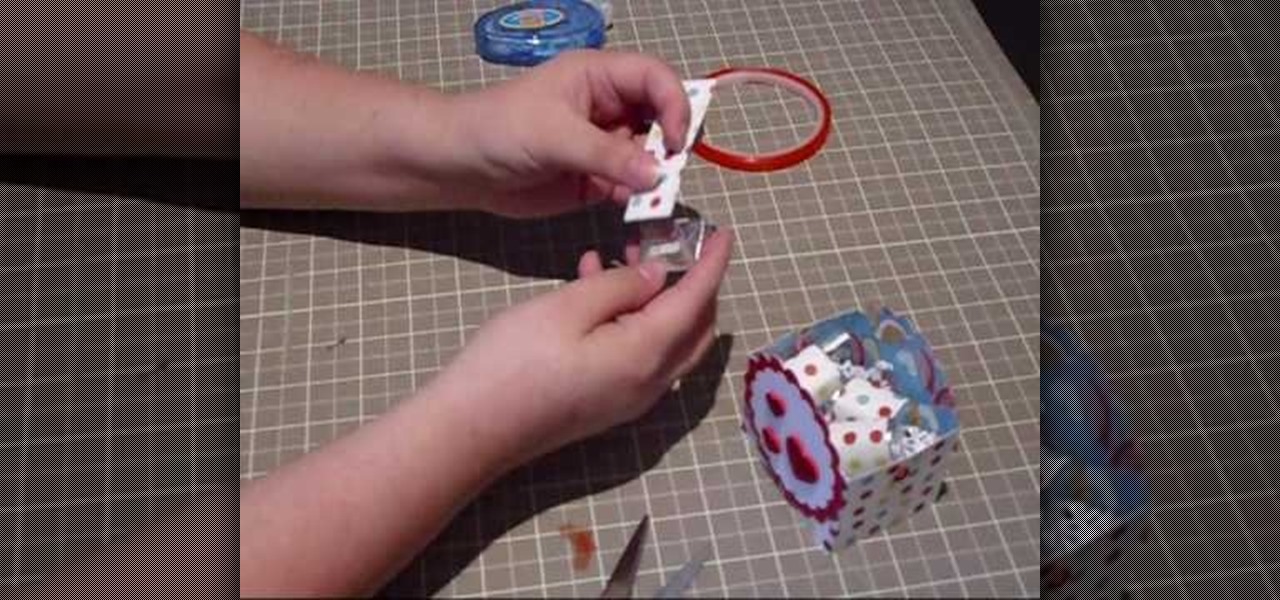
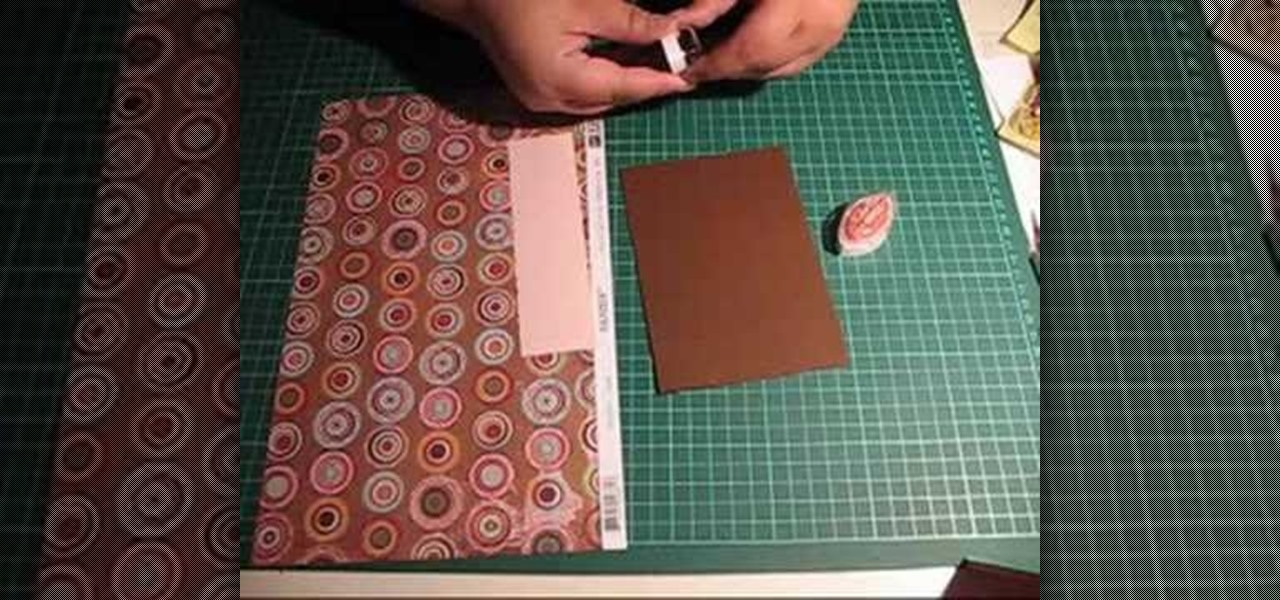
This video shows you how to fold origami boxes. You will only need a single square piece of paper. The process requires simple folds. This project can be done by people of all ages. The video has both audio and video instructions and is very clear about what needs to be done. The final product is a box with an open top. In order to create the lid, you repeat the process. It is suggested that you use a different color or patterned paper for the second box. The second box just gets tucked over ...
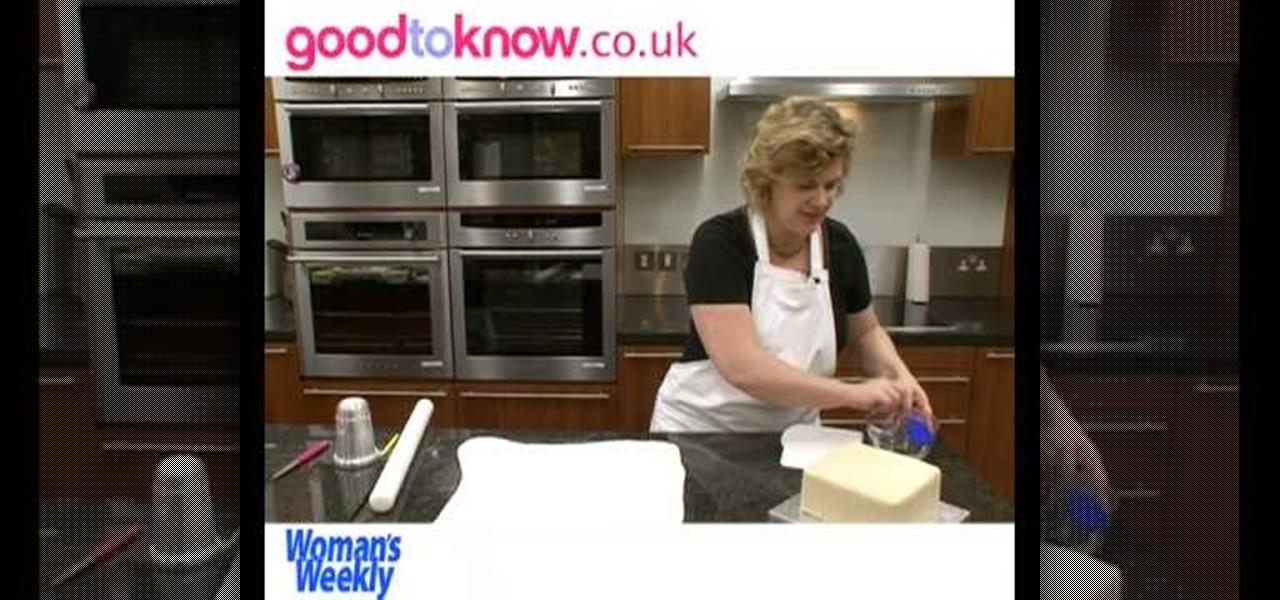
Learn how to make a beautiful & easy star-designed Christmas cake in two-part cake decorating tutorial with Women's Weekly cookery editor, Sue McMahon. You will need a square fruit cake, apricot glaze or jam, marzipan, white & blue sugarpaste or frosting, and non-toxic edible cake glue. Impress your Christmas guests with this exceptional looking cake next holiday season.
1. Stand square 2. Do a 180 Turn with your right leg.
Learn how to make an origami "orchid" by slightly altering an origami iris / lily flower. This origami video shows how to make what I call an orchid flower... really it's something I made by mistake when first learning to make an origami lily / iris. You'll need to start from the frog base.

Guinea pigs often squeak with joy when their owners enter a room. How can you resist such welcoming pets?
A seasonal how-to for creating easy, perfect paper snowflakes. This is a fun Christmas craft this holiday season. To begin, start with a square sheet of paper. Fold the sheet corner to corner. Fold again to create a new triangle. Cut like crazy! For all sorts of patterns and ideas check out this accompanying article:
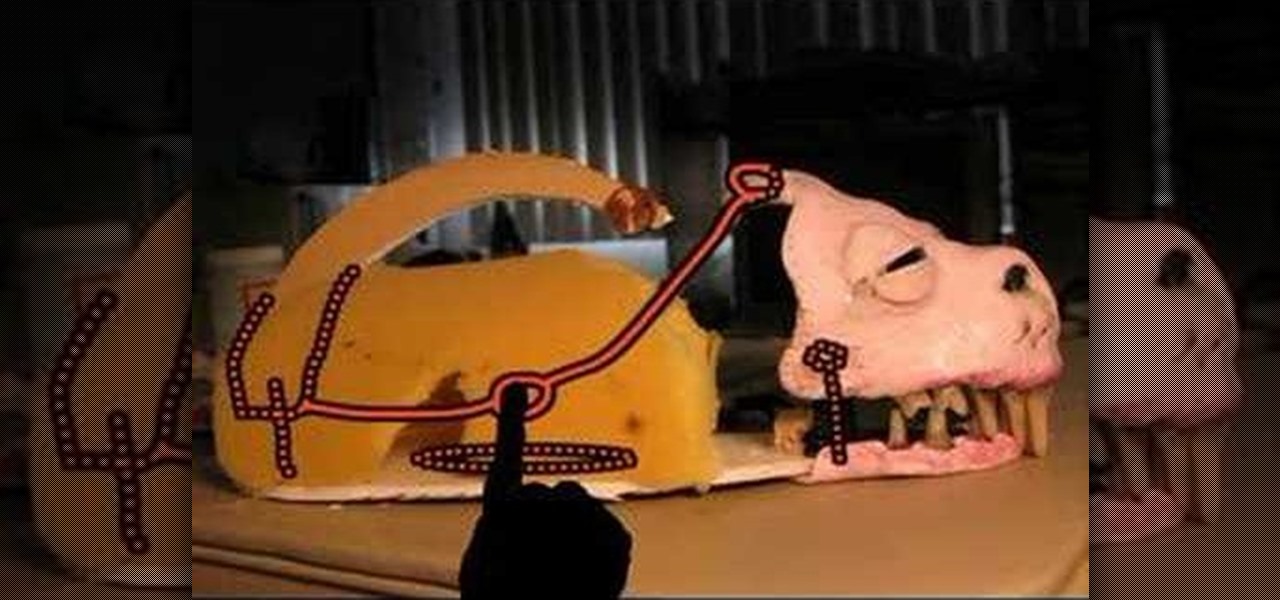
If you're in the mood to make a horror movie, complete with creepy creatures and all, then you could make your dreams come true. Just check out this video tutorial on how to make a creature puppet that bites and wags when held. You can make this mechanism using string, craft wood, and hot glue, the action can be controlled with one finger, so the puppet appears to be alive when cradled in your arms. A nifty horror prop for a "pet monster."
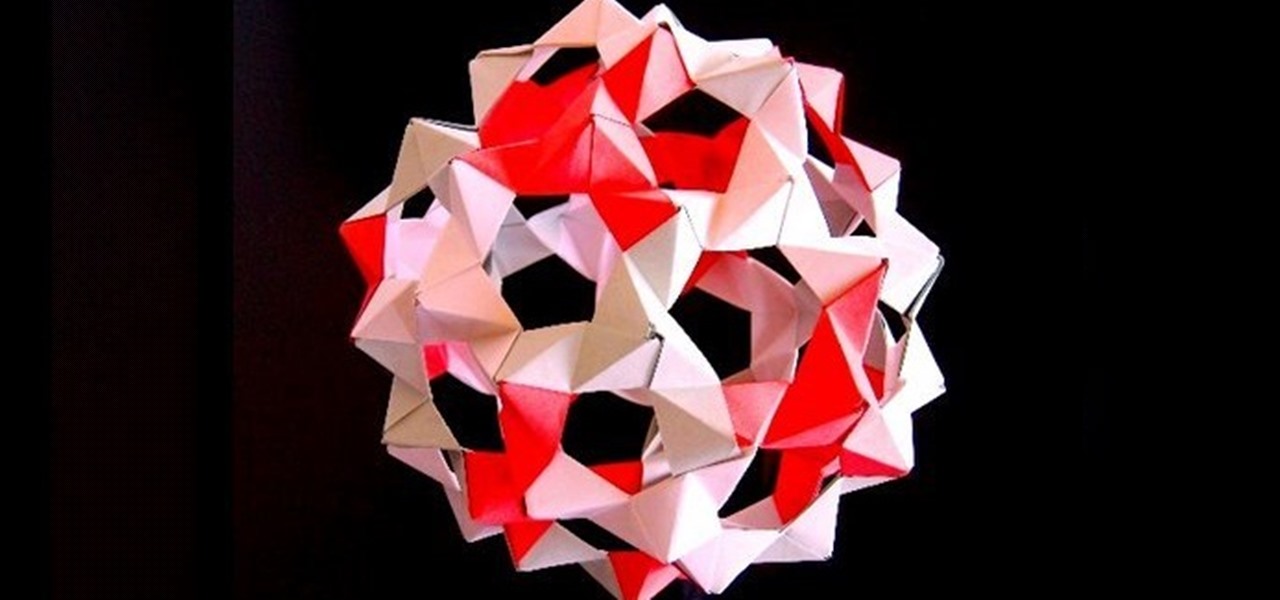
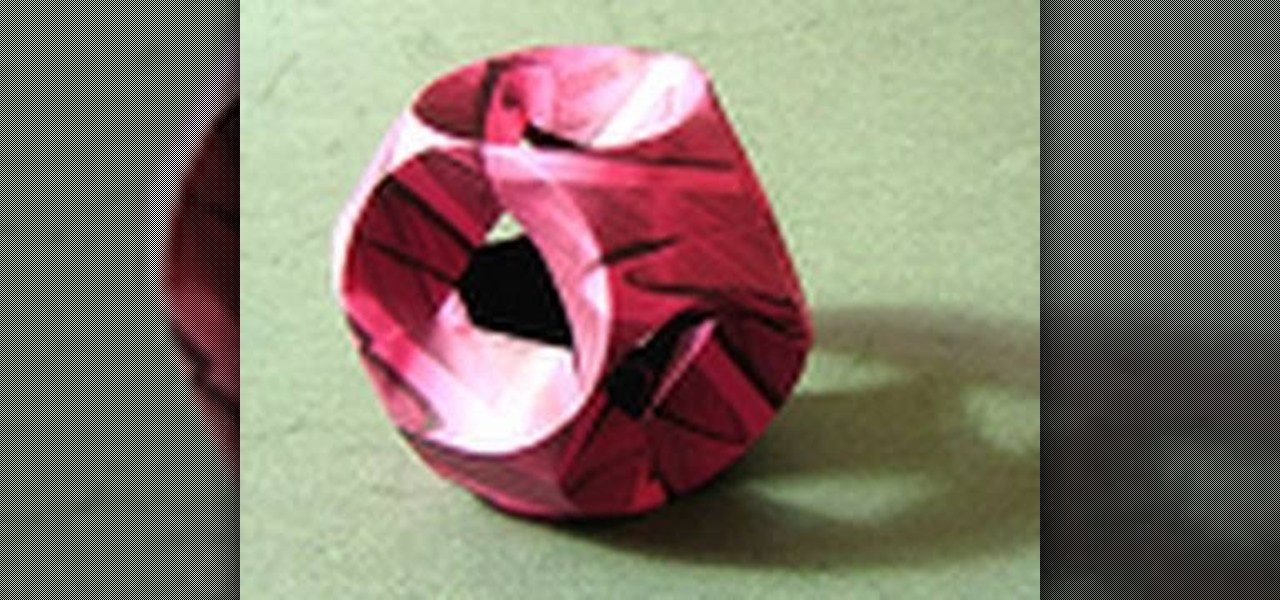
This video provides instruction on how to make "buckyballs" (dodecahedron, truncated icosahedron) from "PHiZZ" units. It looks complicated but it is really easy to make.
Sometimes when you're camping it's necessary to pitch a little something called a tent after a long trek hiking and exploring the great outdoors. And when you're ready to call it a day, make sure you can do so peacefully without the fear that your tent contraption will fall down on you during the middle of the night.
Cathie Filian and Steve Piacenza demonstrate the way of making medieval candles using tissue paper transfer technique. Steve asks you to first take a piece of tissue paper and a square-shaped chunky stamp. Then you should load the stamp with black pigment. Once the loading is completed, you should cut the tissue paper in square shape and place the shining side on the stamp and give a nice light press with your fingers. Then once you get the stamp image on the tissue, gently take it out and pl...
Everyone wants to be a rock star! Grab your electric guitar and get ready to rock. This guitar lick is in the key of D. The tuning is "Drop D", just tune your low E to D. Hit the low D twice. Next slide from the third fret to the fifth fret. Now go down to the A string and the third fret (C). Repeat these notes three times. Then mute check for a three count. For the next part move up two frets for the all of the riff. This riffs are great for southern style rock and alternative rock. The vide...
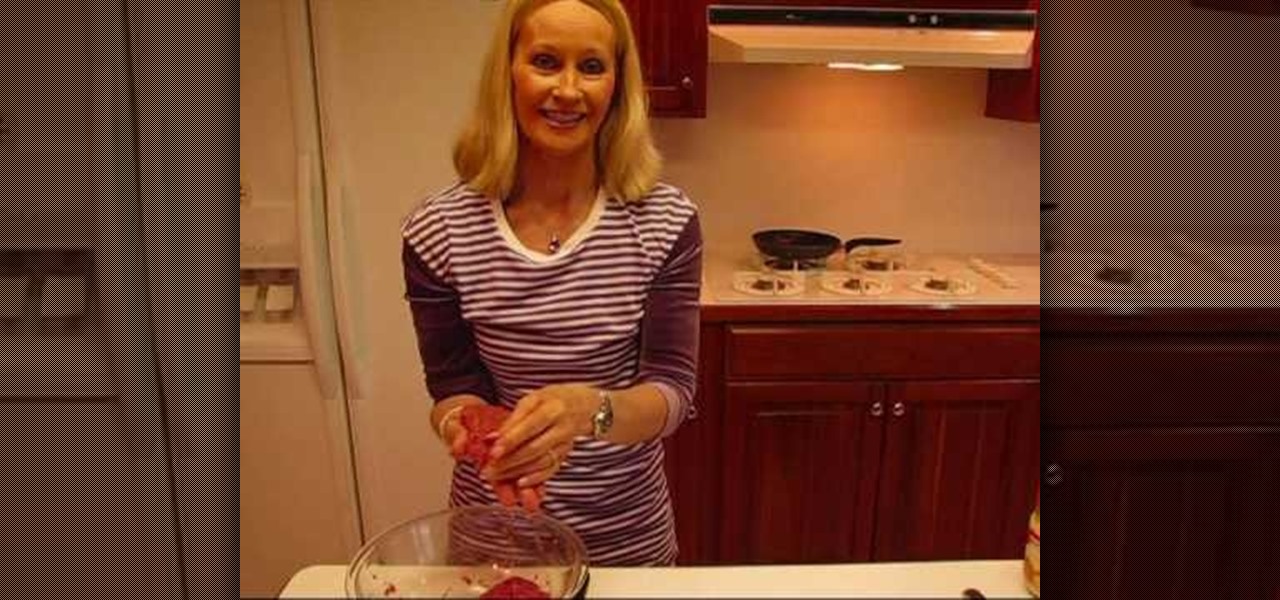
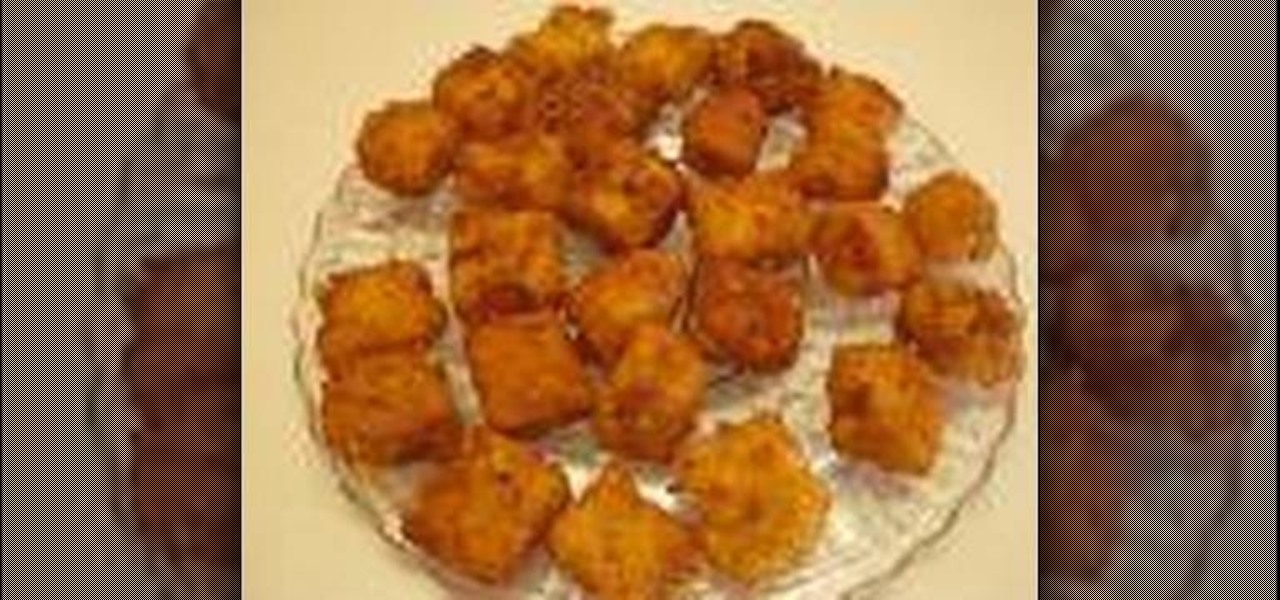
Everybody loves burgers and everybody loves sandwiches - so why not combine them? In this tutorial, Betty makes square shaped sandwich burgers from scratch. This recipe is not difficult to make and is incredibly tasty. But, make sure you remember the napkins because this dish sure is messy!
What could be better then macaroni and cheese as a finger food? Liven up any party with these delicious bites of baked mac and cheese.
Learn everything you need to know about Newton's third law of motion from none other than NASA. The National Aeronautics and Space Administration is the United States government's most infamous agency and powerhouse of space exploration. Why wouldn't you want to learn Newton's laws of motion from them?
This is a complex process, but the guys at Graffiti Research Lab have armed you with detailed written instructions and this video on how to create a night writer. This is a more complicated version of their LED throwies that allows you to catch a tag in lights. You'll never need an airpline skywriter again!
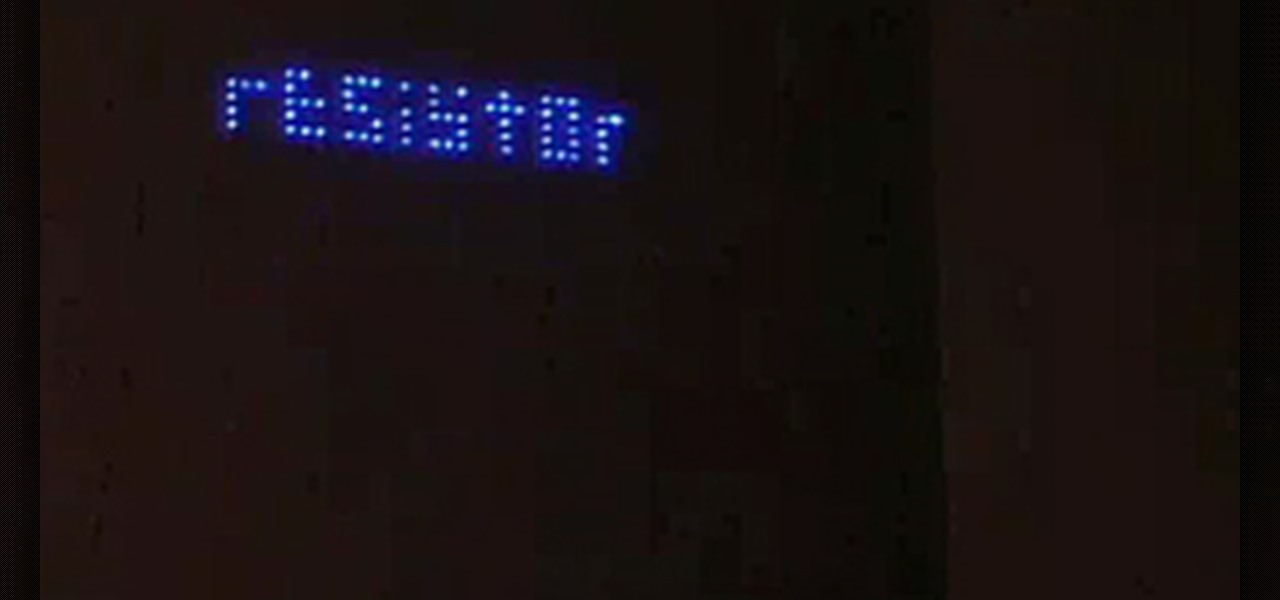
This guide makes beating the Widowmaker in Times Square easy enough, so picking up the 'In This Together' Resistance 3 trophy shouldn't be that hard either right? If you head to the location of the Chimera you kill at the beginning of the fight and then walk towards the edge of the map, you can actually fight the Widowmaker without it being able to hit you.
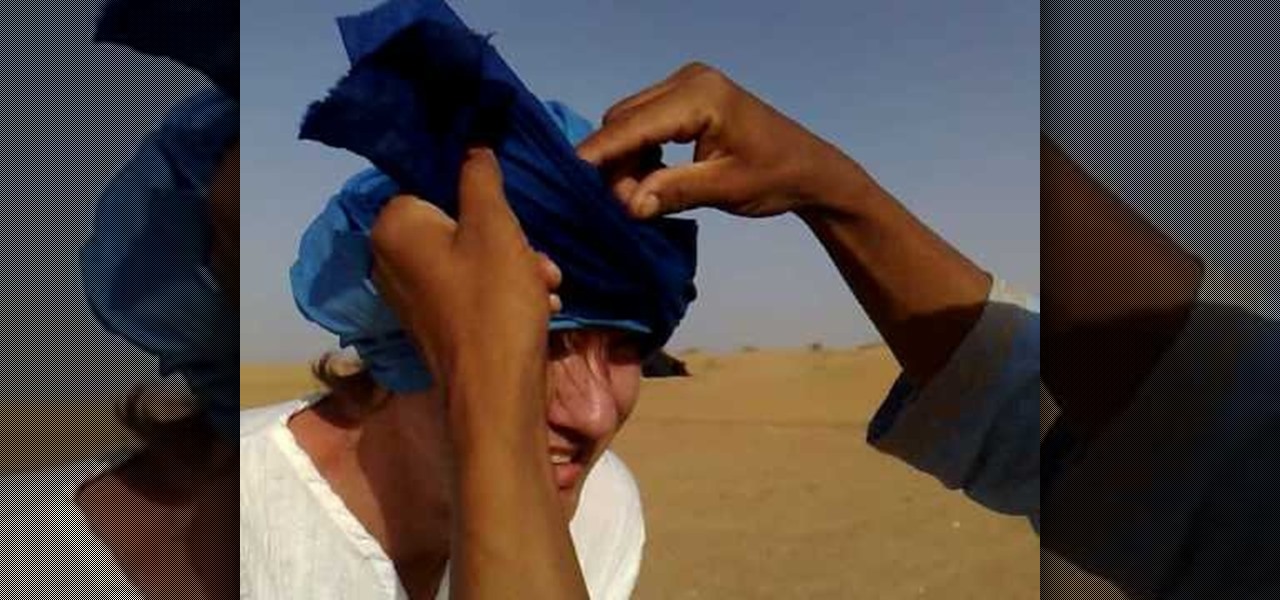
What's the best way to learn how to tie an efficient and sturdy pashmina/shemagh? Why, ask someone who ties one every day, of course. Take a gander at this helpful tutorial to learn how to tie one of these babies on your head quickly from your Middle Eastern instructor.
If you're looking for survival knots or nautical knots then you've gone to the wrong place. But if you're looking to bolster your oeuvre of fancy, beautiful knots, then you've stumbled upon the right video.
Even if you and your office cohorts don't exchange cutesy valentines on Valentine's Day, you can still indulge in the vibrant, lovey dovey holiday by crafting one of these three paper favors for your kid's class.
After you purchase your first car in Gran Turismo 5 on the PlayStation 3, you'll unlock the National B License Tests. The first one (B-1) is a stopping challenge, and if you want to learn how to get the gold trophy, this video gives a perfect example of how to get it.
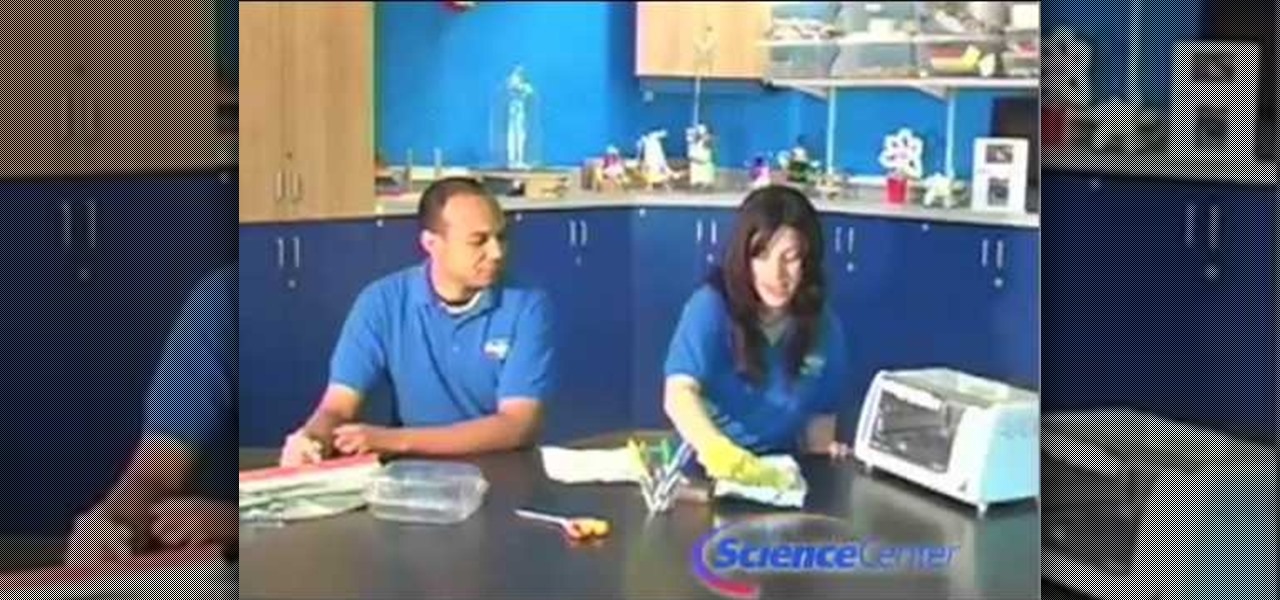
In this video, we learn how to shrink plastic with household materials. You will need: tin foil, plastic container, scissors, glove, and colored markers. To start, you will preheat the oven to 325 degrees. Then, cut a piece of the plastic out in a square shape. Next, draw whatever you want onto your piece of plastic. Make it as colorful as you would like to! When finished, put this in the oven using a glove. Make sure it's on the foil when you put it in. Then, leave it in for less than a minu...
In this video, we learn how to do gumpaste cake decorating lettering. First, you will roll the gumpaste, then add some crystal to the surface so it will stick. Next you will roll it out until it's thin. Cut a piece of it out, then put the rest on the side. Take the small piece and cut it into a small square. Use a letter Tappit to press onto it until it's completely cut out. Once finished, you will be able to use this on a cake! Cut out all of your letters from the remaining piece of gumpaste.
You don't need to be able to create crazy 100-side modular spheres to make beautiful origami projects. In fact, a great portion of the more popular origami projects are on the easier side (good news for sausagefingers like us).
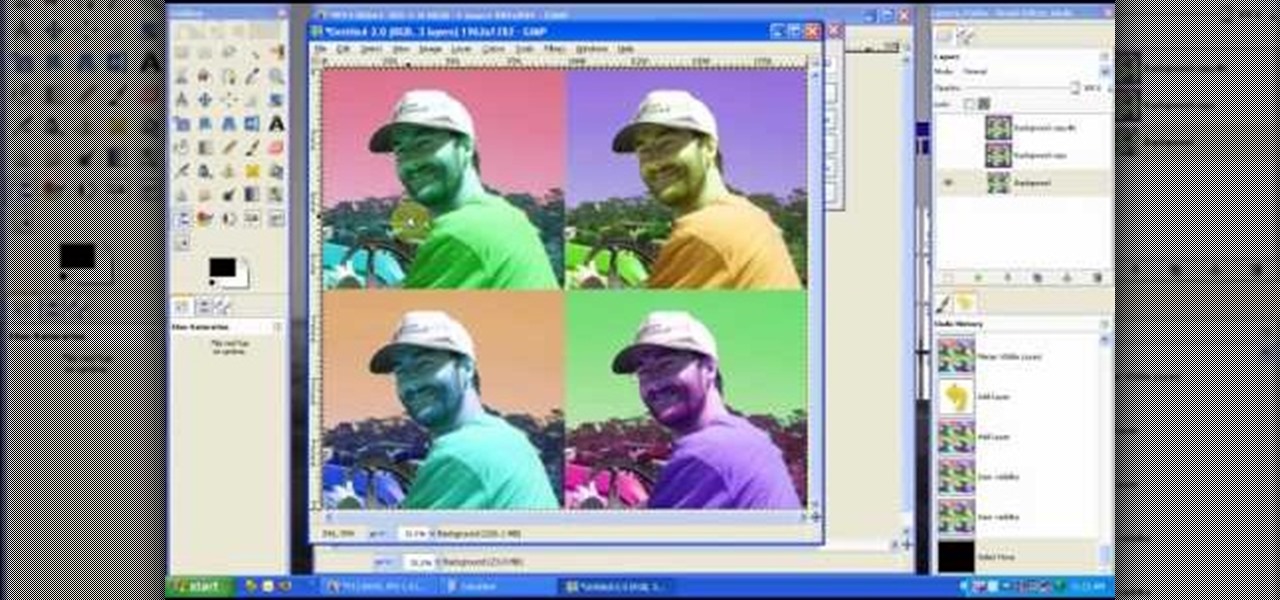
In this tutorial, we learn how to create a Warhol effect in GIMP. First, you will need to take your image and open it up in GIMP. After this, you will need to resize this so that four of these fit into one square next to each other. From here, create a new layer and then layer it to size. After this, change the hue and saturation of the photos. Then, change the lightness and make it any color you like. Then, do the same for the other photos in different layers. Save this when finished, then y...
In this tutorial, we learn how to grow a culinary herb garden. This will save you money in the kitchen and is very easy to do! You can grow herbs in a 6 square feet area that only needs watered for around 10 minutes each day. You just need to make sure to cut out the flowers that will grow inside them. You can grow chives, rosemary, mint, basil, and thyme. You can use all of these inside the kitchen for all of your different dishes. This will save you a small fortune, because herbs at the gro...
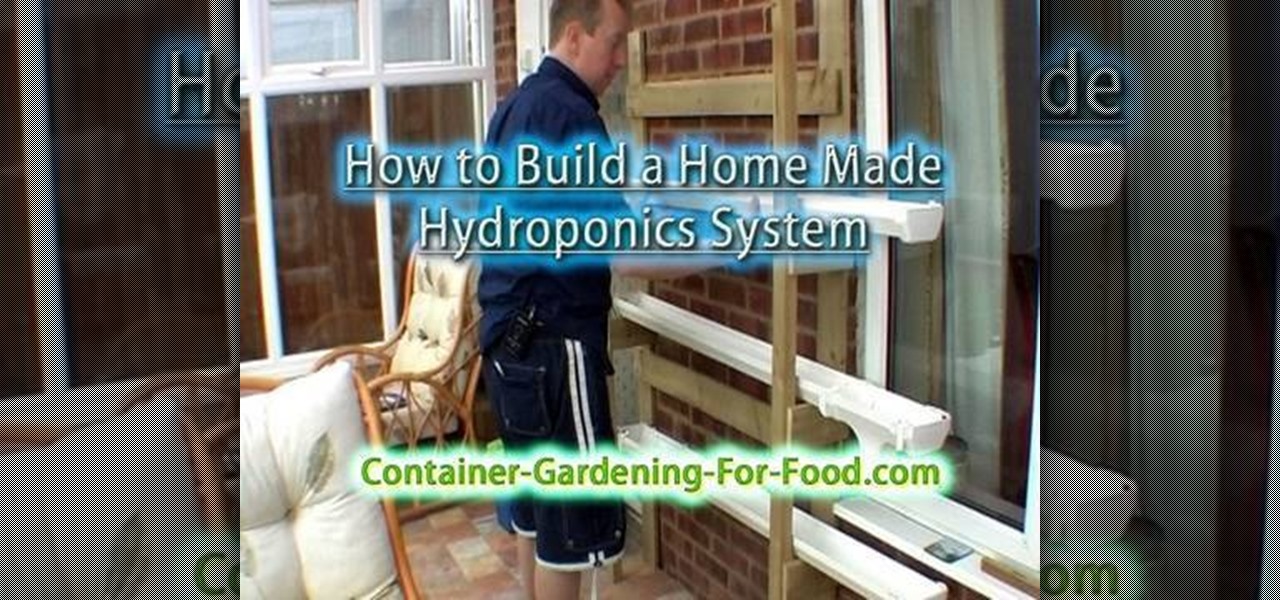
In this tutorial, we learn how to build your own hydroponics system. To do this, you will need: square line rain gutter, 6x end caps, 3x gutter running outlet, 1x small pond pump, 2 meters pond pump tubing, timber for framework, large plastic container, and gutter leaf guard. When you start, you will need to measure out how tall your pump will need to be, then build the framework to surround it. Then, grab all your gutter parts and put them together. Once you do this, start to set up all the ...
In this tutorial, we learn how to make a tubular peyote bracelet. To get started, string your beads onto the string and leave a 10 inch tail. Then, bring it into a loop and tie it into a square line. After this, use a needle to sew more beads through the beads that you just strung on. As you do this, skip beads so that you have interchanging colors around the circle. You will have a total of four beads on top of the eight that you started with. Continue to do this until you reach rows that go...
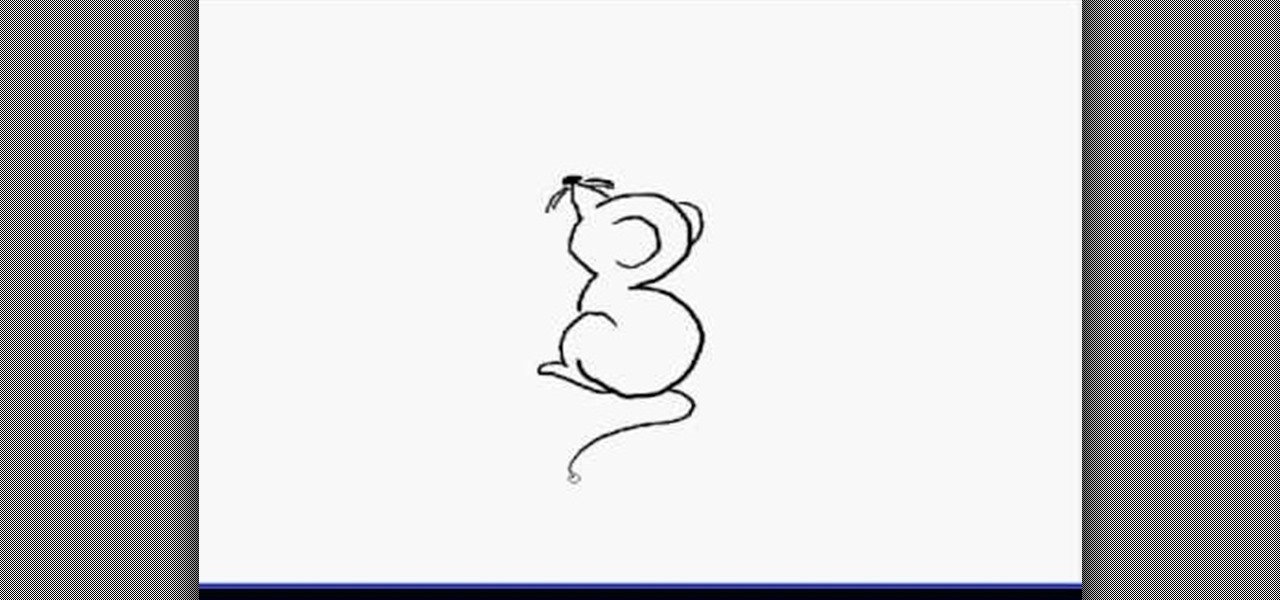
In this video, we learn how to draw a cartoon mouse from the number three. First, draw out your number three. Now, create a triangle shape on the end of the top of the three, then add in a circle and whiskers. Next, add in a half circle on the first hump of the three, then connect the body of the mouse going down the end of the three. Add in a tail at the bottom of the number, then add in a foot next to the bottom of the three. You can adjust this drawing how you prefer and add in any other d...
The core principle of origami is folding something from a single sheet of paper. The idea is to challenge your mind to create something fabulous out of very limited material. And while this is quite the poetic journey, as you'll see with modular origami and this origami tutorial, sometimes more than one sheet is necessary to get the job done.
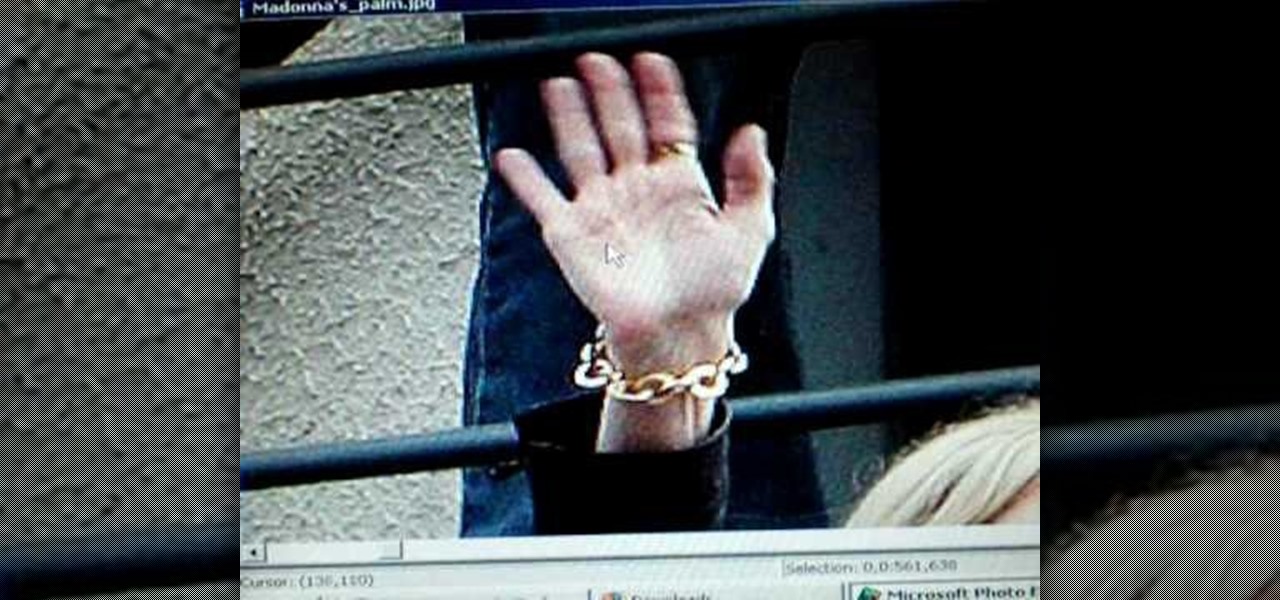
In this tutorial, we learn how to palm read Madonna. Her hand shows she has a practical mind and her fingers are the same length. This gives a sign that someone is ambitious. The ring on her first finger gives the person a manner of difficulties and problems connected with their career. The pinkie finger away from the ring finger shows a need for independence. A square palm says that she has a need to move and other people are attracted to her. The lines on her hand how that she loves others ...
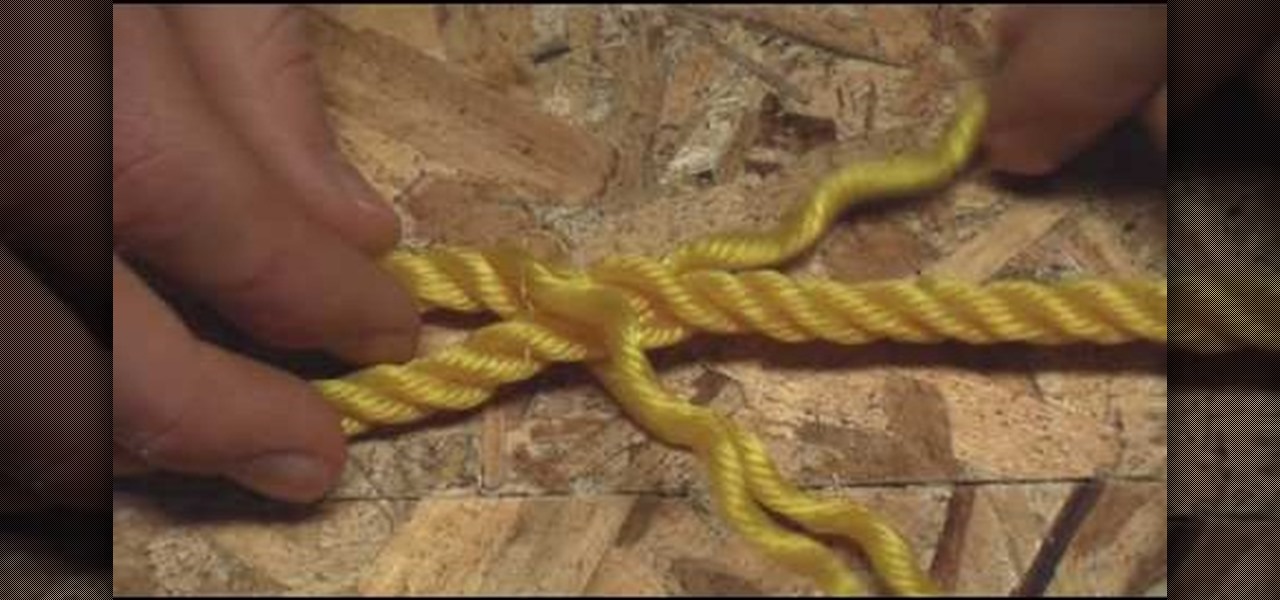
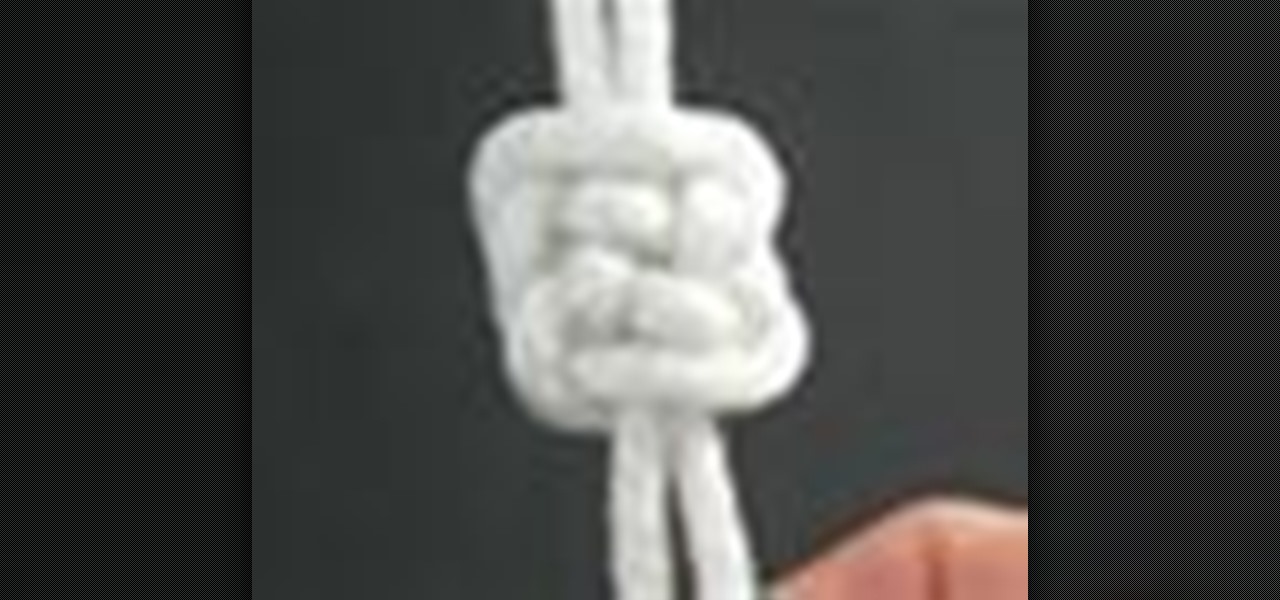
In this video, we learn how to tie a plafond knot. First, make a loop with your string, then make a smaller one directly underneath it. Make a larger loop underneath this, followed by another small one. After this, grab the bottom and lift it to the middle of the one on top of it. Next, bring the top down and push it into the middle of the bottom loop. Bring the left hand side of string through the top of the loop, followed by the right hand side through the right hand side middle. Now, pull ...
In this tutorial, we learn how to make a paper Christmas tree. Start out with a square piece of paper, then fold corner to corner and open it, then fold it on the opposite corners and open it. Now, turn it over and fold it side to side on both sides. Now, the paper will automatically fold into it's shape because of the creases you made. Now take each of the four flaps and flatten them out with your finger. After this, cut your trunk out of your tree at the bottom, then cut slits on the side o...
In this tutorial, we learn how to set up and us Netflix on your PS3. First, insert the DVD that Netflix sent you into your PS3. You will also need to have a pc nearby, all you will need to do is enter an activation code. Once the DVD is loaded, you will be able to browse movies through different categories. When you want to play something, you can simply press play and then wait for the movie to buffer. You have all the usual buttons, so you can rewind, pause, and fast forward. To go back to ...
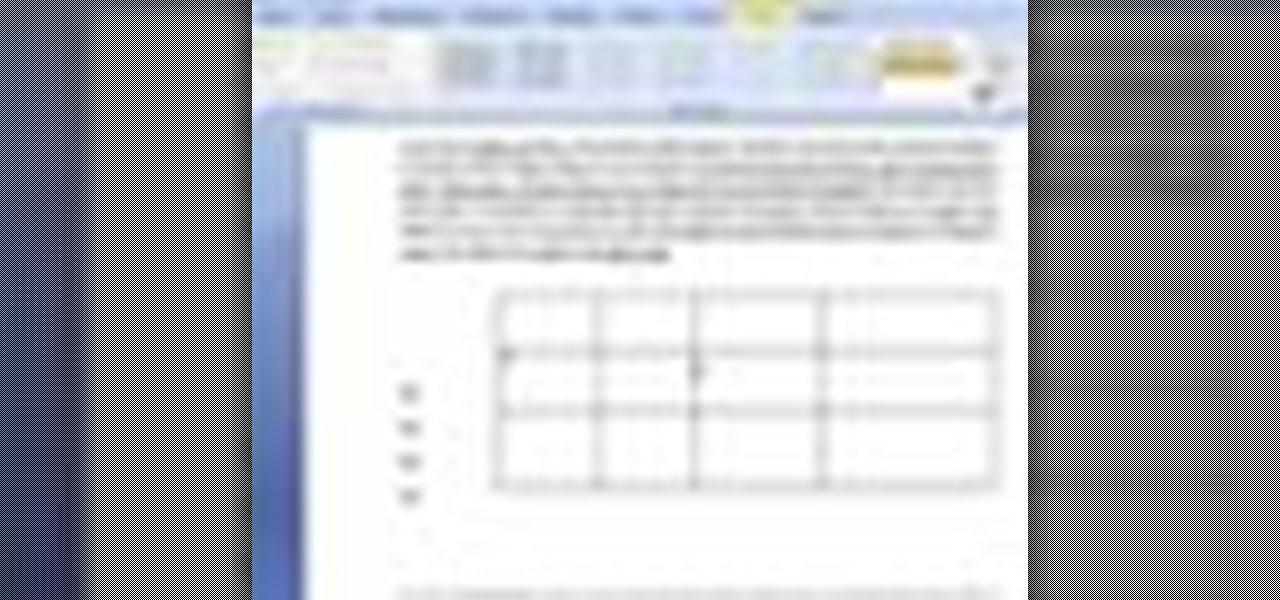
In this video tutorial, viewers learn how to create tables in Microsoft Word 2007. Begin by clicking on the Insert tab and select Table. Then users are able to create a table by dragging the mouse across the squares to determine he amount of columns and rows. Make the final selection by simply clicking. Another option is to click on Tables and select Insert Table. Then users are able to input the number of columns or rows. This video will benefit those viewers who use Microsoft Office 2007, a...
In order to make an accordion envelope, you will need the following: 6 envelopes, 4 pieces of 6x4 1/8 card stock, double sided tape, chalk, a square punch, and glue.
In the PlayStation 3 video game Heavy Rain: The Origami Killer, four protagonists are on the hunt for a serial killer who murders young boys and leave behind his calling card… an origami animal. One of those animals, and the one prominently displayed on the cover art and poster art for the game, is the pajarita. Pajarita in Spanish for little bird (or even just origami in general).
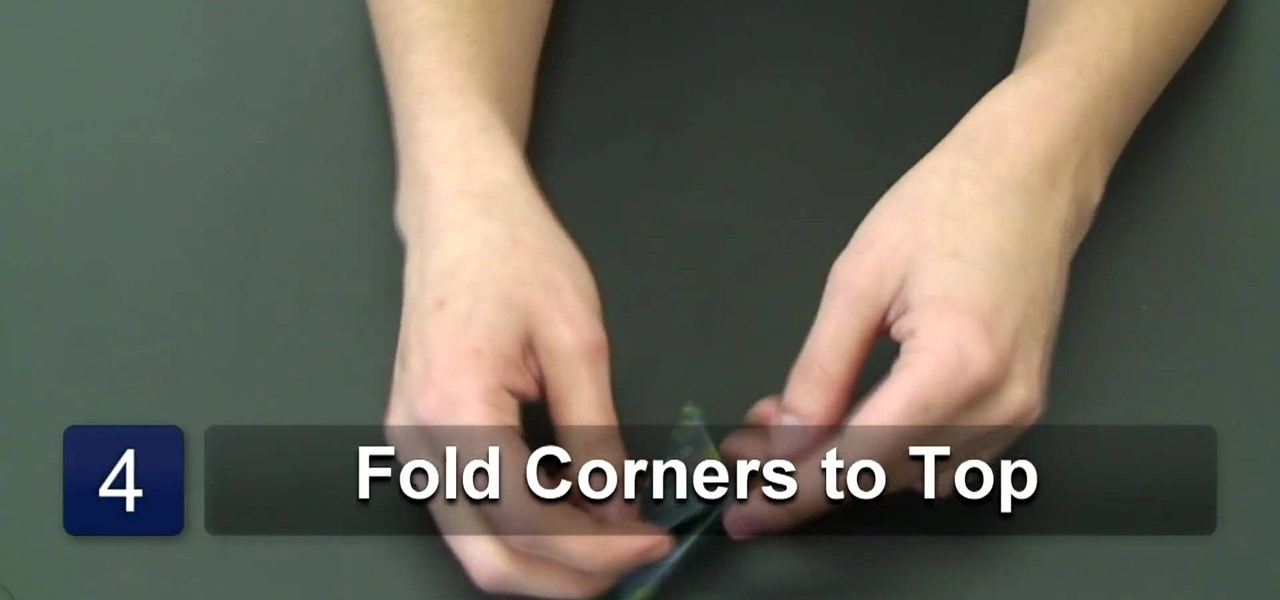
In this video tutorial, viewers learn how to fold an origami water bomb. Users will need a square paper. Begin by folding the paper in half both horizontally and vertically. Then fold the paper diagonally in half both ways. Now fold the edges into the middle to form an isosceles triangle. Then fold the edges to the middle to form a diamond shape. Fold all the tips to the middle and then fold all the corners to the middle. Finish by tucking the triangle edges into the pockets and blow up the p...
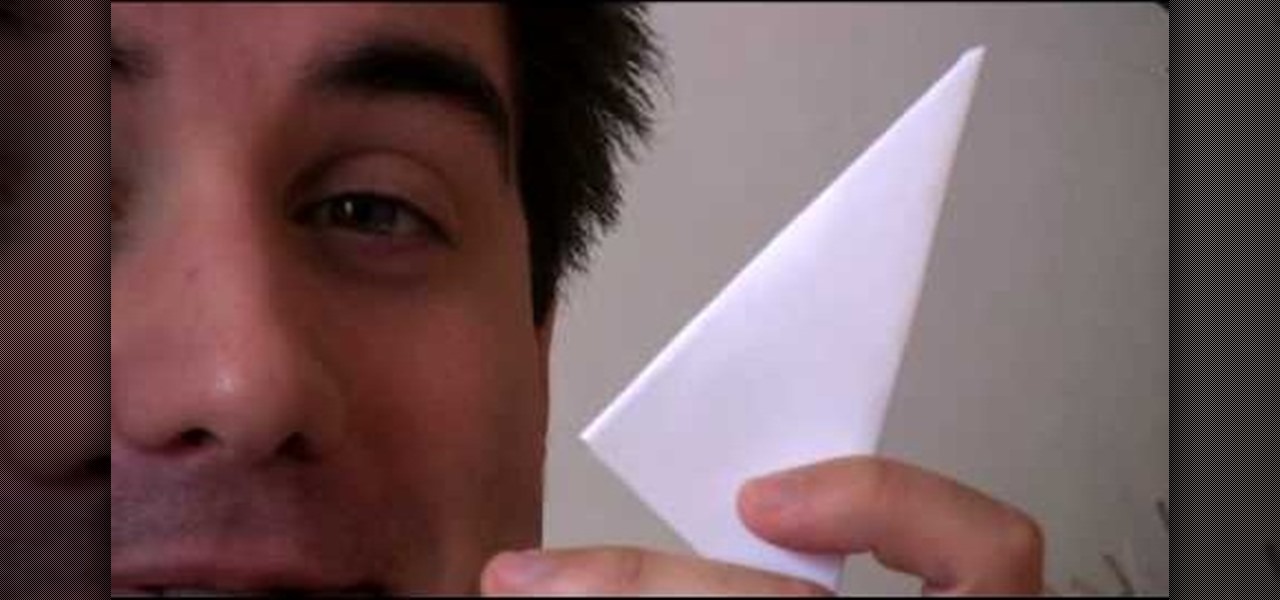
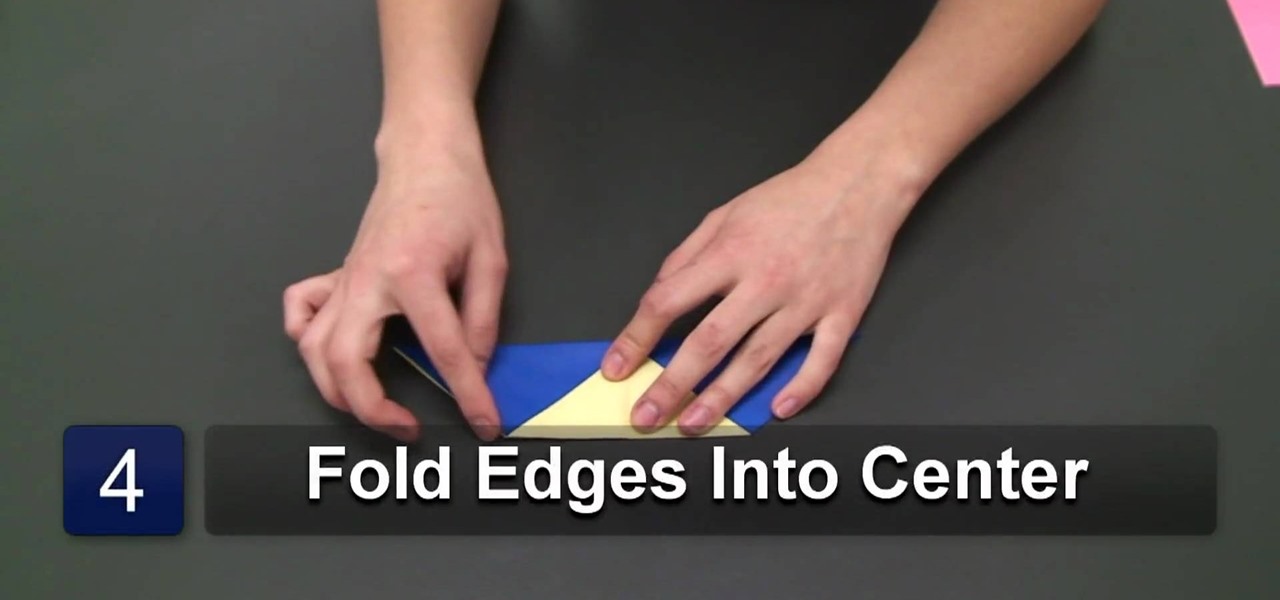
In this Arts & Crafts video tutorial, Ana Maria, Origami artist, will show you how to fold an origami paper pyramid. For this you will need a square piece of paper; preferably colored. Fold the paper in half, open it up and fold in half in the other direction. Open up and fold all corners to the center point of the paper. Now fold it in half in both directions. Open up the last fold and fold one of the edges inwards. Open up again, unfold the adjacent flap and lock the flap down as shown in t...