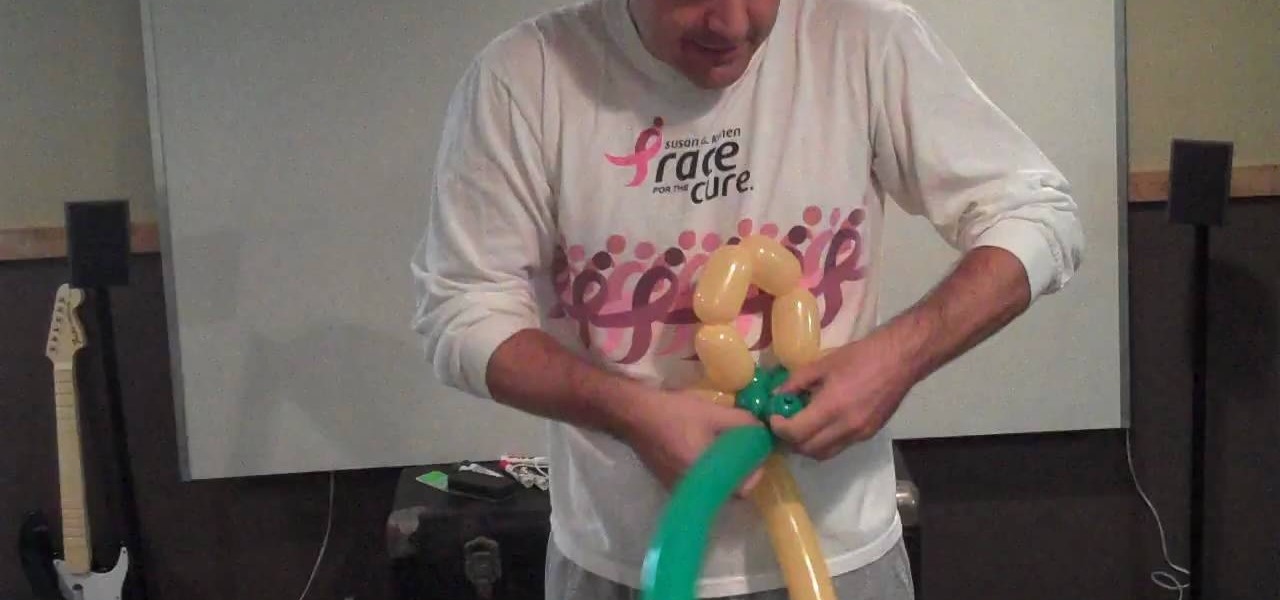
his video show viewers how to make a basic sunflower out of 2 balloons. First, you should begin with the green balloon which will make the stem. Make sure that both balloons have some empty space at the ends for allowance of air movement during folding. Make two small bubbles on the green balloon and then twist this together with the yellow balloon which will make the petals. Make 6 rather large bubbles to form the petals. Make a loop with the yellow balloon after all 6 bubbles are made and a...
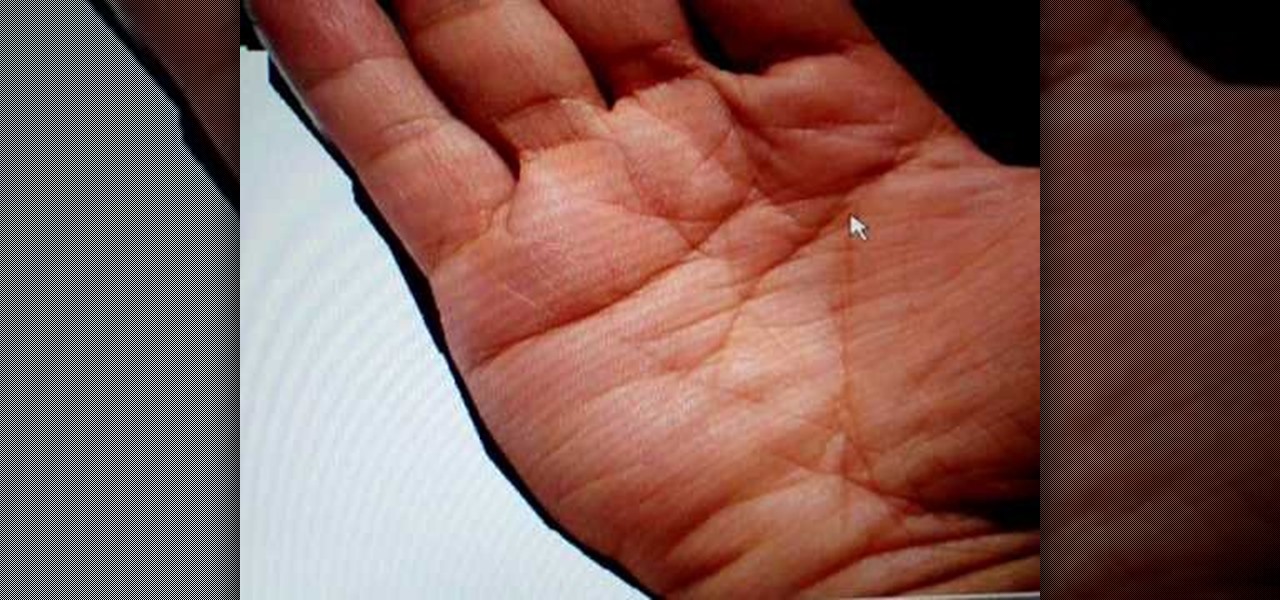
In this video, Peter John teaches us how to palm read the right hand and changes. The square hand is usually the practical side of the person. Where the thumb comes out from the side of the hand shows a person of extravagance. When the thumb is closer to the hand it shows a person who clings or holds onto their money. A line underneath the pointer finger means the person is going to go into business. A line coming out from underneath that means someone who controls their emotions and can make...
This video will show viewers how to fold a small book out of origami paper. You will need a square piece of paper for this project. First, fold the paper downwards in half, then fold it into quarters by folding down both edges of the paper to meet in the middle. Unfold and fold the two top sections down to make eighths on your paper. Then turn the paper around and repeat. Mountain fold both sides of the paper until you reach the middle, after which you should have a strip of folded paper. At ...
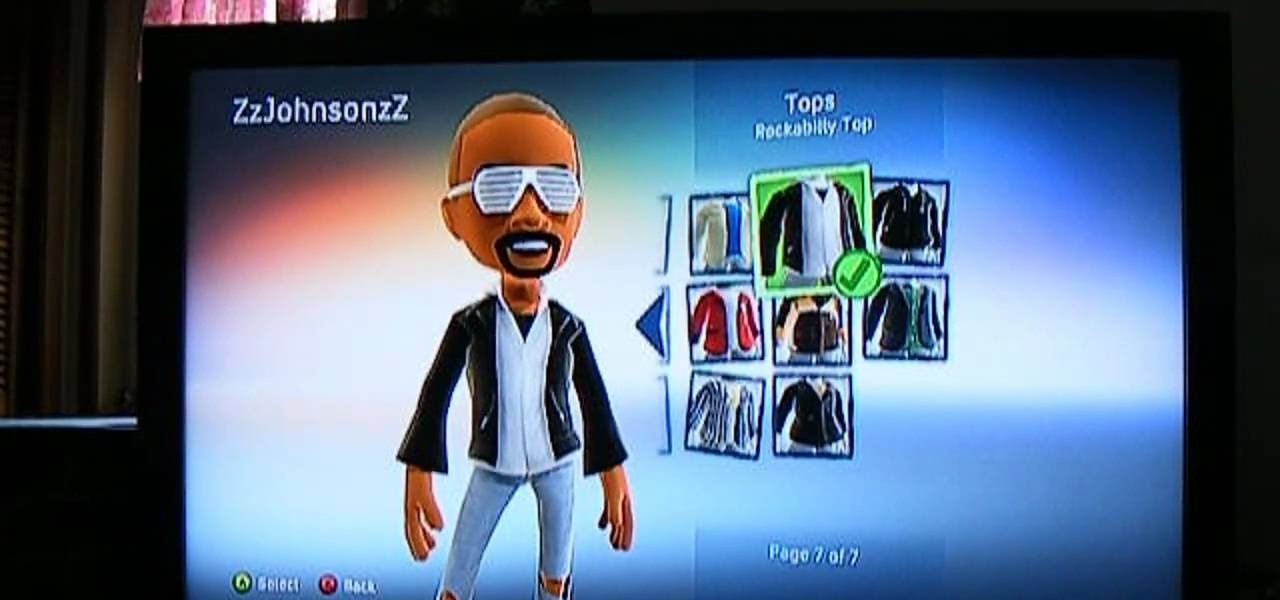
Kanye West might be the most popular and most hated rapper in America right now. It's funny how those two go along right? Whether you like him or want to make fun oh him, making an XBox 360 Avatar in his likeness is a good place to start. This video will show you exactly how to make a pretty good one. Now make him say funny, self-obsessed Kanye quotes!
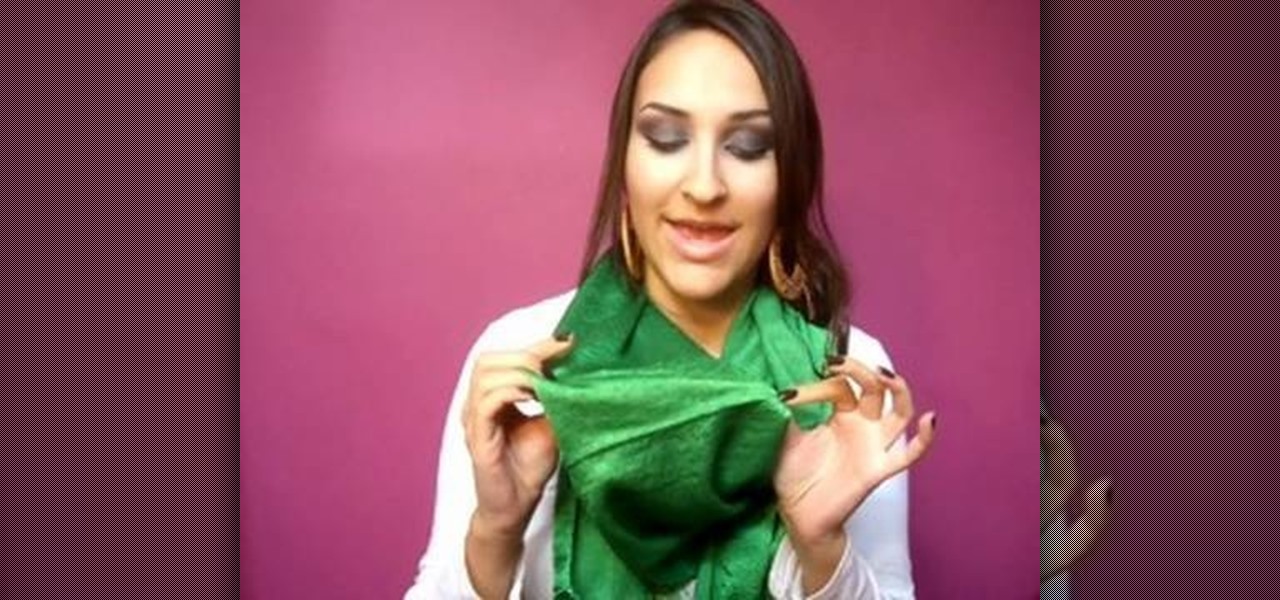
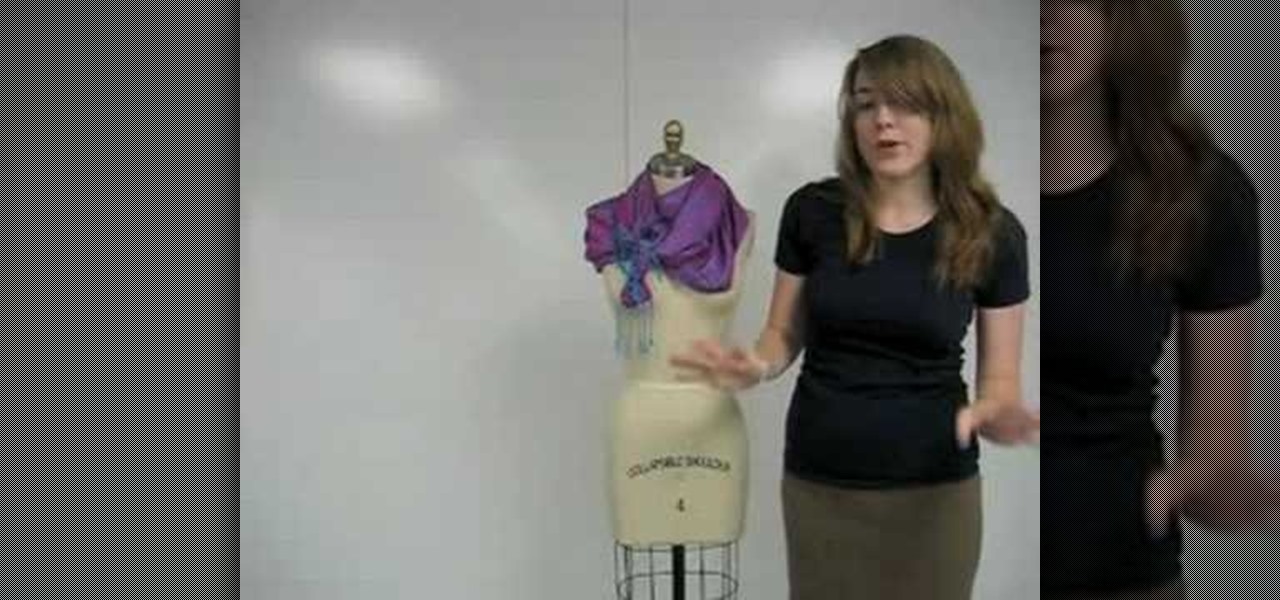
In this video, we learn how to wear a scarf by creating contrast and texture. A squared shaped scarf with contrasting patterns will look great with anything that you are wearing. To wear this, make it into a triangle, then tie the ends together around the back of the neck. Then, you can let the scarf hang down on the front to add a texture to your look. A solid color scarf is also great if you are wearing a simple top to add a splash of color. You can tie this around the neck one, then let th...
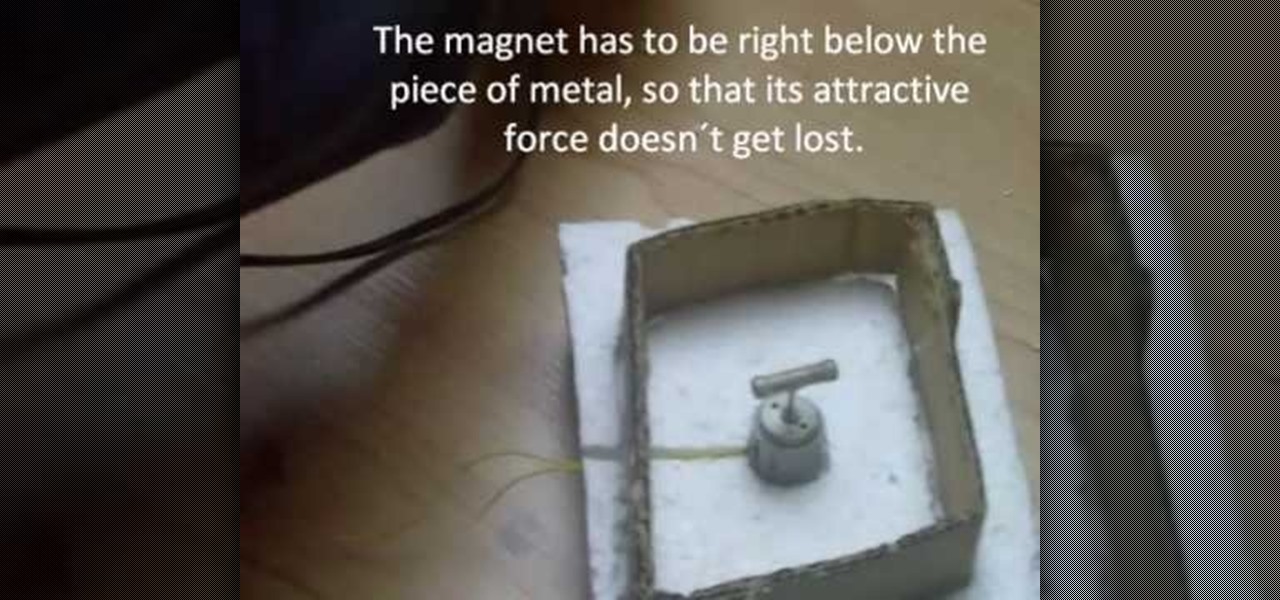
In this video, we learn how to build a magnetic stirring device. First you will need: a block of 1 inch thick Styrofoam, a piece of cardboard, 2 magnets, a small electric motor, a piece of non-magnetic metal, a hot glue gun, and a soldering iron. First, draw the shape of your cardboard square on the foam and cut it out. After this, take your soldering iron and melt away the Styrofoam from the outside. Then, make a hole in the middle for where the motor will be placed and push it inside. After...

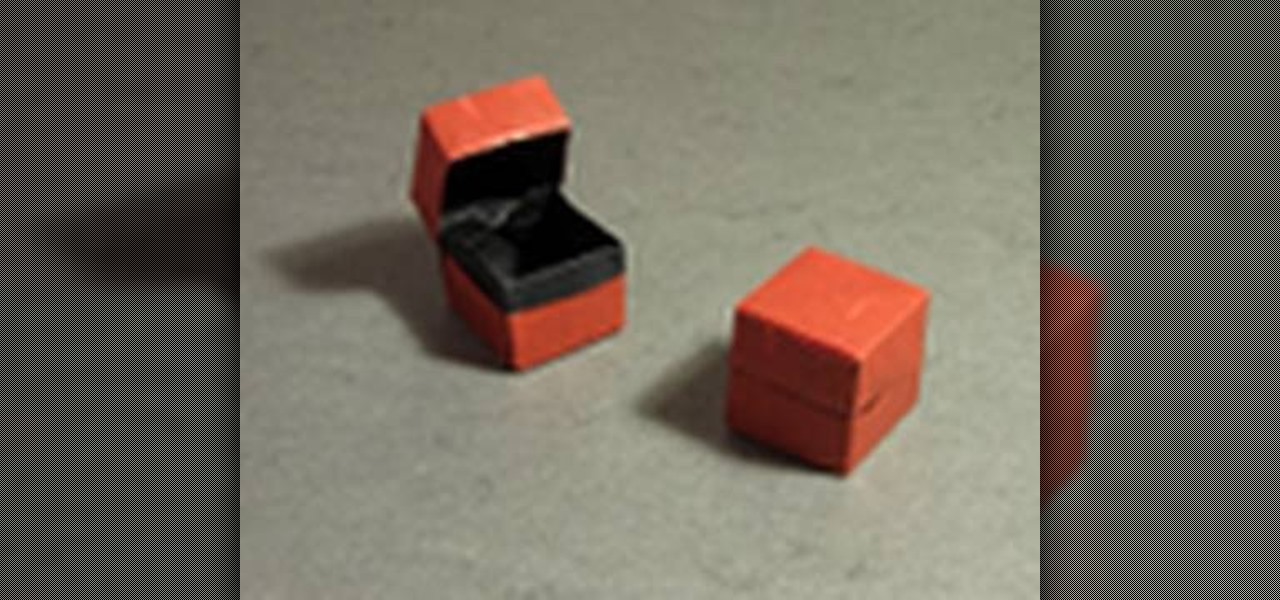
The origami version of a box and lid may seem like one of the simplest origami projects out there, but you should consider this origami box and lid the hard mode version of an otherwise beginner origami craft. Rather than use two sheets of paper total - one for the box and the other for the lid - this origami project only involves one piece of origami tissue paper.
Think all crochet projects produce yuppy granny squares and are only done by elderly cat ladies who live alone? Think again. With stars like Amanda Seyfried proclaiming that knitting is their favorite hobby, crocheting/knitting is once again becoming hot stuff, kind of like designer cupcakes or pilates.
Think all crochet projects produce yuppy granny squares and are only done by elderly cat ladies who live alone? Think again. With stars like Amanda Seyfried proclaiming that knitting is their favorite hobby, crocheting/knitting is once again becoming hot stuff, kind of like designer cupcakes or pilates.
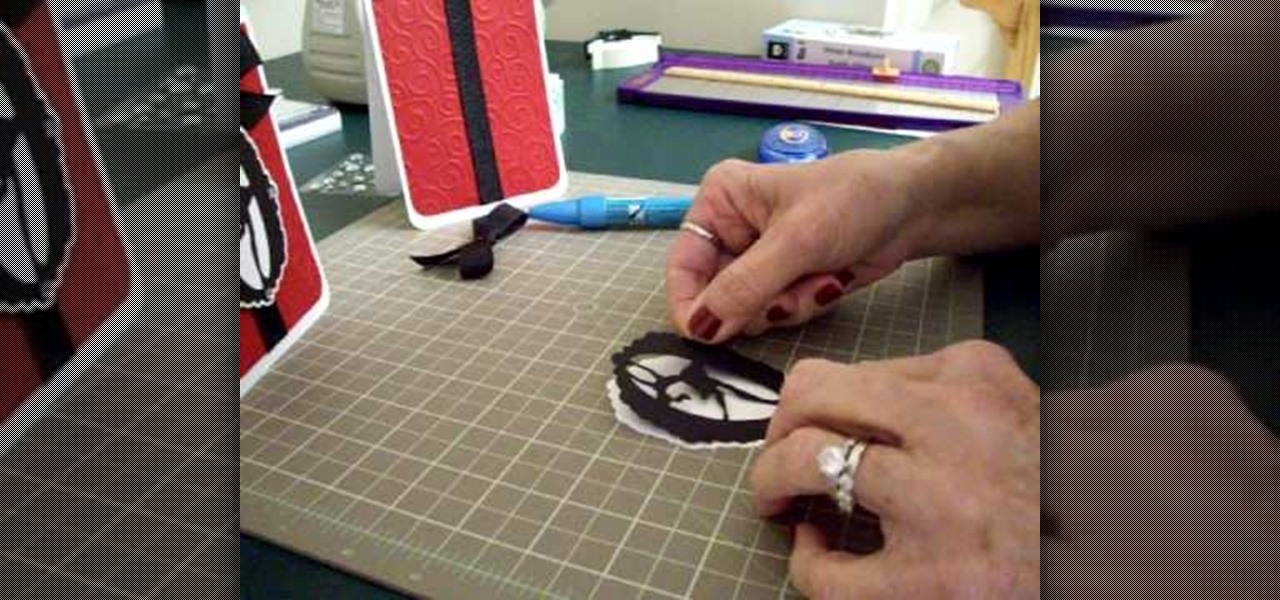
Make a simple, elegant card using Winter Woodland. Go to page 50 of manual. Cut tag and skater at 3 inches. Use 8 1/2 x 11 cardstock and cut vertically to 4 1/4 inch. Fold from top to bottom. Round corners of cardstock and red matte. Make red matte 4x5. Run red matte through cutter bug using swirls folder. Insert between two plates and run through. Place black grosgrain ribbon down the center. Stick to front of card. Glue skater to background. Place square crystals around skater. Create and p...
This video tutorial is in the Arts & Crafts category where you will learn how to make a magic paper ninja star. For this you will need 8 sheets of square paper, all of the same size. Fold one sheet in half, open it up and fold both corners of one edge inwards along the centerline. Now fold the whole sheet in half inwards. Then fold the lower part in a triangular pattern, make a crease and open up the sheet. Fold the lower part inwards from the center and collapse the sheet over the fold. Do t...
In this video, we learn how to make a box. First, fold the piece of paper into a triangle, then another triangle. Now, unfold the paper and fold all the sides into each other, making a square. After this, fold in the sides once more, making sharp creases on the edges. Now, open up the paper and do this again on the other sides, opening up again when finished. Now, fold the sides of the paper and turn it upside down. Follow the creases that you just made to fold the box up into a secure box. M...
In this video, we learn how to create tiny planets in Photoshop. First, unlock your background layer and create a line in the middle of the image. Now, select the bottom that is underneath the line and drag it down to the bottom of the canvas. After this, make your image into a square by resizing the image with your tools. After this, you will need to rotate the image 180 degrees, then select "polar coordinates" in the distort tools. After this, you can rotate your canvas back around 180 degr...
In this video, we learn how to build a canvas frame stretcher. First, you will need to choose lumber that is the size you want your stretcher to be. After you do this, use a hammer and nails to connect all of the pieces of wood together so you have a square shape. You will need to hammer in a lot of nails so the frame stays in place. Use a saw if you need to cut any points down or make it smaller than you have it. When you are done, screw any additional nails into the frame and make sure ever...
In this tutorial, we learn how to properly draw with a pencil. First, start off by drawing squares and see what it looks like when you color them in and shade them all differently. This will help you learn how to control your pencil and see how hard you have to press to make the shades look different. You can also scribble a line going from really dark to light. Make sure you are making a range of different colors so you are learning how the pressure on the pencil effects how the color comes ...
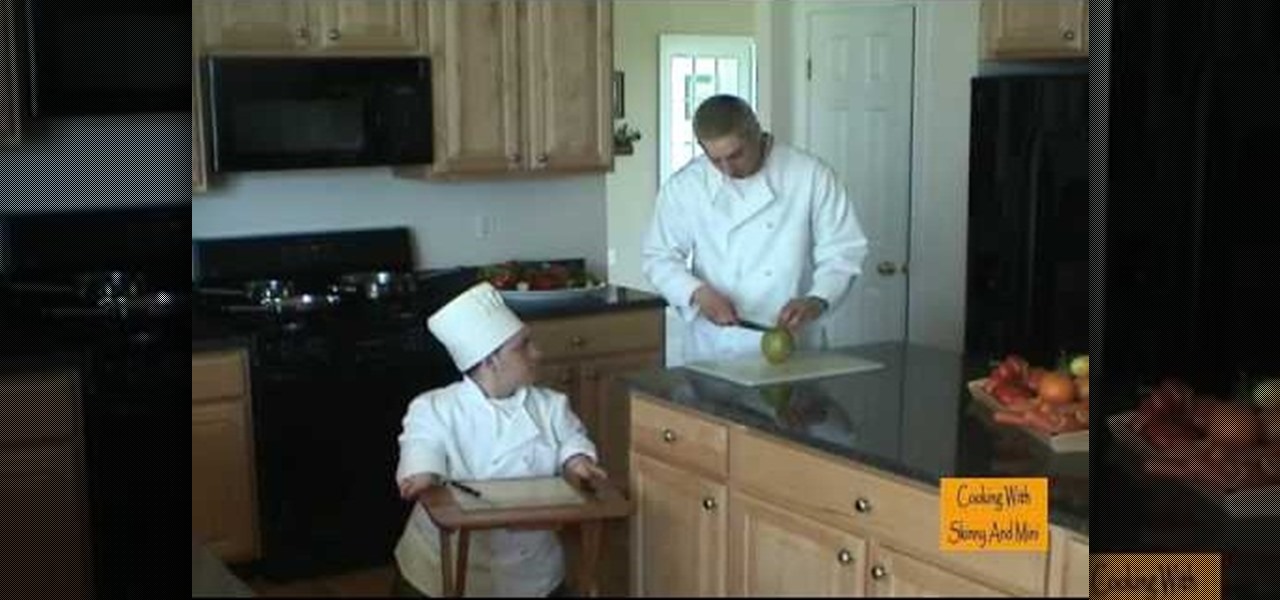
Skinny and Mini teach us how to prepare a mango in this tutorial. The correct way to cut this is to hold it up and cut down in the mango, avoiding the seed. Next, turn it around and do the same thing to the second side. You can still eat the other sides of the mango, just cut the middle seed out. Next, cut the mango into squares while it's still in it's skin, then pop the mango up and you can eat it straight out of the skin. You can also use a knife after this to cut the pieces out and use in...
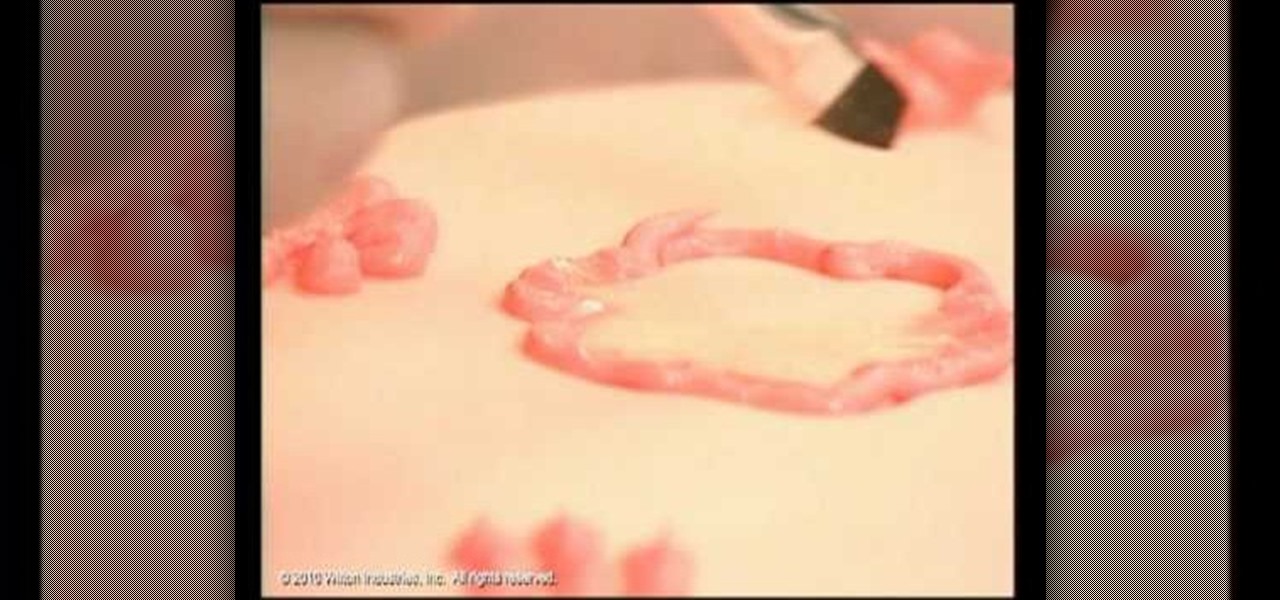
As you'll quickly learn in cake decorating, the outcome and success of your designs stems entirely from the type of tip on your icing bag. Tips range from star shaped to round to square and everything else imaginable, all to give you a limitless variety of ways to decorate your cake or cupcake.
In this Arts & Crafts video tutorial you are going to learn how to fold an origami ninja star. Take a normal paper. Fold it diagonally from one corner and cut off the extra portion to make a square. Fold it in half and cut into 2 rectangles. Fold each piece in half along the length. Fold both ends of each piece in opposite directions to make a triangle. Now fold the ends again to make a bigger triangle at both ends of each piece of paper. Each sheet will form a 'Z' shape. Now place one sheet ...
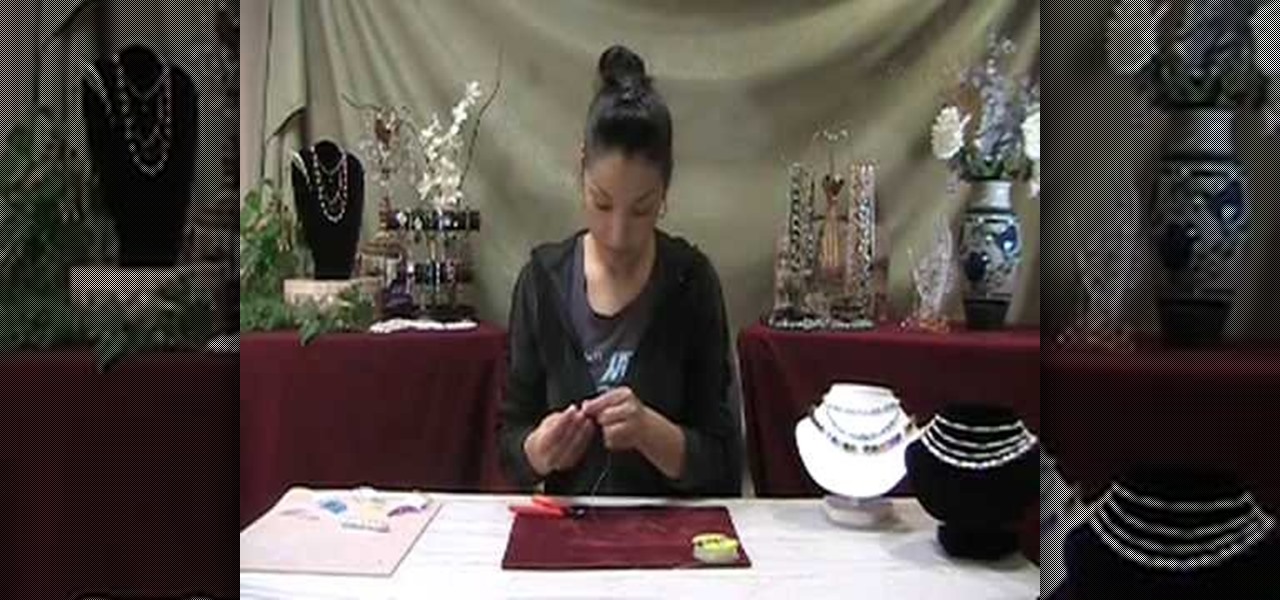
In this video, we learn how to work with Stretch Magic. This is a beading technique that is very easy to use. It's great for making bracelets, because no clasp is required. First, cut a piece of Stretch Magic 4-5 inches longer than you want it. Now, string your favorite beads onto the Stretch Magic. When you are finished with this, connect the ends with a square not and add a drop of super glue for added security. After this, cut off the excess strings from the end and you will be able to wea...
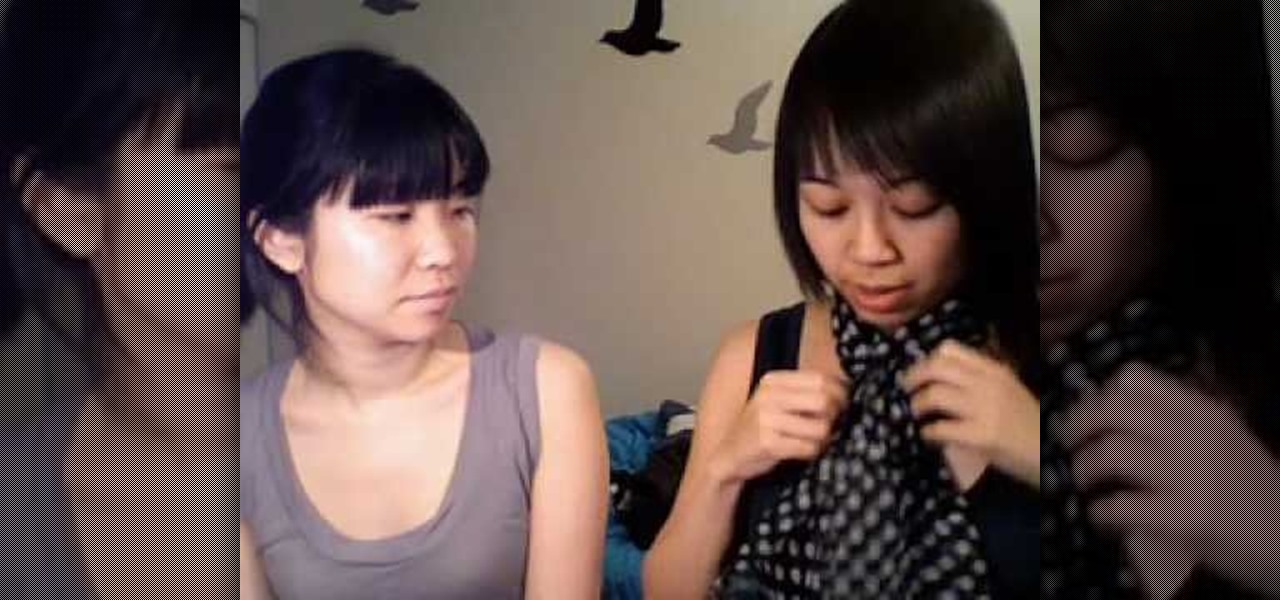
In this video tutorial, viewers learn how to learn how tie a kerchief scarf. Begin by opening the square scarf and then fold the points together on opposing sides to create a triangle shape. Now place the triangle on your chest, with the pointed tip facing downwards and bring the end points around your neck. Users may choose to let the end points hang down loosely or tick them under for a more fuller look. For a more asymmetrical look, turn the scarf to one side. This video will benefit those...
In this video, we learn how to tie scarves. The first way is to wear a scarf with tassels that is wrapped once around the neck with it's sides hanging down in front of you. With a skinny scarf, you can tie it around your head to make a headband or fold it in half and wrap it around a pony tail. If you have a rectangular scarf, you can tie it in a loop around your neck, or make a loose knot on your chest in front of you. If you want a polished look, tie a bow in front with the scarf. A square ...
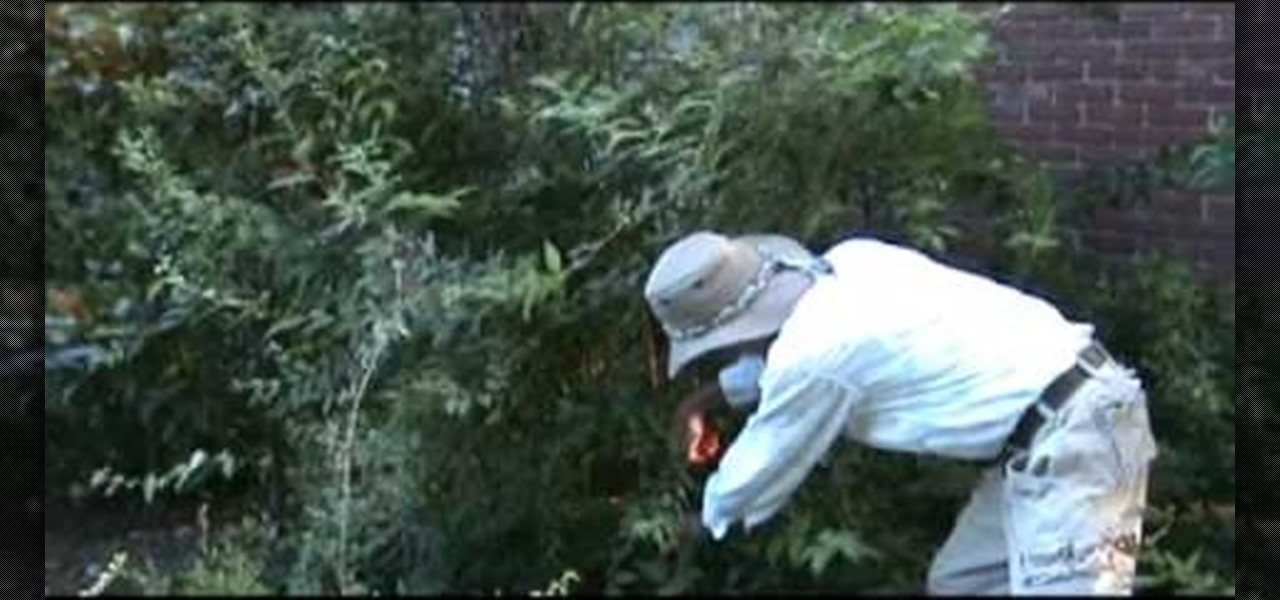
In this tutorial, we learn how to prune trees and shrubs in your garden. If you want to have a natural looking appearance to your plants, make sure you prune them often! A lot of plants will grow out of shape quickly, so make sure you trim them often. Don't square them off on top so your plant doesn't look fake and un-natural. To begin, you will want to take your tallest branches off first, from the bottom of the tree. Keep doing this until the very tall branches have been removed and you are...
In this tutorial, we learn how to make a mini jelly roll. First, take your baby syringe and add in clear caulk then add in red food coloring and mix together with a toothpick. Now take some white and red clay and lay them on top of each other, then roll them out and square out the ends. Now, roll them together and cut them into small wheels so they look like jelly rolls. Add some of the jelly you made to the jelly roll and you're finished! You can place these on mini plates you have made and ...
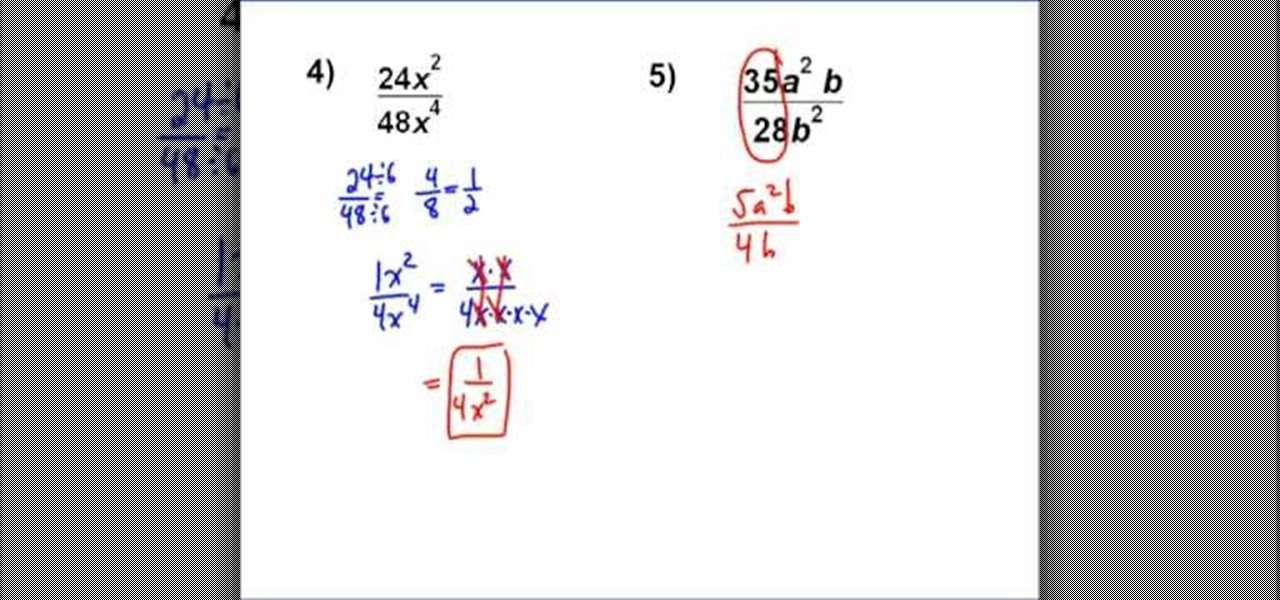
In order to simplify complex variables, you must first consider the numerical values separate from the variable. In the case of 24x/48x, you would look at the numbers alone to see if they have any factors. These numbers have the number 6 in common. So, divide it by 6. This will give you 4/8. This still requires some simplification. Two is still a factor for both. So, divide it again by four. This will give you 1/2. Now, if the numerator was raised to the second power, in the original equation...
In this video tutorial, viewers learn how to make an animated image on a Mac OS X computer. Users will need to download the GIFfun program. Once downloaded and installed, open the program and drag the images into the program. Then set the time delay for each image, amount of loops and configure the options. Once your finished configuring the image, click on Make Gif. The image will be produced in the small square window below. Then simply drag the image onto your desktop. This video will bene...
In this tutorial, we learn how to fold a Christmas tree. First, start with a square paper and fold it in half, then open it and fold it corner to corner. Open the paper again, the turn it over and fold it side to side. Open it once more and fold again side to side. The paper will not automatically fall into the shaped creases and you will have four flaps. Take your finger inside and flatten all the flaps. You should have four flaps on each side and then you can cut the bottom to form a trunk ...
In this video tutorial, viewers learn how to make a spinning paper helicopter. Begin by cutting a piece of paper into a long, thin strip. Then make a vertical cut halfway down the paper strip and 2 semi cuts horizontally above the vertical cut. Now make a 3 way fold on the top square shape of the strip. Then fold one long flap of the strip forward and the other strip backwards. This video will benefit those viewers who are interested in folding origami, and would like to learn how to make a s...
In this video, we learn how to make butterscotch brownies. First, melt 3 tbsp butter and combine with 1/3 cup brown sugar until it's dissolved. Next, beat in 1 egg and 1 tsp of vanilla. Now, stir in 1/3 cup sifted flour, 3/4 tsp baking powder, and 1/3 tsp salt. After this, fold in 1 cup chopped nuts and 1 cup dried fruit. Now spread the dough into an 8x8 inch pan and bake for 20 minutes at 350 degrees. When finished, let the brownies cool and cut them into squares for eating. Serve with ice c...
Sometimes you need a recipe very fast if you are in a pinch. In this tutorial, learn how to make a moist dessert that is somewhere between a cake and brownies. These cherry chocolate squares are absolutely amazing and gooey and take no time at all to whip up!
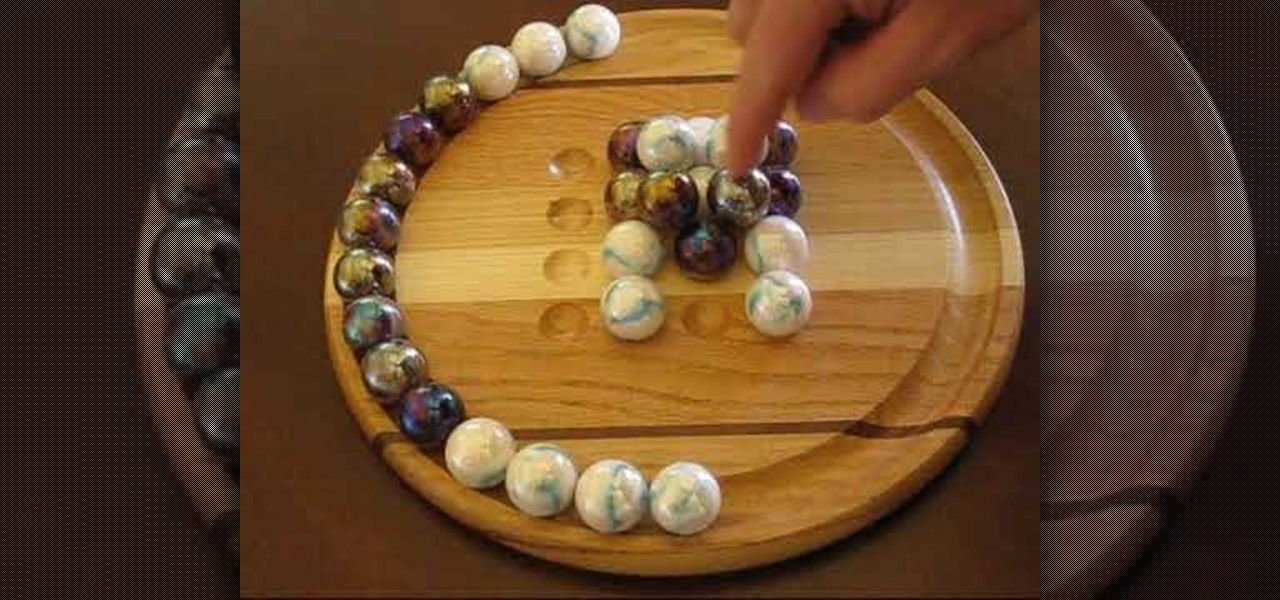
In this video tutorial, viewers learn how to play marble pyramid. This is a 2 player game. Each player has 15 marbles. Players simply take turns placing the marbles onto the field. When 4 marbles form a square, a player is able to place a marble in the center to raise the marble level. Players continue placing and stacking the marbles until it forms into a pyramid. The player with the last marble on top wins the game. Players are also able to stack using their marbles from the field. This vid...
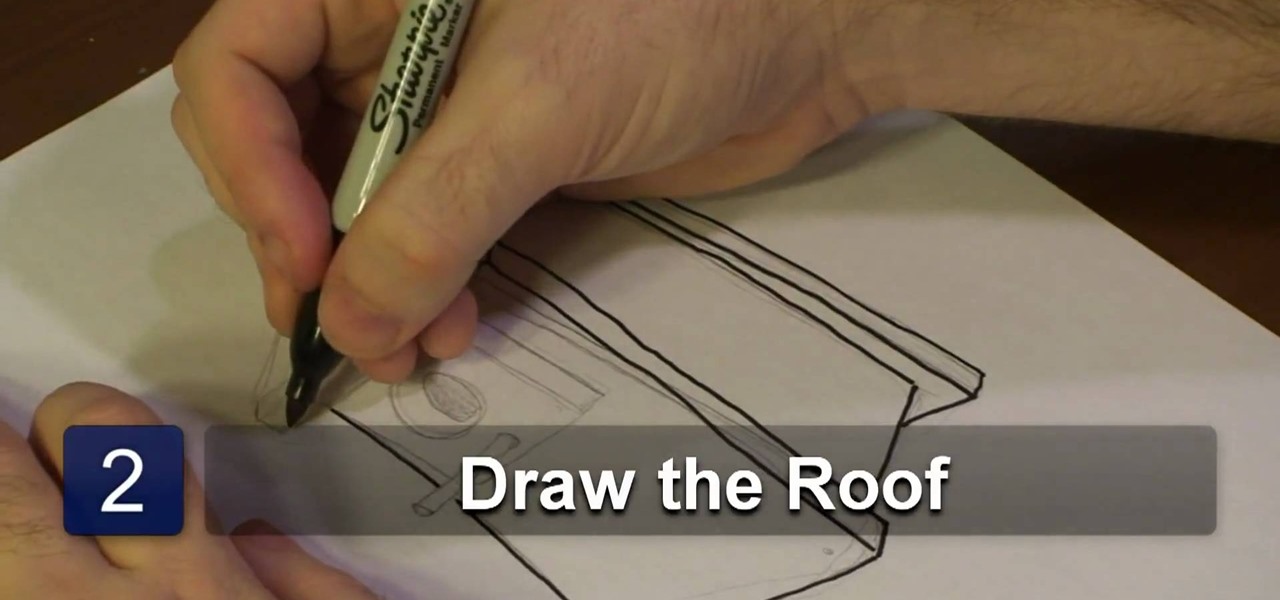
In this video tutorial, viewers learn how to draw an animated birdhouse. The materials required are paper and a drawing utensil. Begin by drawing a rectangular base. A bird house is usually geometric, show the base should only contain rectangle and square shapes. It is recommended to use a ruler, instead of drawing the lines free handed. Add a rectangular roof on top and an entrance in the front. Draw a circle to represent the entry way and add a post. Draw another circle inside the entry hol...
Scarves are some of the most fun accessories to have since they spice up any outfit. Whether they're long or short, neutral or graphic, made of light cotton or thick wool, they instantly tie all your clothes and other accessories together.
Learn how to take a quadratic equation in standard form and change the trinomial into a binomial product. Using the zero product rule, the zeros of the graph can then be found. The grouping method is effective when the leading coefficient (the number factor of the squared term) is some number other than 1 (one). From Ramanujan to calculus co-creator Gottfried Leibniz, many of the world's best and brightest mathematical minds have belonged to autodidacts. And, thanks to the Internet, it's easi...
Everyone has a different shape to their face - it is why we all look so beautiful and unique! Depending upon your face shape - whether it be oval, round, square, heart shaped, etc - you will need to know how to style appropriately for it.
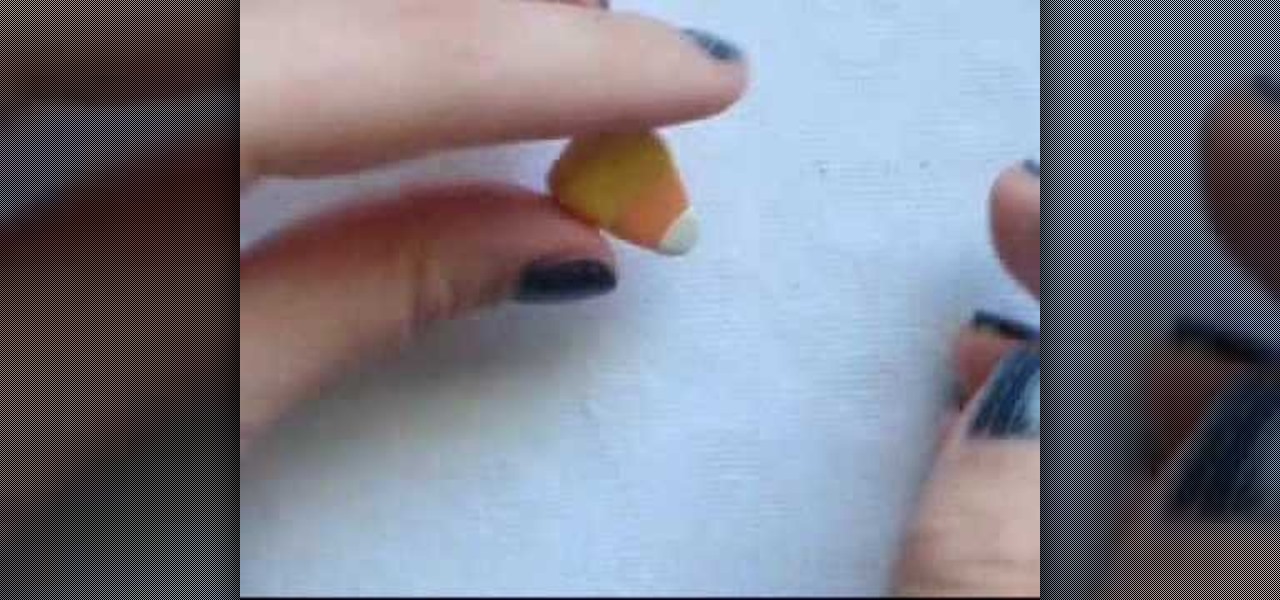
In this video tutorial, viewers learn how to make candy corn out of polymer clay. Users will need yellow, orange and white polymer clay. The yellow is the largest, the orange is the medium and the white is the smallest. Begin by rolling each of the clay into balls and stack them on each other like an ice cream cone. Then flatten it and press on the sides to inflate and square it. Make the top part the widest (yellow) and make the bottom the most narrow (white). It should be in a shape of a tr...
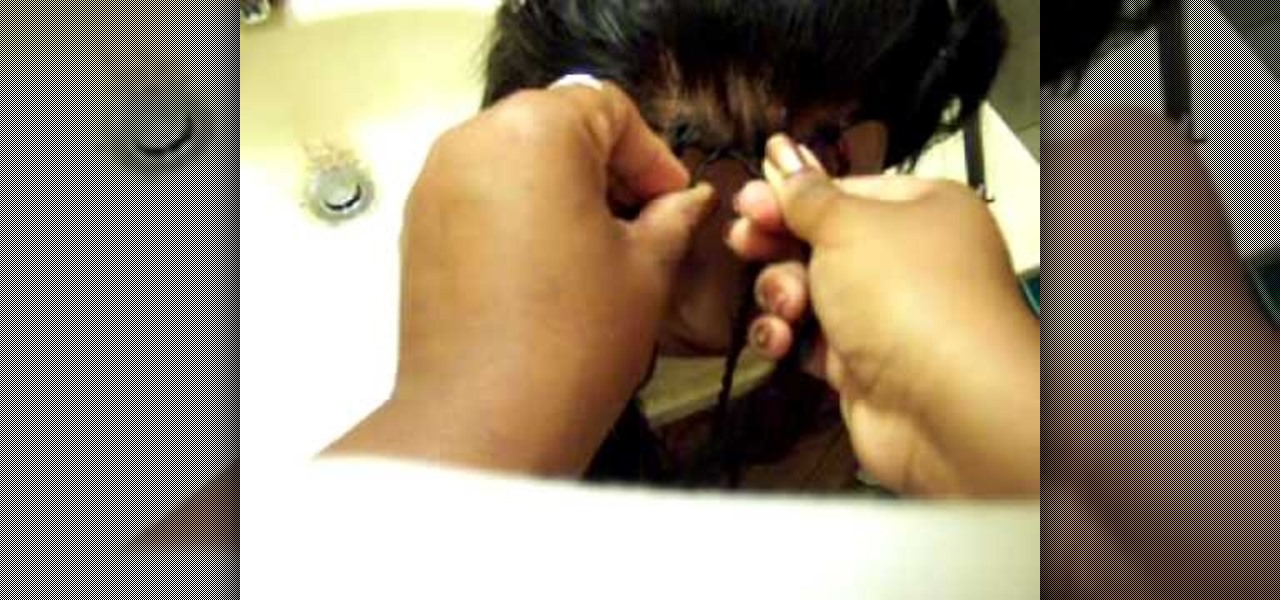
To start a kinky or Senegalese twist, create a one inch square section of hair and split it into two pieces. Drape a piece of weave over the strands. Twist the right piece of weave over the right strand with a clockwise motion. Twist the left piece of weave over the left strand also using a clockwise motion. Then twist the right strand over the left. Continue twisting each strand to the right before twisting the strands together as you go down the section. The twists can continue down to the ...
In this video tutorial, viewers learn how to tie a double handkerchief for tuxedos. Begin with 2 triangle handkerchiefs and fold one over the other. Over lap the triangle to form one mixed triangle handkerchief. There are 2 ways to fold. The first ways is to take a corner and fold it up. Then flip it over and fold a corner down to form a square shape. The second way is to roll in the tow corners to create a cone shape. Put a card inside the fold and hold it together with a pin. This video wil...
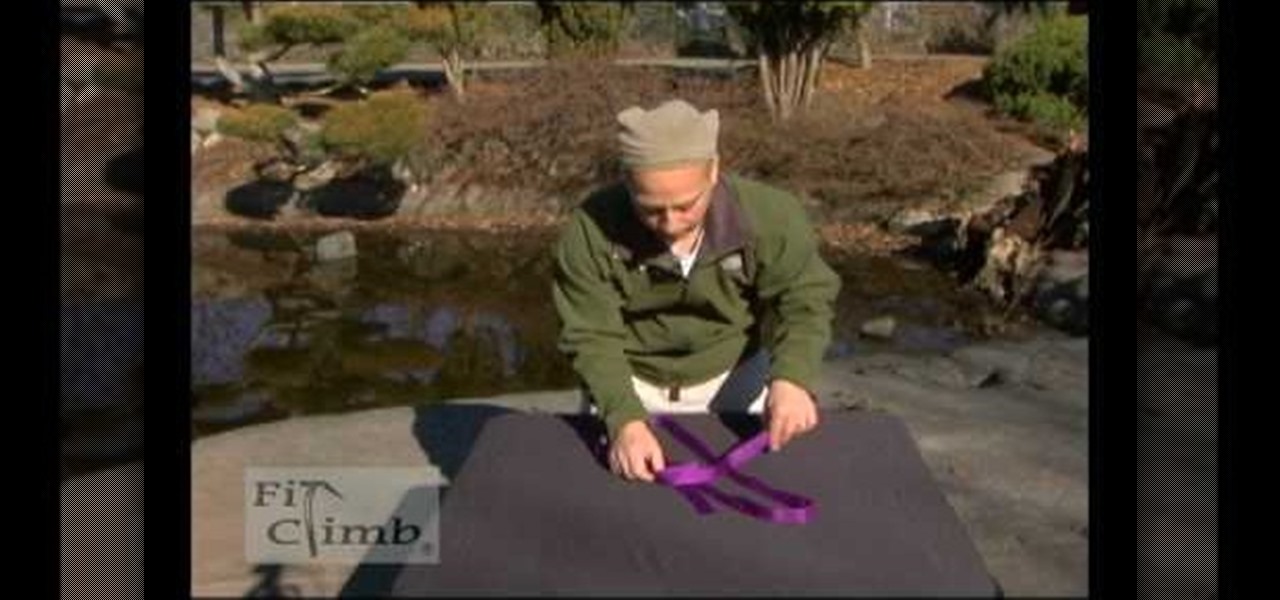
Webbing is not only used in sports like rock climbing and caving, but it also comes in handy in camping and hiking. This video shows you how to tie two webbing ends together to make a loop that will not come off. A square knot does not work for webbing as it will slip through, therefore a water knot is used. Take 4 inches (10 cm) from one marked end and tie an overhand loop. Ensure that the webbing is not twisted. Slip the other end in the knot and trace the second end around the overhand kno...
In this Arts & Crafts video tutorial you will learn how to make a lily flower from folded paper with origami. For this, you need a square sheet of paper. First you fold it in half and then fold it in half in the other direction. Next you fold it diagonally across to form a triangle. Then fold it again across the other diagonal. Open up the paper and push the diagonal folds inwards slightly so that the center point is pointing upwards. Then press the folds in to form a triangle. Take one of th...
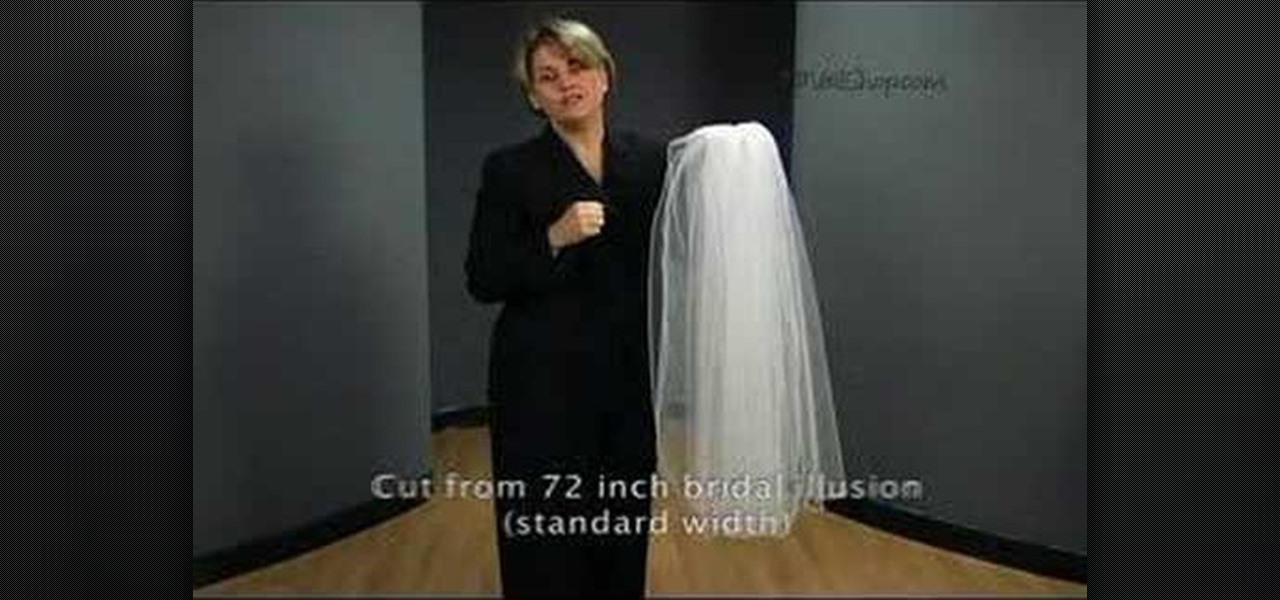
In this video tutorial, viewers learn how to cut an oval style wedding veil. The oval cut veils are exactly like the standard cut, except the sides are straight and the corners are curved. Only begin cutting 72 inches from the bridal illusion. Do not cut the veil any less than that. The standard width is 72 inches. The oval cut veil creates a more angular/squared off look. The oval cut style is only available in 2 layer styles. This video will benefit those female viewers who are getting marr...