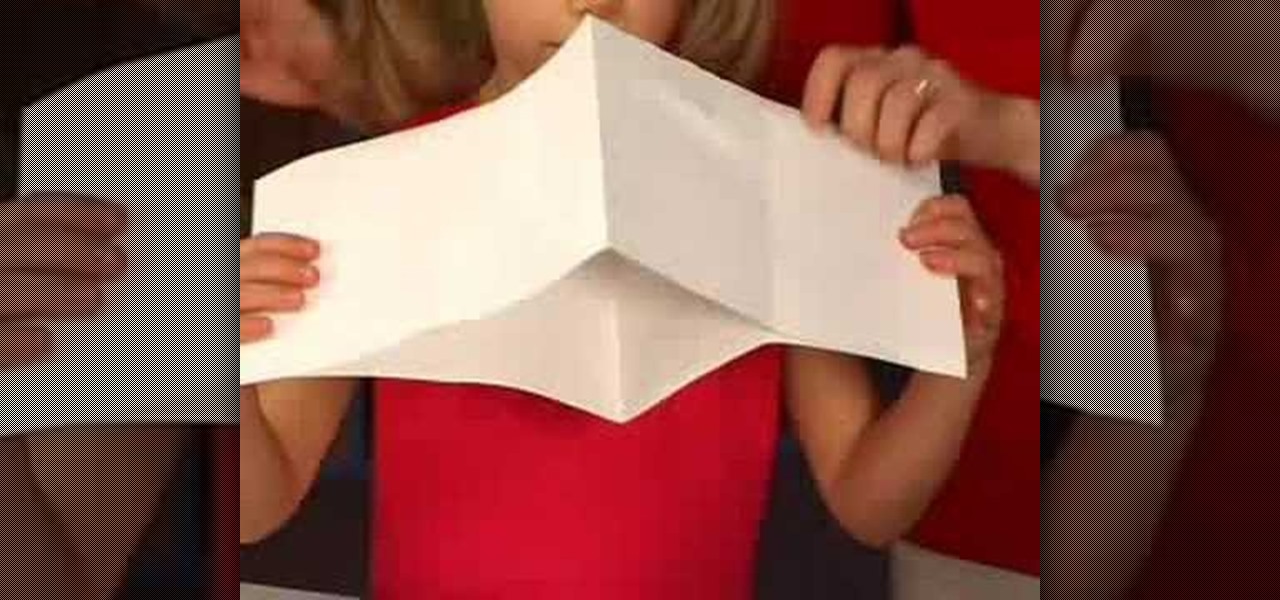
This is a project to keep your kids entertained. It is also a great way to practice hand eye coordination and motor skills. The materials that you are going to need are; construction paper and something to cut the paper with.Depending on the age of the child you can use 3 colors or more for older children and 2 colors for the younger children. Color choice is left up to what the child wants.To get started take a full size sheet of construction paper. Fold this paper in half length-wise. Take ...
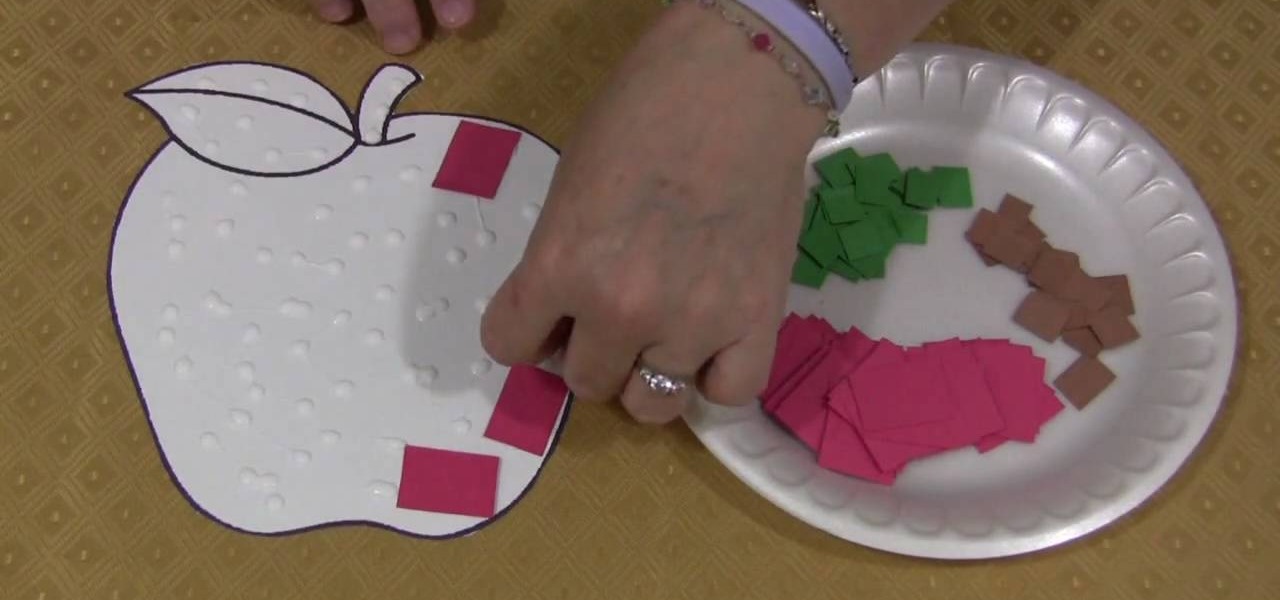
Shelley Lovett of Childcareland shows us how to make a mosaic apple using colored construction paper. This is a fun to do project, which enhances a child's motor skills. The basic outline of the apple is available on the website. It can be printed out and then cut out. Shelley has used red, green and brown colored construction paper, the traditional colors for apple. But she also stresses that we should let children use whatever colors they prefer. It will make the project so much more fun. S...
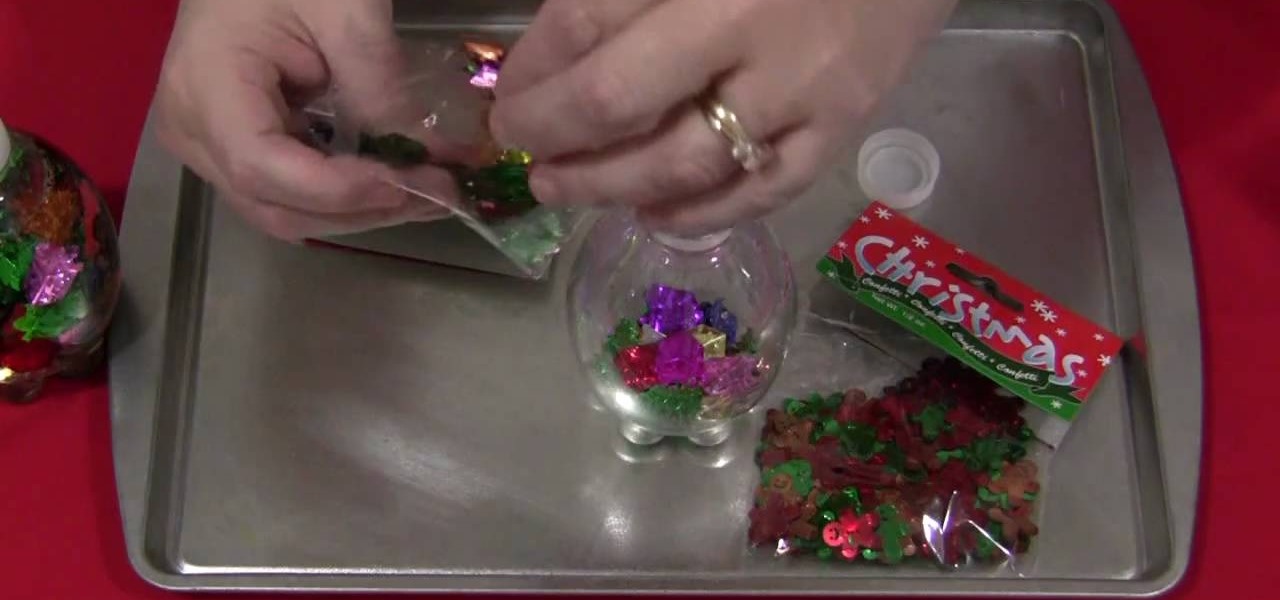
In this Family video tutorial you will learn how to make slow motion discovery bottles with your kids. Shelley Lovett from ChildCareLand presents this video. For this you will need small size empty water bottles, clear corn syrup, confetti and rubber cement to seal the bottles. Fill up to quarter of the bottle with confetti, then pour in the clear corn syrup and fill up the bottle. Then put the cap and seal it. The confetti is all at the bottom of the bottle. So, turn the bottle upside down a...
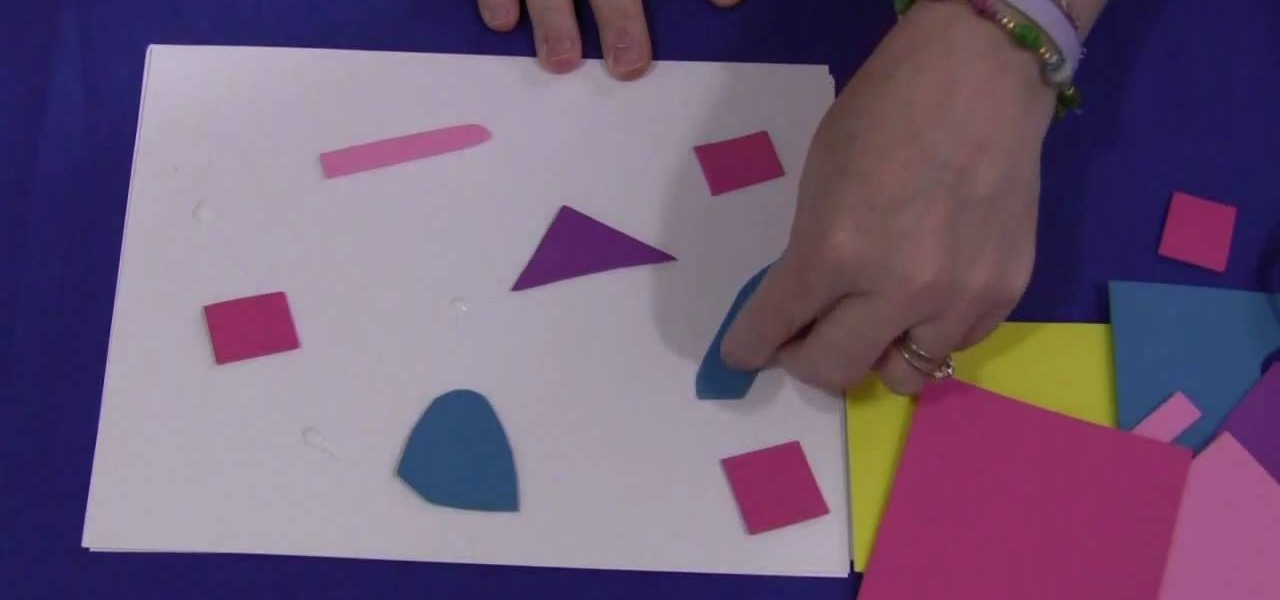
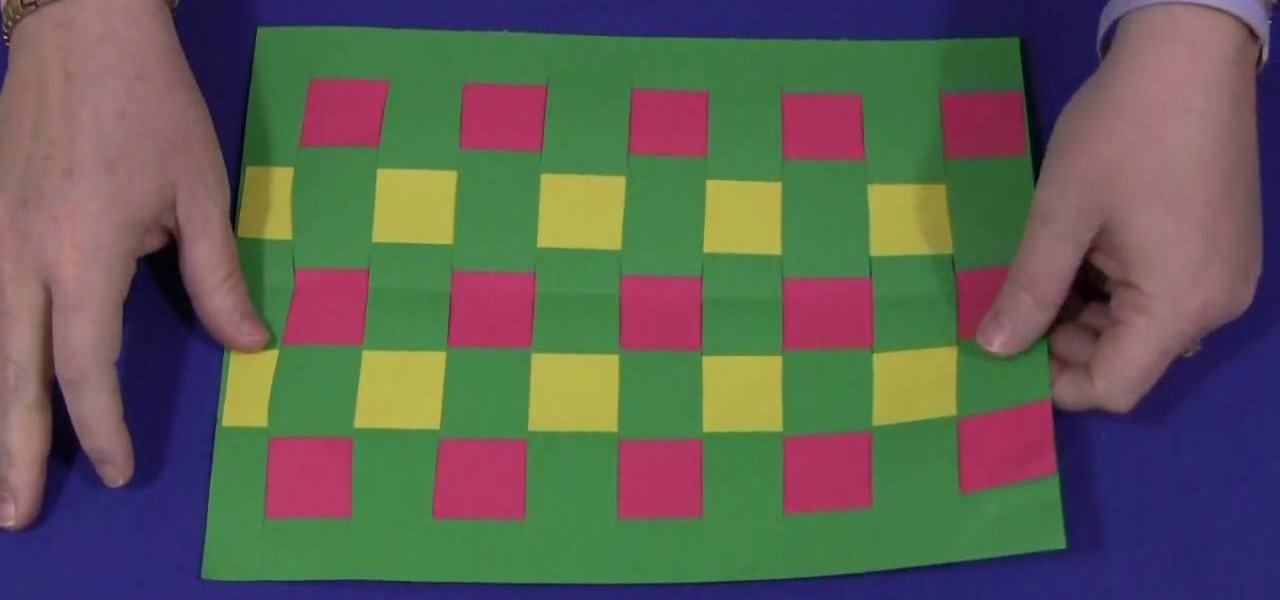
In this video tutorial, viewers learn how to make a foam collage. The materials required for this project are: card stock paper, several different colors of foam paper, scissors and glue. The project focuses on preschool, kindergarten, and elementary school crafts. Begin by cutting the pieces of paper foam into different shapes and sizes. Then simply apply glue on the pieces and stick it onto the card stock paper. Continue doing this to cover the entire sheet of card stock. This video will be...
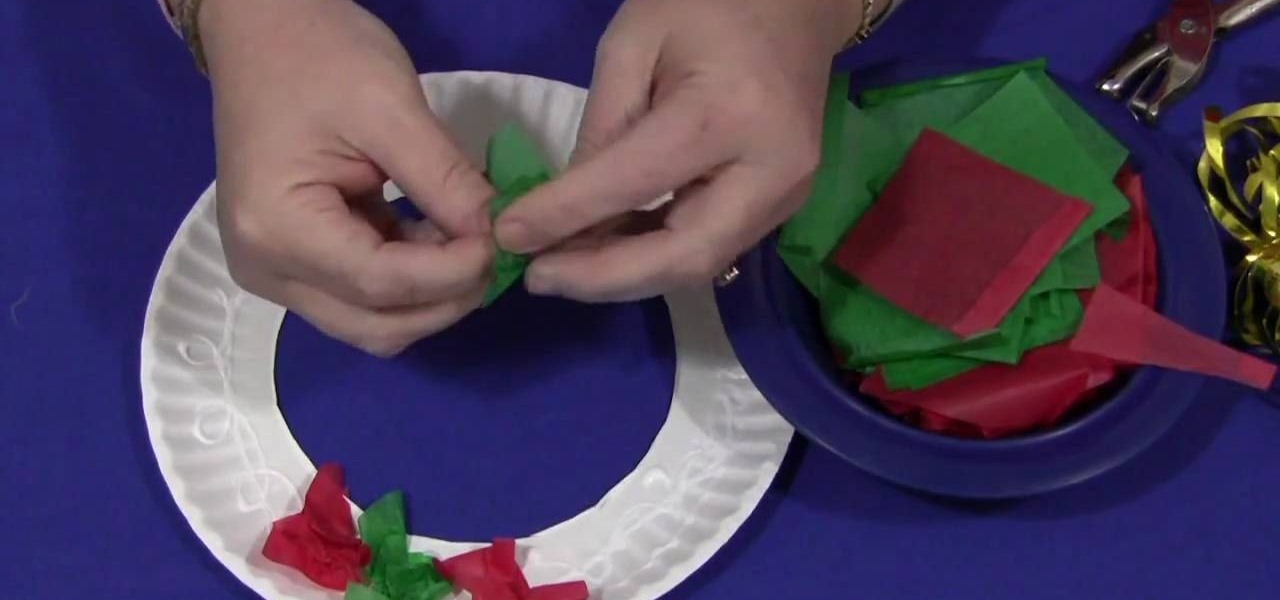
This is a demonstration of making a wreath with tissue paper. For this you will require tissue papers cut into squares, golden colored yarn, golden dust. For tools you require a pair of scissors, a hole punch, glue, paper dish. To start with cut the bottom of the paper dish neatly so that the uniform rim remains. Now apply glue to the rim in the form of spots and streaks. Now take each of the tissue paper pieces crush them and press on the glue. When the whole rim is covered with crushed tiss...

According to Shelley Lovett Pop Beads are a wonderful addition to any early learning environment. In this video Lovett starts by showing all of the different shapes, sizes and colors the Pop Beads come in. She also explains to the viewer where the beads can be purchased. Lovett then demonstrates how the unique construction of the beads makes it somewhat difficult to snap them together. Yet is it the required pinching and grasping that makes playing with Pop Beads so beneficial to developing a...

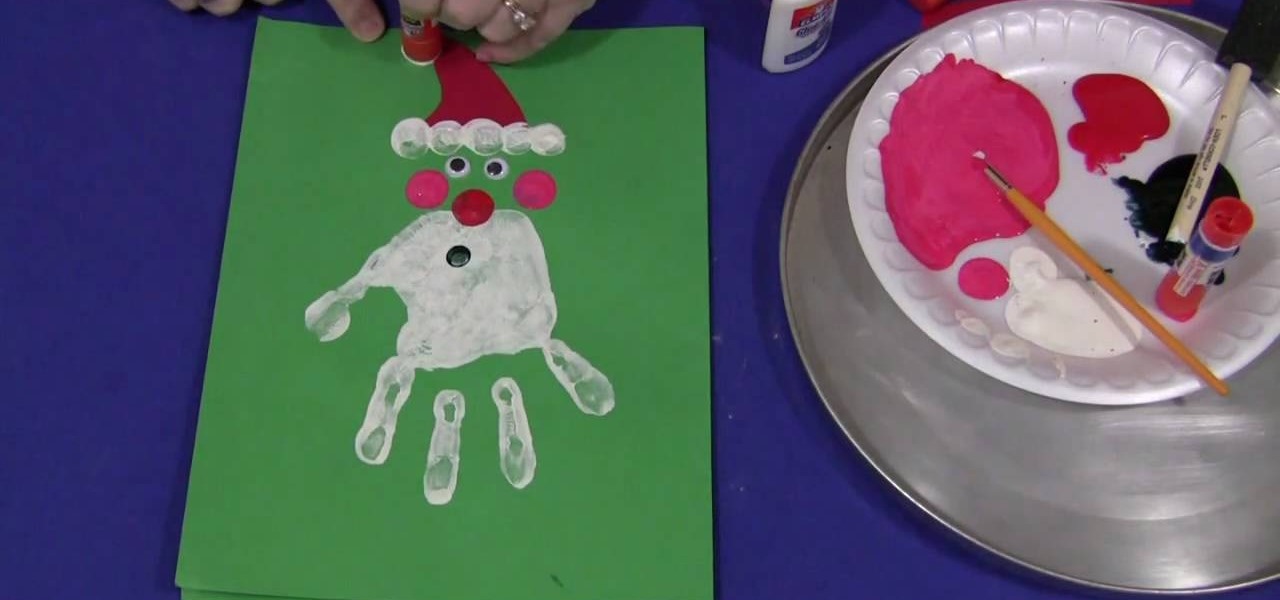
In this Family video tutorial you will learn how to do a handprint Christmas project with your kids. Paint your kid’s hand with a thick layer of white paint, place it over green construction paper, press it and gently lift it. If the child doesn’t like painting of the hand, you can cut out the outline on white construction paper and paste it on green paper. After the paint is dry, dip a finger of the child in black paint and put an impression on the hand print for Santa’s mouth. Then dip the ...
This is a great activity for children to develop some fine motor skills. The blueprints of the Santa can be found on the website. Just print it out and depending on how young the children are they can cut out the Santa or you can cut out the Santa. With the Santa cut out glue him on a piece of construction paper so there is a border. Use some glue and place little dots all round the beard of Santa. Have the children separate the cottons balls from each other. Now the kids should place one cot...
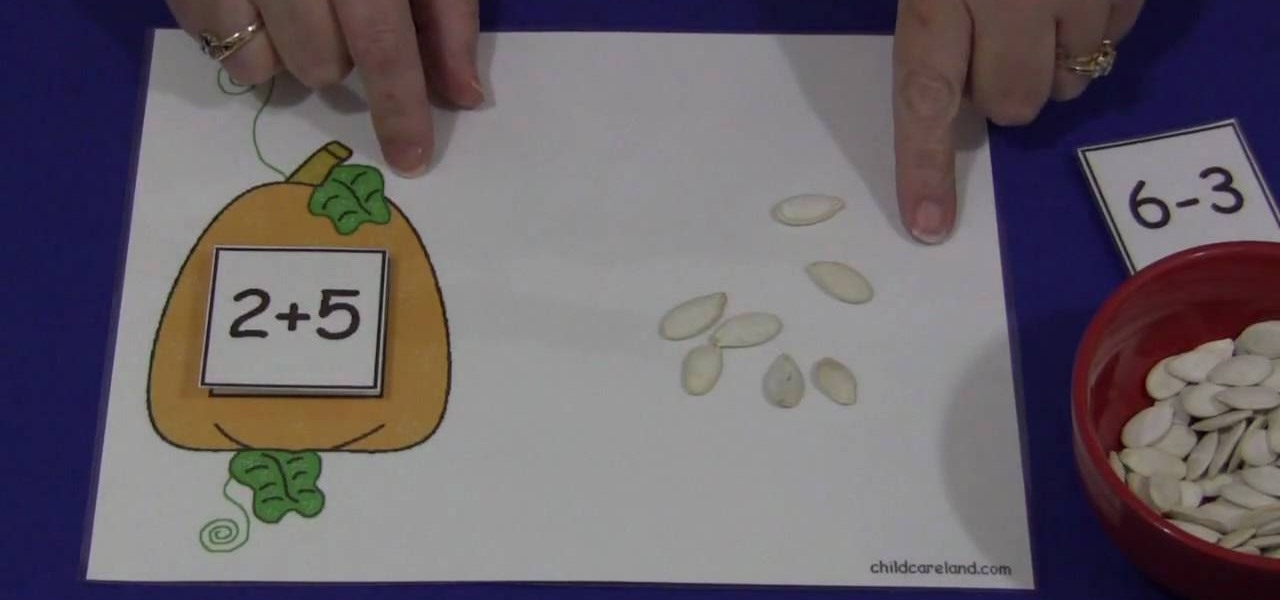
In this video, we are shown how to create and utilize a pumpkin-themed mat and some pumpkin seeds in order to teach young children how to count. Using a mat with a picture of a pumpkin on it, as described in the video, you should have a few squares with numbers on it which the children can put on the mat. Then, using a bowl of pumpkin seeds, have the child pick up the seeds and place them on the mat, having them pick the correct number of seeds as correspond to the number of the square they c...
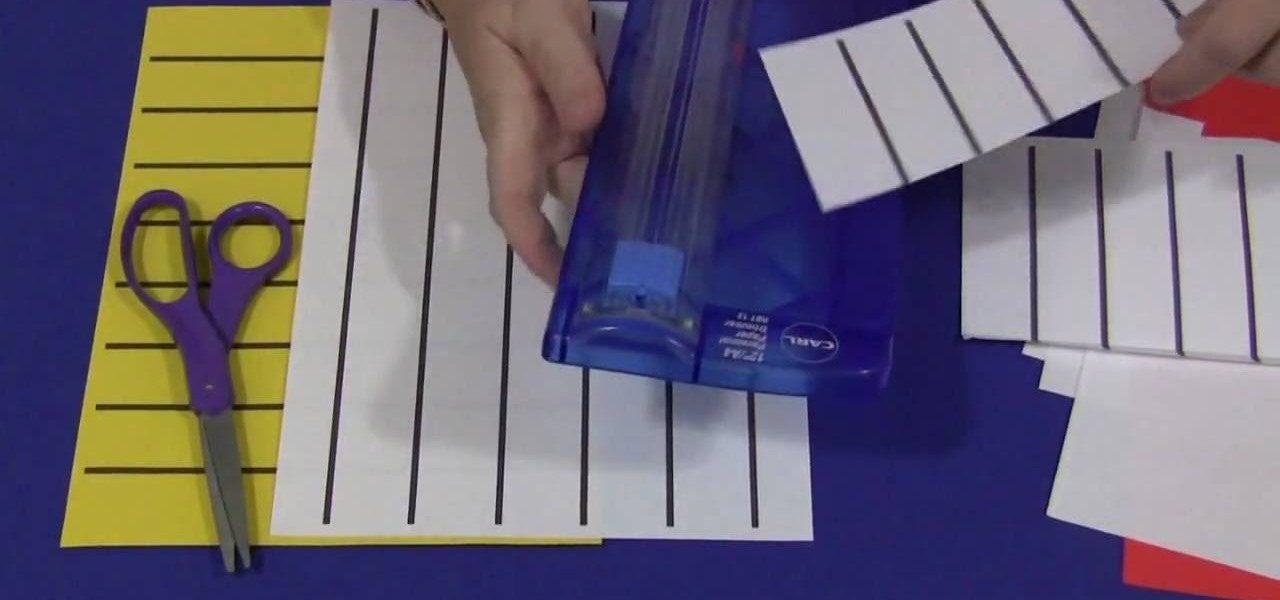
Shelley Lovett has some tips for helping a young child learn how to use scissors. The first thing you need to do is make sure you have paper and child size scissors available for the child to use. A full sheet cut in half is usually more manageable for a young child to work with. Have the child take the paper and just make cuts into the paper however they feel comfortable. Using colored paper can make it more interesting for them. After that very beginning practice stage has been accomplished...
In this video Tanky shows you how to make a LEGO bookcase. He details each step of how to create a small LEGO bookcase, starting from the base and building one level at a time. He Suggests connecting all parts in the final step in order to ensure the bookcase does not fall apart. He then inserts books into each shelf to create a filled bookcase that displays twenty books on two levels of shelf. The LEGO books fit in well. If you follow the steps in this video you will have a realistic LEGO bo...
Nancy Stone, a Parenting Coach, shares some Excellent ideas for helping children express themselves and learn new things through doing simple crafts.
This video tutorial is going to show you how to make miniature ghost animals. For this you will need some animal figures, cheese puff and some fabric stiffener. Take the cheese puff, put it over the animal figure and measure how much you need. Cut off the cheese puff and put it over the animal; covering it fully. Then, take the fabric stiffener, apply it over the cheese puff and put it over the animal. Wrap it up nicely and let it stand for sometime to dry. But, don’t put it under the animal....
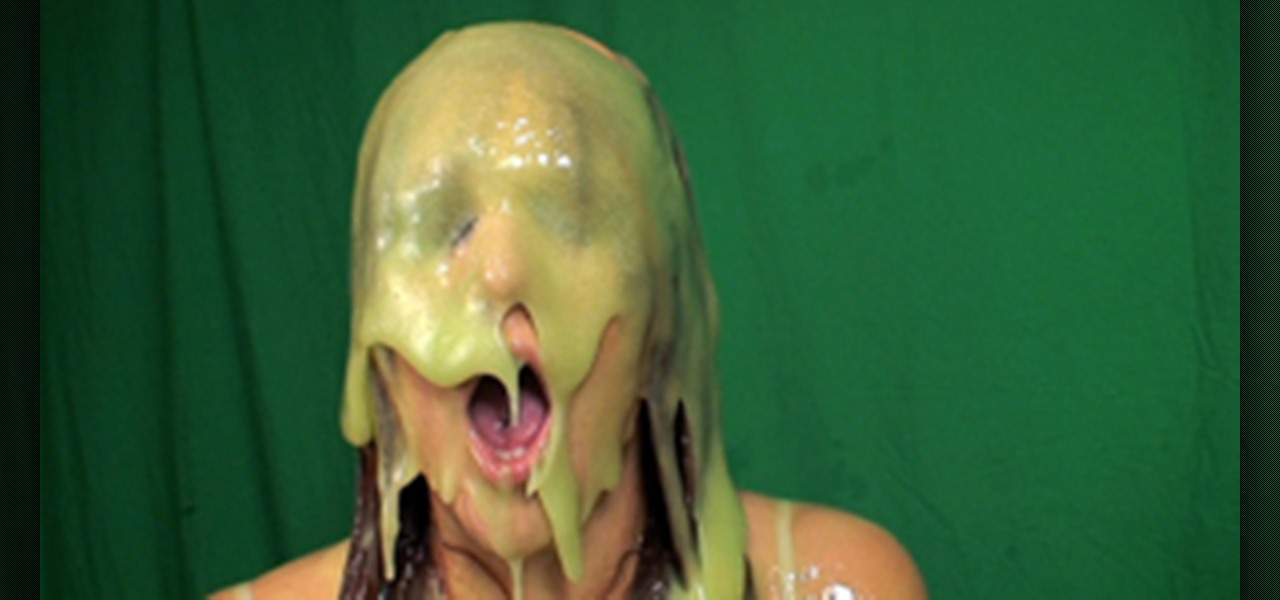
Ever wondered how to make slime? Now you can learn! Make slime just like they use on Nickelodeon for Halloween, pranks, or just to play with! So gather up your ingredients and get cookin'!
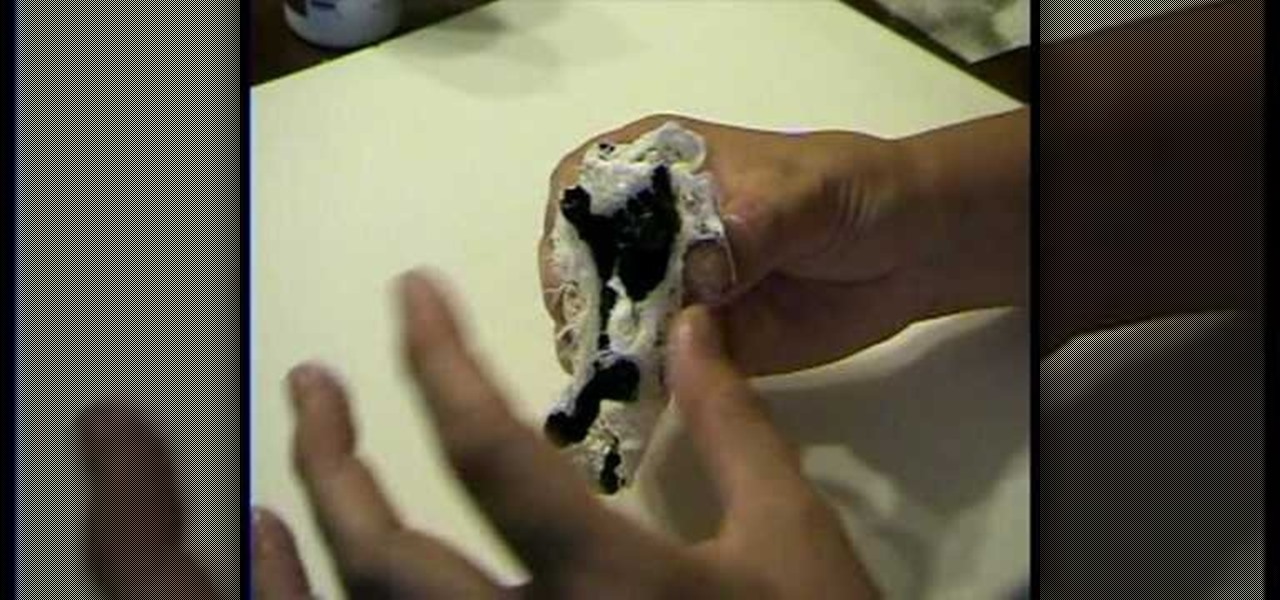
Make Slime! This one is easy. Just mix equal parts of glue and water and then add an equal part of liquid starch. Just like that you have gooey slime. The more you play with it the more fun it becomes. This acclivity causes the polymer chains in the glue to cross link with chemicals in the starch. The result is an awesome stretchy slime.
With just a few things from around the house, you can turn your bedroom into a fortress! Learn how to build a fort in your bedroom for your next sleepover. Forts are fun & materials needed are easy. You will need:
Make homework time go a lot faster with this smart pencil project from Crayola. Learn how to make assignments more fun with a pencil top specially designed for every subject. You will need Crayola Model Magic Fusion, glitter glue, scissors, and washable glue. With this how to video you can create this smart pencil project with your children.
Create a rotating 4-sided pencil holder that tells what's up at your desk. Is it a homework zone? An art zone? Are you Homework FREE? Learn how you and your kids can make a cool pencil holder that announces what is going on in your room with this arts and crafts tutorial. You will need Crayola Color Surge paper and markers, a recycled juice container, scissors, and washable glue. With this how to video you will be able to make a labeled rotating pencil holder with your kids.
Create a travel journal, make a doodle book, or write a story about yourself with this how to video from Crayola. All you need is paper and scissors to create your own 8-page mini book. This is a fun and east project for your whole family to do. With this arts and crafts tutorial you can make a mini booklet with your children.
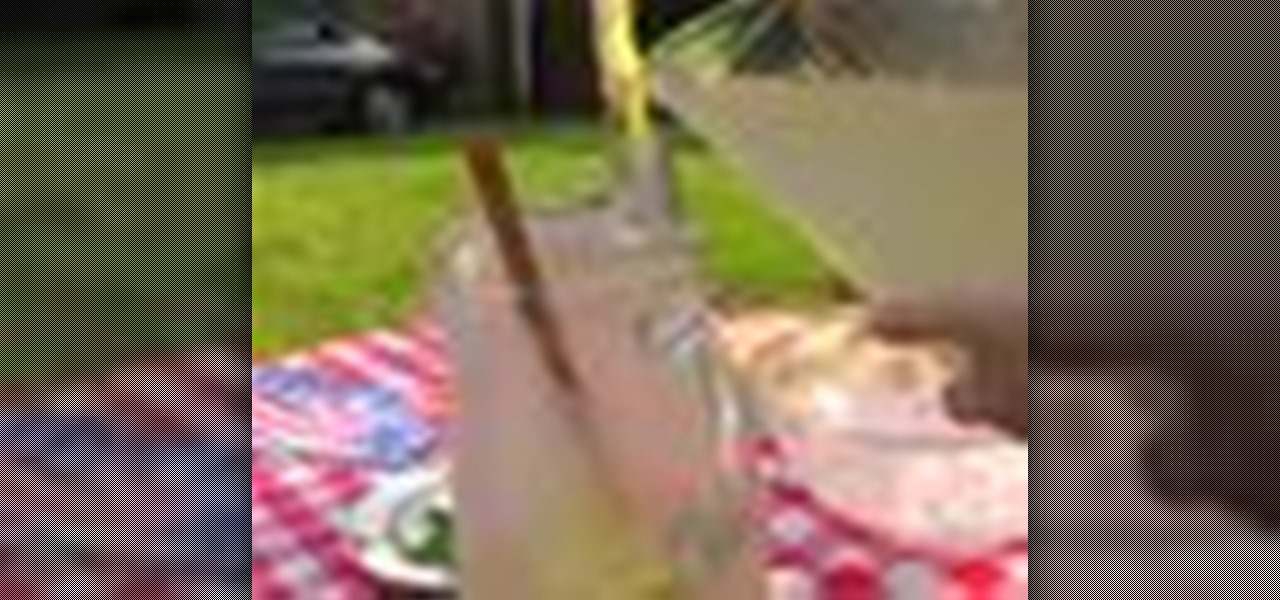
Pack some fun for your next gathering of family and friends. Imaginations run wild with everyday picnic supplies and your favorite Crayola Crayons and Markers. You will need crayons, markers, colored pencils, scissors, glue, tape, and picnic supplies (paper plates, napkins, cups, and plasticware.) This is a great project for summer parties with lots of children or just the young at heart. With this how to video you will be able to have a fun summer picnic craft challenge at your next family g...
Send cool designs spinning on warm summer breezes. Learn how to create a spiral spinner from Crayola Color Surge paper and markers with this arts and crafts tutorial. You will need Crayola Color Surge paper and markers, crayons, markers, colored pencils, scissors, and paper plates. This is a great project to do with your kids on a rainy spring day before summer begins. With this how to video you will be able to create summer breeze spinners with your kids.
Some Dads, or brothers or grandfathers, jingle lots keys and coins in their pockets. Give them a hand for their pocket change and car keys with this one-of-a-kind tray. Learn how you and your child can make a nifty tray for keys and coins with this arts and crafts tutorial from Crayola. You will need Crayola Color Surge paper and markers, Crayola Color Explosion black paper and markers, scissors, glue, and your hands. Dad will love this homemade gift for Father's Day. With this how to video y...
Check out this fun arts and crafts project for the holidays with this tutorial from Crayola. Learn how to make paper ornaments with your kids using Crayola products. You will need paper or paper shapes, hole punch, scissors, string, your favorite markers, cookie cutters, erasable colored pencils, and the Crayola Cutter. With this how to video you and your child can decorate your home for the holiday season with these paper ornaments.
Learn how to make these brightly colored monkeys using Crayola Color Surge markers with this tutorial. You will need Crayola Color Surge Markers and Paper, school glue, erasable colored pencils, scissors, and recycled cardboard pieces. These brightly colored monkeys are a fun arts and crafts project to do with your kids. With this how to video you will be able to make paper monkeys with your family.
Roxy and Sarah take a trip to the craft supply store, and pick up material to make inexpensive Christmas presents at home. Kids can learn how to make a decorated cocoa jar to give to teachers, coaches, or neighbors. All you need is a glass jar, hot chocolate mix, marshmallows, and whatever Christmas decorations you want. Watch this video crafting tutorial and learn how to do this fun kid-friendly activity of decorating cocoa jars as a Christmas gift.
This video provides step by step instructions for how to start a lemonade stand. Learn how to create a business plan, how to advertise, how to make lemonade, as well as tips on how to attract customers.
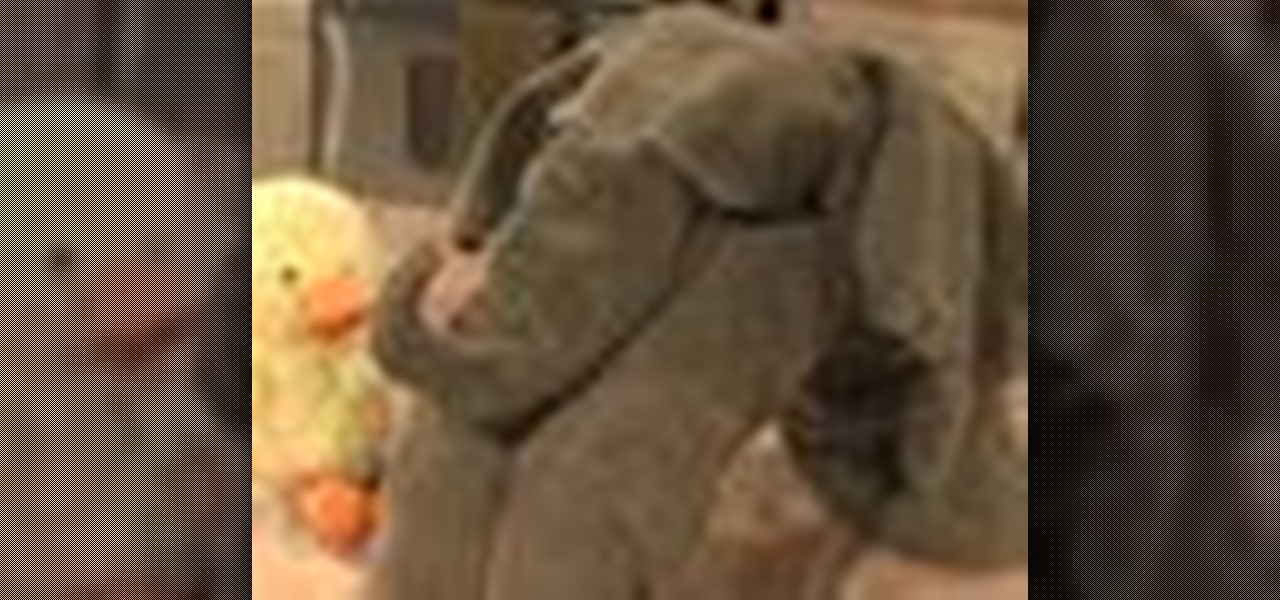
Want an easy way to make bath time a little more fun for your children? Learn the art of towel origami and try making this folded towel elephant.
Teach your kids to have fun without their toys by bringing shadows to life. See how to make a dog, swan, and bunny rabbit with nothing but your hands, light, and a little imagination.
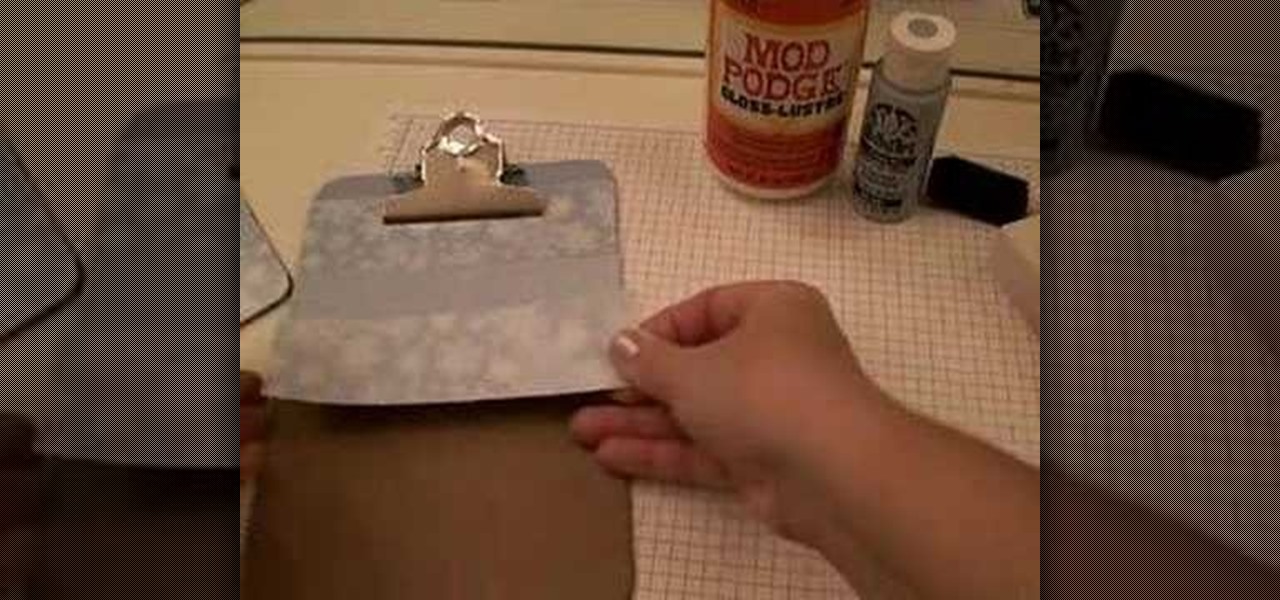
Learn how to create unique designs and decorations for your clipboard.
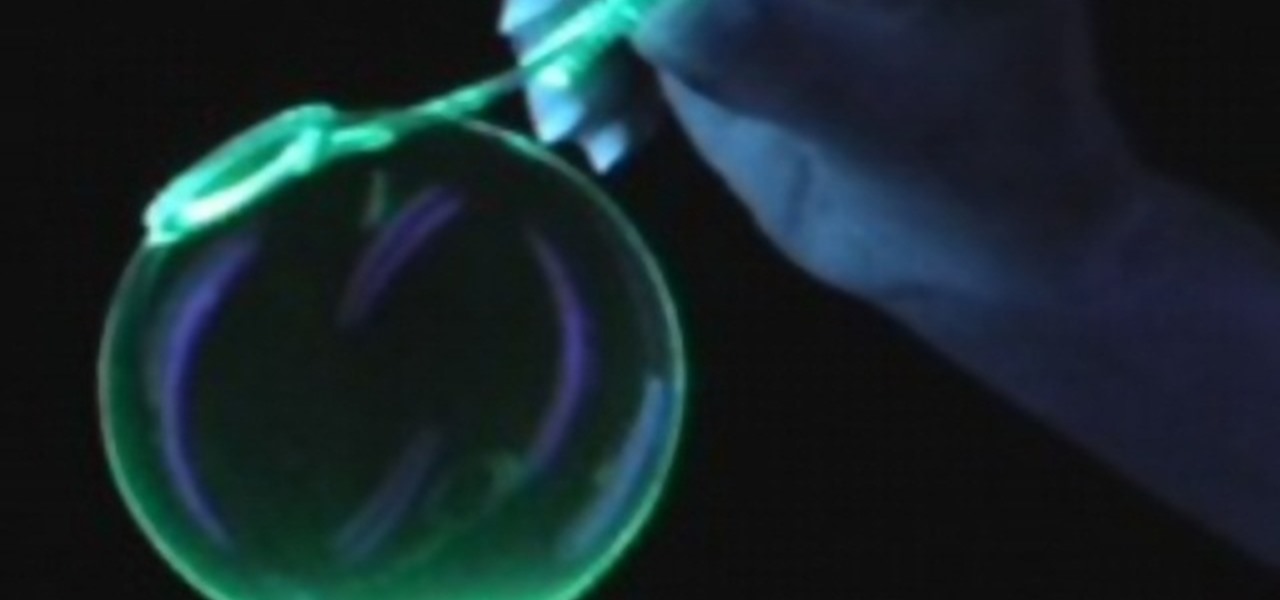
Make a bubble solution out of highlighter markers that'll let you blow bubbles that glow under blacklight.
Make this imaginative toy with beads, a hot glue gun and some junk drawer items.
This video teaches you how to make homemade playdough through a few easy steps. Each ingredient is a common household product.
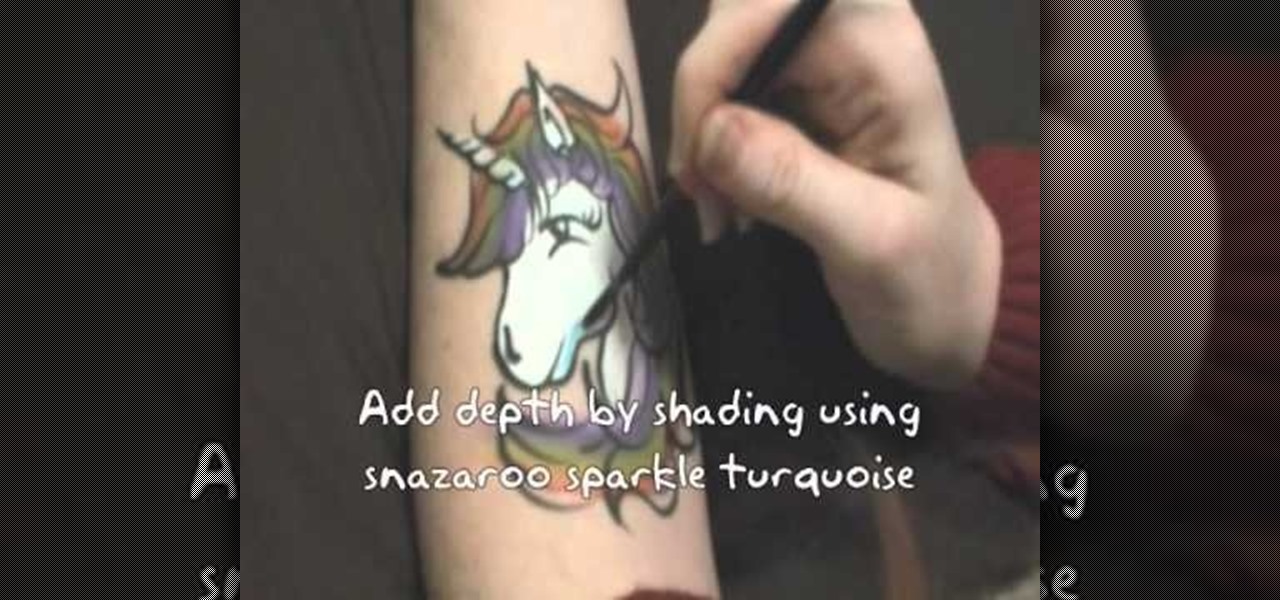
In this video tutorial, you'll learn how to create a very beautiful unicorn using face paint. You can use this design anywhere on the body, from your arm to your face. This is a great activity to do with your kids.
Teach your children about Hanukkah while making this fun Star of David craft! You will need: at least six craft sticks or popsicle sticks per craft; crayons, markers or paint; non toxic craft glue; yarn; tissue paper and safety scissors.
It's like the hand turkey, but with a Christmas theme! Make a Rudolph the Red Nosed Reindeer with your children! You will need craft foam, pom poms, non toxic craft glue, markers, googly eyes, a paper back and safety scissors.
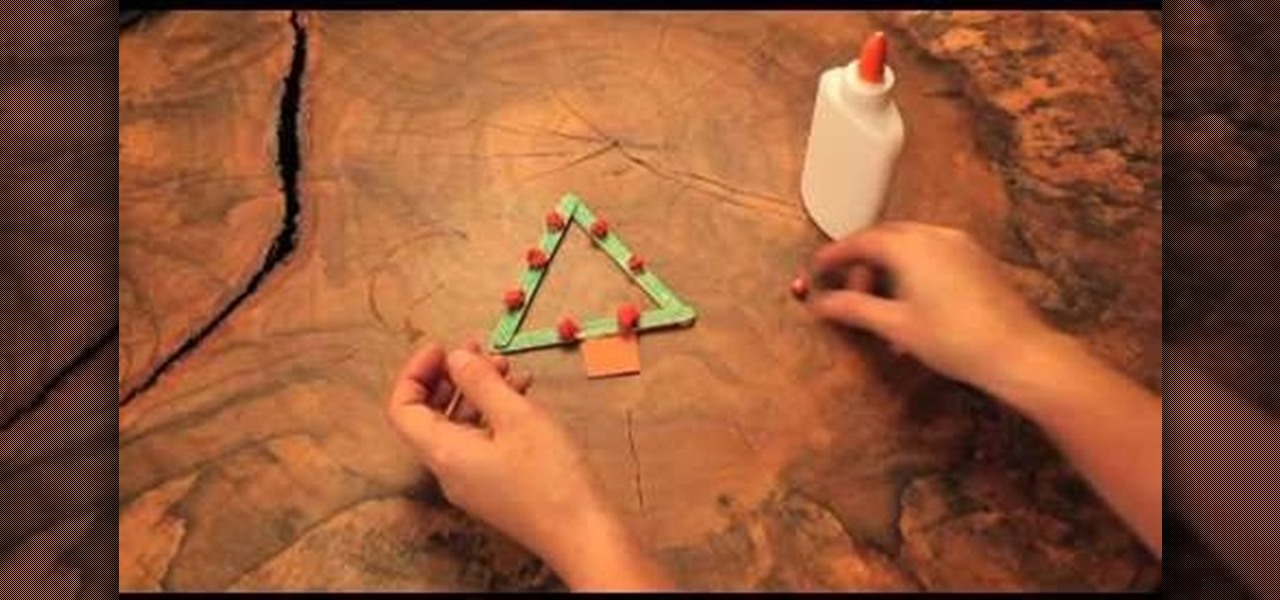
You can make Christmas ornaments with your children! You will need craft sticks or popsicle sticks, crayons or markers, non toxic craft glue, yarn, tissue paper or pom poms and safety scissors. Now, make your own Christmas tree shaped holiday ornaments.
Whether they're your own children or a niece, godson or grandchild, this gift guide is perfect for figuring out what to give the kids on your gift list. Every gift is innovative, eco-friendly and facilitates talking between children and parents.
Focus on the memories, not the food! This video lists some great ideas, like a Giving Tree that you can put at the kids' table to encourage your children to think about what they can give to others, in addition to being thankful.
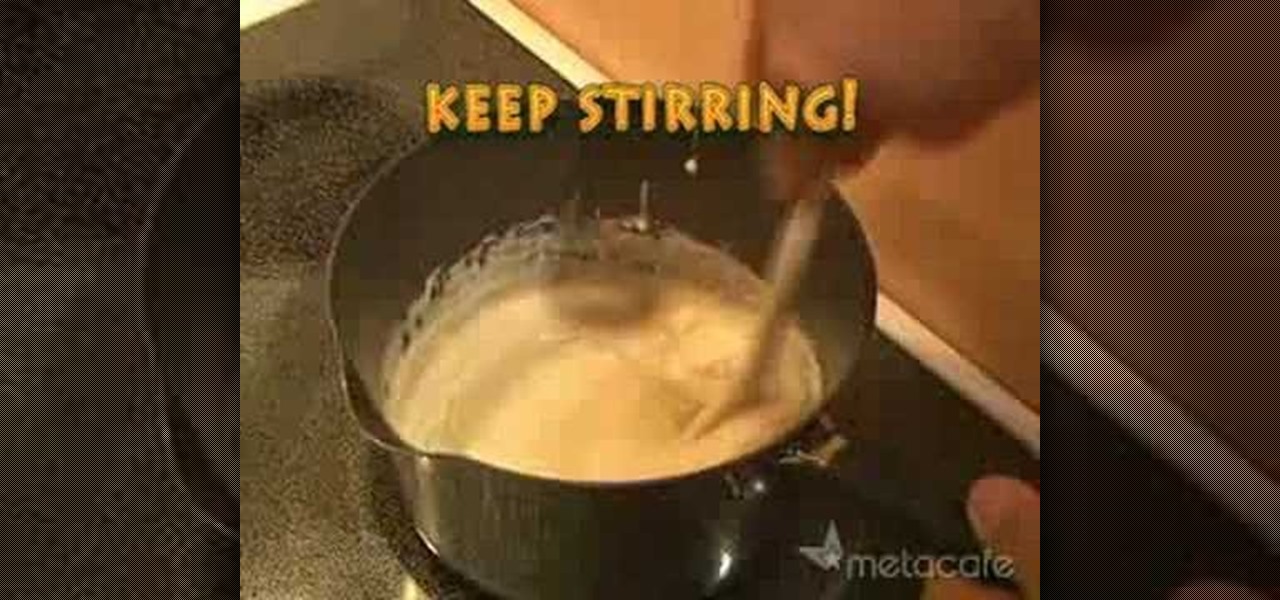
In this video from lachoneus87 we learn how to make silly putty. You need 3 small cups or bowls, warm water, a teaspoon of borax, a big bowl to mix it all in, 2 cups of glue, liquid measuring cup, 1 cup measure, a spoon to mix, and a teaspoon to measure. Optional is food coloring.
In this tutorial, we learn how to make blue silly putty. To make this, you will just need borax, glue, and food coloring. First, pour a cup of water in a bowl with a couple tablespoons of glue and some borax. When it's all poured in the bowl, mix it together. After this, add in the food coloring until you have the color that you want. Mix the putty together until well combined and then play with it! You can store it in a plastic container to play with later and use for whatever type of craft ...