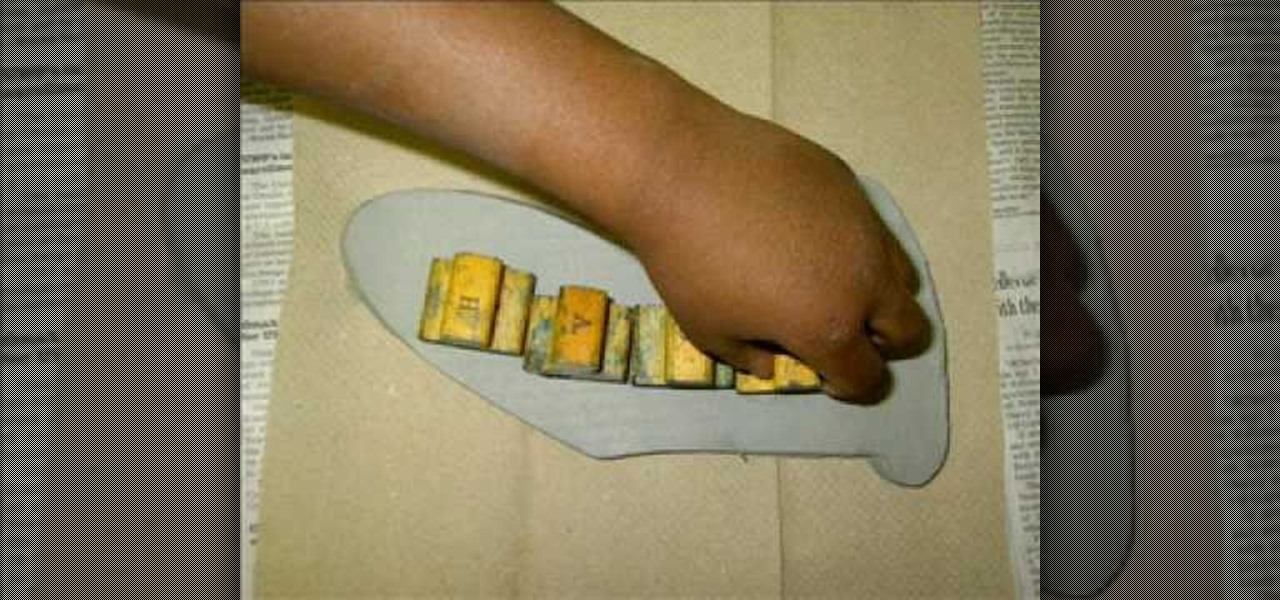
To make a Clay Christmas stocking you need to slice a slab from a block of wedged clay using a wire and two rulers. After you slice the slab trace the shape using a needle and a template. If you want you can add the child's name using stamps. Add decorative stamping. Using a clay extruder, squirt out a clay rope to accent the opening of the stocking. Glue down with slip. Punch out two holes with a straw for hanging. Now you are almost done with your Clay Christmas stocking. You can vary the p...
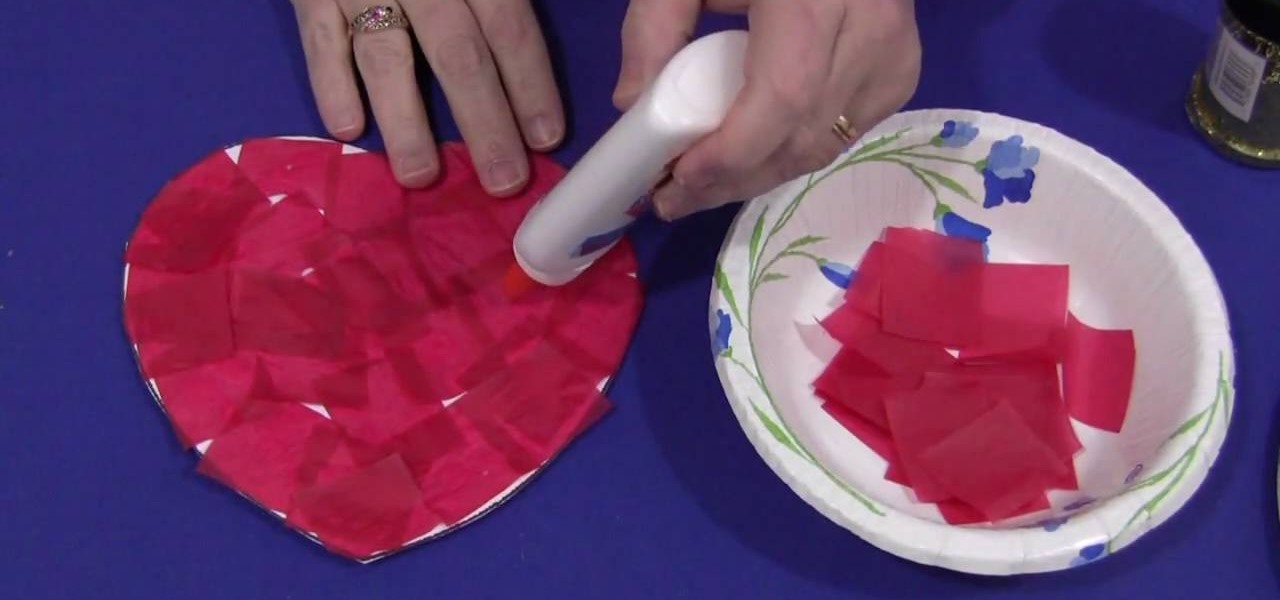
This video explains how to make a tissue paper heart with your kids. The first step taken by the instructor is to cut about thirty small tissue paper squares with the color of your choice. The instructor then takes a large piece of construction paper and cuts out a basic heart design then puts light dots of glue all over the construction paper heart. The heart is then covered in the tissue paper squares until the entire heart is evenly covered with the colored tissue squares. The last step is...
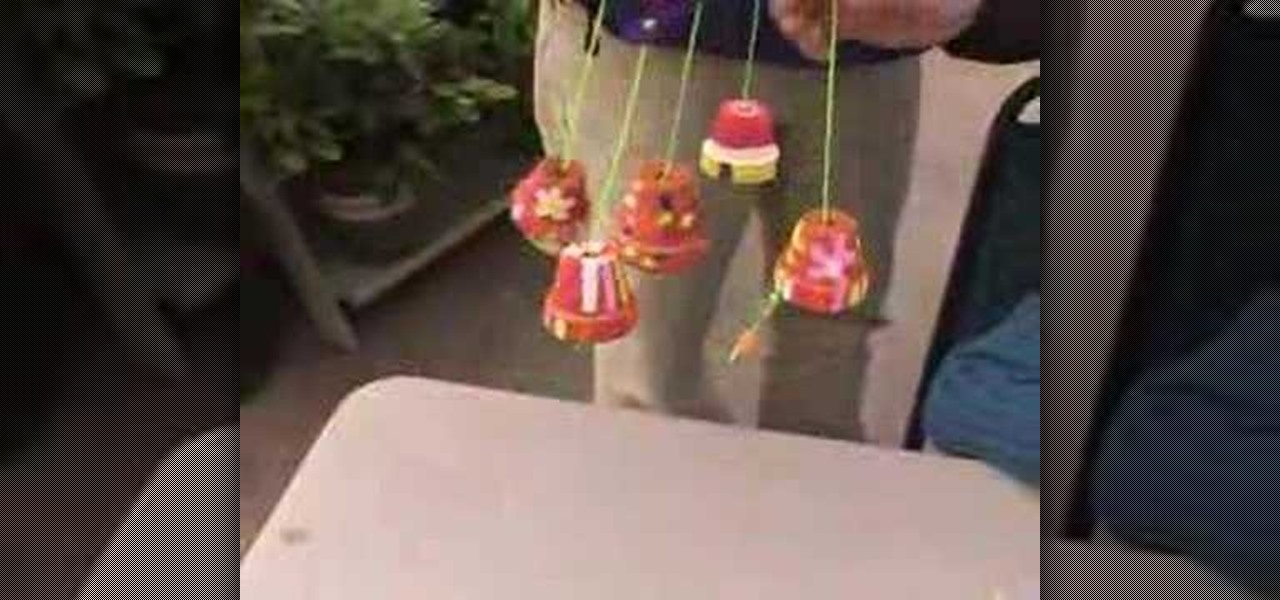
Lynn Snodgrass shows how to make chimes by using small clay pots and popsicle sticks. You can tie them together by using plastic string or regular garden string. The pots can be decorated with paint or you can apply stickers to the pots. 1. Use the sticks tied with the string as the base that holds the pots together. 2. Thread the string through the opening in the clay pots. The pots will have already been decorated with the stickers and the paint and will already be dry. The next step is to ...
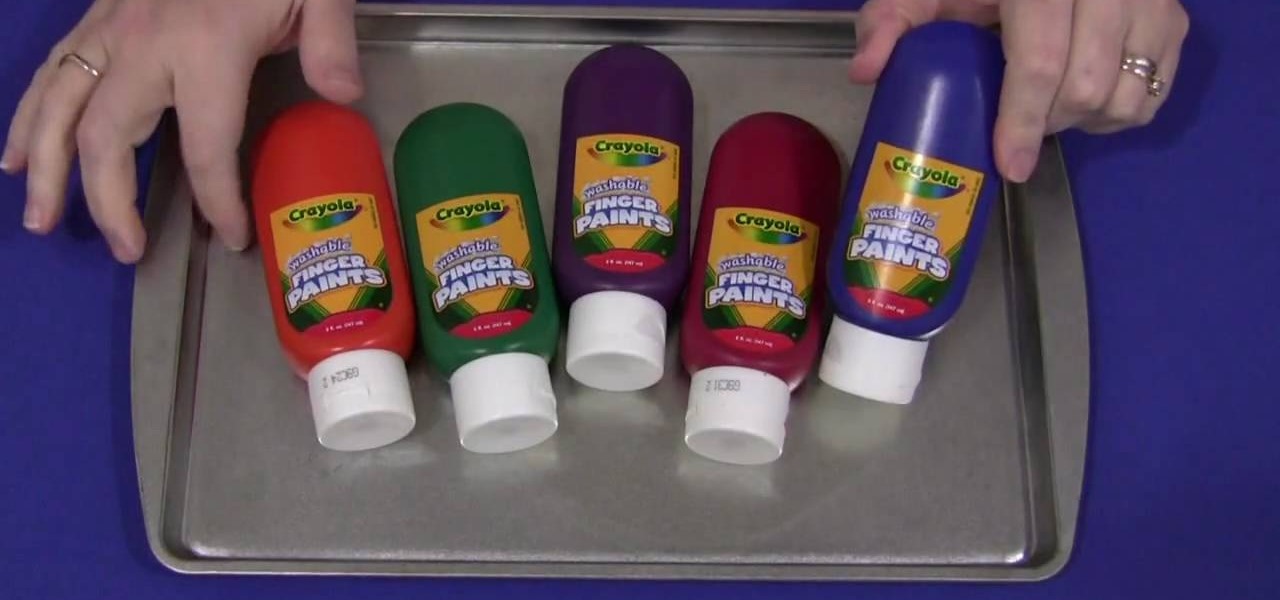
Shelley Lovett from childcareland demonstrates a fun activity involving finger paint that parents can do with their children. She uses finger paints and a pan to make a virtual canvas that is self contained and easy to clean up. She first recommends that only one color be used. She indicates that by using multiple colors, it may result in a brown ugly color and therefore should be avoided. She then spreads the paint onto a flat pan. After the paint is on the pan, parents and children are able...
In this how-to video, you will learn how to teach your kids the Ten Little Kites song. First, cut out different colored pieces of paper into kite shapes. Paste them onto the finger tips of two gloves. The words of the song go to the tune of Ten Little Indians. The lyrics go: One little, two little, three little kids. Four little, five little, six little kites. Seven little, eight, little, nine little kites. Ten little kites flying through the sky. Count them, Count them, Count them with me, t...
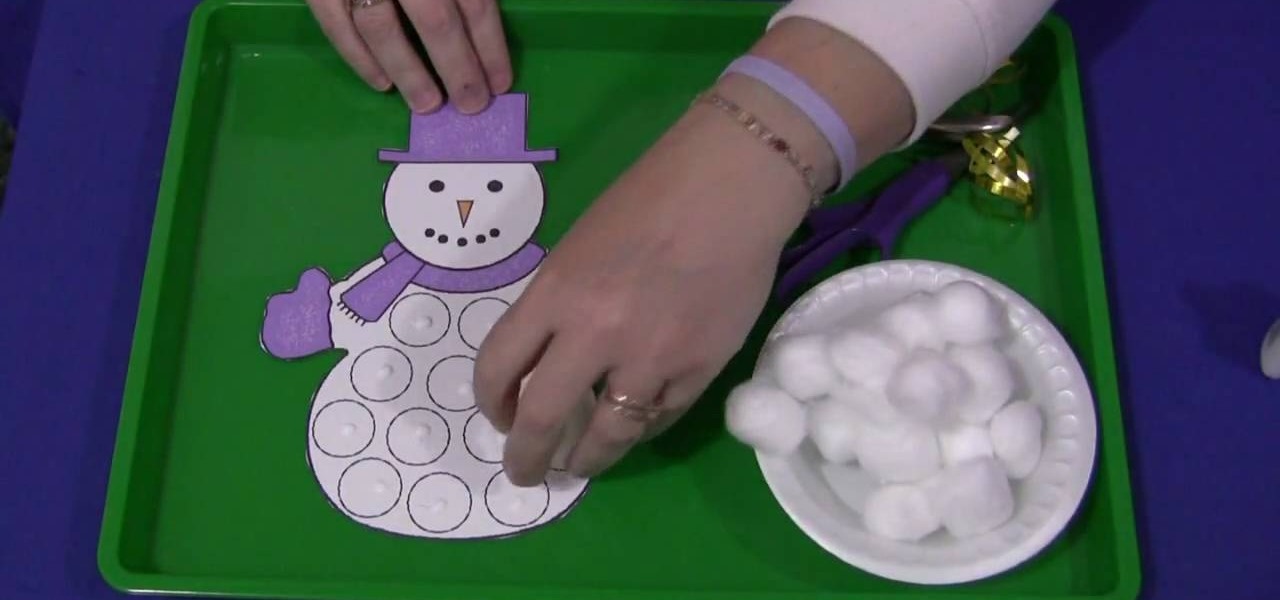
Shelley Lovett from ChildCare shows us how to make a cotton ball snowman. This is a great activity for developing fine motor skills. The snowman comes in a several variations, there is a snowman that has circles on its tummy so that children would have to try and place the cotton balls inside the circles. There is a snowman that comes in black and white so that the children could decorate the snowman's scarf, mittens and hat. Now on the plain tummy snowman, you'd just apply glue all over the ...

Childcareland demonstrates how to make a cupcake shaped book in this video. First, make a pattern page from a regular piece of paper. It should be designed like a cupcake. Place the designed pattern on top of a thicker paper like construction paper or card stock. Place five pages of regular paper behind the thicker page and finally place another thicker page at the back of the stack. Glue the cupcake pattern to the top, thick page, slightly to the left side. Then staple down the length of the...
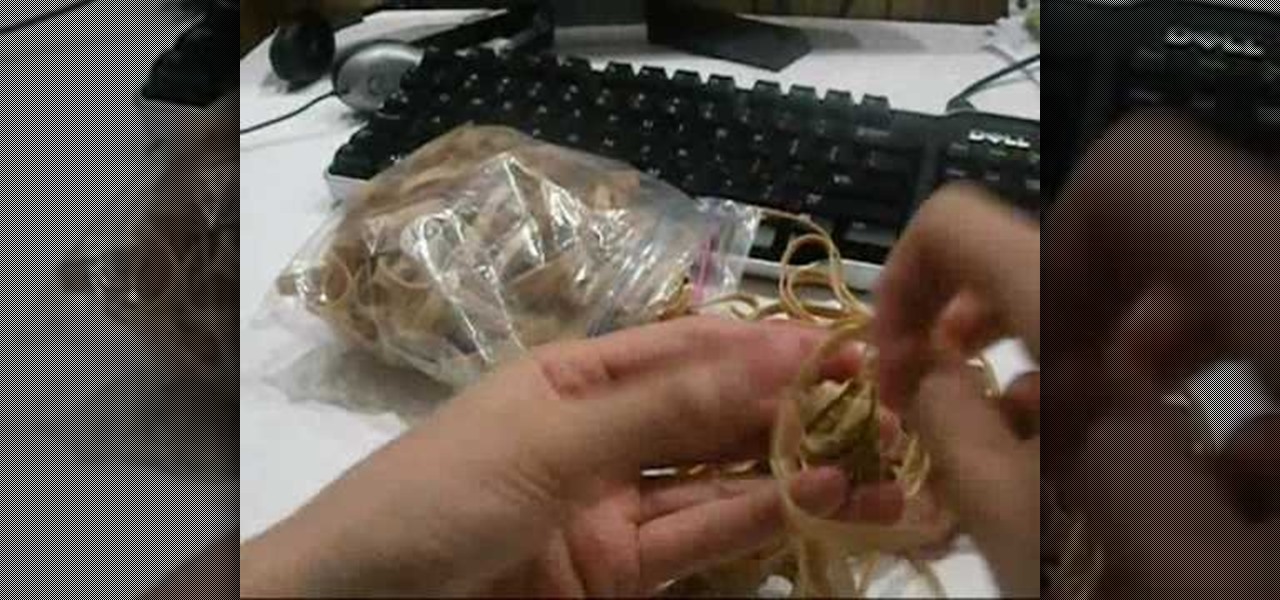
This video shows you, purely through demonstration, how to make a rubber band ball out of only rubber bands. It begins by showing how to create a small knot out of a few rubber bands, then wrap more rubber bands around it as one would with the small ball that is usually used as the core of a rubber band ball. The first few seconds are the most important, as forming the core of the ball out of rubber bands is the main trick to successfully creating the one hundred percent rubber band ball. Unf...
To make a rocket our of Mentos and diet coke, you are going to need a 2 liter of diet coke, three Mentos, a screw, and a magnet. First, thread all three Mentos on the screw and set aside. Next, open up the bottle of coke. Take the head of the screw and place it inside the bottle cap. After that, put the magnet on top of the cap to hold the screw in place. Now very carefully, screw the cap onto the bottle making sure not to prematurely drop the Mentos in. After the cap is secure, remove the ma...
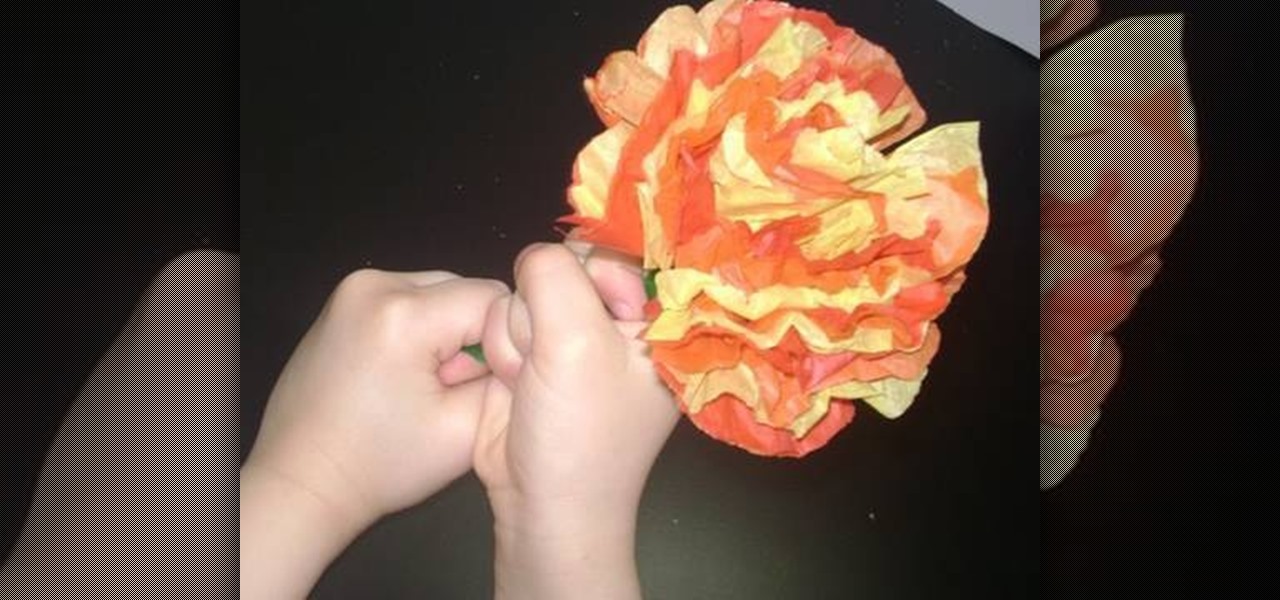
In this video you will learn how to make a tissue paper flower. The video begins with a little introduction to their website simplekidscrafts.com where you can learn more easy crafts that you can do with your children. The materials you will need to begin your project are colorful tissue paper, pipe cleaner, and scissors. This is a very easy to follow guide and only takes around two to three minutes to do. The host shows all of the steps to making her flower by filming an above view over her ...
This video presentation is a tutorial of how to make a baking soda and vinegar rocket. Materials involved include a water bottle, vinegar, baking soda, toilet paper, and knife. First step is to use the knife to gouge a hole in the cap of the bottle. It should not be too large, and should be placed in the center of the cap. Once the hole is made, the cap is to be removed, and the bottle is to be filled partially to half-way with vinegar. After the vinegar is added, the baking soda is then laid...
This video teaches you a simple and easy way to make corn dollies. For those of you that don't know, corn dollies are the homes for the spirits of corn that have lost their homes during the harvest. The spirits will live in the doll throughout the winter and will be returned to the fields the forthcoming spring. To make these you will need corn husks, Sharpies, a pair of scissors, and ribbons of your desired color. These corn dollies are a fun project for kids and will be sure to help create ...
In this video tutorial, viewers learn how to make a simple pair of earrings. This craft only takes a minute to do. The materials required to make these earrings are: 2 large beads, 2 medium beads, 4 small beads, 2 seed beads, 2 earring pins, 2 earring hooks and pliers. Put the beads on the earring pin in this order: small, seed, medium, large and small. Use the pliers to bend the pin to a loop and hook it with the earring hook. This video will benefit those young viewers who enjoy making arts...
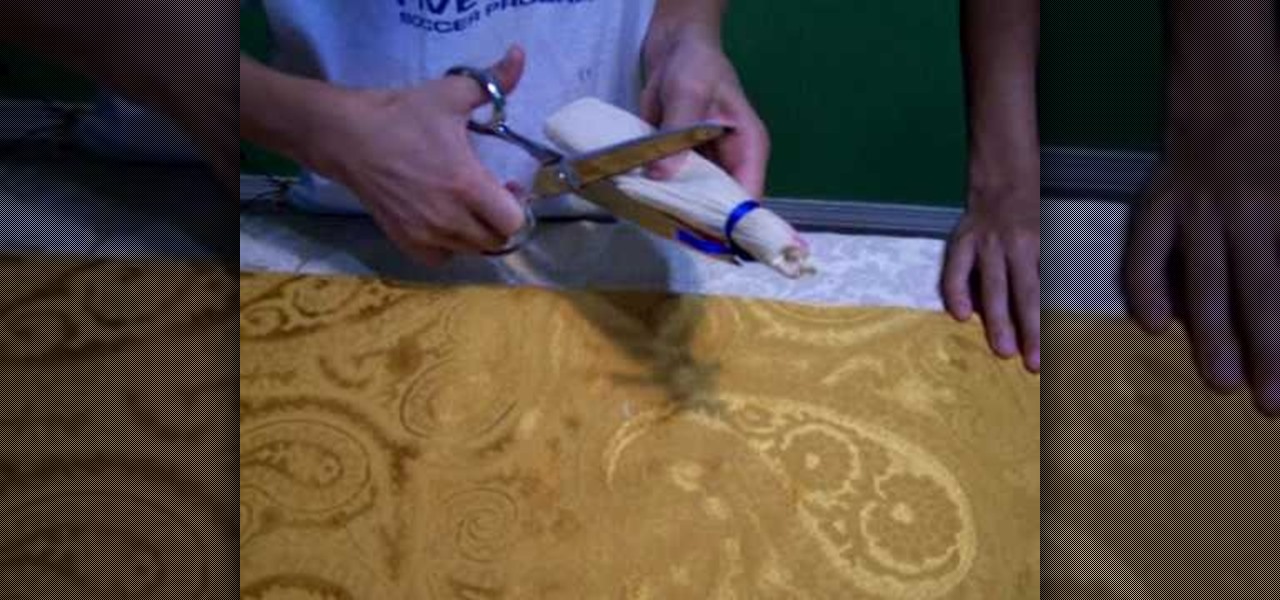
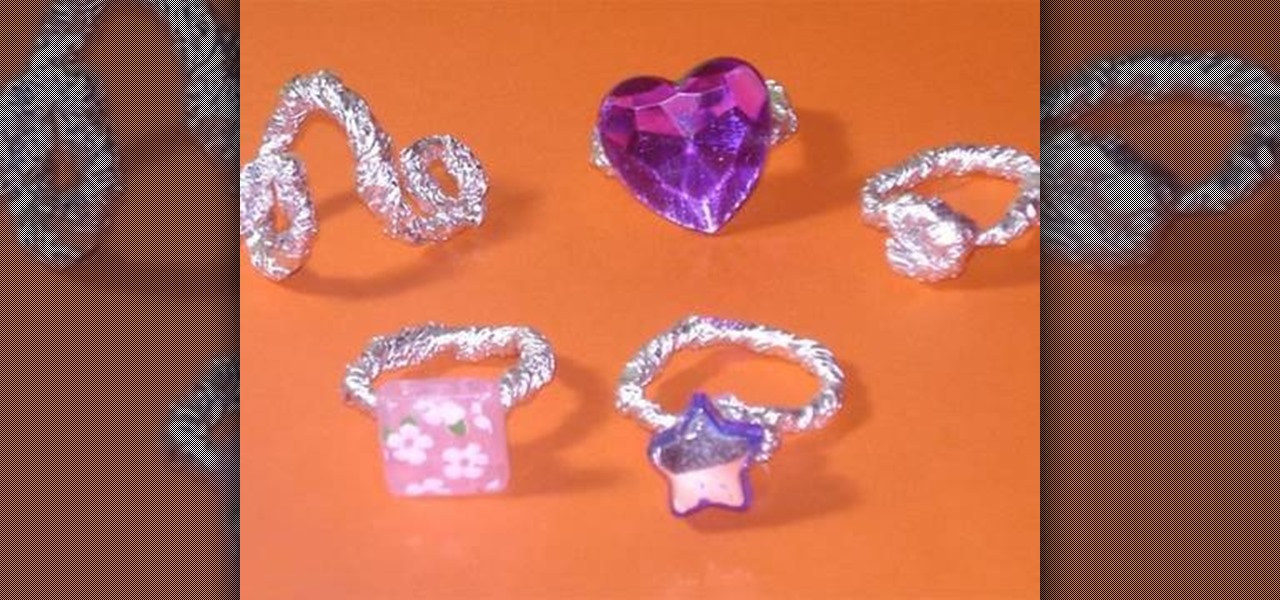
In this video tutorial, viewers learn how to make aluminum paper rings. This video provides all the materials required to make the rings. The materials required include: aluminum paper, glue, plastic gems, beads and the bottom of any decorative element for the top of the ring. Begin by folding the foil into a thin line and twist it. Now bend the foil around your finger to shape it into a ring. Then tie and wrap up the top. Put some glue on and add the bead or gem to the center. This video wil...
This video loosely explains the method of how to make a blue colored slime from corn flour, blue food coloring, and a quantity of water which is undetermined. Quantities of ingredients to be added for this project vary and can be made up as the person goes along in combining the ingredients to produce the desired results. Ideally, the product should be of a slime like consistency, or can be described as 'gooey' in appearance. The resulting slime product should be easily stirred when it is sti...
This instructional video shows us how to make a Japanese flag fan. The materials required are: Foamy (Red and white), four popsicle sticks, glue and scissors. First cut two circular shapes (with one straight edge) from the white foamy, then glue on the popsicle sticks to the straight edge of one of the circles to make the handle. After this, glue down the other white circular piece of foamy to cover the tops of the popsicle sticks. Then cut out two smaller circles from the red foamy and glue ...
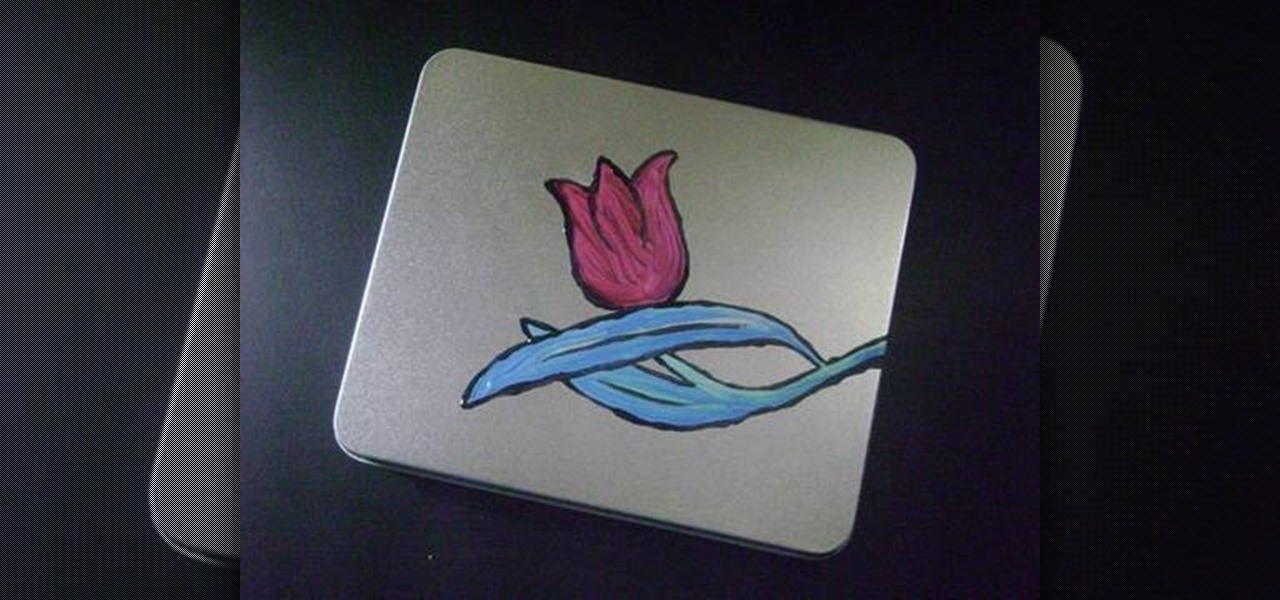
Simple Kids Crafts demonstrates how to make a decorative painted tin case for a mom's jewelry. To make the decorative case, you will need one recycled tin case with a lid, paint, and thick and thin paintbrushes. First, use the thin paintbrush to paint green stems of grass on the tin. Then, use the blue paint and a thick brush to paint grass blades on the tin. Use the red paint to paint a large red flower on the tin case. Let the paint dry. Use a thin paintbrush to accent and outline your flow...
This video, for simplekidscrafts.com, tells us how to make an origami necktie. This is a very easy crafts project, suitable for kids and adults alike. It doesn't require a long list of materials, only a sheet of origami paper is needed. The sheet of paper is then folded ten times to transform it from just a square of paper into a decorative origami necktie. The video has no audio instruction, but encourages you to follow the folding technique exhibited by the child in the video. The camera is...
This video tutorial shows how to transform a paper bag to a picnic bag designed with Frankenstein's face on the front. The ending result of the tutorial is shown in the beginning. The materials needed are listed after the example, including the total number and color of each material needed. The tutorial starts by cutting down the paper bag and folding the top of the bag. Handles for the bag are then cut out and stapled onto the top of the bag – one on each side. To prevent the staples from a...
In this video, SimpleKidsCrafts teaches us how to make finger puppet roosters. This video shows a list of the materials you need, which include only different colors of felt, scissors and glue (a hot glue gun is used in the video). Then, you can see a clear visual of how to make the finger puppet. Furthermore, the demonstration is done by a child, so you know that your own kids will be able to make this as well. Learn how to make a rooster finger puppet step by step by watching this video--fu...
Simple Kids Crafts demonstrates how to make a flower out of a toilet paper tube. For this project you will need one toilet paper tube, paint, a paintbrush, glue and scissors. First, paint the toilet paper tube and let it dry. Then cut the toilet paper tubes into rings. Scrunch up a ball of tissue and glue it closed. Bend the painted rings into flower shapes. Attach the flower shapes to the tissue ball. Paint the tissue ball. Next, paint the inside of the flower shapes. Let it dry. Add decorat...
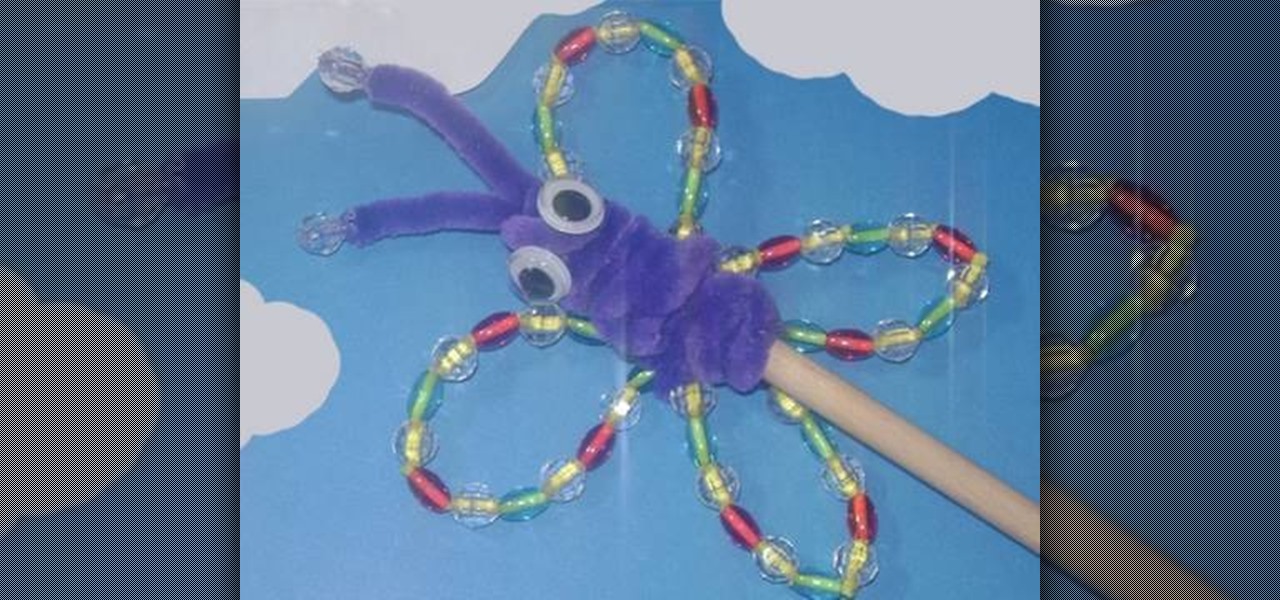
In this video tutorial, viewers learn how to make a garden rainbow butterfly puppet. This video describes all the materials that are required to make the butterfly puppet. The materials required include: beads (blue, red and transparent), 5 pipe cleaners (2 yellow and 3 purple), 2 googly eyes, a stick and one glue stick. This video provides a visual demonstration for viewers to easily follow along. The video is at a step-by-step pace and allows viewers to pause or rewind the video. This video...
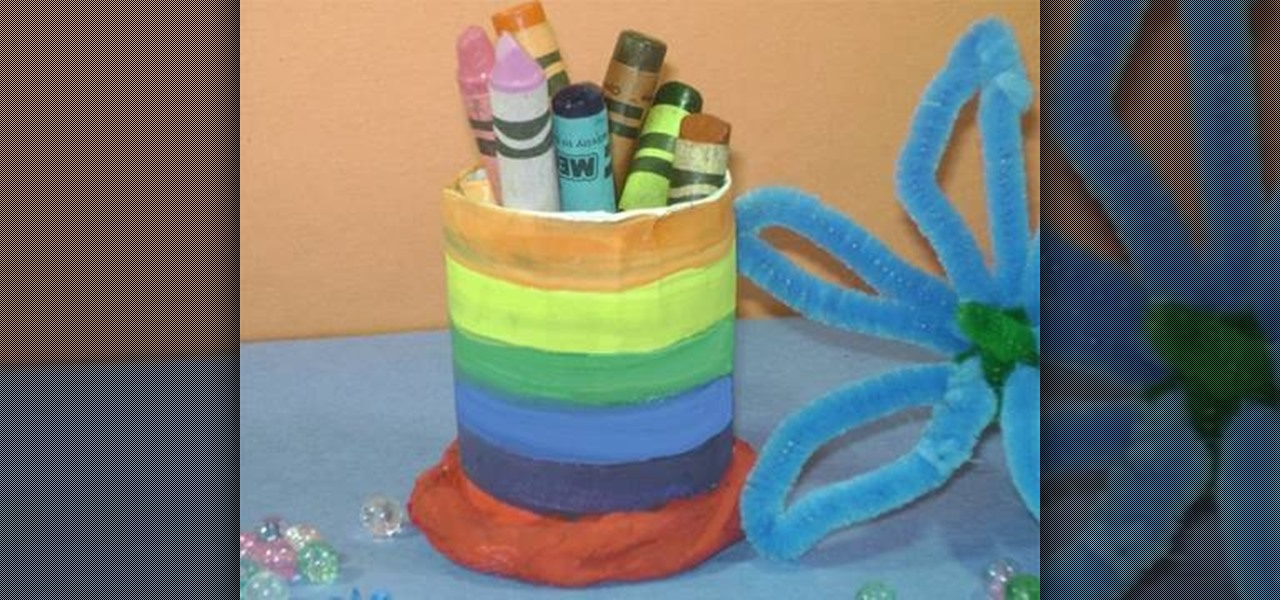
In this video tutorial, viewers will learn how to make a simple pencil holder. This is a child's art and crafts activity. The video provides all the materials that are required in order to make the pencil holder. The materials required include: a toilet paper tube, paint, paint brush, glue, scissors and a sheet of white paper. Users simply decorate the paper with paint and wrap it around the toilet roll. Next, cut another piece of paper for the bottom of the roll and secure it with some tissu...
This is step-by-step video tutorial on how to make a basic but adorable cat puppet. The kids will have such a good time cutting and gluing the materials to make their very own puppet. The process is very quick and very easy. The materials you will need are: Felt (black, white and yellow), 2 googly eyes, scissors, and fabric glue. First cut out 2 triangles for the ears. Glue the circular edges of a half circle of felt together and glue the ears to it. Glue the eyes, nose, mouth, whiskers, and ...
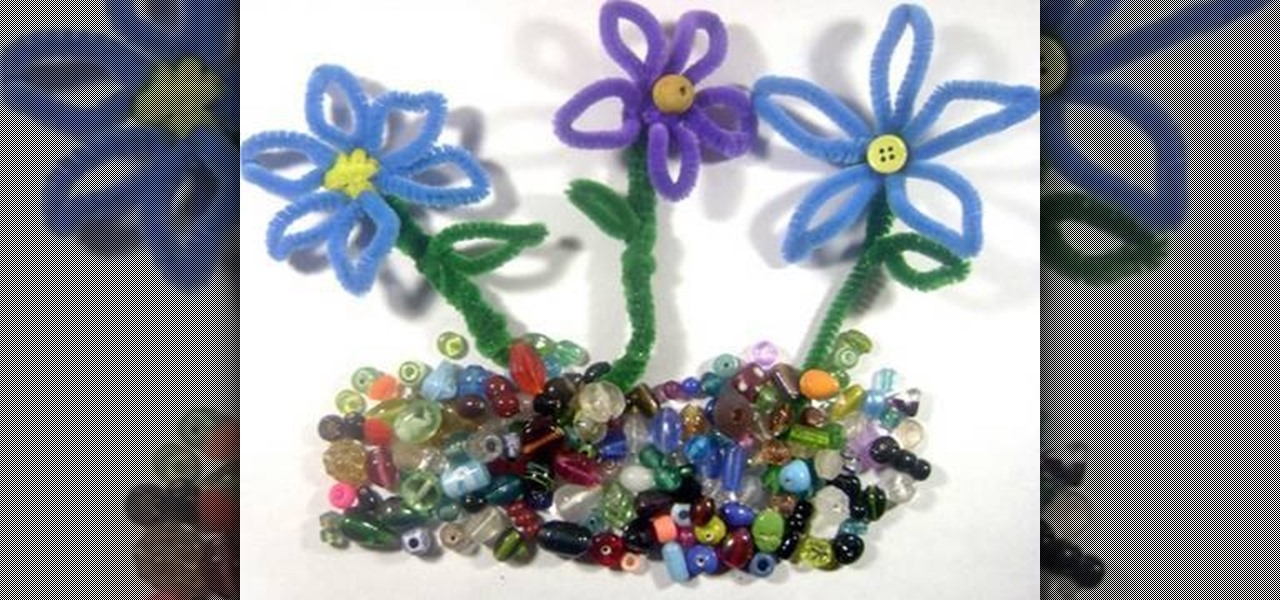
This video will show you how to make flowers out of pipe cleaners. To start you'll need five pipe cleaners. The video shows the basic steps of connecting the first two pipe cleaners by twisting together the ends. Then pipe cleaners are bunched together and wrapped by another pipe cleaner. This creates the petals and the stem that extends downwards. After the petals and stem are shaped correctly, a green pipe cleaner is wrapped around the yellow stem to give it a realistic green appearance. Fi...
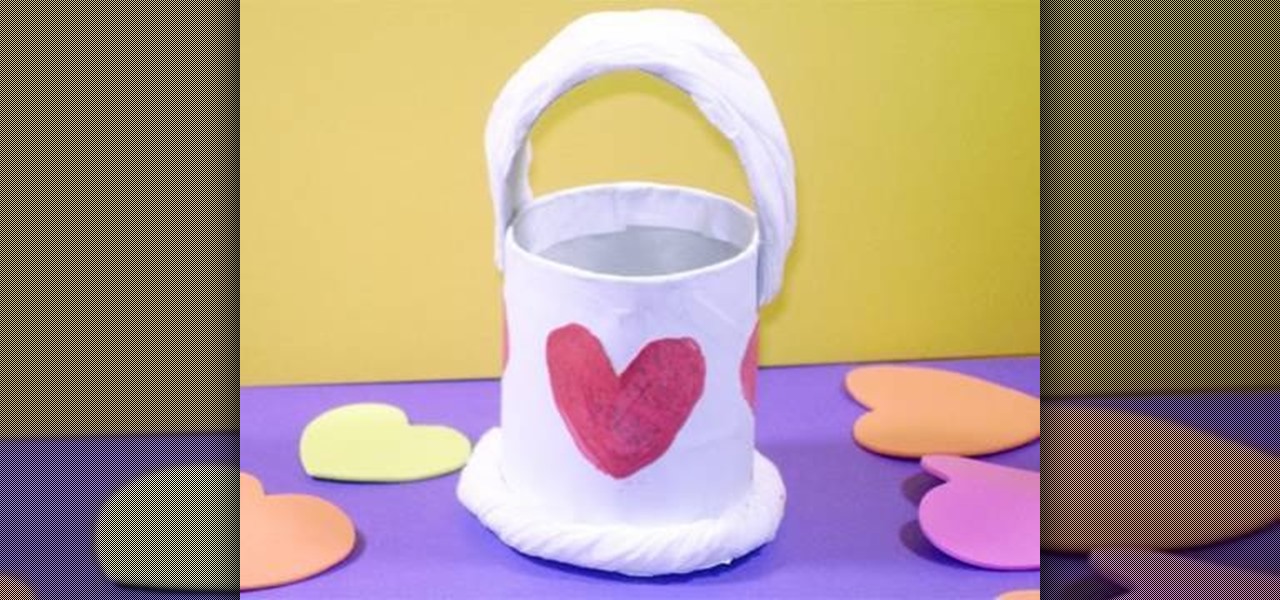
Supplies you will need. 1 toilet paper roll
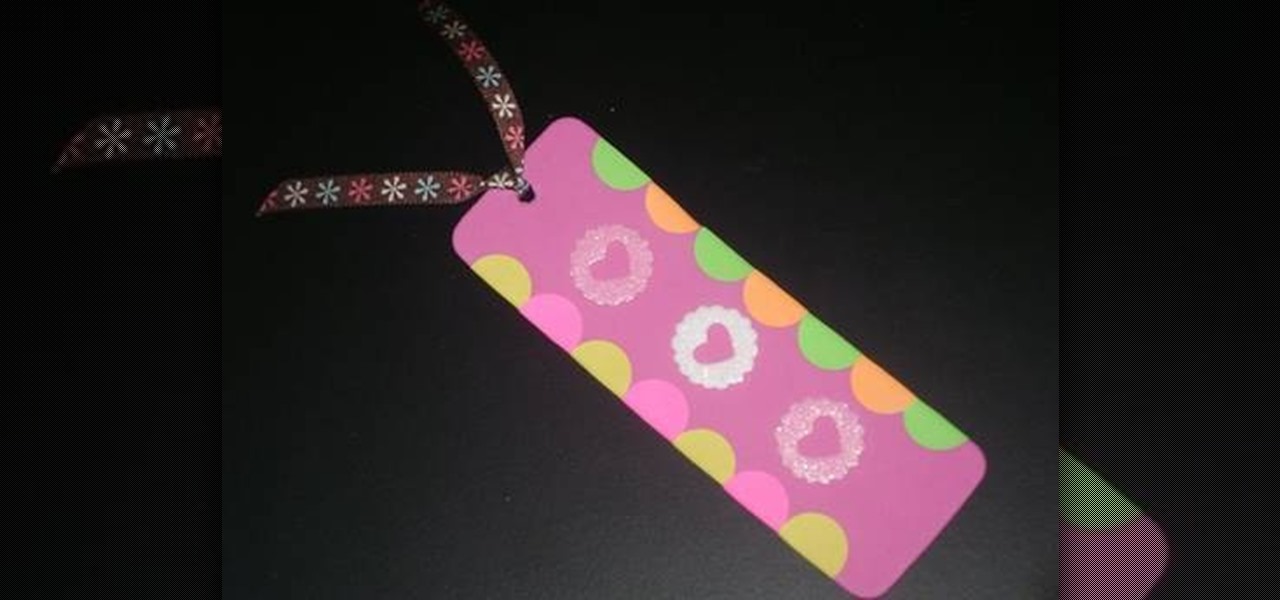
Take a colored foam and cut it to a bookmark shape. Mostly the bookmarks are tall rectangles. Decorate the foam bookmark using markers. Now design it for looking more beautiful. Use stickers to add additional decoration. Collect stickers from a craft store that offers a large variety of scrapbooking stickers. Cut the foam sheet and be sure to get along with the theme of the bookmark. For example, if a child drew horses on his bookmark, cut out horseshoe. Decorate the cut-out if necessary. Add...
This video shows some fun, inexpensive projects you can try for kids. There are several different crafts presented, beginning with Flubber, or Silly Putty. Mixing some glue, water and Borax in a bowl makes the same stuff you can buy in the store. The next craft is Crazy Crayons, where you gather old crayons together and heat them in an oven to make new, colorful creations. Then comes Spiffy-Sniffy Watercolor Paints, where we find out you can just mix water and Kool-Aid powder to make bright w...
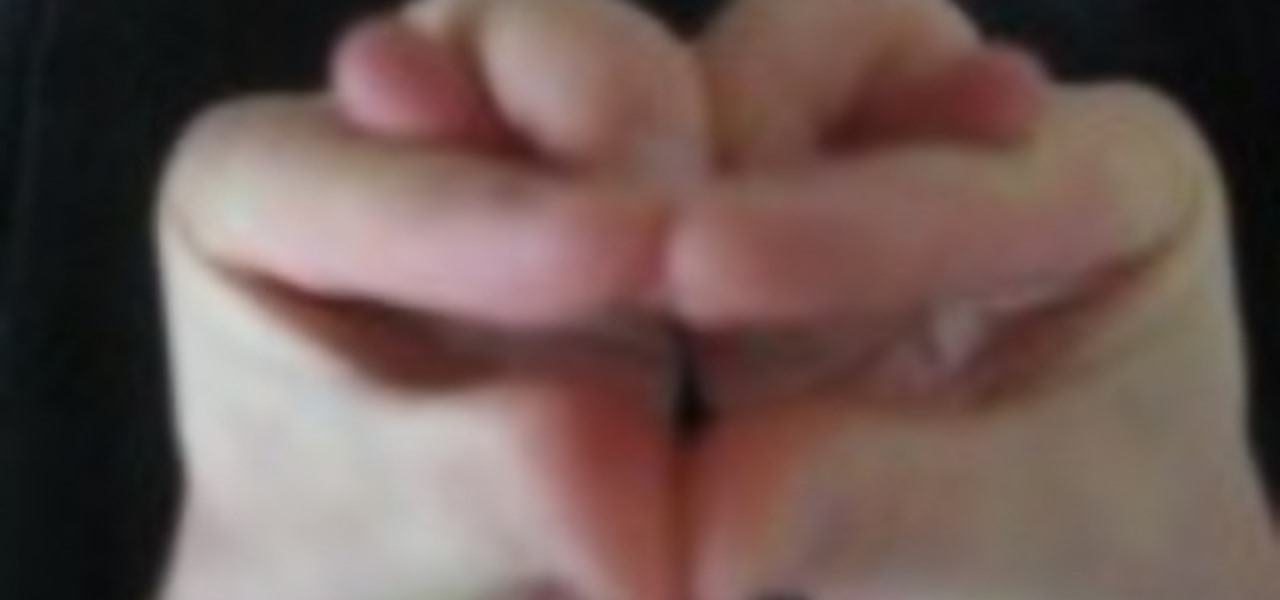
This short video shows how you can make up a frog shape with your hands. In order to make a frog by using your hands start by opening your hands in front of you, palms down. Then you have to cross your little fingers on each other. Repeat the same crossing of the next finger on both hands, The next step is to fold your middle fingers over the two smaller fingers you had crossed before. Finally move the thumb and the pointer fingers in a circle shape to form the mouth of the frog. By opening a...
Make art on a budget! The kids will have a blast making their own finger paints! You Will Need
Puppet time! Kids of all ages can make and play with these. You Will Need
Partiers everywhere have played pin the tail on the donkey. Now you can play, too. Just check out the steps and tips in this how-to video and learn how to play this classic kids game. The only supplies you'll need are tape, a paper donkey (or a variation), players, a paper tail for each player, and a blindfold.
The Picnic Game is a great memory-building game that’s a fun classroom activity and perfect for long road trips with little ones. This video activity shows a game that requires no props or equipment of any kind, just a few players. It's simple, but staves off boredom beautifully. Check out this how-to video and learn how to play the picnic game.
Who’d have thought that crumpled paper was good for anything but the trashcan? With this easy technique, you can transform tissue paper into pretty pieces of art. This is a fun kids craft project. You will need cardboard, double sided contact paper, tissue paper, and scissors. Fun activity to do with kids!
This is Magpie Time, a new show dedicated to teaching arts and crafts to children in an accessible and entertaining manner by re-using found everyday objects in creative ways. Think responsible, green craftiness that engages kids in fun arts and craft projects that use things you have around the house rather than new products you have to buy.
This instructional video demonstrates how to make an exciting stringed instrument from simple junk materials. This is one of the projects from Nick Penny's book "Making Musical Instruments from Junk". This musical instrument is called a poptar, because of the unique sound it makes. You will need a 2 liter plastic bottle, scissors, and plastic twine.
Project it! Sketch it! Perfect it! The Crayola Illumination Station is three great drawing tools in one! Use the light desk mode to trace one of the 10 cool background scenes-or create your own. Switch to projector mode and insert an image disc. Choose from 120 characters to project and trace into your design. Add color and shading to your creation with the included Mini Super Tip markers to complete your work. You can even detach the projector and use it as a flashlight! Includes Illuminatio...
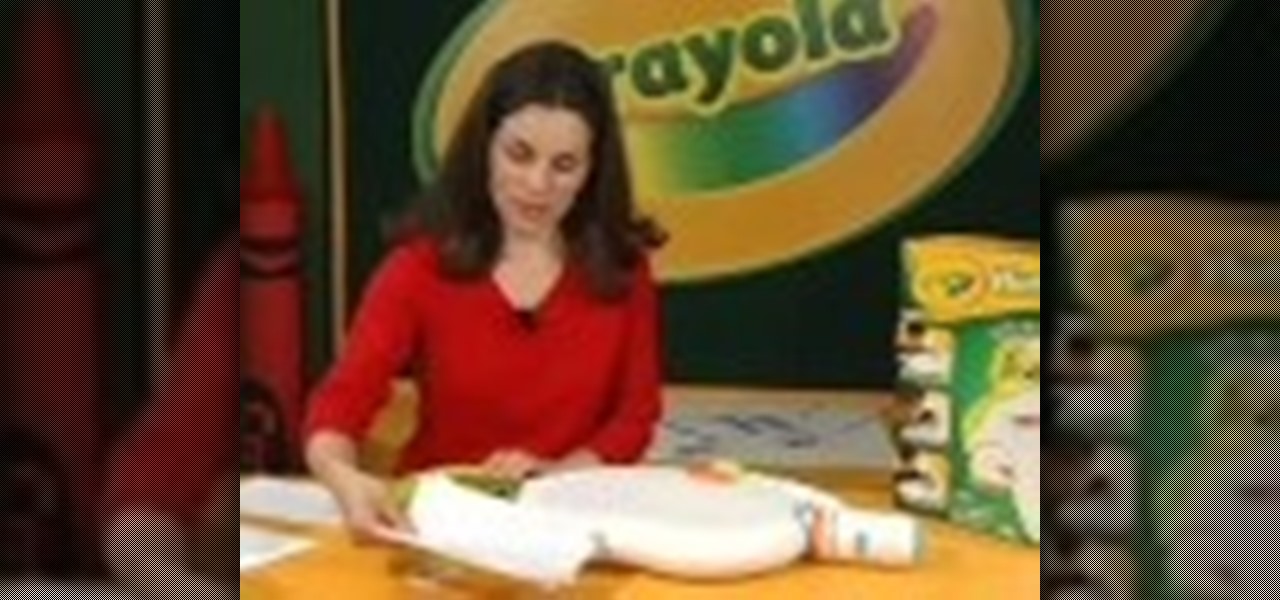
With all 6 Crayola Mix 'Ems markers you can create 36 different color combinations. Just match any cap with any marker, press the button and the marker delivers a cool blend effect. Kids will want to try to create all 36 colors. With this how to video you can create 36 great color combinations using just 6 Crayola Mix 'Ems markers with your kids.
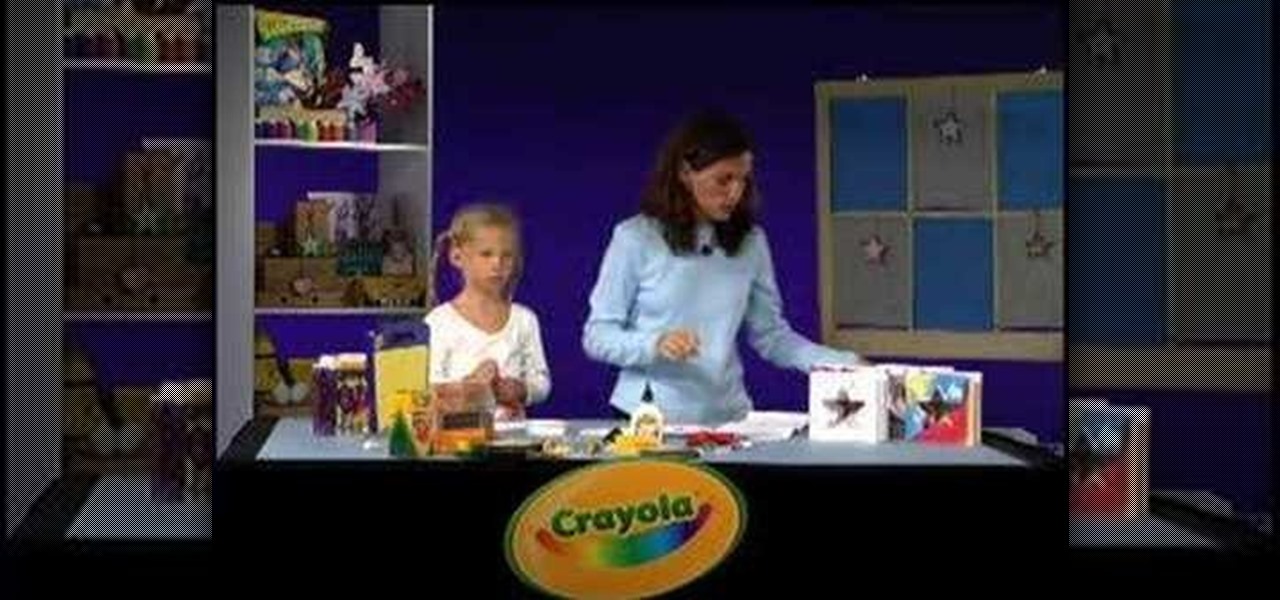
Learn how to make a window holiday card with this tutorial. This is a fun arts and crafts project to do with your children. You will need to use the Crayola Cutter to create peek-through windows in your card. The materials needed for this project are 2 large pieces of white paper, cookie cutters, Crayola erasable colored pencils, glue, glitter glue, markers, crayons, colored pencils, and the Crayola Cutter. With this how to video you and your kids can make these fun window cards for any holiday.
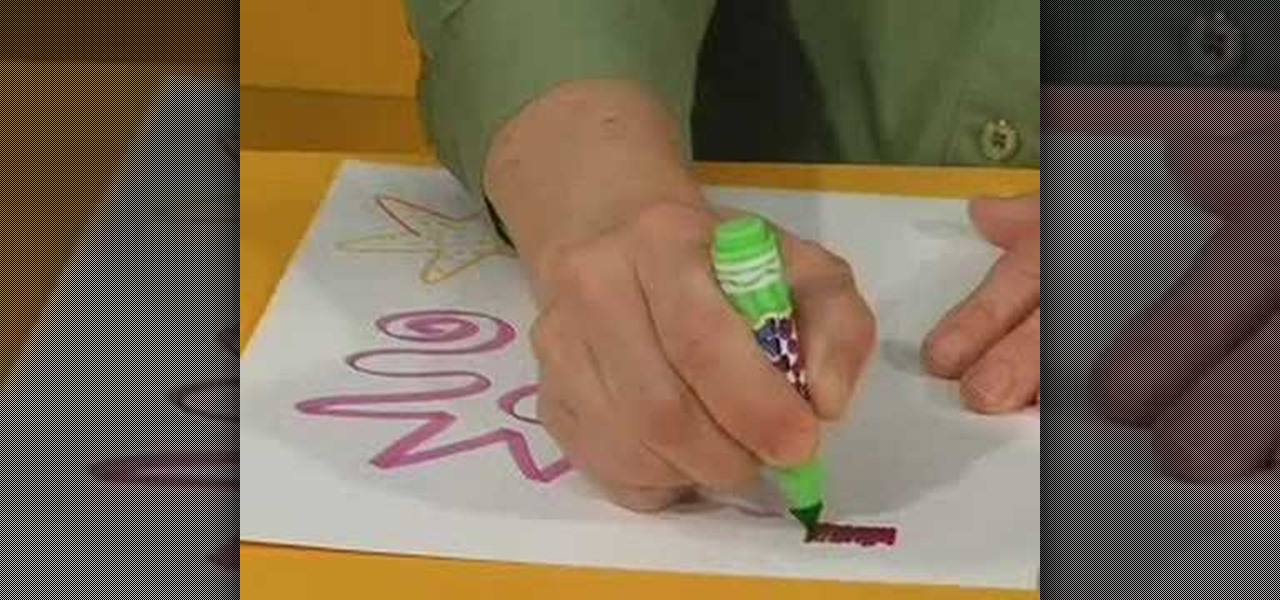
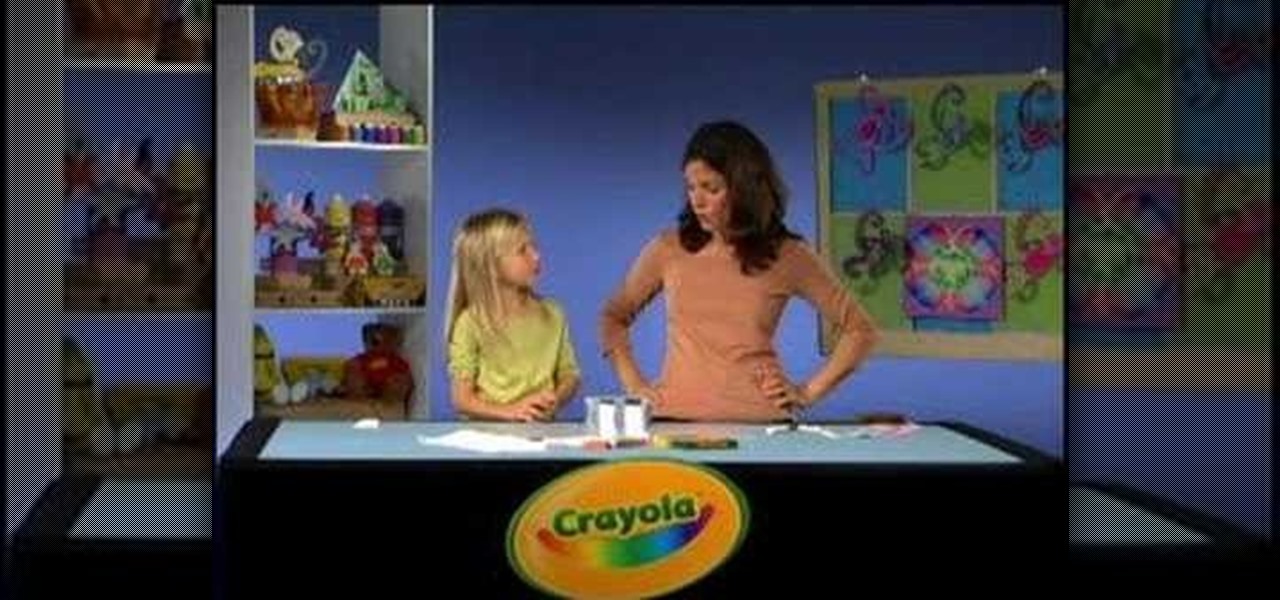
Check out this great science project craft from Crayola. Learn how to separate the colors in a black marker with this tutorial. You will need Markers, scissors, a paper towel, wax paper, and a container of water. This is a great project to teach your kids about the science of colors. With this easy to follow how to video you will be able to separate the colors from a black Crayola marker with your child.