Cross processing is a Photoshop version of slide processing. The result would be you get all these weird color shifts. For reasons best known to people who run the fashion magazines, this look became very popular in the 1990s. Start by adding in a curves layer. Add a new adjustment layer for curves. If you've never used curves before it is recommended that you take a curves tutorial first as for this effect we will need to adjust individual color channels. It is not difficult but if you don't...

This video gives another iteration of a digital makeover, using Mama's Powder w/sharpen action. This series will highlight some advanced masking techniques; rubilith and quick mask modes, and adjust makeup colors using Levels Adjustments rather than Curves. Hopefully this will broaden your understanding of mixing color using a different type of adjustment, in Photoshop or Photoshop Elements.
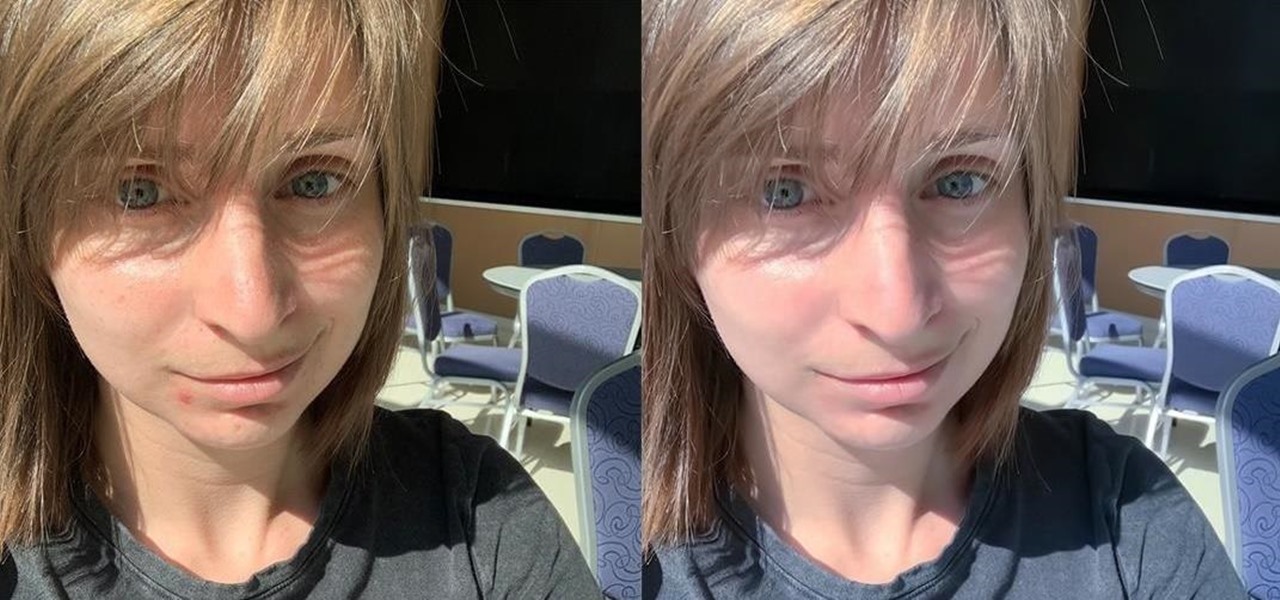
You finally did it! You've combined all your knowledge about photography and angle to take the perfect selfie. It looks stunning, and you cannot wait to post that bad boy to Instagram. But wait, what's this? Your skin looks so uneven and — is that a zit!? I guess the selfie gods were not in favor of your skin when you snapped it. Luckily, you can fix all of those minor flaws with the help of Photoshop Express.

Editing photos can be tedious, especially if you are using a similar theme for all of your photos. It takes time to select every tool, play with the bars, and find an adjustment that you're happy with. Luckily, there's a faster way. Adobe Lightroom for Android and iPhone allows you to save your favorite editing presets so you don't have to change every photo every time.
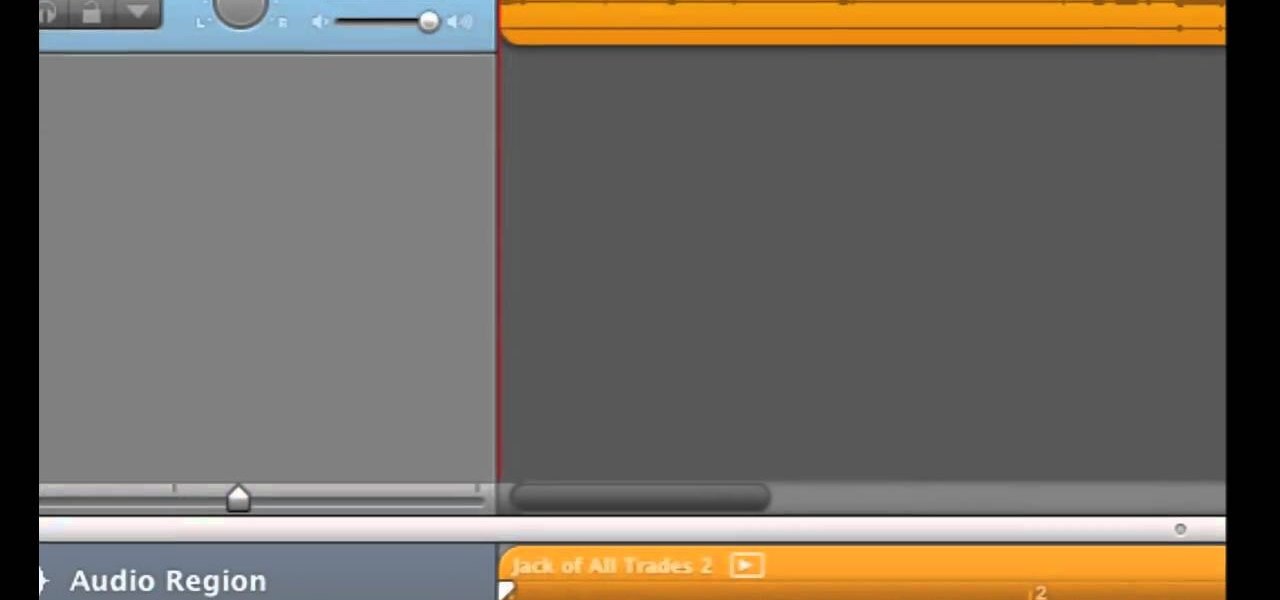
If you've just exported your masterpiece from GarageBand and found that your volume on the song is too low, then you're going to have to fix it. And increasing the levels on your "too quiet" song, you just need to get back into GarageBand and make some adjustments.
With the economy as sour as it is, unpaid internships are a fact of life for an increasing number of students and those who have just graduated from college. Often times the only way these days to get a paid job is to take an unpaid one in the same industry first.

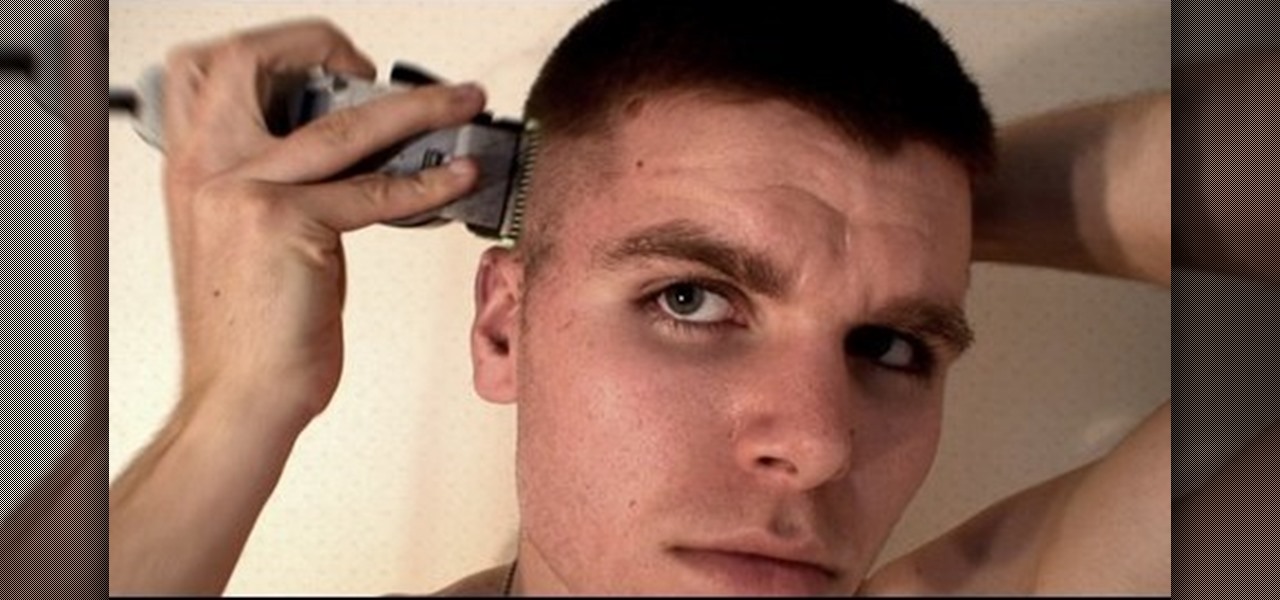
In this video, we learn how to cut your own hair high and tight. Make sure you don't miss any spots by your ears, and make sure the sides are cut evenly. If you have bangs in the front, cut from the back to the front using a shaver. If you want to get rid of your bangs, cut from the front to the back. When you're done, feel the back and make sure it feels completely even. On the razor, there's an adjustment lever, so you can use this to make different feel from the bottom to the top of your h...
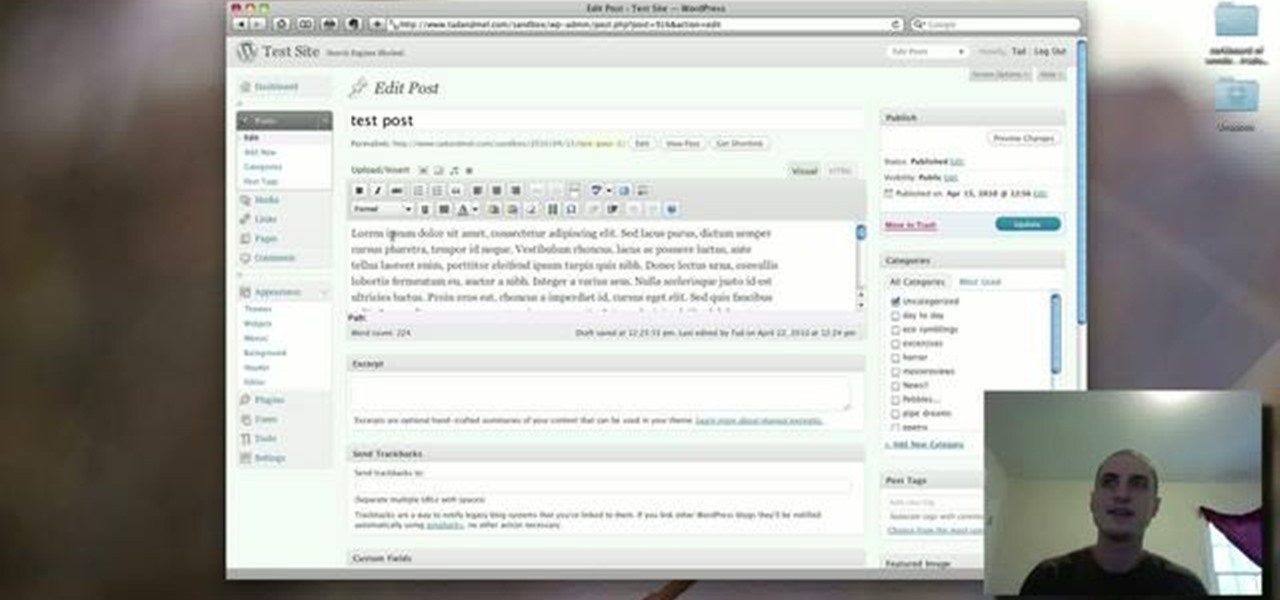
In this clip, learn how to use the Format Dropdown Menu, Underline, Align Full and color adjustment buttons in the WordPress editor. Every version of WordPress brings with it new features, new functions and new ways of doing things. Fortunately, the very same technology that allows an open-source blog publishing application like WordPress to exist in the first place also makes it easy for its users to share information about the abovesaid things through videos like this one. Take a look.
Who says you can't be feminine and powerful at the same time? This female superhero, equipped with a skintight bodysuit that leaves little to the imagination, a cape, and belt, also posses a nice set of...muscles. Not the type of gal you want to mess with, she's uberfeminine yet clearly knows how to stand her ground.
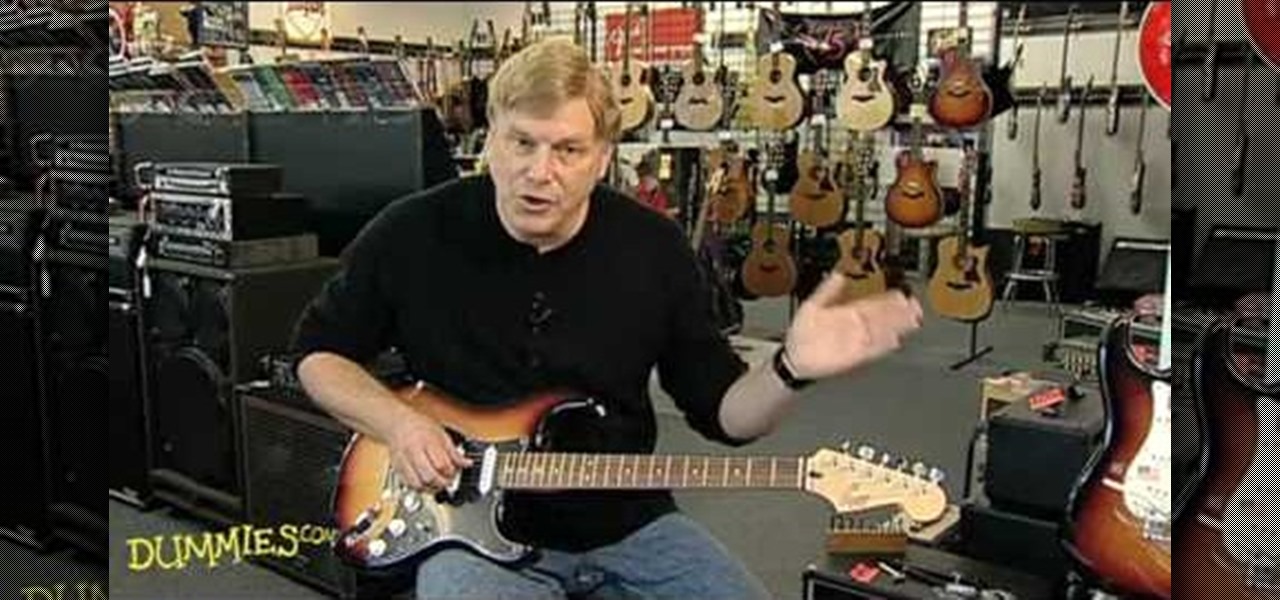
First off, if you're new to electric guitars, here are some handy dandy definitions for you before you watch this video:
In this how to video, you will learn how to make a rockabilly slick back hair style. You will need the di fi extreme cream with maximum hold in order to do this hairstyle. First, take some of the cream and place it on your hands. Rub your hands and run them through your hair. Make sure that you slick your hair back when applying the cream. Make any fine adjustments once this is done. If it is not sticking back, apply more until it does. Use a hair dryer to hold better once the cream has been ...
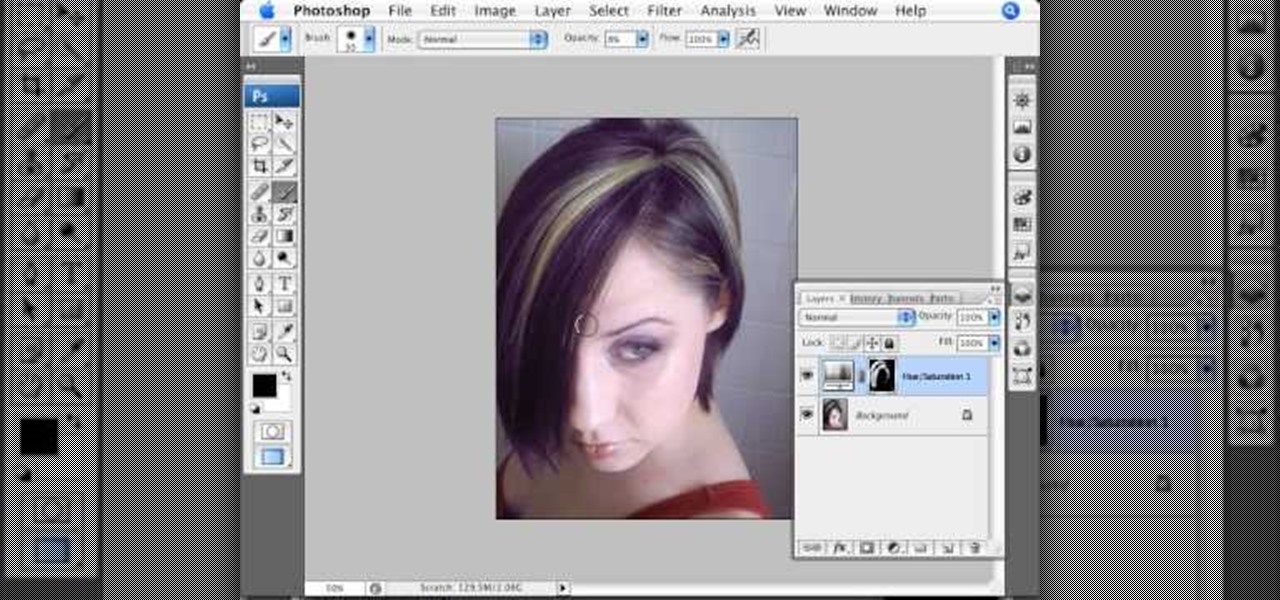
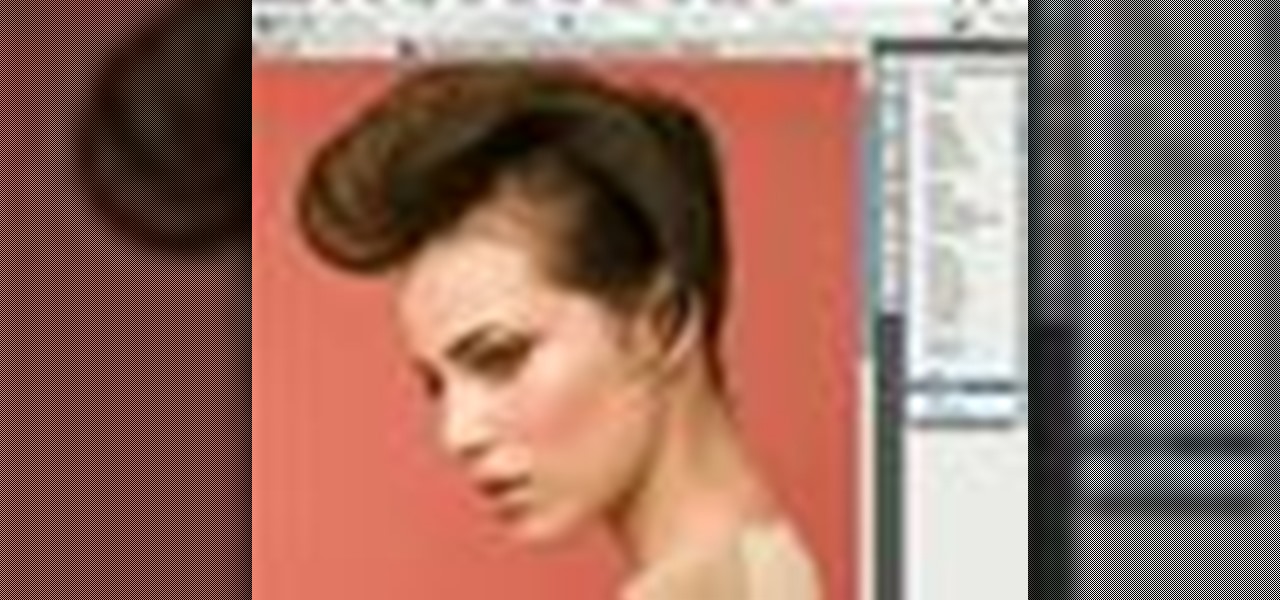
Photoshopuniverse will show you how to change a person's hair color in PhotoShop. You can achieve this by using hue and saturation adjustment layers and set to colorize. Set the saturation to about 50%. Go back to the background layer and select the color range select parts of the hair color, select the parts of the hair you want to change and with the eye dropper click it. Once the selection is made invert the selection the color will change. You can now change the hue to make it what you want.
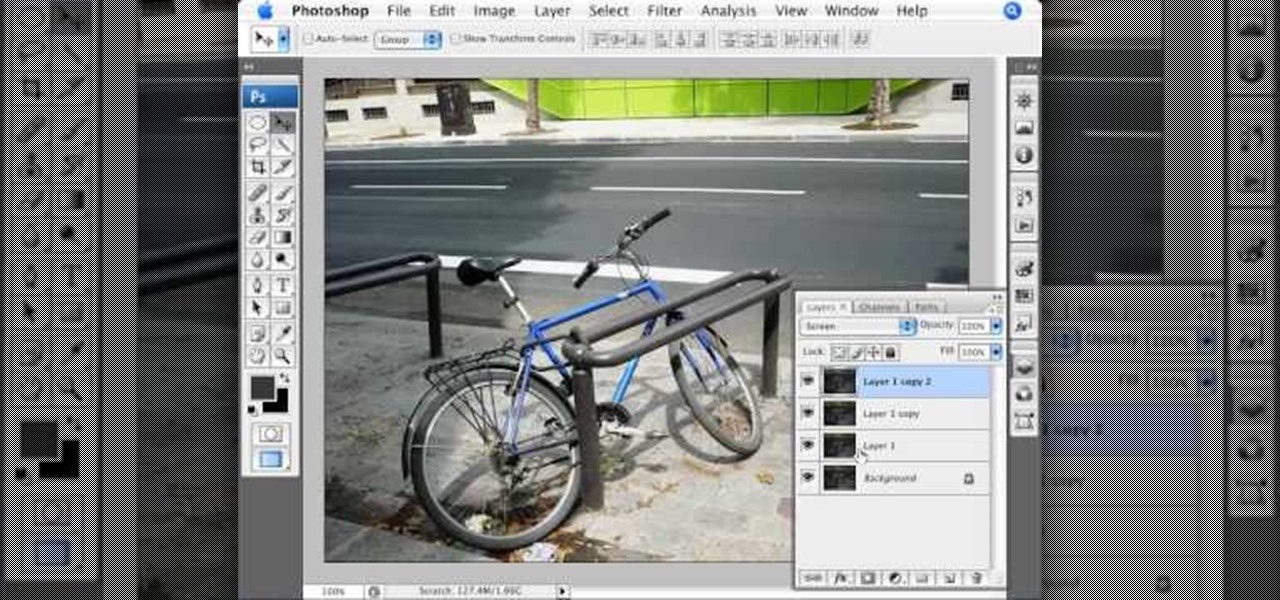
This video by photoshopuniverse shows you how to make any photo seem as it was taken in a studio. Take the working photo and add a new layer over it and fill it in black as shown. Add a newer layer over that and add the filter> render> clouds effect. Increase the opacity of the cloud layer and merge it with the black layer as shown. Add the splatter effect and the sprayed stoke effect as shown onto the merged layer and add a hue and saturation adjustment layer and colorize it as desired. Go t...
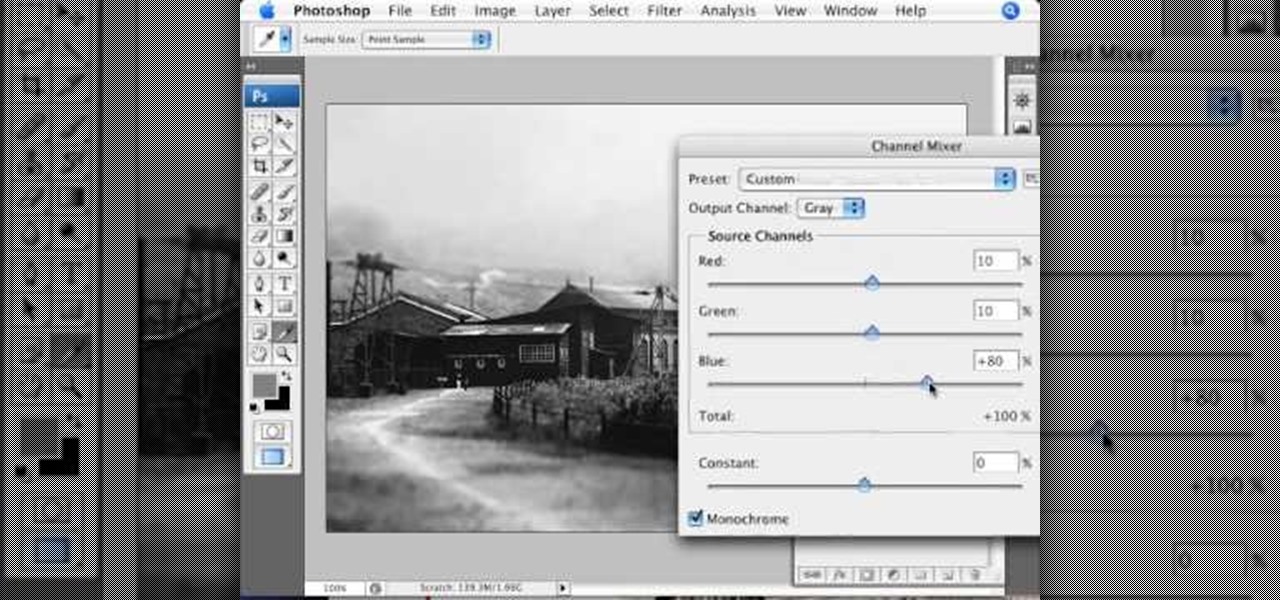
This video demonstrates the split tone effect in Photoshop. A split tone effect makes a picture look more rustic by changing the tones. First, add an adjustment layer to the picture by opening the channel mixer window. Select Monochrome and adjust the RGB values to create a black and white image to your own personal preference. Next, add another layer by opening the color balance window. Here you can change the colors of the light areas by selecting Highlights and changing the color sliders, ...
This video shows you how to use an aspect of Photoshop so that you can fix snapshot pictures that may have gotten an exposure level you did not want. This quick and easy tutorial video shows you how easy it is to adjust the layers in the screen. With different adjustment tricks for the layers to use if you are unsatisfied with the results you are getting. Each video will take moments to do and once saved you can move on to edit any other photos that did not come out with exposures that you wa...
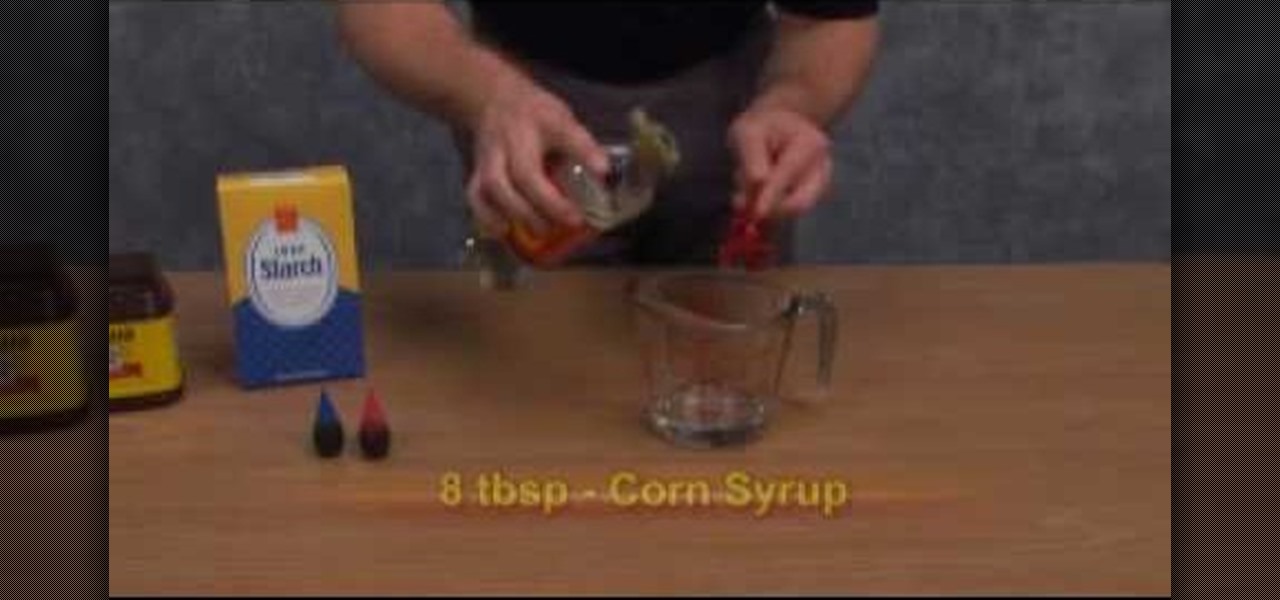
A tutorial and demonstration on how to make fake blood. Things you'll need: 8 tbsp. corn syrup, 1 tsp. red dye, 1 1/2 drops blue dye, 1 tsp. cocoa powder, 1/4 tsp. corn starch. Combine all the ingredients in an empty container. Mix well until everything is well incorporated. Make necessary adjustments to the ingredients if needed. Follow these steps and You'll be able to make a fake blood.
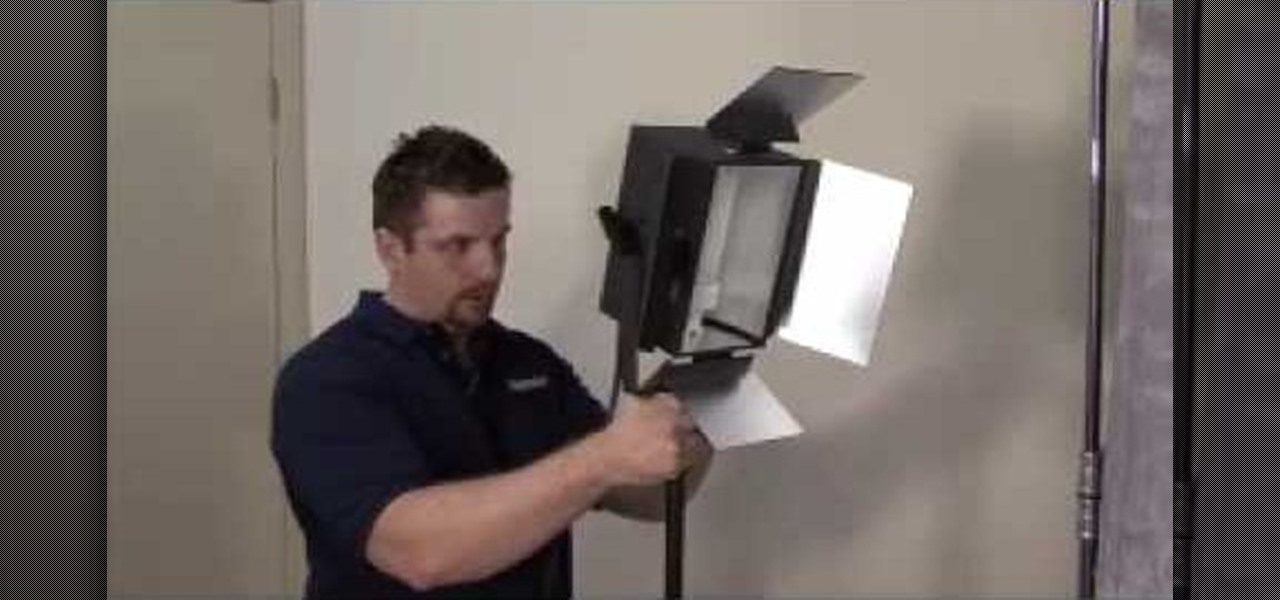
Interviewing lighting basic training tutorial provides easy to follow instruction in this step by step video. Set up the interview area to allow the best camera angles. Place your lights in key, fill, and backlight positions. Use back lighting spillover to fill subject area without camera spillover. Check your setup with the subjects and make any necessary adjustments to your camera or lighting angles. Place your crew and your ready for your interview. This scenario using key, fill, and back-...
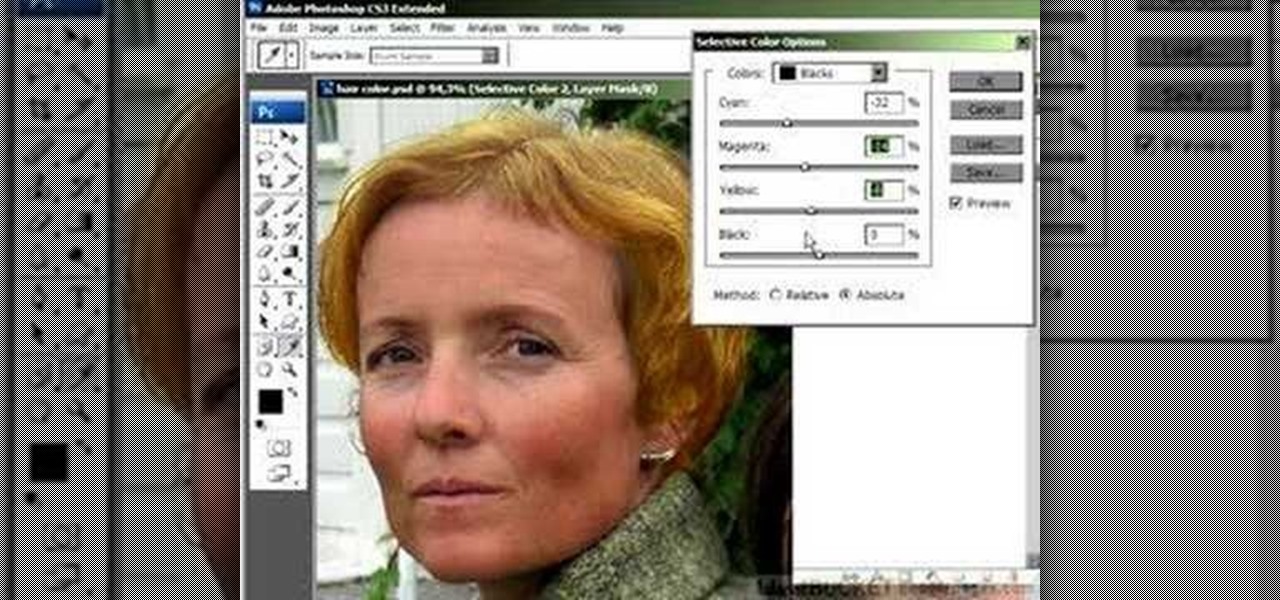
In this Photoshop tutorial the instructor shows how to change the dark hair color to blond. To get this accomplished you need to use a couple of very special techniques. First use the selective adjustment layer and select the outline of the hair. Now use the selective color option and change cyan and magenta settings to about minus forty. Now changing the other yellow color to achieve saturation and black colors to achieve the effect with shadows. Now next change the colors of black so that t...
In this video we are going to light cast a window so we can add more focus to the photos. First take unremarkable photo, then find a window image to transfer and select all Ctrl+a. After that copy it to the previous image. Click layer 1, then select the white space in the window that allows the sun light to pass by using magic tool quick select the part of the window. Delete the layer, after that go to adjustment layer, select levels. Adjust the level so that the color of the window is darker...
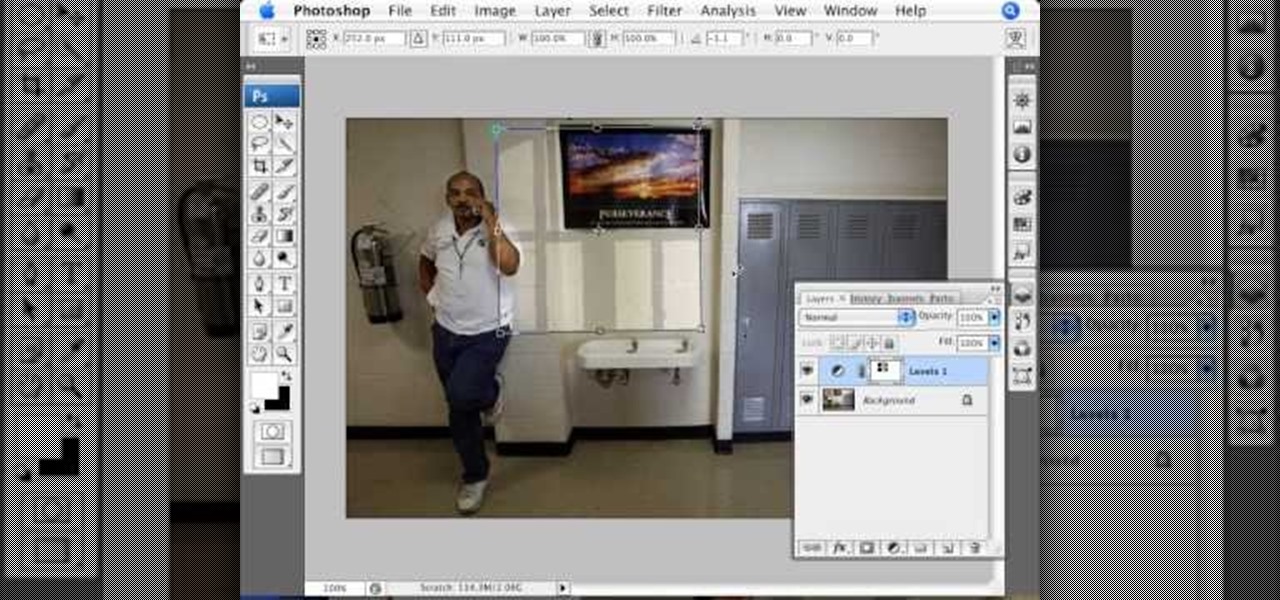
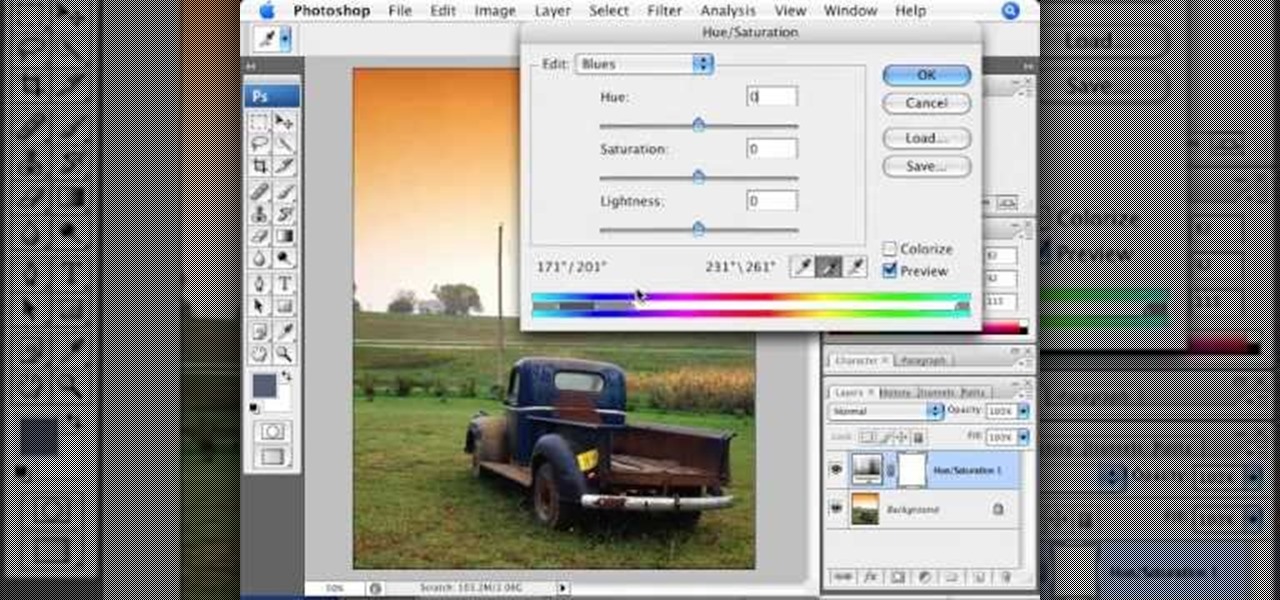
Adjusting the color of specific objects within your images in Photoshop is crucial. Sometimes fine tuning the color of just one component in an image is required. While an image may be adjusted globally at once, this approach lacks flexibility. This tutorial will show you the proper steps from the creation of an adjustment layer to the appropriate and functional calibration of the hue and saturation options. Get the most out of these tools and maximize your productivity in Photoshop.
Instead of using Photoshop, why not give Apple's Aperture a try? Aperture is designed more for post-production work for professional photographers, letting you cull through shoots, enhance images, manage massive libraries, and deliver stunning photos.
With a little practice a cushion cover can be made at home easily. The materials/equipments required are as follows: fabric of your choice (having appropriate dimensions) to make the cover, scissors, measuring tape and ruler, needles, threads, sewing machine and an iron.
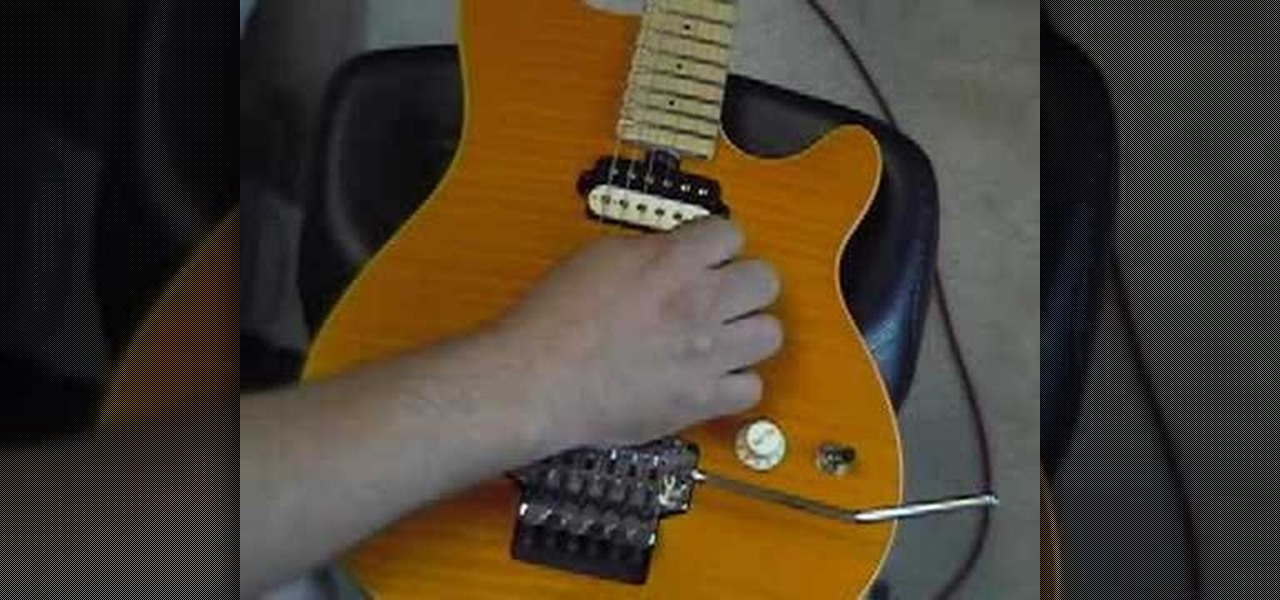
In this video, we learn how to adjust the spring tension on a Tremolo. First, find the strings in the back that are parallel to the body of the guitar. Then, unlock the nut and set the fine tuners so you have maximum range of adjustment. Start to twist the tuners at the bottom of the guitar until the tension on the strings is enough for you to play correctly. Then, go to the back of the guitar and adjust the crimp screws that are along it. When finished with tightening your guitar, test it ou...
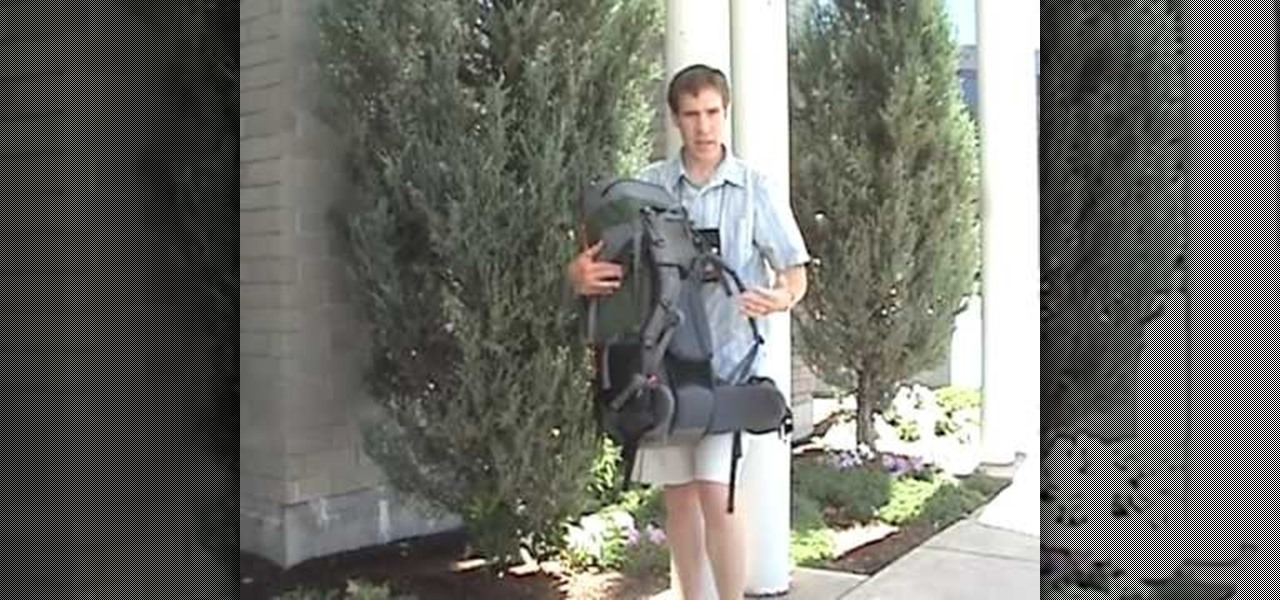
In this tutorial, we learn how to fit a backpack for long distance hiking. For scouts, look for a backpack with an adjustable torso so the pack can grow with you. After this, have the sales staff help you adjust your pack correctly, and measure how long the pack is on your back. You want the pack to fit you perfectly so you don't have back problems later. Try the pack on both on the hip section and shoulder to see how it feels on you. Tighten any adjustments to make it more secure, then you w...
Living with quadriplegia requires a lot of adjustments. Physical therapy and occupational therapy are a necessity, after your physical condition has been stabilized. Physical therapy is necessary to regain and maintain as much coordination and strength and flexibility possible. The occupational therapy will teach you how to perform as many of your daily activities of living independently as possible. It is important to have emotional support. Attitude is important. You have to stay positive. ...
In this clip, actress Julie Crisante explains some of the hardships you might have when you uproot and make the move to Los Angeles. Make sure you are ready for the major adjustment you will be facing. Los Angeles is an incredible city - it is beautiful, the people are friendly and always fun - but moving as an actor can be difficult for some. A lot of actors wind up leaving in their first year when faced with the cost and competition. Stay focused and stay in LA with these helpful tips from ...
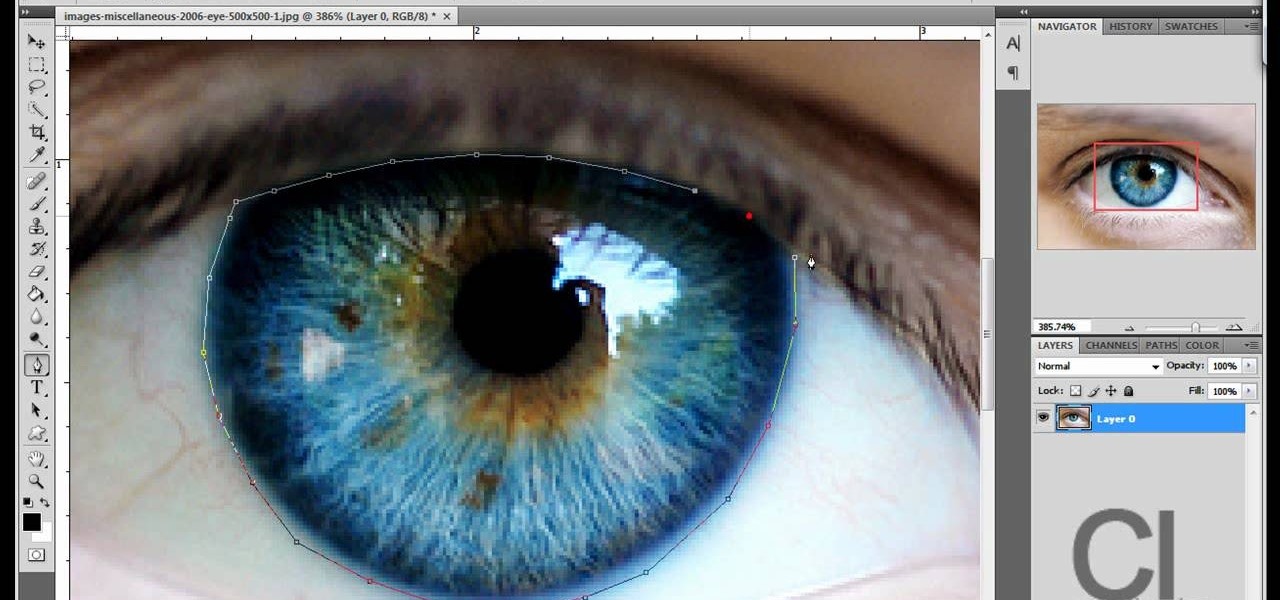
Changing the color of your eyes is very quick using Photoshop and this handy video. After using the selection tool of your choice to outline the eye (this video uses the pen tool) with a little bit of feathering, just change the hue of the eye. The video shows how to do this by pressing control + h, however it can also be selected by choosing the image menu, then adjustments, then hue/saturation. This great effect can be used as shown on close up eyes or on smaller eyes further away. Both way...
In this video from FiveSprockets we learn how to light an interior space while filming on a budget. For this you need two Chinese lanterns which he found for $2.95 each. You need 2 light bulbs which he found for $3.95 each. Make sure you get extra ones. Then get a couple of pan lights. They are day light and mood light. They were $7 and $5. You also need a multi colored gel pack which is $6.00. He uses C-stands to hold the lights up but he suggests coming up with other ways if you don't have ...
In this video tutorial the instructor shows how to perform basic lighting corrections in Adobe Photoshop. The levels tool is the Photoshop's most used command which has many features to it. Its most basic function is as a lighting correction tool. In this video open an image and work on its adjustment layer so that you do not damage the original picture. Now choose the levels option by right clicking and it shows a pop up window which contains a histogram which shows the population of the col...
Don't know how to create the night vision effect using Photoshop? Well, this video is the solution for you. First of all, select the image that you want to create the effect on. Then you need to open up a new black and white adjustment layer. In the setting box that pops up, go under the preset drop down box and select red filter. Next, go down and check the tint box. After wards, the viewers can set their own photo and saturation base on their own preference.
This is a quick and easy tutorial for Photoshop on how to create a simple but effective reflection of an object. This tutorial uses vector masking, scaling, hot keys, vertical flip, gradient tool, and opacity adjustment. After watching this video you will be able to make a reflection of any object you would like. The product of the tutorial will be a half faded reflection that actually seems as though the image is sitting on a reflective surface such as metal, glossy tile, or a wet surface. A...
New to Apple's Aperture 2? Aperture 2 offers photographers a streamlined way to speed through edits, make essential adjustments, and deliver photos online and in print.
This software tutorial shows you how to use Dr. Brown's Place-A-Matic script in Photoshop. Learn how Place-A-Matic allows you to open multiple images as Smart Objects in Photoshop.
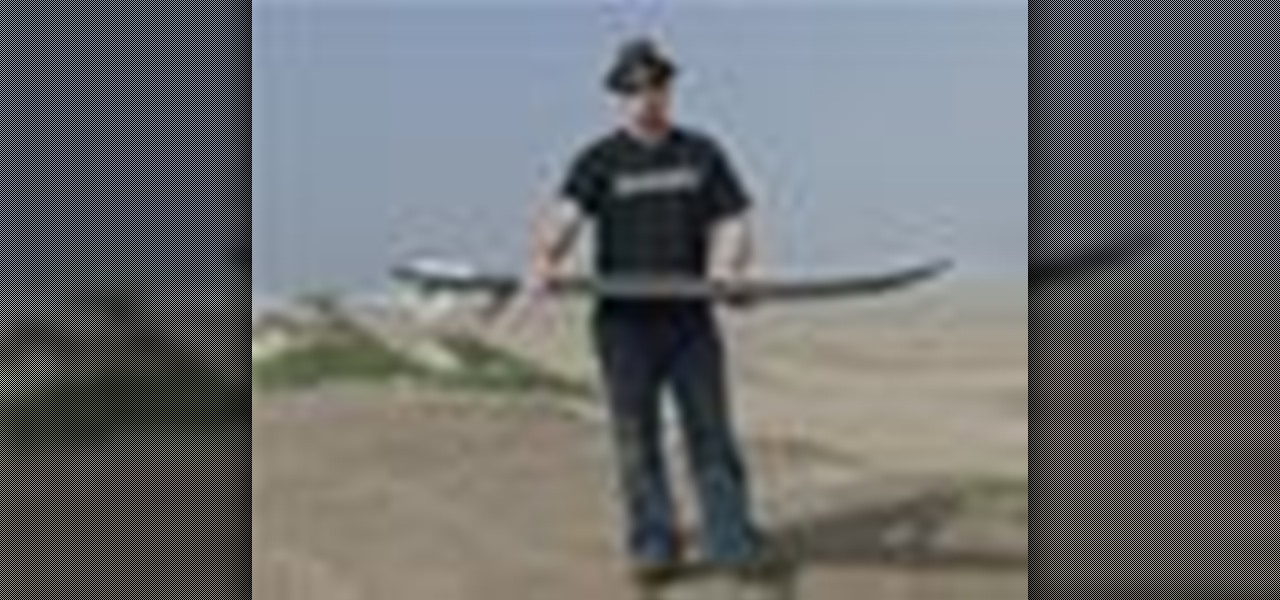
Changing positions on a surfboard is one of the hardest things to learn how to do. Get expert advice on surfing techniques in this video lesson. Take action: use proper foot position, shuffle feet to make minor adjustments, and remember that sweet spots are different for every individual. Mike Jones, the instructor of this how-to video, has been surfing since he was only six years old. He was lucky enough to surf the pro tour for a few years before starting his own surf shop and clothing bran...
In this motorcycle tutorial you will learn how to check and then adjust the valves on a Kawasaki KLR650 motorcycle. You will need to remove the bodywork of the bike first. Once you've done that, watch this video and get ready to do a valve check on the KLR and then a valve adjustment.
This two part segment from Giant Bomb takes you through the 'Cloak and Daggers' sidequest available in Deus Ex: Human Revolution. To begin the sidequest, you will need to speak with the undercover cop, Jenny. She is located in the northern area of the Detroit and will ask you to uncover information on a crooked cop named O'Malley.
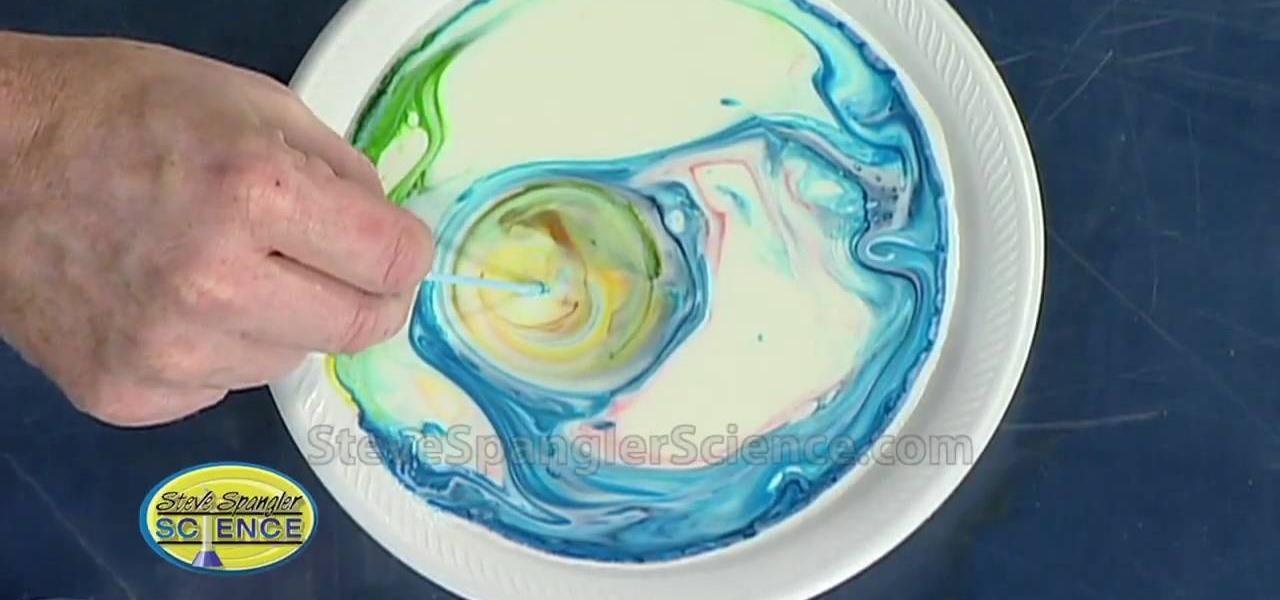
Soap is an incredible thing and this how-to shows some of its incredible qualities. You'll need a plate, some whole mile, some food coloring, some Q-tips and some dish detergent. It's an explosion of color! Some very unusual things happen when you mix a little milk, food coloring, and a drop of liquid soap. Use the experiment to amaze your friends and uncover the scientific secrets of soap.
Watch this software tutorial video to learn how to uncover Outlook 2007's best features: drag-and-drop calendaring and color-coding. This how-to video will allow you to use drag-and-drop calendaring in Outlook to make your calendars better.
Did you know the iPod bar graph in iTunes display has hidden view modes? It's true and Veronica uncovers them in this video.
Watch this video and uncover the delicious mysteries of fava beans. Learn to clean and cook them