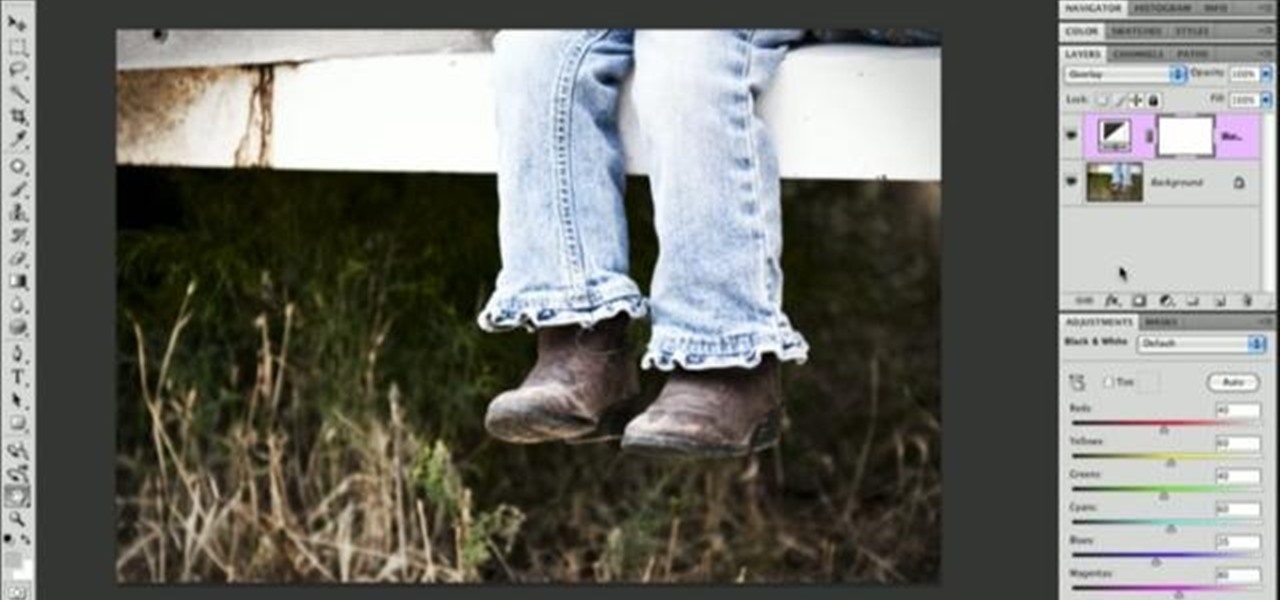
In order to add a nice contrast punch to an image using Photoshop, go to your adjustment layer and click on the black and white adjustment layer. Then go to your "blend modes" and change it to "overlay". If you find that the effect is too harsh you can adjust your opacity settings or you can switch your blend mode to "soft lights". In "overlay" using the black and white adjustment panel you can change your settings to meet your preference. If you are using a previous version of Photoshop that...
Pattern brushes in Illustrator can create additional interest and a custom look to shapes in Photoshop. Follow the steps in this tutorial to learn how to create new pattern brushes in Illustrator. In a series of steps creating different shapes aligned in different patterns, the create new brush command can duplicate those patterns as a brush stroke. The end effect allows us to create different designs quickly that can then be used for logos, art projects, and many other things.
Outcomes are endless in Adobe Illustrator. You can create pretty much whatever you can think of and what you can create. This tutorial will demonstrate how to create a glass bar in Adobe Illustrator. You will need to:
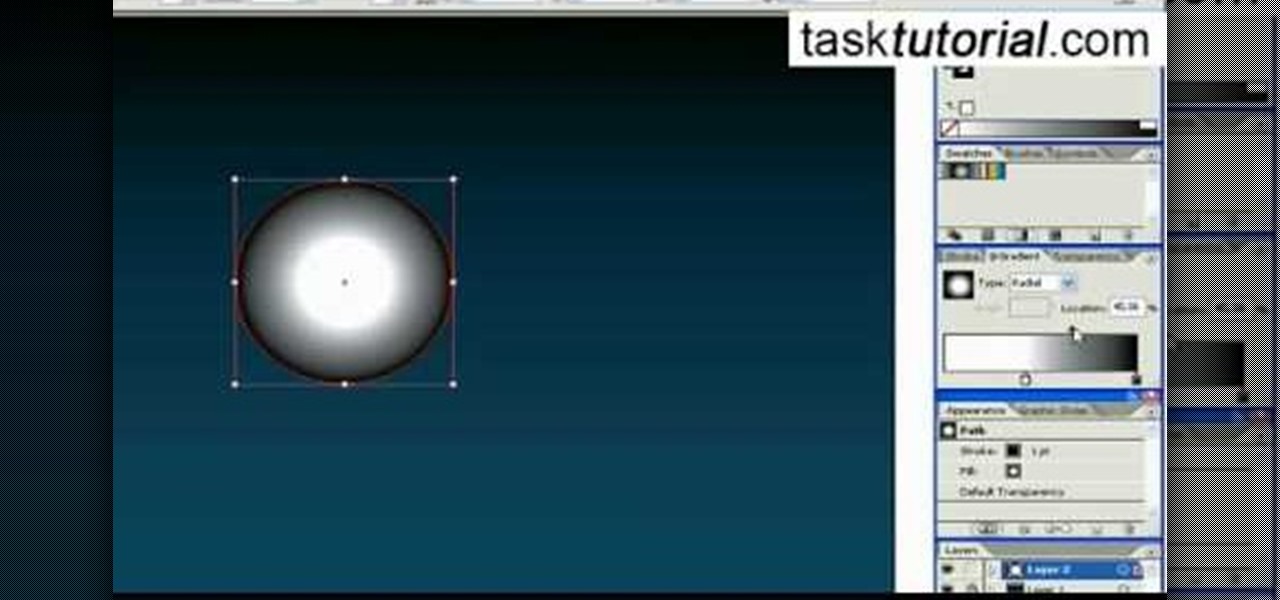
Want to create some cool effects in illustrator? Create a new layer. Draw the ellipse tool and add radial gradient, then go to transparency and select screen. Then create the star tool and deselect stroke. Drag and place the star shape on ellipse and group them. Then duplicate that layer to make multiple sparkles on different layers. Resize other sparkles by holding down shift key. One can change colors of other sparkles. This will help you in making a good background.
This how-to video is about how to create a simple text effect in Photoshop.
In this Photoshop tutorial the instructor shows how to mask a photo to itself and produce a glowing effect. First open the image in the Photoshop tool and duplicate a layer and add another layer in between filling it with white. Now select and copy the whole layer. Add layer mask to it and alt click it. Now paste the copied layer on the masked layer. Now do the control+I to invert the masking. Now the images gets a glowing effect on which you can apply the glossy effect on it. Now merge all t...

From task tutorial.com that how to create an envelope icon on illustrator. First draw a rectangle change the angle to 90 degrees then select gray color, select pen tool draw a shape and then go to layer select duplicate then rotate the shape using left mouse button by selecting the rotate tool. Now using down arrow key move the shape to down ,choose select tool and resize the shape then select the path go to gradient and change it angle to 90 degrees. Finally select the layer and go to effect...
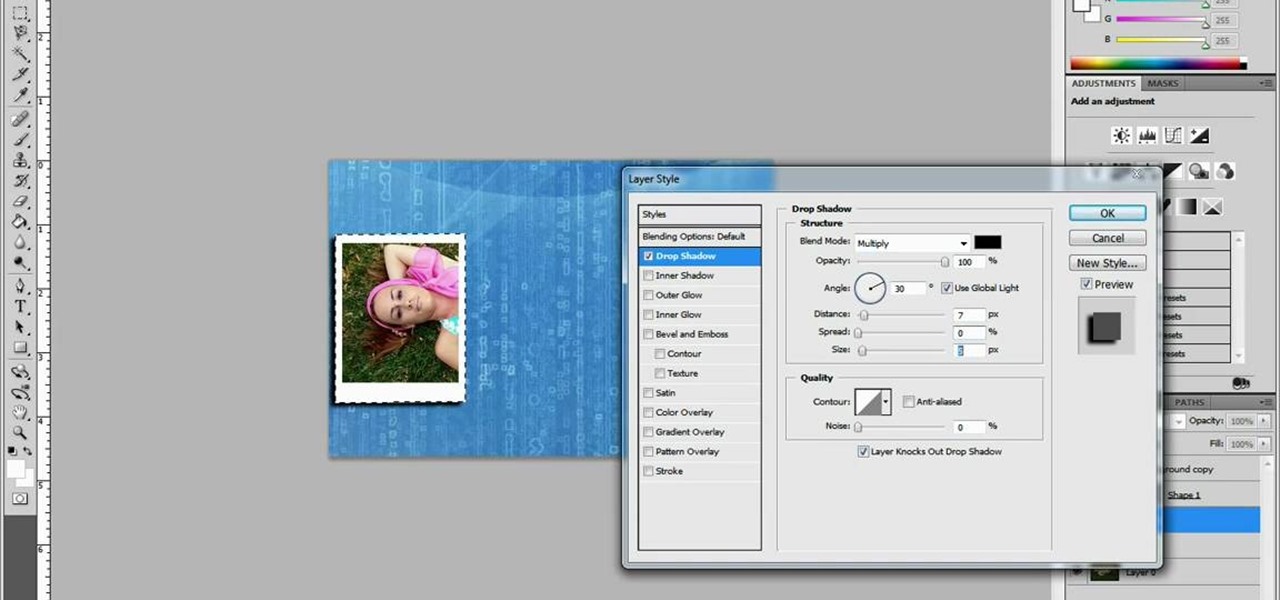
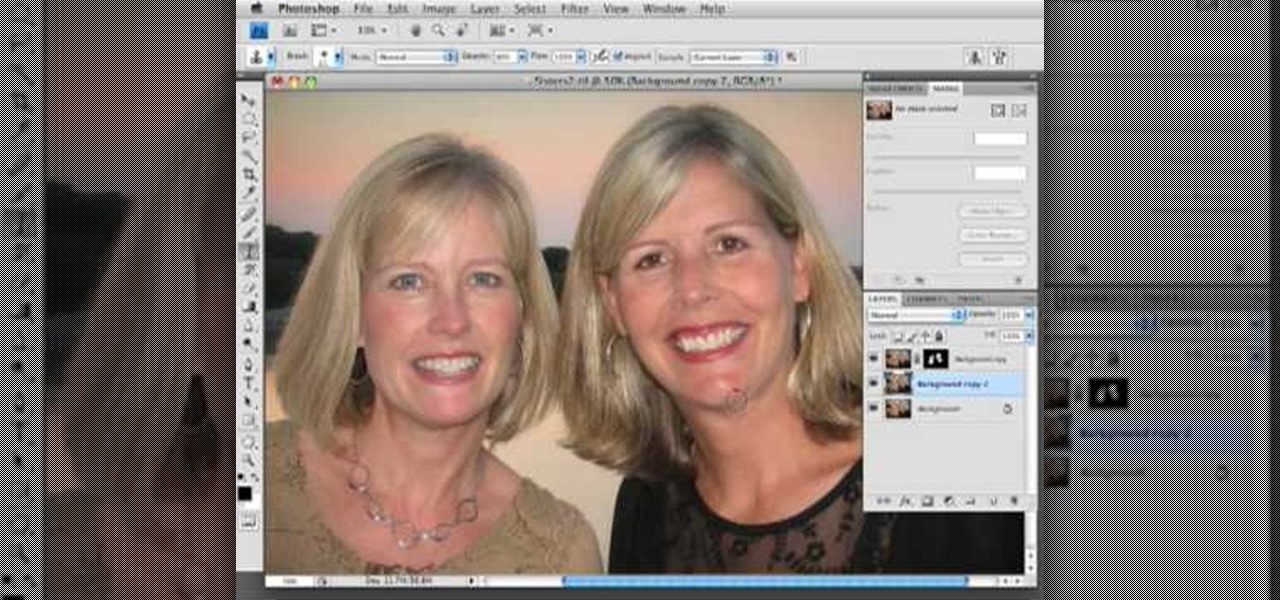
This video shows you exactly how to great a collage using Photoshop. Step by step, from duplicating the layer, dragging, and every tool you'll need to learn to achieve the best collage possible. You can use this to make a cool, unique, and interesting collage, to share with your friends and family. This tutorial is easy to follow, so if your looking to master your Photoshop skills or are just learning how to use the program. This video shows you an alternative to the typical photo albums, and...
In this tutorial, we learn how to create amazing 3D text in GIMP. First, start a new image with the width and height that you want. From here, select the text editor and then type in your text. After this, change the font to what you want and then change the size and color as well. From here, you will duplicate the layer and then go to layer, and then filter. Select the map button and then map the object. Select the text and then show the preview to make sure it's what you want. Change the or...
In this video, we learn how to join lines in Xara Xtreme. All the lines in this are independent, but they can be joined together to make an object. First, open up the object gallery and then duplicate the layer. After this, copy the image and increase the line size by four pixels. Then, go to "arrange" and "combine shapes". From here, the shapes will all combine together to make one total image. Make a rectangle around this and then select "subtract shapes". Combine the layers to finish, then...
In this tutorial, we learn how to make a Duct tape hat. First, grab a hat that you want to duplicate and measure it out with a piece of paper. Then use this piece of paper as reference to how you will cut your pieces of duct tape. Now, cut the duct tape and stick them together to create the top of the hat. After this, you will connect the other areas of the hat together and make the bill of the hat. This will need to be thicker than the other areas and you will also have to cut it into a curv...
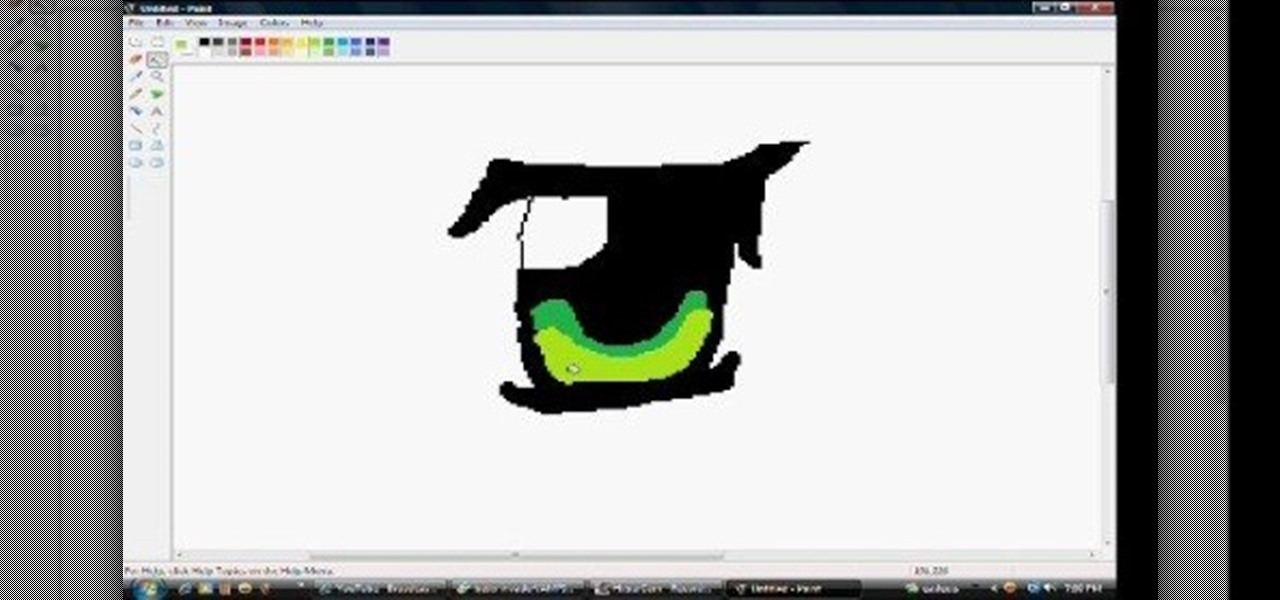
In this tutorial, we learn how to draw anime eyes in MS Paint. First, open up MS Paint and then grab a marker that is thick. From here, draw in a thick line that will be the top of the eye. Then, draw in the round area underneath the eye and the pupil inside of this. Draw in the bottom lash line of the eye, then start to add detail to the middle of the eye. Use the dark line to create a thicker line around the pupil, then fill the eye in with black. Leave a white part to make the eye look glo...
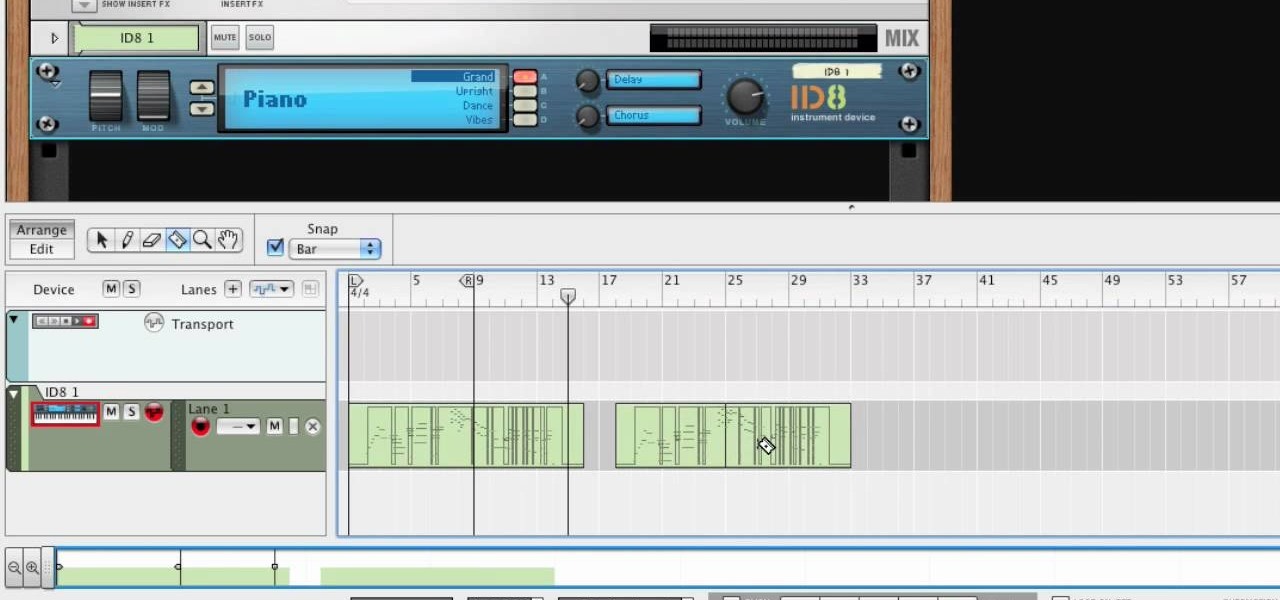
In this tutorial, we learn how to use MIDI in Record. First, automatically find your controller keyboard and set it up in your software. With this set up, create an ID8 instrument by clicking on the icon. Settle for a grand piano and record something to test it out. All clips are recorded and save mini notes, data, automation, and more. Clips can be moved, resized, duplicated, split, and joined through Record. These make up the arrangement and make the music. You can automate anything you wan...
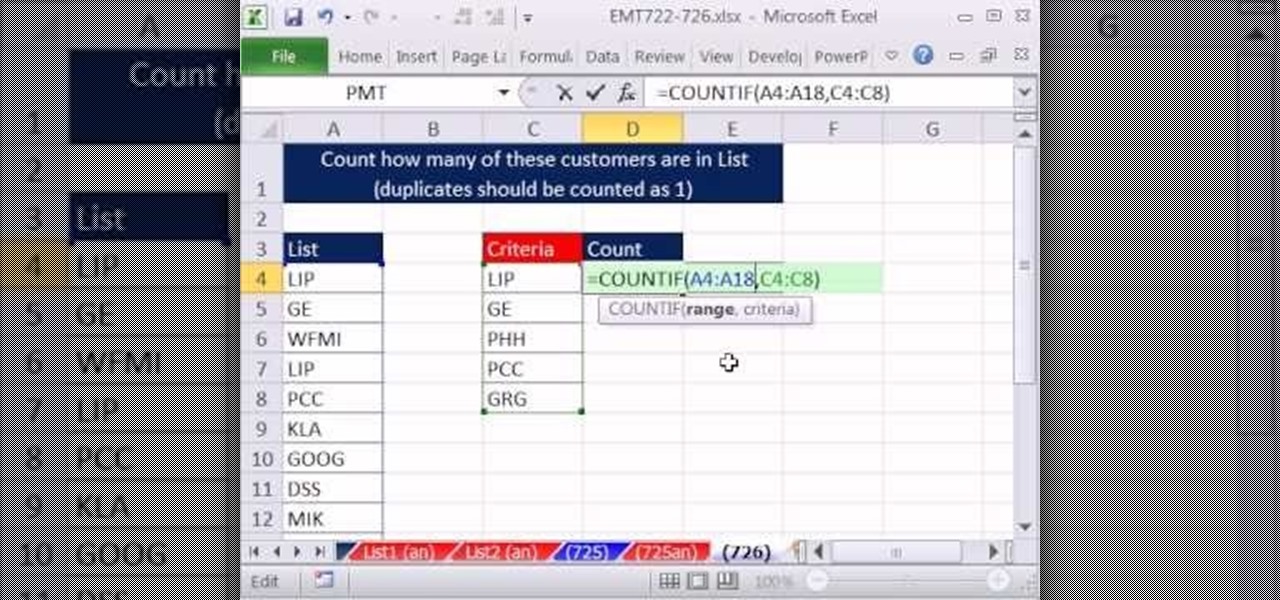
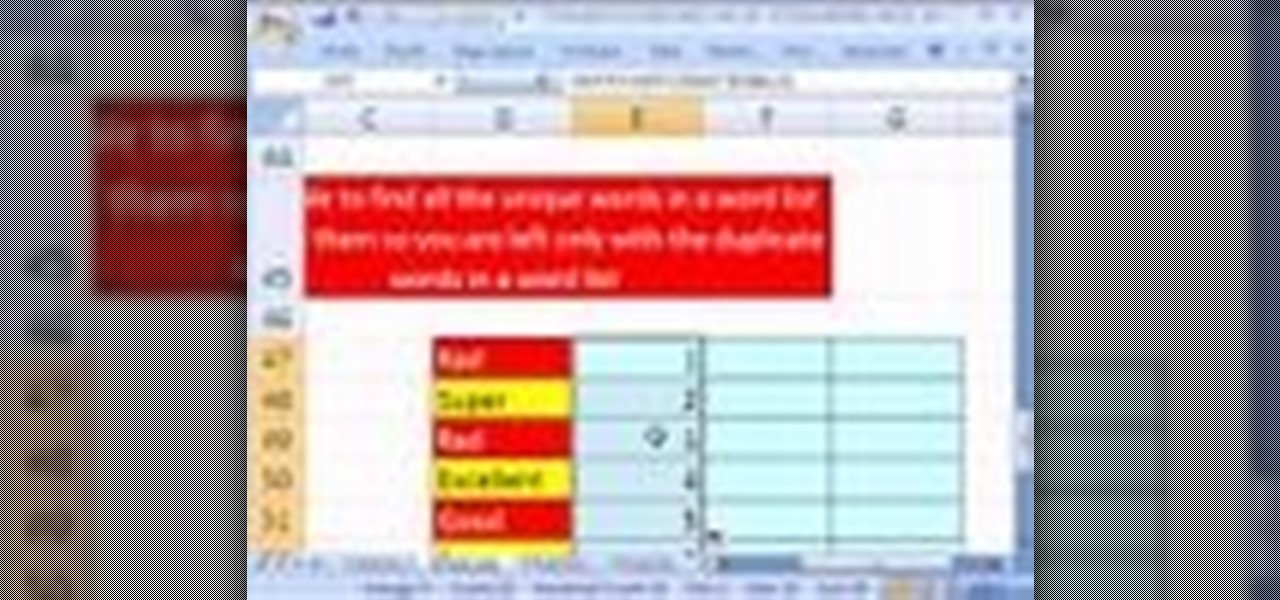
New to Microsoft Excel? Looking for a tip? How about a tip so mind-blowingly useful as to qualify as a magic trick? You're in luck. In this MS Excel tutorial from ExcelIsFun, the 726th installment in their series of digital spreadsheet magic tricks, you'll learn how to use the SIGN, COUNTIF and SUMPRODUCT functions to count 1 for each item in a first list that's also contained in a second list.
In this video, we learn how to remove acne spots with Photoshop. First, open up the picture and zoom in on the acne you want to remove. Now, unlock the layer by right clicking and unlocking it. Next, use the clone stamp tool while pressing alt to clear the skin where the blemishes are at. Click constantly on the acne until all of it is done. You want to click as many times as possible to get the best effect in removing this. When you are finished with this, duplicate the layer, then change th...
In this video, we learn how to convert an image into a sketch in Photoshop. First, open up Photoshop and open the picture you want to convert. Now, click the layer and unlock the background. After this, go to "image", "adjustments", and remove all the saturation from the photo so it's black and white. Then, duplicate this and invert it by going back to the adjustments section. Now, go on the top of the layers tab and select "color dodge" from the drop down menu. Now, go to "filter", "other", ...
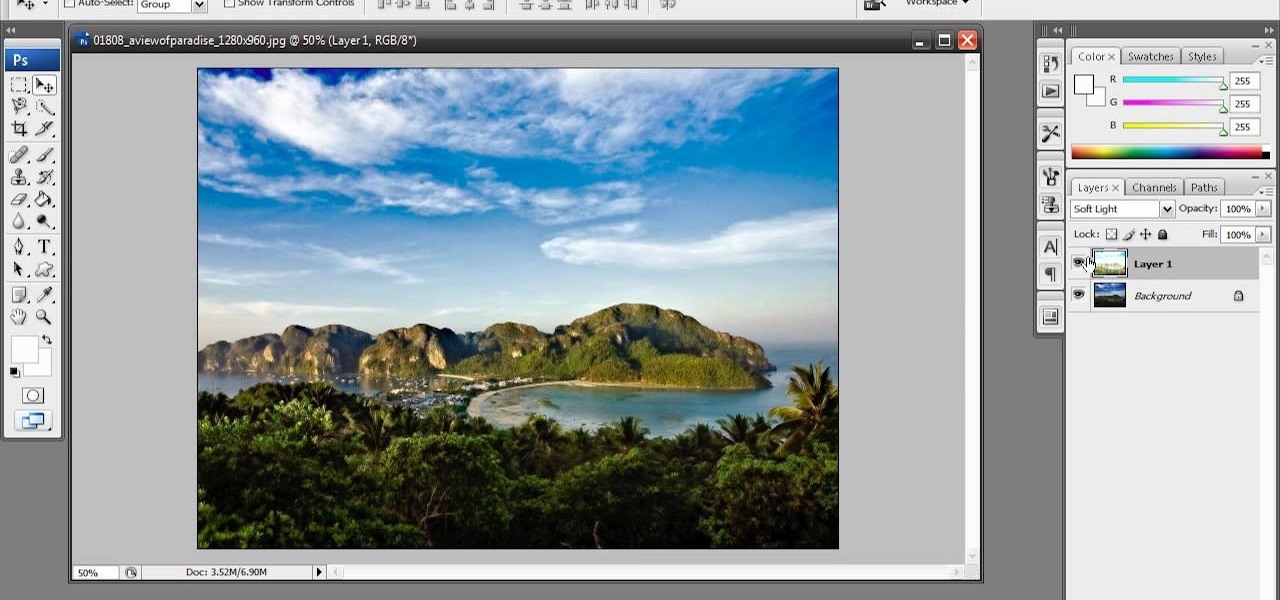
In this tutorial, we learn how to use the soft light layer mode in Photoshop with Yanik Chauvin. This will reduce gray in the picture. First, duplicate the layer and then click on the blending mode menu. Click on the soft light option, then your photo will adjust and have saturation in it. The flatness will be removed from the image and the gamma will be increased. If you find this too strong, you can go into the opacity slider and adjust this to what you think fits your picture. When finishe...
Yanik Chauvin teaches us how to color correct product shots in Photoshop in this tutorial. First, remove some of the black from the image by using your crop tool. After this, if your image is too wide, duplicate your layer and use the marquee tool to edit. Remove any dust spots from your image, to make it look more clear so you have an image that is impeccable. You can do this by creating a new layer and then adding a feather to the image. Continue to go through the editing tools available un...
In this video tutorial, viewers learn how to enhance an image in Adobe Photoshop. Begin by duplicating the layer by press the Control and J buttons. Then change the blending mode to Soft Light. Now press the Control and M keys to open Curves, and drag the curves up to brighten the image. Then click on Filter, go to Blur and select Gaussian Blur. Set the Radius at 2.7 pixels and click OK. This video will benefit those viewers who enjoy editing images, and would like to learn how to enhance a p...
The magic trick in this video can be performed with nothing more than items found in your local restaurant or bar.
Kim Kardashian is beautiful and any girl would most likely love to duplicate her look. Well, if you are a fan of Kim's - or at least her makeup! - check out this video and replicate it for yourself.
Love Microsoft Excel? This clip contains a tip that just might induce you to. With this free video tutorial from ExcelIsFun, the 32nd installment of his "YouTubers Love Excel" or YTLE series of free video MS Excel lessons, you'll learn how to use the MATCH & ROW functions to create a logical test to find the first occurrence of items in a list with duplicates.. Learn to love digital spreadsheets more perfectly with the tricks outlined in this free Microsoft Office how-to.
In this video tutorial, viewers learn how to create fog using Adobe Photoshop. Begin by importing the image into the program and duplicate the image. Now go to Filter, select Blur and select Radial Blur. Set the amount to 100, Blur Method to Zoom and Quality to Best. Now select the rectangular marking tool and select the sky. Then open the Hue/Saturation menu and set the Saturation to -100. Use the eraser tool to remove the gray from the edges. Now use the paint tool and paint white streaks o...
In this Software video tutorial you will learn how to sharpen blurry images using Photoshop. Open the image and duplicate the original layer. Then go to filter > other > high pass. In the window that pops up, enter a value of 4 – 6 pixels. Now simply change the blending mode of that layer to overlay by clicking on ‘layers’ and selecting ‘overlay’ from the dropdown menu. You will notice that you have a much clearer picture. Then go to filters > sharpen > ‘unsharp mask’ to add som...
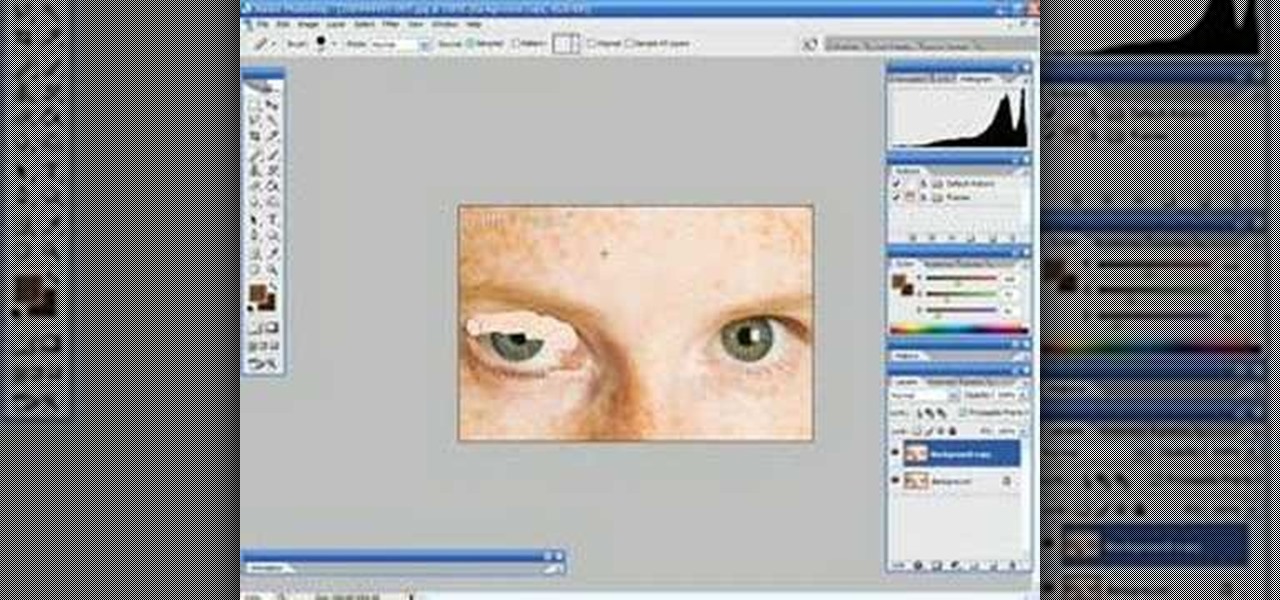
In this Software video tutorial you will learn how to make a winking animated GIF in Adobe Photoshop. Select a photograph of two eyes and duplicate the layer. Now copy the top eyelashes and paste them on top of the bottom eyelashes. Go to the eye drop tool and select a dark color. Then go to paint brush, choose a brush with size 1 and select darken in the ‘mode’ dropdown menu. Reduce opacity to 50%. Now darken the lower eyelashes as shown in the video. Then go to healing brush tool and se...
In this video, we learn how to turn a photo partially black and white using PhotoShop. First, open up the program and open up the picture you'd like to change. Now, click with the right key above the layer and choose duplicate "layer". Now click above the eye icon to hide the layer, then select the layer. Now you can go to image, adjustments, then black and white. Now make the second layer visible and select the eraser tool. Wave your brush over everything but what you want to keep colorful. ...
In this how to video, you will learn how to get rid of shine using Photoshop. This is useful if you took a picture using too much flash, causing shine to appear on the faces of those in the photo. First, open the image in Photoshop. Duplicate the background layer. Select the clone stamp tool on the left and select a brush with no hardness. From here, change the opacity to 80 percent. Click the option key on an area of cheek. Now, click on the dots of shine on the faces. This can be used on wr...
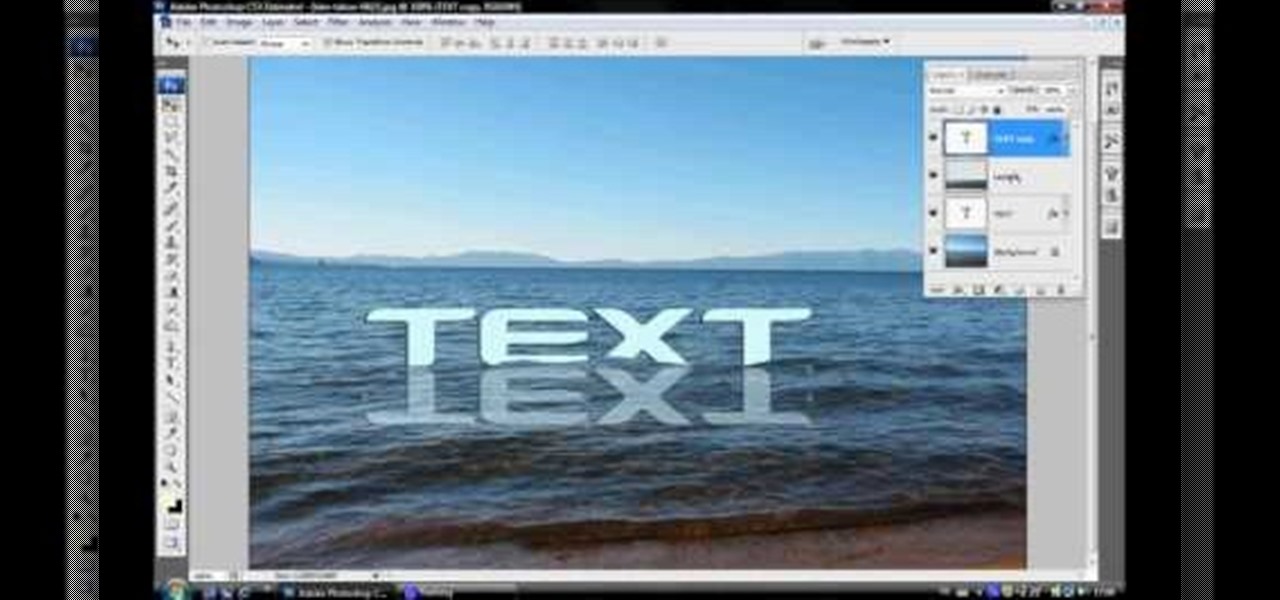
In this video tutorial, viewers learn how to make floating text on water. Begin by importing the water image into the program. Begin by selecting the polygonal lasso tool in the toolbox and select the top of the water. Once you have made the selection, right-click on it and select Layer via Copy. Then select the text tool and type in your text. Create a contour to make the 3D and give the text a light color. Then place Layer 1 over the ext layer and use the selection tool to place it behind t...
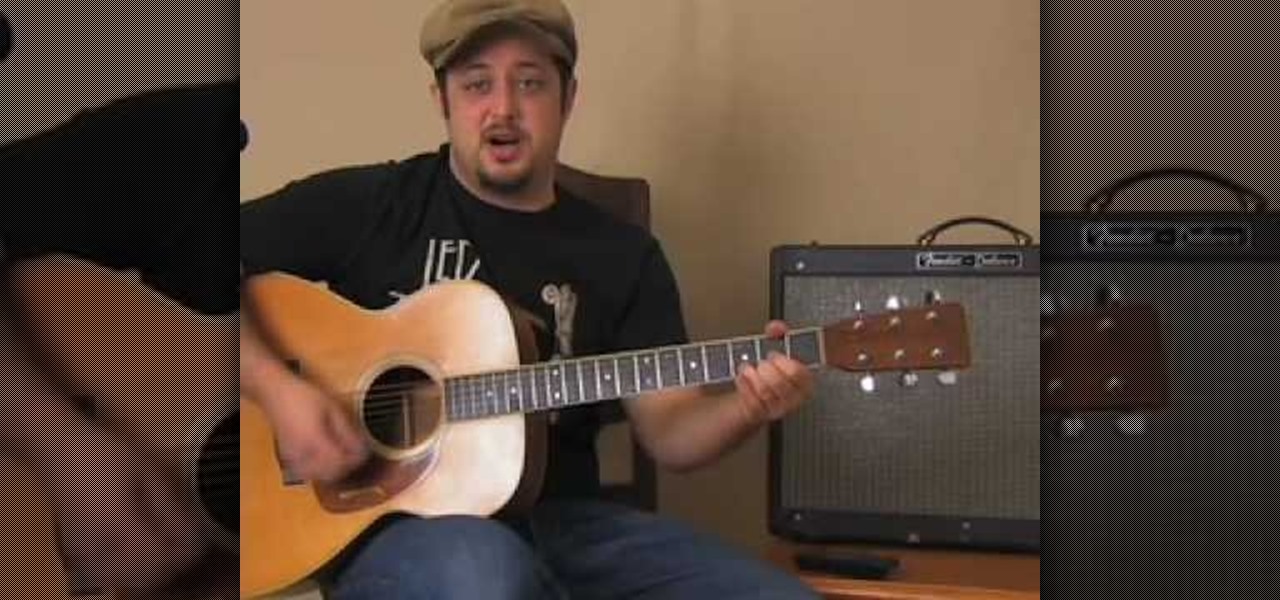
Jack Johnson is a great musician. His music is catchy and heartfelt and it seems like everybody is a fan. In this tutorial, learn how to play your acoustic guitar in the style of Jack Johnson and impress your friends.
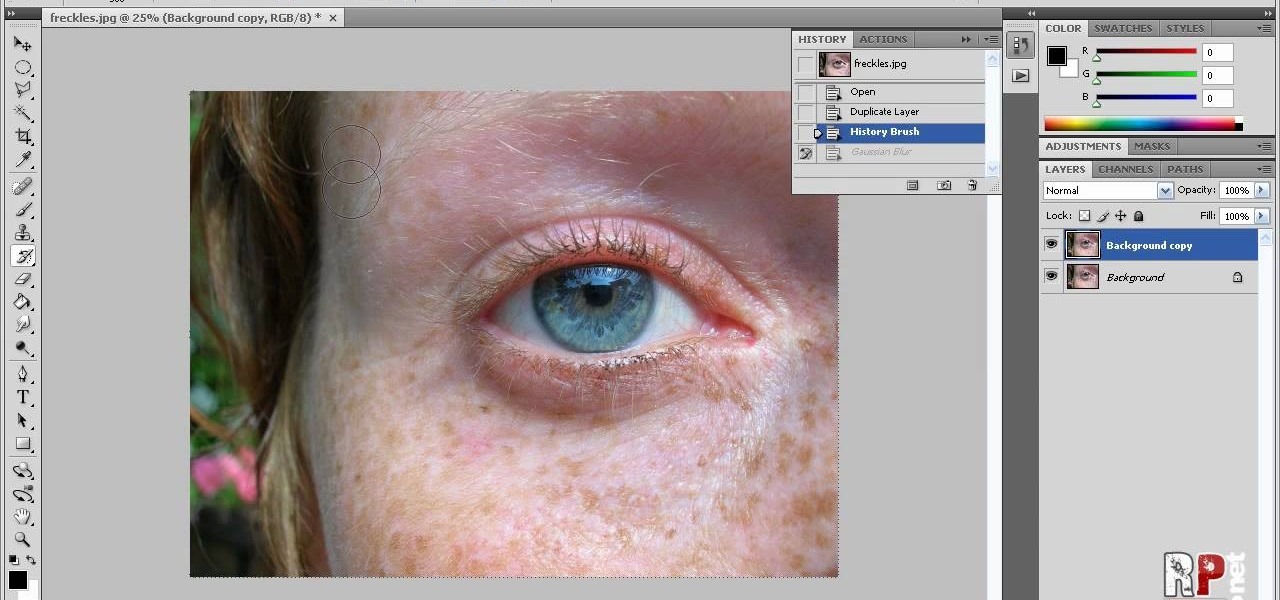
In this how-to video, you will learn how to reduce freckles in Photoshop. This is useful for editing people who have a lot of freckles. First, open the file in Photoshop and copy the background layer. Apply a Gaussian blur to the layer. Adjust it so that the freckles are no longer visible. Click okay and then open up the history palette. Click on the duplicate layer in the history window. Set the source for the history brush. Set the mode to light. Next, paint over the freckles. Now the freck...
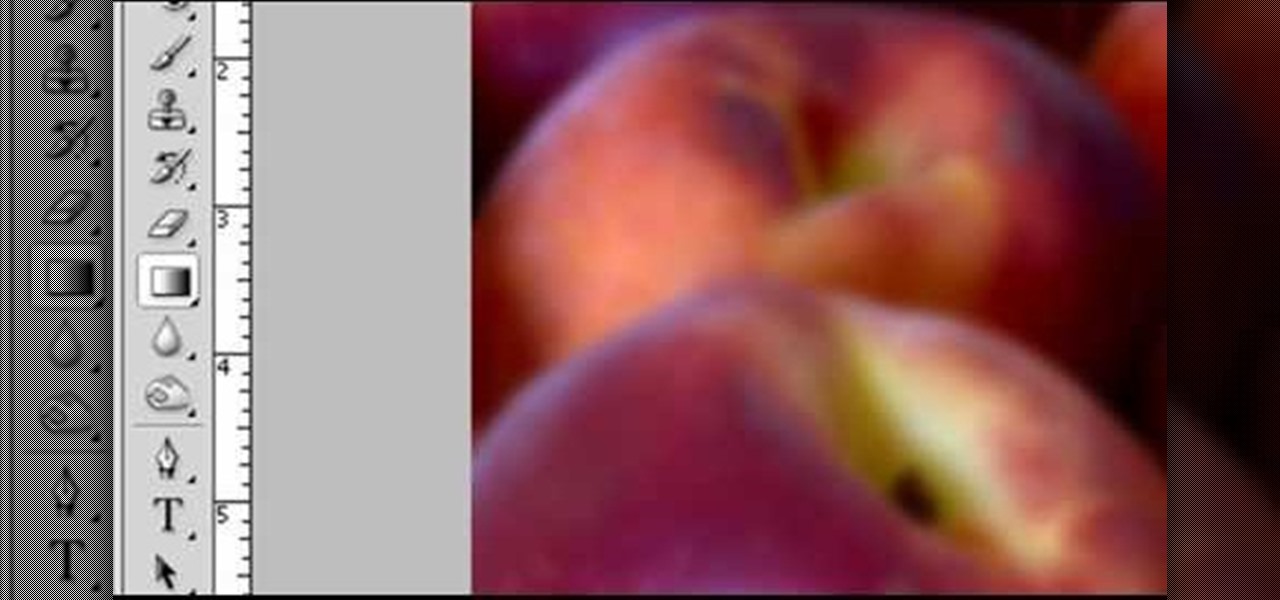
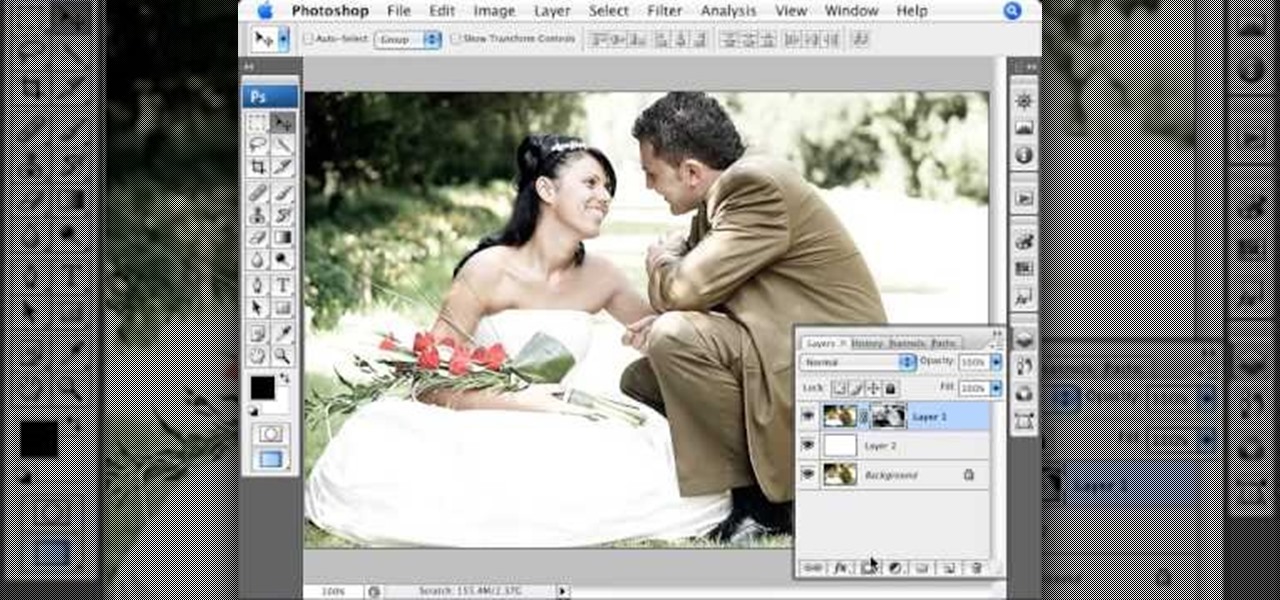
Robert with Roberts Productions demonstrates how to give your photos depth of field with Photoshop. You can create this effect by having a clear foreground and a gradually blurry background. First, duplicate the background layer. Then, go to filter and select Gaussian blur. Set it to a believable radius like 12 pixels. Create a mask by clicking on the mask icon. Then, make sure the foreground is set to black while the background is set to white. Next, go to the gradient tool and make sure tha...
River City Graphix Tutorials demonstrates how to make a reflection in Photoshop. First, fill the background layer with black. Then, select the text tool and a color of your choosing. Type the words that you would like to reflect. Next, duplicate the layer to make a copy of the layer. Hold shift and bring it down, setting it on the bottom of the other layer. Select the rectangular marquee tool, right click to get the free transform tool. Right click again and then flip the image vertically. Se...
New to Microsoft Excel? Looking for a tip? How about a tip so mind-blowingly useful as to qualify as a magic trick? You're in luck. In this MS Excel tutorial from ExcelIsFun, the 159th installment in their series of digital spreadsheet magic tricks, you'll learn how to solve Duplicate VLOOKUP function problems with a COUNTIF formula that creates a column of unique values for the first column in the lookup table.
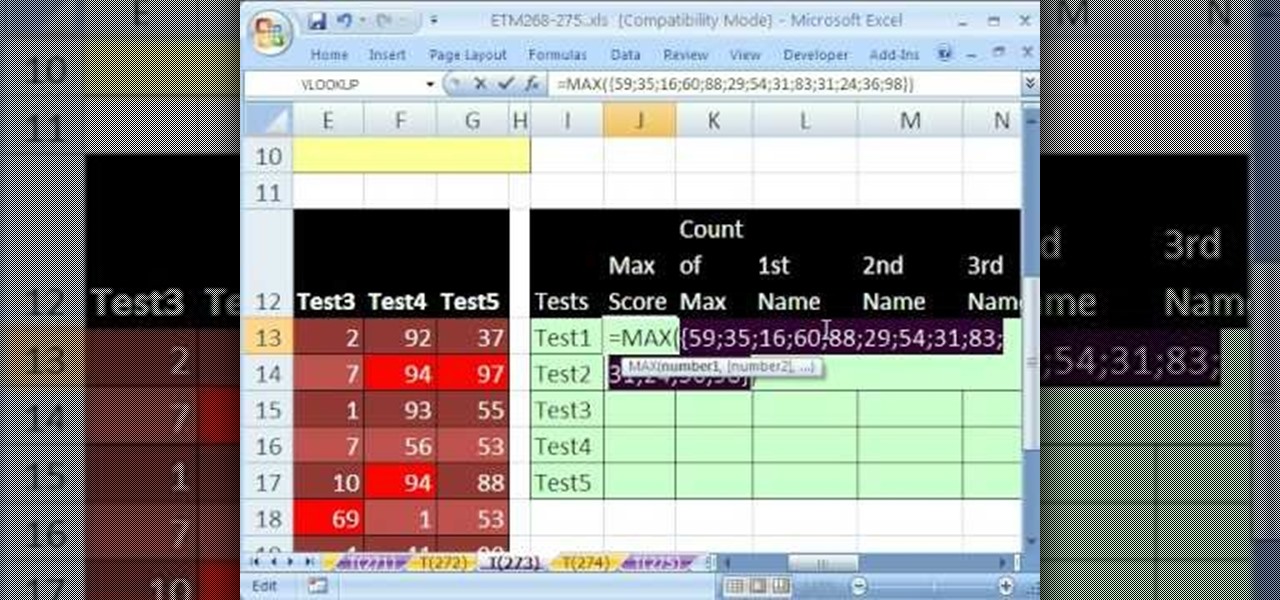
New to Excel? Looking for a tip? How about a tip so mind-blowingly useful as to qualify as a magic trick? You're in luck. In this Excel tutorial from ExcelIsFun, the 273rd installment in their series of digital spreadsheet magic tricks, you'll learn how to extract the top (i.e., max high) 5 values and their associated names from a column allowing for duplicates. This is accomplished with recourse to Excel's TRANSPOSE, COUNTIF, MAX, INDIRECT, IF, COLUMNS, INDEX, SMALL and ROW functions.
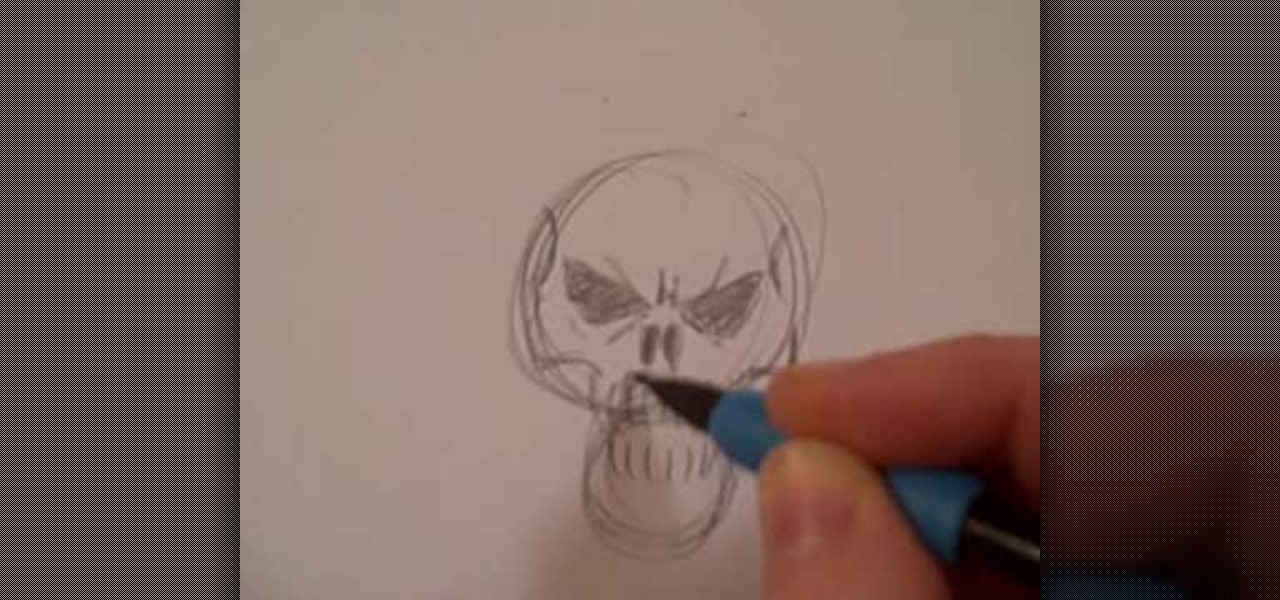
This short video shows how to draw a skull with a pencil. The video contains no spoken or written description of the process the artist in the video is going through, so to duplicate his drawing, you'll have to just watch and draw along. The artist starts the drawing by making two circles vertically, the lower circle being about half the size of the upper circle. He then adds the nostrils, eyes, and teeth, before going on to add some definition to the jaw area, making it look like a complete ...
Adding motion to graphics using Photoshop can create an exciting and dynamic effects. Select a picture you want to add motion to. First, duplicate the background layer. Then under Filters, select blur, and then select Motion Blur. Then you set the angle of the Motion Blur. You can select any direction and also set the intensity of the blur by setting the distance setting. Then you will need select the eraser tool and select under Options select the brush. Chose a soft edge brush and erase ove...
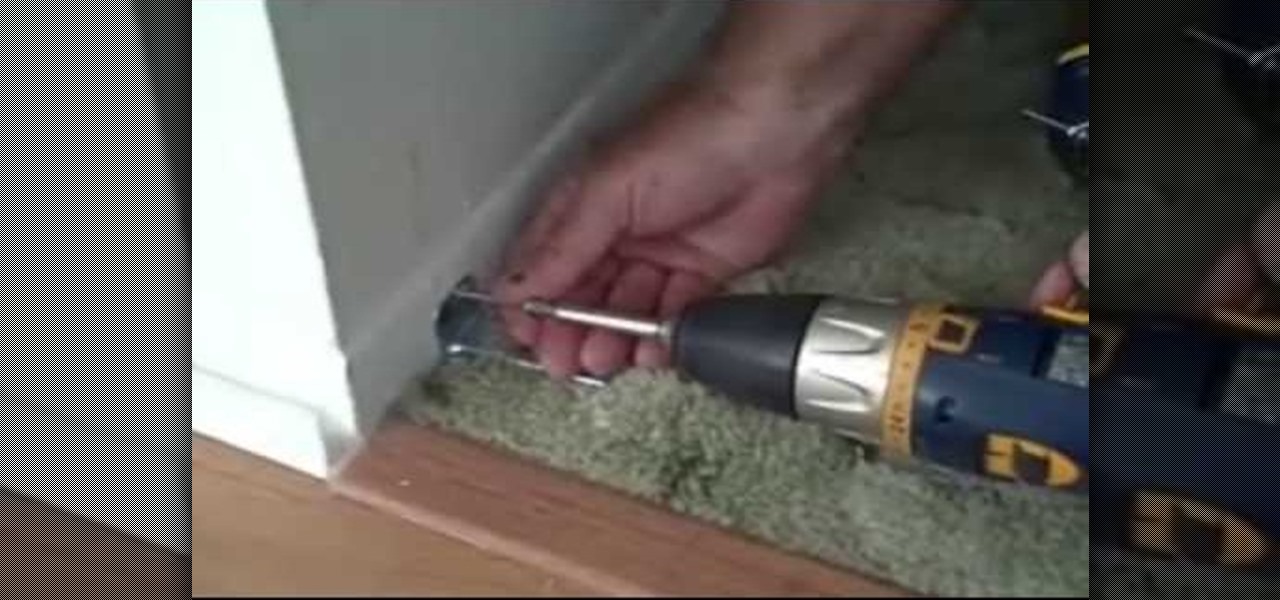
This video shows the method to install bifold closet doors. The doors are of two sizes. They include a thirty inch and a twenty four inch door. The video first demonstrates the installation of the thirty inch door. This is then repeated for the other door. The middle line of the upper part is drawn over the opening. The middle line is extrapolated to the sides to put the bottom support. The tracks are installed on the top. The floor bracket is fitted at the bottom. The top glides are installe...
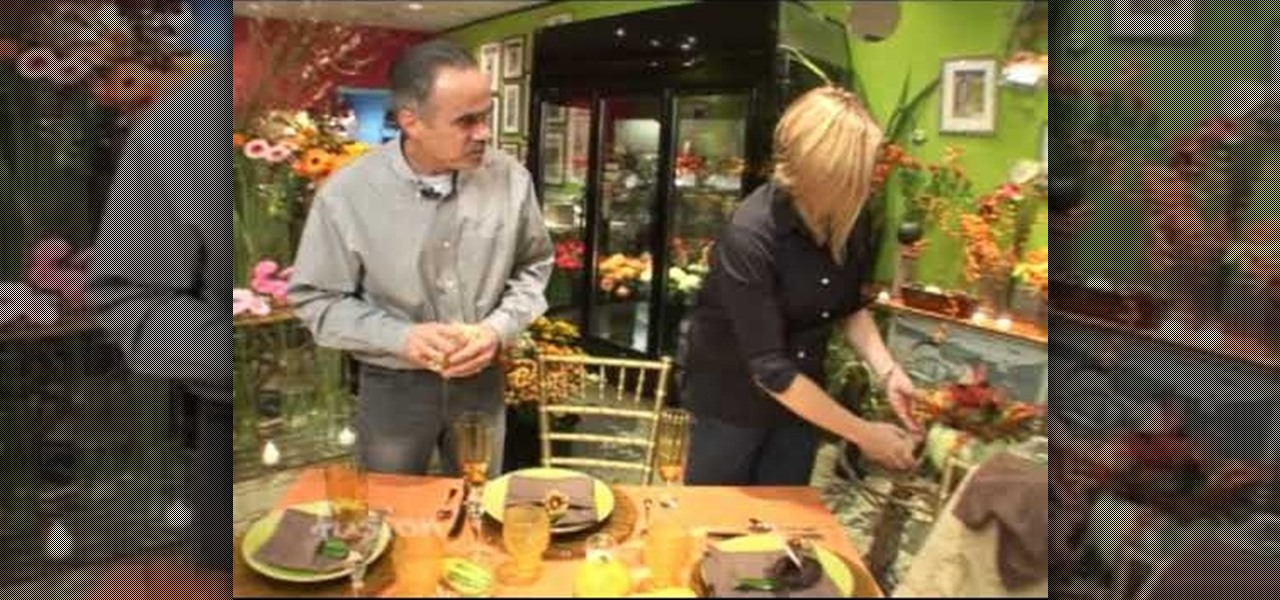
To make some flowers of geranium plant, the flowers are colorful and beautiful. Put the branches together to the main branch in various designs. Merge three leaves together to form a new design. Now start placing all the leaves to the main branch if you want. You need to make a petal to form the flower. Arrange the bunch of flower in middle of your dining table allowing its fragrance in the entire room. We will put the flowers together .This is very important and necessary step. We will dupli...
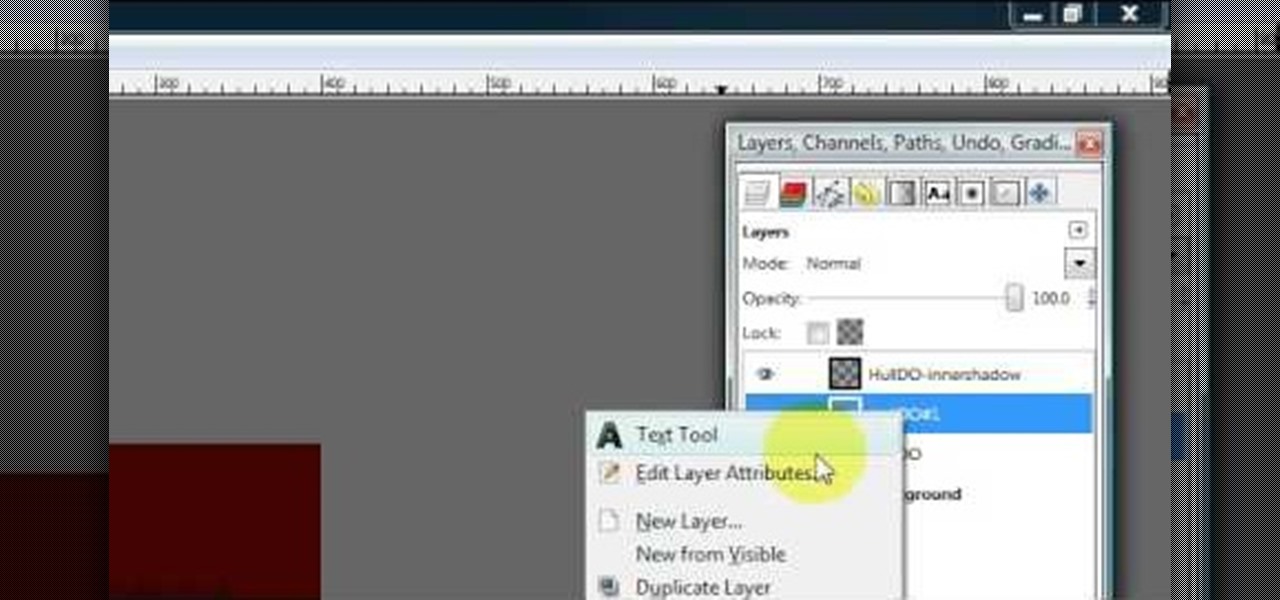
Hulldo teaches you how to create indented text in GIMP. First, create a new document of any size. Then use the text tool to write some words. Next, select that text and go to Script fu-layer effects-inner shadow. Once you've done this, duplicate the layer. You will now want to filter-blur-Gaussian blur. Apply that to your second layer. Now you can either merge the layers or leave them as they are. You can also play with the text settings, if you want a larger shadow, a bolder text and so on. ...
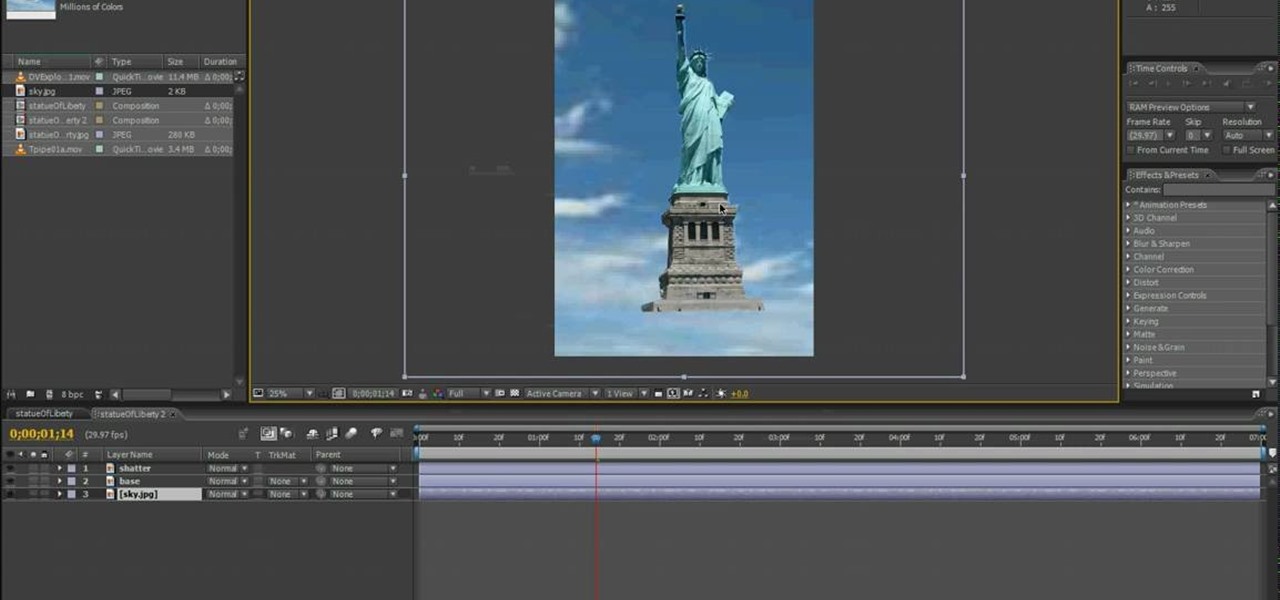
This video shows you how to create a building explosion (more specifically, the Statue of Liberty) in Adobe After Effects in less than ten minutes. The smoke and fire are downloaded separately, while the shattering of the statue is created in After Effects. First, duplicate the layers into what will and what will not explode, then create a mask around each one. Then, set the shatter effect to the exploding layer. Set the shape pattern to glass to make it more realistic. Also, you can raise th...