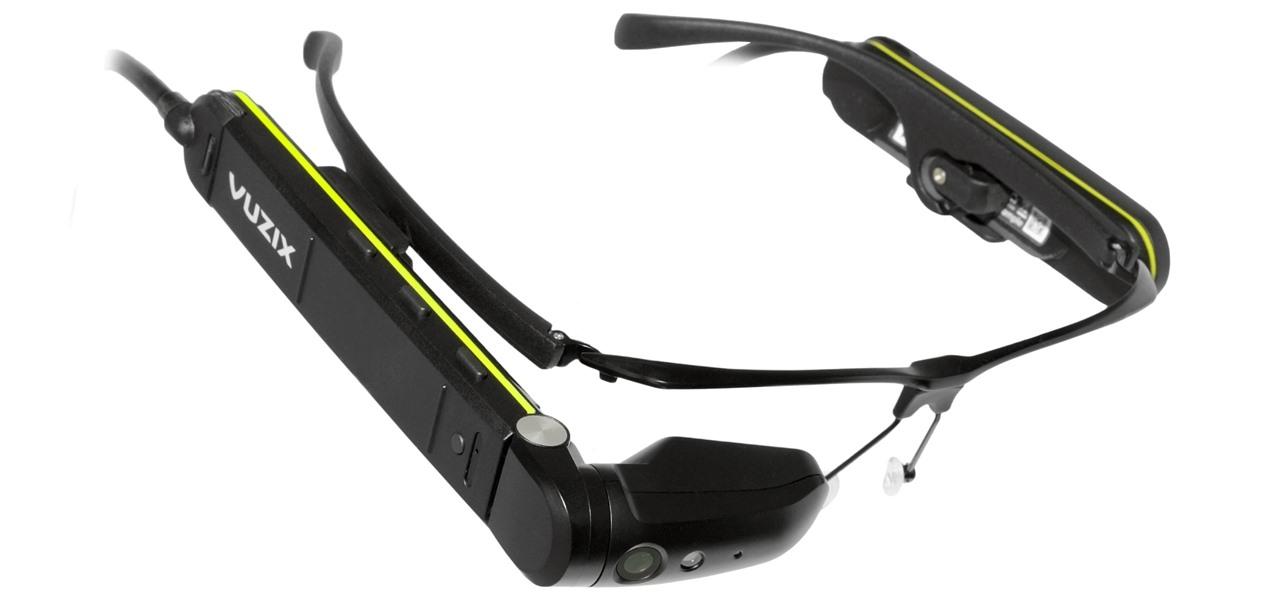
Augmented reality hardware maker Vuzix came to the rescue of a vision-impaired student in Pennsylvania today by delivering a pair of Vuzix M300 Smart Glasses to enhance her eyesight.
With the announcement of Google Glass Enterprise Edition last week, a literal behemoth entered the arena of companies serving augmented reality solutions to business customers. While Google Glass, with the backing of Alphabet, has the potential to be a disruptor, the field already has a number of players who have been in the game.

This tutorial shows you how to use the deco tool available to users of Adobe Flash CS5. The deco tool can create both static and animated images, and this tutorial demonstrates how you can use the deco tool to quickly create a skyline picture in Adobe Flash.

The bone tool is one of the most important tools in Flash for creating basic animations. It allows you to give your characters virtual bones which you can manipulate to make them move. This video tutorial will show you how to use the bone tool to create a simple animation of a dancing cartoon cow. It is very cute, and this tool will be the basis of many of your future, more cinematic works.

Meet Photoshop's Magnetic Lasso Tool! The Magnetic Lasso Tool is probably the best out of three Lasso tools for it allows precise and quick freehand selections. hether you're new to Adobe's popular image editing software or simply looking to pick up a few new tips and tricks, you're sure to benefit from this free video tutorial. For more information, including a thorough overview of the magnetic lasso tool, watch this graphic designer's guide.

Meet the Adobe Photoshop pen tool! Whether you're new to Adobe's popular image editing software or simply looking to pick up a few new tips and tricks, you're sure to benefit from this free video tutorial, which presents a complete overview of the Photoshop and Illustrator pen tools. For more information, and to get started using the pen tool yourself, watch this graphic designer's guide.

The drawing tools in flash aren't always the most intuitive to newcomers. In this tutorial, Ralf will show you how to use the basic drawing tools in flash. You learn the difference between Merge Shapes and Drawn Objects, which are all shapes of the same look and feel with the exception that one can be more easily manipulated and the other. You'll learn how to use this selection and sub selection tools to select various objects on the flash stage. You also see how to use the oval and rectangle...
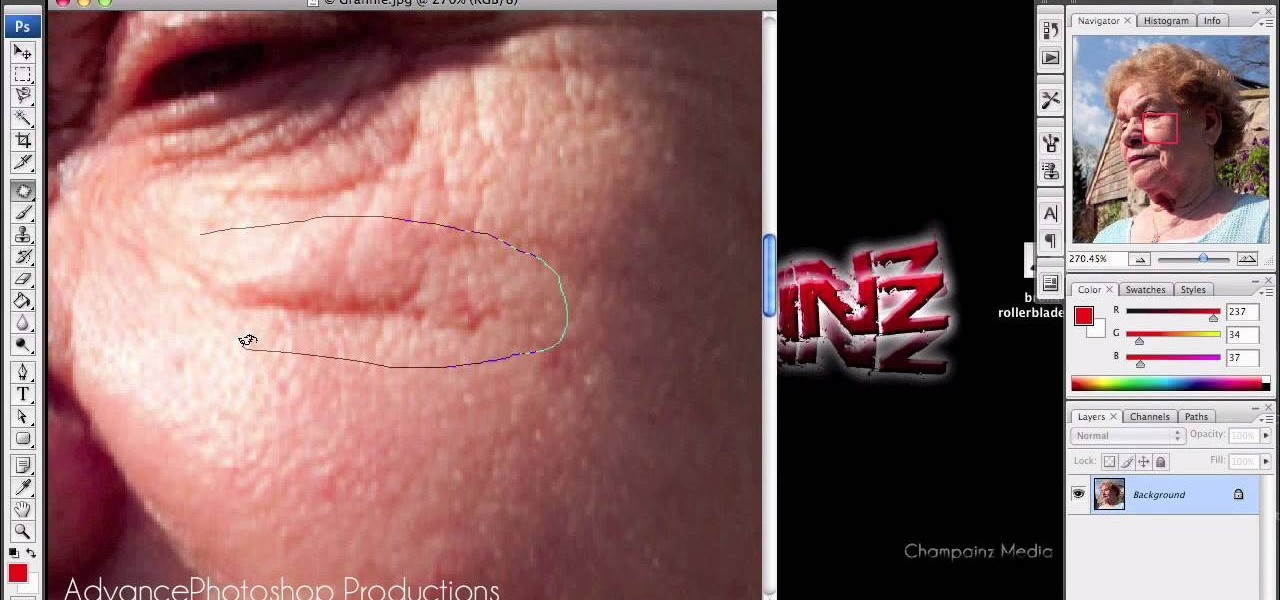
In this video, we are given ways to clean up an image, or remove unwanted objects in an image using Adobe Photoshop. The first tool that we are shown is the clone stamp tool. It allows you to clone a certain sample of an image, for you to use to paint over the object in the image you don't want anymore. In the video, the narrator shows us how to seamlessly take a man out of an outdoor setting. The next tool that we are shown is called the patch tool. In the video, the narrator uses the patch ...
In this video, Lance Sisiolo draws a beautiful house using Microsoft Paint. He uses line tool to draw most part of the house. He uses different types of lines. He also uses curve tool to draw sky and the entrance of the house. The unwanted part of the picture is erased using erase tool. Then he uses fill with color tool and airbrush tool to paint the picture. He uses different colors to increase the beauty of sky and the house. Then some trees are added. Using airbrush tool he increases the b...
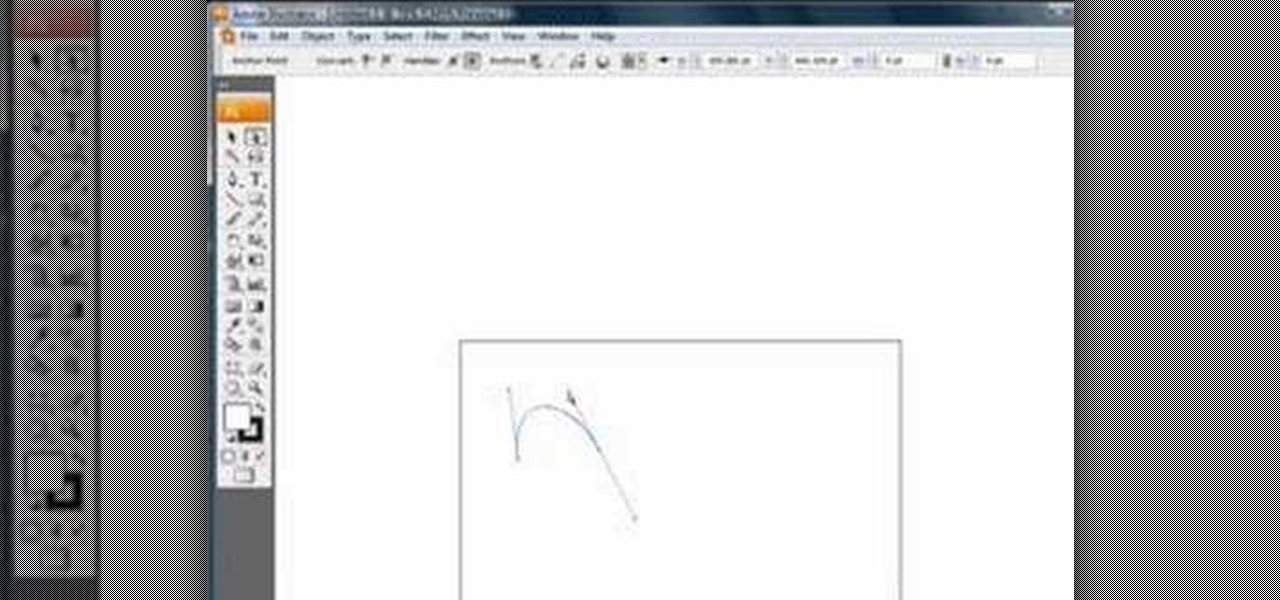
Chad Perkins shows how to use the Bezier pen tool in Photoshop, Flash, and After Effects. Perkins attempts to shed light on how the tool can be used and dispels certain misconceptions about the pen tool. The pen tool allows users to create various types of paths, either open or closed, at the most basic level of use. At the more complex level, the pen tool can be used to create professional looking curves. For better understanding of what the pen tool can do for graphics and other designs, fo...
Want to know how to use the Pyro FX tools in Houdini 10? This masterclass will tell you everything you need to know about using Pyro FX fire and smoke tools in Houdini 10. The discussion covers the addition of exciting new fire and smoke tools. Topics covered include a powerful new fluid up-resing technique, advanced noise and turbulence control, and a highly tweakable custom fire and smoke shader.
This Photoshop tutorial shows you how to use the extract tool to extract a background from a monster image. Many techniques show you how to remove the subject, but here you will learn to remove the background. Never fear, the Extract Tool is here! Rediscover the Extract tool all over again. In some situations, it's still the best way to make a mask for detailed hair.
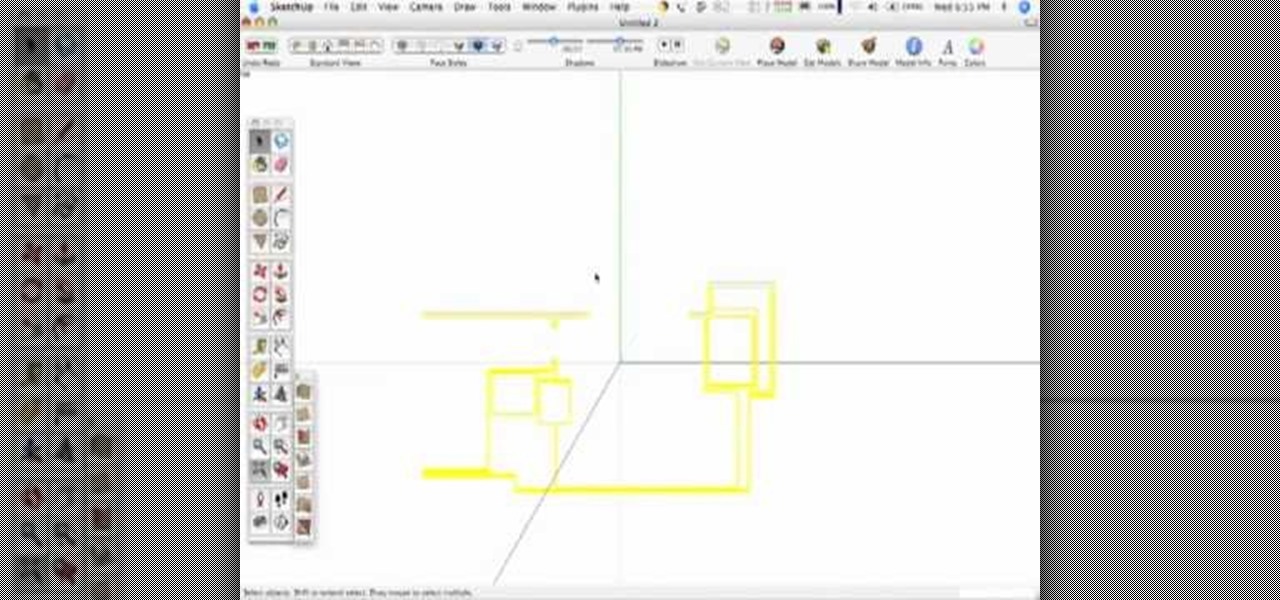
This two part software tutorial shows you how to work with the sandbox terrain tools in SketchUp 6. Take a look at how to create your own terrain in Sketchup using 4 different methods.
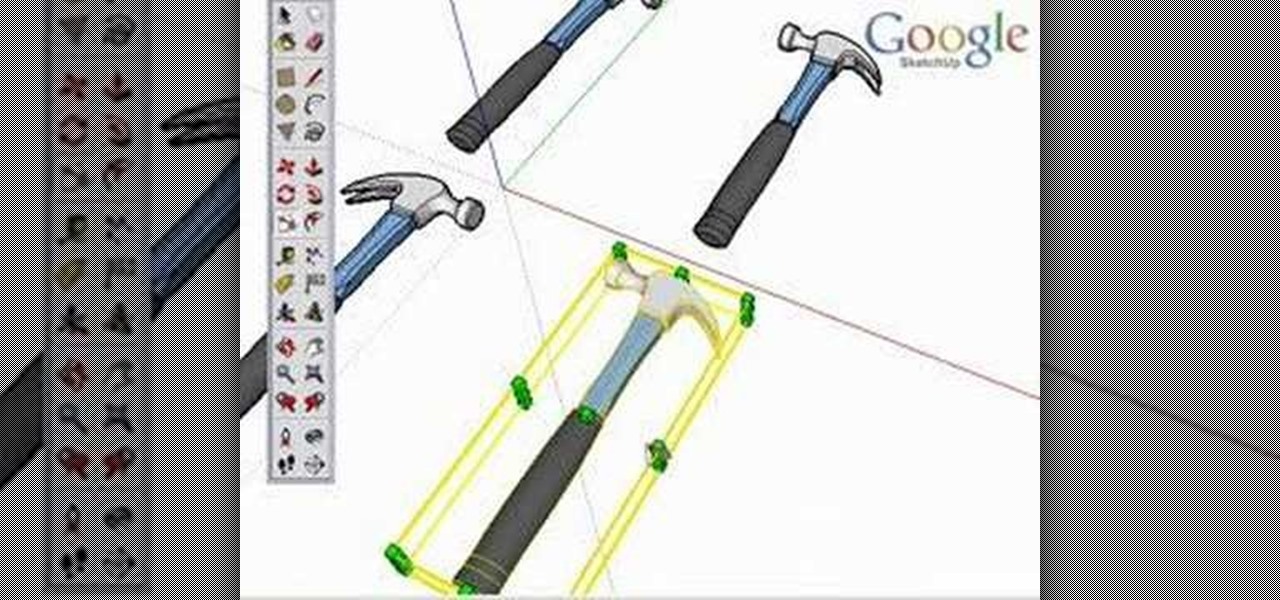
One of our favorite tools in SketchUp is the Follow-Me tool. It's the kind of tool that takes awhile to master, but once you've got it, you're free to model complex shapes in SketchUp that might have been considered impossible. In this SketchUp 6 software tutorial, Mike demonstrates how to use the Follow-Me tool to build a complex roof.
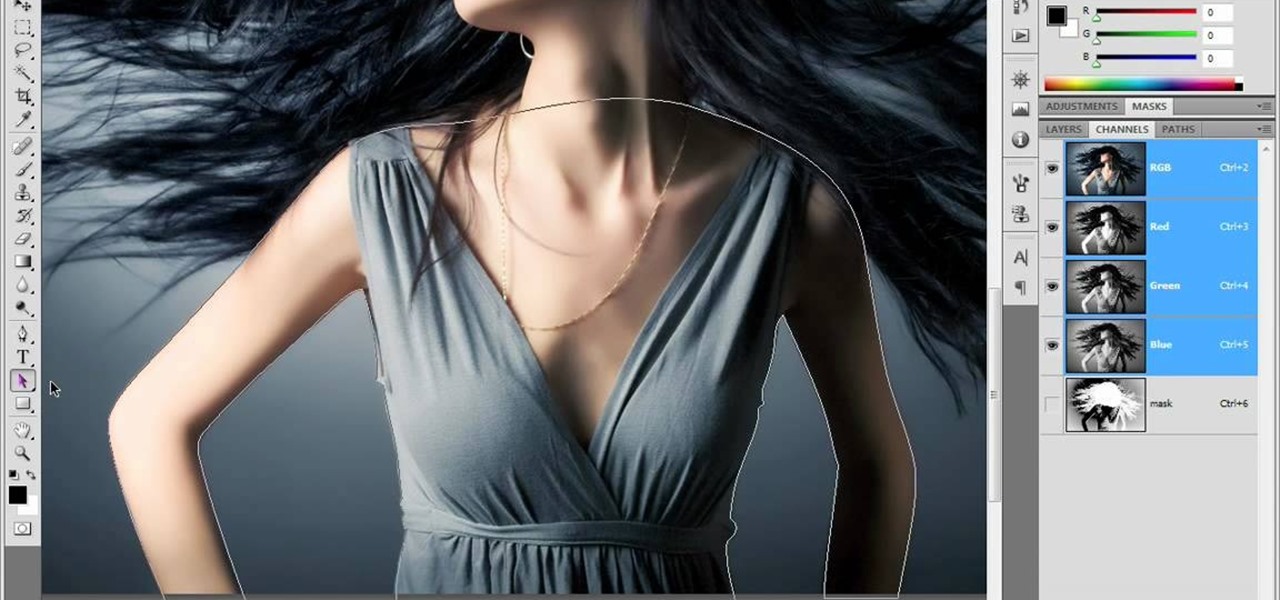
Many folks select images in Photoshop with the likes of the Quick Select and Magic Wand tools. Highly automated, but these tools rarely work accurately. Experts use the Pen tool. Using the Pen tool is an art form worth learning, because it always works. Whether you're new to Adobe's popular raster graphics editing software or a seasoned professional just looking to better acquaint yourself with the program and its various features and filters, you're sure to be well served by this video tutor...
This video offers instructions on how to use a wire wrap (or wirewrap) tool, an excellent and underrated alternative to soldering. It's particularly useful when prototyping as wirewraps can be undone quickly using the short end of the tool (though this particular process isn't demonstrated in the video). See how to connect a 4-legged RGB LED to header pins, a job that is particularly obnoxious to accomplish using solder and an iron, using 30-gauge wire and the tool. For more information, and ...
SketchUp 5 and up has a Sandbox. But there are a few rules to know before you're allowed to play. In this episode of The SketchUp Show, Alex leads you in creating a landscape from scratch, and a second way to model terrain from existing contour lines using the sandbox tools. Landscapers will love learning to use the sandbox tools in this episode!
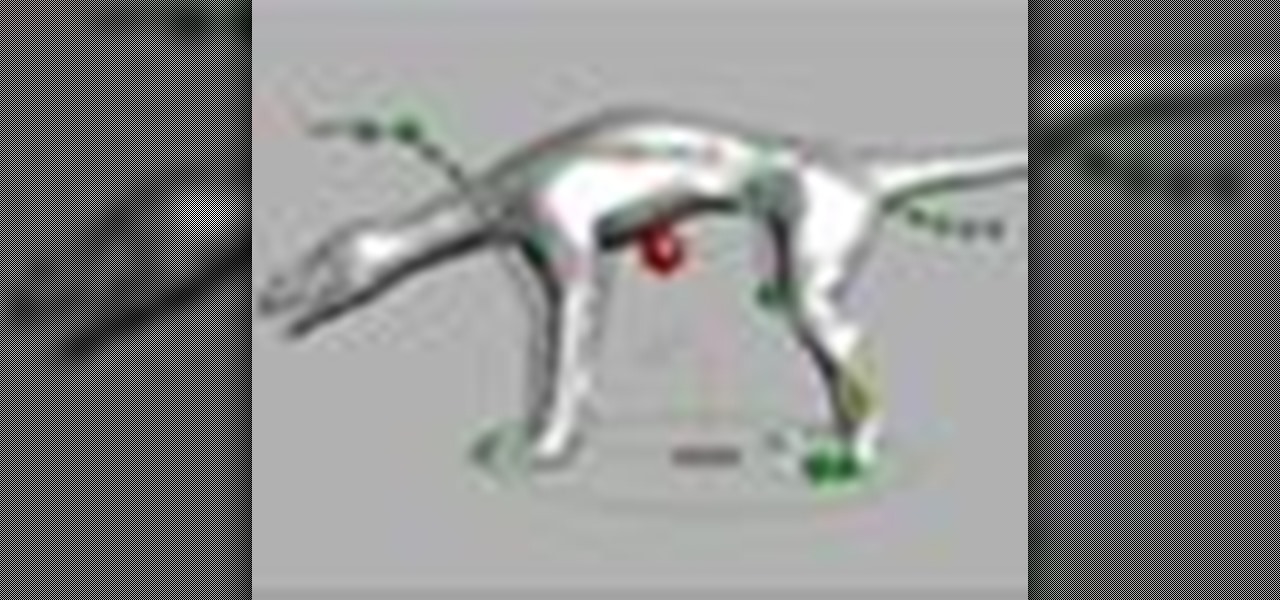
This five part Houdini 9 video series covers an entire rigging workflow using the H9 Quadruped Auto Rig shelf tool. Take an in-depth look at setting up joint controls, creating proxy geometry, generating animation and deformation rigs, and painting weights. The concepts presented in this tutorial series will apply equally as well to a Biped Auto Rig set up.
By following along with these tutorials, you can learn not only how to draw the popular Nintendo character Sonic the Hedgehog, you will also be able to master many of the basic and intermediate drawing tools available in Adobe Illustrator 5.
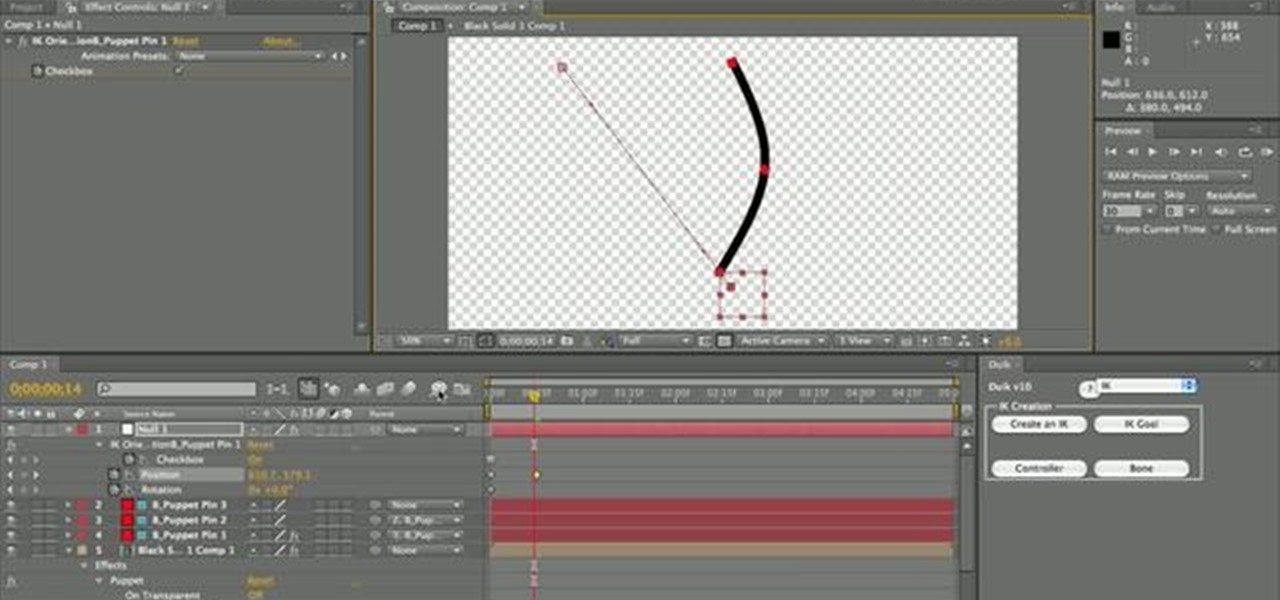
This is a quick little tutorial for someone who wants to learn how to do better puppetry or puppet effects in Adobe After Effects. Use the Puppet Tool and the DuIK Tools on your next animation project using inverse kinematics.
In this video tutorial, viewers learn how to use the zoom tool in Adobe Photoshop. To select the zoom tool, click on the magnifying tool in the toolbar. Users are also able to press the "Z" key to select the zoom tool. Once selected, users are able to zoom into the image by left-clicking on the image. Users are then able to select the hand tool to move around the image. To zoom out, right-click on the image. This video will benefit those viewers who use Photoshop to edit images, and would lik...
Flash CS4 has a lot of powerful new tools, and if you've used previous versions of the software it can be difficult to figure out how to use the new features. This video explains how to use one of the new features, the Deco tool, to animate cool backgrounds and other parts of an animation. Make sure you're using every Flash tool you have at your disposal!
If you've recently purchased a Kreg Jig, you've probably recieved the plans for bulding certain items, including a work bench. If not, it's okay, you can head to their website for the guide. So, in this tutorial you'll find out how to build a workbench using your Kreg Jig tools. It's a great place to keep your tools and will make life much easier for you whenenever you need something. Enjoy!
In this how to video, you will learn how to liquify an image using Photoshop. First, open the image in Photoshop. Next, go to filter and select liquify. Use the forward warp tool to press pieces of the photo. Use the reconstruct tool to bring the image back to the original state. The twirl clockwise tool can be used to twirl pieces in the photo. You can adjust the pressure to twirl more. The pucker tool can be used to push sections into the image. The bloat tool can be used to pinch sections ...
In this Software video tutorial you will learn how to animate symbols with a bone tool in Adobe Flash CS4. Open up a stage in Adobe Flash and put say five oval symbols vertically like links in a chain. All the symbols are in one layer. Grab the bone tool from the right side, click the mouse on the top of the 1st link and drag and leave it at the bottom or the top of the 2nd link. Now repeat this process for the top four links. Take the ‘selection tool’ from the right side to manipulate th...
If you have friends or relatives living or traveling in another country, you may need to call them internationally. Check out this tutorial and learn how to dial a far away land just as easily as you would dial one close to home.
She thinks just because you're related that your closet is her closet; and if she ever gives your things back, they're never washed. If it's time to stop your sister from being a closet bandit, check out this video. This tutorial is full of tips for gettinf rid of that pesky sibling and keeping your clothes all to yourself.
In this video, learn how to jailbreak your iPhone (Mac or Windows) with a Pwnage tool in order to not get a 1600 error. In order to complete this tutorial, you will need the following downloads:
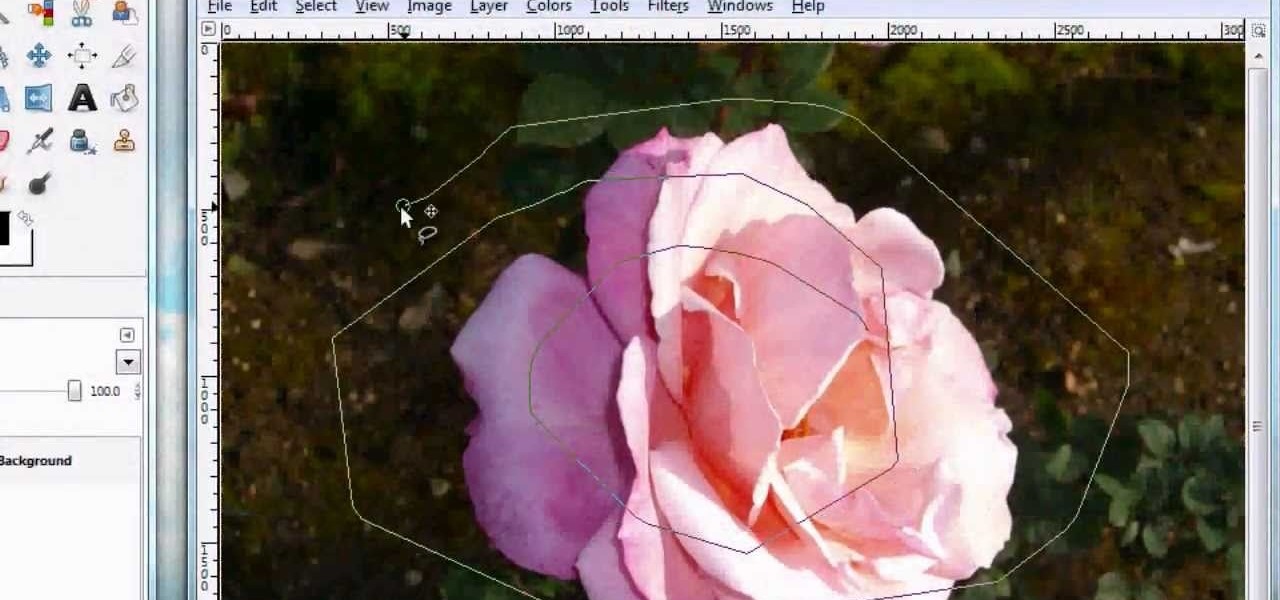
For anyone looking to edit a picture with one or more persons down to just a single person in the picture, you can use GIMP. This video tutorial goes over how to utilize the paths (or pen) tool and foreground select tool. The paths tool allows a person to select a part of an image to create a series of lines, or paths, that allow you to create a path around whatever you want to select in a picture. This item can then be moved and copied to a completely different photo. The foreground select t...
This task tutorial explains how to use Photoshop to create a YouTube subscribe button. First, select the rectangle tool and draw a bar. Select color options and deselect the color overlay. Then, go to gradient. Using the dropper tool, select the first and second color. Open layer options again and select the stroke color using the eyedropper tool. Increase the stroke size and change the position to inside. Click okay. Select type tool, create text field and type in the text. Open layer style ...
This episode of TUTCAST shows you how to get rid of blemishes in your photos using Photoshop. For this demonstration the patch tool in Photoshop is used to clean the blemish. Use the elliptical marquee tool to select the area including the blemish as shown and then feather the selection using the selection modify feather command. Use the patch tool to patch the area with the blemish and use the clone stamp tool to clean up the unevenness as demonstrated.
Guitars will need to be tuned continuously to ensure that it is tuned for the correct scale and notes so your music makes sounds the way you intend. If you haven’t been playing forever, you will probably need the assistance of an electric tuner to find the note. This video will show you how to tune your guitar using a tuner.
Photo editing expert Chad Troftgruben teaches the viewer how to effectively use the quick selection tool in Adobe Photoshop. In Chad's opinion, the quick selection tool is quite similar to the magic wand tool in the same software, except for one major difference: one can select a particular object, even in a complex picture, simply by holding down the left key of the mouse and moving the pointer over the object. Chad also points out that the quick selection tool saves a lot of time and is ver...
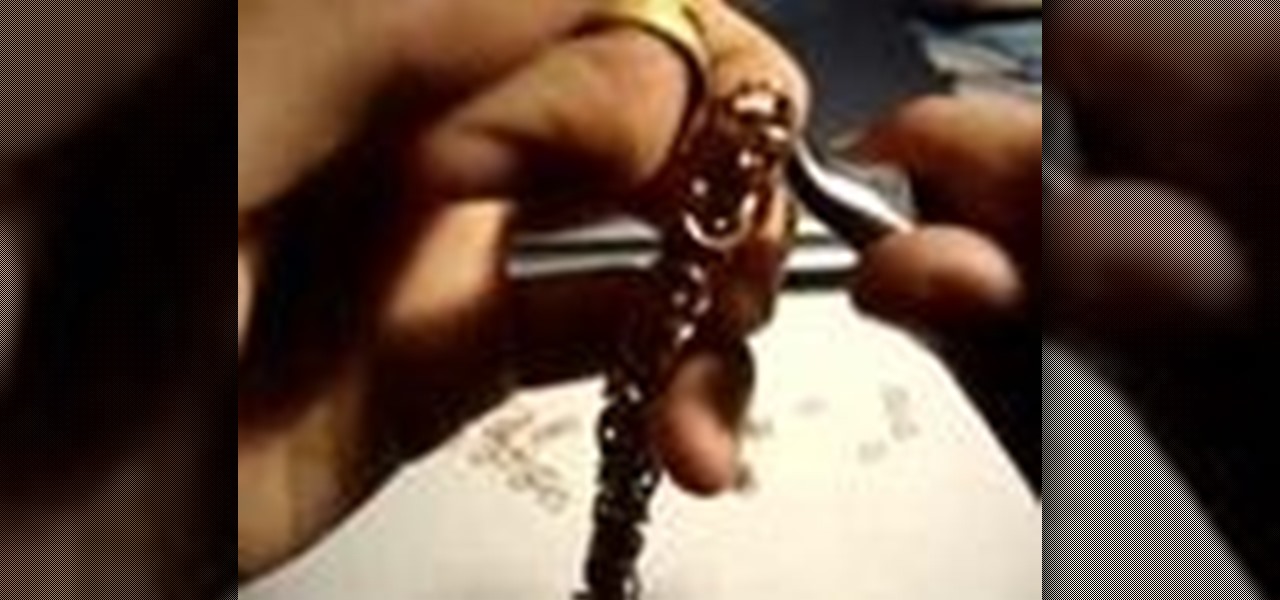
This little ring is a frequently used chainmailing tool. The ring tool substitutes for a pair of pliers, and works for about eighty percent of chainmail patterns. Watch this metalsmithing video to see how the ring tool is used.
Adobe Photoshop CS3 has a lot of power becuase it has a lot of tools. But if you don't know how to find those tools, or worse yet, what to look for, you are going to get frustrated fast. This Photoshop CS3 tutorial will familiarize you with the basic tools and how to work with layers in Photoshop.
This 3D modeling software tutorial shows you how to work with the pen tool in modo 301. The The pen tool can be used for organic or hard surface modeling in modo. Take a quick look at the versatile and intuitive Pen Tool in this modo 301 tutorial.
The Bevel tool is an important part of a balanced modeling diet in any 3D software. The Bevel tool in modo changes to match the selection mode you are modeling in, making it intuitive to use.
This is a short clip examining the use of the Eraser tool for 2D and 3D painting in modo 201 and higher. The eraser tool will erase pixels from the currently selected texture map on a modo model according to the currently selected brush. Choose the size brush you need and simply paint across the surface you need to remove the texture from. Learn how powerful a painting tool the eraser tool is in this modo tutorial.
This 3D software tutorial covers the basics of using the clone tool in modo 101. The clone tool works the same way in newer versions of modo. This tutorial is great for anyone new to learning modeling in modo. The clone tool allows you to make copies of the currently selected geometry and then use the handles to move the new copy.
Although there isn't an actual mirror tool in SketchUp, it is easy to mirror anything with the scale tool. Take a look at this instructional video and learn how to use the scale tool for mirroring purposes in SketchUp. This tutorial covers, how to mirror objects using the scale tool, how to use modifier keys, and mirroring symmetrical components or shapes for efficiency.