In this video, we learn how to make a jingle bell card using Cricut Storybook. you will need the Cricut Storybook cartridge and Cuttlebug Music Notes folder to do this card. First, you will take a cut out of the word "jingle" that has a bell attached to the bottom of it. You can find this in your Cricut crafting books. Next, apply a checkered green paper over a forest green card stock. Next, grab a holiday embossed white paper and apply a ribbon to it, then glue this onto the checkered paper....

In this video, we learn how to remove an automobile headliner on a Saturn S-series. First, you need to remove the back cushion and then take the back rest on the seat, then lay it down. After this, remove the dome light and remove all the grab handles from the vehicle. Next, remove both visors and screws, then remove the mouth on the seat belt and bolts. After this, remove the cover on the back brake light, then the trim that runs along the side of the inside of the car on both sides. Once yo...
In this video, we learn how to remove water spots from chrome. This is one of the hardest surfaces to get water stains off of, but it can be done easily. First, grab an empty spray bottle, vinegar, water, a rag, and a paper towel. Now, mix two parts of vinegar to one part of water and spray it onto the chrome item. Use the rag to wipe off the mixture, then continue to spray on once more. Do this around five times total, then use a paper towel at the end for the finishing look! You can use thi...

In order to perform a Back Tuck in gymnastics, you should stand with your legs hip distance apart. Next, you should squat down. Don't squat too deep, because it will decrease your power. But, it should be a good deep squat. Swing your arms behind you at the same time. Next, jump up into the air, swinging your arms through and up. Extend your body as much as you can, from your fingers to your toes. When fully extended, your arms should be near your ears. When you have extended as far as you ca...

In this video, we learn how to paint a black and white French design for short nails. First, paint a diagonal stripe down the nails with white nail polish. You may need to apply two coats of white polish to get a strong color on the nail. Let this dry, then grab a very fine brush and use black nail polish to paint a design onto the white part of the nail. Apply dots and different lines to make the pattern turn out how you want it to be. When finished, you will have a beautiful nail design tha...
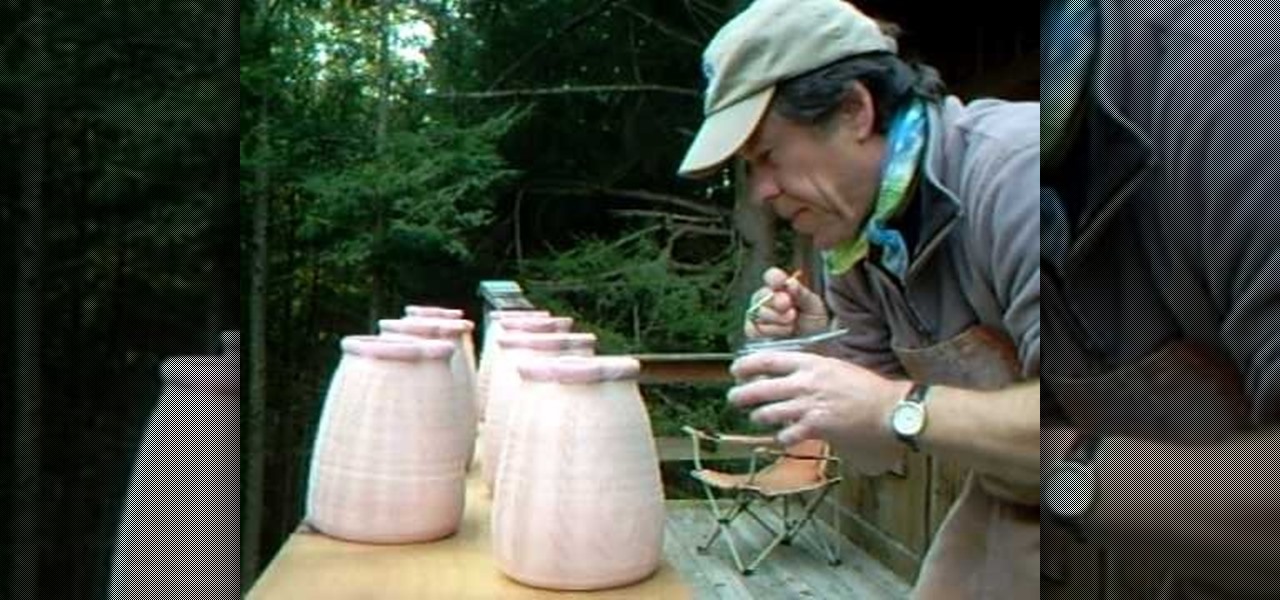
In this video, we learn how to use wood ash to prep pots for the kiln. First, grab wood ash and place it into a container that sprays. After this, blow in the appropriate hole and hold the container so the ash gets all over your pots. Continue to do this all the way around the pots. You will get out of breath while doing this, so take your take and take breaks to breathe. Make sure you do this in a quick amount of time so the ash inside the container stays ready to be blown. After this, the p...

In this video, we learn how to dye yarn with Kool-Aid. First, take two chairs and wrap yarn around them as tight as possible to keep them from getting tangled up. Then, place in a bath of lukewarm water for ten minutes. After this, grab packets of Kool Aid the color you want your yarn to be. Now, take the yarn out of the water and squeeze out any excess water. After this, mix up the Kool Aid and place it into individual jars for each color. Next, place the jars in a large pot of water and the...
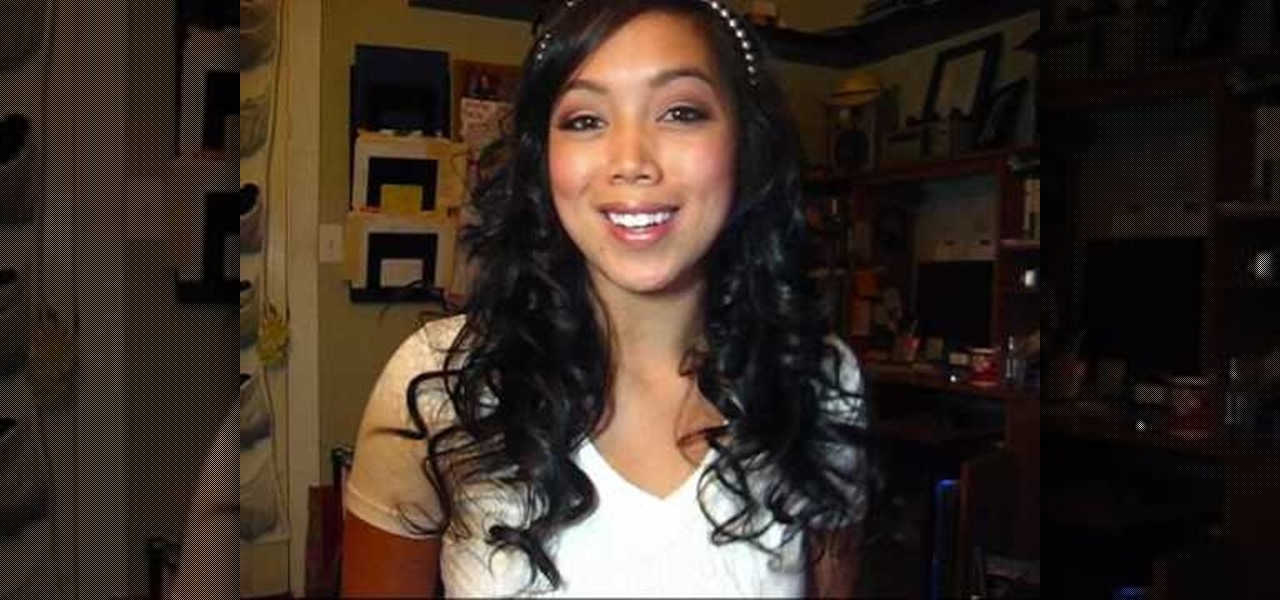
In order to create Vanessa Hudges loose waves, you will need the following: hair clips, a large barrel curling iron, and spray.
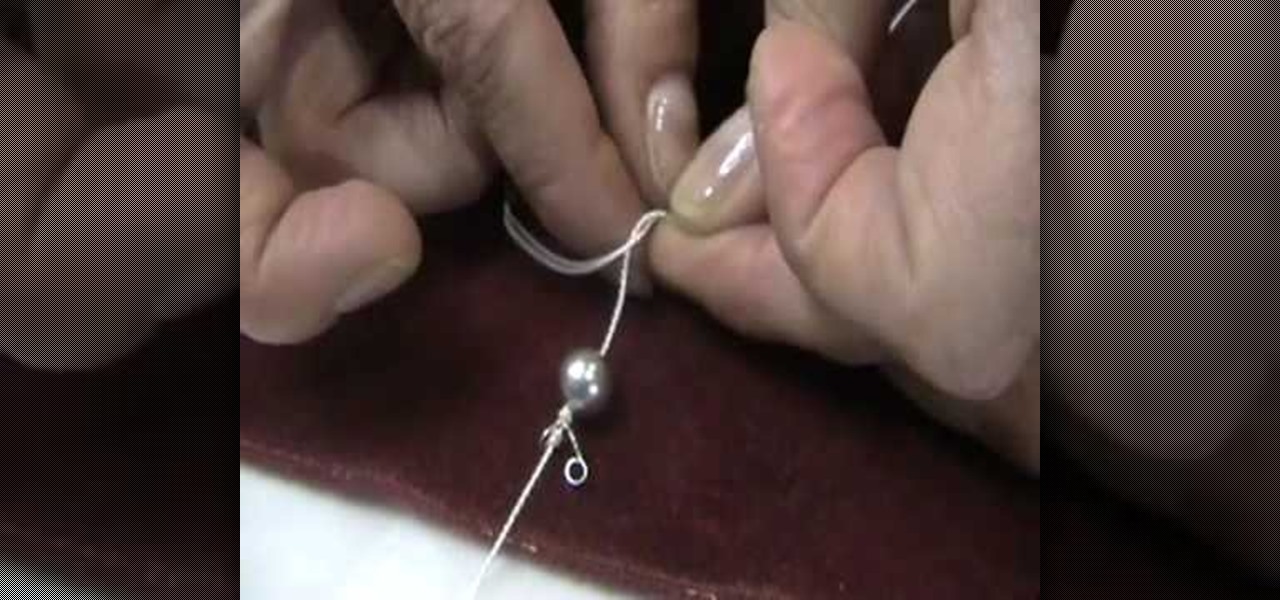
This video tutorial is in the Arts & Crafts category where you will learn how to knot pearl beads from Brenda. Pearl knotting is making a simple knot between each pearl on a strand. They not only give a professional look, they also keep the pearls in place and prevent them from rubbing against each other. After you have strung the clamp to the end of the string, tie a double over head knot and string your first pearl. Make a simple knot on the string behind the pearl. Grab the string with a t...
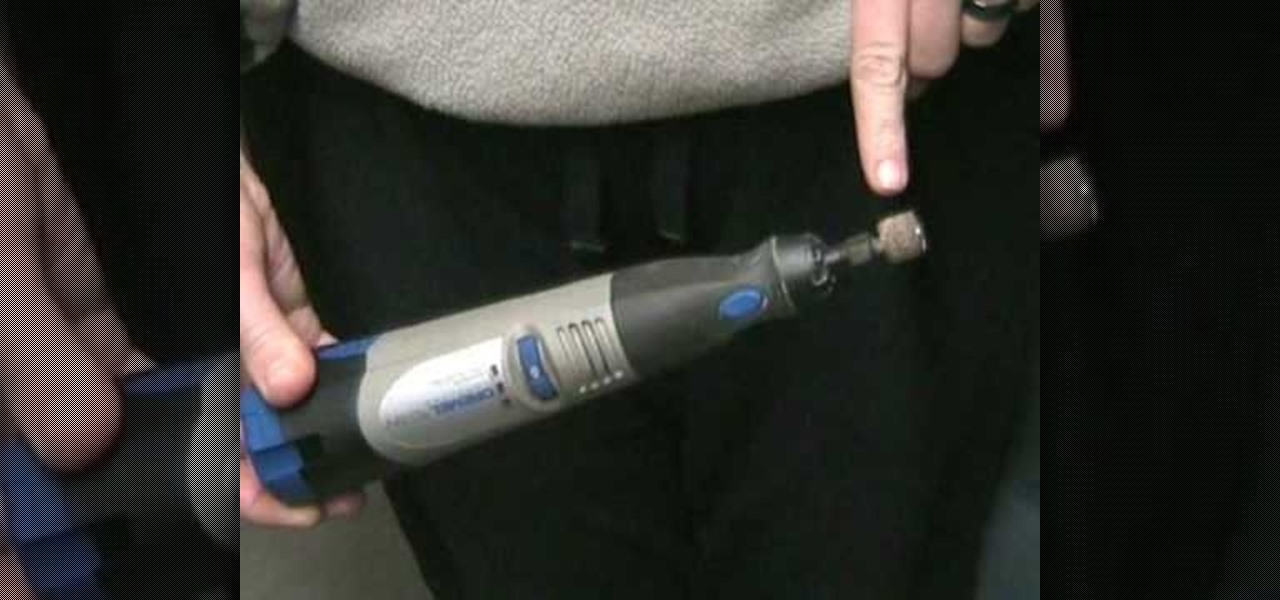
In this tutorial, we learn how to trim your dog's nails without cutting them. Before you begin, you will need a Dremel tool with a sandpaper drum attached. Now, have your dog sit down and place their paw up on your knee. Now. grab the tool and gently place it on the tip of the dog's nail. Do this on each of the nails, until you have trimmed all of the nails. Make sure you don't trim down too much or push too hard, this could cause a burn on the dog's nail or injure them severely. Keep treats ...
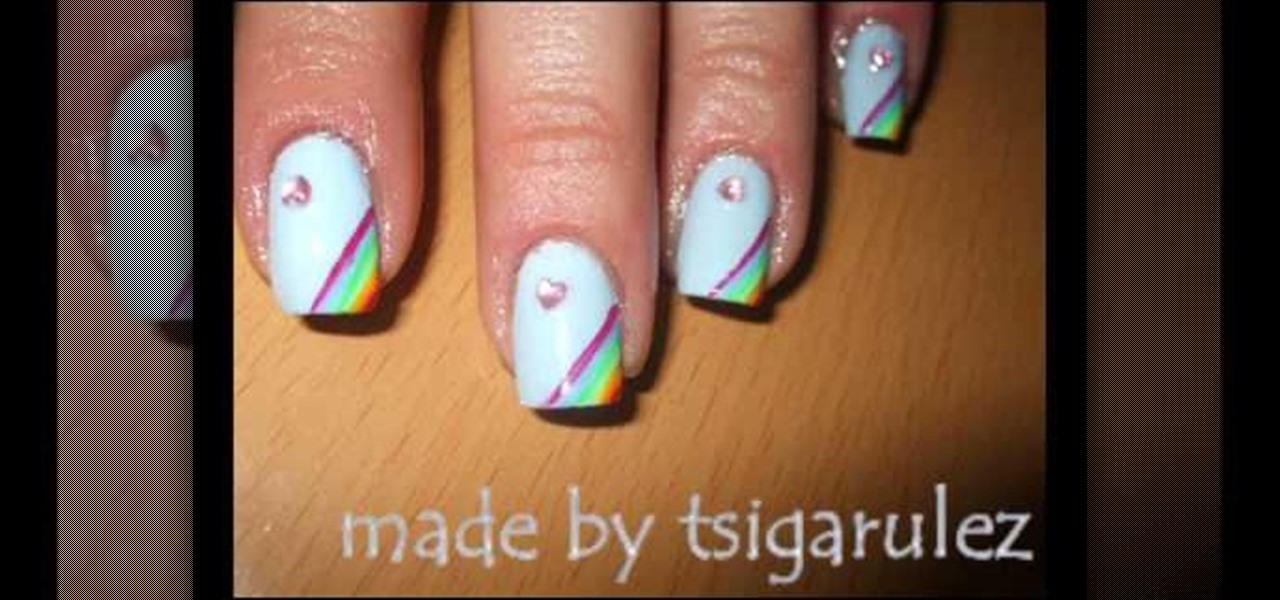
In this tutorial, we learn how to paint rainbow nails with rhinestones. First, paint the nails light blue and let them dry. After this, grab several other colors, enough so that you have the colors of the rainbow. Now, paint lines onto the left hand corner going diagonally across the nail, making each line next to one another. After you get to the very tip of the nail, let the colors dry completely. Next, paint on a clear coat on top, then apply a pink heart rhinestone on the bottom corner of...
In this video, we learn how to get a spunky hairdo with a fishtail braid. First, make sure you have straight and clean hair, then grab a teasing comb and tease from the back of your hair up to the front to give your hair a more volumized look. Spray with hair spray, then let the hair down and gently brush the top to make it appear soft and not tangled. Once you're done, bring the hair back and place into a side pony tail, tied with an elastic behind your ear. Now, take a rat tail comb and lif...
In this video, we learn how to create bouncy curls with a flat iron. Start off by applying heat protector to your entire head of hair, then heat up your flat iron. Next, grab a small section of your hair (as small as you want to curls to be) and place the flat iron inside the top, then twist the iron 180 degrees and pull the hair straight down. When it reaches the bottom, the hair should be completely curled. To make a tighter curl, use smaller sections of hair and leave the iron in longer. C...
In this video, we learn how to tie your shoes. First, tie a knot at the base by crossing the laces over each other. Then, make a loop with one lace and wind the other one over it. Come underneath with a loop and then grab both loops and pull. To do this with the other hand, you can do the same thing just use your dominant hand to make the loops. This is only one of the many different ways to tie your shoes. It will take practice, but it can be done and once you do it it's very simple!
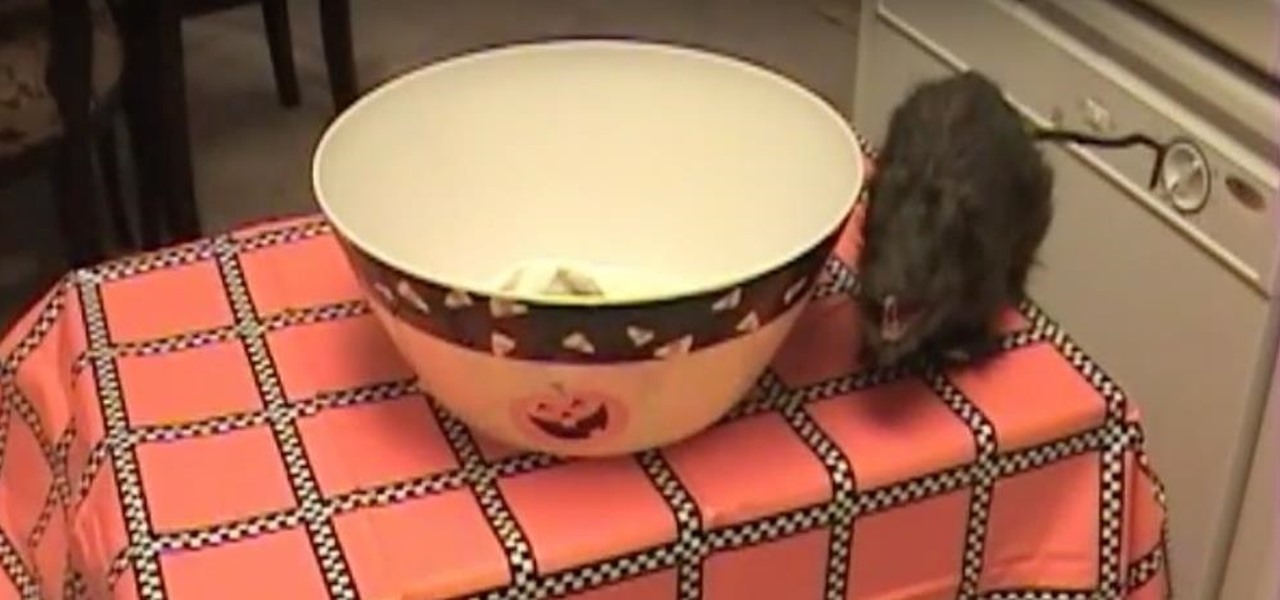
If you're looking to pull off a great prank for Halloween, this next tutorial will show you a classic prank. It involves using a candy dish and your hand.
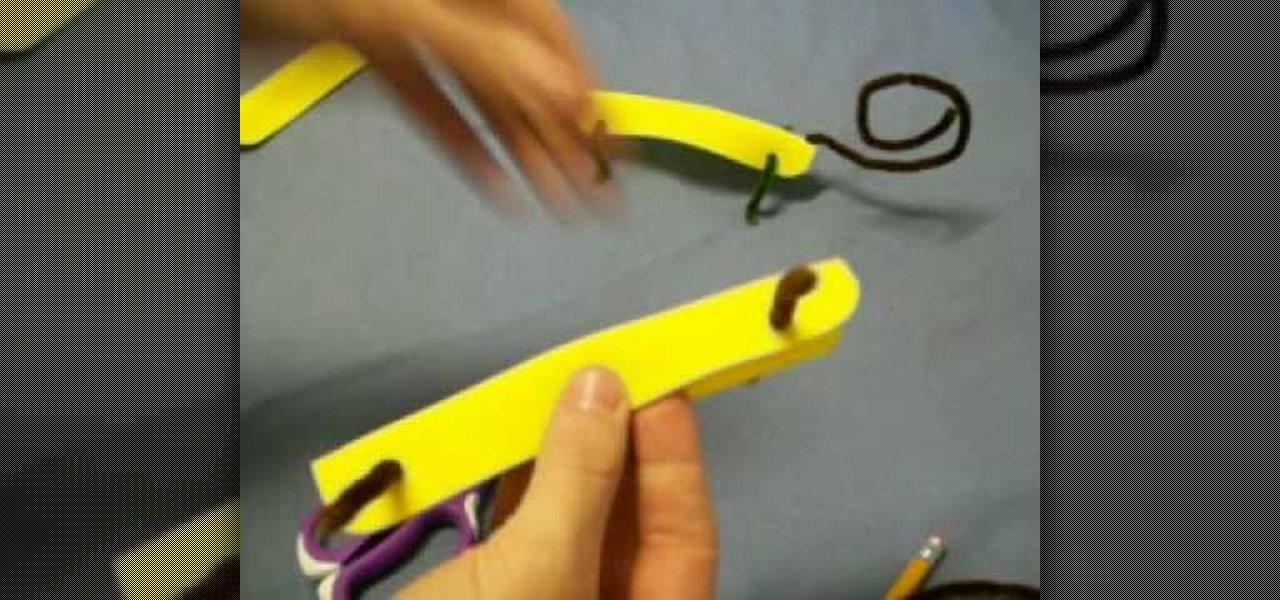
In this video, we learn how to craft a lizard out of foam and pipe cleaner. First grab your piece of foam and poke a hole into the front of it going through it, then through the back going all the way through. Next, poke the pipe cleaner through the holes so it looks like four legs. After this, poke a hole in the back to string the tail through. Poke a hole through the front and place a red pipe cleaner inside of it with a curl at the end to make it look like the tongue. To finish, draw on tw...
In this tutorial, we learn how to make cloth flowers. Start out by grabbing several different strips of fabric and folding it into a shape that makes a flower. After you do this, place a needle into the fabric so it doesn't come unraveled. After this, start to twist the fabric and then thread the needle through the strip. Now, pull the fabric up and it will scrunch up into a flower shape. Now, wrap this around a stick with a piece of fabric on it, that will become the middle of the flower. Wh...
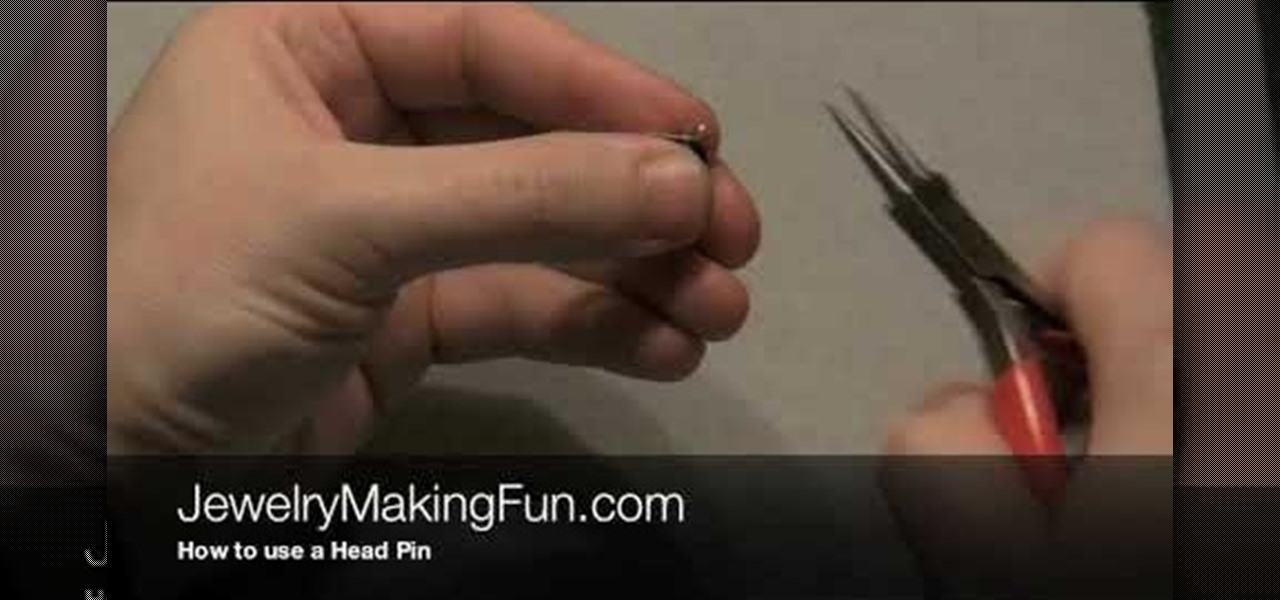
In this video, we learn how to use a head pin while making earrings. Start off by grabbing a 1" long headpin and feed a bead through it until it reaches the other end of the pin. Now, decide how you want to close the loop. The first way to close it is to make a single loop by using pliers and making a 45 degree bend. Cut off any excess wire with wire cutters. The next way to do this is to wind the excess wire around the base until it comes to the bottom of the bead. This is visually appealing...
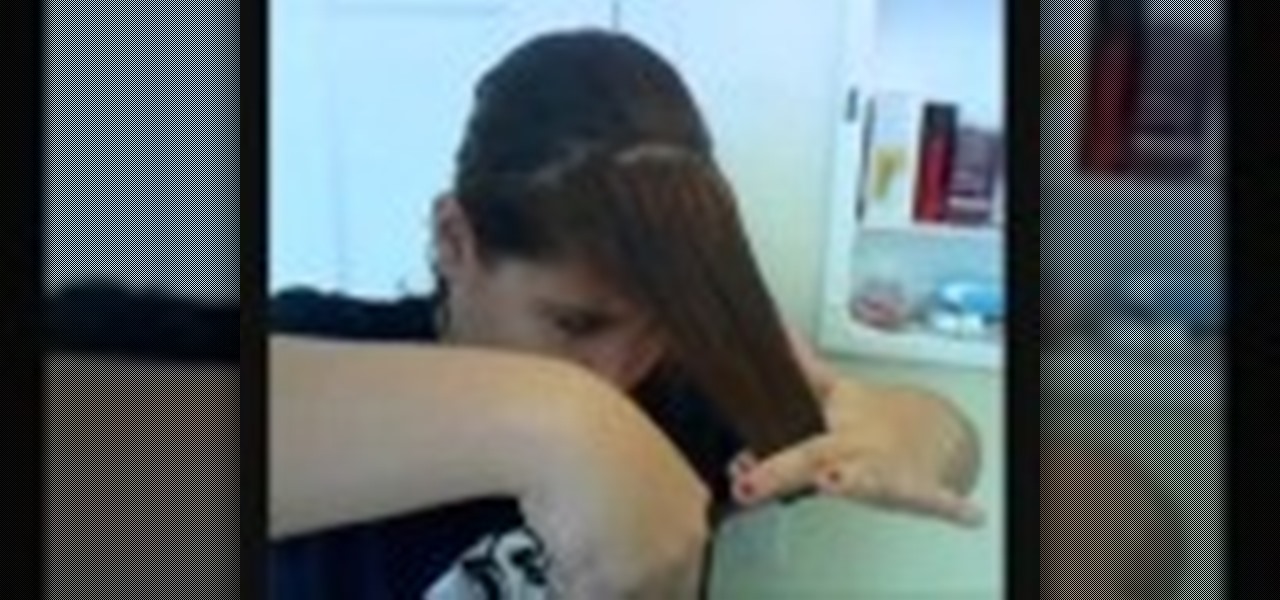
In this tutorial, we learn how to fake side swept bangs. First, straighten and brush your hair. After this, you will take the hair from one side of the head and use a comb and brush it to the opposite side. After this, grab hair spray and spray it onto the bangs. After this, comb the hair again and then work the bangs with your fingers. Next, use more hair spray to make the bangs more firm and stay in place. Continue to do this process until your bangs are completely to the side and they are ...
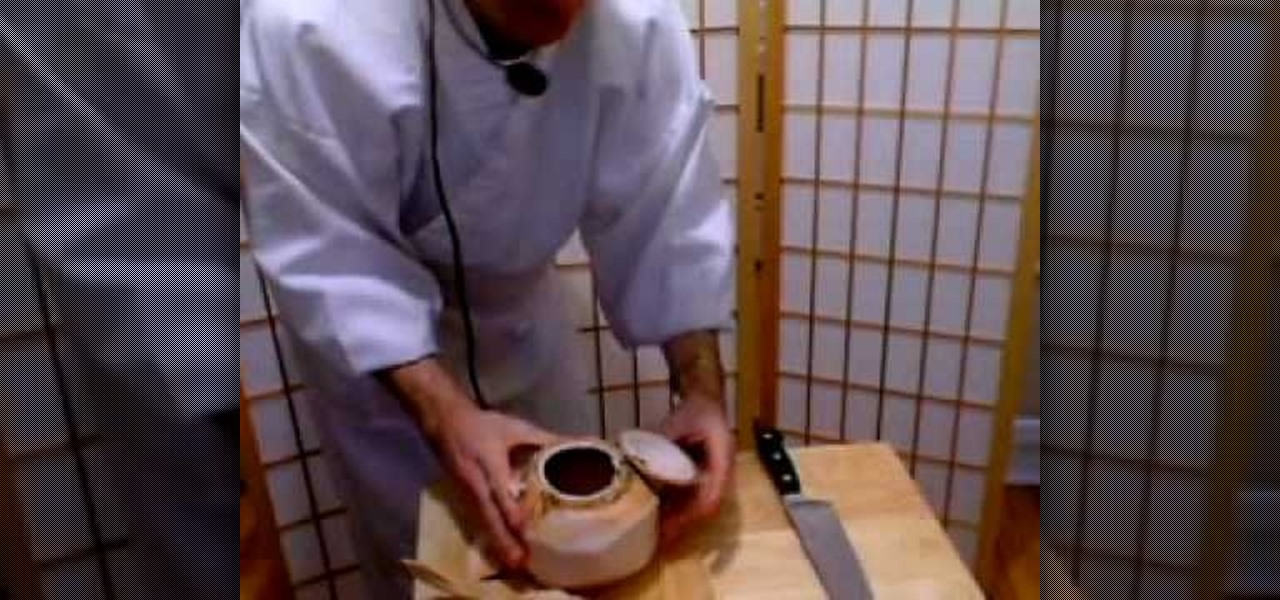
In this tutorial, we learn how to open a fresh young coconut. First, you want to grab a sharp and large knife, then go around the coconut cutting the husk off. After you have done this, you should be down to the nut of the coconut. Some areas of the husk will be thicker than the others. Next, use the corner of the knife to knock the top corner of the coconut. After this, take the knife and stick it into the hole that you made. Wedge it in there slowly, then turn the knife towards you and cut ...
In this tutorial, we learn how to cheat on a test with a hollowed pen. First, grab your pen and take the top off the ink of it. Now, cut a small slip of paper out of a piece of copy paper. After this, write down the answers that you need for a test. Next, use the scissors to cut the side of the pen and make a slit in it. Now, attach the answer strip to the ink of the pen and place it back into your pen and put the top back on. Now, the sheet of paper that has the answers on it will hide in th...
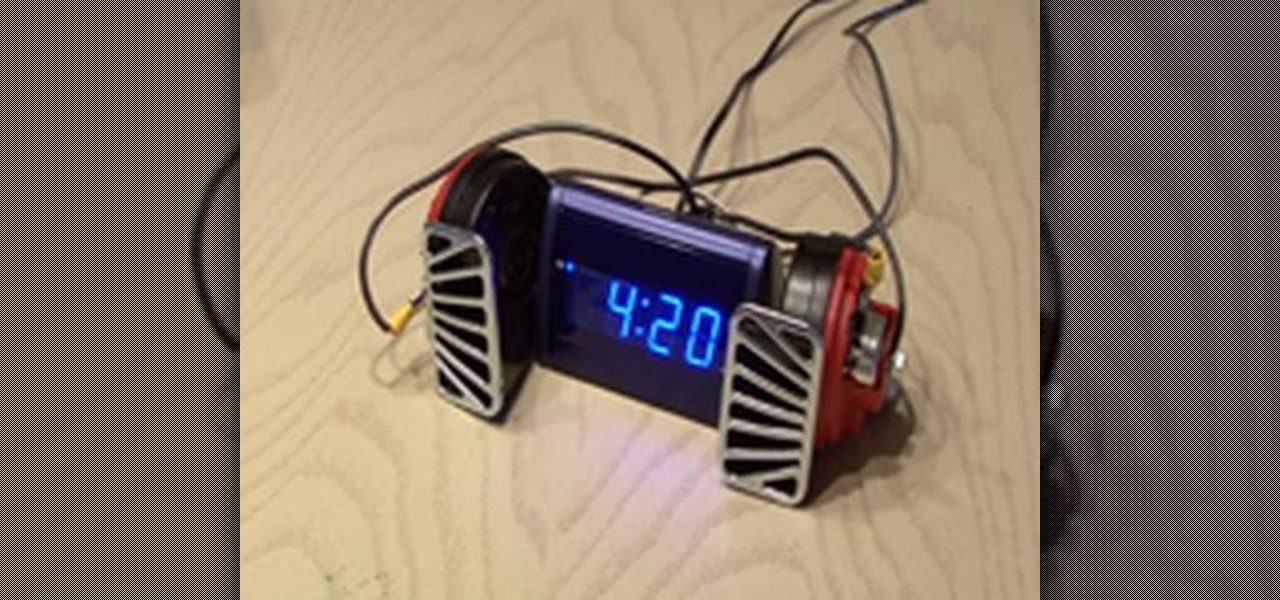
In this video, we learn how to make the world's loudest alarm clock. If your alarm clock does not wake you up, this is for you! First, you will need to take apart your alarm clock and find the wires that are connected to the tiny speaker that is inside of it. After this, grab two very large horns that have enough decibels to wake you up. Now, find an old 12 volt ac adapter and solder two wires from the adapter to the spot where the alarm sends signals to the alarm clock. Now, test out your al...
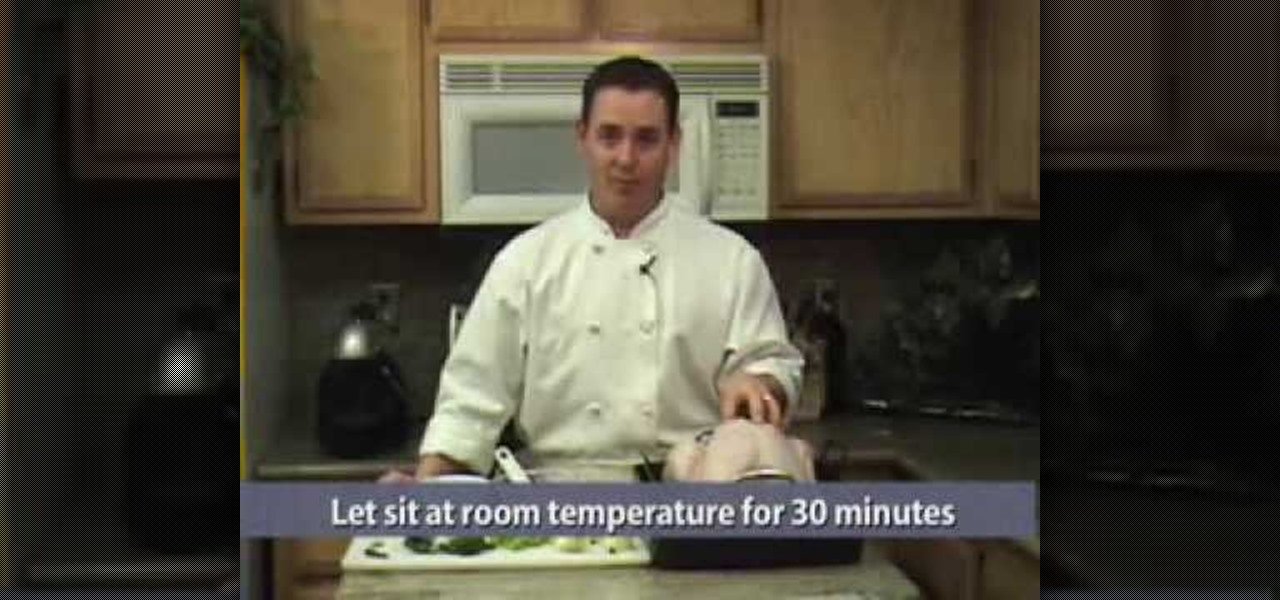
In this tutorial, we learn how to easily cook a turkey using a simple turkey brine. First, grab a large plastic bucket that is clean, and add in water until it's halfway full. Add in pepper, bay leaves, dried thyme, peppercorns, and parsley to this brine. Use a large spoon to mix this together, then place your turkey inside overnight. When finished, let your turkey sit out for 30 minutes, then place it on the baking pan. Stuff it with parsley, lemon juice, and any other types of seasonings yo...
Michael Weisner teaches us how to draw an adorable little puppy in this tutorial. Start out by drawing the outline of the dog, drawing in all the details as well as the body. After you have the base done, grab a Sharpie and start to draw the top of the head and the ears. Make lines on the top to make it look like the dog has fur and don't forgot the eyes and nose on the face. After this, trace out the rest of the body, including the front and back paws. Make sure to add in any shading you fee...
In this video, we learn how to make looming easier. First, you will want to use a table loomer to help make this much more simple. Start to thread the different colors or one color through the loomer and then grab a plate when you are done. use the side of the plate to run it through the middle of the string. When you are finished, this will help push the thread down into the looming machine and you won't have to do it manually with your hands. When you are finished, you can take out the loom...
In this tutorial, we learn how to do a side headband braid with ribbon intertwined. First, grab a ribbon that is around 32 inches and any color you want. Now, take a chunk of hair on the side of your head, and place the middle of the ribbon underneath it. Now, separate your hair into three sections, then start to braid by connecting the ribbon in with the strands. Once you finish this, tie off at the end. Now, make a messy bun in the back of your hair with the braid on the side still. After t...
In this video, we learn how to make single ended dreads. First, you will need synthetic hair, a hanger, and a steamer. First, take the hair out of the package and then cut a section out of it and put the other hair aside. Next, place the hair on a clothes hanger hook, then pull on the hair with your hands. After this, pull the ends down and then take a comb and back comb the hair piece. You want it to be in a big poufy mess what you are finished with it. After this, you want to braid the hair...
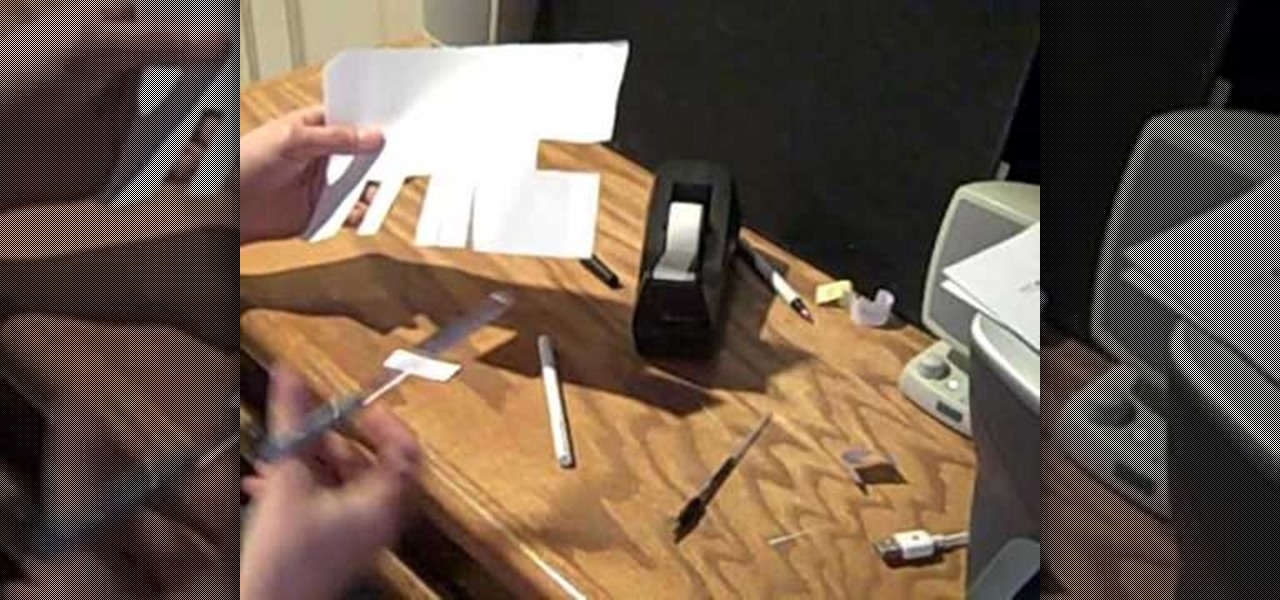
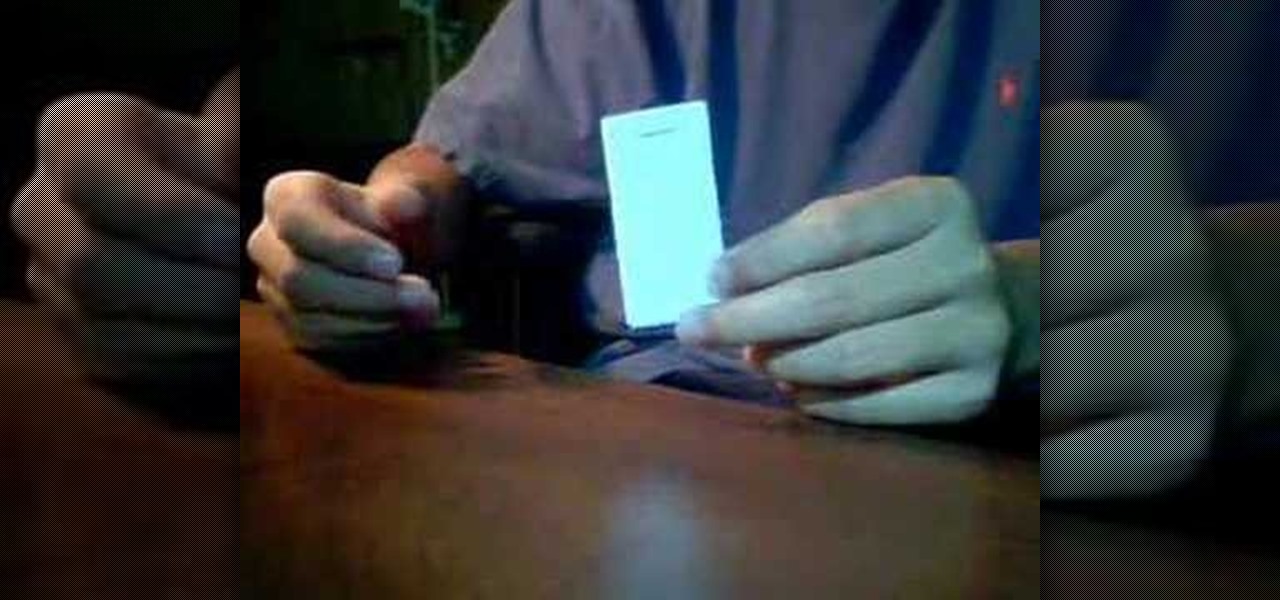
In this video, we learn how to make a compact cheat sheet for a test. First, grab a sheet of copy paper and fold a rectangle into the bottom and make a crease. Next, do this once more, and on the other side as well. Then, tear the paper where the crease was made and fold the strip into a small booklet. Next, use a stapler to staple the side of all the papers together. Next, you can write in all the answers and questions that will help you cheat on your test. Hold this in the palm of your hand...
In this video, we learn how to easily cut your bangs. First, you will want to take a shower and have your hair went and brushed out. Next, part your hair so that your bangs are in the front and the rest of your hair is tied back behind you. After this, grab your scissors that are for hair cutting, and then level your hair out in front of you. Be sure to hold your head up straight and don't look too far down or up. Next, cut the bottom of your bangs where you want them to be at, then continue ...
In this video, we learn how to write the letter "b" in calligraphy copperplate. Start off with a piece of lined paper and your calligraphy pen. Create a smooth curved line going down, with a dot that is at the end of the line. After this, create a swirl on the left hand side of the line, then curve it out to make the top of the letter of the humps on the "b". Make sure you grab ink often, especially when you want to make a bolder line. Continue down to make the humps of the letter, then when ...
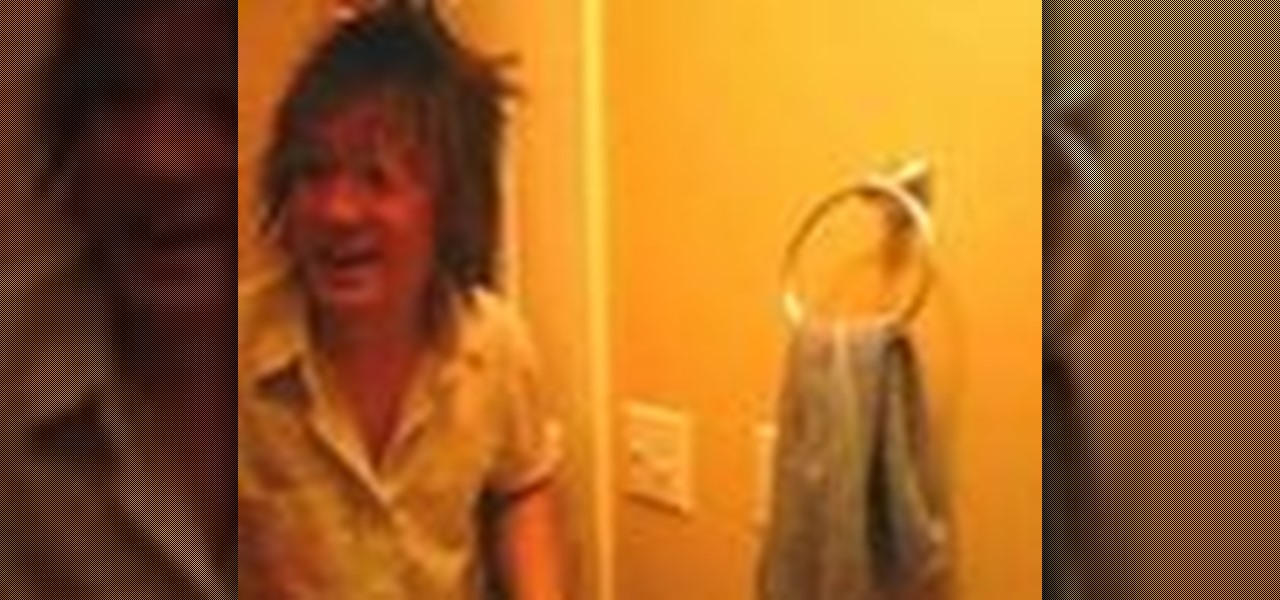
In this video, we learn how to thin and layer hair for a spiky look. To do this, start off in front of the mirror with sharp scissors and a razor over the sink. Grab the scissors first and brush your hair to the front of your face. Start off cutting different layers into your hair, making some longer and some shorter. Next, take a razor and run it through your hair to create a think layering of all the hair. After you are done cutting it to your desired length, add in hair gel or wax to your ...
In this tutorial, we learn how to make a cool neon text effect using Photoshop. First, type your text using a big and simple font. After this, right click on the text layer and click on "rasterize type". Now, press the control button while you click the thumbnail of the text layer. After this, grab the lasso tool and click "select inverse". Then, set it on 12 pixels in the toolbar. Now, use the magic wand too and select each of the letters by holding shift. Next, create a new layer and click ...
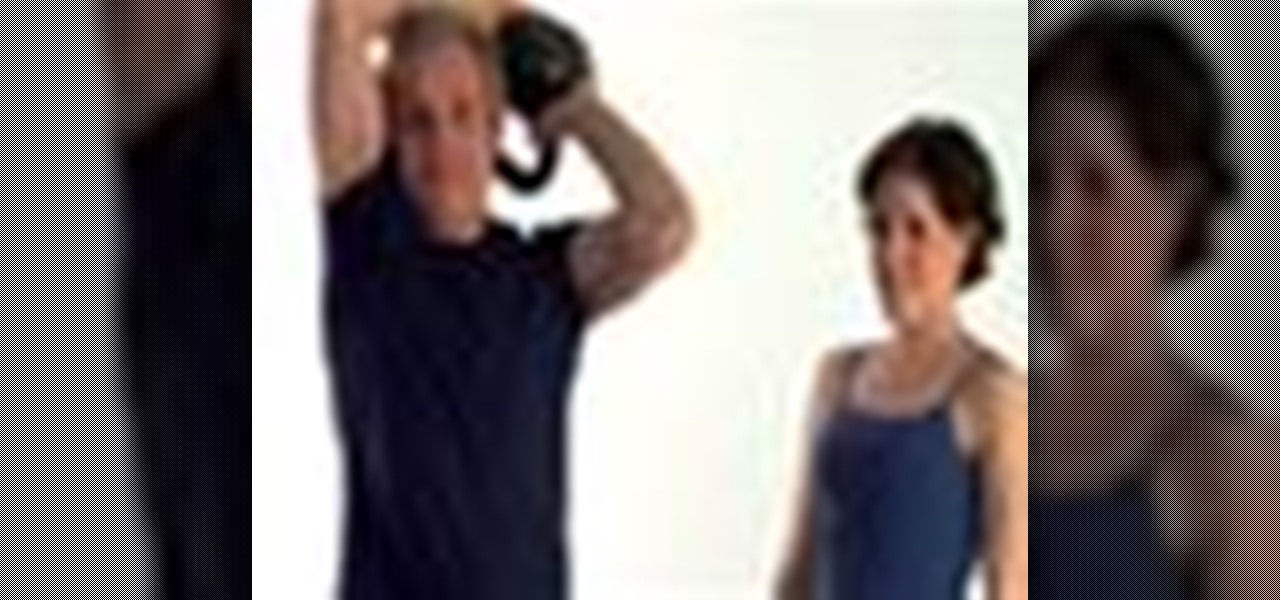
Dina teaches us how to do the Turkish get up exercise with a kettlebell in this tutorial. You want to start off on the ground dong stretches to get your body prepared for this. After you are ready, you will grab the kettlebell and start to do various exercises that work all the different parts of your body. You will need to make sure you maintain control of your muscles while you are doing this, so you have the best results when you are finished and you don't pull a muscle. Do different arm a...
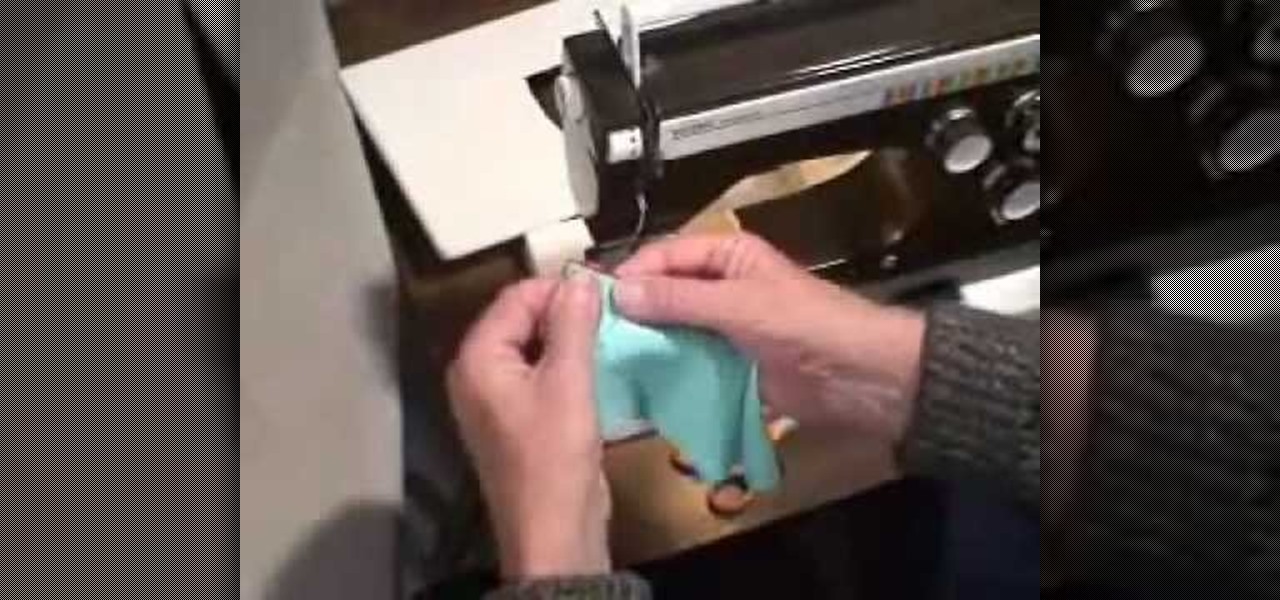
In this tutorial, we learn how to edge finish with lingerie elastic. First, grab your elastic and place it onto your fabric. Line up the elastic so it matches in perfectly with the fabric. Use a sewing machine to sew the elastic onto the fabric. Go slowly while you are doing this and lift the elastic in your hand as you continue to sew it on the fabric. When you get to the end of the fabric, the elastic will be sewn on, and you will be able to wear it! This only takes a few minutes, just make...
In this tutorial, we learn how to style your hair messy and scrunchy. First, grab your hair and place it into a bun in the back of your head when you get out of the shower. After this, let the hair dry, then pull down your hair and add in scrunching gel into your hair. You can also use mousse if you prefer that. Scrunch this into your hair while pushing it up. When finished, your hair will have a dry and messed up look. You can also apply hair spray to your hair if you want to keep the look g...
In this tutorial, we learn how to make a Senorita margarita cocktail. You will need: tequila, Triple sec, sweet juice, lime juice, and orange juice. First, take a pre-salt rimmed glass and fill it up with ice. Then, add in 1 oz of tequila, then add in 1 oz of triple sec. After this, add in 1 oz of sweetened lime juice, 1 oz sour mix, and 1 oz of orange juice. Grab a lime to garnish on the side, then mix together with a straw. Serve immediately and enjoy this delicious drink! You can add more ...
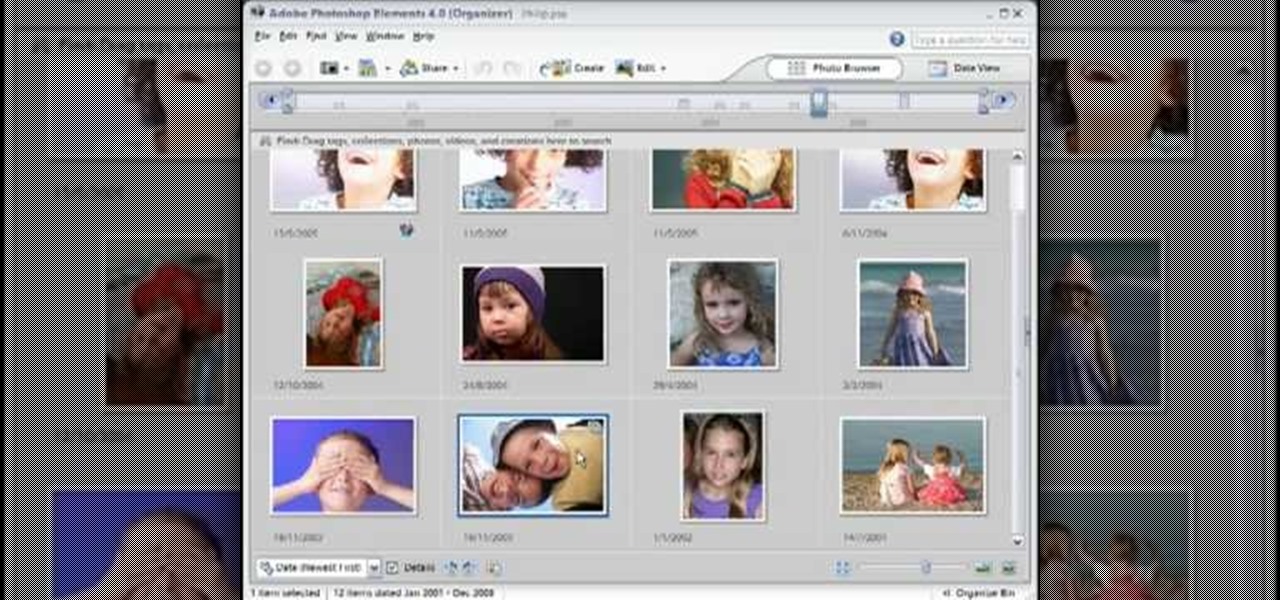
This video tutorial belongs to the software category which is going to show you how to use color options in Photoshop Elements 4. This version of Photoshop includes color settings that help you to control the way in which the colors in your photos are managed from capture to editing to printing. To use the options menu, click on edit > color settings. Now you get a dialog box with 4 options. Check the option that you want and click OK. Let's say you select the 'allow me to choose' option. Fli...
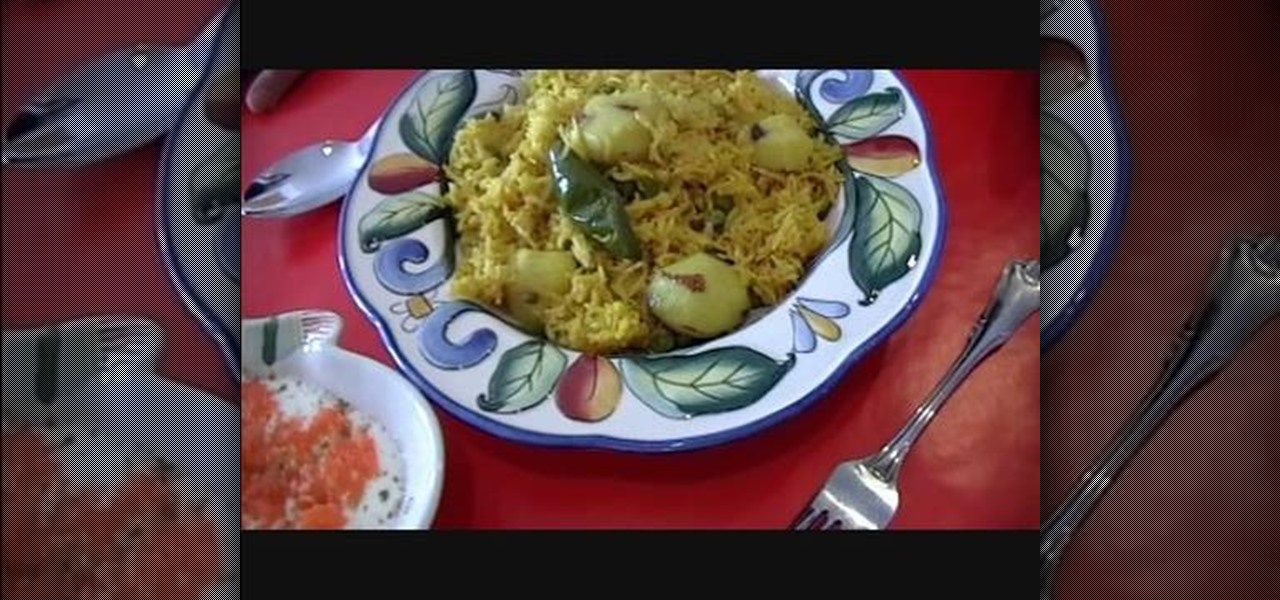
In this video, we learn how to make yellow rice. Start off by chopping up a jalape–o pepper, a potato, and grab frozen peas. Next, prepare your traditional spices, which include: paprika, garlic, curry, and salt. Now, heat up all your ingredients in a large pot and let simmer. after the garlic starts to brown, add in your vegetables into the pot and mix together. After this, add in your rice to the pot and keep mixing. Now, place water into the pot and throw everything into a pressure cooker....
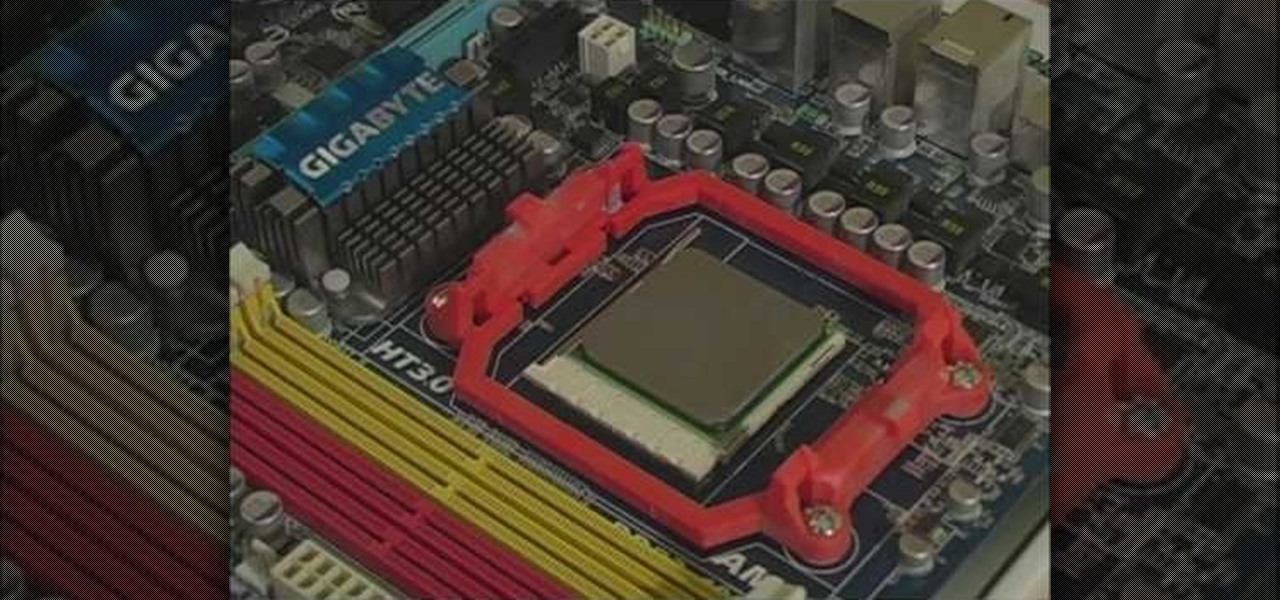
In this tutorial, we learn how to build a gaming PC at home. First, grab your processor and place it into the socket of the motherboard. Lock it into place, then apply compound on top, rubbing it in evenly. Next, install the heat sensor, which will keep the processor cool. after this, install the RAM into the correct slots. After this, insert the motherboard inside the case, matching it to the slots in the case. Use a screwdriver to screw it in, then install the cases. Install the hard drive,...
In this tutorial, we learn how to do UVmapping with 3D Studio Max. Open up your image in the software, then go to "unwrap UV". Scroll down to edit and you will be able to see the basic scale. Grab the mass and scale it down, then use your element turn on to select the different pieces. The UV mapping will now turn a different color and show you where you have edited it. Continue to do this throughout the entire program. Make sure you have all other programs closed while you are doing this, an...