In this tutorial we learn how to draw a cartoon skull. To start, you will draw the eyes of the skull using two triangles that are facing each other. Next, draw the nose of the skull and shade it in with black. Then, draw in the teeth and color in the inside of the mouth. From here, you will draw a hate on top of the skull and then draw in a body from the bottom of it. Add on baggy pants and large feet. Then, draw in hands and a large cape to finish up this cartoon skull drawing!
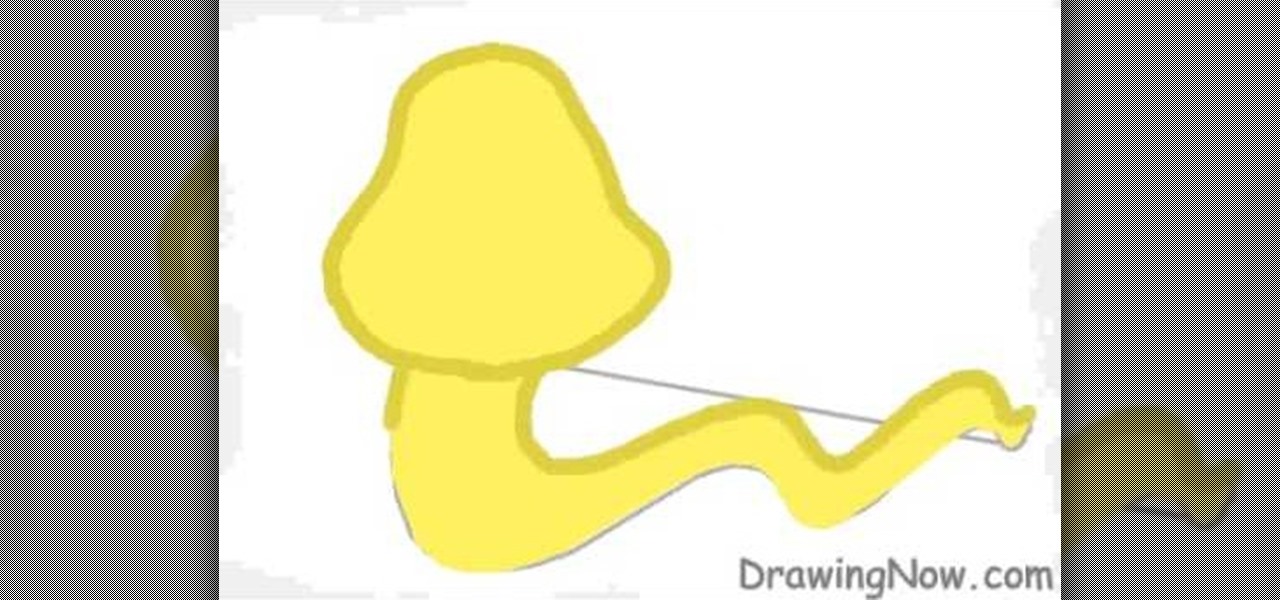
In this tutorial, we learn how to draw a cute snake. First, draw a bell shape for the head, then draw a thick squiggly line for the body of it. After this, color the snake yellow and then outline it with a dark green color. From here, add stripes to the snake in hot pink. Next, you will draw on the face to the snake. Make sure to give it a friendly smile and draw the stripes on the top of the head. Next, you will draw on the tongue, giving it a long one with two triangle edges. This will fini...

In this tutorial, we learn how to draw skulls the easy way. First, draw a round circle on the page followed by a smaller one connected at the bottom. From here, draw in two sideways triangles on the middle of the large circle. Then, draw in lines on the face and create the section of the nose. After this, draw in large teeth on the skull and then connect lines around the circles to make the jaw line. After this, draw on lines around the skull to make it look like it has depth. Then, shade in ...

In this tutorial, we learn how to draw curvy steps using pencil. To start, you will draw a thin horizontal line with a small point on it. After this, you will draw lines out from this, using a ruler to keep them straight. From here, draw your steps on the bottom of the page using the lines to keep them proportioned and in place. Draw them in a triangle wedge shape and then color them in. Shade the bottom and the sides to give them depth and dimension. After this, draw in the area around the s...

In this tutorial we learn how to make 303 acid using TS404. First, move the distortions around all the away around. After this, you will have a techno kind of beat. From here, you will change the oscillator one and two knobs all the way to the left. Once you have fine tuned these, play your audio to see how it sounds. Keep the filter in LP24 and move the resonance all the way to the right. LFO and Wave should be changed to the triangle pattern. Move the amount to the opposite. When finished, ...

In this video we learn how to make a paper rose from newspaper. First, fold a red piece of paper into a small triangle. After this, fold it into quarters on both the right and left side. After this, you will have a slight flower shape. Take a pair of scissors and cut diagonally across from this, then open it up. Then, wrap the flower around a pen to create realistic petals. When finished, make more of these to create a bouquet of flowers. Use different colors and different types of papers to ...

Tutting is basically the human body's way of trying to become a square. Or a triangle. Or a rectangle. That's because tutting is a type of street dancing that involves moving the body to create geometric positions, usually with right angles.
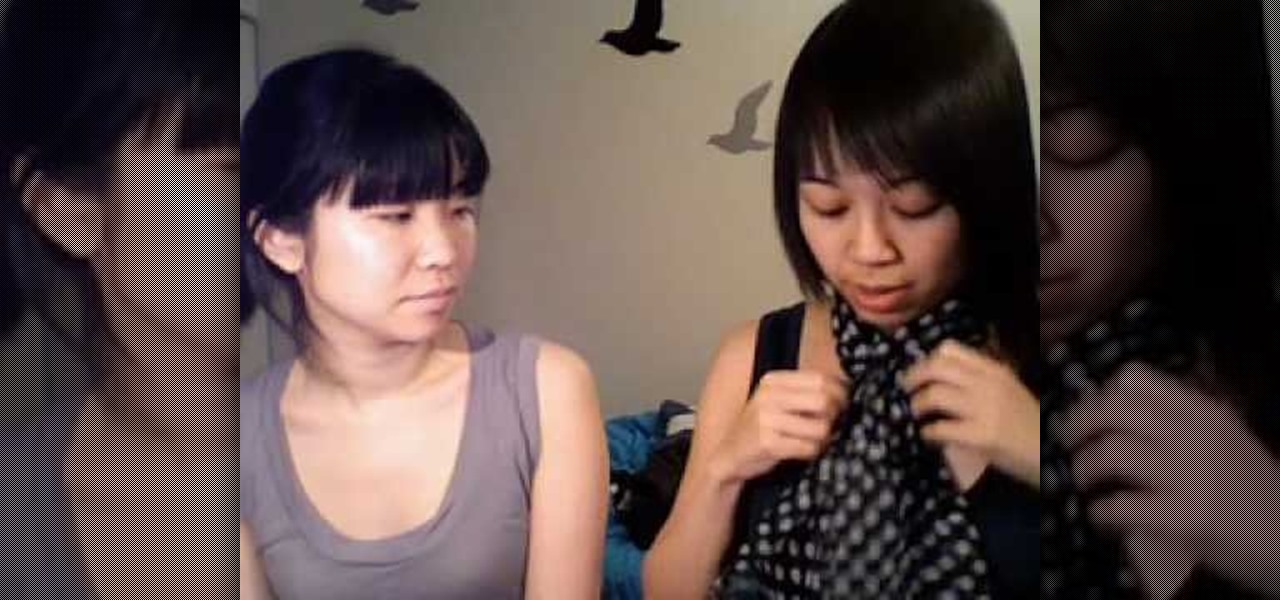
In this tutorial, we learn how to tie a scarf from Lucky Magazine. The first way to fold a square is to fold it into a triangle, then fold it down until you are left with the bottom. Put it around your neck, then knot it and tuck the knot into the neck area. The second way to tie a scarf is to take a long one and place it behind the neck. Then, wrap it all the way around and tie it in the back. Now your neck will be completely covered with no chance of chills. These are both great ways to tie...
In this video, we learn how to draw Karin. First, start drawing a circle and then add the eye line to help you place the eye. After this, draw in a triangle at the bottom of the circle as a reference to where the chin will go. Then, draw in a line for the body, then circles for the body and shoulders. After this, draw in the neck and then draw the rest of the body. Now, draw in the hair and the details of the face. Once you have finished this, erase the background lines from the face and then...
In this video, we learn how to make the best paper snowflakes. First, take a dark blue and white piece of paper and fold it up into a square, then fold into a triangle. Next, grab a pair of scissors and start to cut along all of the sides of the paper. You may have to do this a couple of times to get the shape right, it will be helpful to use a diagram to show you where to place the scissors. When you are finished, open up the piece of paper to see your snowflake! String this with other snowf...
In this video, we learn how to draw Rukia. Start out by drawing a circle with a triangle shape at the bottom. Then, draw reference lines in the face to measure where the features of the face are going to be. After this, start to draw in the details of the face. Draw the eyes, mouth, nose, eyebrows, and any other details you need. Make sure the eyes match the original character and leave white for the pupils to show. Draw in the hair to finish up the drawing, making sure to draw the eyebrows a...
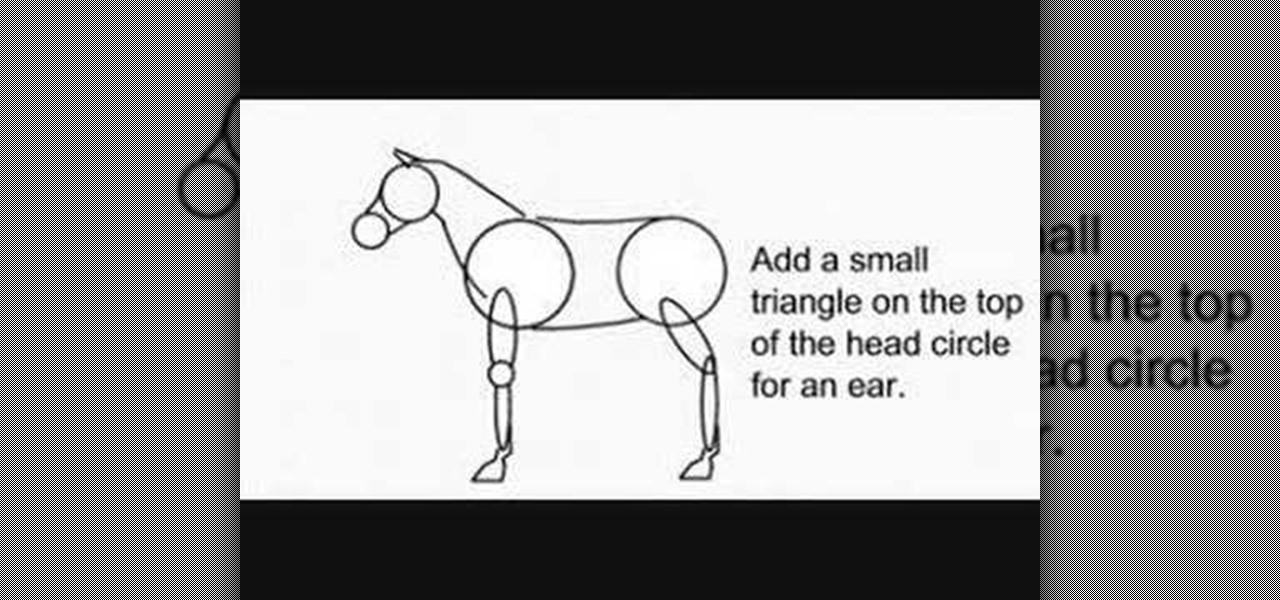
In this video, we learn how to draw a decent horse. First, start with two circles connected by two curved lines. Next, add a sausage for the top of each leg and add a small circle for the front of the knee. Then, add another for the lower part, and add two hoof outlines at the base of each leg. Then, add the back of the hooves. Next, draw two more lines that are far apart at the bottom and narrow at the top for the neck. Then, draw two circles for the top of the head and the muzzle. Join the ...
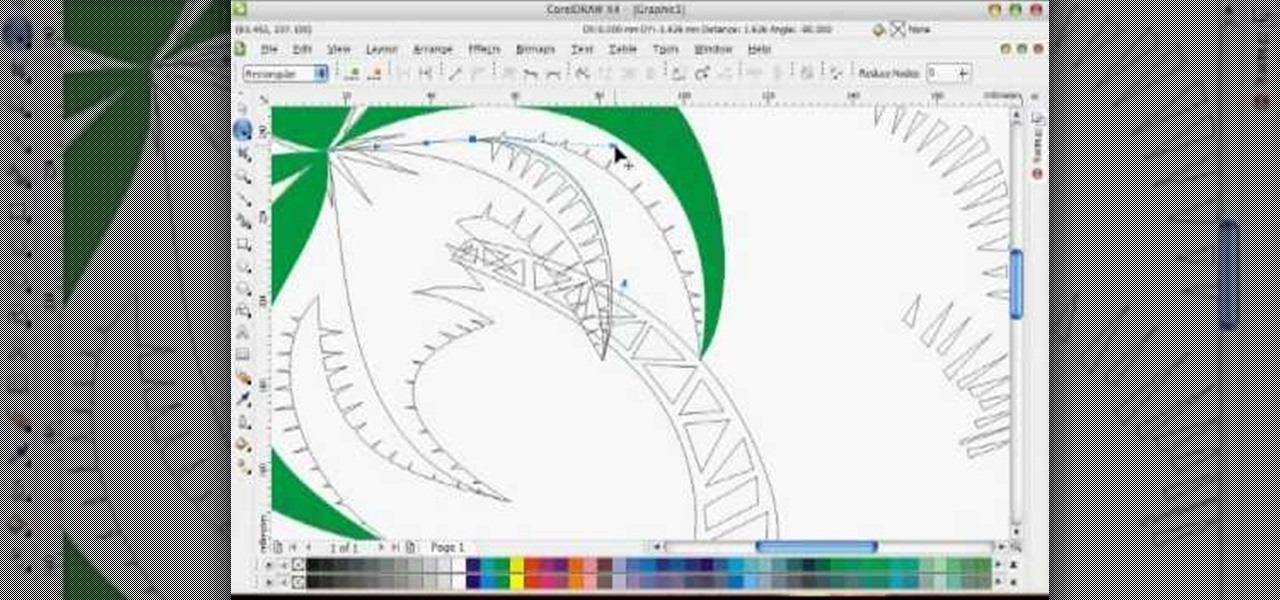
In this tutorial, we learn how to draw a vector art palm tree in CorelDraw X4. Start off in the CorelDraw program and create the base of the tree with a drawing tool in black. After this, draw small triangles inside of the base of the tree and then draw the leaves and branches of the palm tree. Fill this in with small spikes and then erase the middle nodes. From here, use a shaping tool to make the spikes on the palm tree more rounded and lifelike. After you do this, start to color in the ent...
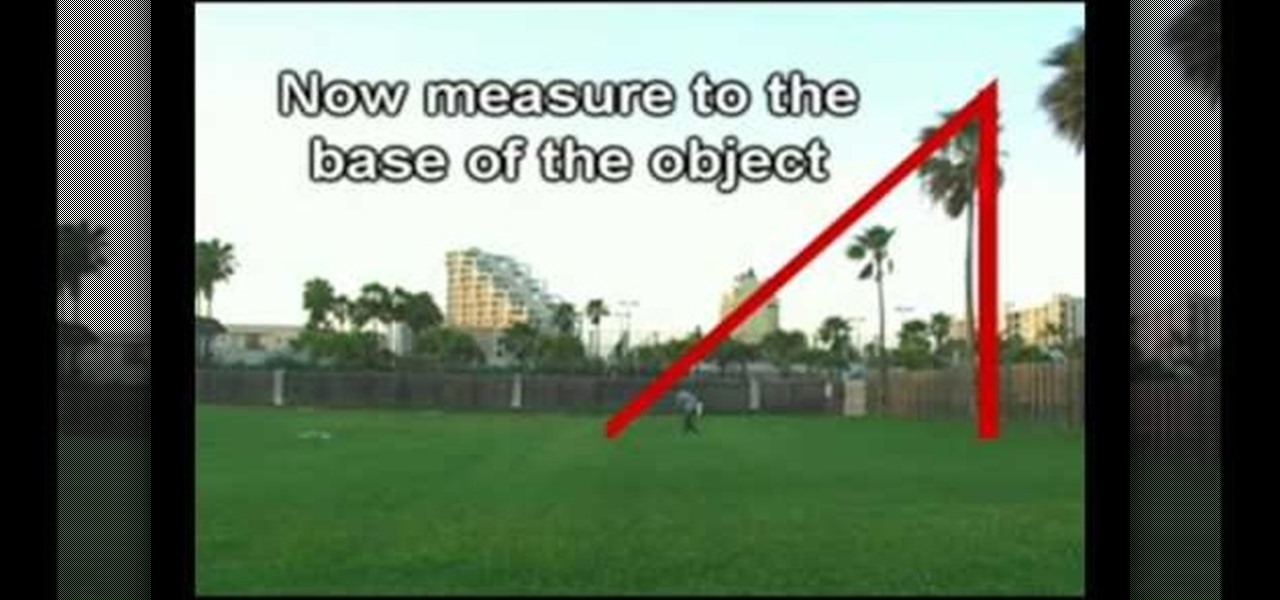
In this video, we learn how to use a protractor to measure the height of any object. First, attach a level to the protractor, followed by a straw at the 45 degree angle. Next, walk back form the object while looking through the straw. Keep walking back until you spot the top of the object through the straw, then measure to the base of the object. After this, you will have an isosceles triangle that has two equal sides. Use these sides to help find what the size of the object is. After this, a...
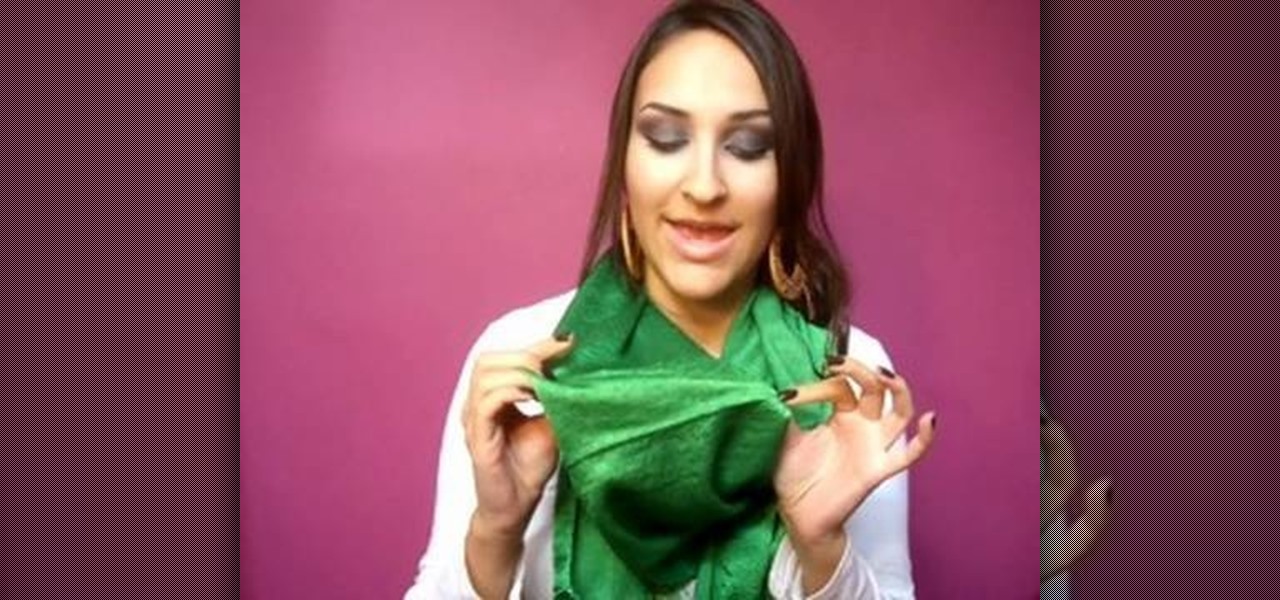
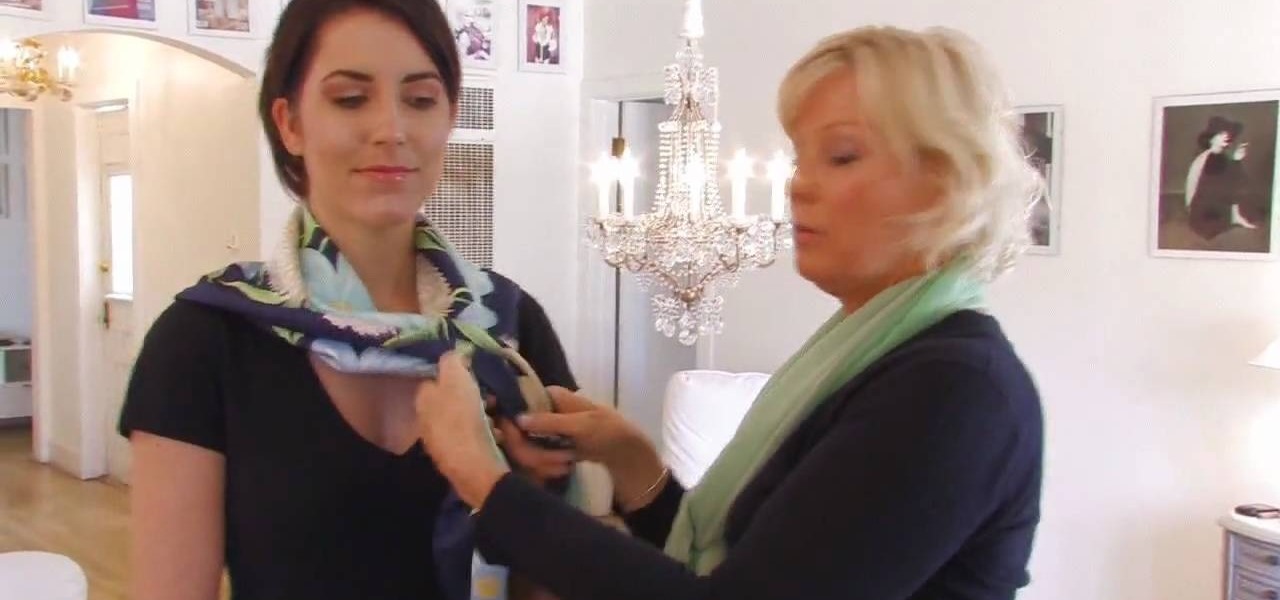
In this video, we learn how to wear a scarf by creating contrast and texture. A squared shaped scarf with contrasting patterns will look great with anything that you are wearing. To wear this, make it into a triangle, then tie the ends together around the back of the neck. Then, you can let the scarf hang down on the front to add a texture to your look. A solid color scarf is also great if you are wearing a simple top to add a splash of color. You can tie this around the neck one, then let th...
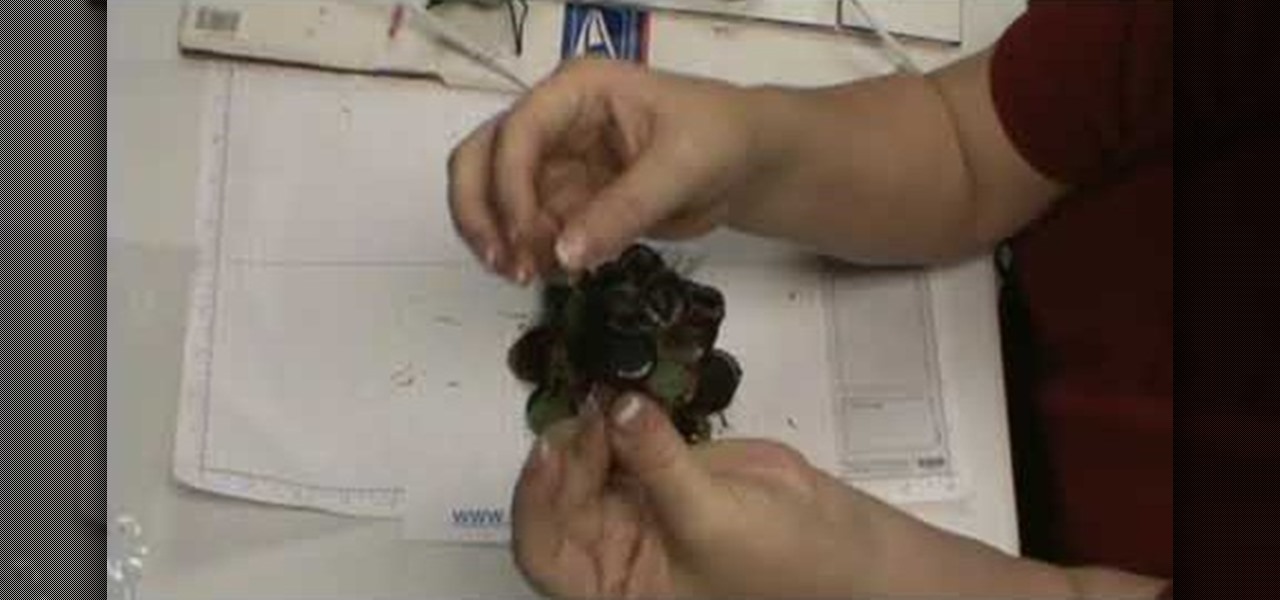
In this video, we learn how to add netting a flower pin. Once you have already out your flower together, put a pin in the back so you can clip it to your clothing. Now, purchase netting from a craft store and cut out a small rectangle. Now, fold this piece up in half and then in half once more. Now, make a triangle at the bottom and open up the flower. Find a place to put the netting in, then apply hot glue inside and use a craft pencil to push the netting into the glue. Do this a couple more...
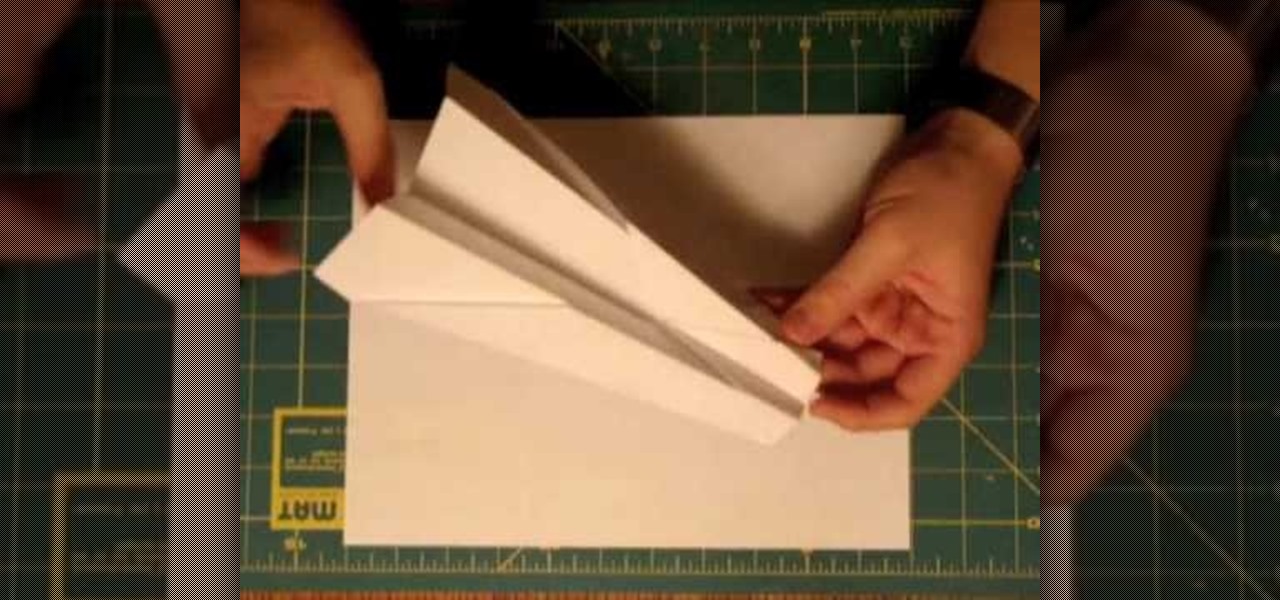
This video shows viewers how to make a paper airplane. You should begin with an 8.5 x 11 piece of paper and fold one corner to the opposite side, making a triangle. This should be repeated on the other side, so that a cross is formed on your paper. Folding down opposite sides of the creases, you should have a triangular flap on your paper. Fold both sides of the flap upwards and then flip the paper over. You should then take the tip of the paper and fold backwards. Fold the paper in half so t...
In this tutorial, we learn how to throw an upside down double walled pottery vase. Start off by using water every few seconds to craft your vase. Use your fingers to press down in the middle, to make the round shape and have the vase rise up into the air. Make this into a bowl shape, which will be into the air. Next, shape the middle using your hands into a triangle shape. Raise the side bowl around it, and keep using water to increase the size of the bowl. Collar the bowl in, then start to m...
In this tutorial, we learn how to draw a simple cartoon dinosaur. Start by drawing a rectangle and give it eyes on the upper right hand corner, then nostrils. Start drawing a body that has a jelly bean shape. Now, create small arms on the side of the body, that are smaller than the rest of the body. These arms should have a cylinder kind of shape to them. Now, draw some legs onto the bottom, using large cylinder shapes and little pointy toes. There should be adequate space in between each of ...
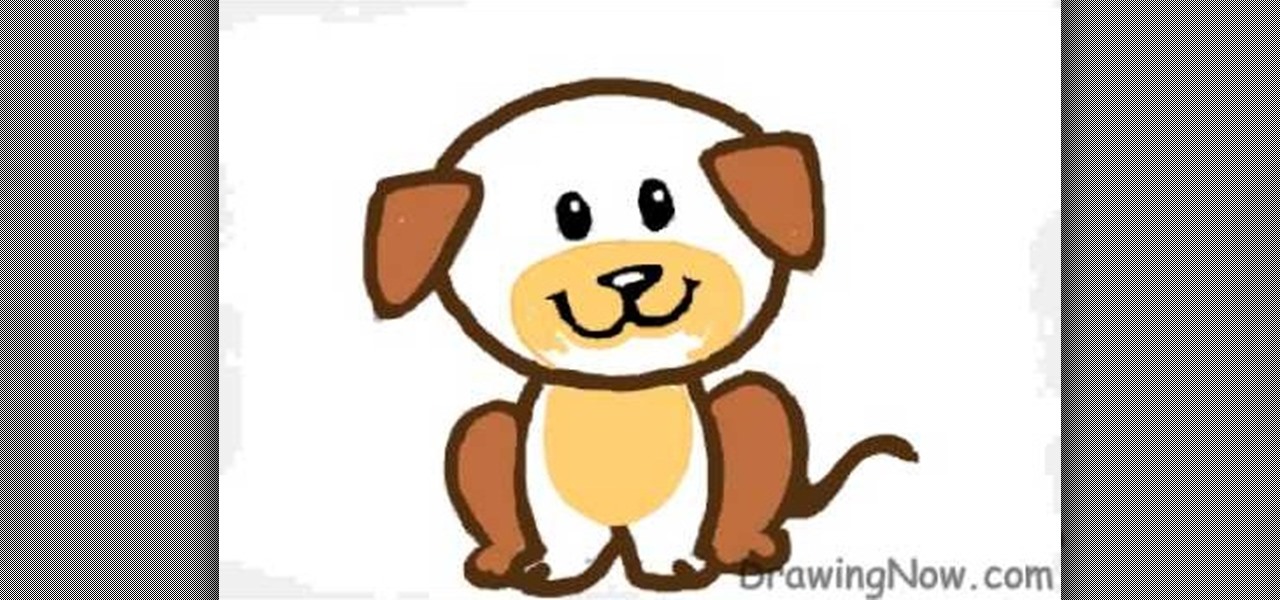
In this tutorial, we learn how to draw a cartoon puppy First, draw the oval head, followed by triangles for ears. next, draw the body underneath with four legs coming out of the bottom like the dog is sitting down. Add on a squiggly line for the tail next to the leg. Now, color the ears and back legs light brown, then add eyes, a nose, and a mouth onto the face. Draw a circle around the nose and mouth, then color in with lighter brown/tan color. Now, color the rest of the dog a darker shade o...
In this tutorial, we learn how to make mini paper square boxes. First, grab a piece of paper and fold two ends in so they touch in the middle. After this, fold the bottom up so it covers the triangles and they meet at the middle. Crease the edges, then cut down the edges on both sides where the crease is. Next, fold the sides in so you have a shape that looks like a sword. After this, fold the sides up, then fold the other sides in. When finished, push the creases in and you will form a box, ...
In this tutorial, we learn how to make a left-hand crochet Valentine's puffy heart. You will need: a size G crochet hook and yarn. Start by working a chain of three then forming a loop and doing a chain one. After this, work 9 single crochets through the center of the ring. Next, do 18 single crochets making the first stitch on a single crochet. Keep doing 18 single crochets around the circle you have created. After this, make one single crochet for a total of 18. The edges will start to curl...
In this tutorial, we learn how to make a paper football for 1 dollar. First, grab your paper and fold it in half length wise. Next, make sure the crease is nice and clean, then fold it length wise once more. Now, fold one of the corners up into a triangle shape, marking the crease exact. Fold this up again and keep doing this until you get to the end. Once you reach the end, fold the other end in twice into the pocket you see. Crease this, then stand it upright and flick it with your other fi...
In this video, we learn how to tie scarves. The first way is to wear a scarf with tassels that is wrapped once around the neck with it's sides hanging down in front of you. With a skinny scarf, you can tie it around your head to make a headband or fold it in half and wrap it around a pony tail. If you have a rectangular scarf, you can tie it in a loop around your neck, or make a loose knot on your chest in front of you. If you want a polished look, tie a bow in front with the scarf. A square ...
This video tutorial is in the Arts & Crafts category which will show you how to fold a circular teabag paper. This is a simple process and doesn't take much time to do. First fold the circular paper in half to get a semi-circle and then fold it in half again in to a quarter. Unfold the last fold and fold one quarter back to the halfway mark. Then turn the paper over and fold the bigger side of the paper along the fold line exactly matching the edge as shown in the video. Now you get a little ...
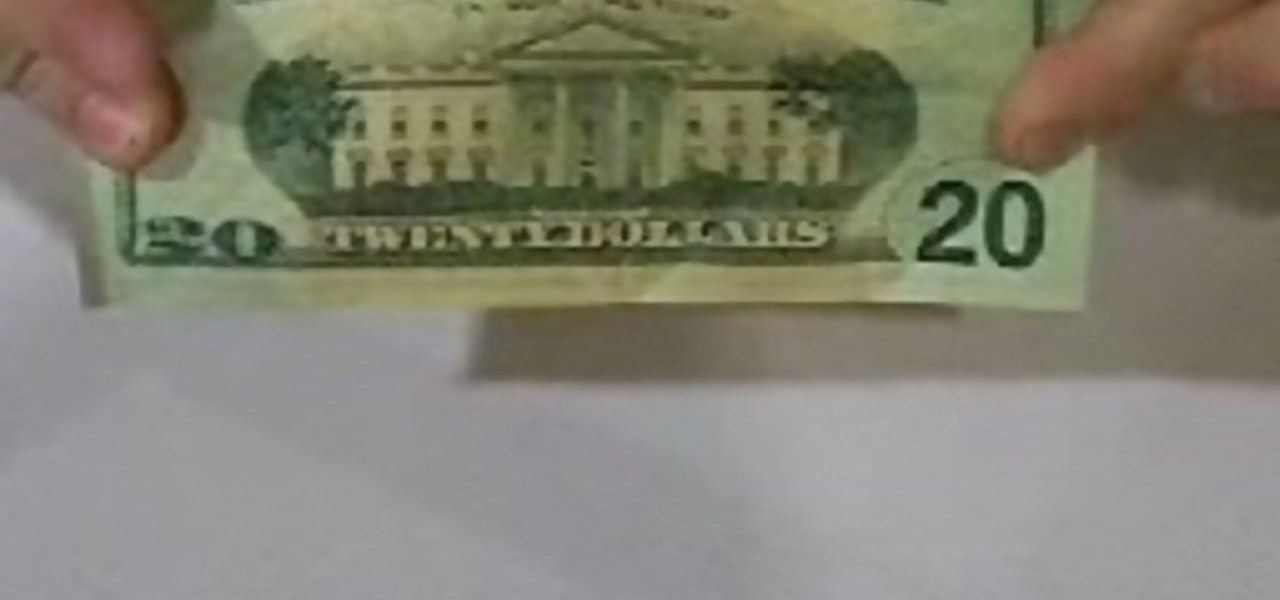
In this tutorial, we learn how to make a paper football with a $20 bill. First, take the bill and fold it in half length wise. Next, take the bill and fold one of the ends into a triangular shape. After this, fold the triangle over and keep doing this until you get to the end. When you reach the end, and tuck the flap on the end into the pocket you created. After this, you can hold the bill up with your fingers, and flick it with your other fingers. You can use any type of bill to make this, ...
In this tutorial, we learn how to make a perfect paper football. First, fold the paper in half, length wise. Next, fold it again the same way and fold the crease. Now, rip a small section of the top part and discard. Now, fold the paper in the middle to make a sort of "l" shape. Then fold again so you have an arrow. Now, fold all the parts together so you have a diamond shape, then tuck the end arrow into the pouch you created to have an even smaller triangle. When finished, hold the paper wi...
In this tutorial, we learn how to draw a fun bunny doodle. To begin, draw an upside down triangle with two straight lines coming out of the top middle. Next, draw a half circle over the eyes, then draw two large bunny ears on top of the half circle. Then, connect the curls on the end of the ear to the bottom of the head. Now, do an additional line to make the inside of the ear. After this, draw another circle around the bottom of the face, then draw a line with two humps at the bottom of the ...
Cate Adair shows us ways to wear a square scarf in this tutorial. The first way to wear this is the classic, which you will wrap the scarf around your hair and wear sunglasses. The next way to wear it is to fold it around your neck, with a jacket over it, to keep you warm during cold months. You can also double wrap the scarf around you, letting the triangle side lay on the front of your shirt. This can be a fun statement with many different outfits, no matter what you are wearing. Wear acces...
In geometry class you learn that circles most definitely aren't squares. But in the crochet world, circles can become squares, triangles, and even hexagons. How, you ask?
In this tutorial, we learn how to fold a Christmas tree. First, start with a square paper and fold it in half, then open it and fold it corner to corner. Open the paper again, the turn it over and fold it side to side. Open it once more and fold again side to side. The paper will not automatically fall into the shaped creases and you will have four flaps. Take your finger inside and flatten all the flaps. You should have four flaps on each side and then you can cut the bottom to form a trunk ...
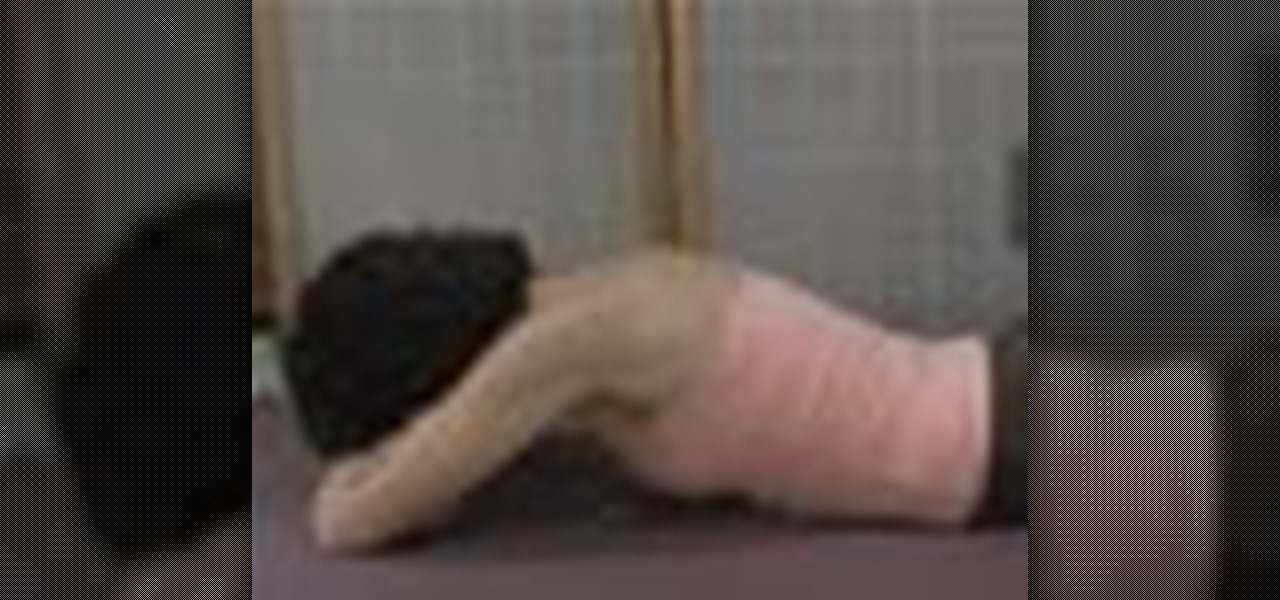
In order to do the resting crocodile pose, you will need to lie on your stomach. Separate your legs. Space your legs greater than hip distance apart. Your toes should be pointed. Cross your arms. Your arms and chest should form a triangle with the floor as the base. Rest your head on your hands and breathe deeply. As you inhale this will work your lower abdominal muscles, while it sends more oxygen to the cells of your body. This pose is a recommended pose for anyone who is rehabbing muscle o...
In this tutorial, we learn how to make a tissue paper flower. You will need: pipe cleaners, scissors, and tissue paper (three different colors). First, twist three pipe cleaners together to make a stem. Next, cut your tissue papers all into the same size, mix colors to get a prettier flower. Now, layer the sheet and fold the papers as many times as possible. Cut the ends in a triangle shape, then spread the papers again and fold up again in the alternate direction. Now using your papers and p...
No matter how often you sew or how many projects you complete, you can't possibly find a use for EVERY single scrab of fabric lying around. Your first thought is probably to throw them away, but there is indeed a project you can do that only requires the smallest of fabric scraps.
In this video, we learn how to do a bird of paradise yoga move with Dina Priost. This move is an intense pose, so make sure you are properly warmed up before you go into this move. First, start in an extended side angle pose then go into a bind. Make sure your top shoulder is on top of the other with your chest opened up. Now, straighten your left leg so you are in a triangle pose. Look up or look straight out front taking deep breaths. Now, bend both your legs so they are straight and bend d...
In this video tutorial, viewers learn how to fold a pocket square into the winged puff and rolled puff. For the winged puff, begin by folding the pocket square diagonally in half to form a isosceles triangle. Then fold the two edges towards the middle to form a diamond shape. Now fold the two outer points into the center and fold the bottom flap up, creating a pentagon shape. For the rolled puff, cup the pocket square in one hand, then roll the top of the pocket square downwards with the othe...
To create a quick hair quiff, start with a triangle section from the crown to the edge of the eyebrows on both sides. Take the section at the crown and back comb with a fine comb, but pushing down through the hair and gathering hair to the root about three times. Pull the hair that is left over it and repeat with another section. Finish with all sections until only one is left at the front. For the final section, back comb one time, and smooth over the other previous sections. Use a small bri...
This video is a demonstration of how to make a Chinese paper star out of newspaper. First take a folded piece of newspaper and fold it in half again the long way, and then again, to make a narrow strip. Fold the strip in half to crease it, then fold the strips at a right angle in both directions. Fold the outside edges in toward the center twice and then in a triangle. At this point you will have a thick diamond shape. Repeat with another sheet of newspaper. He demonstrates how to join the tw...
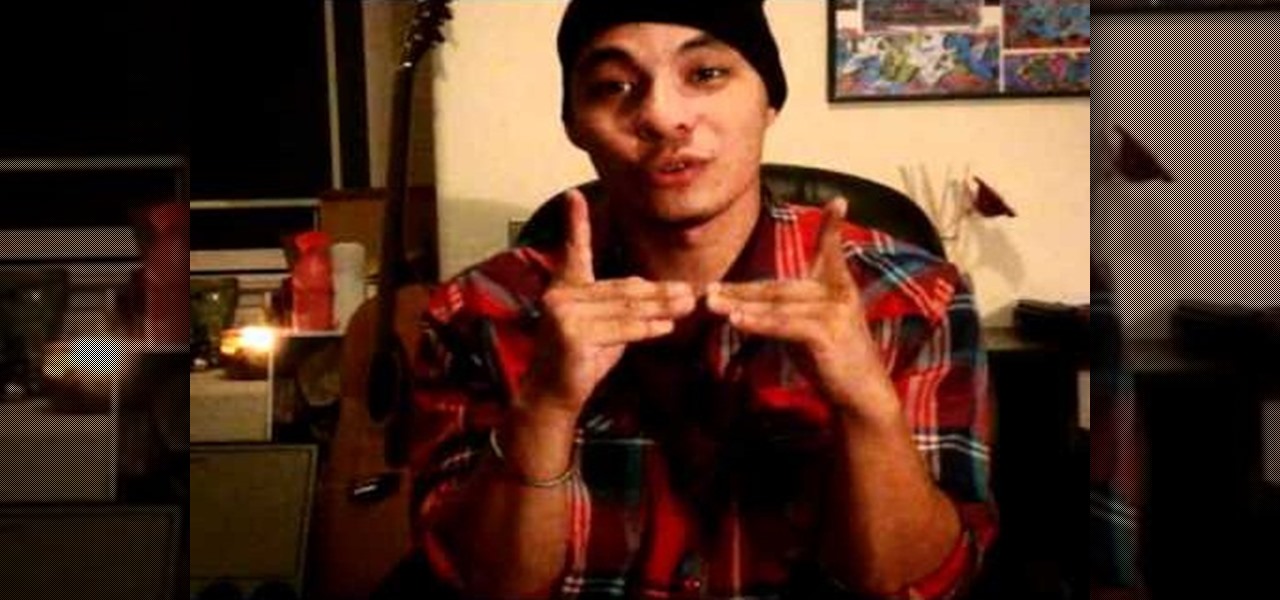
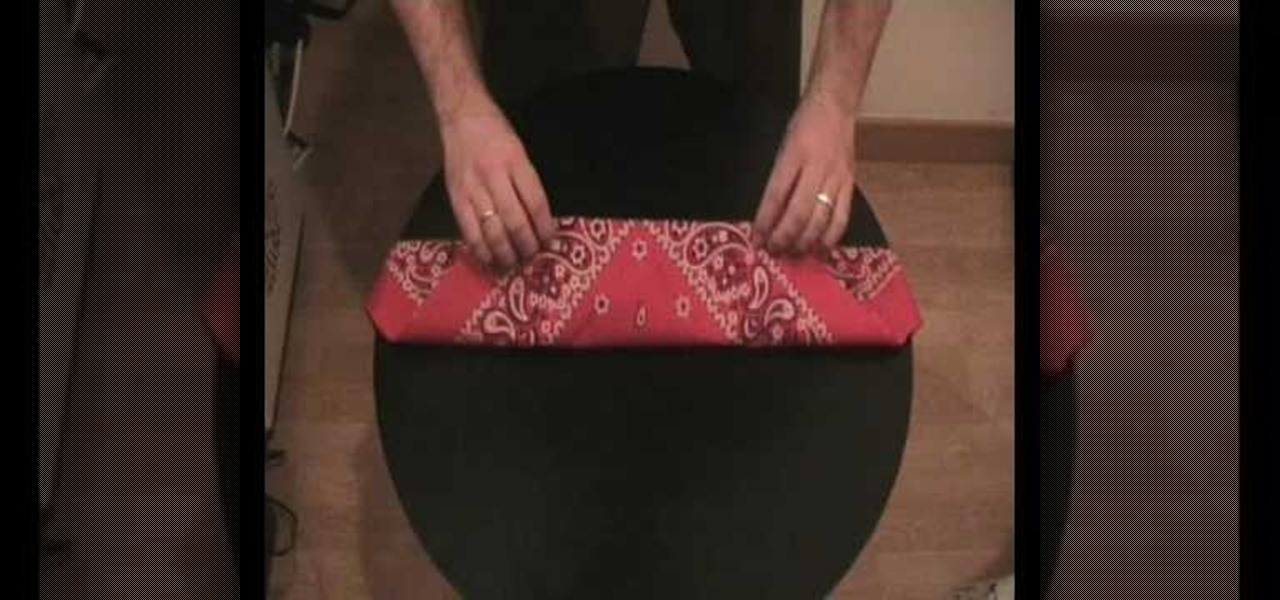
In this tutorial, we learn the proper way to fold a bandana. This is a traditional way, not a rapper or gangster style. First, lay the bandana flat and make sure there are no creases in it. Next, fold the bandana into one big triangle. After you've done this, fold the top point down and keep folding down until you've made a large and thin rectangle. Now, flip it over and you can tie the bandana around your head. Tie it in the back of your head and place it across your forehead, now you've got...
This video shows you how to make a very good paper airplane, that will fly in the air for about 10 seconds before it falls. Start by folding your paper in half length-wise, and then at one end fold triangles from the corners into the middle. Then flip your paper over, and fold the same corners in again, so that your paper looks like a taller point. Take the last 3 inches of the point and bend it into the middle of the paper, creating an X out of the folds. Then fold it all in half so that you...