
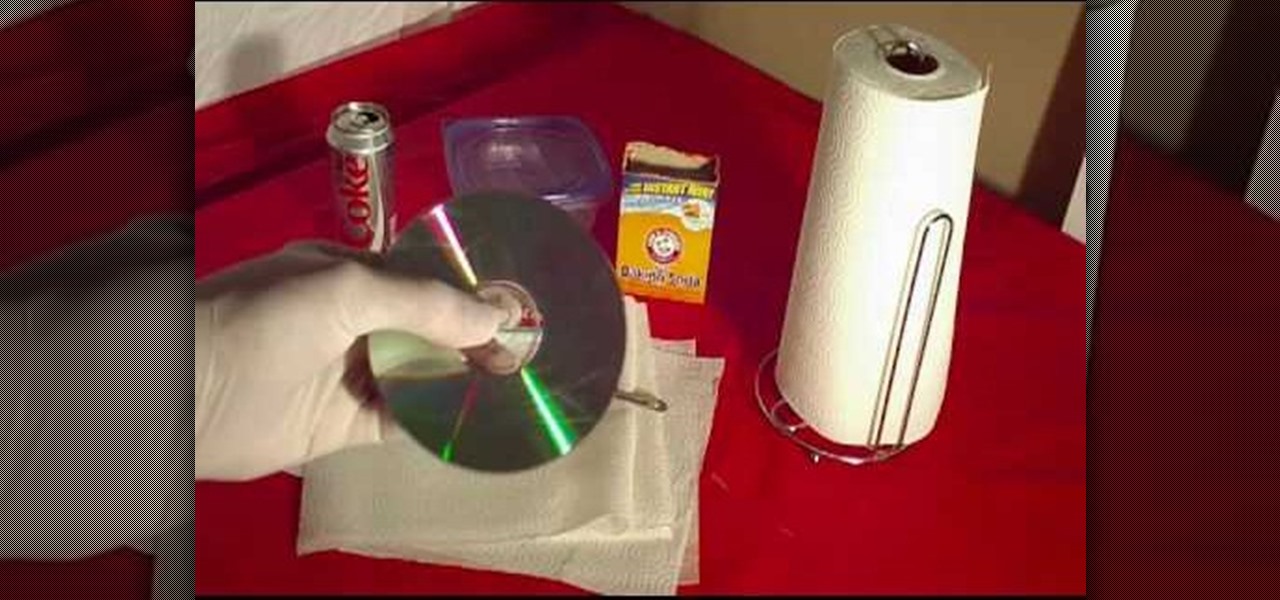
How To: Remove scratches from any DVD
In this Household Hacker experiment, we'll demonstrate how to completely remove scratches from your CD or DVD media.

In this Household Hacker experiment, we'll demonstrate how to completely remove scratches from your CD or DVD media.
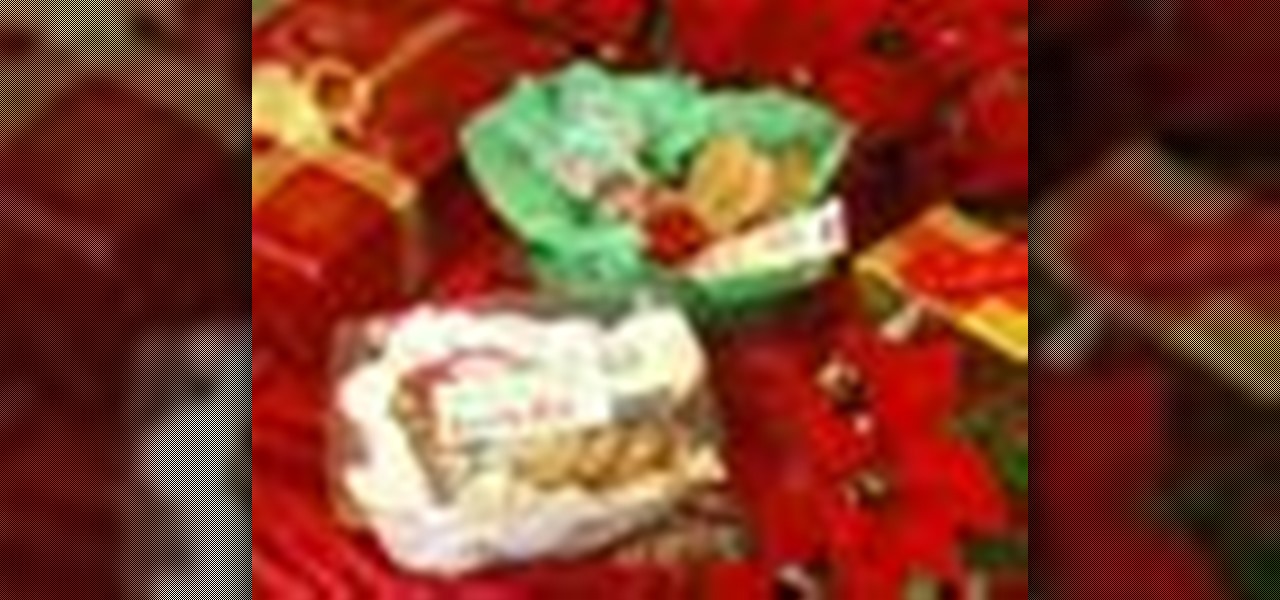
Share the joy of the holiday season with this great homemade Christmas gift from your kitchen. Crank up the Christmas music and invite the kids to come make some gingerbread family kits.

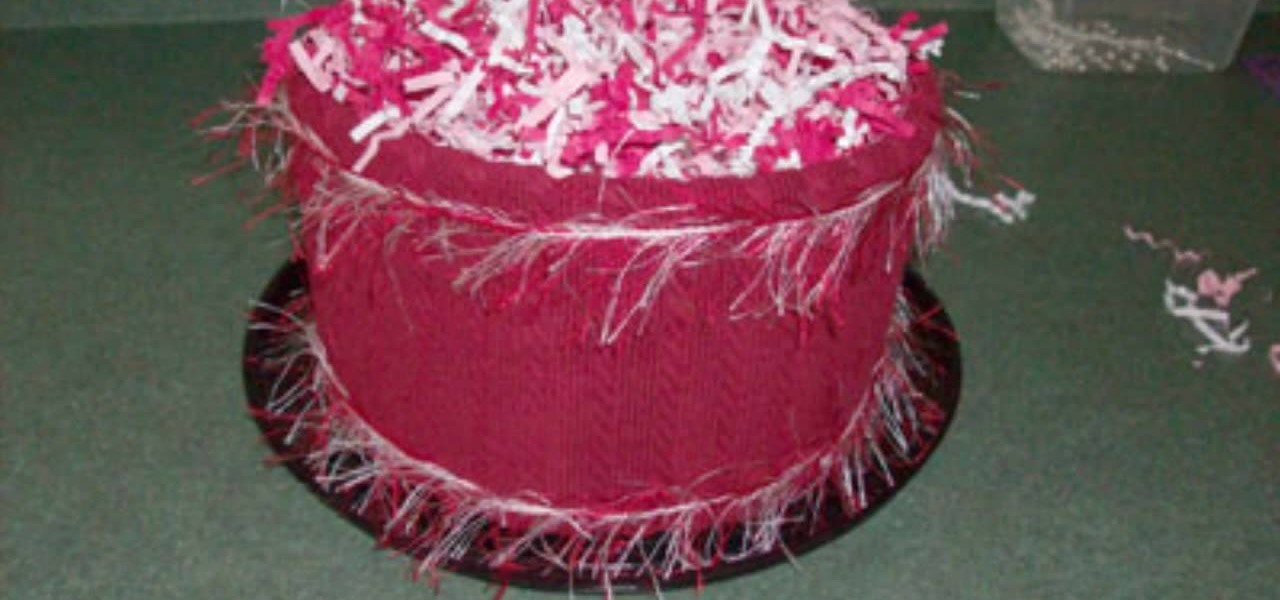
This is a video tutorial on how to make an oval box using card stock, rubber stamps, and ribbon. Decorate paper to use as surface to your cardboard oval box. You can also use an oval stencil to make varying sized oval shapes for the box and lid shape. Have fun crafting this nifty and elegant little container.

Check out this instructional printmaking video that demonstrates how to clean up the screen after making a print. Now the ink used stays good forever (until heated), so go ahead and put it back in the ink container. Just scoop it up and squeegee it. It is a good idea to wear latex gloves. Follow the simple instructions outlined in this printmaking tutorial video to learn how to clean up after making a print screen.
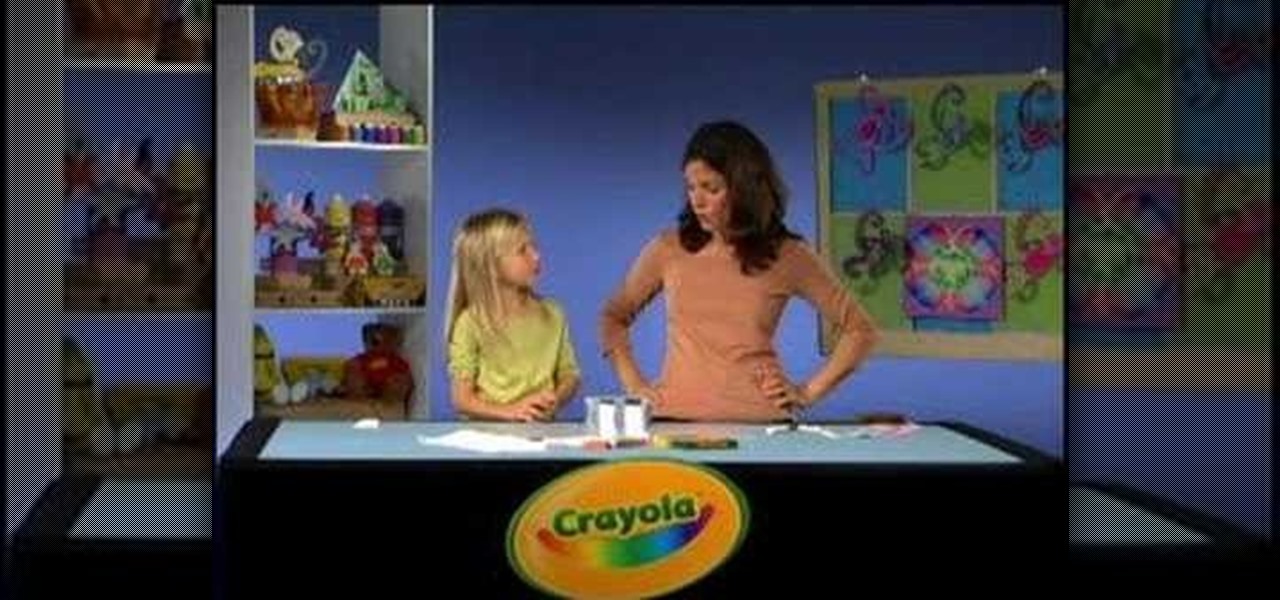
Check out this great science project craft from Crayola. Learn how to separate the colors in a black marker with this tutorial. You will need Markers, scissors, a paper towel, wax paper, and a container of water. This is a great project to teach your kids about the science of colors. With this easy to follow how to video you will be able to separate the colors from a black Crayola marker with your child.

When you need to make a Ghostbusters prop, who are you going to call? Parker! In this video, he shows you how to make a proton pack prop for Halloween, play, or a home movie. You will need a vacuum hose, a small box, miscellaneous plastic parts, a medium circular tin, a big box, a tin can, a water bottle, a coke bottle, a race car trigger, a cookie package, and a pudding container. Watch this video prop-making tutorial and learn how to build a Ghostbusters proton pack.
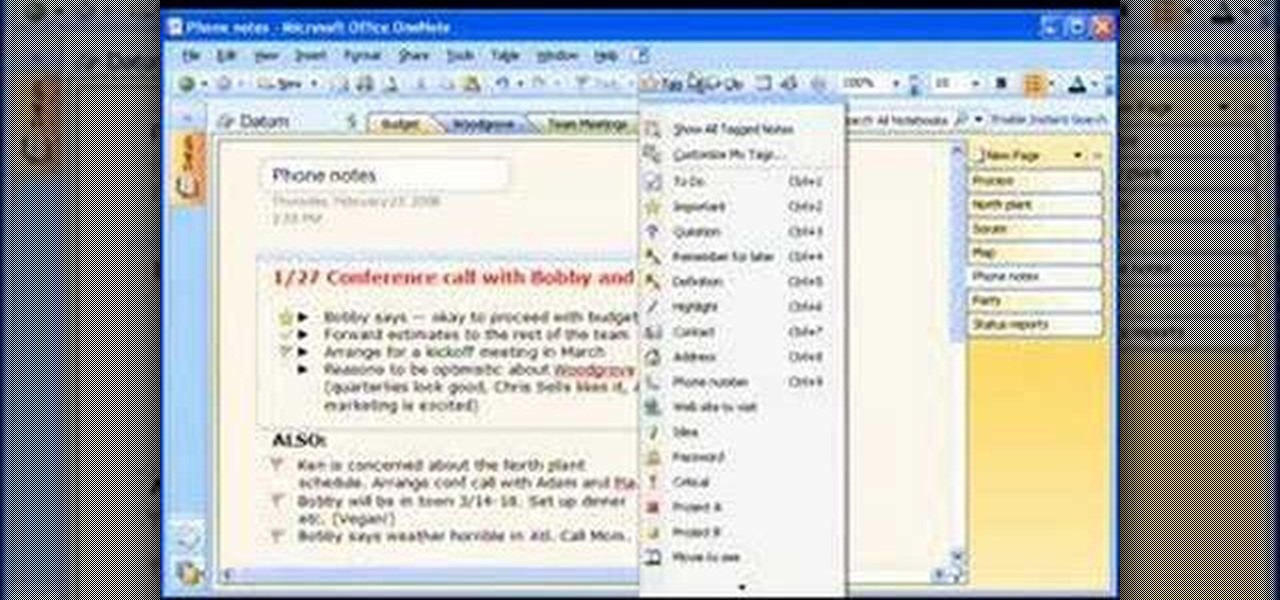
Take a look at this instructional video and learn how to create space in your note containers and move pages in Microsoft Office OneNote 2007. See how much control you have over how your notebook is set up, from a few words on a page to entire pages to whole sections. You'll also see the many ways you can find information in your notebook. Search for keywords, which OneNote will find no matter where they are — in text, in hand-written ink, in URLs, in graphics, even spoken in audio files. Or,...

This gardening tutorial teaches you how to create a successful terrarium for kids of any age. This how to video covers the major points of making a terrarium and I give you lots of alternative methods. Learn how to select a kid-friendly container, select plants, make the terrarium, care and maintain the terrarium. You can use the terrarium as an eco system learning tool for children. This is a great project to do with your children with this how to video.
In this video tutorial, Chris Pels will show how to share data in between JavaScript and server-side code by using a hidden field in an ASP.NET page. Next, learn how to use the RegisterHiddenField method in server-side code to programmatically create a hidden field on the client. In addition, see how to programmatically create a HiddenField server control for sharing data on an ASP.NET page. Finally, use the RegisterArrayDeclaration method to create a container in server code for storing mult...
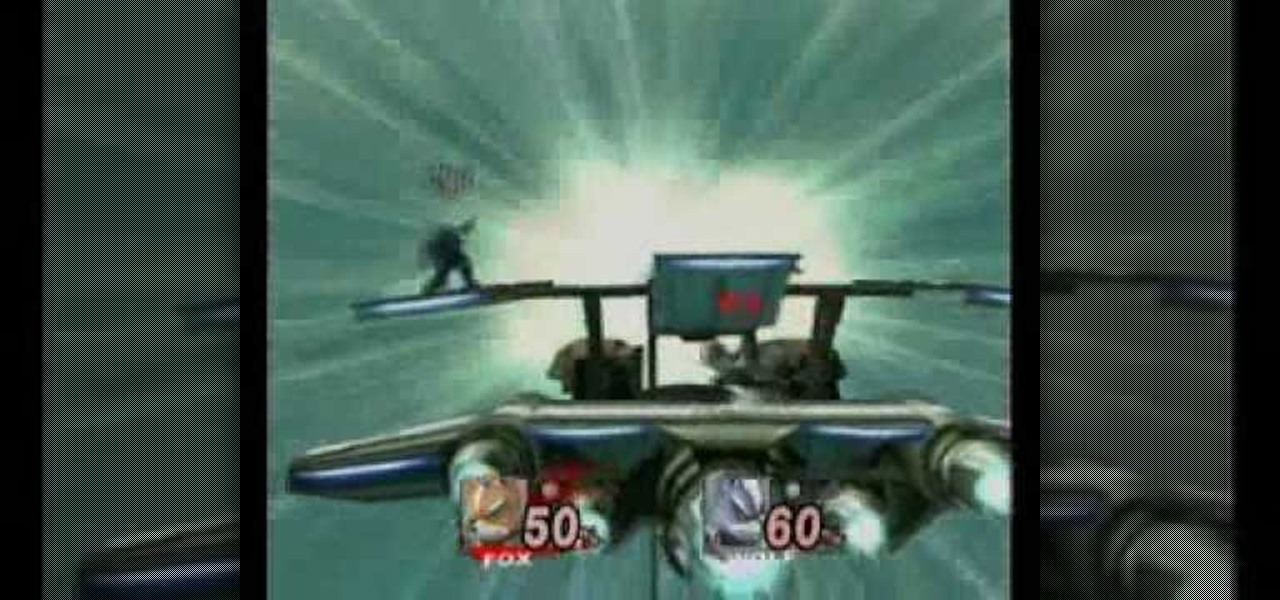
To unlock Wolf, you must've first completed Subspace Emissary. In Subspace Emissary choose to go to "The Ruins" and choose any difficulty and any characters to go. When in the stage keep going as you would in any Subspace Emissary stage and the first door you see you don't have to enter unless you want trophy (not a specific trophy) and a Heart Container which you most likely won't need since the next door you go to, which is very nearby, will be where Star Wolf is and when starting the battl...

Everybody has a blood type. There are four types of blood in the ABO system: A, B, AB, and O. In this medical how-to video, learn how easy and important it is to find out what your blood type is. The procedure is very watch and find out.
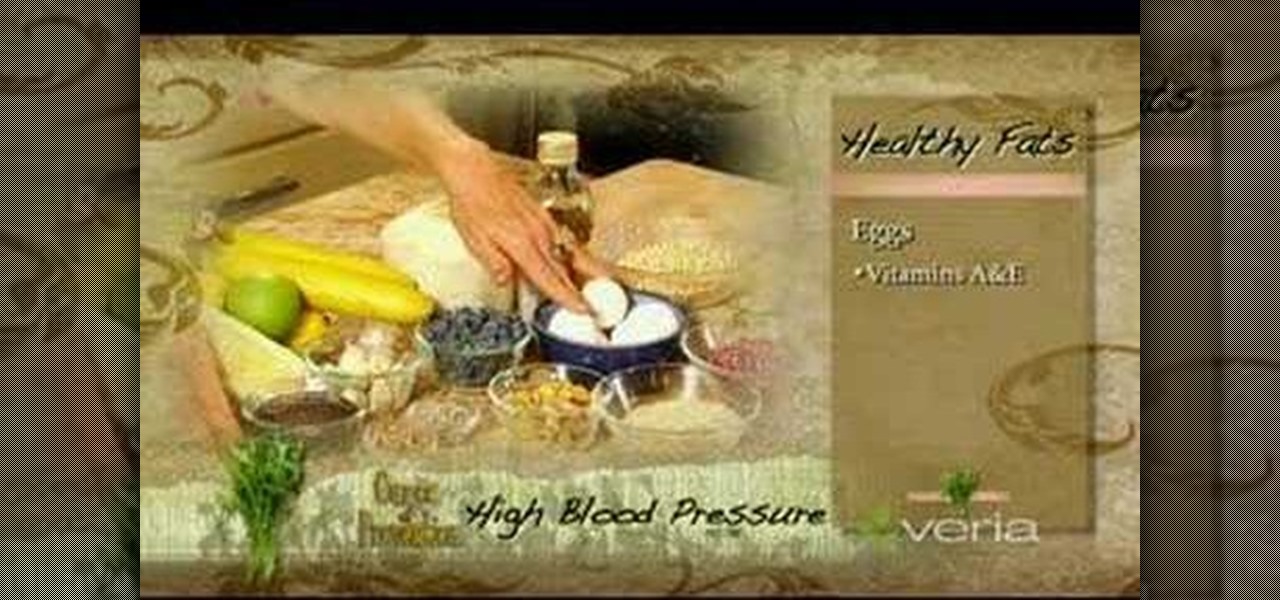
The how-to video offers safe, holistic ways to help reduce high blood pressure. Watch and learn how eating potassium, magnesium and vitamin rich foods will help with lowering not only blood pressure but cholesterol levels.
In this video Dr. Carlson does several experiments to illustrate how a vacuum works. A vacuum is created when all the air is removed from an object.
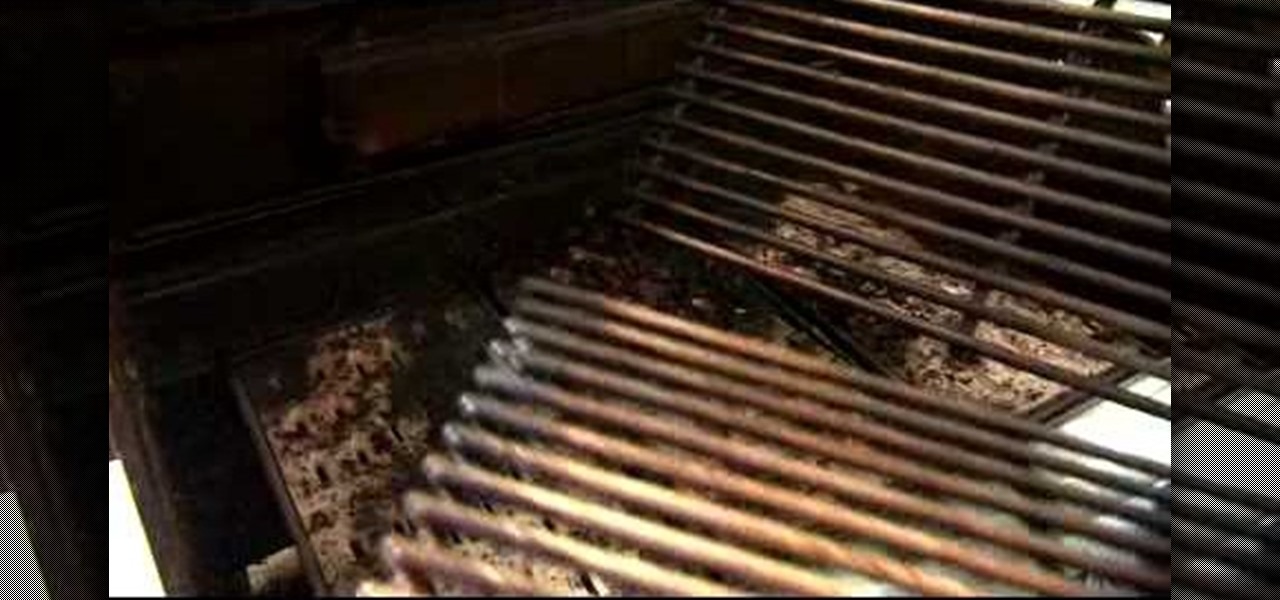
There are different theories on if you should clean your grill or not but if you’re on the side that likes to keep your grill clean then Danny Lipford will show you exactly how it should be done. These grills can get pretty dirty .

TVfXQs2Cassiopeia shows you have to remove your acrylic nails at home. You'll need to by a bottle/ container of acetone, which is fairly cheap (~$5) and can be bought at drug stores. Acetone looks like water, and is usually beneath the sponge that comes in the container (it may smell a bit). Dip each nail in the solution and the nail polish comes off almost immediately. To get the acrylic off, which may be a little harder, rest your nails in the acetone for a few minutes. They should get thin...

The hype for HBO's Game of Thrones reached proportions as epic as the series itself this week with the latest release of the final season's official trailer, but it's a Snapchat promotion that will truly make fans at SXSW bend the knee.

Despite mounting scientific evidence that viruses can cause changes in learning and memory, the reasons have remained elusive.

Deadly rat lungworm parasites have found their way into Florida. The parasitic worm relies on snails and rats to complete its life cycle, but don't let this nematode's name fool you. This worm can cause meningitis and death in humans who inadvertently consume snails, frogs, or crustaceans harboring the infective parasite.
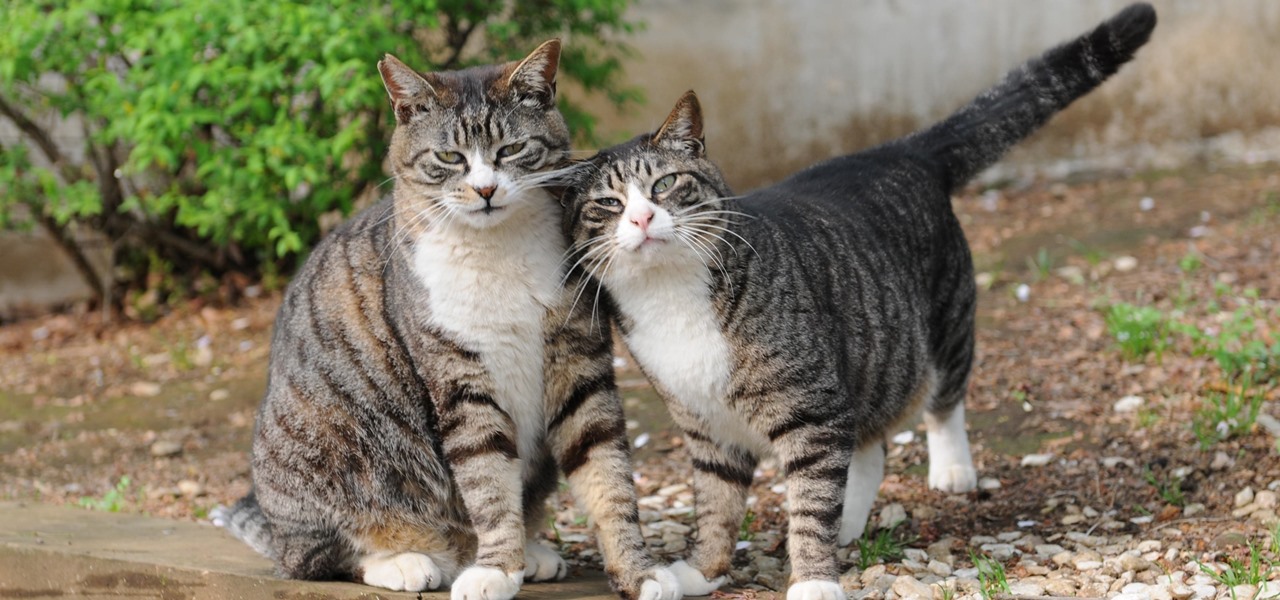
Like humans, cats can suffer infections caused by ticks, and too often, the disease is fatal. Learn about tickborne diseases that affect cats and what you can do to protect Fluffy from an untimely demise.
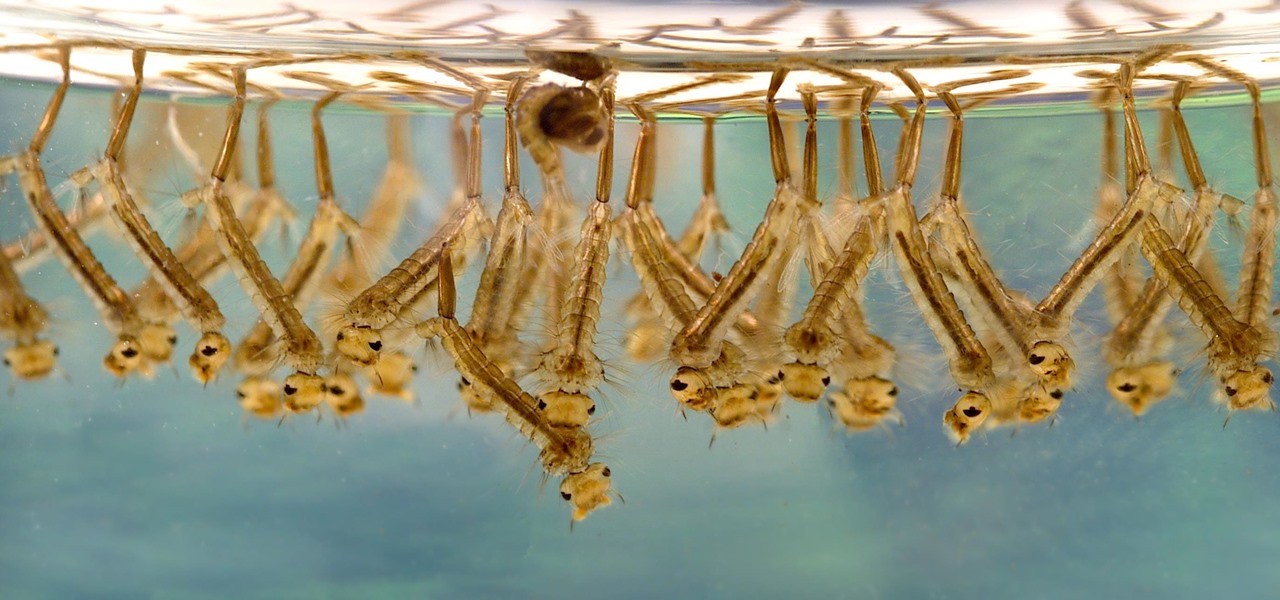
When just floating peacefully in the water with their brood mates, the Culex mosquito larvae in the image above does not look very frightening. But in their adult form, they are the prime vector for spreading West Nile virus — a sometimes mild, sometimes fatal disease.
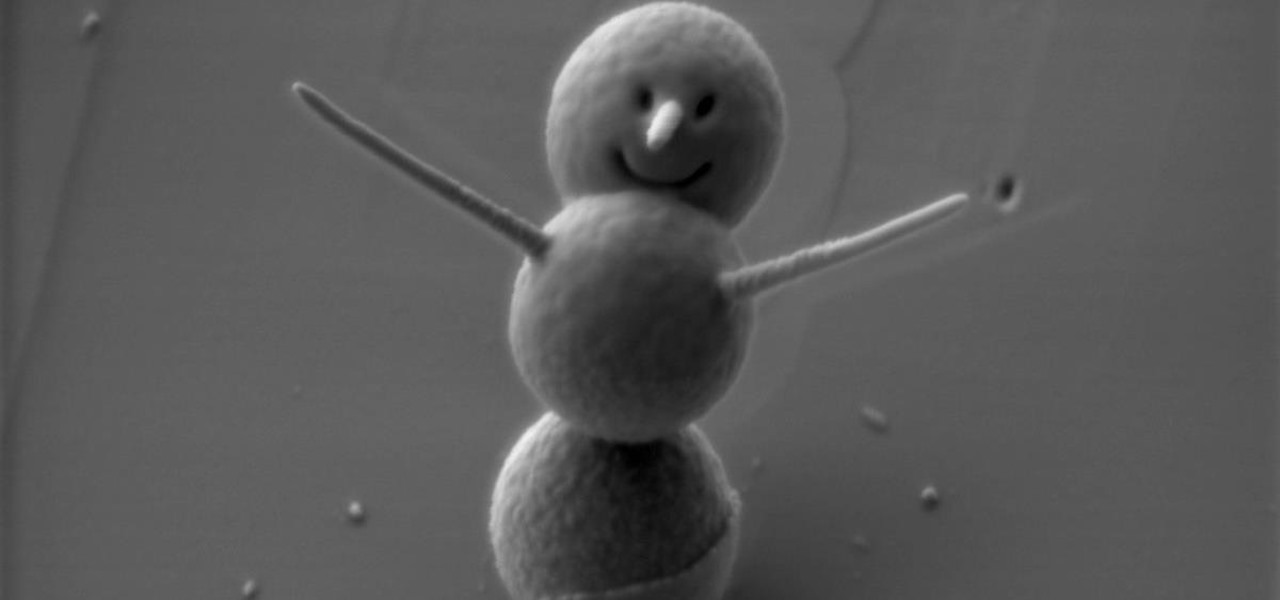
Frosty the Snowman is a fairy tale they say, but this microscopic snowman is very real and just broke the record for the world's smallest snowman. (Though, it's not Guinness-official yet.)

Most people are familiar with the fact that vinegar adds sourness to a dish, in varying degrees from light acidity to puckering acid. However, vinegar can also be used in lieu of salt when seasoning the final touches to sauces, soups, and stews.
If you're a big fan of home improvement, then you've you've probably painted a wall or item in your day. Not only can it get expensive, it's also time consuming, and very often just plain boring. Waiting for paint to dry so that you can add another coat is, well…like waiting for paint to dry.
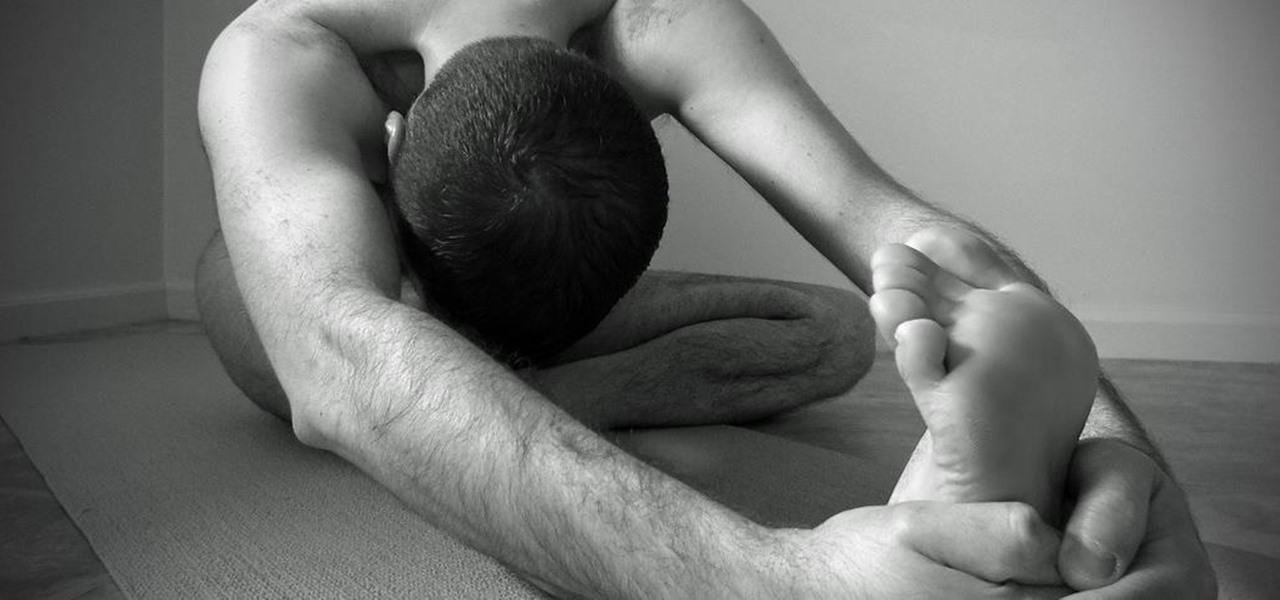
If you're like most people, you've stretched before a workout or playing sports. Doing so should help you get your muscles ready to work. While stretching is good for your muscles, you're wasting your time if it's the first thing you do. I talked to Dr. Brian Parr, professor at the Dept. of Exercise and Sports Science at the University of South Carolina Aiken, who explained this misconception and what you can do about it:
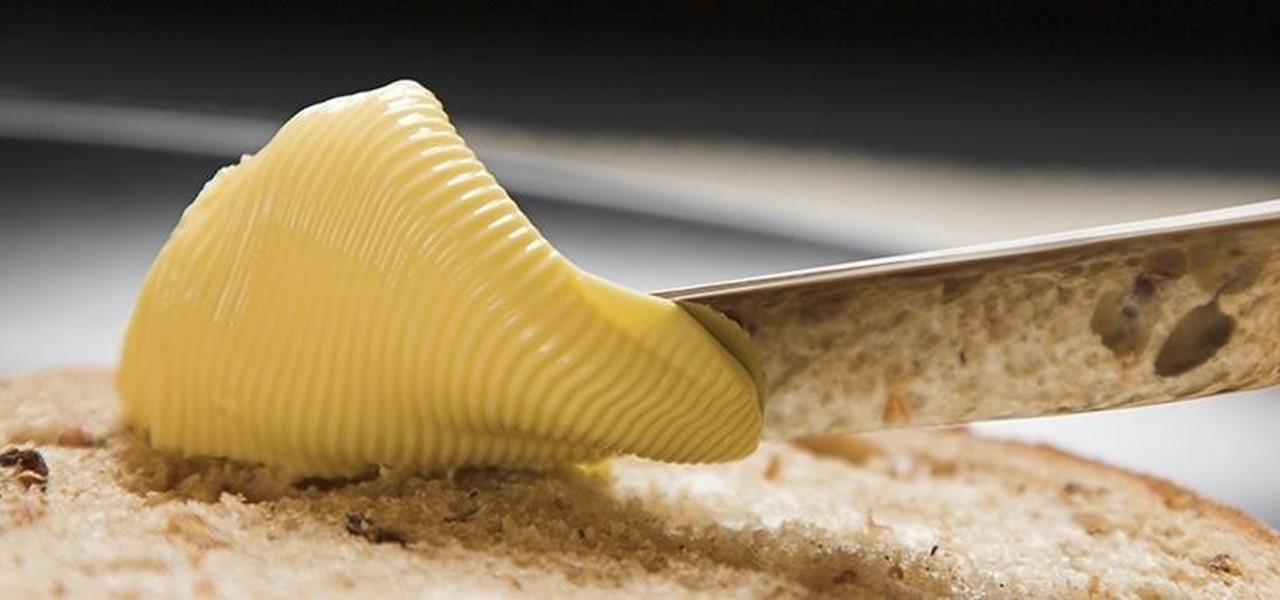
We've already taught you a few tricks for getting chilled, rock-hard butter to spread easily on toast, and some of you probably bypass that issue entirely by purchasing spreadable butter from the supermarket. But why waste your money when you can make a healthier, tastier version at home for a fraction of the cost?
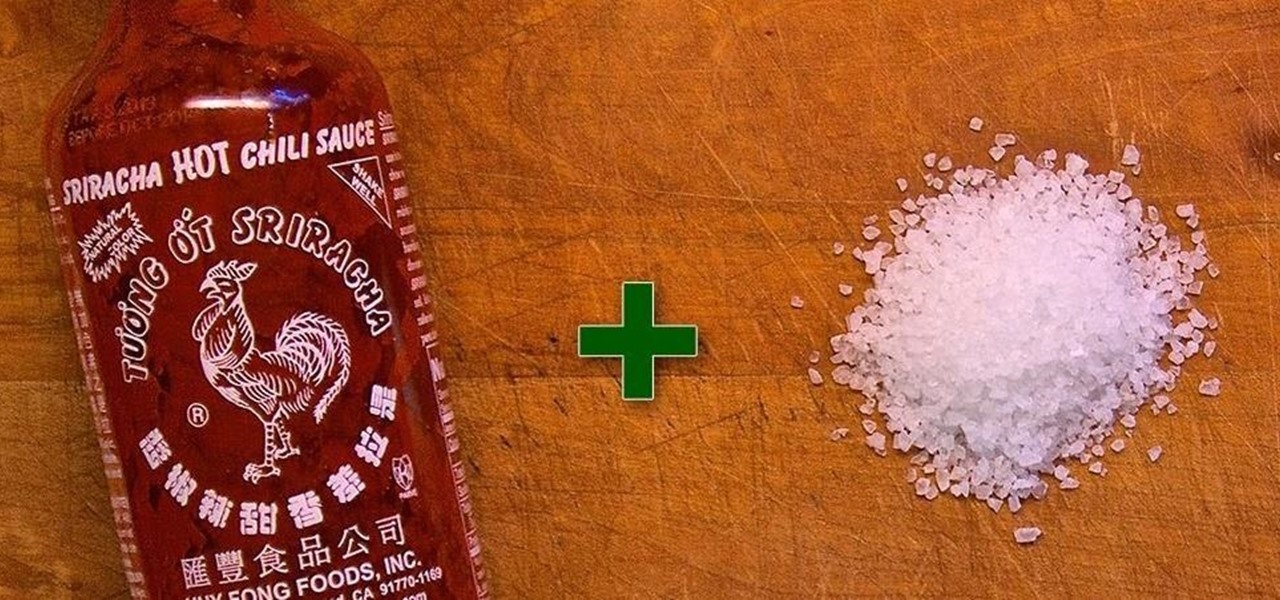
What can't Sriracha do? You can use it to upgrade your ramen, spice up your candy, or even try one of various recipes to make your own. And if you want an easy way to add it to basically everything, you can make your own Sriracha salt, which is just as awesome as it sounds.
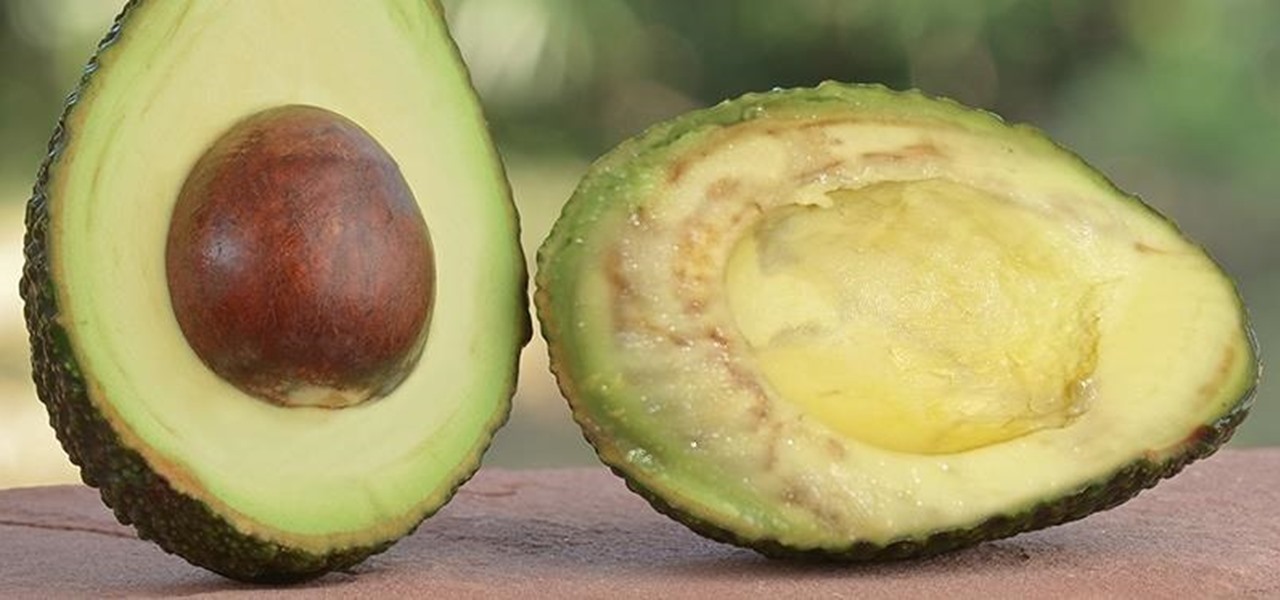
A lot of fruits start to turn colors once they've been cut due to an enzyme called polyphenol oxidase that turns the fruit colors when it's exposed to oxygen. You can prevent this reaction in apples with a honey-water bath, but what about avocados?
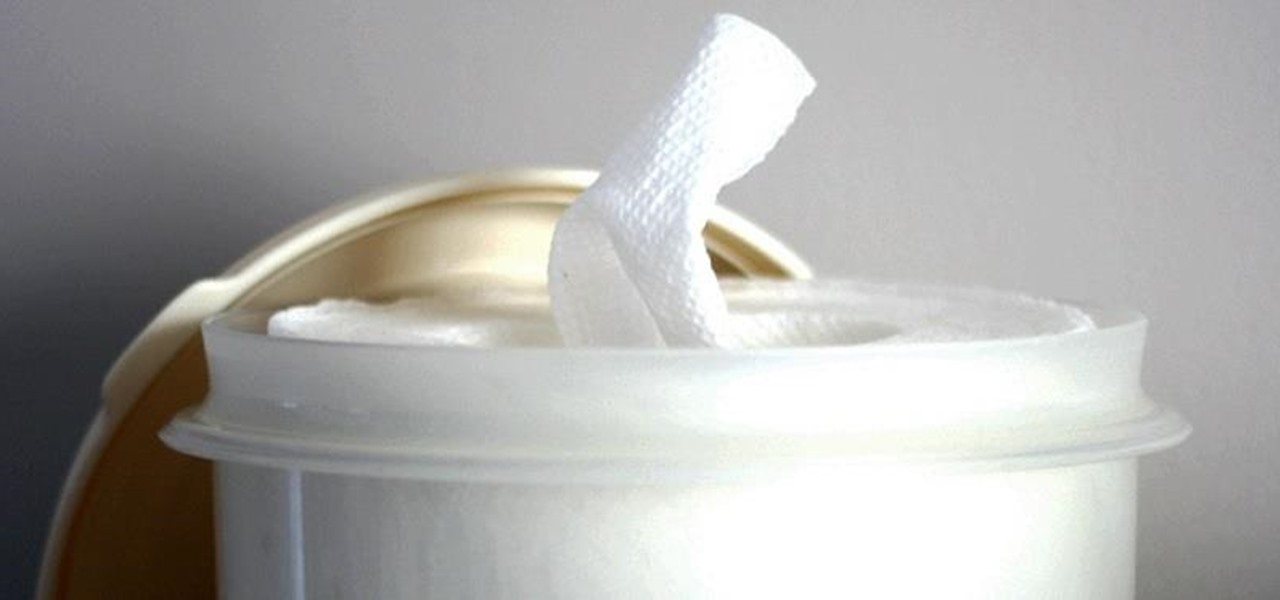
For me, the worst thing about makeup has always been taking it off. It's always that one last thing you have to do before you go to bed, and if you don't, you instantly regret it when you wake up. When you're tired, makeup removing wipes are a godsend because they're so quick.
Pringles are just as well known for their cylindrical packaging as for their suspiciously addictive fried crisps. Yes, that's crisps—not chips.
Not having power sucks. It can be fun for the first few hours, but if it lasts any longer than that, most people run out of things to do pretty quickly (i.e. the batteries in all their devices die).
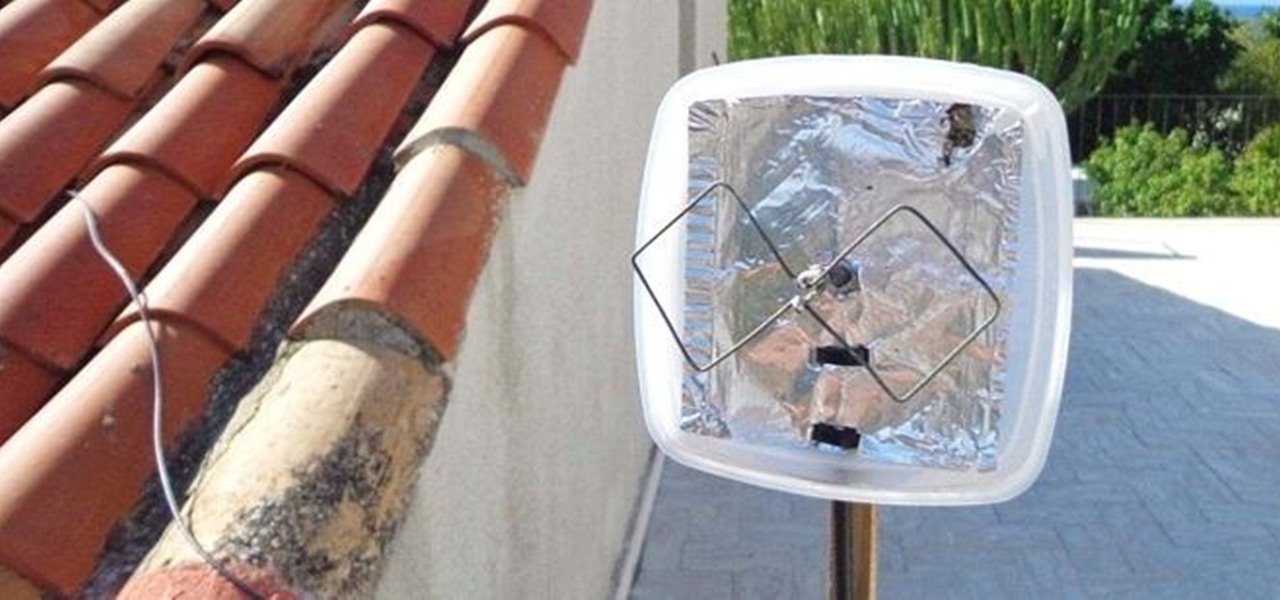
There are plenty of ways to speed up your wireless network at home, some as simple as changing the placement of your router. While you can always buy equipment to boost your signal, there are plenty of cheap or free DIY solutions you can try as well.
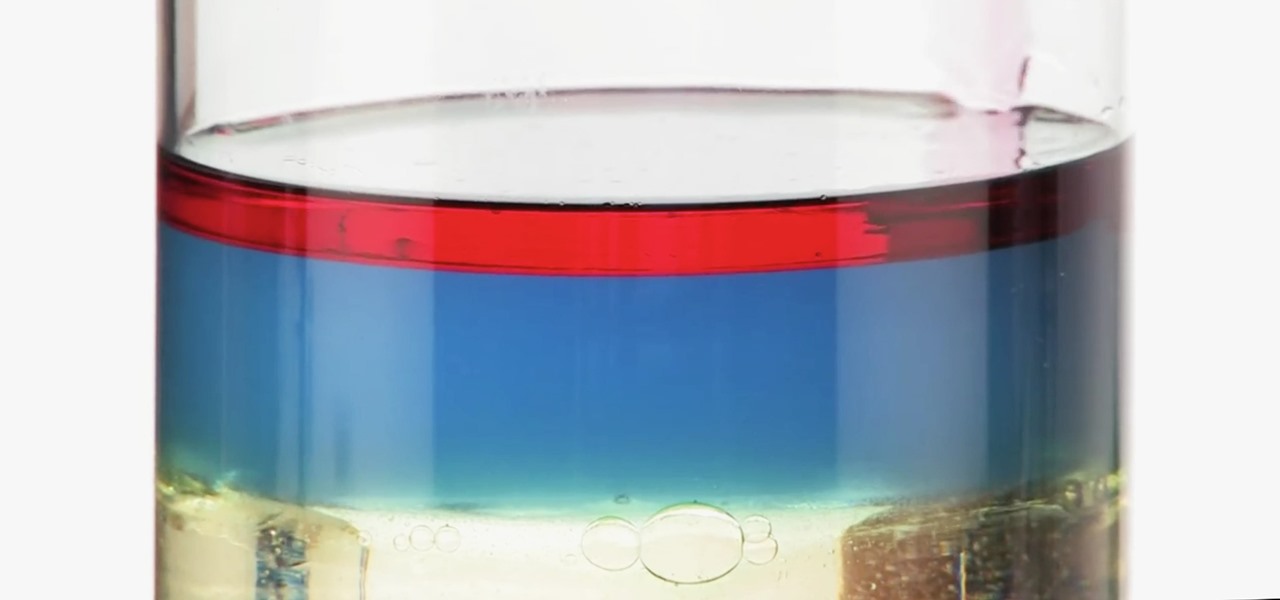
Ralph Waldo Emerson once observed that "the seed of science" was "wonder," and taking a look at this nine-layer liquid tower from Steve Spangler's Sick Science! channel, one can't help but do just that — wonder. How is this possible? Is this magic or what?
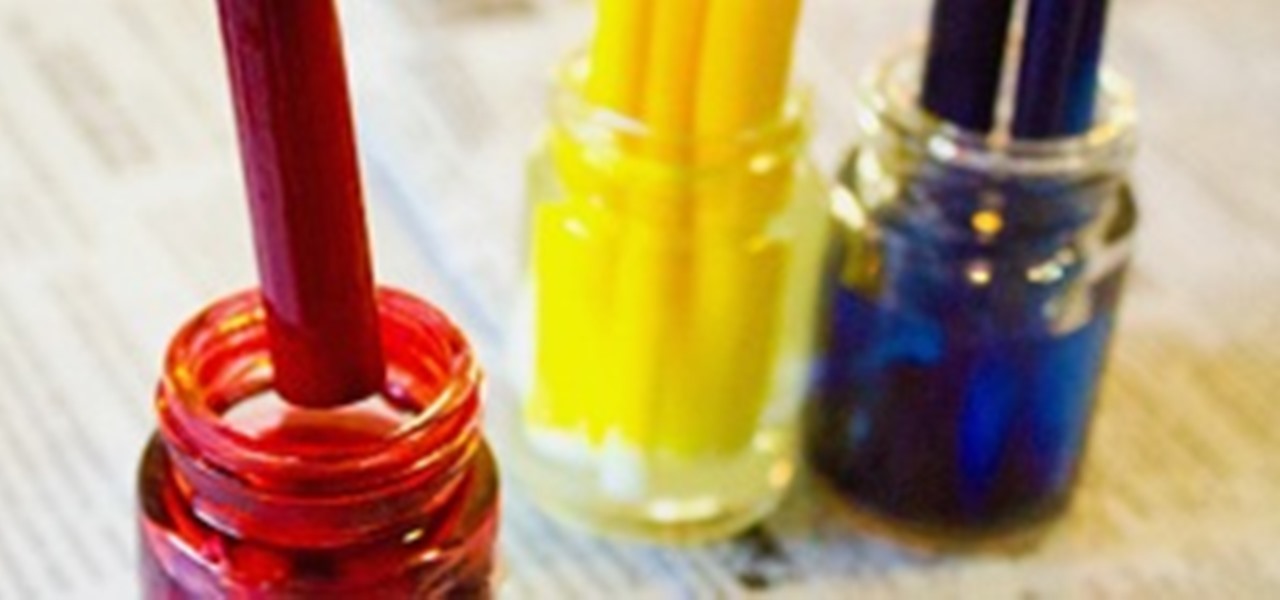
Dried out markers are the worst. They take up space, and for some reason, even though they're totally useless, most of us have at least a few lying around just for the sake of not throwing them out. Luckily, Julie Finn over at Crafting a Green World has come up with a way to repurpose them into alcohol ink, a versatile type of ink that can be used on non-porous materials like plastic, glass, and metal. This is truly a tutorial for the pack rat in all of us. First, a little primer on what you ...
Acne develops when pores become blocked with dead skin cells and oil. They usually disappear over time but sometimes they leave a scar. When those blemishes form white blood cells rush to the surface to help heal the area. But occasionally a scar forms. Popping and picking can send bacteria further into the skin and increase the blemish and it greatly increases the likelihood that a scar will appear. Nodules and cysts are more severe blemishes and have an increased likelihood of leaving scars...

You can use either an open or a closed container for your terrarium. Because there is no drainage hole in the container it's really important to have a false drainage system. So you can add river gravel or rocks to the bottom of the terrarium as a drainage level. Put about one inch of rocks in the bottom of the terrarium. Add a layer of charcoal on top of the rocks and it will help to keep the whole terrarium fresh. The charcoal will help keep mold and bacteria from growing in the terrarium. ...
While we all know that Valentine's Day is supposed to be about the giving and receiving of love and affection, let's face it: These days, the Hallmark holiday is more about the giving and receiving of chocolate and sugar high-inducing candy.
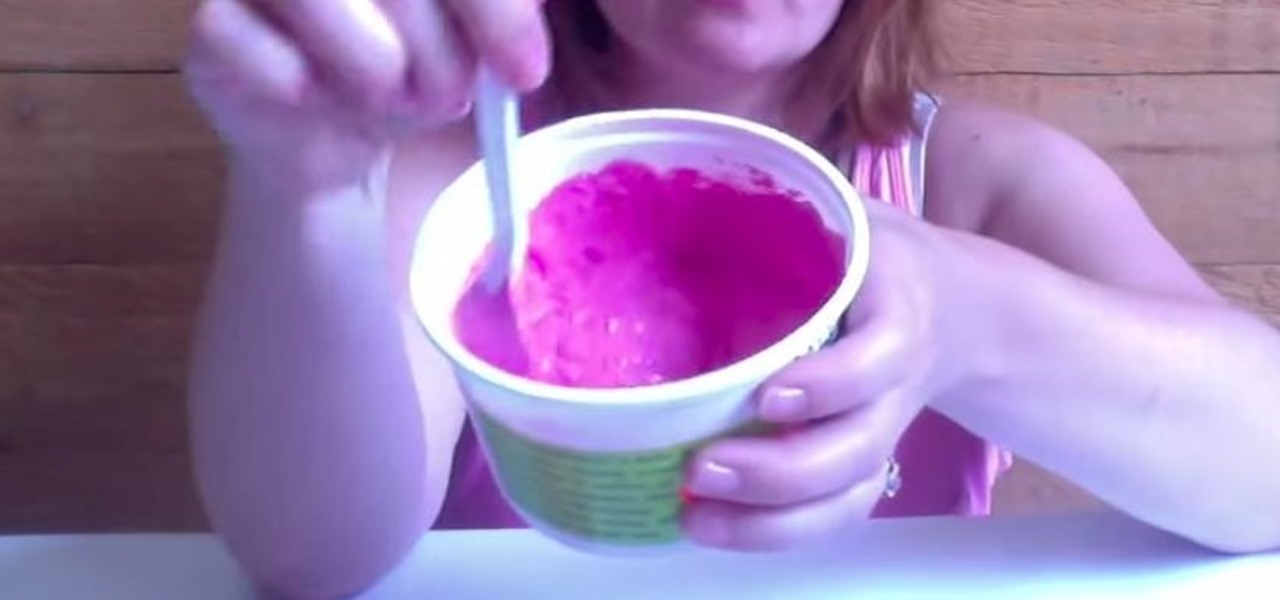
In this video, we learn how to make slime for under 5 dollars. You will need: a large pan, gallon of water, food coloring, and 1 c corn starch. Mix in warm water and continue to mix until everything is well combined. Keep adding more water to corn starch until it's the consistency that you would like. After it's hot and a slimy substance, add in some food coloring that you would like. After this, pour the slime into individual containers and allow it to cool so you can use at a later time. Wh...
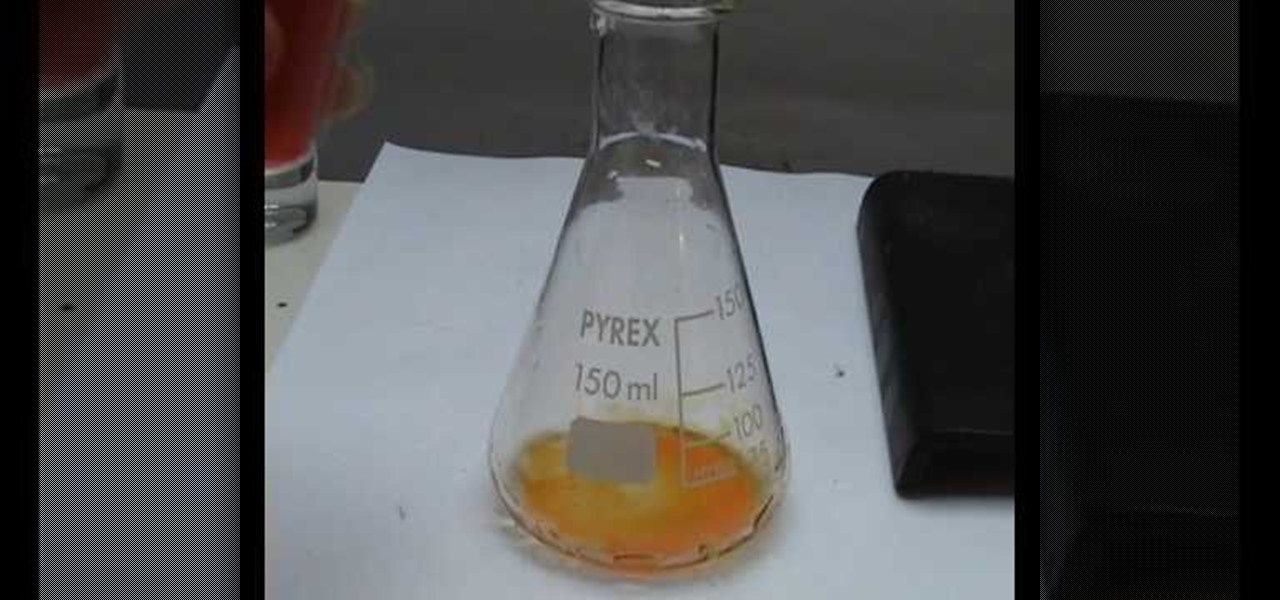
In this tutorial, we learn how to make a chemical indicator from kitchen items. First, make an indicator by grabbing some red cabbage and some vodka. Now, heat up some water until it's boiling, then place a smaller beaker inside the water with vodka inside of it. Place the red cabbage inside of the smaller beaker, then stir it up and let sit for 10 minutes. A lot of the color will come out with the cabbage being inside of the alcohol. After this, pour this into a storage bottle and pour the w...
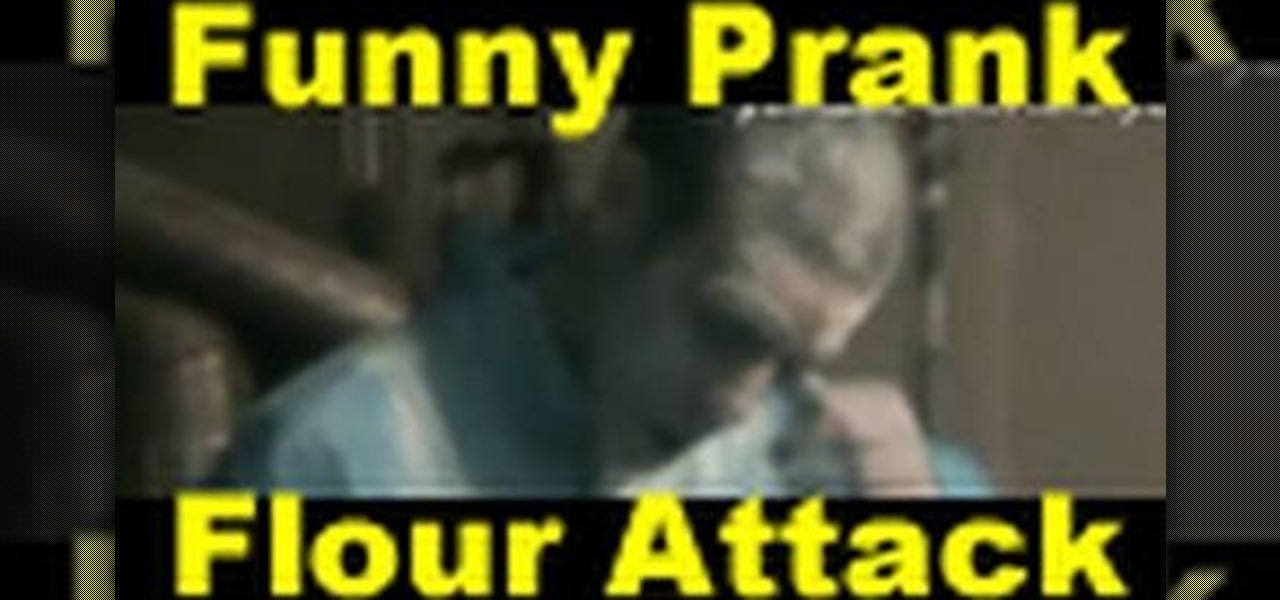
This prank is about as simple as it gets. All you need is some kind of tray, some flour, string, and a part of your house where there is a pull-chord light switch (most likely the basement). Just remove the light switch chord and dangle your new string in its place, attached to your container of flour above. When your victim tries to turn on the light, bam! They'll be hit with the flour.

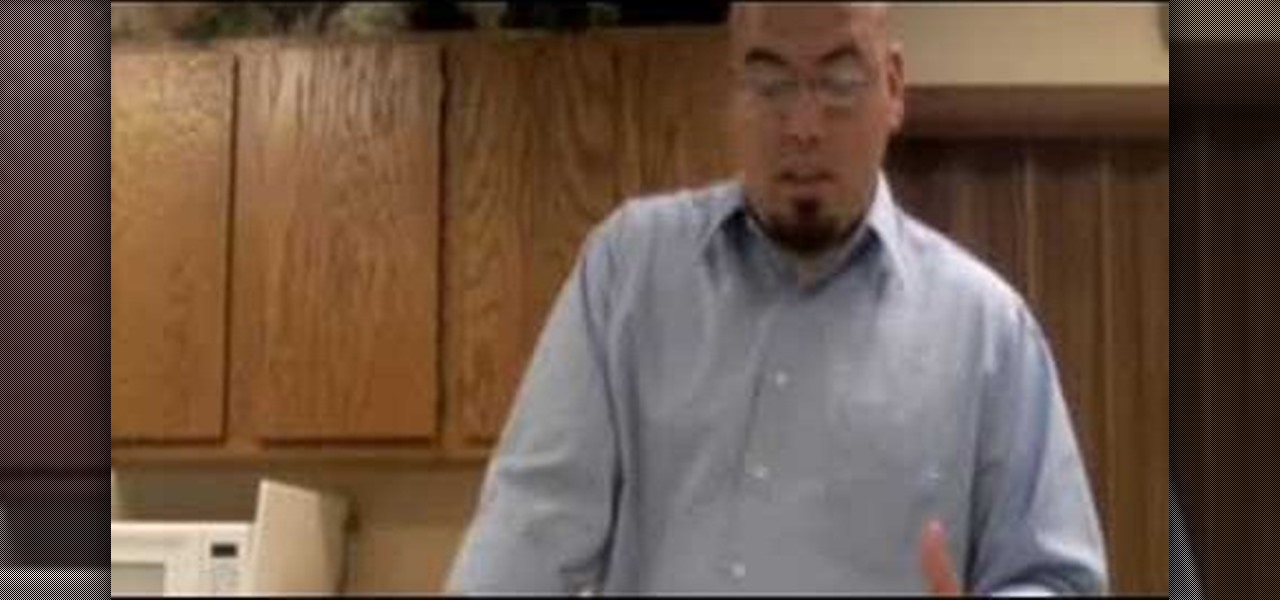
In this video, we learn how to start a great fire in a wood stove. First, you will need premium kindling, gloves, and a small axe. Next, you will chop the wood into small pieces using the axe, making small splits. After you have a large pile of kindling together, store the pieces that you won't use in a waterproof container. Now, carefully stack your wood into your wood stove. Place the first two pieces going across, then the other pieces going front to back. Continue this pattern, then apply...