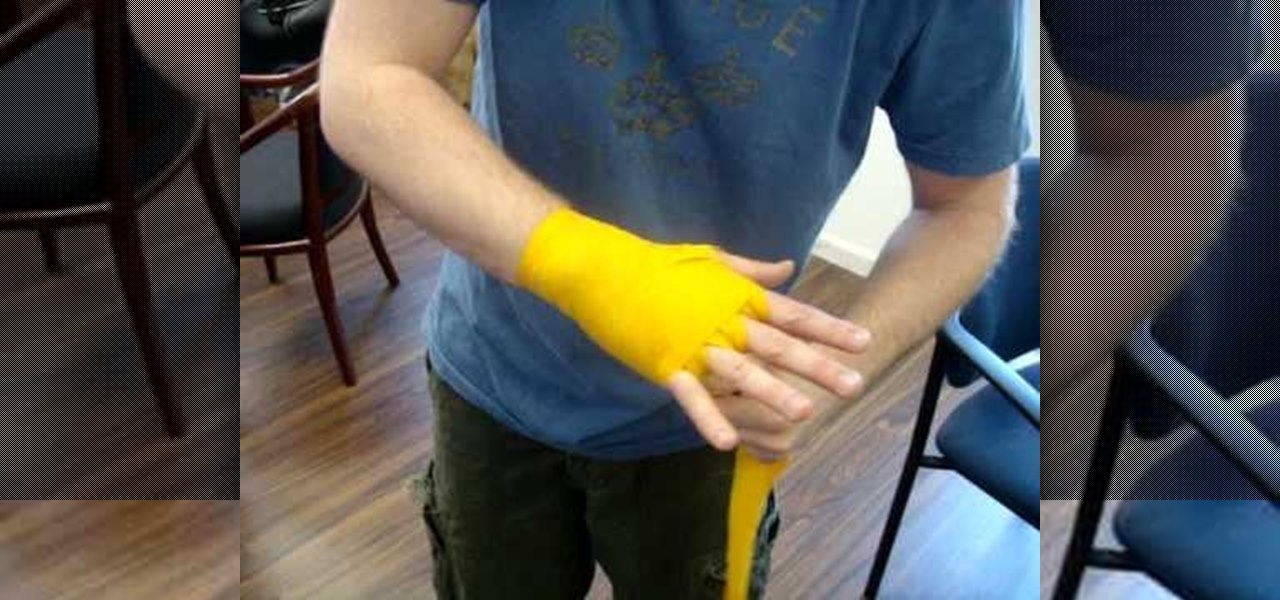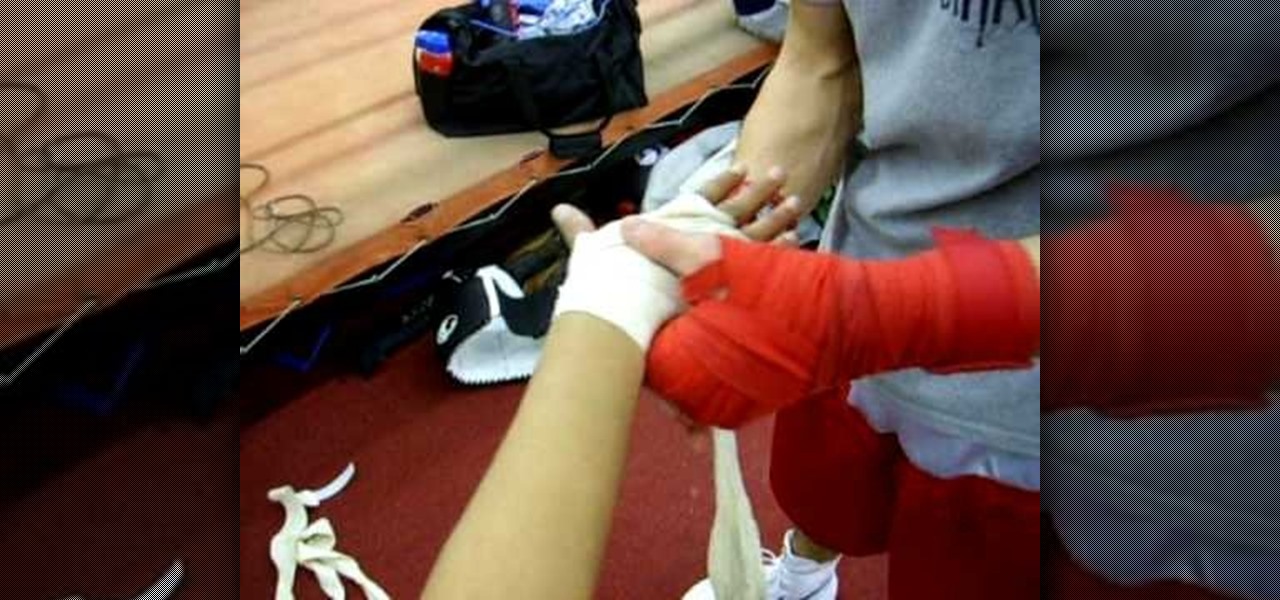
In this boxing fitness video the instructor shows how to wrap hands for boxing training. If you are going to hit heavy bags or pads for fitness boxing, then you need to properly wrap your hands or you face the danger of injuring your knuckles or wrists. The instructor shows you how to wrap by wrapping a cloth around a woman's hand. Instead of wrapping the cloth on your hands yourself, it is always better to ask some one to wrap your wrists for you because they can work with both of their hand...

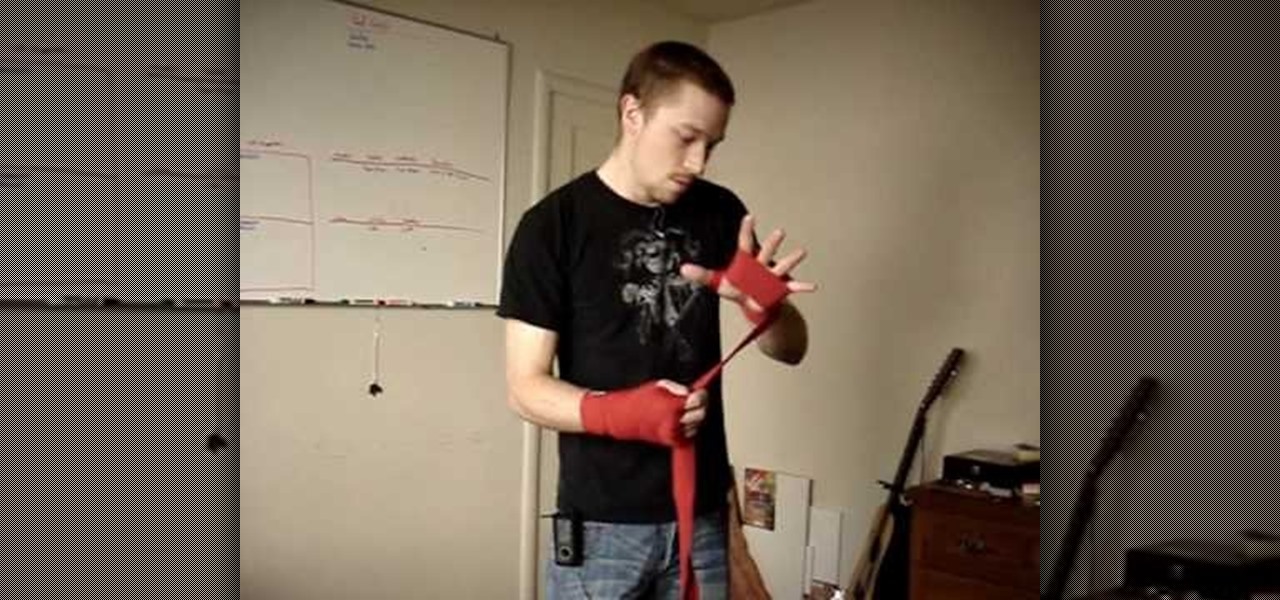
Here is one technique to wrap your hands for boxing, as recommended by an instructor. You'll need a wrap that has a thumb loop and Velcro on the other end. While you're doing this, make sure that it's comfortable and not too tight.

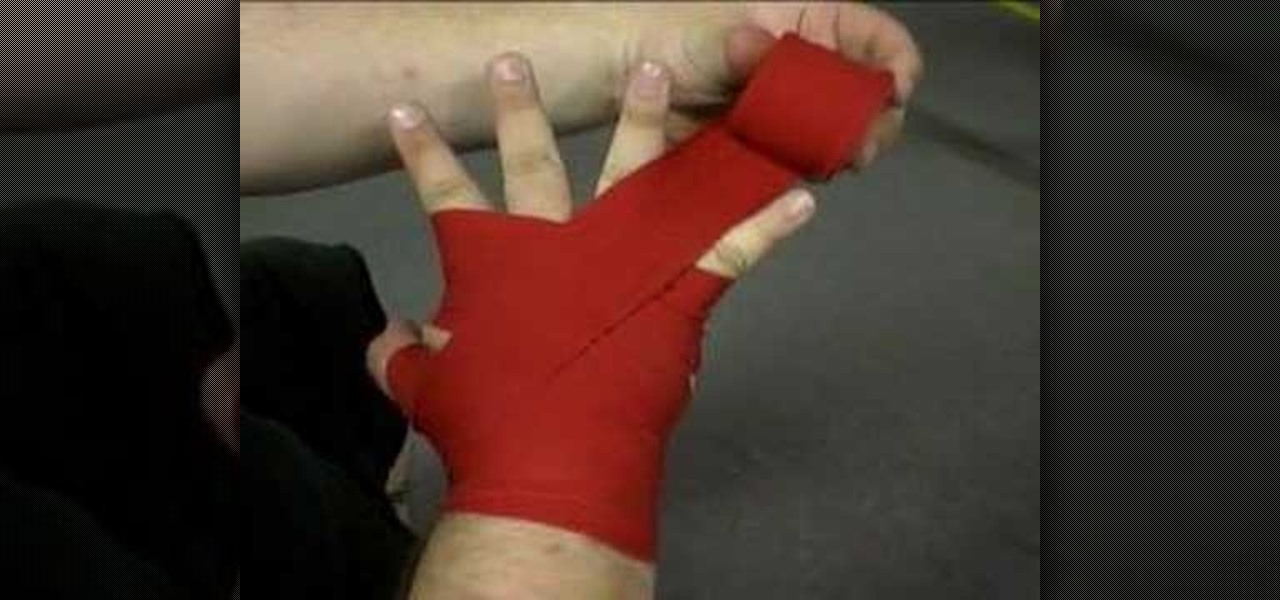
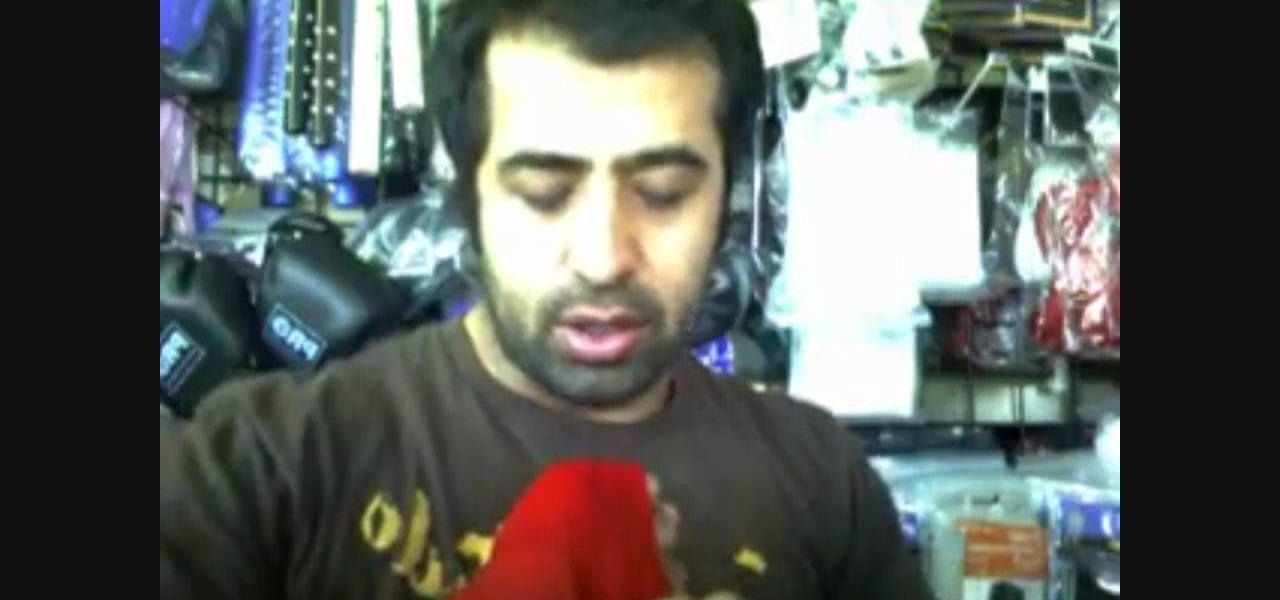
Laura Bateman, of Extreme Fitness Now, demonstrates how to wrap your hands for boxing. Wrapping is important for protecting your wrists and knuckles from injury. Mexican hand wraps are longer than the typical hand wraps. Place the looped end of the wrap over your thumb. Be sure to position the wrap the right side down. Next, wrap it around your wrist three times. Feed the wrap under your thumb, under the palm and up to the knuckle of the index finger. Wrap the knuckle two times. Cross down to...
This is a video tutorial on how to put on boxing wraps. There are many different ways of wrapping your hands so as to protect your hand. The hand wraps used are 180 inches. Unwrap the hand wrap and put your thumb into the loop and go around back and wrap your wrist twice. Be careful not to make it too tight nor too loose. After that, you wrap your knuckles twice and go back to your wrist. Then come up again and wrap through your fingers as shown in the video. Follow the rest of the video to p...
A boxer knows that during and after a fight, their bodies will be aching. As a part of the job, they grit their teeth, focus and get past the pain. The most important part of a boxer's body, though, is arguably his hands. A boxer depends on his hands to win fights and to train. The best thing one can do to protect their hands is to wrap them properly. This video will show you exactly how to wrap your hands so that they are cushioned and protected against injury. An ideal wrapping job would pu...
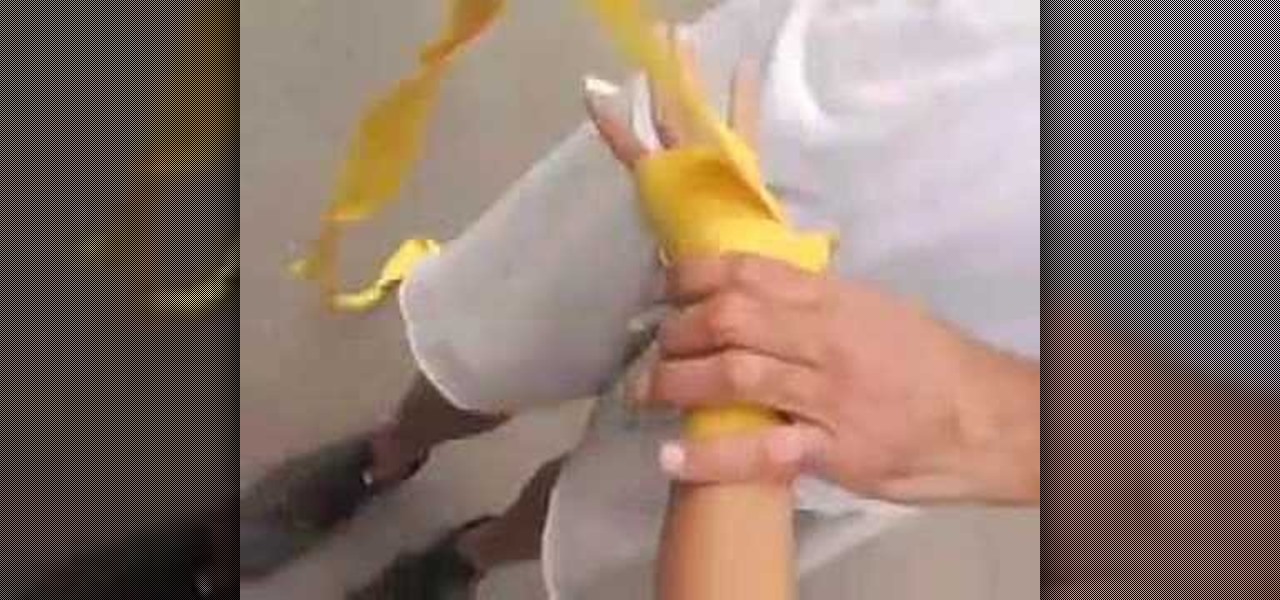
In this video tutorial, viewers learn how to wrap their hands for boxing. Begin by putting the hand through the loop and put the wrap over the hand. Now wrap it 3 time around the wrist and layer it. Then go back and criss cross the back of the wrist, as well as in between the thumb and index finger. Now wrap it around the thumb. Now wrap 3 times around the knuckles and layer it. Go through a pair of fingers, then wrap it around the thumb and repeat this for the other fingers. Finish by coveri...

The first step to wrap your hands for boxing and kick boxing is to place the hoop at the end of the wrap around your thumb. After the hoop is around the thumb the fabric is wrapped around the hand four times slowly moving towards the wrist. The fabric is then tied in an X formation around the thumb and returning back down to the base of the wrist. The fabric is then wrapped around each knuckle until all of the fingers have been wrapped correctly. The last step involved is wrapping the fabric ...
Tie a double overhand knot 4" from the end of the shock tippet or other material to which you want to connect your class tippet. Gently tighten the double overhand knot, but only until it turns over and forms a figure-eight. This leaves two gaps through which you can pass the tippet material. Create a doubled section of your tippet 18". Putting a sharp angle on the tip of the doubled loop will help it pass through the figure-8. Pass the doubled tippet line through the top of the figure-8 knot...
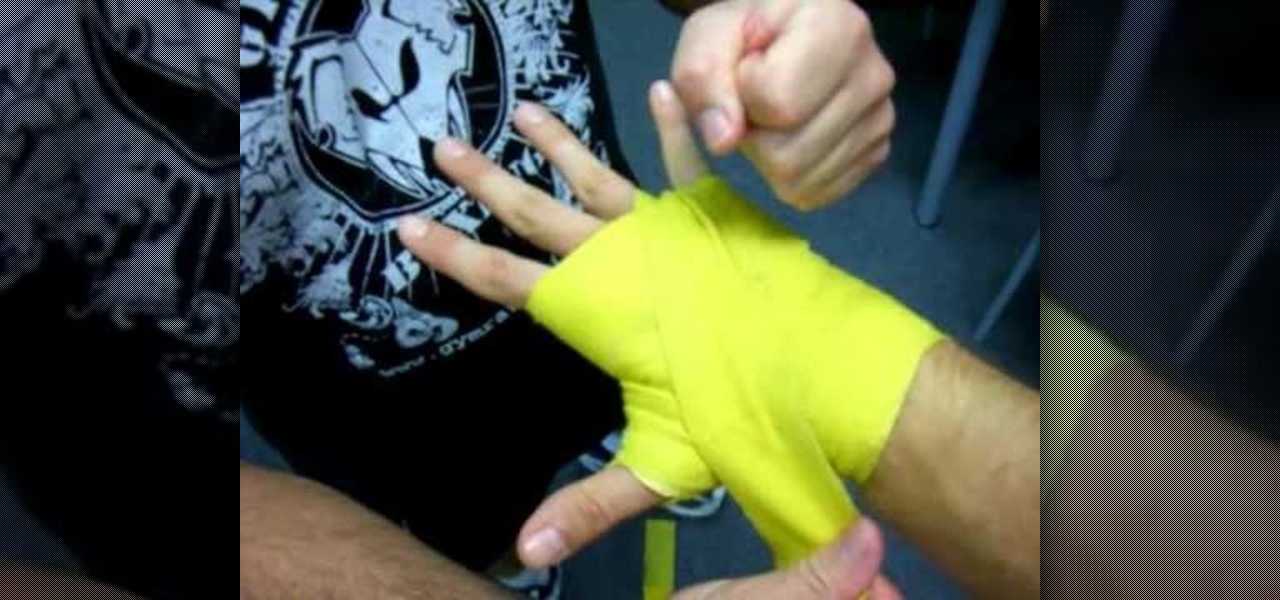
In this video tutorial, viewers learn how to wrap the hands for boxing, MMA and kickboxing. Begin by putting the thumb through the loop and bring it under the palm. Wrap it one time around the wrist. The cross it through the thumb and index finger. Wrap around the knuckles 3 times. Now cross it behind the thumb and over. Then go under the wrist and over the thumb again. Then go over the wrist, under the palm and through the pinkie and ring fingers. Roll around it to secure and repeat for othe...
There are many ways to wraps your hands for Muay Thai or kickboxing. One way is to first attach the Velcro to itself so that it creates a loop, after rolling the hand wraps back up in the opposite direction. Now you want to attach the loop to your thumb then wrap the wrap around your wrist three or four times. Secure the thumbs and come up towards the knuckles them you need to make a knuckle pad. You do this by looping the fabric about four times against your knuckles, securing it with your t...
In this tutorial, we learn how to do a basic hand wrap for boxing. First, grab the wrap and wrap it around your knuckles several times. After this, wrap down towards your thumb. Then, wrap diagonally and go the wrist, wrap around this several times. From here, wrap around the thumb from the wrist and then go diagonal to the area below the knuckles. Use your fingers to space in between the wrapping so you don't make it too tight. Continue to do this same pattern a few more times until you have...
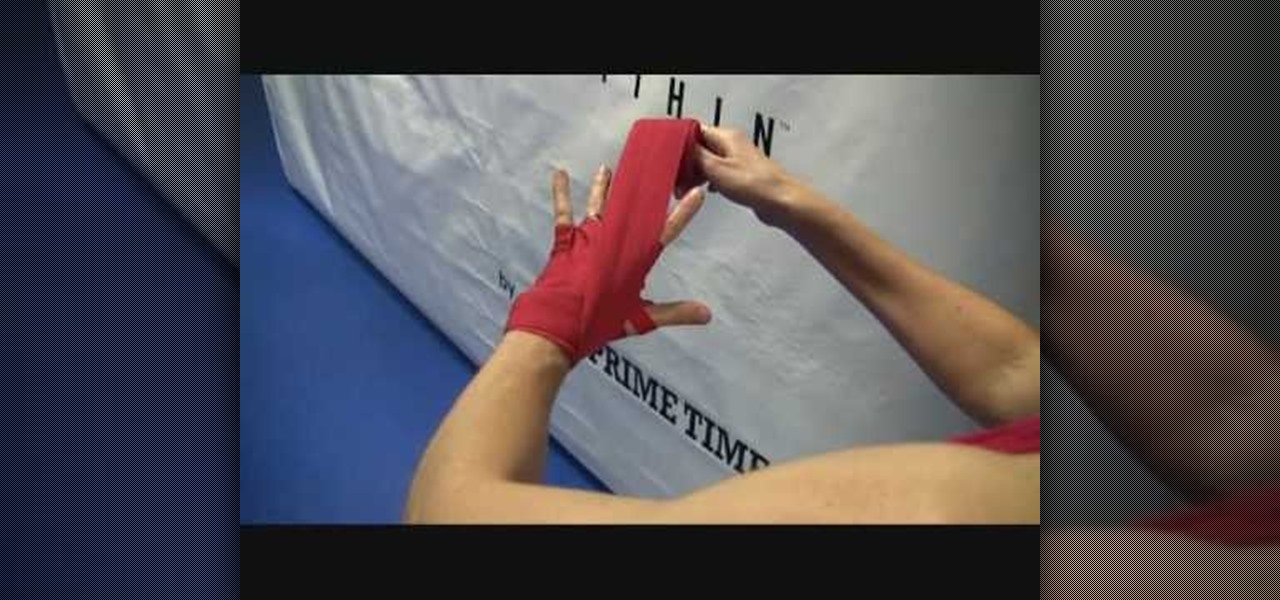
Wrapping your wrists for boxing is very important to provide protection and support when you are throwing your punches. This video shows you the right way to wrap your wrists to prevent injury. You'll be putting the seam side of the wrap against your skin, and start by putting the loop at the end over your thumb. You will start by wrapping the wrist a few times, depending on how long your wrap is. Watch to see the correct way to cover the knuckles and secure the wrap against your hand before ...
Learn how the do the two handed neck wrap using a mace with this tutorial. This is an intermediate move for drum majors and baton twirlers. Watch this how to video and you will be able to do a two handed neck wrap with a mace.
Learn how to do the one handed neck wrap using a mace with this tutorial. This is an advanced move for a drum major or baton twirler. Watch this how to video and you will be able to do the one handed neck wrap with a mace.
Quinten shows us how to protect your hands in boxing using a correct hand wrap in this video. When you punch something, you put a lot of pressure on your hands and wrists so wrapping your hands before this is highly recommended. First, start on one end of the wrap and put your thumb through the loop at the end. Go over the top of the wrist first, then go over the top of the hand over the knuckles. Keep your fingers parted so the wrap doesn't become too tight at the end. Go between the knuckle...
Pay attention to this knitting demonstration video and learn how to do the e wrap cast on. This is not a good knitting cast-on for long lengths because it is not possible to control the tension well when knitting the first row, resulting in a loopy, uneven edge.
There are many different methods of wrapping ones hands when they are doing Muay Thai boxing. This clear, concise video shows a simiple method that you can try as well before you start your mortal combat. The emphasis on this tecnique puts wrist protection over knuckle protection.
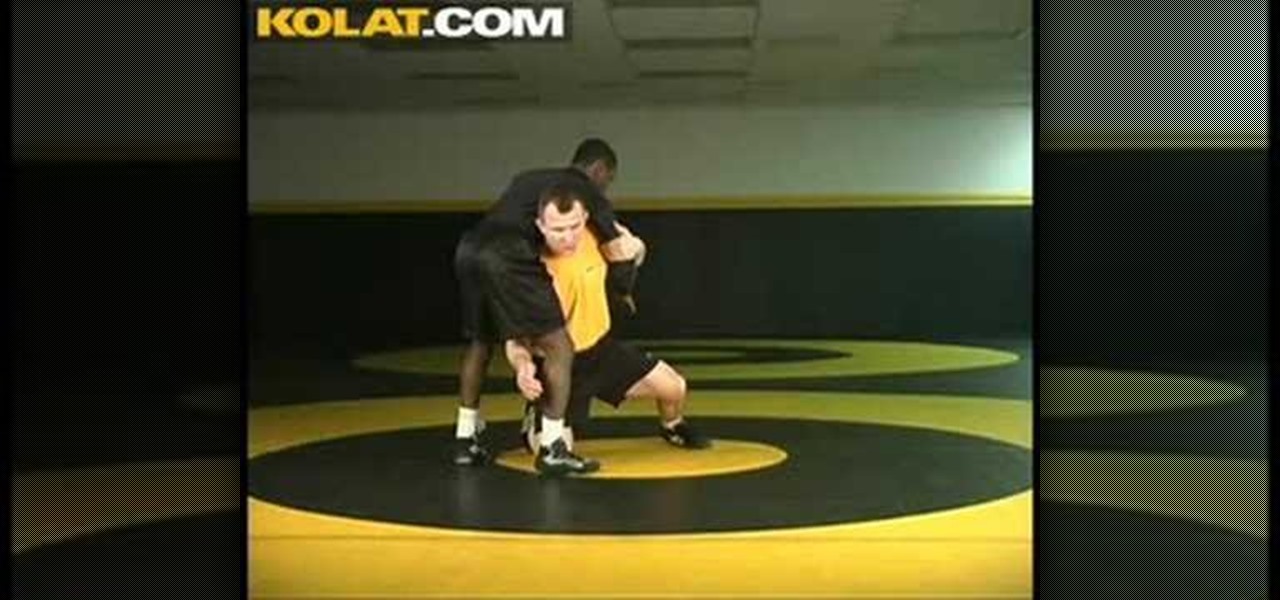
Cary Kolat demonstrates wrestling technique - collegiate offense - fireman's carry series - fireman's carry hand wrap explanation. This is a KOLAT.COM video on wrestling technique, practice and drills.
Looking for some new tricks to perform on the pogo stick? Start off in bus driver (twisted hand) position, then while jumping high do a backward 360 reverse, and graduate to a reverse leapfrog done between the legs. That's called a v-wrap. Learn how to do a v-wrap move by watching and following along with this video pogo stick trick tutorial.
Brad Daddis and Rigel Balsamico of Daddis Fight Camps break down how to do a proper hand wrap for Muay Thai training.
Step by step instruction on the correct way to wrap your hands before Muay Thai kickboxing training or competition.
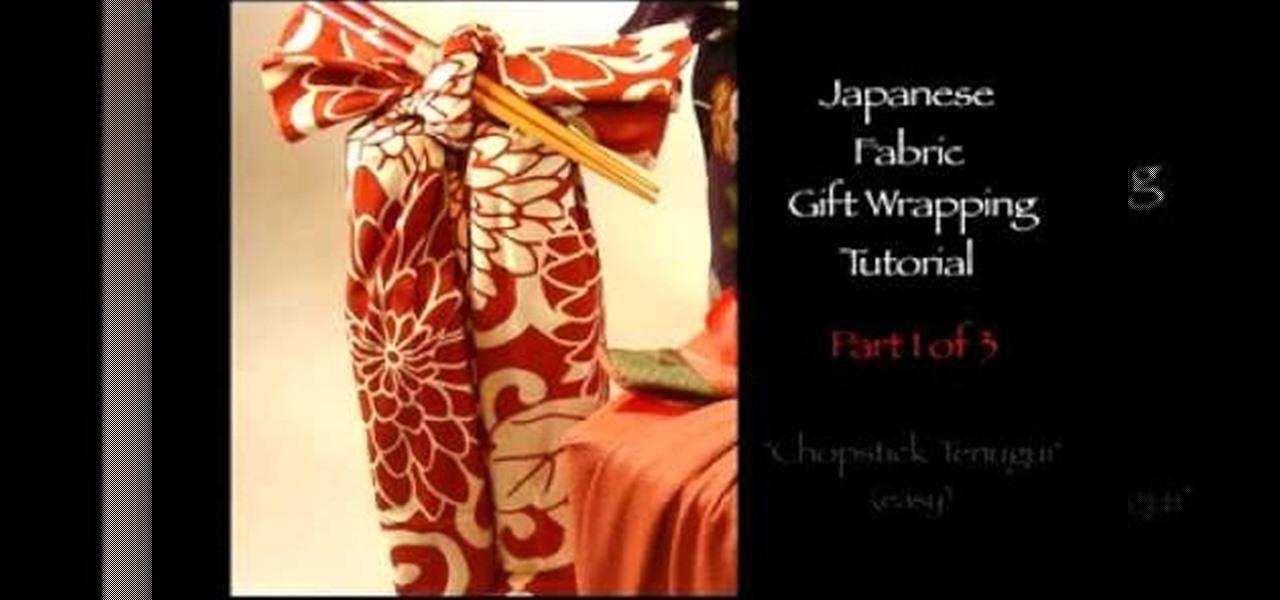
In this video tutorial, viewers learn how to gift wrap two bottles using the chopstick tenugui wrap technique. Tenugui is a thin Japanese hand towel made of cotton. The materials needed for this gift wrap are: a tenugui, chopsticks and two small bottles. Begin by laying the bottles horizontally as the bottom bases touch on the tenugui. Roll the tenugui and fold it up. Tie the ends with a double cross and add the chopsticks in the knot. This video will benefit those viewers who are planning to...
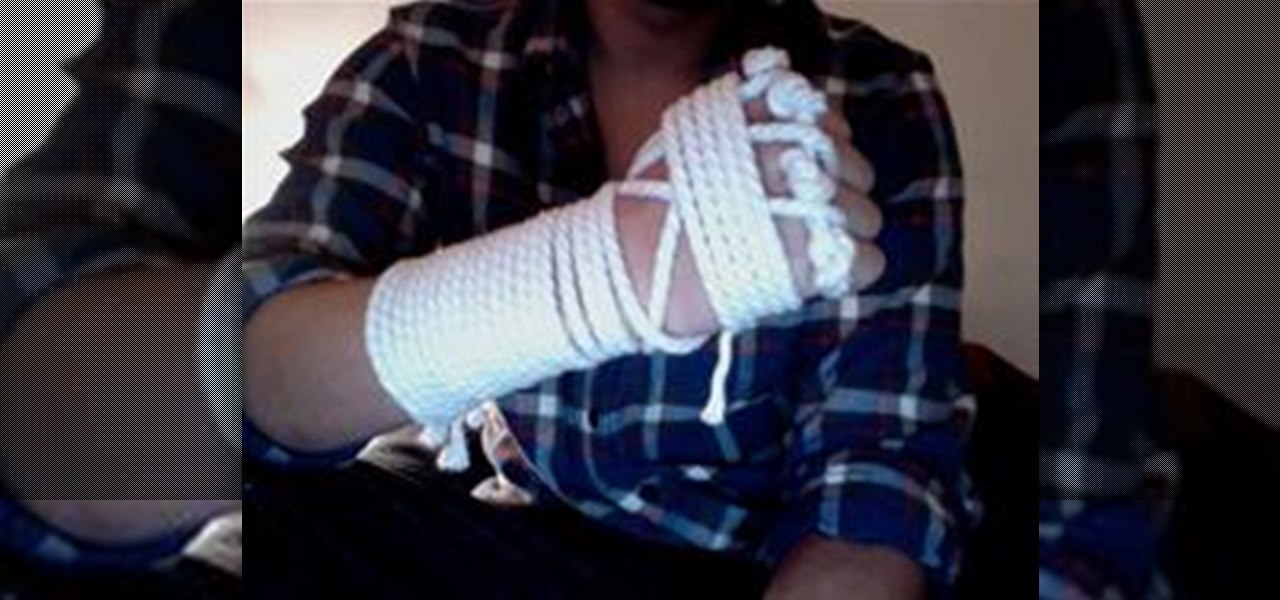
Muay Boran Muay Boran (Ancient Boxing) is an all-inclusive term for the ancient boxing arts of Thailand, from which modern Muay Thai was born. In the old days, fighters would wrap their hands with strips of twisted hemp cloth or hemp rope. Although it is commonly thought that fighters would dip their wrapped hands in broken glass, this is largely a myth. They did, however, dip their hands in water in order to harden the rope.
Adolfo explains how to properly hand wrap your hands. You put your thumb through the loop over your hand. You do this before you put your gloves on.
In this tutorial, we learn how to make a left handed crochet wide headband. First, make a slip knot on the crochet hook and then make a chain of two. Next, wrap the yarn over and pull through once. Repeat this and then wrap the yarn over the hook, then wrap over and pull through once. Repeat this fourteen times to make the entire foundation for your headband. Once you have made this, you will need to repeat this on top of the first foundation several times until you have made several rows so ...
This video shows you how to wrap cables for later easy unraveling. Place one of the ends of the cables in one hand. With the other hand make a loop out of the cord and place it into the first hand. Make a second loop and turn it 180 degrees before placing it in the first hand. Make another loop and place it into the first hand. Make another loop and turn it 180 degrees and place it in the first hand. Keep repeating this process to the end of the cord. Eventually the cord will form itself to t...
Learn how to wrap a textblock in this video tutorial. Wrapping the block allows you to protect the book's inner pages while you are working on the outside of the book. All you need to do is use some butcher paper, or any other kind of heavy duty paper you may have on hand. Lay the spine flush against one side of the paper. Open the front cover and fold the bottom sides into the book. Tape these ends together. Then, with the excess paper on the non-spine portion of the book, fold those ends in...
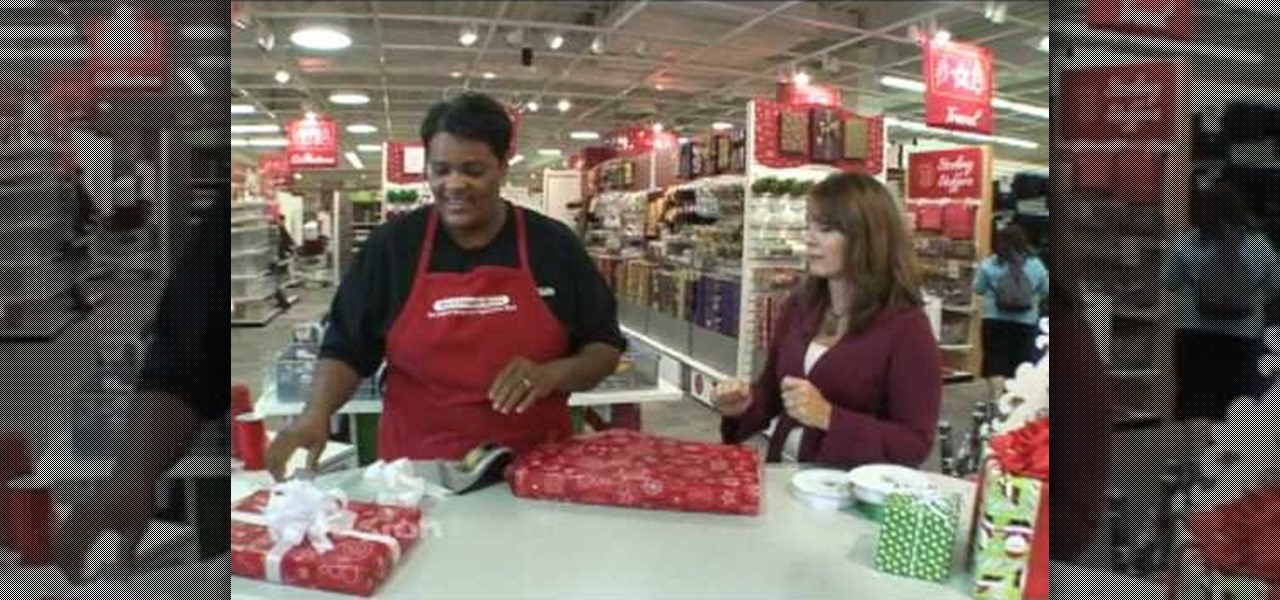
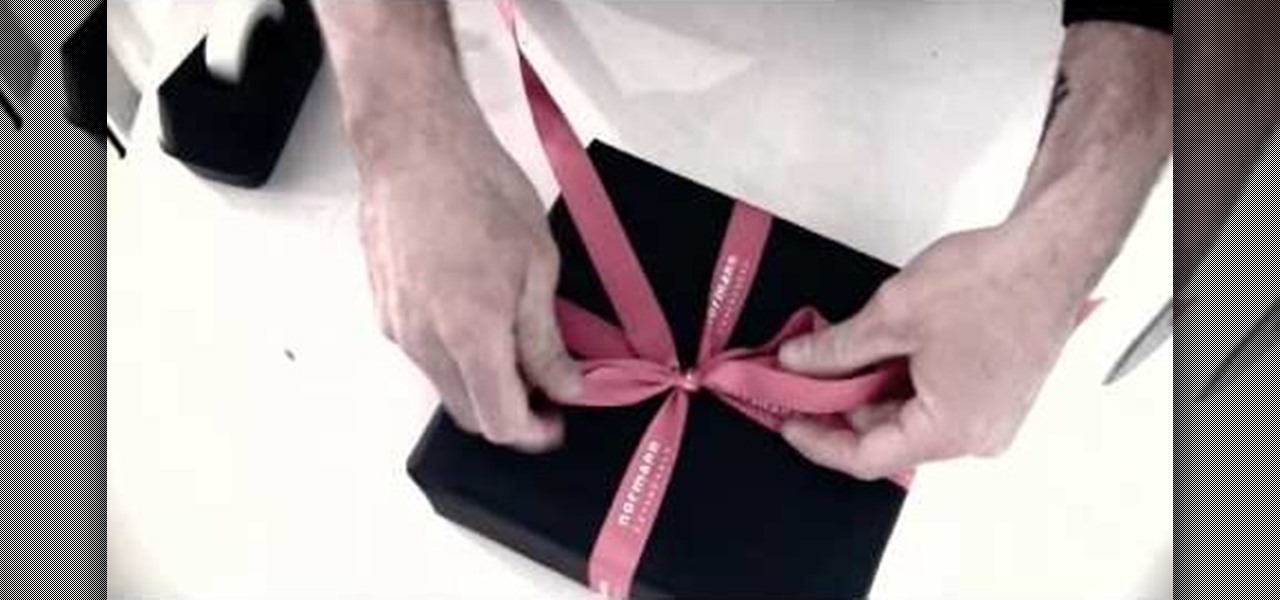
In this video from FusionNW, Paige Walker from The Container Store gives us some gift wrapping tips. A lot of people have trouble wrapping presents with wrapping paper. Here we learn how to make it simple, with your gift-wrapped presents looking like they were professionally wrapped. Remember: A gift that's wrapped in a very special way is just as special as the gift itself! One thing that's important is that you measure the wrapping paper right, and this is demonstrated for us. You'll want t...
In this tutorial, we learn how to make a lily out of paper and pipe cleaner. First, lay your hand flat on a piece of copy paper. Next, trace your hand with a pen or pencil, then cut it out with scissors. Now use a pencil or pen to curl the ends of the fingers you just cut out. After this, combine two pieces of gold pipe cleaner together and bend in half. Then, place a green pipe cleaner in the middle and make a twist to keep in place. To finish, wrap your paper hand cut out around the gold pi...
In order to tie a 7 x 5 Turks Head Knot, you will need to begin by draping the rope or twine over the fingers of your outstretched hand. Fold your pink down, leaving your three fingers outstretched. Catch the string in front and hold it with your pinky.
In this video Meenik shows you how to do spiral wraps with poi. He shows you how to hold your hands and position your thumbs and gives multiple angles so you can really see what goes on.
Officially, anyone who holds the yarn in their left hand is a Continental knitter. Some continental knitters wrap the yarn between the needles to knit it, and some simply scoop, or "pick", the yarn with the needle. The latter requires fewer hand movements, and has a reputation of being the fastest method of knitting there is. Watch this video knitting tutorial and learn how to do a basic, continental, German or left-handed knit stitch.
This holiday season, become a wrap artist! Learn how to make every Christmas present look festive, no matter what shape or size. Wrapping Christmas gifts can be quite the bore, but when you add a little artfulness, it could be more fun than ripping it off and finding your present.
How To Properly Wrap Your Hands For Boxing Always wrap your hand before you train in boxing to avoid hand injuries.
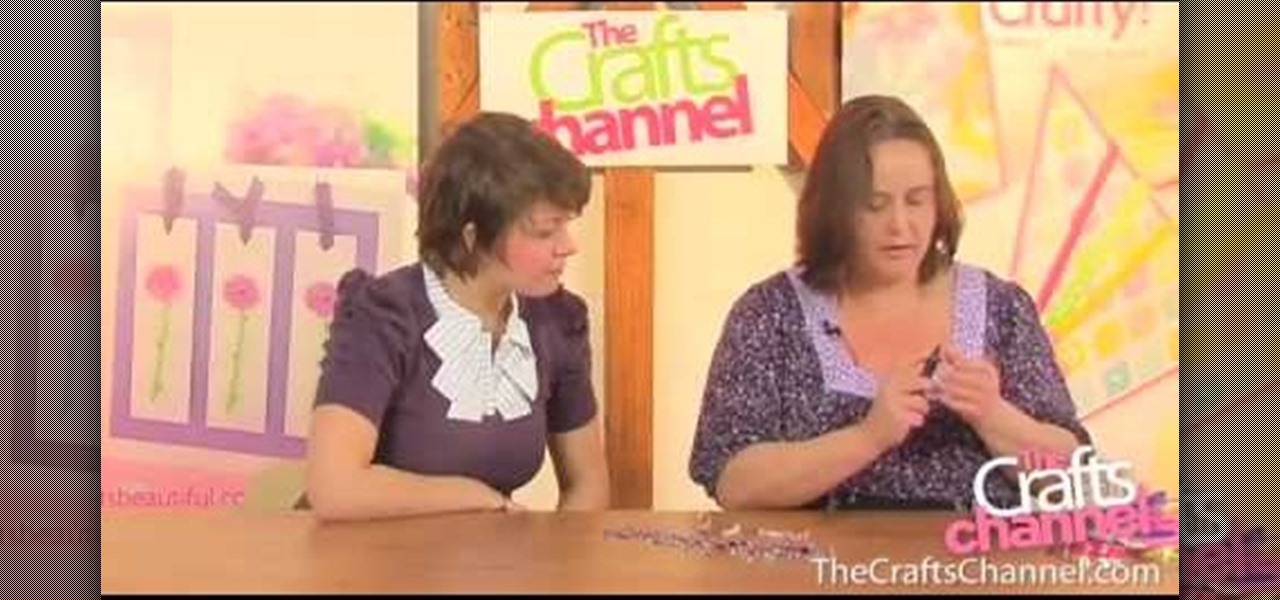
In this video the crafts channel demonstrates how to make a crystal cluster ring. Start with a pen about the size of your finger and wrap your thin gauge wire around it completely twice. Give the wire a simple twist. Put your beads on the wire, then bend the wire around into a circle. Next wrap the wire again around the base on the stone setting. Be sure to wrap it tightly. After twisting the wire tightly around the shank of the ring cut the wire. Use a pair of round nose pliers to create a f...
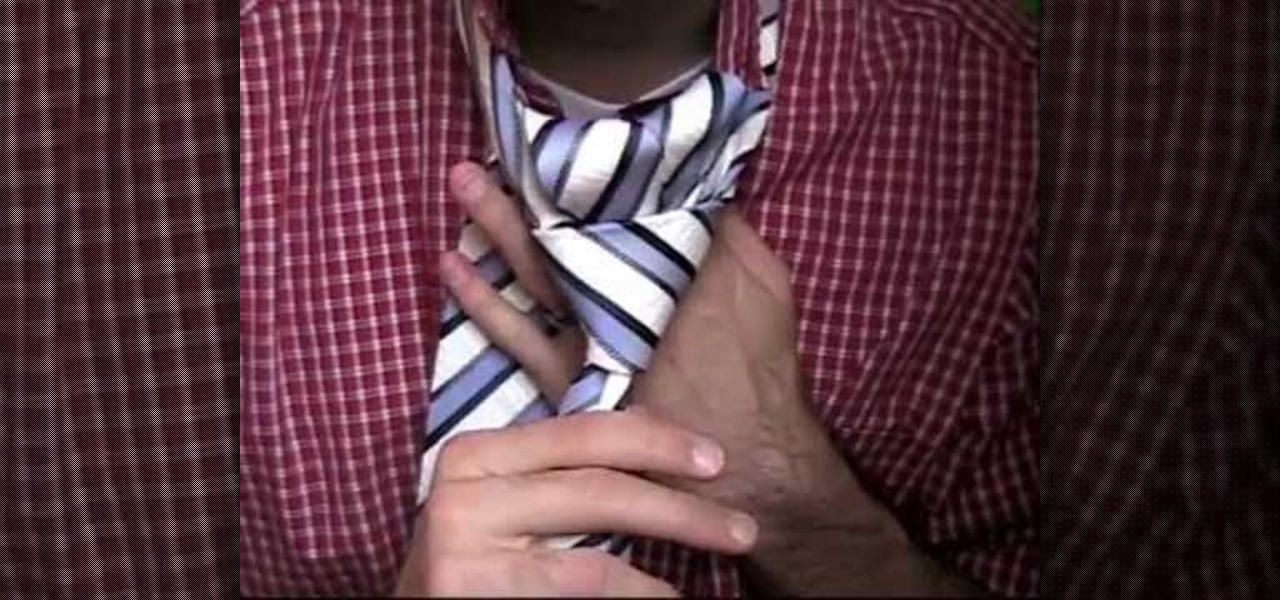
If you want to know how to tie a Double Windsor knot, this video is for you. To tie a Double Windsor knot: Lift up the collar of your shirt. Place the tie around the back of your neck so that the wide end hangs down on the side of your dominant hand, a little more than twice as low as the thin end. Cross the wide end once over the front of the thin end and then around the back of the thin end a few inches below your neck. Slip the wide end through the back of the V-shape made by the knot, pul...
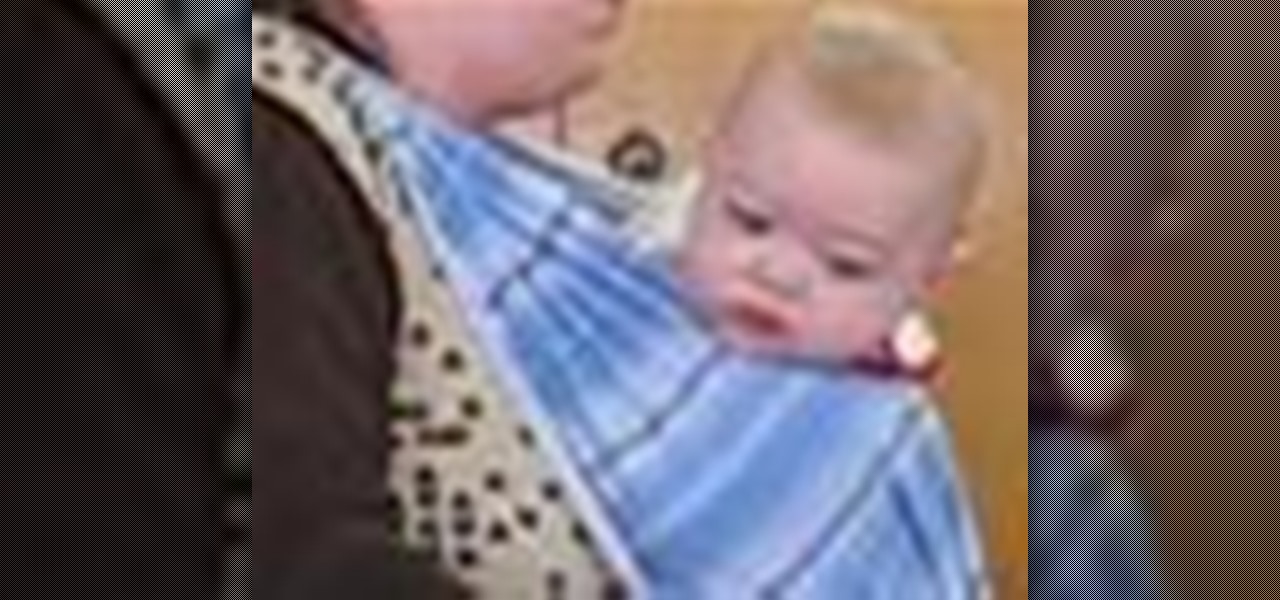
Need a way to carry around your baby while keeping your arms free? No need to buy a special carrier, all you need is a sturdy cloth and the step-by-step instructions in this how-to video. Find the middle of your wrap. Center on the small of the back. Cross each length over opposite shoulder. Adjust for comfort. Take opposite ends in each hand and cross in the back. Tie a square knot in the front. Get your baby. Place each leg on either side of the cross. Spread the fabric out starting with th...
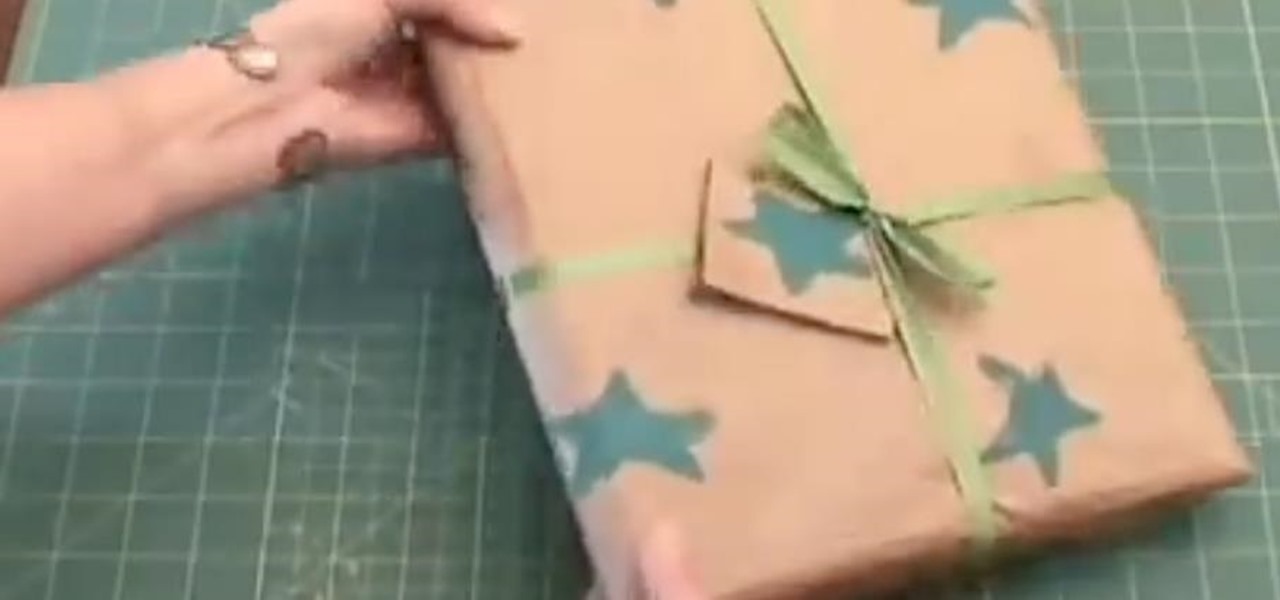
In this tutorial, we learn how to wrap a gift the easy way. To begin, lay the wrapping paper down on a flat surface. Next, lay your gift down upside down on the middle of the paper. Next, fold the paper over half the gift, then tape it. After this, measure the other side to meet in the middle, and make a crease. fold it over the middle and tap it. Now, fold in the sides. To do this, fold in the edges first, then push the top layer down, and bring the bottom layer up. Tape this. Now, turn the ...
In this video tutorial, viewers learn how to gift wrap using recycled material. The materials need for this project are: a potato, large paper bag, tape, ribbon and paint. Begin by cutting the potato in half and draw a simple shape onto the sliced surface of the potato. Then cut out the negative part of the shape with a knife. Now open the bottom of the paper bag and cut down the side so that it lays flat. Then brush some paint onto the potato stamp and press it down along the paper to form a...
Make beautiful presents using materials around the house with simple gift wrapping techniques. Learn how to wrap presents with aluminum foil, wax paper, cheesecloth, and more in this free arts and crafts video series.