In this tutorial, we learn how to attach a charm on a chain with Anna. To begin, grab a pair of pliers in each of your hands. Now, pick up the chain with them and gently lift up one side of the flap. After this, pick up your charm and attach it onto the chain. When finished, attach the chain onto the larger chain (bracelet or necklace), then gently close the chain link back up. You will want to gently press the opening back down leaving no gaps in it, or the chain will come loose and you will...
In this video tutorial, viewers learn how to make a beaded watch band with a non-loop watch face. Begin by cutting 2 pieces of the stringing materials to approximately 10 inches. Then put one end of the string through the hole of the watch face and pull it to about halfway. Now users will have 2 strands to work with. Users may choose to making a double strand watch band by putting beads on both strings, or a single strand watch band by running both strands of string through a single bead. Fin...
Keep your favorite dessert or food item close to you at all times by making a foodstuff-shaped piece of polymer clay. From chocolate cupcakes to orange slices to donuts, polymer clay can be formed into almost any food imaginable. Plus, miniaturizing makes food look adorable, making it even more irresistable.

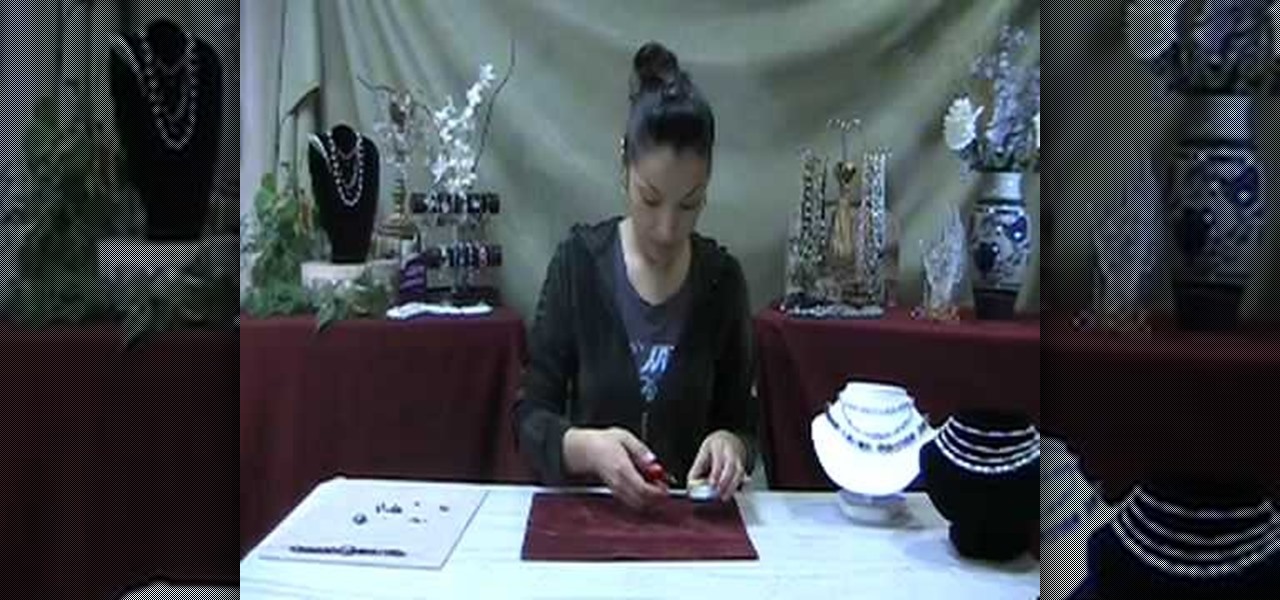
During this rough economic period, more and more people are looking for better ways to save on money, but still look good in the process. One of the best ways of doing that is by making your own jewelry. Much of the materials can be bought at stores like Target and Wal-Mart and are easy to put together. So in this tutorial, you'll find out how to make beautiful looking pearl cluster earrings. Good luck and enjoy!

When it comes to displaying your own sense of style, there are so many different options to choose from. You can focus on the hair, hands, whole body, or even your toes. Either way, you can customize and create any stlye you can by easily choosing which jewelry to wear or how to wear your hair style. This video tutorial will help give you another great option to help achieve that personalized look. Find out how to make awire wrap ring easily. Enjoy!
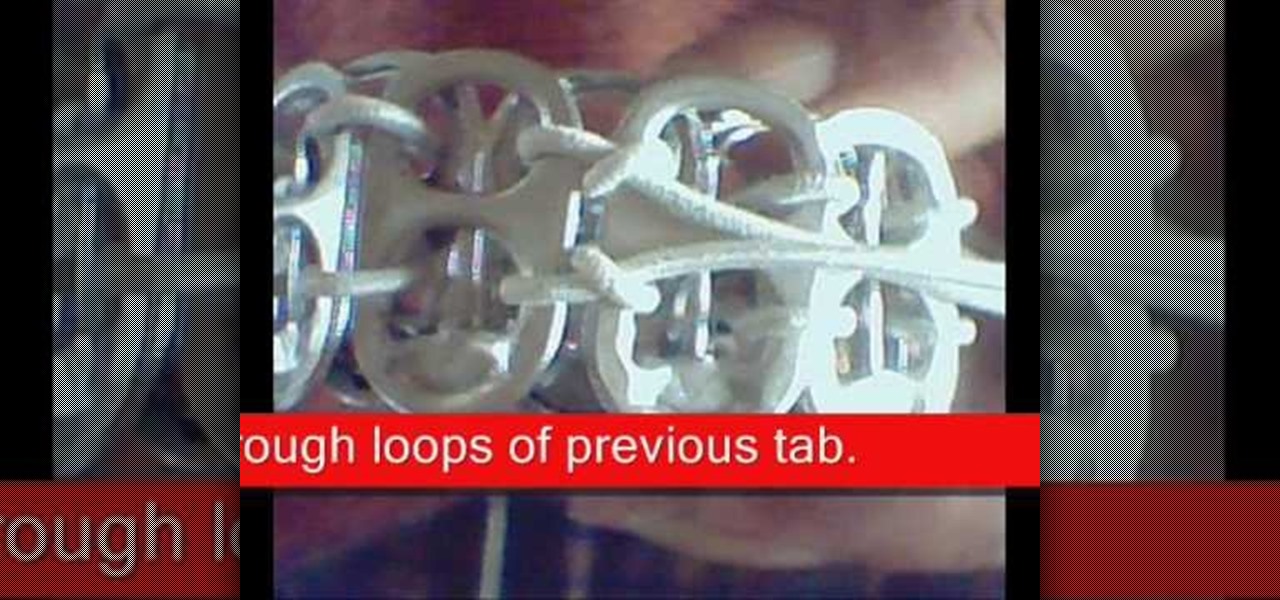
It's time to be Earth friendly! This tutorial will show you how to save the tabs from old soda cans and make really cool jewelry out of it. Follow along with the video and learn how to make a bracelet from soda tabs. So, start recycling and raiding your neighbor's trash for tabs to make more fun designs. Just don't forget to recycle the rest of the can when you are done!

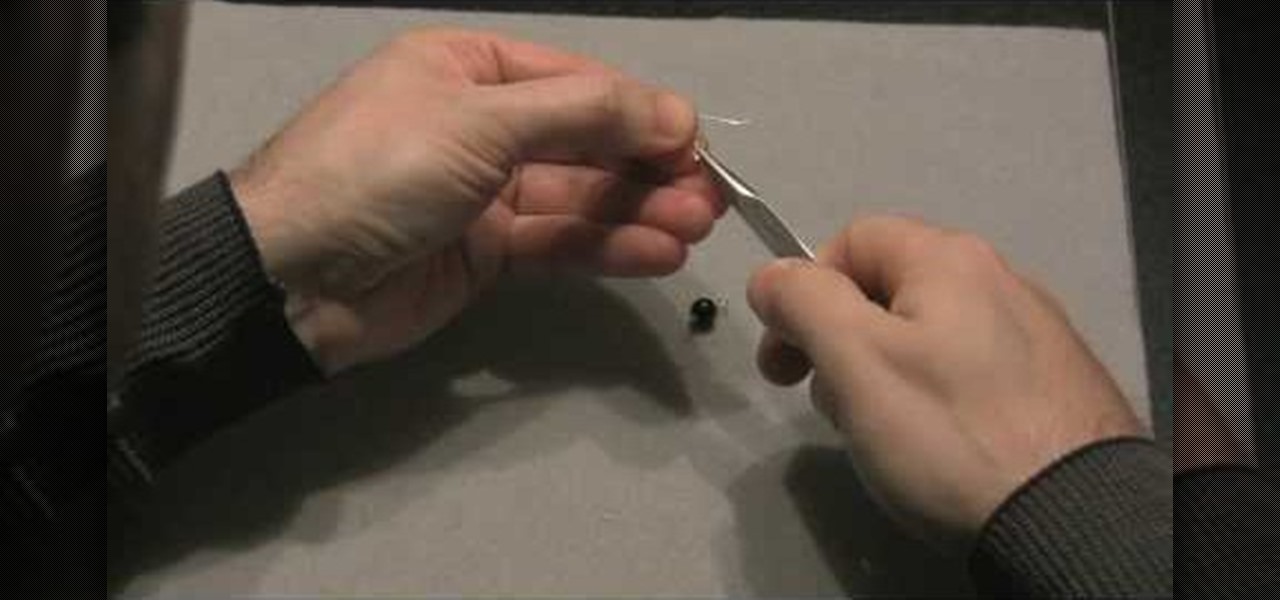
Artbeads demonstrates how to make a simple loop using eye pins. Simple loops on head pins or eye pins are great ways to attach charms to your jewelry. To make a simple loop use chain nose pliers to make a 90 degree bend in the pin above the bead. Then, cut the wire so that there is a 3/4 inch tail on the wire. With round nose pliers, create a loop on the end of the wire. Use chain nose pliers to open and close the loop to attach it to a chain or clasp. You can also make a loop by using the ro...
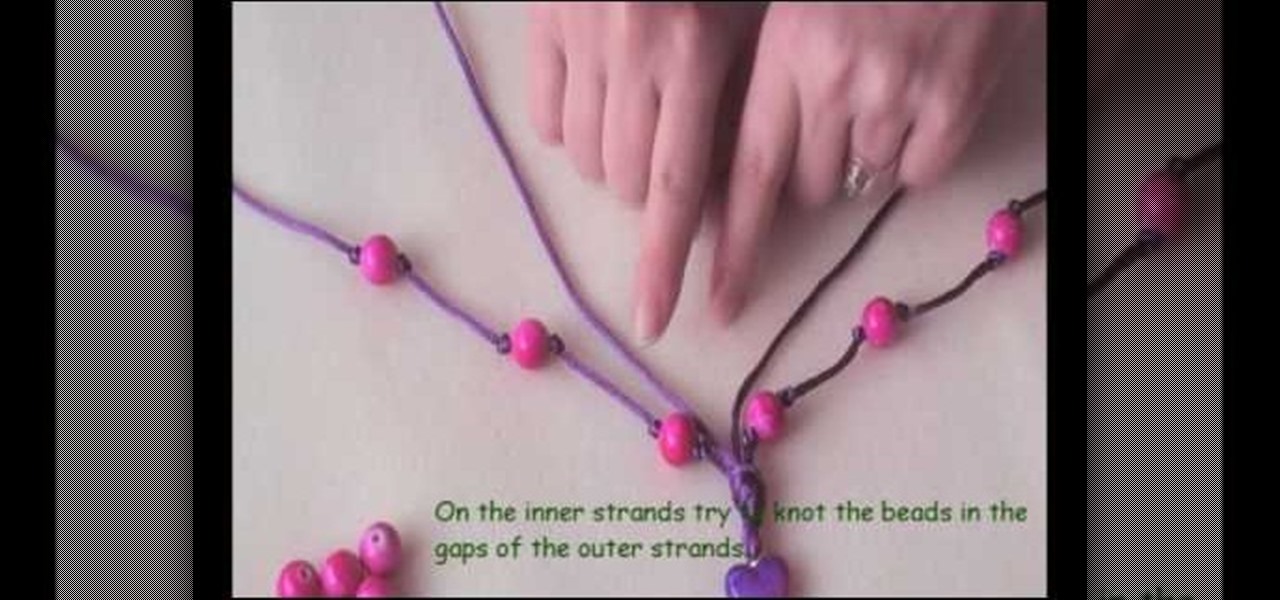
In this video the demonstrator shows how to make an alternative style rock star bead necklace. She uses purple cording, pink round beads, and a pink and purple heart bead to construct this fun, original piece of jewelry. By using a headpin and pliers, she shows how to turn the heart bead into a charm to use in the center of the necklace. She also shows us how to knot the beads in place for a polished look. Follow her unique tips including using nail varnish to sting beads easier, seed beads t...
In this Arts & Crafts video tutorial you will learn how to attach an eye pin to a French hook. The video is from Jewelry Making Fun. For this you will need nose pliers, an eye pin and a French hook. One way of doing this is to hold the French hook in one hand. With the pliers twist one end of the loop on the French hook to open it slightly. Then put the loop of the eye pin into the loop of the French hook and close the loop with the pliers. The other way is to open the loop of the eye pin, pu...
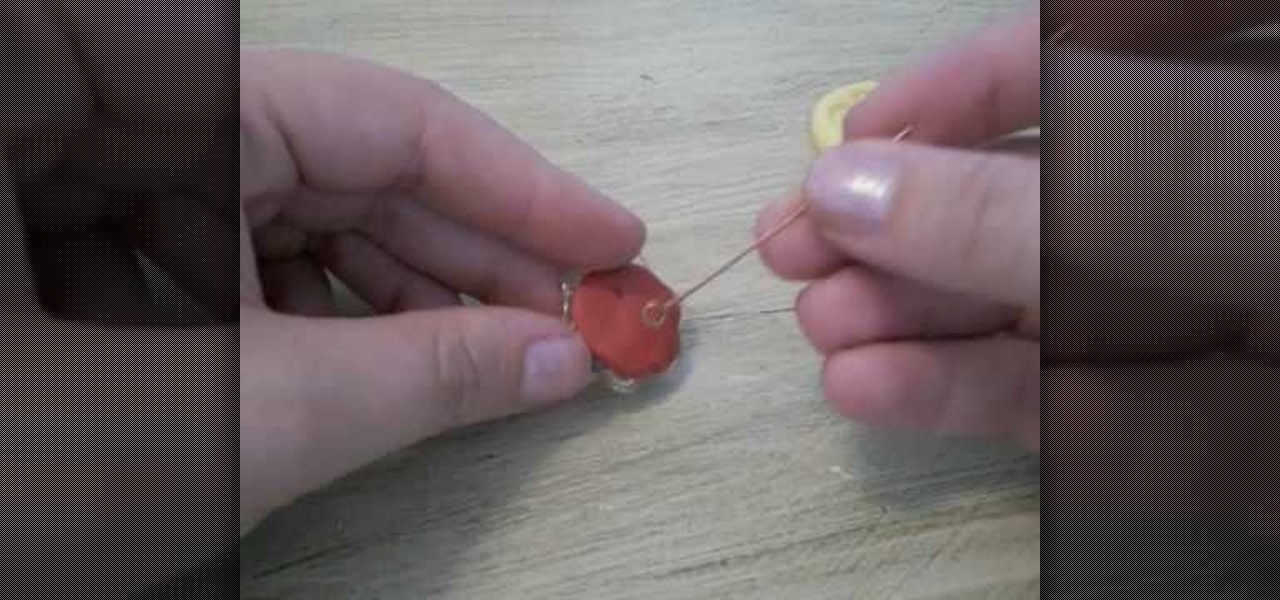
Those interested in learning how to make their own jewelry, can learn how to make a floating illusion necklace by following the steps in this video tutorial. You will need a beading board, beading wire, crimp beads, beads of your choice, a barrel clasp, wire cutters, and crimping/flat-nosed pliers. First measure out how much wire you will need. The tutorial is making a 16-inch necklace. Make sure to cut extra wire. For a 16-inch necklace, this means you should cut approximately 20 inches of w...
This video shows how to make an earring holder. You will need a canvas and some acrylic paint. Paint the entire canvas including the sides. You can paint it a solid color, or paint any design you like. Use glue to attach some glitter, or use puffy paint or glitter glue to decorate the earring holder. When the paint is dry it is ready to use. Simply push your earrings through the canvas. If you have earrings that are delicate, you may want to use a nail to form a hole in the canvas before plac...
Rob shows us how to use a silver one inch long wire head pin to place a bead on. He uses both flat nose and round nose pliers to close the loops he demonstrates how to make. outlining the basics for loop making and the loop connection process. He slowly and clearly shows us how to make two different types of loop closures. On of the loop closures is simple and easily reopened. The other loop closure is made by making the first loop and then using tools to wrap the rest of the wire around the ...
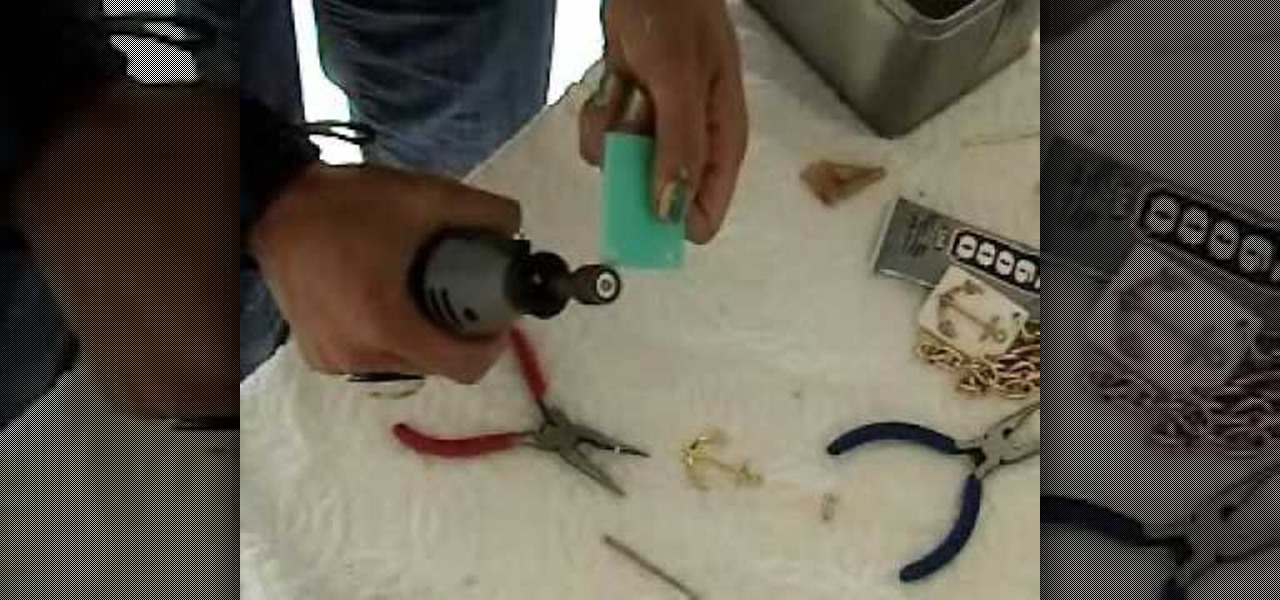
Learn how to make your own jewelry starting with a gold anchor and plastic gold chain necklace by following the steps Kandee outlines in her tutorial. You will need a drill, some attachments for it, a gold pendant, gold chain, and clasps to connect your necklace. To begin, create your pendant by gluing an anchor charm to a plastic square pendant. Once you have created the pendant, drill holes in the upper portions of the pendant. Then connect the gold chains on each side of the pendant using ...
She begins by taking something she has molded with Amazing Mold Putty. She uses Magic Gloss resin which cures with UV light to fill the silicon mold and sprinkles some glitter onto the resin. She emphasizes that she's doing this indoors, because the resin will harden when exposed to light. She takes it outside to cure in the sunshine and says it will take about 15 minutes to cure. When it's done, she rolls a ball of Pardo clay. She pops the molded piece out. She presses the molded resin piece...
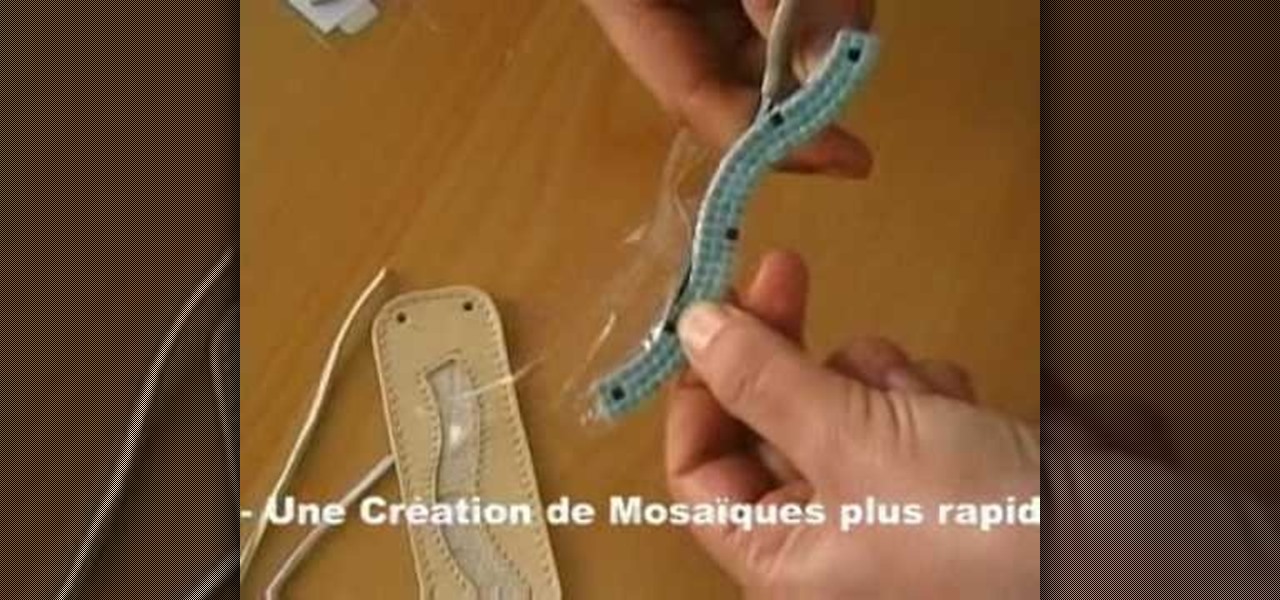
Alea Mosaic shows you how create a beautiful stone-inlaid jewelry bracelet. This video clearly and concisely lays out the steps. First, you affix a pattern underneath clear adhesive foil. Next, you peel the the cover off to expose the adhesive. You then place the stones according to the pattern, and fix a transparent foil on top. Once that is done, trim the plastic from around the stones. Then, you apply glue to the bracelet base, then place the stones inside.
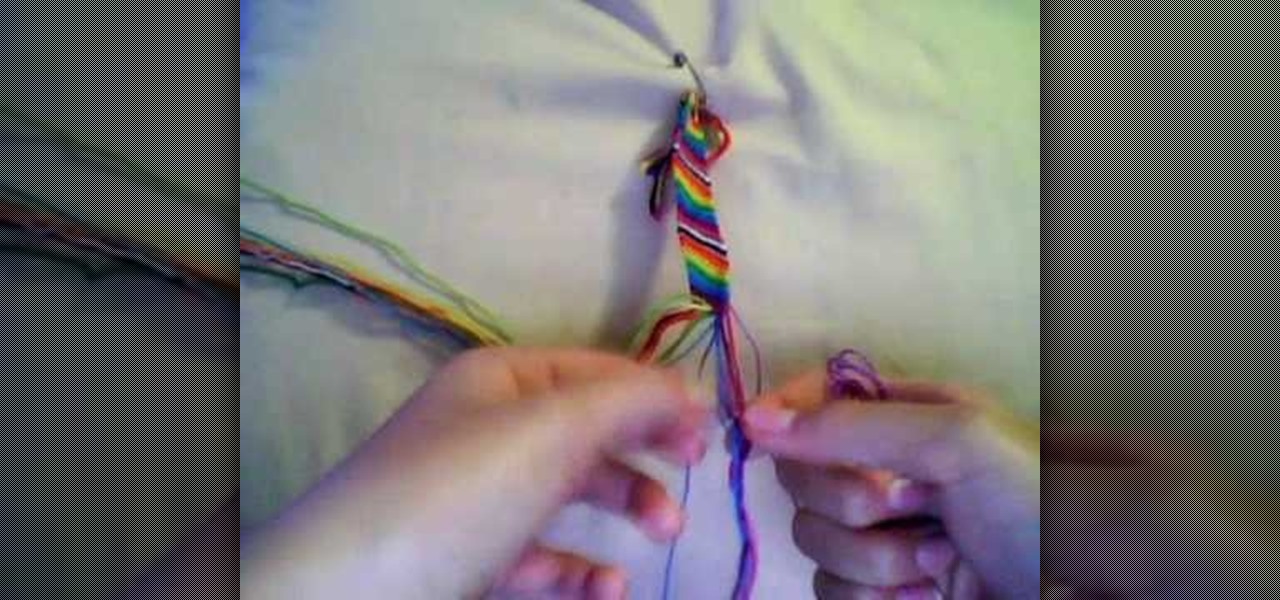
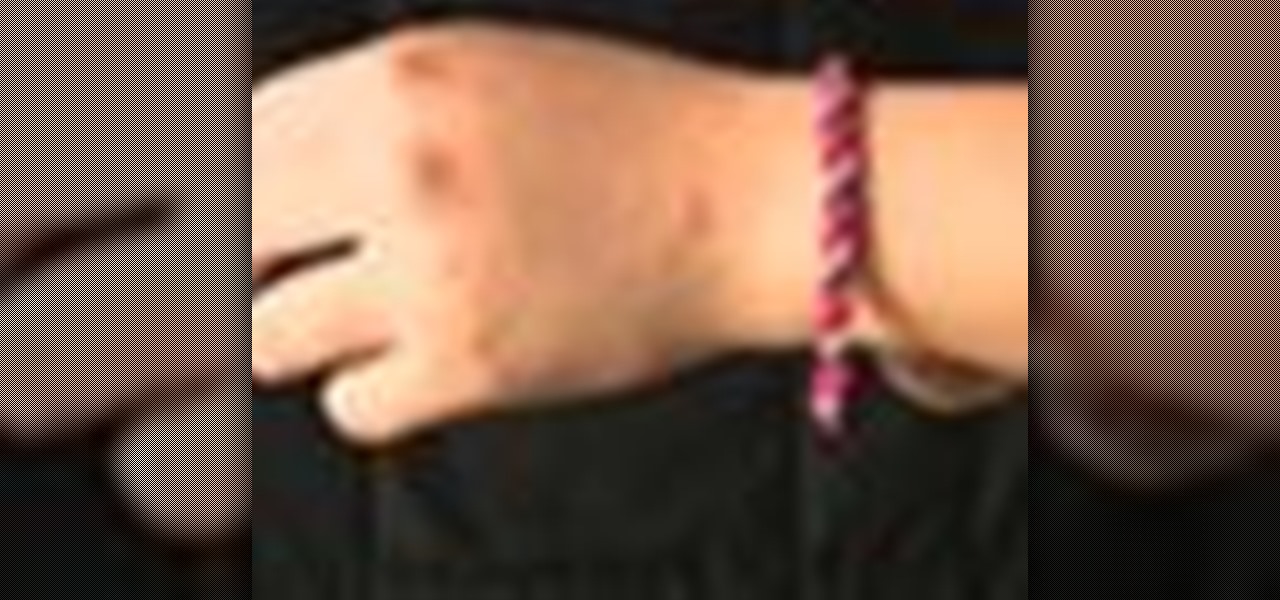
Learning how to make a piece of jewelry can be a daunting task, but this straight forward tutorial gives you all the skills needed to perfect the craft of making friendship bracelet. Starting with just a few simple pieces of string, one can make this very simple DIY project. Although the materials are cheap to procure, the end result is anything but cheap looking. The candy stripe design adds to the charm of this whimsical bracelet. Make one for all your friends today!
This video is all about how to make a snowflake pendant. This is just an interesting task for women who like wearing jewelry. Now you can make pendants by your own hands at home. You require just few beads of your choice color and take a needle and a strong thread ,you can also have some kind of chains to make it strong and beautiful. Just arrange beads in any pattern and attach with some chain. It takes just few minutes to do it.
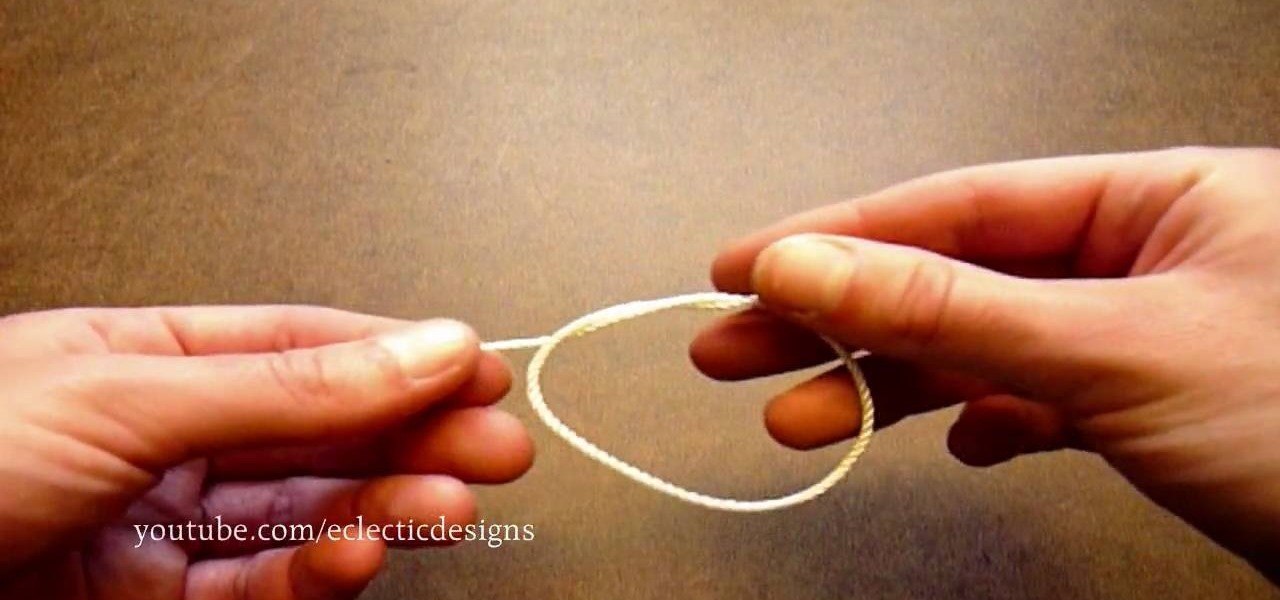
To tie the overhand knot, make a loop and pass one end of the string through the loop and tighten by pulling both ends. To tie a double overhand knot, make a loop and pass one end of the string through the loop twice before pulling both ends to tighten the knot. To tie a surgeon's knot, take the left string and bring it over and around the right string twice. Then take the right string over and around the left string and pull both ends to tighten, leaving a complete loop of string below the k...
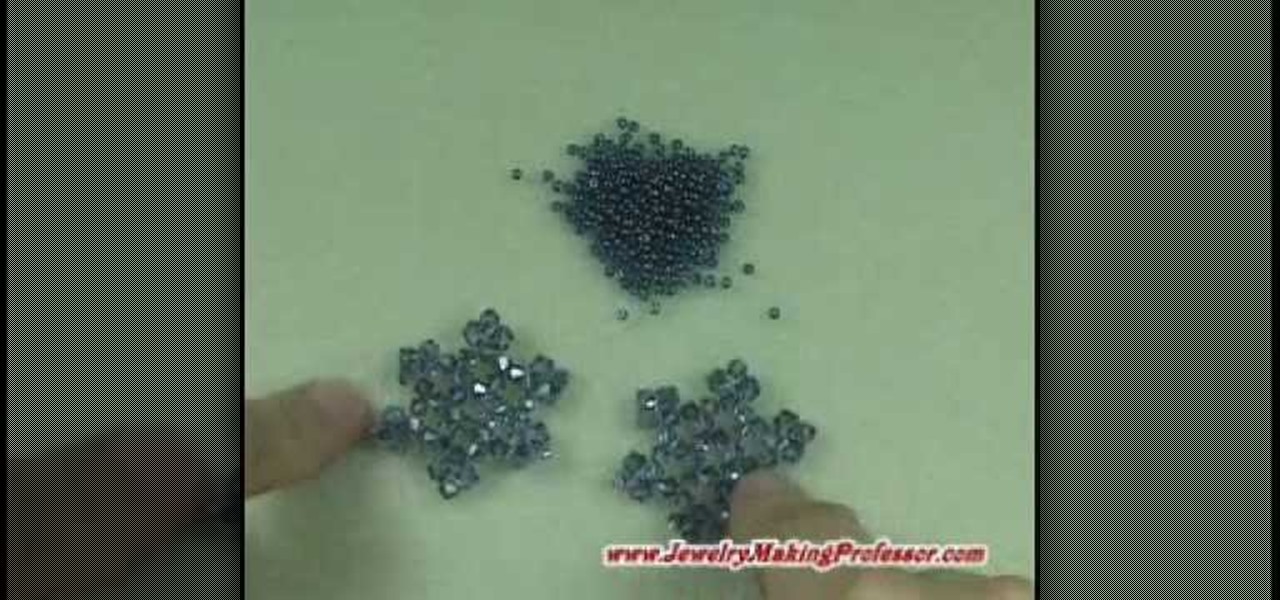
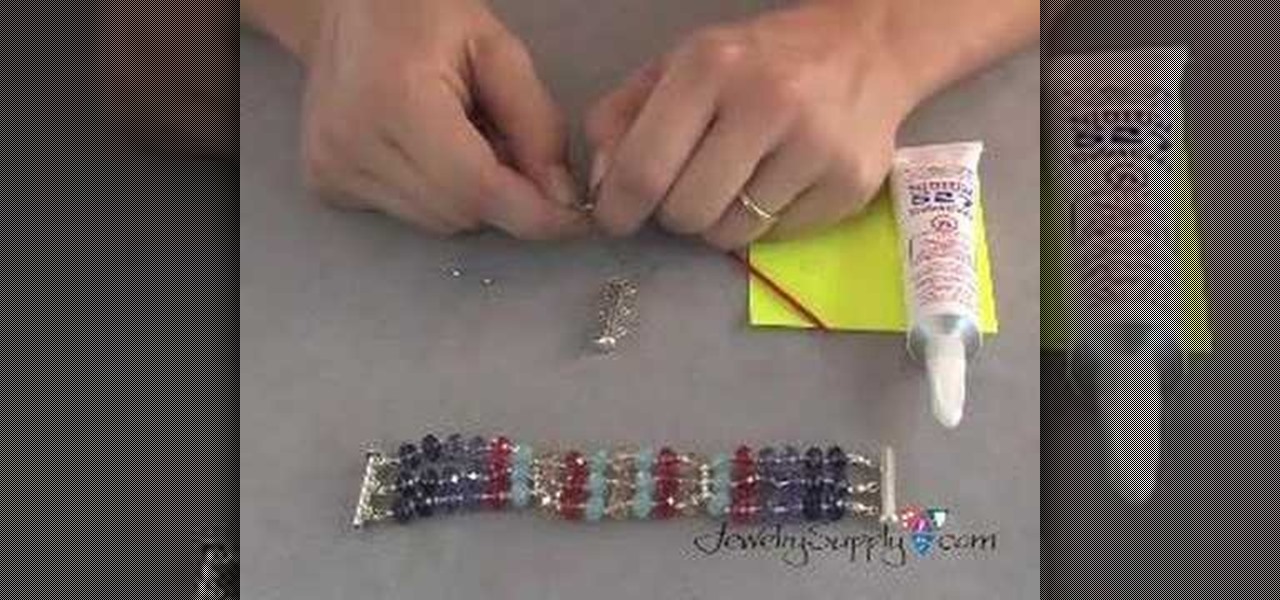
Learn how to make a right angle weave (aka, "RAW") tennis bracelet in this two-part jewelry making video tutorial. The Right Angle Weave is a versatile stitch, and in this video a variation is taught. Beads used in this tutorial include the Hex Cut Seed Beads and Swarovski Crystal Bicones.
Most friendships come and go, but the truest ones that stay and bloom deserve something special to honor the bond. While going to Claire's with your girlfriend to purchase a "Best Friends 4 Ever" heart necklace - broken in half, of course, so each of you has half - is a nice way of honoring your friendship, you can do something special by making a friendship bracelet yourself.
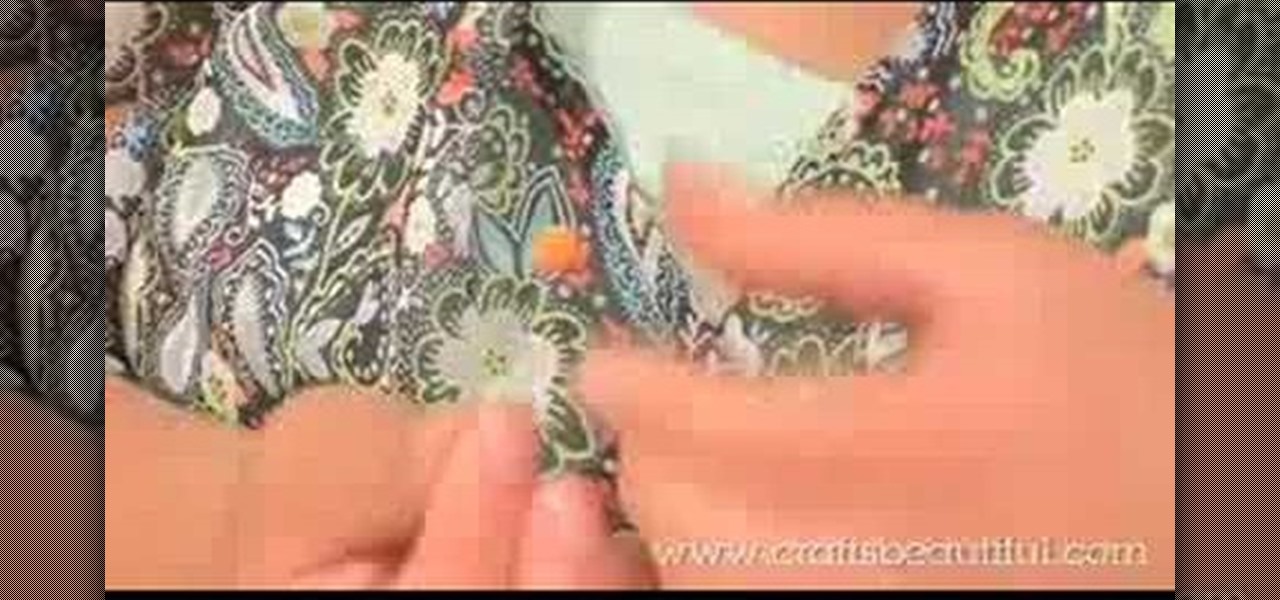
A kanzashi, as shown in this how-to video, is an ornamental hair pin used in Chinese and Japanese hair styles. While they're more of a traditional piece, they're still commonly worn by brides and as part of a kimono costume (for geishas). This video tutorial shows a method of making this beautiful piece yourself out of any chopstick. You will need a chopstick, 10cm of wire, a charm, a big bead, two split rings, 3cm of chain, a 5mm x 2cm scrap of cloth, a pair of nippers, a pair of pliers, a k...
Making your own earrings is a great solution for when you can't find the perfect pair for that awesome dress. Why not make your own by watching these free videos and learning how from an expert jewelry maker.
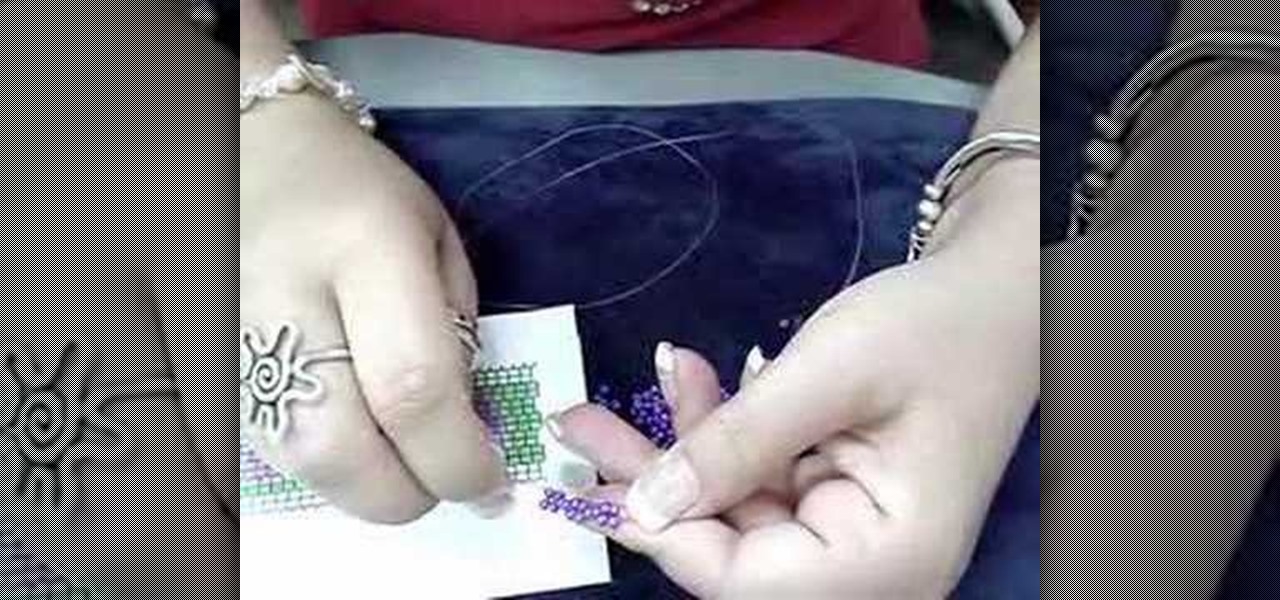
Make a two drop peyote bracelet, just like in the latest beading magazines, and learn how to read a peyote pattern, all by watching this video jewelry-making tutorial. Learn how to read a color wheel as well, and how to use it to improve beading technique. For this project you will need a needle, nylon line, and beads. Watch this how-to video and make a two drop peyote bracelet of your own!
This video jewelry-making tutorial shows how to make a Swarovski crystal spacer bar bracelet. For this craft project you will need crystals, space bars, silver rounds beads, crimp beads, and a three string clasp. Learn how to make a Swarovski crystal spacer bar bracelet by watching this how-to video.
Watch this four part jewelry making sequence to learn how to make a beautiful Swarovski crystal bracelet and a pair of earrings to match.
You can easily copy the aged look on old brass jewelry and hardware. Brass, an alloy of copper and zinc, oxides naturally. But you can encourage the process to go faster by using vinegar and salt water, or a rag soaked in ammonia. Use these techniques to mimic an antique patina.
A fun type of bracelet is the paracord. It is a heavy duty, unique accessory that is relatively easy to make. In this tutorial, learn how to use the cobra style weave to make a funky looking piece of jewelry. This makes a great addition to your personal style or a wonderful gift. Give it a try!
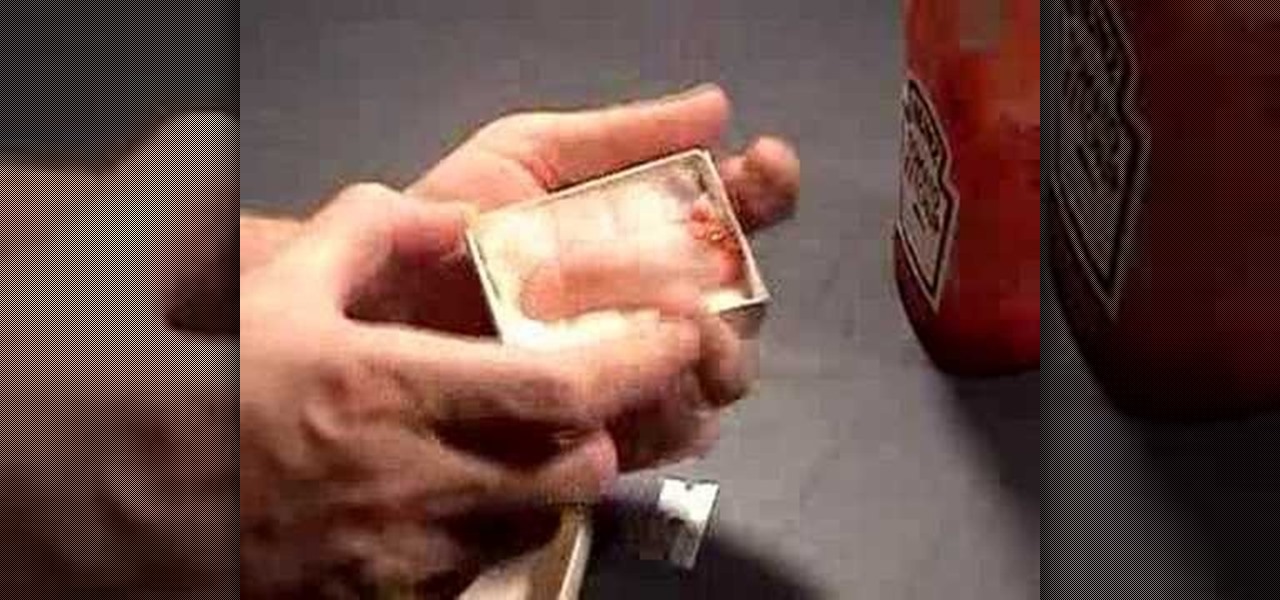
Want to scare the socks off your friend? Give them a bloody finger in a box for a gift... your bloody finger! To complete this prank you will need a small jewelry box, a cotton base, scissors, and ketchup! This trick is great to add to a spooky Halloween party... or: your little sister's birthday.
Remember pulling this trick on friends in 8th grade? It'll be great to try on your wife, because she'll think you're giving her jewelry. Tell her you "found something", then show her the box. Remember to jiggle your finger when she goes to feel it. Good Luck. Lou Ryder.
Raven Symone shows you how to make earrings using yarn. You will need yarn, a crochet needle, tapestry needle, silver hoops, pliers and earring hooks. Learn to crochet with Raven Symone to make a fun piece of jewelry. You can use your crochet skills to make other fashionable objects. Raven Symone explains that crocheting is about much more than doilies.
Planning on shooting a low budget sci fi flick? The guys at Indy Mogul teach you how to make a cyborg arm and eye patch using a PVC coupler, coin tray, thin orange tubing, blue flash controllers, silver bubble wrap, duct tape, a rolodex, and costume jewelry.
This tutorial shows you how to do two basic macrame ties, which you can use to make keychains, bracelets, chokers and other types of jewelry. Add beads, charms and other decorations to your projects - macrame is cheap, easy and fun!
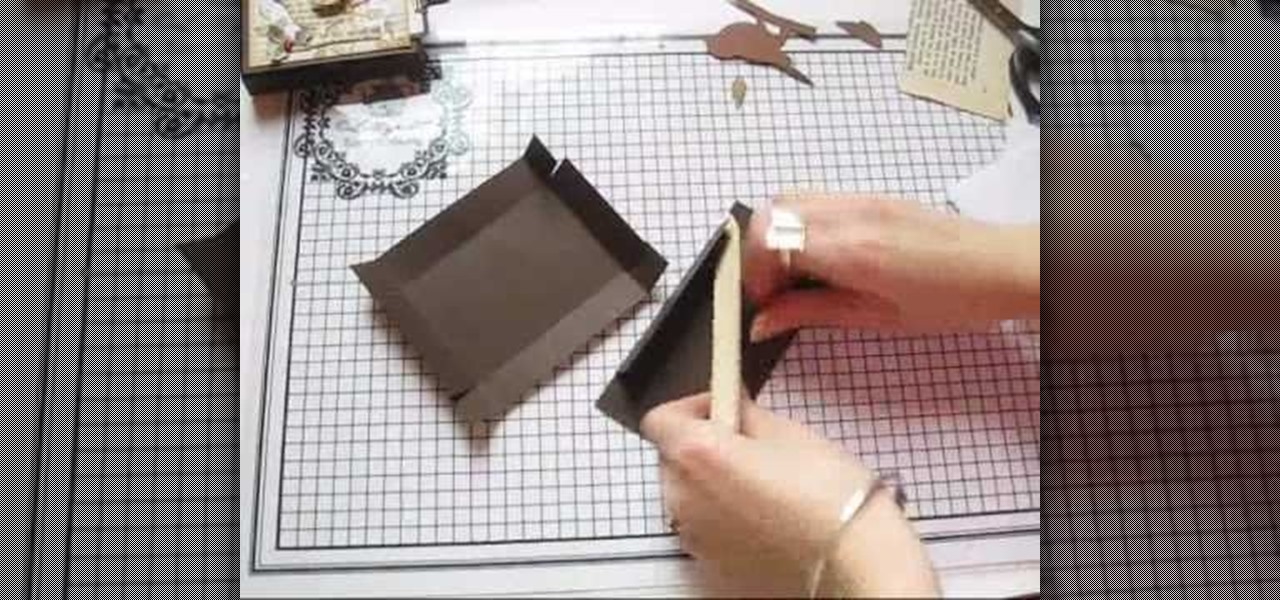
This tutorial shows you how to make a lovely small box that you can use to enclose small Christmas presents, like jewelry or gift cards. There's also a special pocket for you to include a gift tag or little card!
Want to have a green Thanksgiving this year? You can make a classy, lovely Thanksgiving centerpiece with your children out of recycled materials! This project uses empty glass soda bottles, a few paints, flowers and some old jewelry or colored beads.
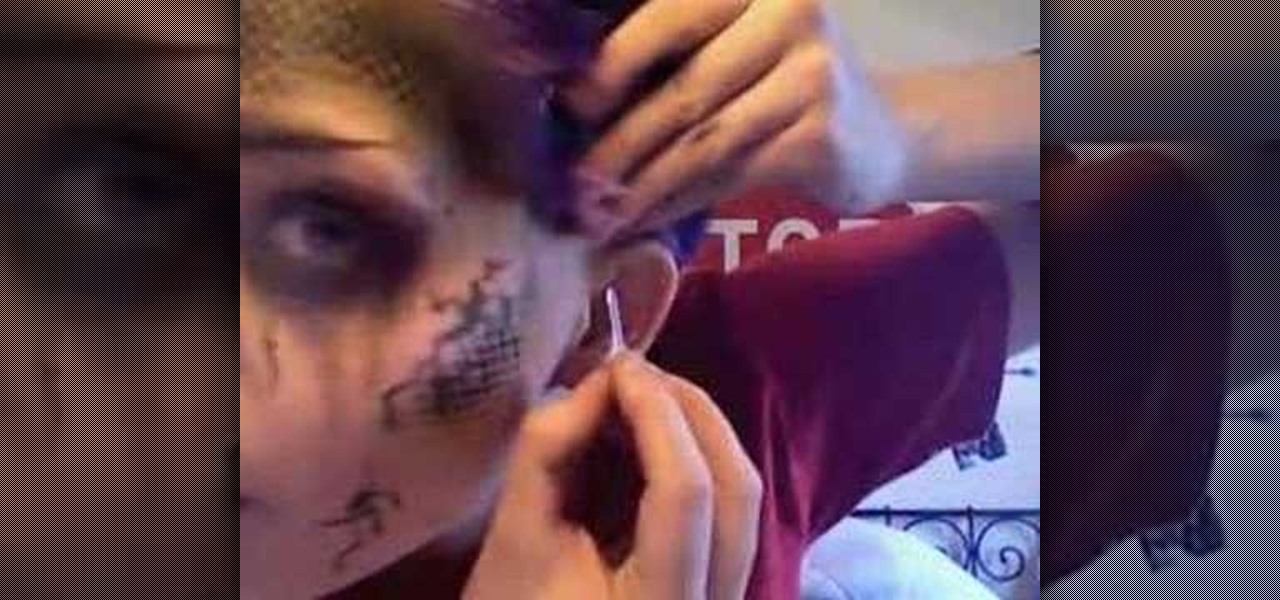
Looking for a good way to apply latex ear tips to make you look like you have elf ears or faerie ears? All you really need are the latex ear tips and some spirit gum, and maybe some jewelry if you'd like to accessorize.
Is your silverware or silver jewelry showing too much tarnish? You can remove the tarnish easily by using a baking soda toothpaste. This tutorial demonstrates how you can use just a dab of toothpaste, a soft cloth and some rinse water.
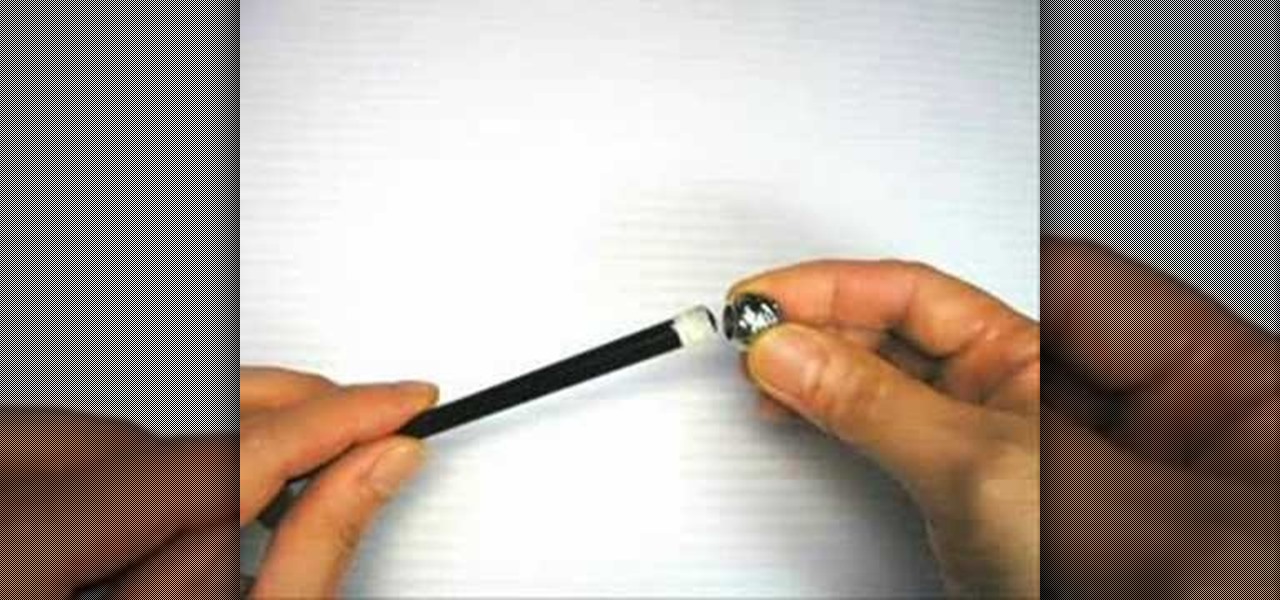
Perfect for a 4th of July craft, this tutorial shows you how to make an easy beaded bracelet with a patriotic touch. You'll need some copper wire (or jewelry wire), red, white and blue beads, a pencil and a pair of safety scissors.
It's very important to know what you're skin undertone is, because then you'll know what makeup looks best on you, what jewelry matches perfectly, what clothing makes you radiate, what hairstyles compliment you and what colors fit perfectly. If you're into fashion, makeup and beauty, than it's a must to know your undertone. Finding the answer is easier than you think!
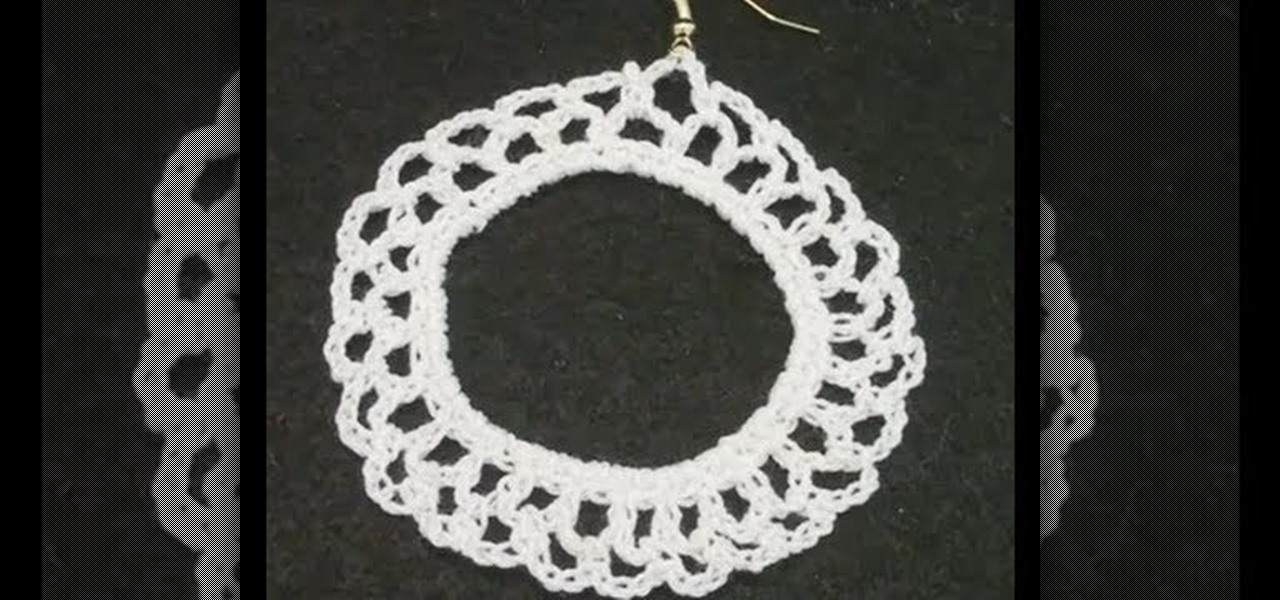
This tutorial has been specially designed for left handed artists. Make your own pair of crocheted earrings using leftover crochet thread left on your spool - all you need is a #9 crochet needle! This video shows you how precisely how to make yourself some elegant and crafty jewelry.
This tutorial has been specially designed for right handed artists. Make your own pair of crocheted earrings using leftover crochet thread left on your spool - all you need is a #9 crochet needle! This video shows you how precisely how to make yourself some elegant and crafty jewelry.