

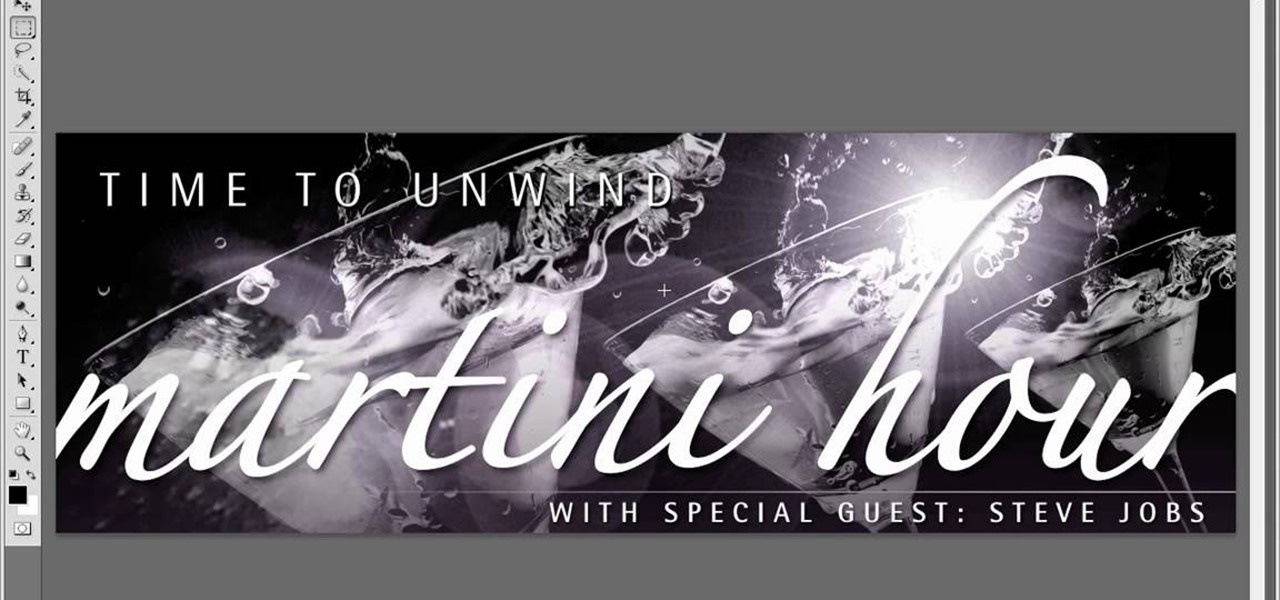
How To: Use the gradient tool in Photoshop
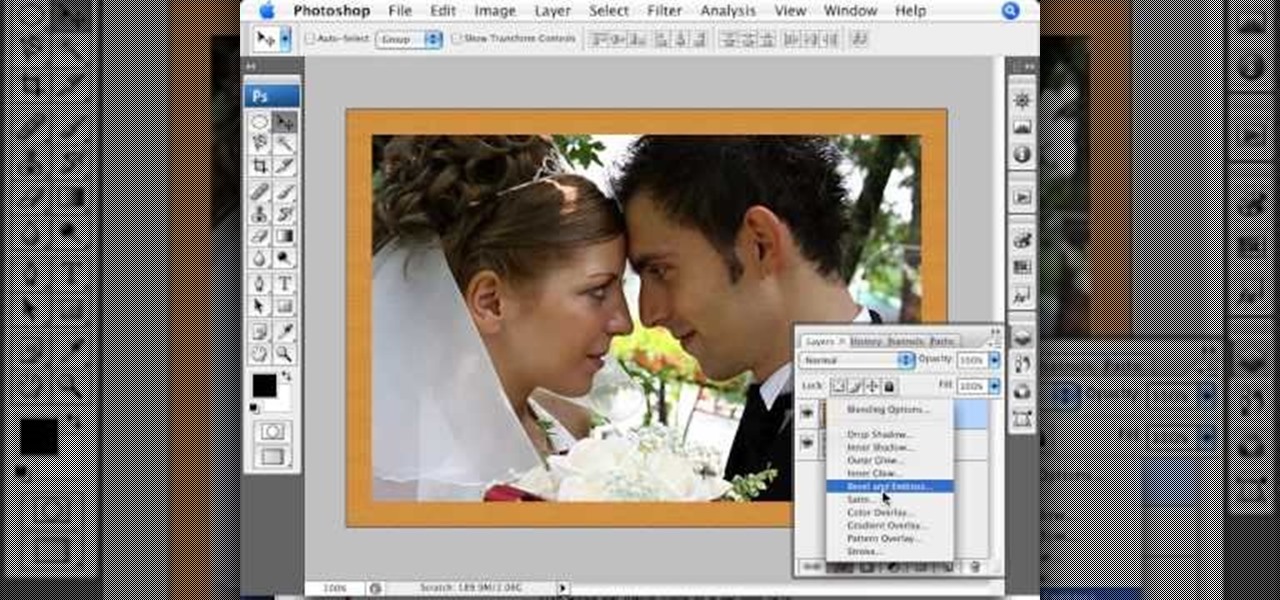
The Gradient Tool allows you to fill the entire canvas or a selection with a color range. You can also choose the direction of the fill. See how in this Photoshop tutorial.

The Gradient Tool allows you to fill the entire canvas or a selection with a color range. You can also choose the direction of the fill. See how in this Photoshop tutorial.
Pixel Perfect is the "perfect" show to help you with your Photoshop skills. Be amazed and learn as master digital artist Bert Monroy takes a stylus and a digital pad and treats it as Monet and Picasso do with oil and canvas. Learn the tips and tricks you need to whip those digital pictures into shape with Adobe Photoshop and Illustrator. In this episode, Ben shows you how to dive into new features of Photoshop CS4.
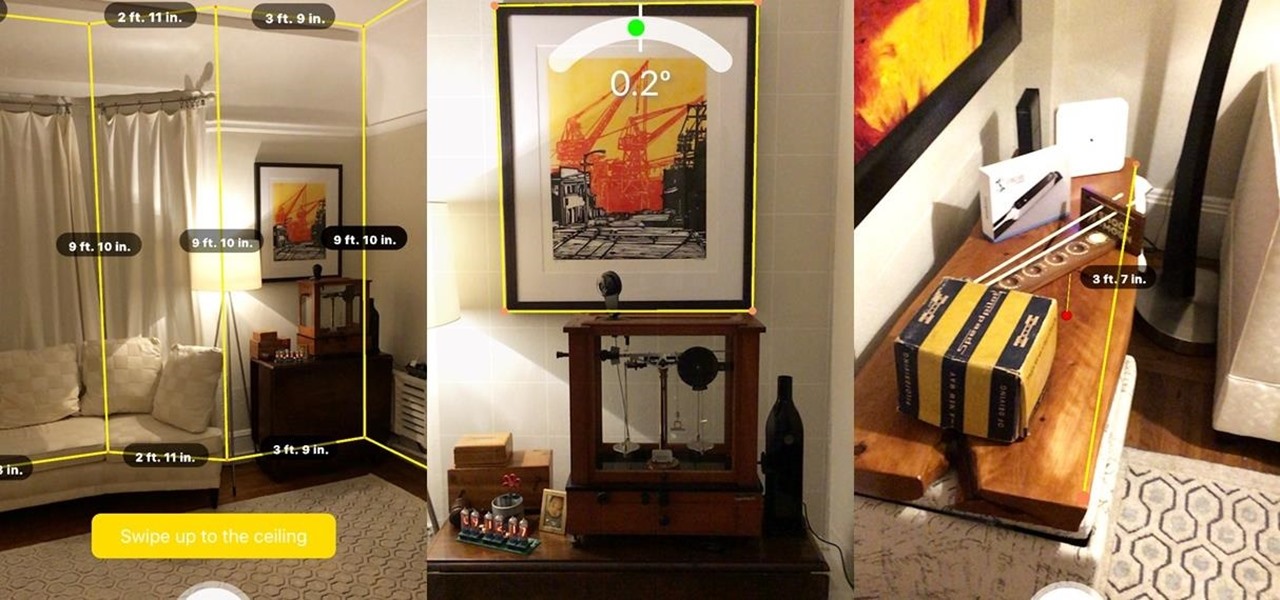
In off-record discussions with AR experts, the consensus on ARKit is that it takes a software approach to the depth-sensors available on Tango devices. As a result, the toolkit has shortcomings, such as detecting walls and vertical surfaces.


In this tutorial, we learn how to create Apple's aqua wallpaper in Photoshop. First, create a new canvas in the dimensions you choose. Now, go to the paint pallet and choose a color. Click on ok, then start to paint your background. Select the pen tool, then draw a line from left the right on the canvas. Now, change the color of this shape to white. Now, change the fill of the layer to 10-30%. Now, double click on the layer and make the stroke white and add a drop shadow to 40 pixels and 20% ...
Advance Photoshop shows viewers how to make the Photoshop CS3 icon in Photoshop. First in Photoshop go to File and then click New. Make a new blank at 500 x 500 pixels. Go to your layer button and create a new layer. Next, go to your rectangular marquee tool, hold down shift, and make the rectangle slightly smaller than the canvas itself. Set it from foreground to background and change the background color to a dark blue, enter 15396F for the color. Click on foreground color and enter 3070CA ...
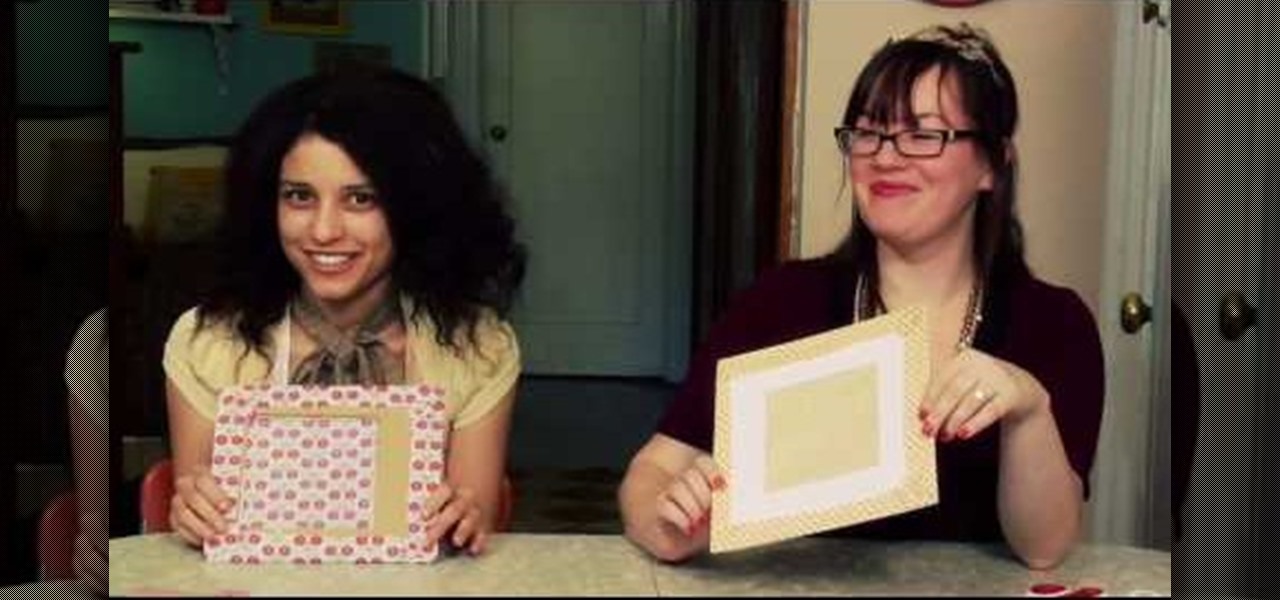
Frames are a must-have for those special pictures, pieces of artwork, and momentos that need a safe place for storage yet need to be showcased. But purchasing a mass-produced frame at Ikea probably won't help your special objects feel, well, special.
Layer comps let you assemble multiple image variations or even independent pieces of artwork inside a single Adobe Photoshop file. The Layer Comps palette gives you the freedom to explore. Whether you're new to Adobe's popular raster graphics editing software or a seasoned professional just looking to better acquaint yourself with the program and its various features and filters, you're sure to be well served by this video tutorial. For more information, including detailed, step-by-step instr...
This video demonstrates how to do image transfers. For this project, you will need the following: acid free card stock, stencils, transparency film, a gel medium, and a PC.

In this video, Steven Marin shows us an interesting method to recycle old CDs to make beautiful flower arrangements along with other recycled materials. In order to make the flowers, you need to take your old CDs and heat them up in a toaster oven. As demonstrated in the video, the CDs are very hot when they are taken out and should be handled with care. They are easily molded into the interesting flower shape by pressing them down over the neck of a bottle or by holding them in a cloth and s...

Check out this DIY video tutorial from Curbly, the best place to share pictures of your home, find design ideas, and get expert home-improvement advice.

One of the more obvious benefits that vertical surface detection will bring to iPhone and iPad apps with the spring 1.5 update to Apple's ARKit platform is the ability to hang virtual artwork that rests realistically on walls.

Apple is planning to completely overhaul its Apple Music streaming service this summer, and is expected to unveil the changes at its Worldwide Developers Conference in June, according to reports from Bloomberg and 9to5Mac.
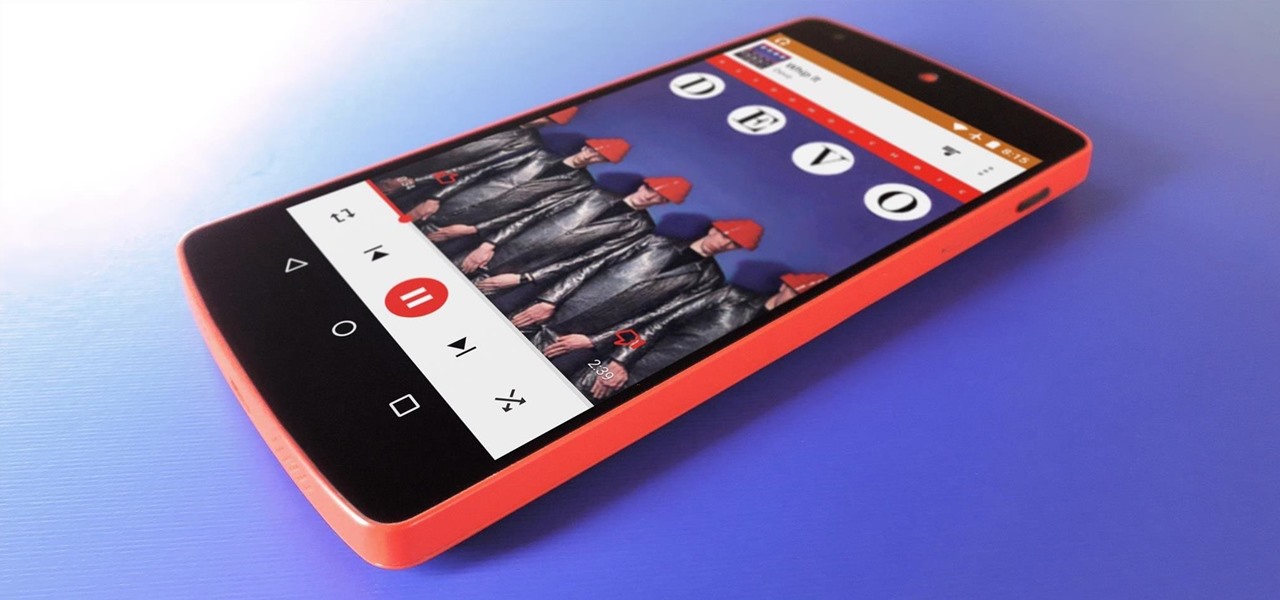
Google Play Music is an awesome app—even if you don't subscribe to their $9.99/month All Access service, you can still use it to store and stream up to 50,000 of your own songs for free. Add to that the fact that it's a pre-installed app on most Android devices, and there aren't many reasons not to be using Play Music.

Since version 4.4 (KitKat), Android has taken the album artwork for any song that's currently playing, as well as videos, podcasts, and other media, then used it as the background image for your lock screen. While many users have enjoyed this little tweak, others aren't quite as fond of it.

In this Software video tutorial you will learn how to create shock style text in Photoshop. Go to the text tool and select it. Then select the font and a large size. Select white color and type in your text. Now create two copies of this text and select the original text. Then click on image > rotate canvas > 90 degrees clockwise. The text will turn by 90 degrees. Now go to filter > stylize > wind. Make sure under ‘method’, ‘wind’ is selected and under ‘direction’, select ‘from ...

In this video the instructor demonstrates how to make colorful glowing neon lines in Photoshop. To do this, open a new canvas in Photoshop of 1280 X 720 pixels. First make the background black. Add a new layer to it. On the new layer, using the pencil in the path mode, make a shape of a neon light, which is basically a curved line as shown in the video. Now go to the brush tool and set the hardness to 100. Now go back to the canvas, use the pencil, right click on the curve and select the stro...
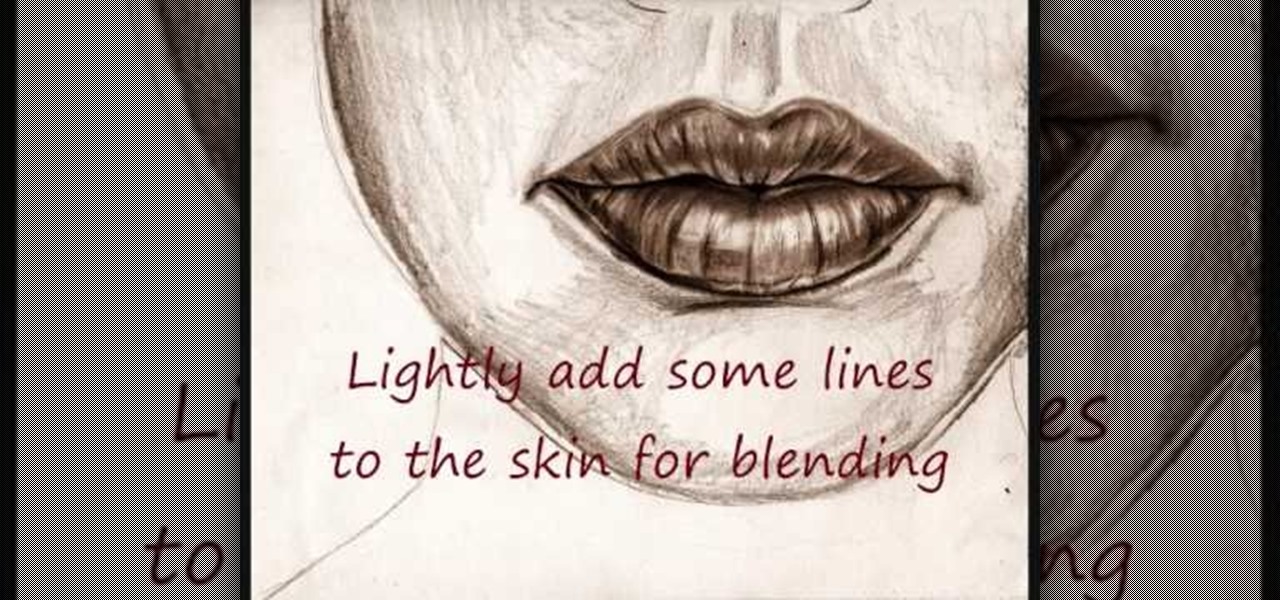
In this video tutorial, viewers learn how to draw lips. Begin by drawing a horizontal line for the mouth and draw a Mickey Mouse shape in between the line. Then sketch the upper lip with the 2 smaller circles on top and draw the lower lip with the large circle as guidelines. Now users may draw the rest of the face. Then darken and define the upper and lower lips. Now lightly sketch some lines on the lips to show depth. Then darken and shade the lips. This video will benefit those viewers who ...

A fun way to display photos and artwork in your home is with homemade frames. Keep the crafty feeling of the art and make a colorful frame for display. This project can be done with kids of any age, and they will love helping to decorate their rooms or play areas. These frames are 8 pointed star shaped decorations that add a spark to any wall. All you need are popsicle sticks, glue and any paints or glitter you may want to add to your project. So, get messy and have fun..its time to start cra...

Illustrator is a great tool for creating individual artwork. Creative and clever, it has many functions, one of which is mosaic. If you want to make your illustration or design appear to have a myriad of tiny 'squares' like a Roman mosaic, this guy can help you do it. The short clip explains clearly how to bring the chosen effect to your design. You can see on screen exactly how to do it, so you're not left in the dark, searching every menu for the right tool.
This crafty project is inexpensive, it's easy to do and it's really handy for attaching things like letters, photos and to-do lists. This isn't like a cork memo board, because you won't need any push pins or cork pins! Watch and learn how to make this French memo board. This is the pretty alternative to drab store-bought memo boards.
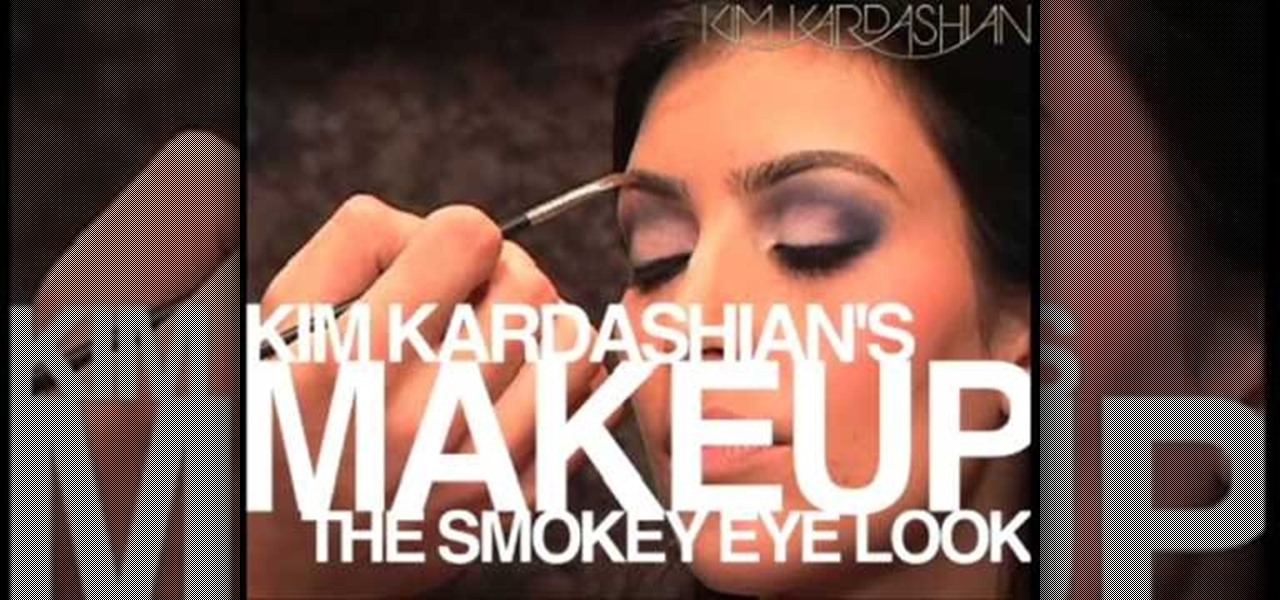
Kim Kardashian really doesn't need to wear all the makeup she does. As we've all seen through tabloids, Kim even looks glamorous sans makeup and just getting a pedicure at a cheap salon. But when Kim wears makeup she's smokin' hot.
When you hear the word "watercolor," the image of Monet sitting in his garden in Giverny slowly whittling monumental versions of his garden's lillies on canvas probably comes to mind. But you don't have to be a superstar painter to be able to create beautiful watercolor prints.
Okay, just to clear things up before you head over to watch the video, duct tape painting does not involve grinding up little pieces of duct tape to make paint.
In this video tutorial by photoshopuniverse you learn how to create a wood photo frame in Photoshop for your photos. Take the photo that you want to add a frame to, open it in Photoshop. Open the layers palette and double click to convert to a regular layer and increase the canvas size of the image to the required thickness of the frame. Create a new layer and fill in with the wooden pattern. Apply a mask and reveal the photo as shown. Apply the desired effects bevel and emboss to get the woo...
Forget about spending too much money at a retail store for a new bookbag when you can make your own! Go back to school in style - your own personalized style - by making your very own purse to carry your books in. Use fabrics & accessories to customize your book bag to fit your style. Materials you will need to complete this bookbag include:

Tutorial on how to create realistic reflections on Photoshop with the objects. Take a base ball image then open layer pallet and duplicate the base ball layer its shortcut is Ctrl j. Go to image menu adjust the canvas size change height to 200 and anchor to the top then click OK then go to edit select transform change to flip vertical, select move tool then move the base ball vertically down change opacity to four percent. Finally go to filter select blur then motion blur with an angle 90 deg...
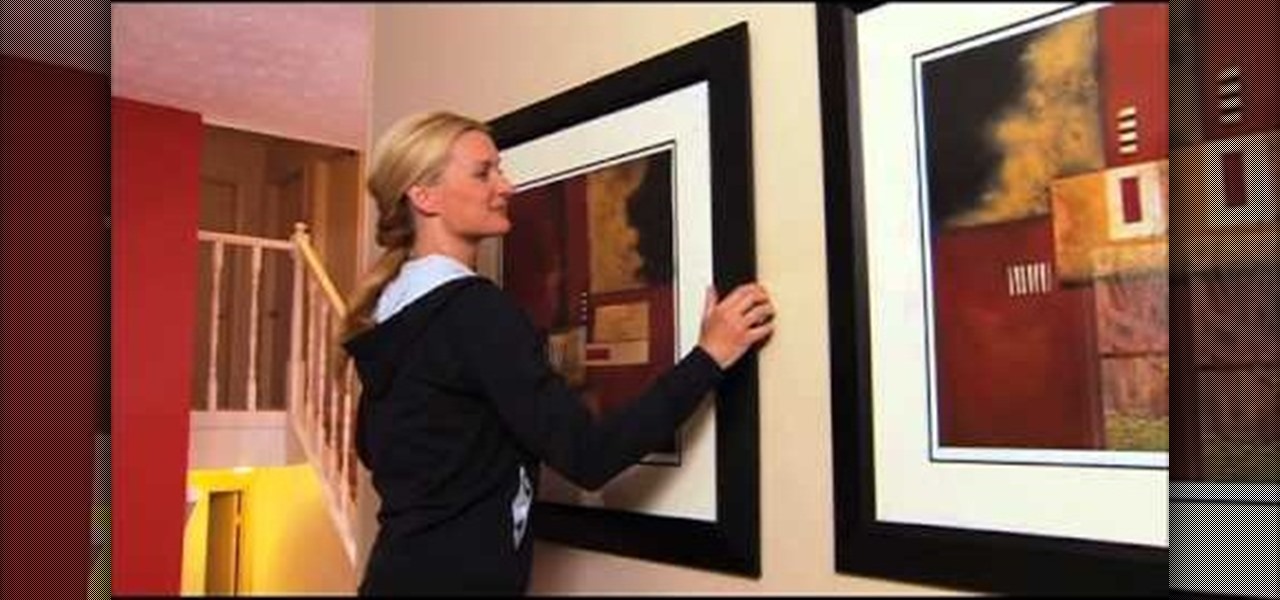
Until you decorate, your house won't feel like a home, but when you start hanging picture and frame on your living room walls, you should watch this video from Lowe's for some pre-hanging tips!

Comic book art is not only awesome, but it takes a really keen eye, and talent, to draw great comic book art. Steven Sanchez has a unique style and tone to his artwork, and in this great two-part video, you will learn how to draw the faces and heads that make Steven stand out from other artists.

In this video tutorial, viewers learn how to draw a chibi-style animation face. This task is very fast, easy and simple to do. Begin by drawing box-like face with any type of angle, depending on the character's emotion. Then add an ear. Now draw the eye. Make sure that the eyes are exaggerated and over-sized. Then draw a small nose in the center of the face and add a mouth. Add detail to the mouth such as: teeth, tongue and a chin. Finally, add the eyebrows and hair. This video will benefit t...
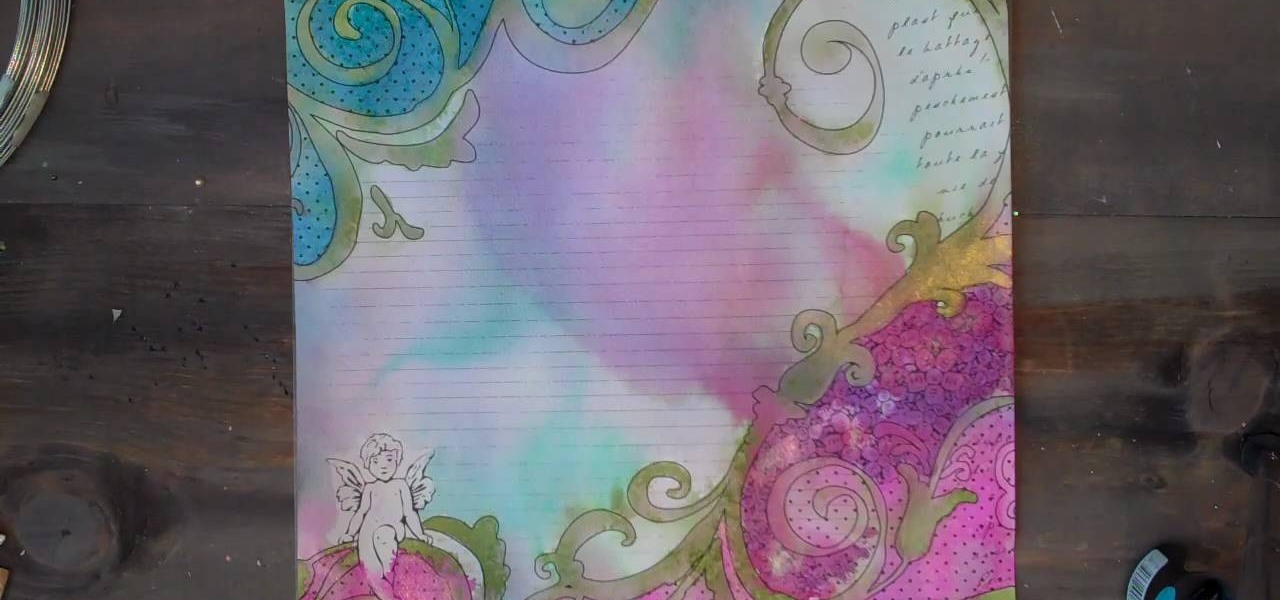
In this tutorial, we learn how to use Prima Paintables paper. These are meant to watercolor on and are very thick pieces of paper. You can take a paint brush and open up a bunch of different paint colors. Start to paint your picture, then allow it to dry. When finished, you can spray a water bottle on it to bleed the picture and make it look unique and your very own. This is something that is fun to do and makes it easy to paint your own creations using this paper that is made just for painti...

In this video tutorial, viewers learn how to draw a vampire. Begin by using the paint bucket tool to fill the entire background in black. Then start drawing the vampire in transparent blue. Sketch the outlines of the face and draw curves for the guidelines of eyes, nose and mouth. Now erase half of the face and fill it in black. The other half of the face is filled with tints of blue and purple airbrush. Finish by adding the details with opaque shades of blue, purple and white pencil lines. T...

In this video tutorial, viewers learn how to draw Obi-Wan from Star Wars. Begin by drawing a circle for the head and rectangular shape for the jaw. Then draw a line 1/3 way across the circle. Draw the eyes on the line and the nose just underneath the line. Now draw 2 lines from the ends of the eyes to the rectangular shape. Use those lines as a guide to draw the length of the mouth. Then add the ears, eyebrows and beard. Now lightly draw the hair. Finish by coloring and shading the image. Thi...

In this video tutorial, viewers learn how to draw the black Spider-man in Adobe Photo-shop. Begin by drawing the shape of Spider-man and then scan it. Now extract the ink from the white page. Then change the ink from black to white. Make the background black. Then fill the entire figure of the character in black color, using the pencil tool. Now create a blue layer over the entire image. Add white to the eyes and center spider symbol. Finish by adding details and a spider web in the backgroun...
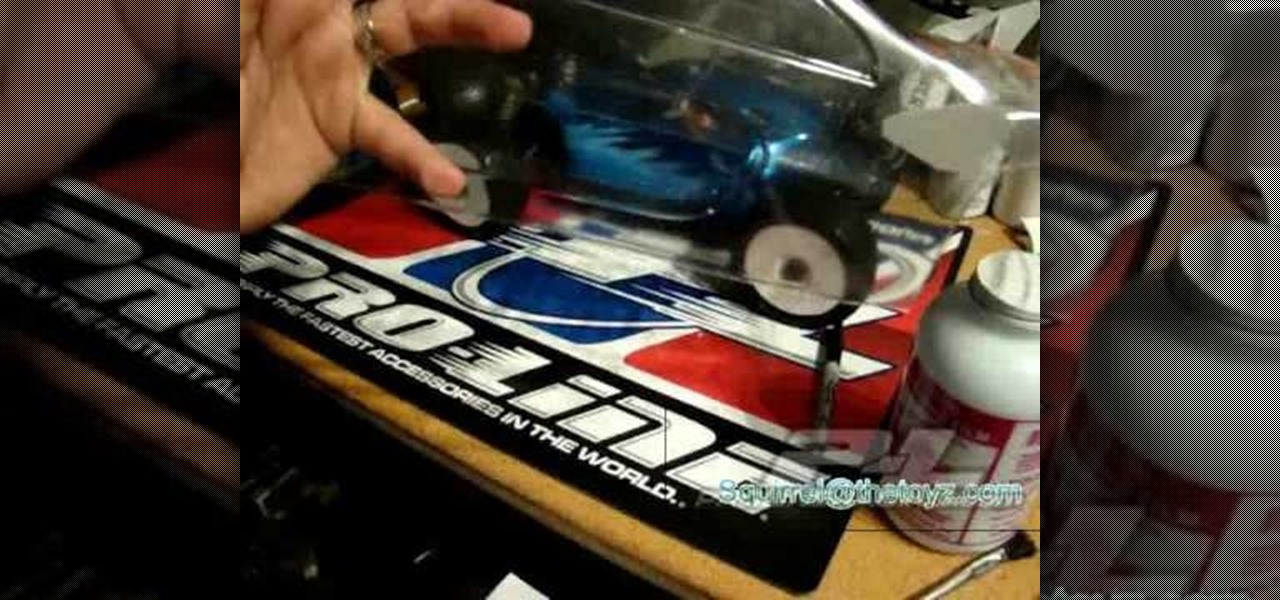
In this tutorial, we learn how to apply decals to RV cars. First, peel your decal from the paper they come on and then place it onto the RV car where it is smooth and there are no ripples on the vehicle. Make sure the entire decal can fit onto the spot where you want to place it. If you put it onto a bump, it won't seal and there will be blur with the lines. Once you apply the decal, push on without letting any air through, dragging the paper along the artwork. To make it more flat, take a cr...

In this video tutorial, viewers learn how to make a stencil. The materials needed for this project are: contact paper, scissors and a pencil. Begin by drawing the design, shape letter or number on the contact paper. Make sure to draw the stencil on the back of the paper and make it reversed. When finished drawing, carefully cut out the design. To use it, simply peel off the invisible paper and place it onto the surface of the artwork. Then trace over it. This video will benefit those viewers ...
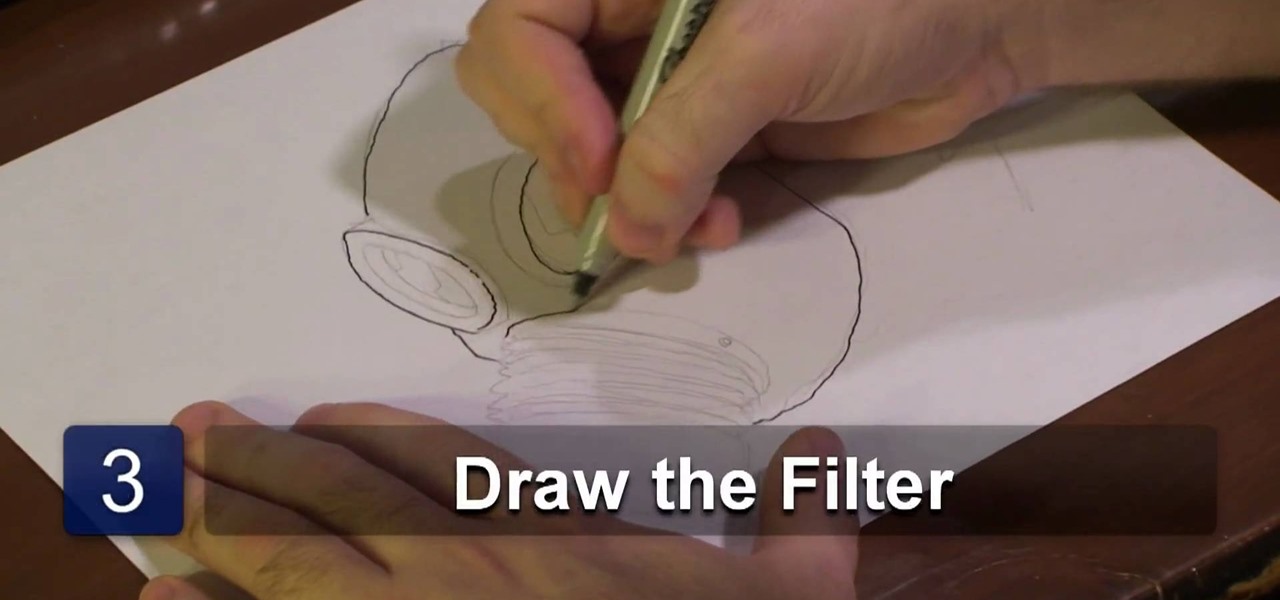
In this video tutorial, viewers learn how to draw a gas mask. Begin by drawing to oval shapes for the frames of the eyes. Then start drawing the base of the mask. Towards the bottom of the mask, draw an accordion-styled tube and attach it to a short cylinder to represent the filter. Now add more details to the eye frames by adding an inner and outer circle to show depth and detail. Then add more detail to the filter by adding lines to the tube and adding holes in the cylinder. This video will...

First, make the chin of the skull by drawing out a slight sharp curve facing downwards. Then, make the forehead and the upper part of the skull by drawing huge slight curves. Draw a circle on the spot where the eye socket should be. Draw a curve at the side of the circle to give it an illusion of popping out. Draw the cheekbone lines as well as the jaw lines to give the skull more definition. Draw several rectangles standing vertically to create the skull's teeth. Finish the head with a sligh...

First, outline the upper portion and lower portion of the right eye. Make the upper line darker than the lower one. Copy and paste this to create the left eye of your anime artwork. Create the eyeball using the Circle tool. Create two more circles inside the eyeball - one bigger and the other smaller. Make eyelashes by using a set of curved lines. Create at least three thick strands of these eyelashes. Create another circle inside the eyeball that intersects the two smaller circles created ea...
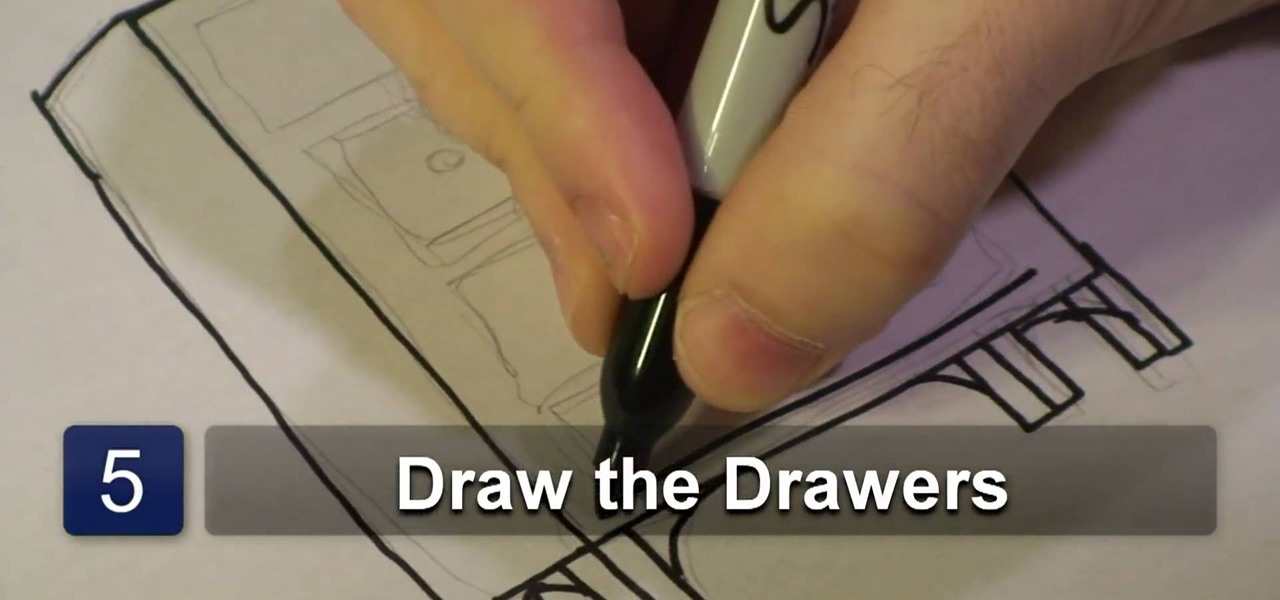
In this video tutorial, viewers learn how to draw a dresser. Begin by drawing a vertical rectangle to represent the font panel. Then add a long rectangle on one side to represent the side panel. Now add 4 pairs of legs under the dresser and add leg supports by drawing an arch between each 2 legs. For the drawers, draw 4 long horizontal rectangles on the front panel and add some doorknobs on each drawer. Finish by adding any extra detail. This video will benefit those viewers who enjoy drawing...