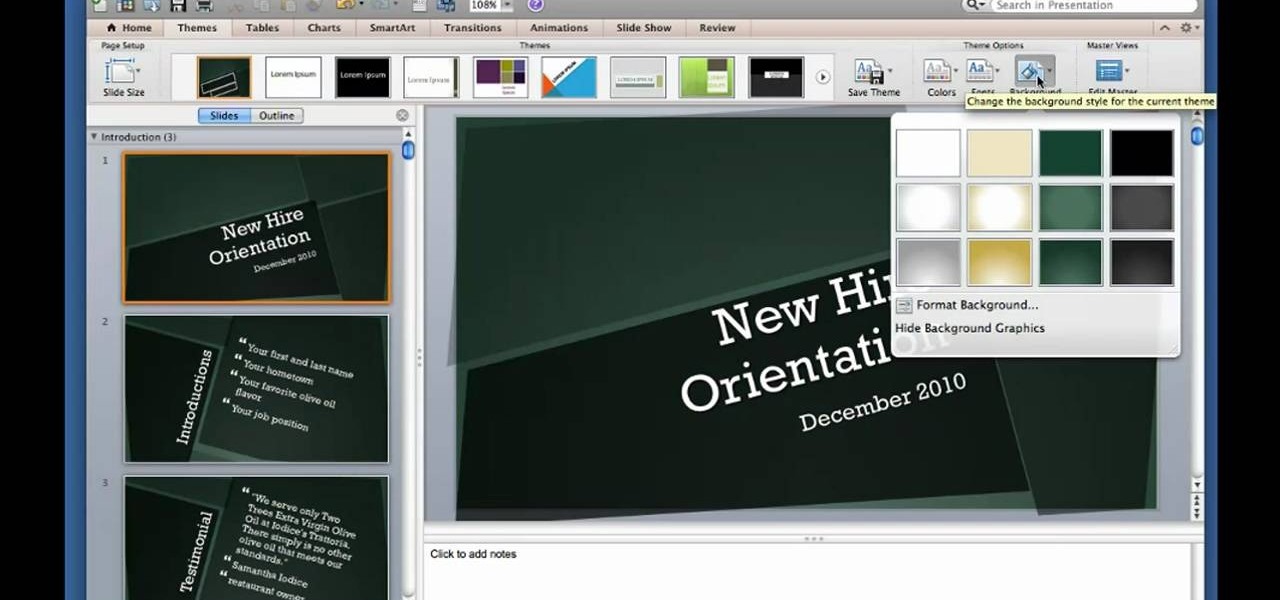
Interested in giving your PowerPoint presentation a personalized look and feel? Try applying a custom theme. This video will show you how it's done. Whether you're new to Microsoft's popular word digital slideshow application, new to MS PowerPoint 2011 or even an expert merely looking to brush up on the fundamentals, you're sure to be well served by this quality video tutorial from the folks at Lynda. For detailed, step-by-step instructions, watch the video.
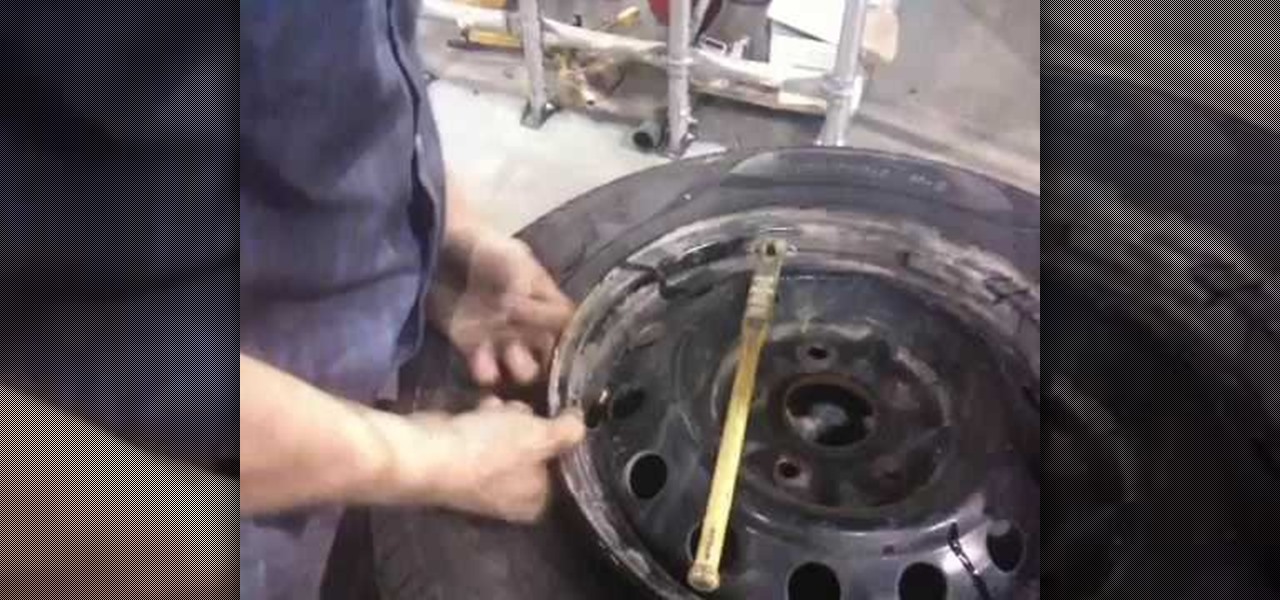
In this tutorial we learn how to change and balance a car tire. First, take the tire and remove the air out of it from all the sides. After this, remove the tire from the wheel. You will need to use a pry bar to help you remove it from the tire completely. It will help out a lot if you have a machine that will do this for you. Then, apply grease around the wheel and put the new tire on. From here, inflate the new tire while on the wheel and it will be ready to install on your vehicle.

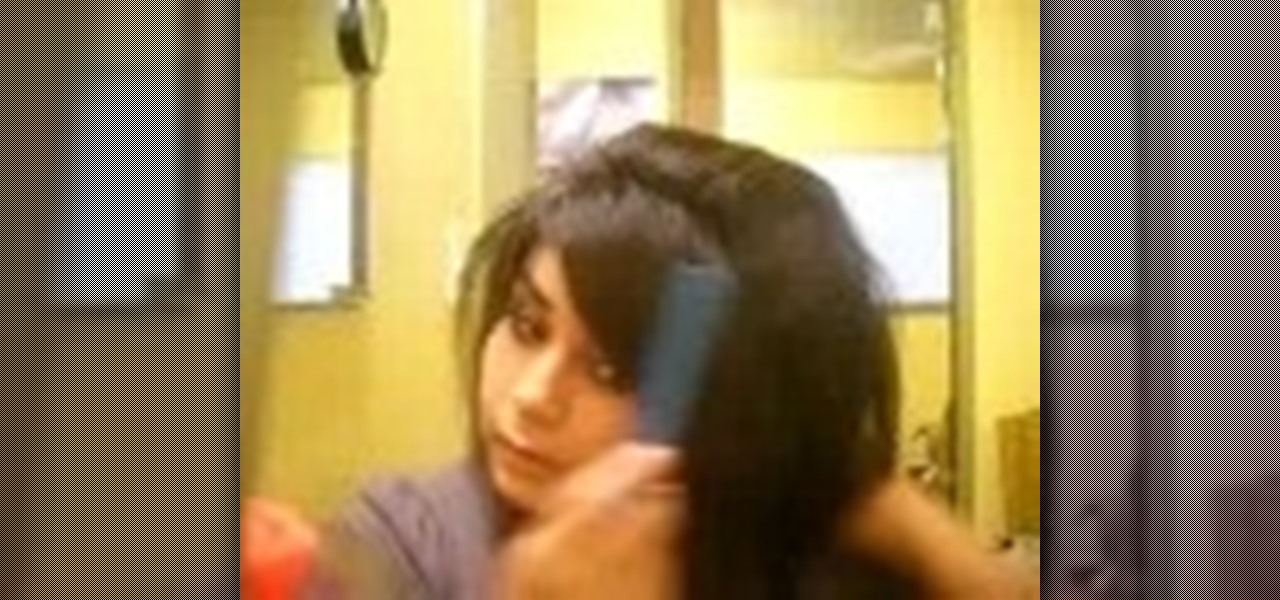
In this tutorial we learn how to use an Enzo Milano to get wavy hair. To start, section your hair off so you just have the bottom part of it. Then, you will stick the iron on the root of your hair and wrap your hair around it with your fingers. Then, let this sit on the iron for a few seconds before releasing it. Continue to do this until you finish curling all the sections on the hair. Take off the top section from the clip and then do that layer of hair. When finished, apply hair spray and ...
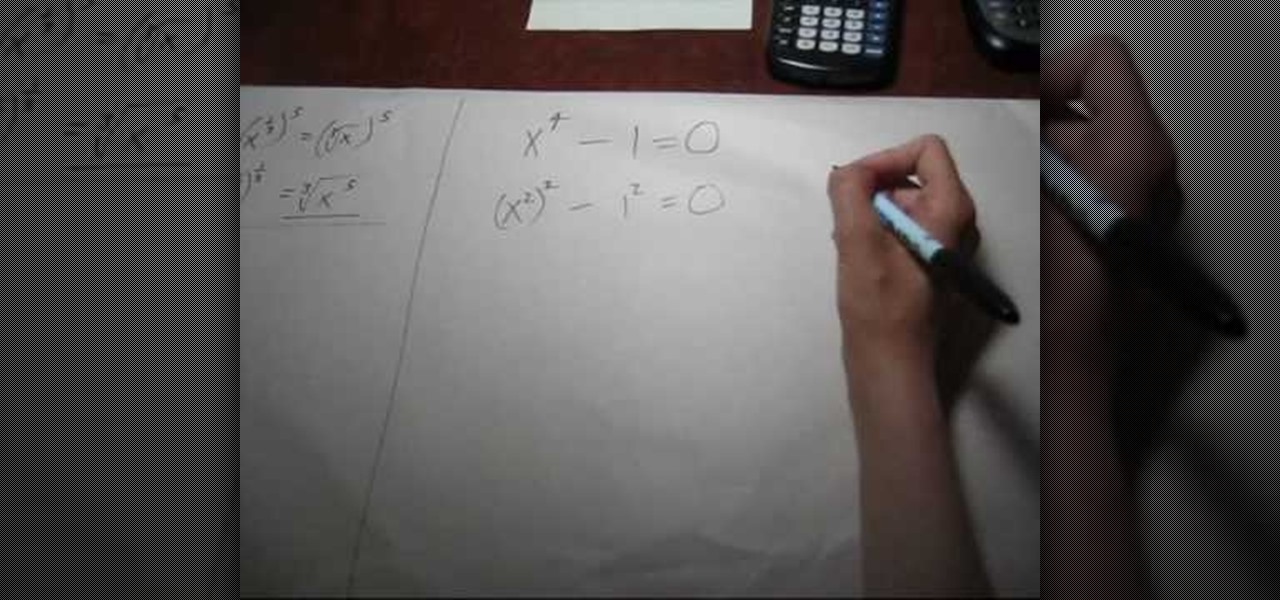
Solving equations involving fractional powers of a variable are not that hard to solve as they sound. In fact, just watch this video to learn a few tips and solving these type of equations will become a little bit easier.

In this tutorial, we learn how to make a Spartan 300 shield. You will need: paper mache, durable cloth, gold spray paint, newspapers, cardboard, nuts and bolts, and the cap to a trash can. After you have these, cut out a large piece of cardboard and place it over the trash can cap in a circle shape. Then, dip newspaper strips into the paper mache mixture and apply it to your shield, taking your time to make it smooth. Let this dry, then cut two strips of cardboard and place it in a 'v' shape ...
In this tutorial, we learn how to tease your hair easily. First, brush your hair back and then grab the hair in the back of the crown of your head. Hair spray all of the hair and then comb it back against the growth, towards the root. After this you need to check to make sure it's enough volume. Your hair will stick up, but that's what you want it to do! After this, grab the hair behind this and do the same process. Continue to do this until you have achieved the look you want. To finish, sim...

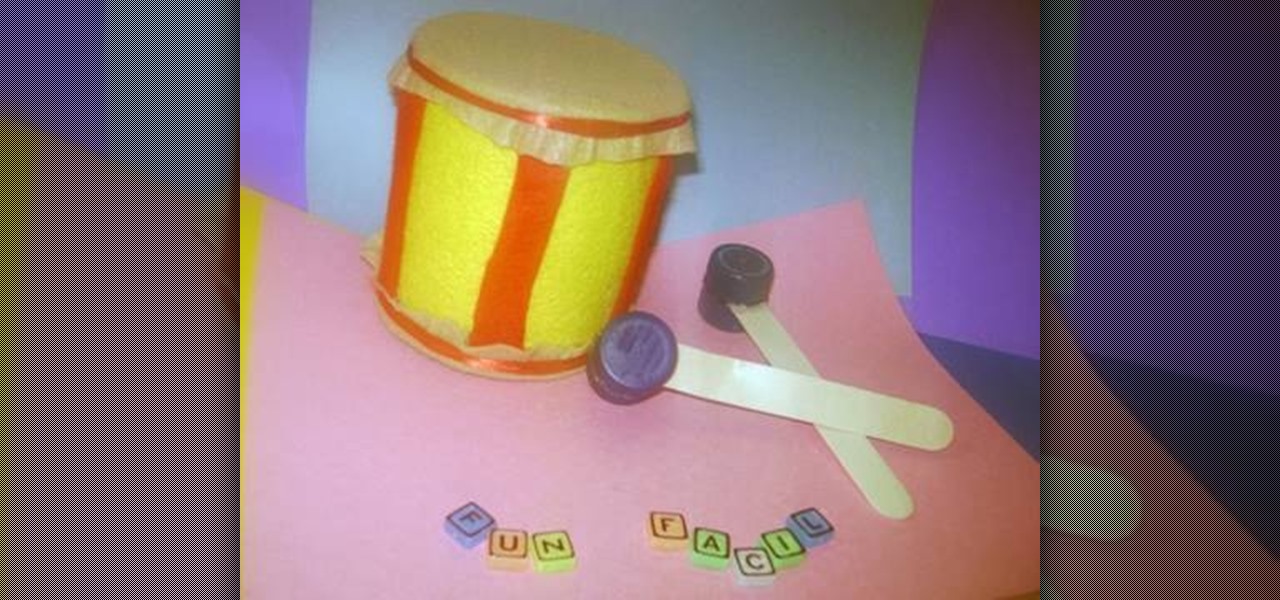
In this tutorial, we learn how to make a toy drum. You will need: felt, recycled tin can, 1 red lace, 4 soda caps, 2 popsicle sticks, glue, and scissors. Cit, cut the felt into a circle and glue it around the tin can. After this, take red felt and cut it into strips, then glue on the side of the tin can so it's striped. When finished, apply glue to the top of the can and then cover with additional pieces of felt. Tie a ribbon around the top and the bottom of the felt on the fan. To make the s...
In this video, we learn how to pierce your lip at home the professional way. First, sit the subject down and put a cloth around their upper body. Then, grab a clamp and place it where you are going to pierce the hole. After this, push the needle through the spaces in the clamp and follow this by sticking in the jewelry. Apply cleaning products into the mouth that are for cleaning the wound specifically. When finished, make sure to take proper care of the piercing and the jewelry as well so it...
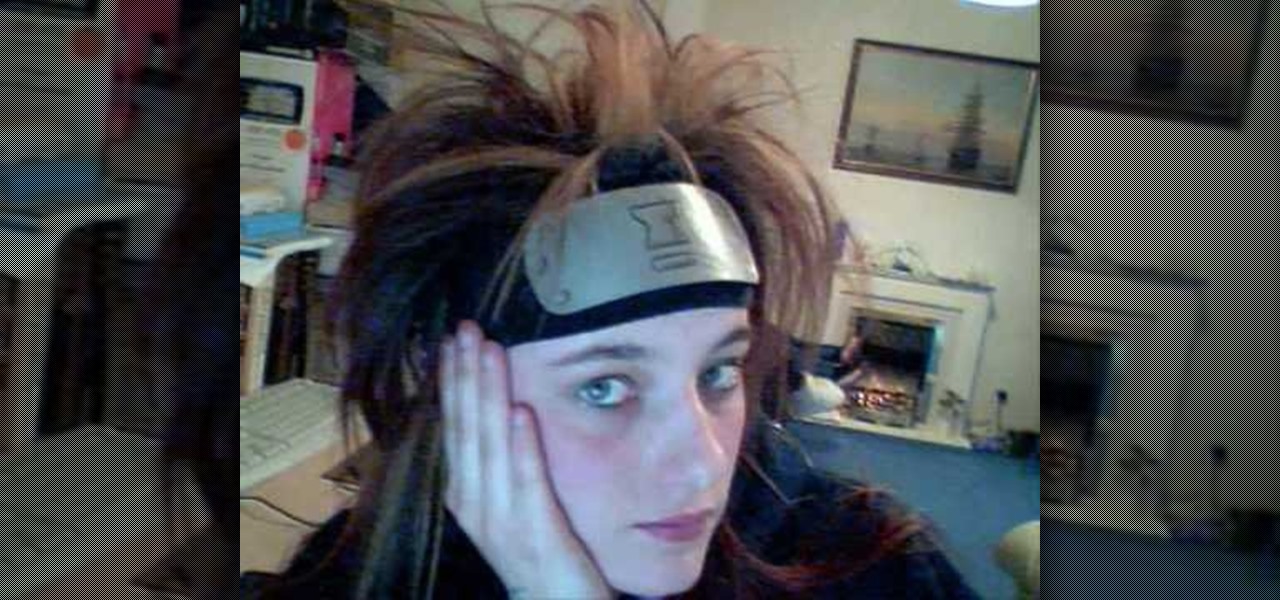
In this video, we learn how to make a decent Naruto headband. First, get a paper plate and figure out how big you want it, draw on the template so you can see it through the paint. Then, apply metallic paint with a paint brush using the template you drew as a guide. Next, you will wait for it to dry and then cut it out. Round the edges like it's a real headband, then draw on the hair band the village insignia. Once finished, glue this to an old sock and wait for it to dry. Then, you can attac...
In this tutorial, we learn how to make & decorate a vintage retro rose romance cake. Start out by rolling out fondant that has been mixed with yellow coloring. Once this is rolled out, you will lay it over the cakes and then cut off the excess fondant from the bottom. Do this on all the layers of the cake until it's fully covered and completely smooth. Then, you will use the same fondant to roll into small flowers that you will apply around the outside of the cakes. Use icing to help the rose...
In this video, we learn how to make a VW beetle cake with buttercream. First, you will need to apply the buttercream icing onto the top of your cake and the sides. After this, you will pile on the other cakes to this with more icing inside of each layer. Then, you will start to cut the cake and it into the shape of the car that you want to make. Use an outline so you can follow it while you are making it so you know exactly how it is formed. Next, you will add in the parts for the wheels, the...
In this tutorial, we learn how to easily install a toilet. When you pull it out of place, there will be black residue on the toilet, scrape this off with a knife. From here, you will need a wax ring and plumber's putty to apply to the toilet. Once this is on the bottom of the toilet, it will help it stay in place and save you a lot of anguish. Now, take the plumber's putty and put it around the edge of the toilet. Now, when you install the toilet it will be sealed to the floor and stay in pla...
In this tutorial, we learn how to make a slit flower frame card. First, gather all your cardstock together in the colors that you would like. Then, take the first one and cut a circle window in it using a blade and a template. Then, punch slits on the outer frame of the window. From here, shade the petals and pull them out from the card to stick out. Then, place a rubber stamp with hearts on the other place of card stock. Then, turn the flower frame over and apply foam tape to the back. From ...
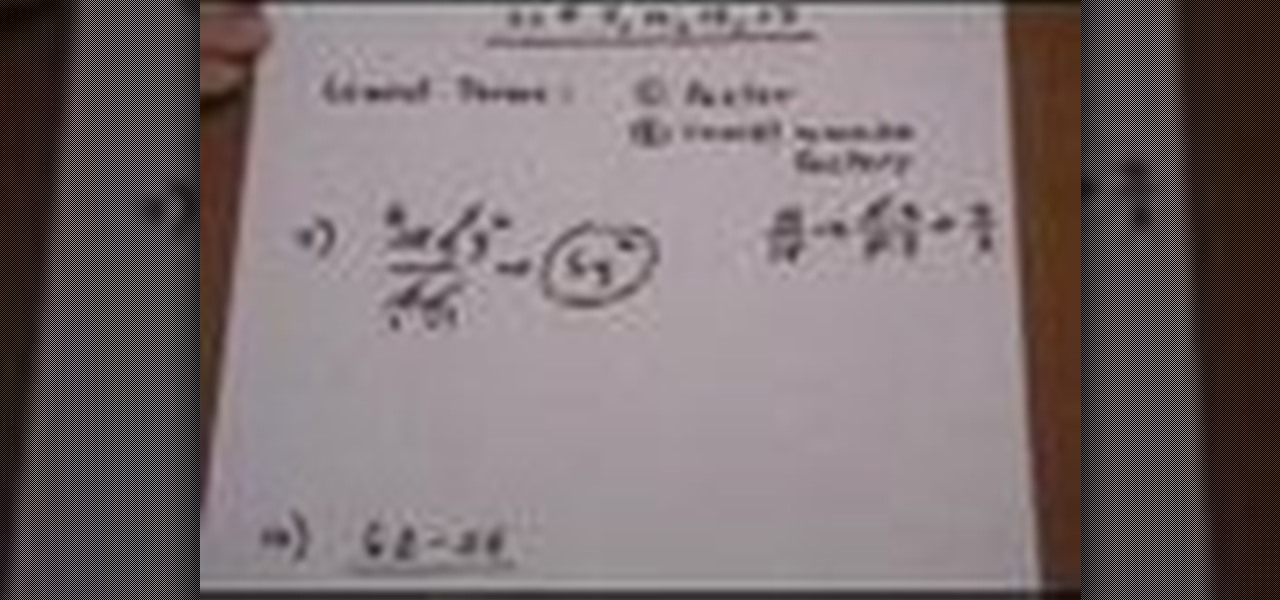
Putting a rational expression in its lowest terms (also called "reduction") is a bit tricky, but it becomes very easy once you know a few tricks.
In this tutorial, we learn how to style short hair for an edgy look. You will need to apply a heat protector on your hair first and then blow dry it. Blow dry it against the grain so you get greater volume and it sticks up more on the back of your head. For the front, blow dry your bangs to one side and then use a straightener to pull them to a side. If you want an even more edgy look, you can make a fauxhawk with your hair, which would involve putting gel in the bangs so it holds up in the a...
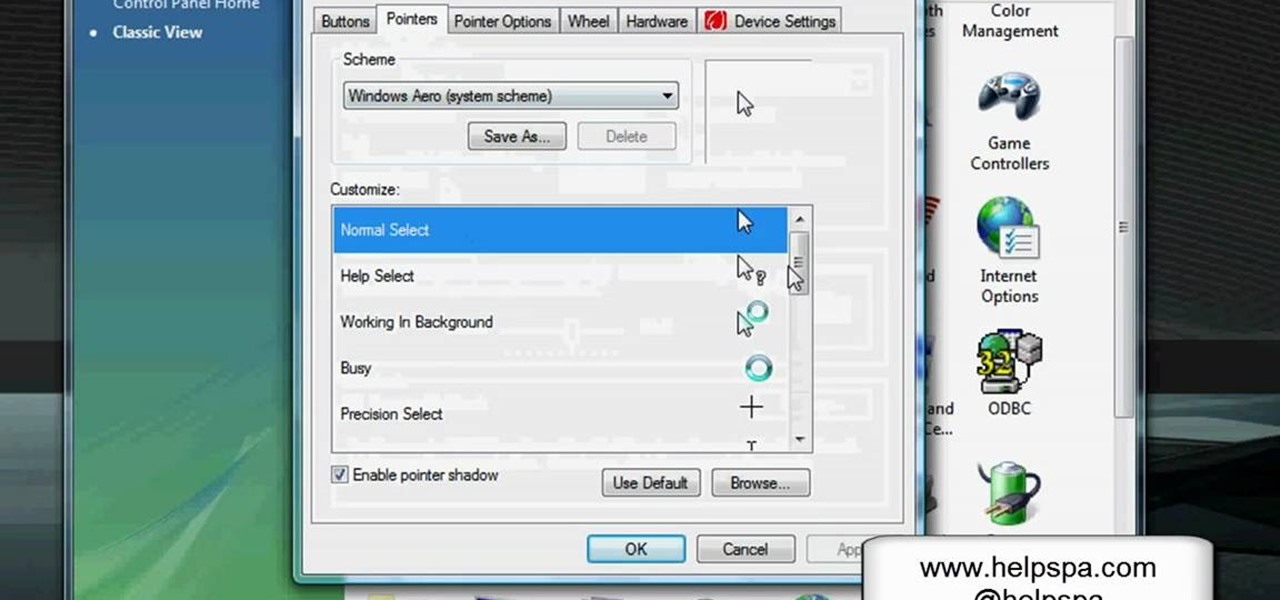
In this video, we learn how to change the mouse sensitivity on Vista. First, you will go to the start menu, then the control menu. From here, scroll down to where it says 'mouse' and double click on that. After this, you will see a section for the double click speed. Change that if you would like. Then, click on the tabs on the top of the window to change the pointers, pointer options, wheel, and hardware. Once you have changed all the options that you want, you will be able to apply them and...
In this video, we learn how to remove ink stains from your American Girl doll. If you get ink marks on your doll it's pretty easy to get off with just some Oxy spot treatment clear. The main ingredient in it is Benzyl Peroxide, which is an acne medicine. After you have this, you will put a little bit of it onto the stain on the doll. Apply this using a Q-Tip and not your finger, to avoid oils. Press this all over the spots on your doll, then cover the spots with plastic wrap. Put the doll in ...
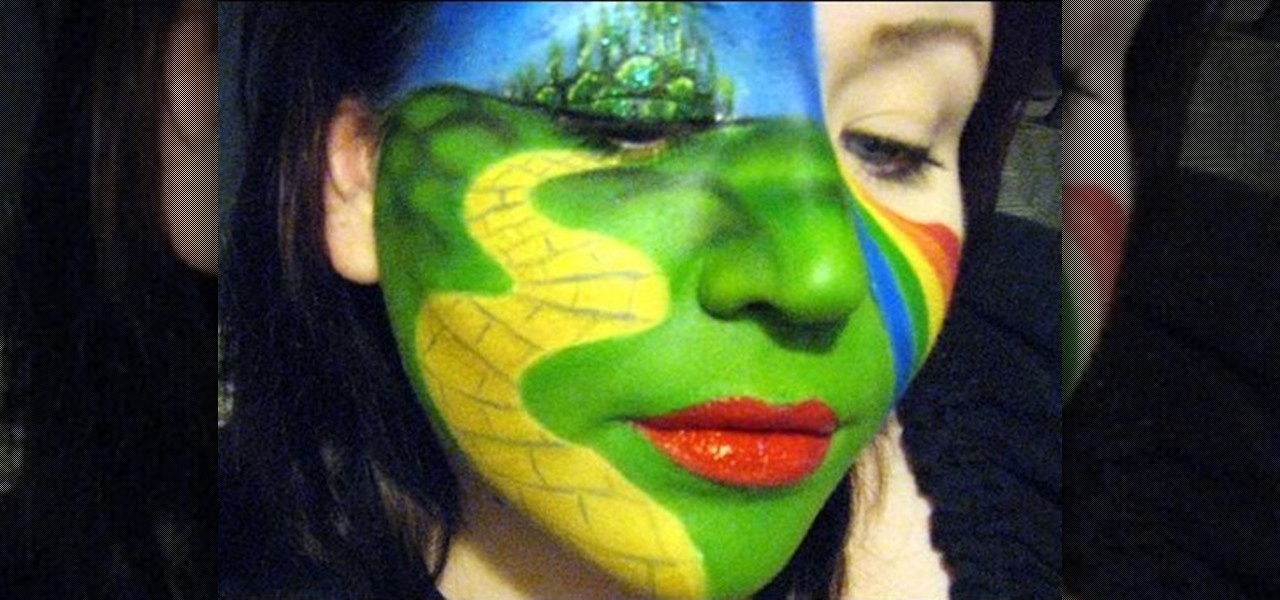
In this video, we learn how to do Wizard of Oz Inspired Makeup for MakeupbyTiffanyD's Co. When you are making this design, you will draw the emerald city on your right eye and then green hill around it. From there, you will draw the yellow brick road going down from your eye to the bottom of your face. The green will mimic the Wicked Witch as well. Your lips will be ruby red for Dorothy's red shoes and then create a rainbow on the other side of the face. Just apply mascara to the other side o...
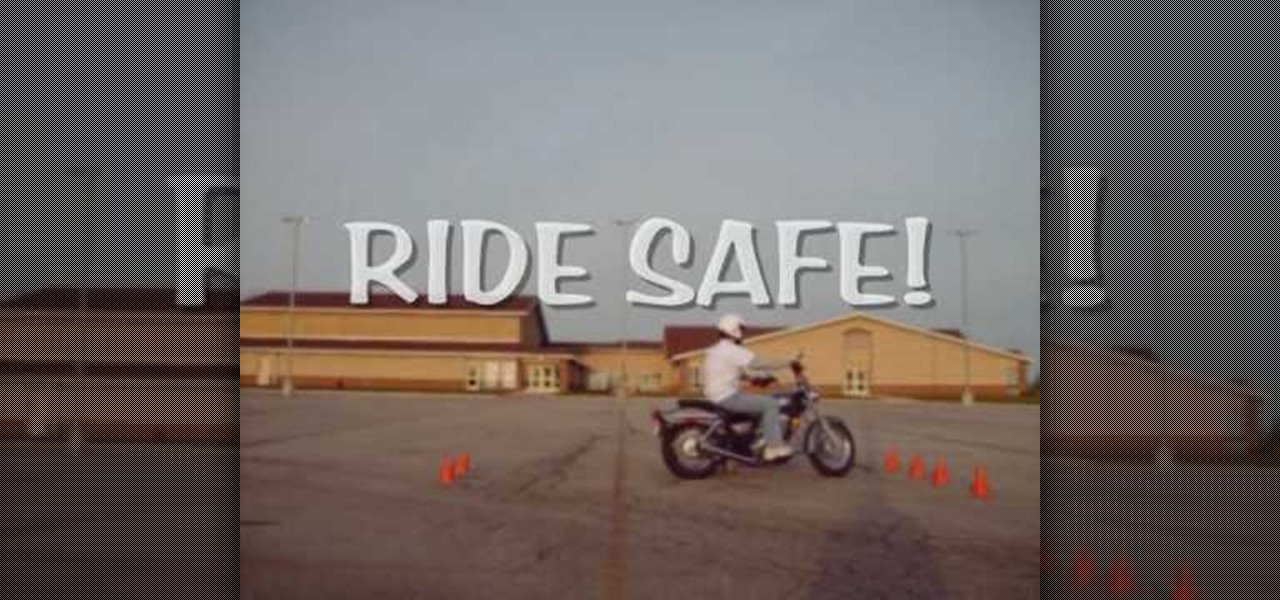
In this tutorial, we learn how to make a quick stop on a motorcycle. You must reach a speed of 15 mph first. A quick stop means you stop right when you are in the middle of driving, without slowing down first. Close the throttle first, then pull in the clutch. From here, apply both brakes evenly and firmly without locking them up and keep the handlebars straight. Make sure you ride safe and you do this with a helmet on after you have learned the basics of riding a motorcycle. Once you learn t...
In this tutorial, we learn how to skin a deer hide. First, cut into the joint on the back legs. Cut across this, then down through the back side of the leg. Open the leg up with the knife and continue to cut until you see the last joint. After this, you can snap the leg and then repeat this same process for all of the legs. Now, apply pressure to the neck where you want to cut and then skin the stomach area from the inside area. Keep the tip of the knife away from the hide so you don't poke a...
In this video we learn how to decorate a ceramic lamp base with Simon Leach. First, grab a small paint brush and then apply paint to it. Once you have this, start to paint your chosen design onto the pot. Painting a leaf or a plant will be the most appropriate for a large jar or lamp base. Use a brush that will move along the pot and create unique lines. Go all around the pot until your design is finished. Let this dry and then rinse your pot off when you are done. Let your personality shine ...
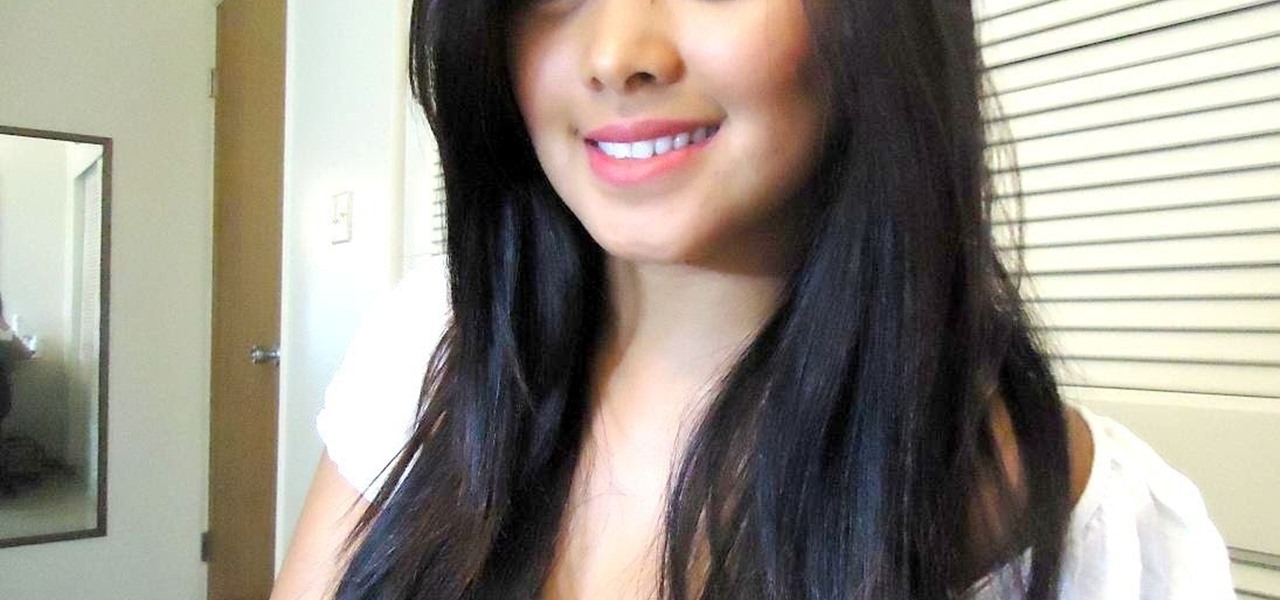
Girls always want they don't have. We know lots of girls with freckles who prefer to cover them up, which there are those of us who wish we had a few cute ginger spots on our faces.
In this tutorial, we learn how to make 3D nails. You will need: nail glue, nails, glitter, nail polish, tools, and anything else to decorate. To start, paint the nail and then apply small ribbons to them at the top. You can also add in glitter if you would like. Glue the ribbons by using nail glue or super glue. For the rest of the nails, repeat the same process, making all of them look different by adding small pearls, different shapes, and glitter. Let these dry, then you can place them ont...
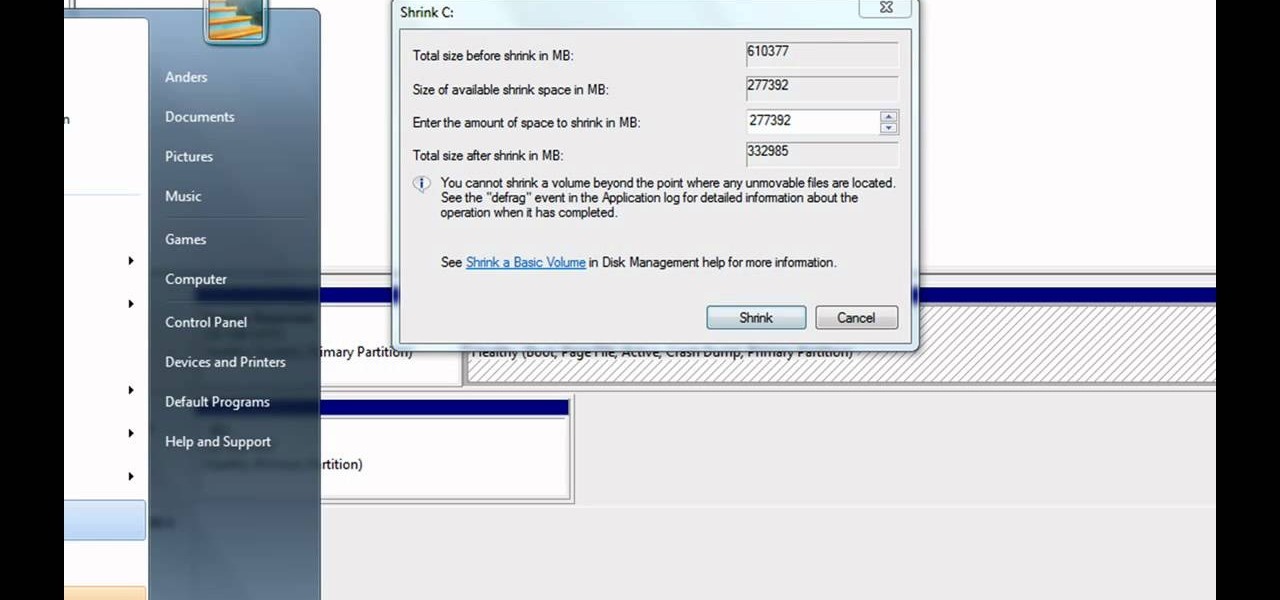
Partitioning simply refers to the process of logically dividing the space on your Hard-disk into different drives. The methods shown in this video only apply to users of Windows Vista and Windows 7 operating systems.
In this video, we learn how to create a bucket drum or protest art. To start, you will grab a large plastic bucket and you will apply take all around the sides of it so it's wrapped up. The tape should be intersecting at the opening of the top of it. Then, use a tie to connect this in with the tape and then size it so it fits around your waist. From here, you will tie the bucket to your waist and then use sticks to beat your new drum. You can stick the sticks to the side where the tape is to ...
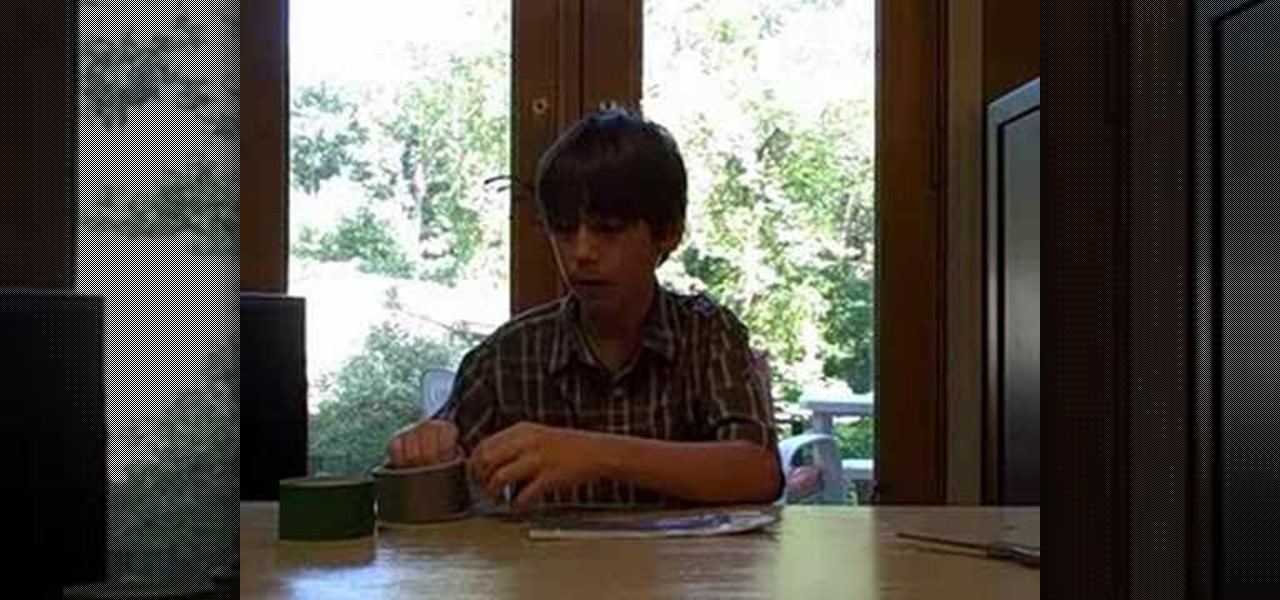
In this video, we learn how to make a duct tape wallet with a change pocket. First, grab your favorite color of duct tape and then place some down on a flat surface with the sticky side up. Overlap these until you have the desire size you want, then fold the edges over. After this, apply the sticky side down to this and you will have a nice little wallet that is made between them connecting to each other. Make the change pocket by doing the same process, just use a smaller piece and connect w...
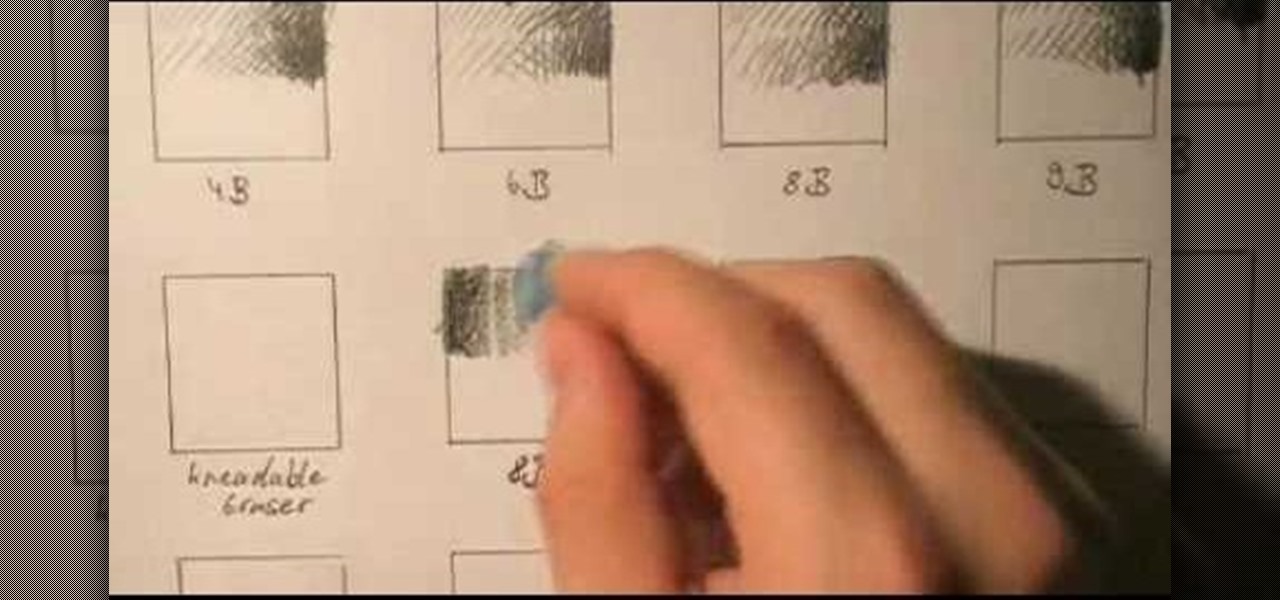
In this video, we learn how to draw with basic concepts and techniques. To shade with different pencils, you will start out by doing a light touch on the pencil and then push down harder to create a darker shade. Use different pencils to get long and wider lines from the shading. A 4B and a 6B pencil will have lines that look the same, but they are different in the way they apply graphite to the paper. Practice using all of your pencils to get an idea of how they write, then you can choose wh...
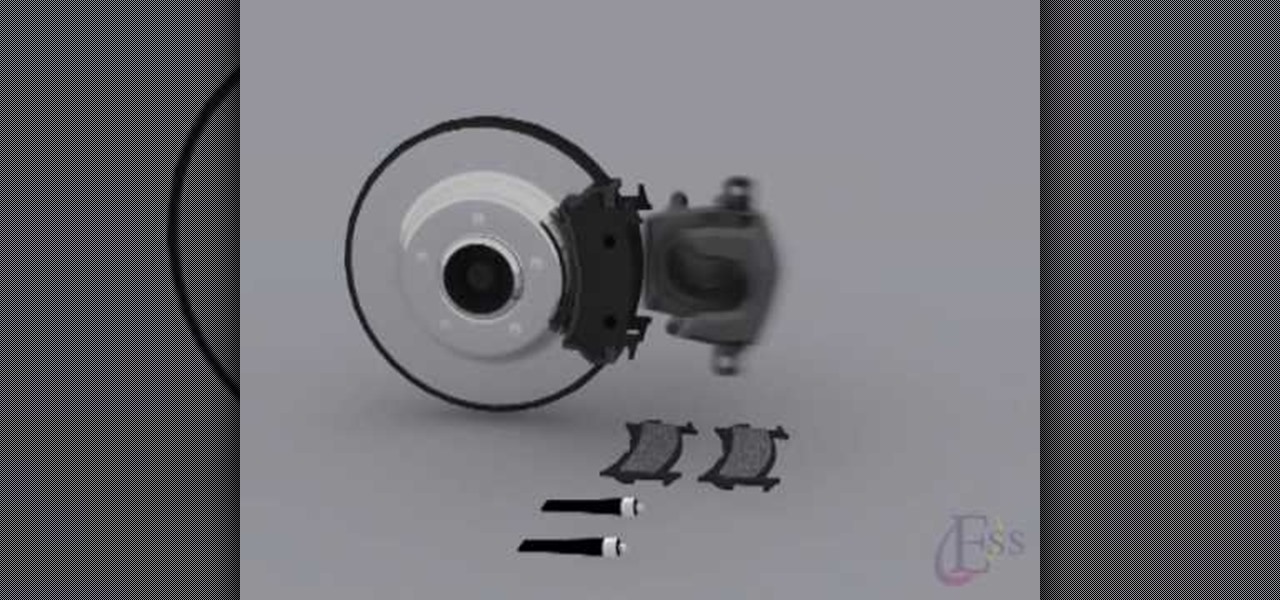
In this tutorial, we learn how to remove and replace the brake pads on your car. First, wash the brake caliper with cleaner, then use a wrench to remove the caliper bolts. After this, remove the assembly and the outer brake pads. Remove the inner brake pads and apply anti-squeal to the backing plates of the pads. Install the pads and then the caliper along with the bolts. From here, you will place the wheel and bolts back onto the car and you will be finished! Make sure everything is tight an...
This video could very well apply to most bathroom exhaust fans, but this video specifically installs the Delta Electronics Breez Humidity Sensor Exhaust Fan, Model VFB25AEH (130 CFM). With this video, you'll learn the DIY approach to installing one of these exhaust fans in your bathroom, along with removing the old junk one. An upgraded bathroom fan can help eliminate the dangers of moisture, mildew and mold within your bathroom areas. Milan Rosan shows you the complete installation process. ...
In this tutorial, we learn how to tie dye an oval style shape. Start with a square piece of a shirt that is damp, then fold it in half. Then fold it in half again, then in half again. After this, fold the shirt accordion style, paying attention to where the main corner of the shirt is. Once finished folding, tie two knots in the bottom, then fold the fabric up until you reach the ties. Now, tie or secure this bundle tightly with rubber bands. Apply your favorite colors of die on the shirt, ge...
In this video, we learn how to prepare surfaces before painting with Lowe's. First, you will need to place a drop cloth on the floor and apply painter's tape to all the outlets and spots you don't want paint to touch. After this, clean off the walls and remove all the dust and debris, including nails. Next, grab the paint you need along with brushes and paint rollers. Remove any wallpaper that is on your wall, then start to paint. Pour the paint into the tray, then use the roller dipped in pa...
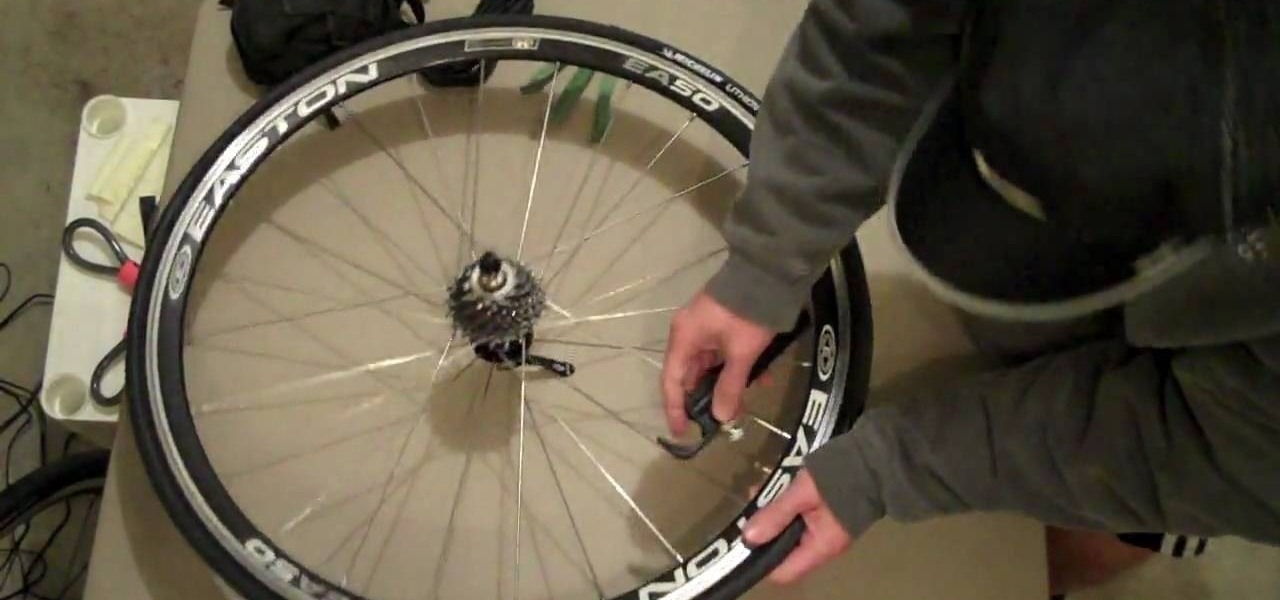
In this tutorial, we learn how to change a bike tire with CO2. First, you need to take the tire and wheel off of the bike. Then, release the air from the tire and then remove it from the wheel. After this, use a lever to remove the inner tube from the wheel as well. Replace this with a new tube and tire, then apply back onto the wheel of the rim. Line this up on the bike to place it back on, then screw all the parts back on. After this, tighten up your brackets and chain then you will be read...
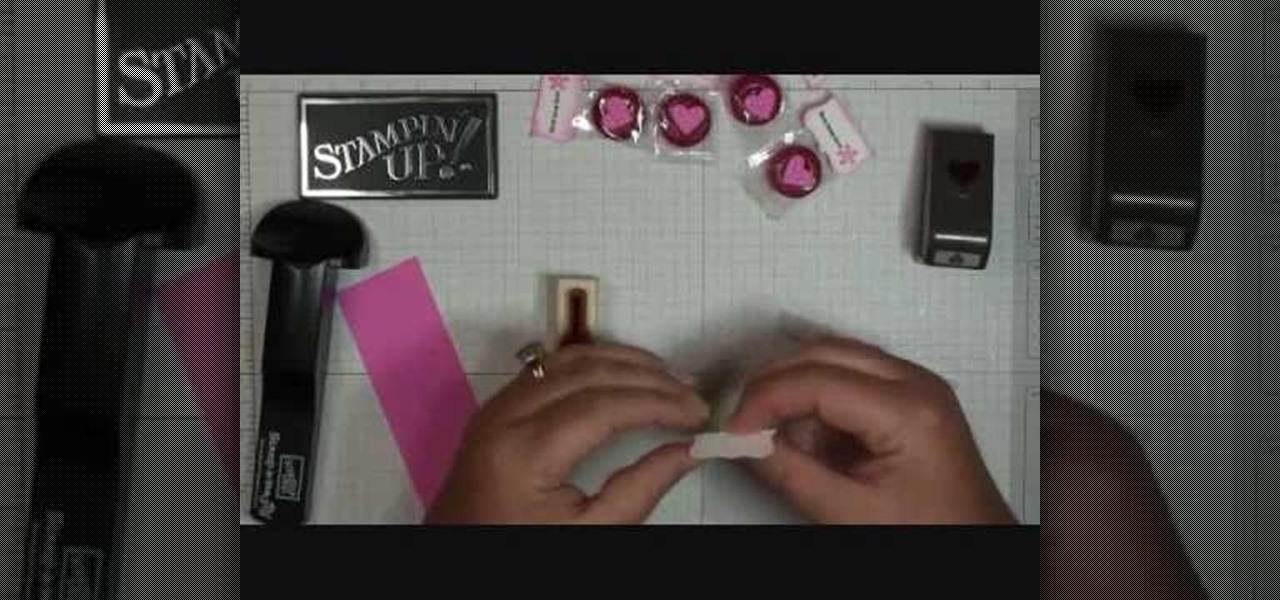
In this video, we learn how to make Life Savers treats. First, use the curly label punch and punch it out of a white paper. Next, fold this in half and then use your stamp-a-ma-Jig on card stock with a love and flower stamp. Use a black and pink marker to fill in the colors of the stamp. Next, stamp this on the piece that was folded in half, then punch out a heart and use sticky strip to adhere the individual life saver to the middle of the sentiment. Once finished, apply the heart and you ar...
You don't need a ton of makeup to look fresh and sexy. You can tone down your makeup and still look hot! Zhareena shows you how to tone down you look and still appear fabulous, just by using less cosmetics. This makeup look is great for school, running errands, dates, and more! It's really easy to apply and consists of affordable products.
Let's be honest here: Most of us weren't born with makeup ad-worthy skin. Even if we had a perfect complexion when we were kids, teen acne, hormonal changes, and dry spots contribute to uneven skin tone and hyperpigmentation, meaning not so clear skin.
J.Lo is back in the studio, but that doesn't mean she's out of the limelight… and this makeup tutorial will show you a trendy look inspired by Jennifer Lopez, perfect for spring or summer. The hot trends are coral colors, which J.Lo is known to wear frequently. It's perfect for all skin tones and really warms up the skin. Great for a new season! Watch and learn!
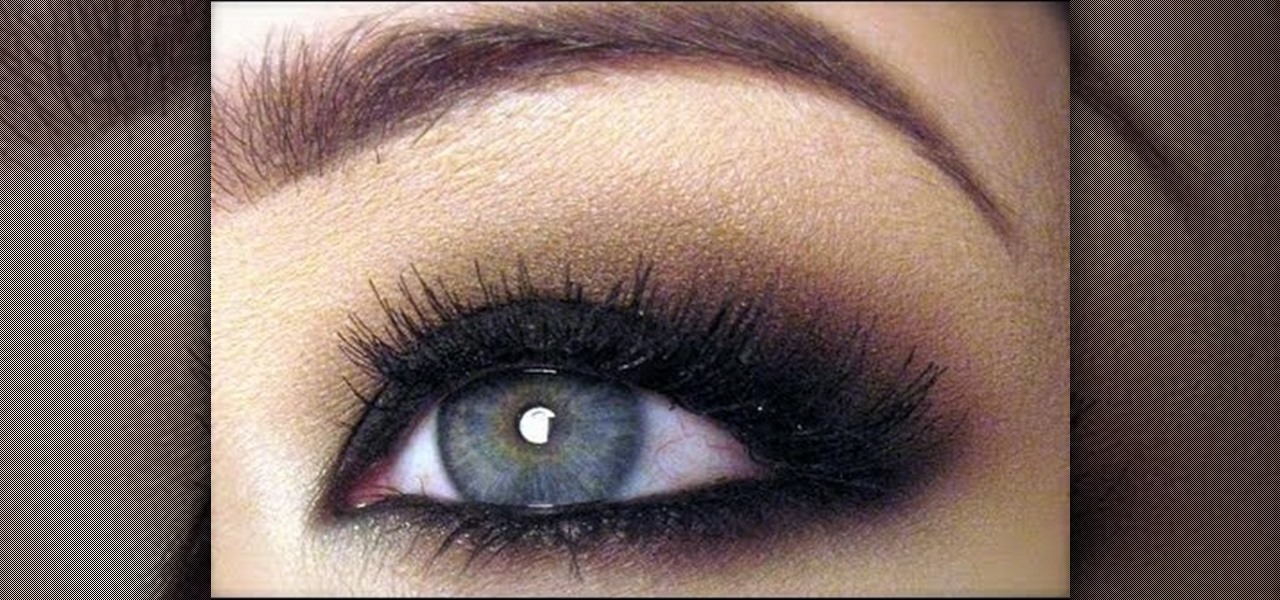
When it comes to smokey eyes, is there any starlet more versed in how to apply the look than Kim Kardashian? We can't think of any person more enamored with the sultry femme fatale look than the "Keeping Up With the Kardashians" star.
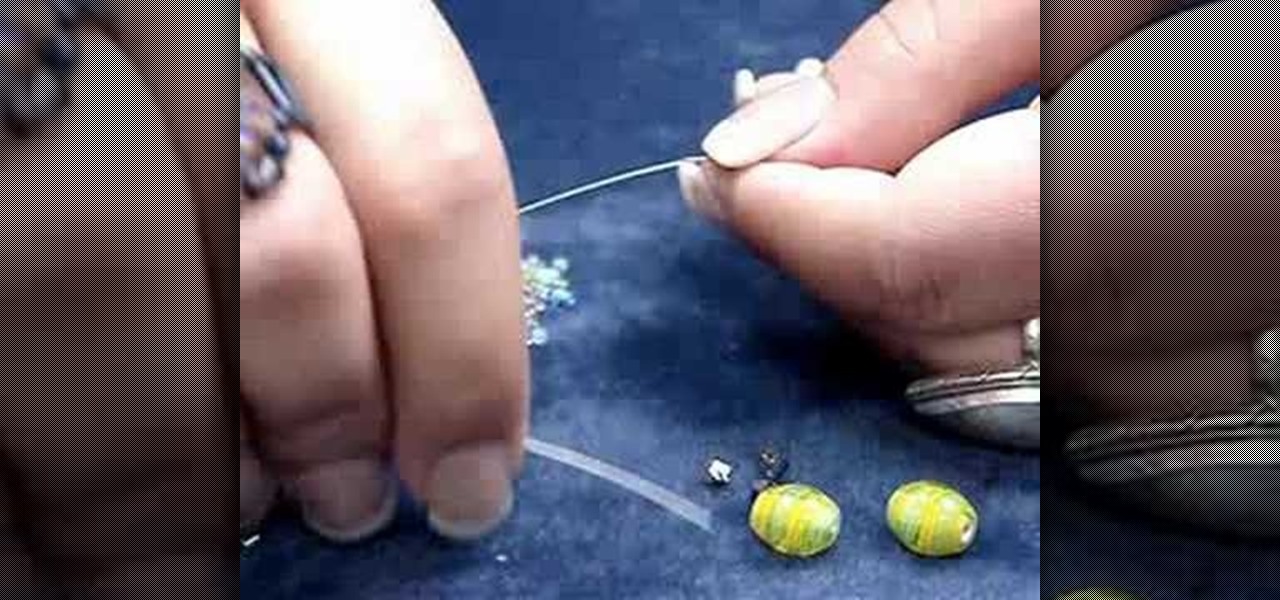
In this tutorial, we learn how to make a beaded bookmark or "book thong". First, take a wire and add on a small horse shoe shaped bead. After you do this, use pliers to help bend the wire around this pin to keep it in place. Next, add on a peace sign pendant, then tie the wire around and push the wire into a cylinder bead. Continue to add on more beads to the wire until you reach the end. Use different types of bead to make it more unique and completely your own design. To finish, apply a cla...
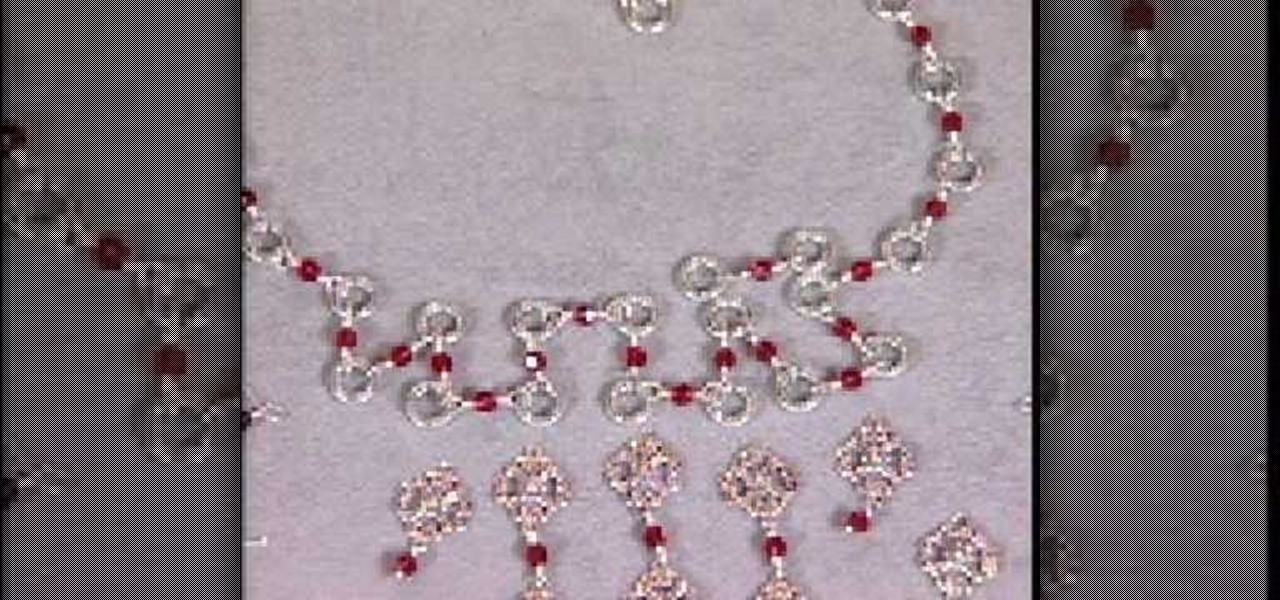
In this tutorial, we learn how to make a silver vintage-style bead necklace. First make sure you have silver wire and glass beads in the color that you prefer. Now, you will string the beads through individual wires and close them so these can be applied to the center of the necklace. This will create a long chandelier like quality on the necklace. After this, you will create the base of the necklace with the same color beads and silver. You will want to follow the pattern of creating silver ...
Michael Jackson might be the single most recognizable singer in history. Whether pre or post-Vitiligo, you still know him and have some reaction the second you see a picture oh him. The same applies to this cool Xbox 360 Avatar, which this video will show you exactly how to create.