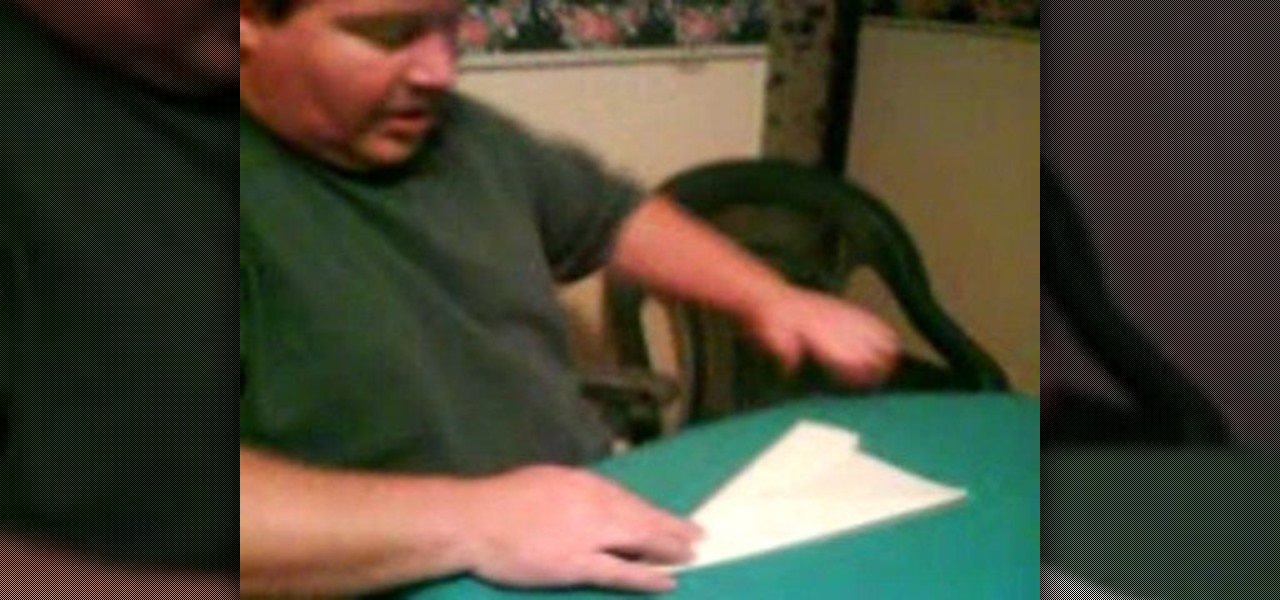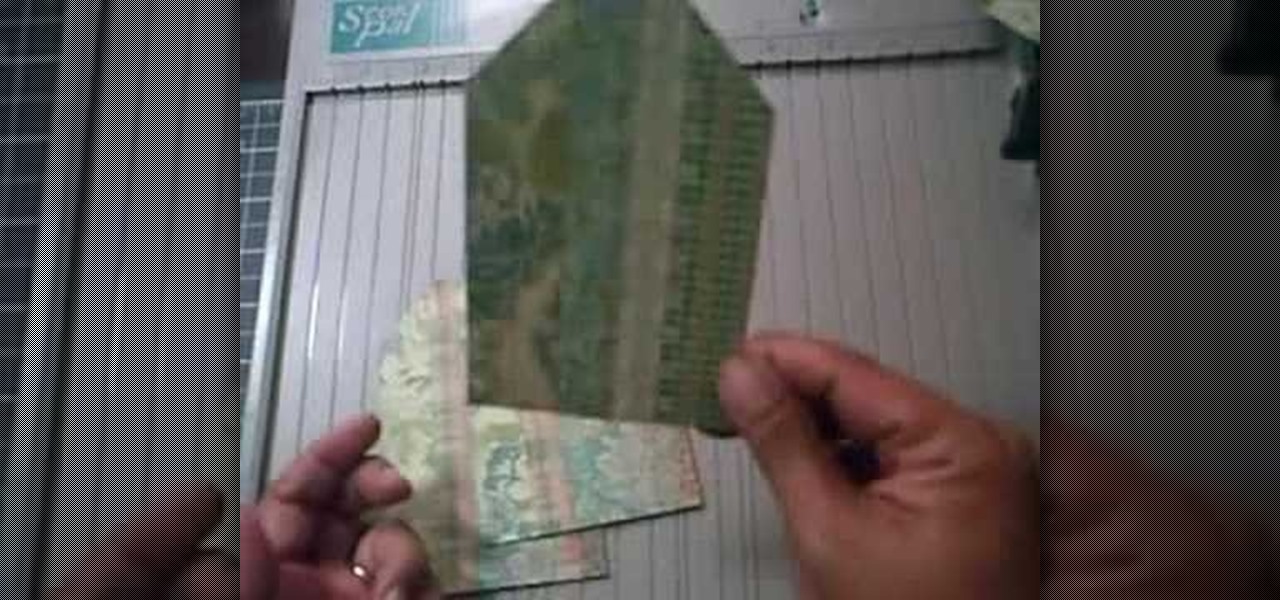
This video explains how to create a 4z4 tri-fold mini album. The first step is to score your designer paper at four inches and then fold along the score mark. The previous step is completed three more times until you have four score marks along your paper. Three separate pieces of paper are then cut measured at three and half inches. Your chosen picture is then glued into the center of your original twelve inch panel. using the three individual pieces of paper you must glue them around the pi...
In this tutorial, we learn how to read a tape measure like a professional. Rulers are awkward and you can't measure something over 13 inches with them. A retractable tape measure will measure as long as you would like and it has different markings on it. It has an inch, half inch, and goes on and on. The smallest is 3 32nd's of an inch. As you become more familiar with measuring the tape measure, you will take more accurate measurements for the projects you're working on. When finished learni...

This is a video tutorial in the Fine Art category where you are going to learn how to make a hippie chiffon one shoulder top. The materials you will need are chiffon, studs, elastic thread and elastic. Use a simple tank top pattern to cut out the chiffon. Elongate the center of the fabric; this will give it the flowy look. Shirr 5 rows into the middle of the fabric making sure the elastic is on the wrong side of the fabric. Fold in half, right sides together. Sew the side seam and the shoulde...
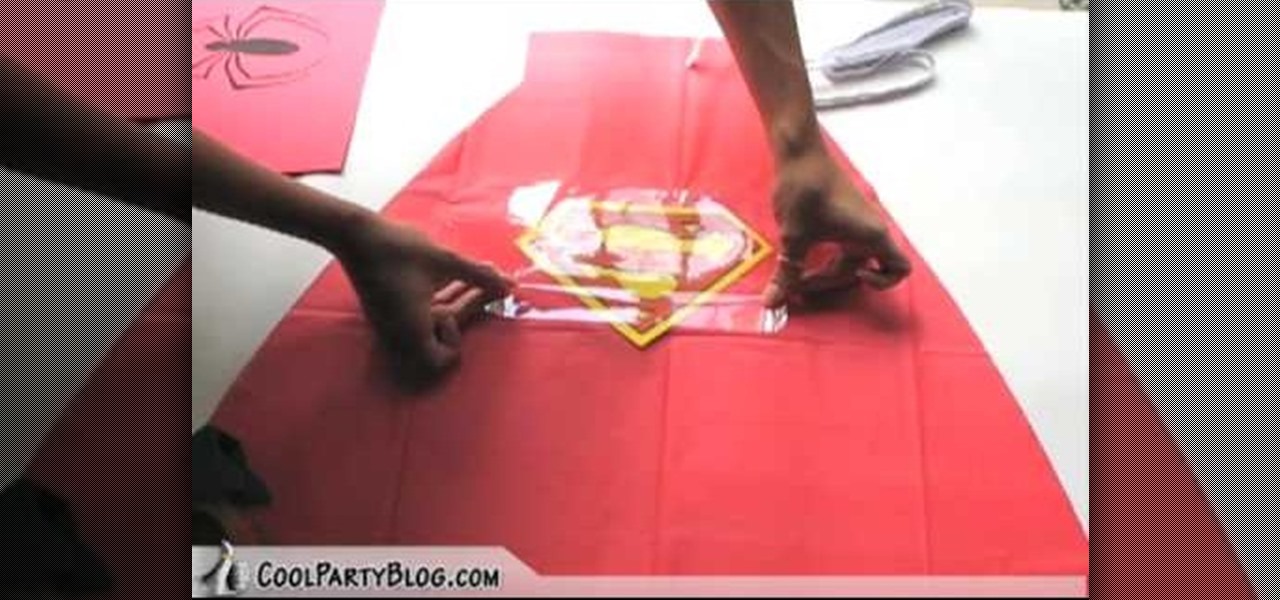
In this tutorial, we learn how to create super hero cape party favors. First, take a plastic red table cover and remove it from the package. Next, open it up and fold it in half twice, so you end up with a rectangle. Then, take scissors and cut a large triangle shape out of the material. When finished, open up the cover and it will be in the shape of a cape! Then, cut out some "s" for Superman signs and tape it on the back of the cape. Then, tie string around the top so it can be worn and you...
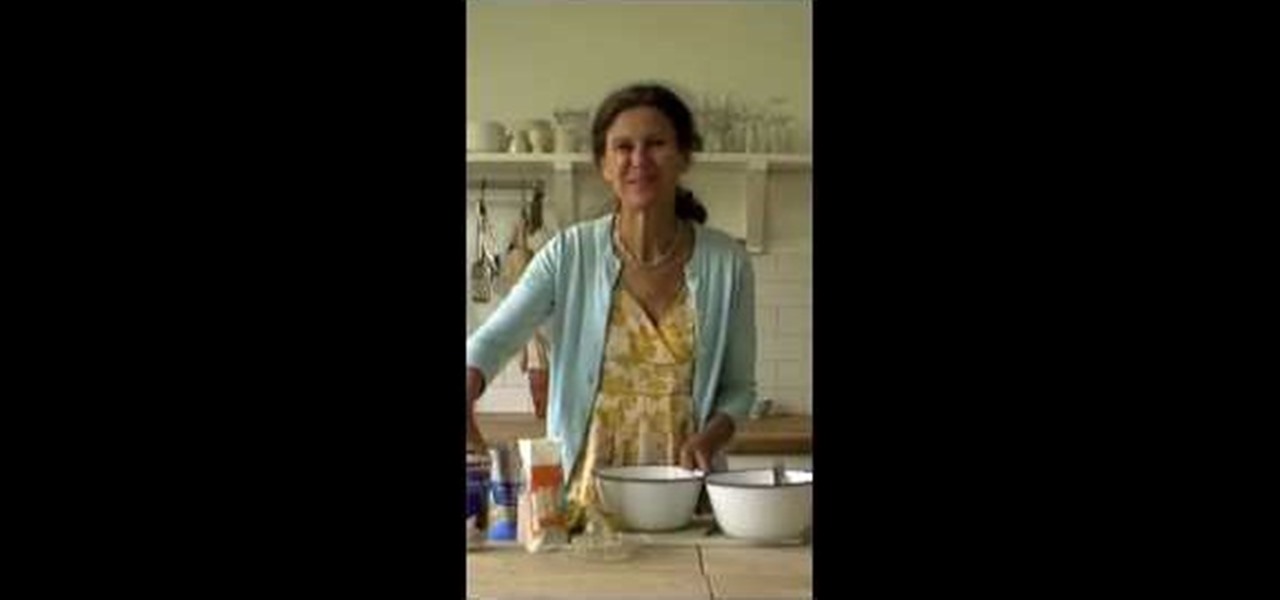
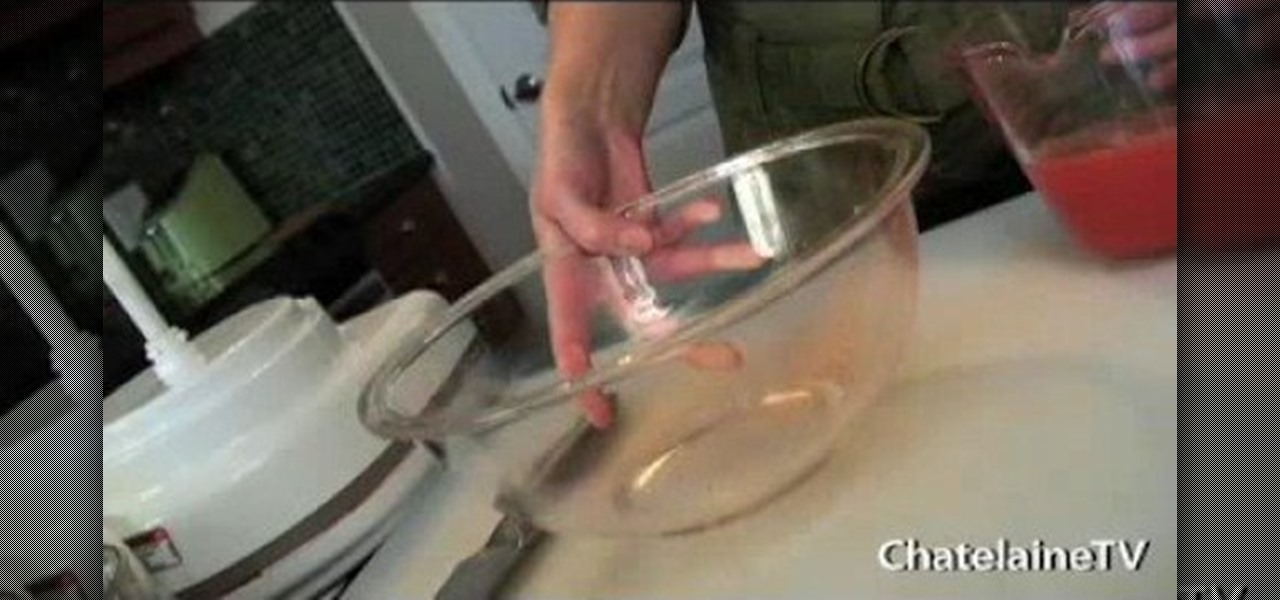
In this video, we learn how to make lemon ice cream. First, grate the zest of one lemon into a large mixing bowl. After this, cut the lemon in half and squeeze them into the bowl. Now, pour in 200 g caster sugar and mix together. Now, take 450 ml of cream and beat it with an electric beater or hand whisk to make the cream for the ice cream. Now, combine the two bowls together and mix them with your hand until well combined and smooth. Pour into a dish and keep in the freezer until hard, then ...
In this tutorial, we learn how to tie a dress scarf. You can use this in a number of ways to add some fun to your outfit. Start off with a black turtleneck and grab a long and skinny scarf. Find the middle of the scarf, wrap it around the back of the neck and then twist it. From here, tie at the bottom and give it even ends! With a scoop-neck top, you will take the scarf from the middle and wrap it around the neck. After this, pull it through in a half bow on one side and pair with a long jac...

In this tutorial, we learn how to make a butterfly pop-up card. First, draw a butterfly on the middle of a paper and then draw flowers and smaller butterflies around it on the sides. After this, fold the card in half so the drawing is stick out and cut along the top and the bottom of the butterfly. From here, color in the entire character and then fold inwards and pop the middle out. After this, stick the insert into the card of your choice. Then, glue it down and you will have a cute butterf...
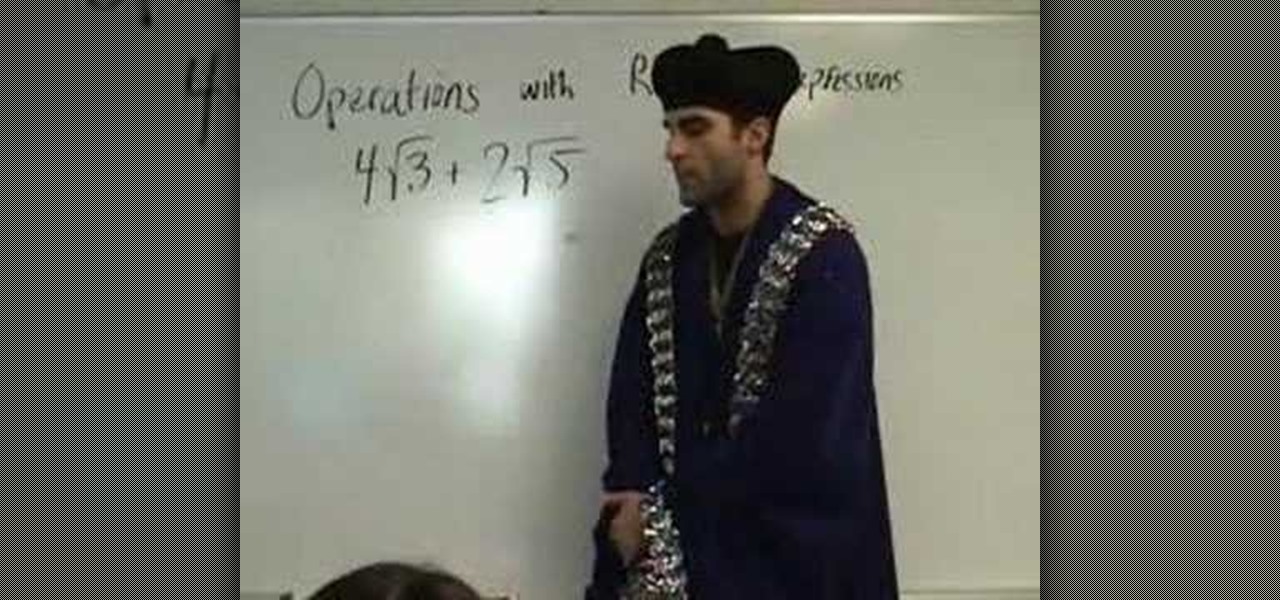
Radical expressions are those in which the radical symbol (under root sign denoting the square root or the nth root) is present (either multiplied or added). Solving these is a bit tricky, but involves similar algebraic maneuvers in a different way.
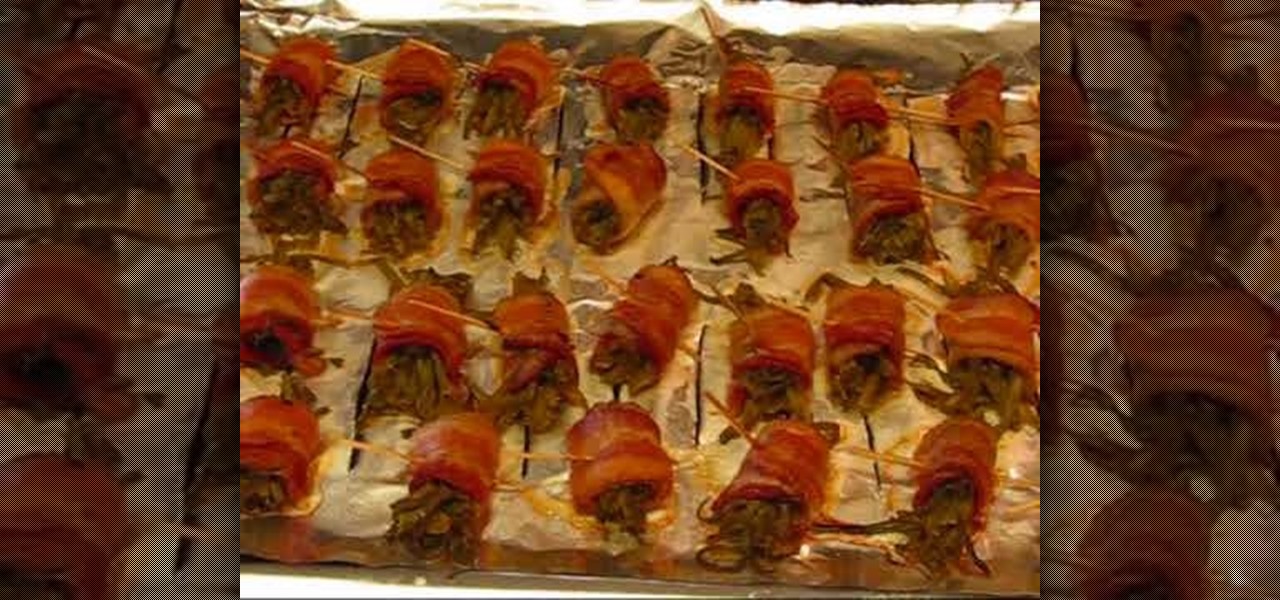
In this video, we learn how to cook bacon-wrapped green bean bundles. First, purchase a large can of French style green beans. Drain the liquid from them and then bunch up a small amount in a bundle. Then, take your favorite kind of bacon and let it thaw. From here, wrap the bacon around the green beans, cutting the bacon in half if it's a small bundle. Put a toothpick in the middle to keep it all together, then place on a baking pan lined with foil. Bake in the oven at 300 degrees for 15 min...
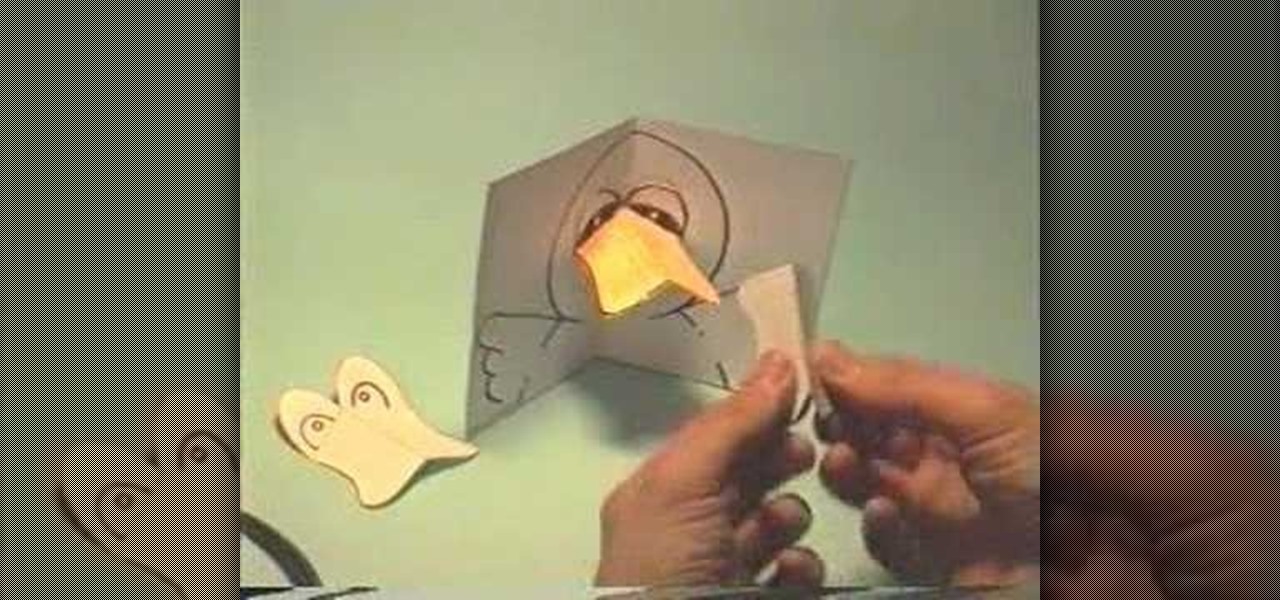
In this tutorial, we learn how to make a little duck pop-up card. First, draw a duck on a 4x6 piece of paper. Simply draw the big head with the wings coming out at both sides. From here, fold it in half so it closes together. Then, make another small piece of paper that has the eyes drawn onto it and the beak colored in. Place this on the duck to get it in the right spot. Then, adhere it with glue on the top part and fold it in again. Now, when it opens up in the card, the beak will pop up, e...
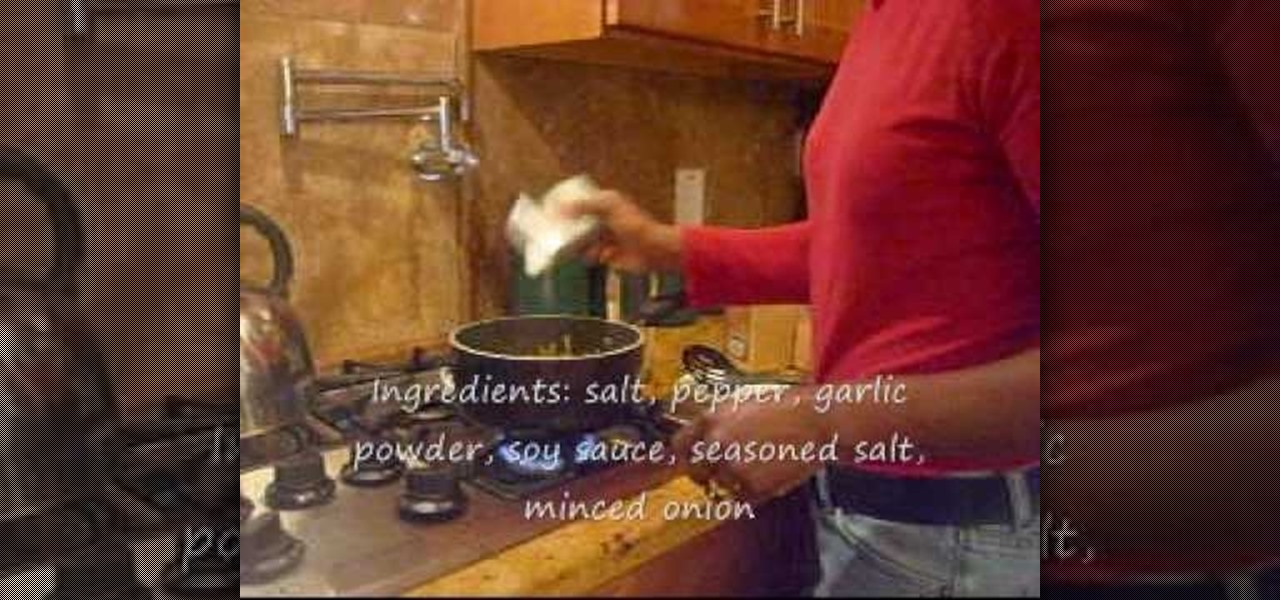
In this tutorial, we learn how to cook soul food style string beans. First, drain all the water out of the can of green beans. Then, leave half the liquid in another can of green beans. Put them all into a pan, then add 2 tbsp olive oil along with salt, pepper, garlic powder, seasoned salt, onion powder, and soy sauce. Then, add in 2 tbsp of butter to the string beans. Add as much or as little of the seasoning to the beans as you'd like and just let it heat up. When finished and hot, serve an...
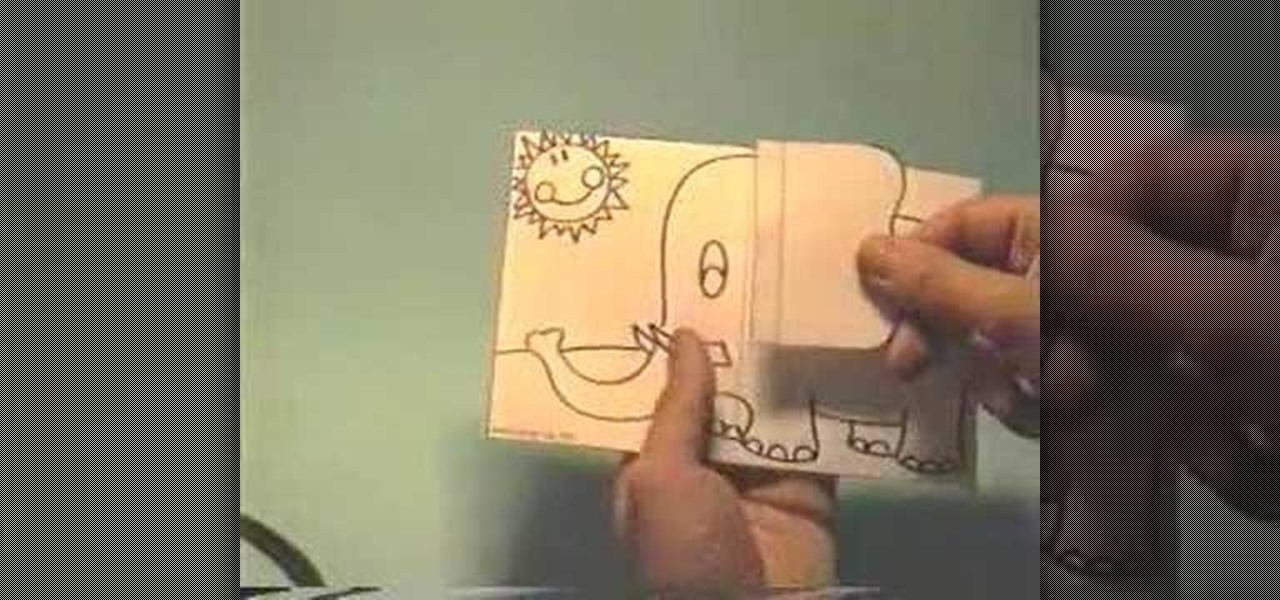
In this video we learn how to make an elephant pop-up card. First, draw a picture of an elephant on a 4x6 card. You can make this anyway that you want and put whatever other characters on it as well! After this, clip a small piece of paper into the shape of an ear. Then, glue the side of it and place it onto the elephant. The other half shouldn't be glued so it will flap up! Then, put this on the inside of a card and color it. When the person receives it, it will be a pop up card, enjoy!
In this video from AbcSchoolofPolish we learn some basic Polish phrases. The first phrase is "I'd like to make an appointment to see a dentist." In Polish this is "Chce sie umowic na wizyte u dentysty."
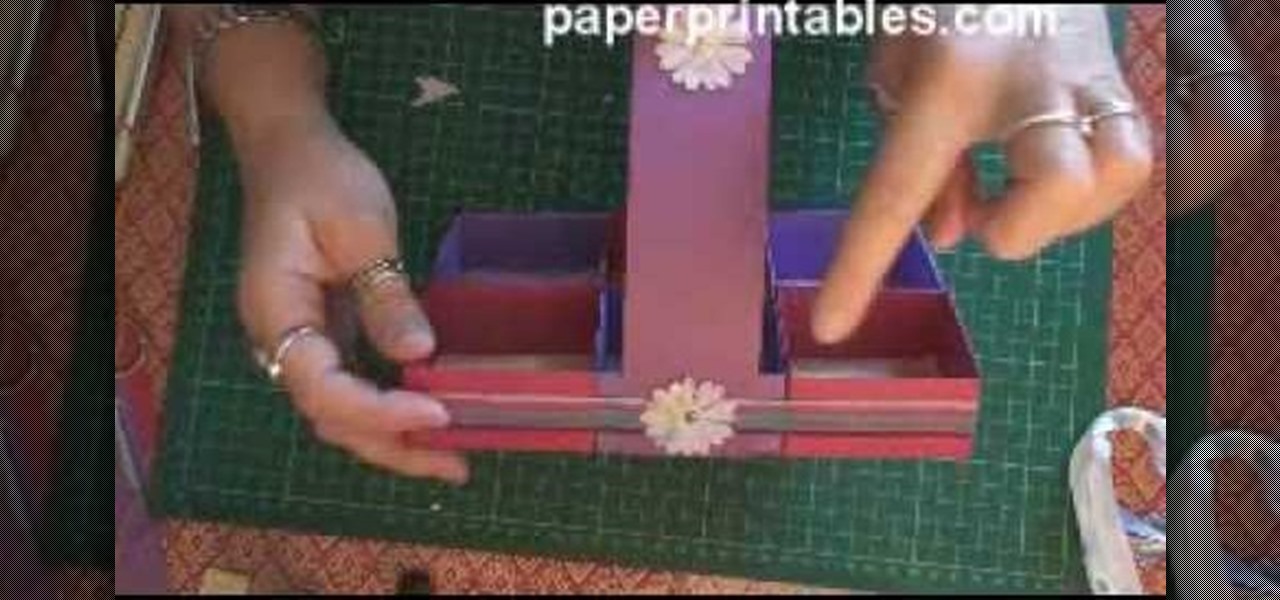
In this tutorial, we learn how to make a paper cup cake/muffin basket. First, take a piece of paper and fold it in half. After this, curl the edges up from each of the corners until you end up with a small square in the middle of the paper. Use scissors to create slits where you will make the tabs to construct the box. After all the tabs are cut, push them together so you have a small basket with a neat line. To finish this up, add a handle to the top and push into the sides. Then, draw on an...
In this video, we learn how to make an Easter pop-up card. First, draw a duck with a little baby duck on a 4x6 piece of paper. From here, fold it in half so you can see the image on the outside. After this, use scissors to cut the middle, where the little baby chick is at. Cut the top and bottom around it, but avoid cutting the sides. From here, bend that piece left and right. Then, open up the card and bend it into the middle. From here, take a piece of paper with eggs cut out of it and bend...
In this video, we learn how to create a "purple smoke" fashion makeup look. start out by applying foundation to the face, then apply purple liner around the lips and fill them in half way to the middle. Then, smear the color into the middle and apply purple shadow over the lips. From here, apply black eyeliner to the tops of the eye, then apply black shadow underneath the brown on the crease of the eye, then rub on a silver shadow around the entire lid. Use liquid liner to draw on lashes on t...
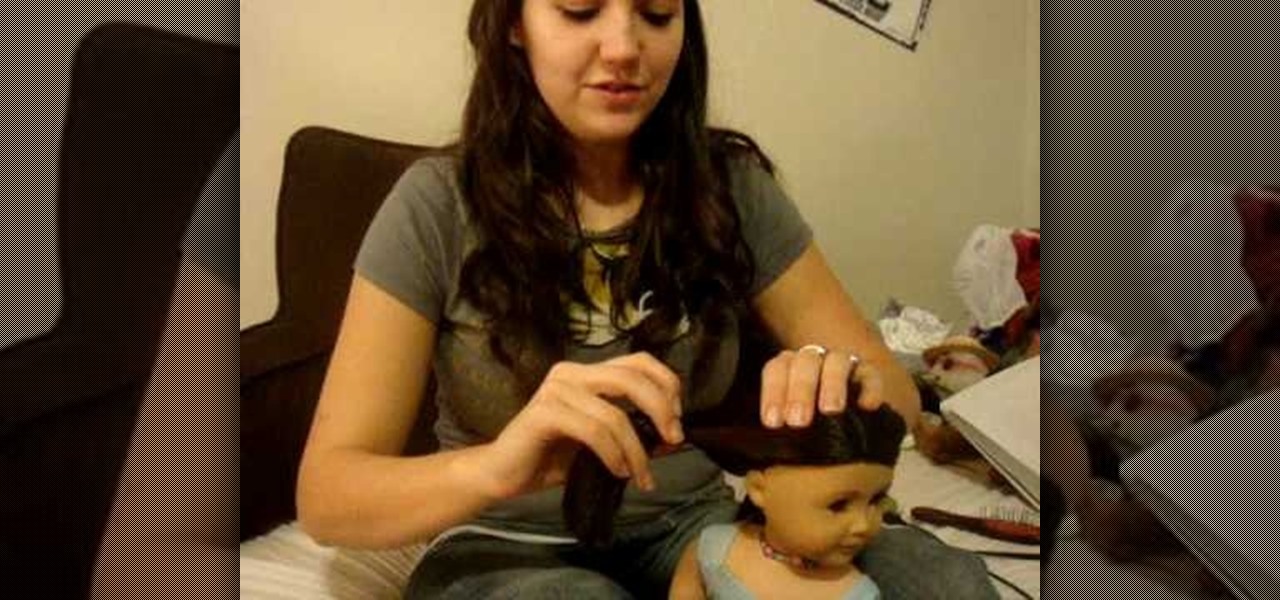
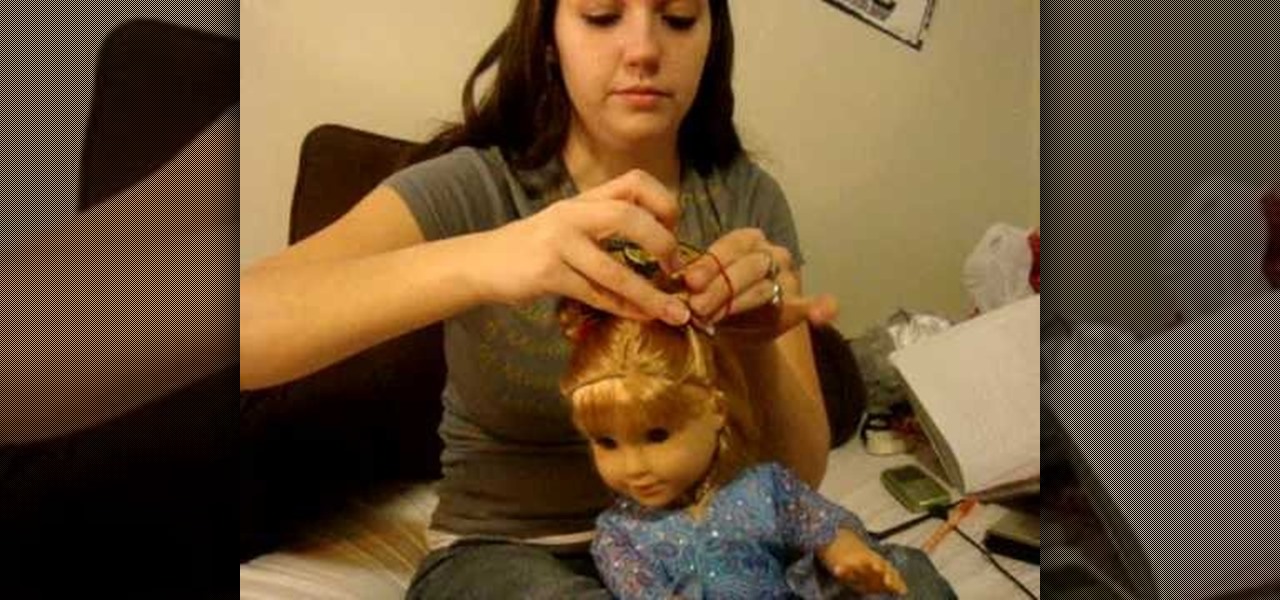
In this video, we learn how to do a double twist flip on your American Girl doll. First, part the hair down the middle and then brush it out. From here, pull out the rubber band one side and then split the middle of the hair in half. Push the rubber band with the hair through this, then tighten it up. Do this on the other side of the hair to make them both even. This will finish the hairstyle on your doll! The great thing is that you can do this on dolls that have short hair or long hair and ...
In this tutorial, we learn how to make an array of paper roses. Use any colors of paper you want with this to add a special touch to them! Now, you will take the pattern or color of your choice and fold it up into a square. after this, fold it into a triangle and then cut the edges of this off. After this, cut the bottom off and open it up, it should be a flower shape with a hole in the center. After this, repeat with several other papers and then cut the flowers up into halves. From here, yo...
In this video, we learn how to do a cute hairstyle on an American Girl w/ short hair. First, brush the hair and then take a small piece from the front section of the hair. Twist this and then pull through and tighten with a rubber band. Then, part the hair in the middle and start the braid the other side of the hair until you reach half way down. When finished, you will put ribbons on each side of the hair and then brush out the excess hair in the ponytails. This will finish this really cute ...
In this tutorial, we learn how to cook a pumpkin. First, place foil on a baking dish where you will cook the pumpkin. Then, cut the pumpkin in half and scoop out all of the insides out into a bowl. Next, rub olive oil inside the pumpkins and on the outside of them and place onto the baking sheet. Now, bake these in the oven at 375 at the bottom rack in the oven for 30 minutes. Test out to see if their done by sticking a knife in and seeing if it comes out easily. Then, scoop the insides out a...
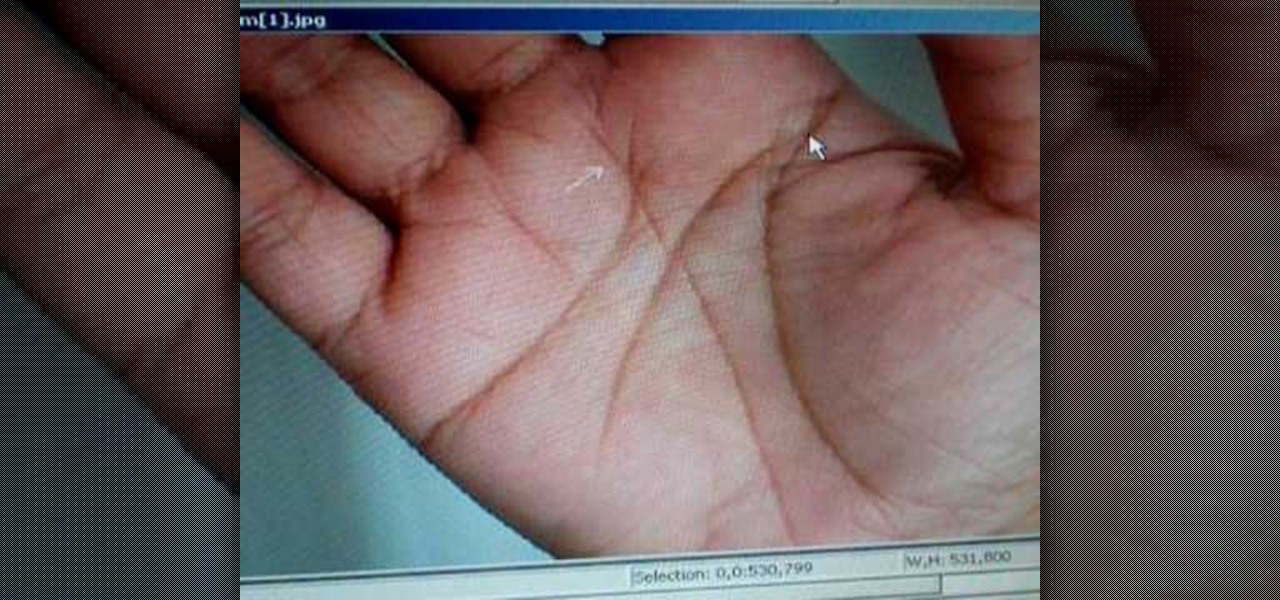
In this video, Peter John analyzes the right hand in palm reading. Once you have the hand turned over, you will see lines that are underneath the middle finger. The half line means that someone is emotional because the line arcs more than usual. The person also likes to show their emotion and have the emotions shown to them. Then bait line on the side of the hands should be slightly clear, which will tell how affectionate someone is and how much they show love. Right hand palm reading can be ...
In this tutorial, we learn how to get big teased hair with clip-in extensions. First, put half of your hair up and then clip the extensions in from the root until they are secured in place. After this, you will grab sections of hair at the top of your head. Hair spray the hair and then brush the section of hair against the way it grows. Continue to do this until you have teased all the hair on the top of the head. Brush your hair softly when finished, then style how you want and spray with ha...
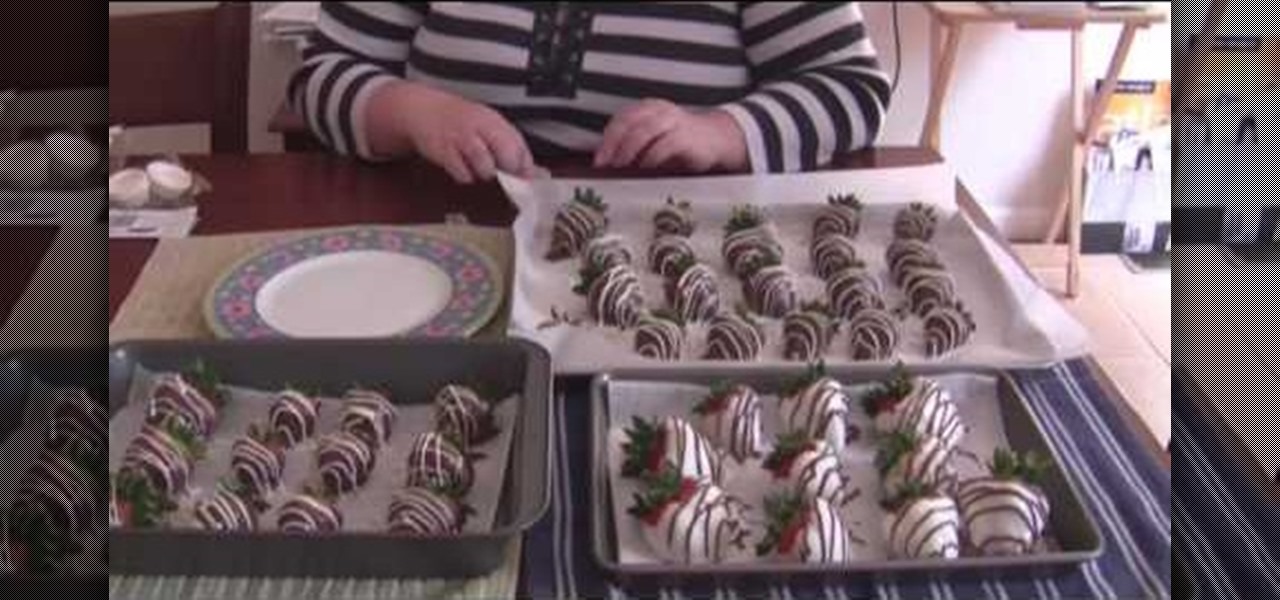
In this video, we learn how to make chocolate covered strawberries for dessert. First you will wash your strawberries and then thoroughly dry them as well. After this, you will take two squeeze bottles from a craft store and fill them half way through with two different kinds of decorating chocolate. Then, heat up a double boiler and heat up chocolate candy melts. Then, melt the two craft bottles in the hot water from the double boiler. Now, dip the strawberries into the chocolate and place t...
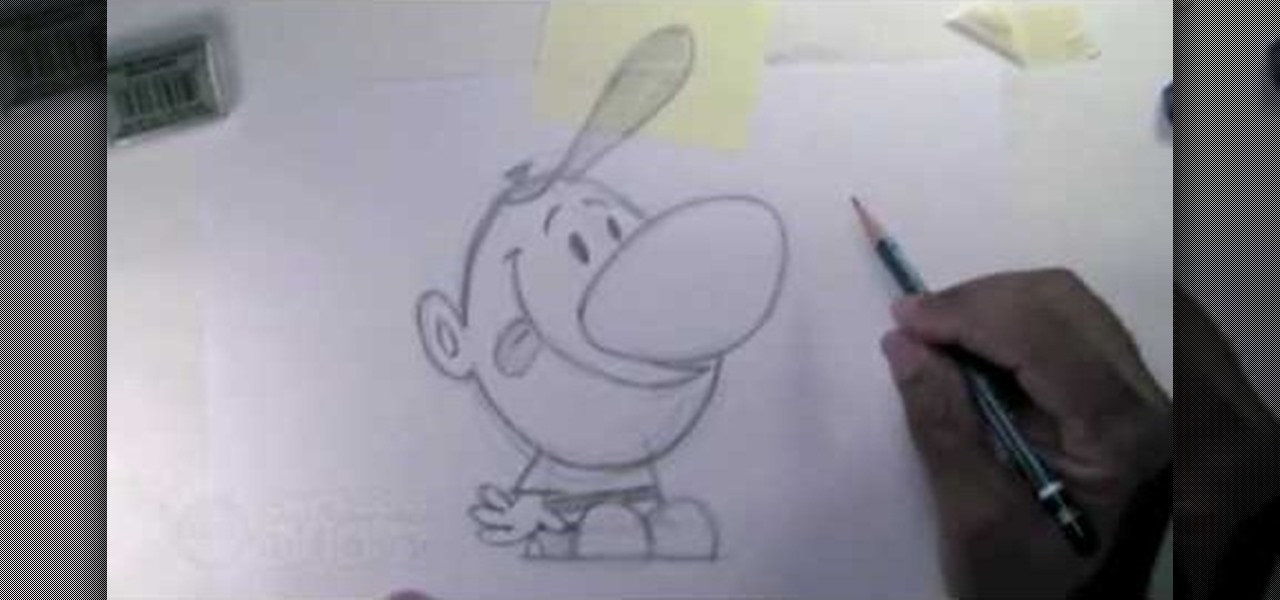
In this video, we learn how to draw Billy from The Grim Adventures of Billy & Mandy. Start out by drawing the egg shaped head with a pencil. From here, sketch on the body by using a block shape then draw the shoes as simple half circles. The arms and hands will be hanging to the sides. Now, draw on the huge nose in the middle of the circle. Attach the mouth to this and draw it all the way up near the eyes, which are simple dots. The brows are simple slashes. After this, add in the minor detai...
In this tutorial, we learn how to recycle a plastic bottle to make a toy bottle rocket. First, take a large plastic bottle and a sharp knife, then cut it in half. After this, take the side with the cap on it and then paint on the inside of the bottle. You can paint whatever you want on the inside, feel free to use different colors and get as creative as you want! From here, take some bottle caps and poke holes in the center of them. Then, string these together by pushing a string in the middl...
In this tutorial we learn how to recycle plastic bottles to make a toy windmill. First, cut the bottle in half so you just have the cap end of it. Then, use the scissors to cut strips in the plastic, all running next to each other. Once you have all of these cut, pull the strips out so they are flared away from the cap. Then, twist these so the are all going backwards from the cap and place a stick on the bottom of these, connecting with the cap. Now you can use these as a toy windmill, enjoy...
In this video, we learn how to do mini buns on your American Girl doll. Firs, you will grab a section from the top half of one side of the head. Then, you will put a rubber band around the hair. From here, you will twist the hair around the make a bun, then secure it with another rubber band. Repeat this on the other side of the head so there are two buns on the top of the head. This will look cute on the front and the back! If you want, you can keep going and make two more so you have four m...
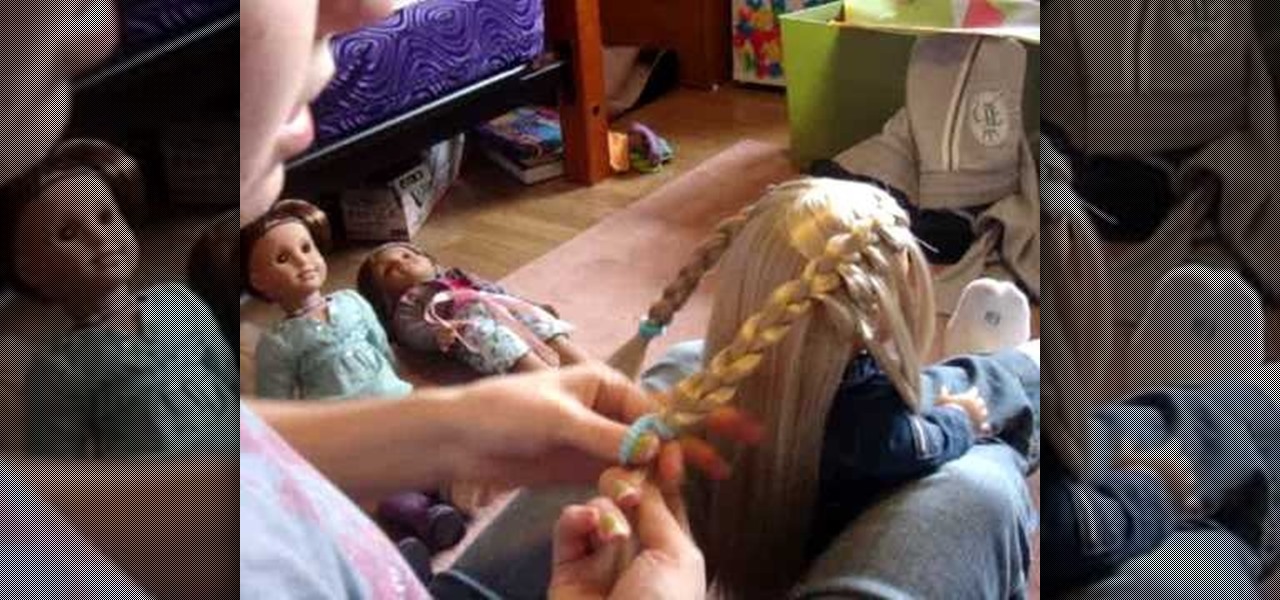
In this tutorial, we learn how to do floating braids on your American Girl doll. First, take a small section from the top right side of the head. After this, brush it out and split it into three parts. Then, braid over three times and take a piece from the top and instead of adding it in, put it in the front over her arm. After that, braid over and take a section from underneath. Add this into the braid and then go over. Now, repeat the same process by putting the section of hair to the front...
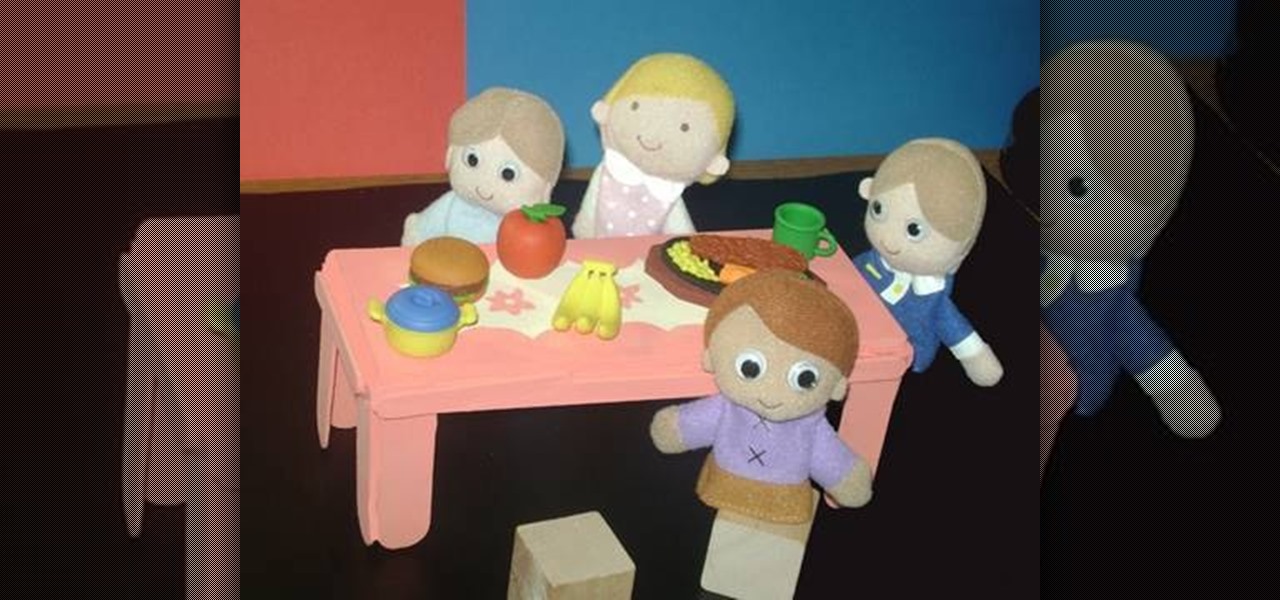
In this tutorial, we learn how to make a miniature table. Materials you will need are: a wood slat, 4 popsicle sticks cut in half, paint, paintbrush, and glue. Heat up your hot glue gun and then grab your popsicle sticks. Glue one stick to the side of every corner of the slat. After this, you should have two on each side of all four corners of the wooden slat. After you're finished placing them on, let the glue cool and then harden. To finish, you can paint this and decorate it and use it ins...
In this tutorial, we learn how to get wavy hair with a wide-toothed comb and no heat. First, spray some waving product all over your hair and then comb it out. From here, you will combine the top half of your hair and then twist it into a bun. After this, clip it to your hair with a bobby pin. After this, grab the right side of the hair and then twist it up into the head. From here, you will repeat the process on the other side of your hair. Leave this in your hair overnight and then take out...
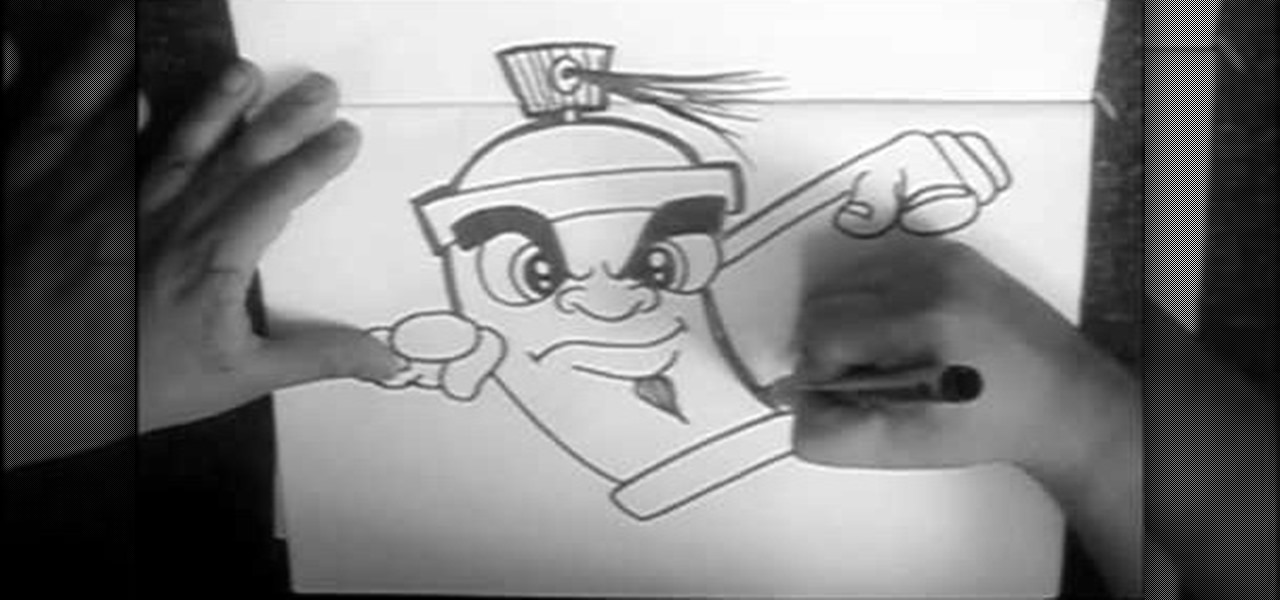
In this tutorial, we learn how to draw a cartoon spray can. Start off by drawing a round circle for the eyes, then fill in the pupil and draw the eyebrow above it. After this, draw in the nose and then draw the other eye opposite to the first. From here, draw in the mouth and the goatee on the face. Then, draw in the top, which will be a rectangle with a half circle on top of it. From here, draw a hand on the right side pointing straight out, then draw a top to the spray can showing the spray...
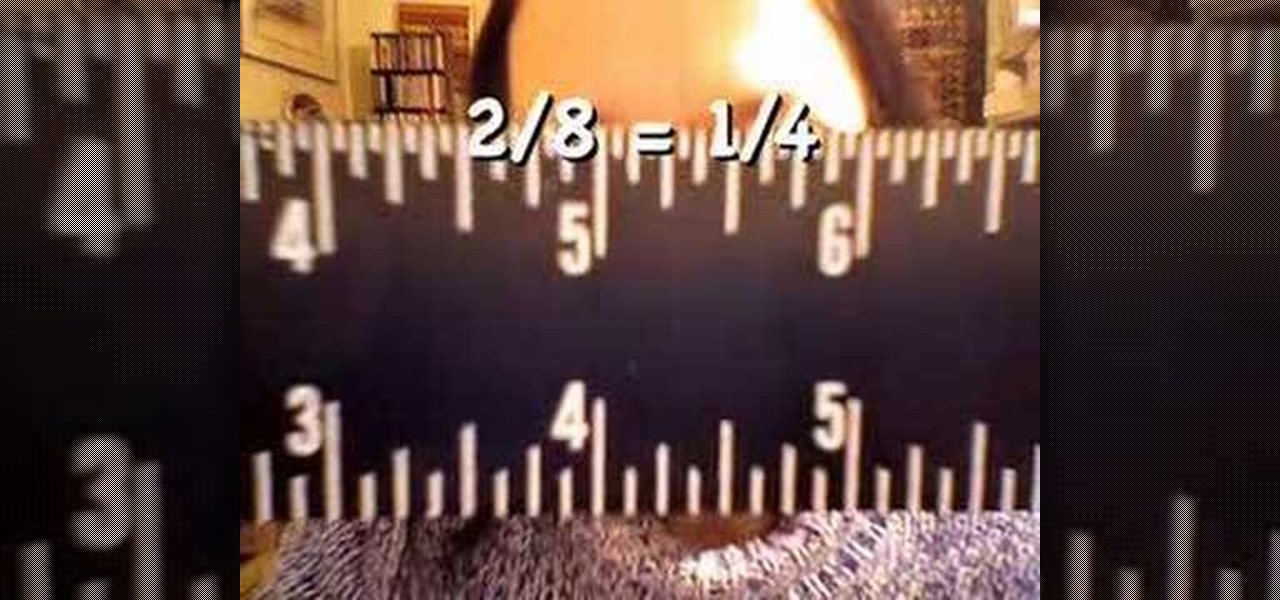
In this video, we learn how to read a ruler. First, grab you ruler and look on the top and the bottom of it. The top is divided into different marks that shows inches, half inches, and quarter inches. If you aren't familiar with reading this, just use the markers at the top to help you count between 1/4, 1/2, 1/8, etc. The other side of the ruler is used for centimeters, which you usually will not use in the United States very often. Learning how to read a ruler can help you get better with f...
In this video, we learn how to make the farthest flying paper airplane. First, you will lay the paper flat and fold in two sides on the top. Then, fold it in half and keep folding the plane in. After this, you will see the wings become smaller and smaller. Once you fold this up until you cannot fold it in anymore, you will be able to throw this and make it fly! This will be really thin so it will go further and further. This will fly across the room easily and make everyone jealous they don't...
In this tutorial, we learn how to do twist braid pigtails on your American Girl doll. Start by brushing the hair out and combing it in the middle. Then, take a small section in the font and split that in half. Start twisting it towards her face and then twist them together away from her face twice. Then, pick up a piece from the bottom and twist it into the braid. Continue to add in hair from the bottom until you have all the hair inside the twist braid. When finished, tie off at the end and ...
In this tutorial, we learn how to draw a sphere in 3D. First, draw a circle and a square around it with a light pencil. From here, you will use the side of the pencil to shade in the sides of the circle. Then, draw a half circle next to the circle to make it look like it's shadow. Shade that in and then add in more dark markings to the circle, leaving a small white area on the top of it. After this, draw in the outline of the circle and erase any stray lines. This will complete your sphere, e...
In this tutorial, we learn how to do a Y braid on your American Girl doll. First, brush your doll's hair out and then put the hair in pig tails. From here, you will split the tail in half on both sides. Then, you will combine the two middle pieces and start to braid the hair like normal. Do this all the way down until you reach the bottom of the hair. When finished, tie the end with a rubber band to keep in place. This will finish the Y braid look for your American Girl doll, enjoy! Decorate ...
Do you have a beanie and just can't figure out how to wear it? Then this video is the right one for you! With this, we learn how to wear a beanie 18 different ways! The first way is to wear it flat on your head. Or you can wear it as a fedora. A girl can wear it with her bangs hanging out, then you can wear it with the cap sticking out for a "robin hood" look. You can pull up the sides of it to create a half hat or you can wear it to the side. Any way you choose to wear the hat, just let it w...
Usually when you think of jellies or jams you think of the sweet variety, usually prepared with strawberries or grapes. But jellies come in a more savory variety too, and make excellent bread spreads.
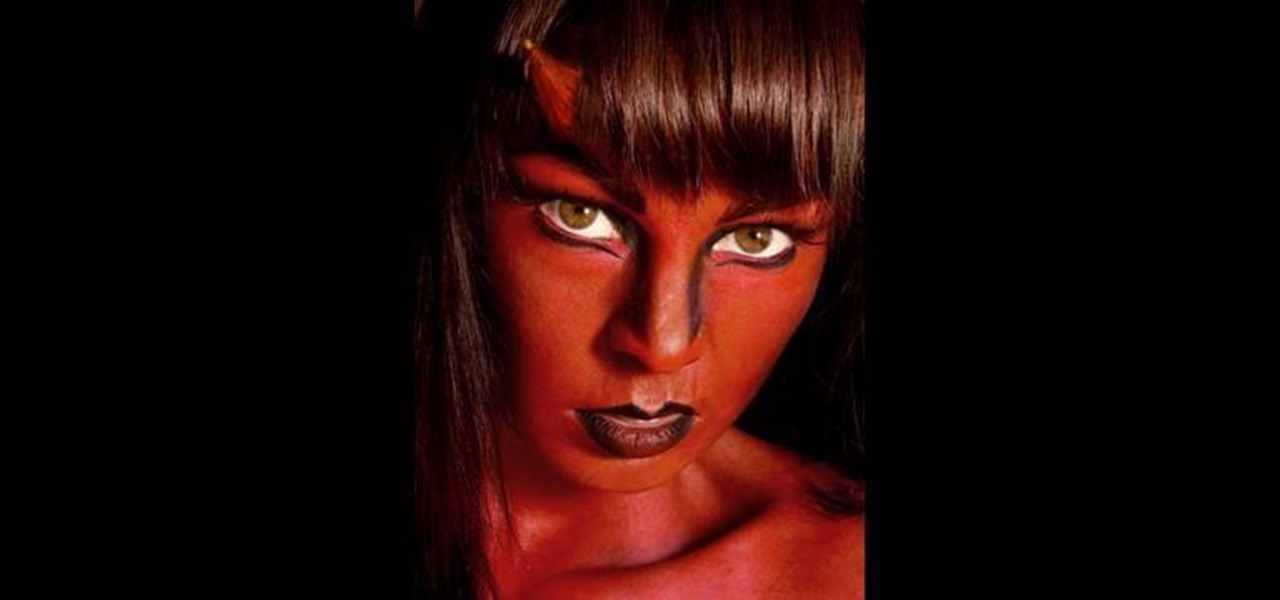
Are you completely out of costume ideas, or you just need a makeup look that'll scream what you're dressed up as without needing any representative attire? Then check out this Halloween makeup video to learn how to create a fiery she devil makeup look with Hell-red skin, blood red lips, and even horns if you're up for it.
In this tutorial, we learn how to prepare celery with Skinny and Mini. First, you will clean your stalks of celery and dry them off. Then, remove the stalks one by one from the bunch and chop off the tops of them so there are no more leaves. Next, cut the stalks of celery in the middle and then chop them in half. Now, bunch the celery together and cut them into small cubes with your sharp knife. After this, repeat the process with the rest of the celery in the bunch. Use this chopped celery i...