Samsung's latest Oreo Beta update for the Galaxy S8 brings an impressive number of new customization features. On the lock screen, we've seen the introduction of new colorization options for the clock and transparent notifications. Not to be forgotten, the Always On Display is getting some new clock styles and colors.
When you see a color depicted on your computer, smartphone, or tablet, odds are it was processed as a hex triplet before it was rendered. Most modern websites and operating systems use a hexadecimal coding system to signify certain colors, and these are represented as 6 letters and numbers.
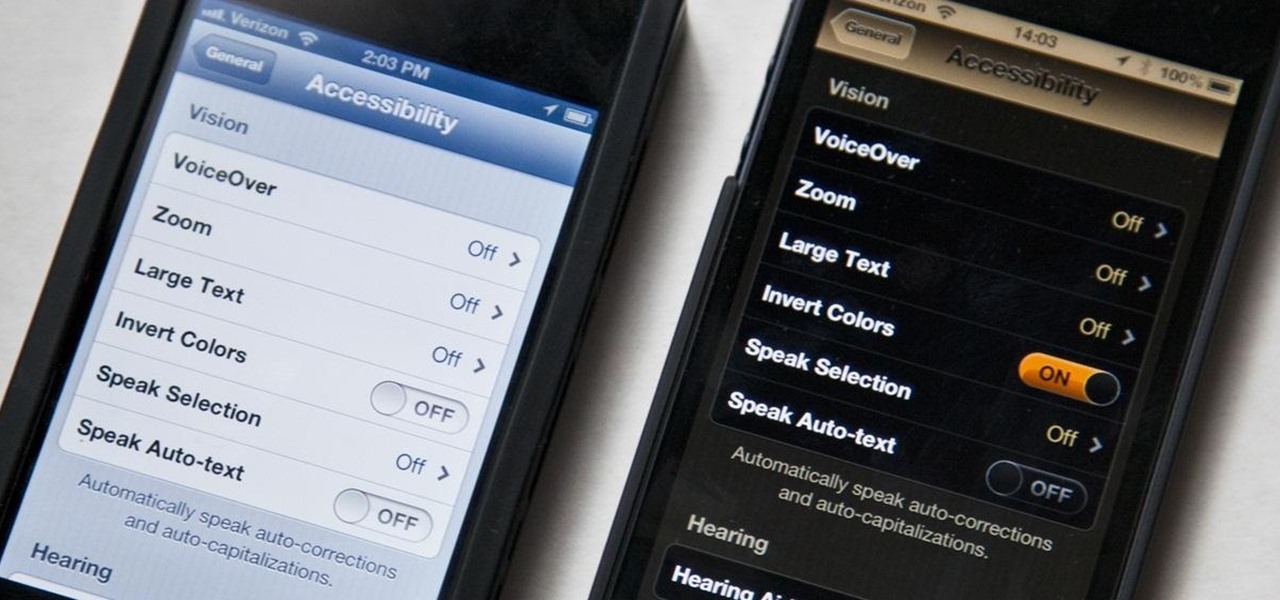
Inverting colors on your mobile device not only saves battery life, but also helps prevent straining your eyes, especially during the nighttime. Bright white screens interfere not only with your eyes, but with your sleeping patterns, as well. The bright lights greatly reduce your melatonin, a hormone secreted by the pineal gland in the brain that helps you go to sleep. Thus, the onset of sleep is delayed and the possibility of deep sleep is reduced greatly.
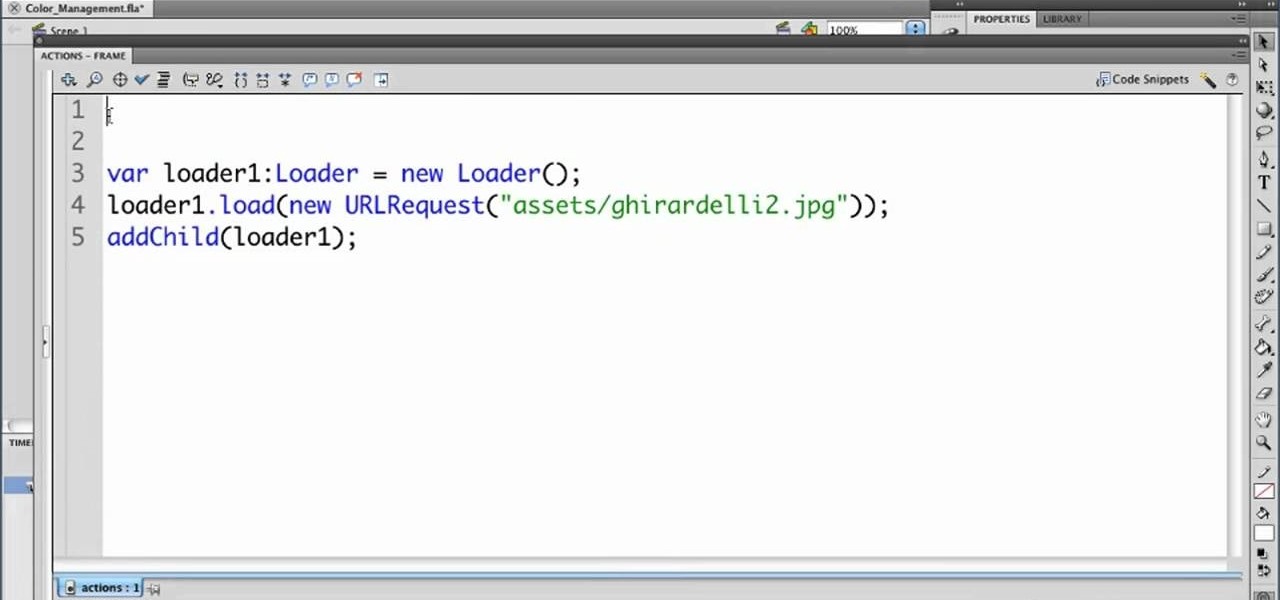
In this clip, we learn how to use Flash Player 10 color management options within Adobe Flash Professional. Whether you're new to the Adobe's popular Flash authoring application or are a seasoned Flash developer merely looking to better acquaint yourself with Flash Professional CS5, you're sure to be well served by this video guide.

To do that, first select the pen tool, choose yellow stroke color and draw the path as showing in the video then deselect and choose pen tool again, pink color in stroke and draw the path again. Now you need to select the blend tool and click on both paths. Now go to object, blend and choose blend options. Now select the specified steps, put the value of 25 there and click on ok. Now open the blend in layer window and select the paths. Now set color to white
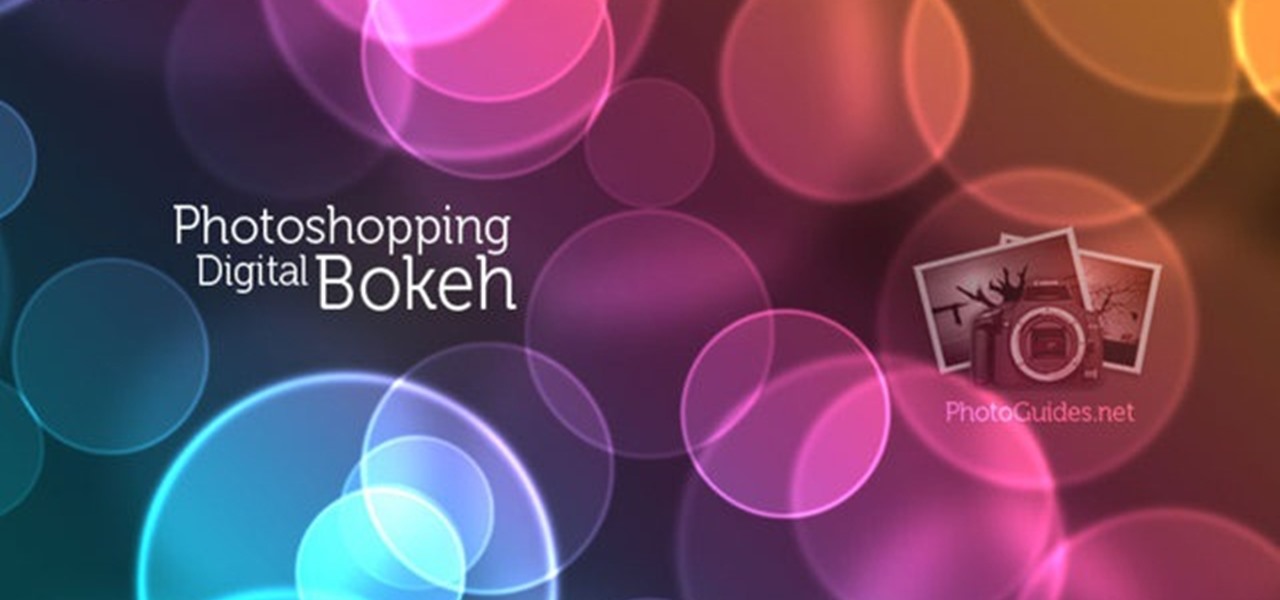
Ash Davies teaches us how to Photoshop digital bokeh with this tutorial. First, open up Photoshop and create a new canvas with your width at 1920 and your height at 1200. Now, create a new layer and set your background layer as invisible. Now create a medium size circle and reduce the fill to 50%. Now enter blending options and add a stroke of 10 pixels to the inside with the color set to black. Now define the shape as a brush and then click "edit" and "define brush preset" name this, "bokeh"...

You can convert any color photo to black and white photo. In Photoshop CS3, There are 4 ways to do it.
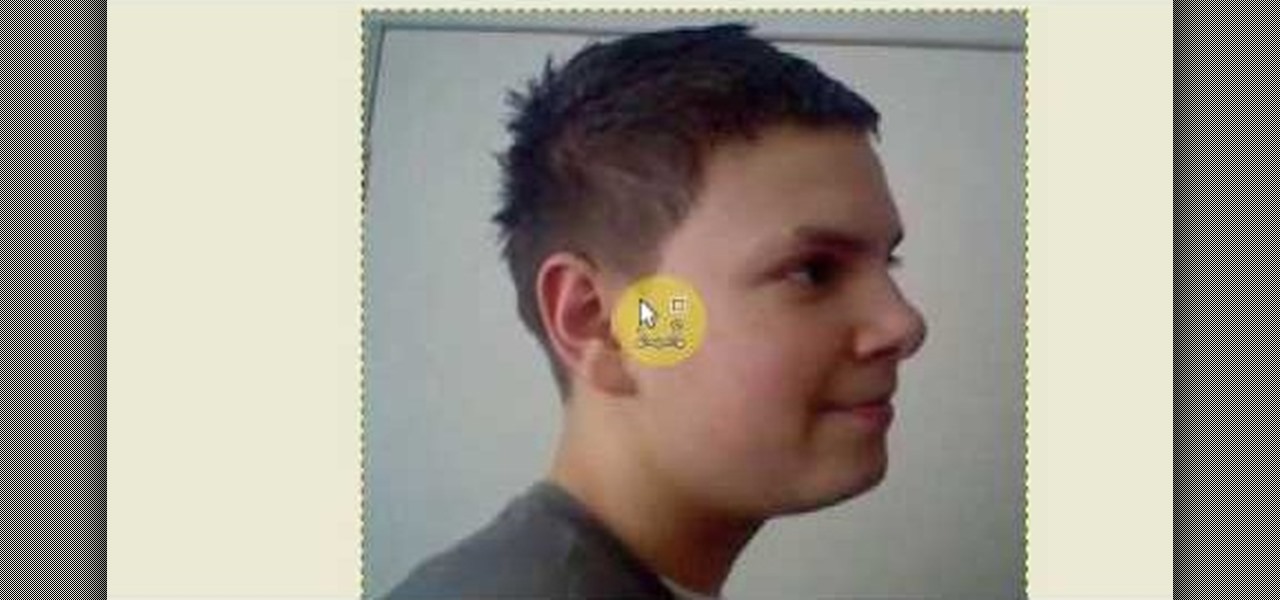
Open up the GIMP on your computer, and then proceed to open up the photo you wish to modify. Now, select the scissors tool from your Tool palette or by clicking "Tools" on the menu bar, then click "Selection Tools," and also click "Intelligent Scissors." Use this tool to outline the person's hair in the photo by clicking along the hairline at about 1/4-inch intervals until you return to the first place you clicked.
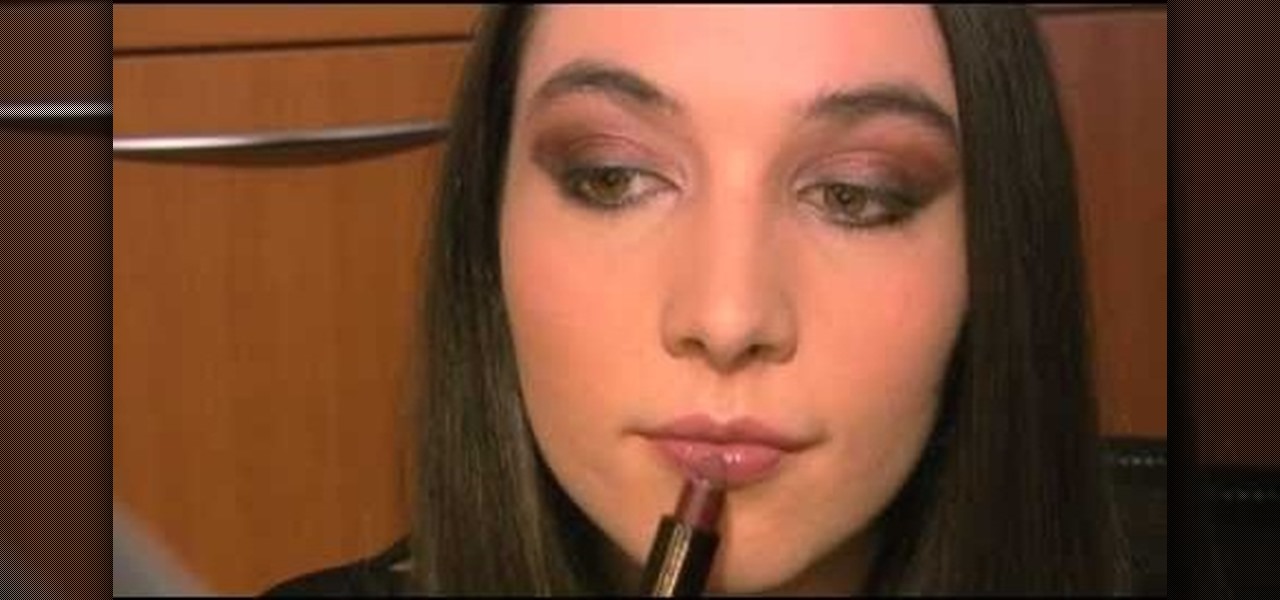
During the fall, warm and comforting colors like brown, red, and sienna abound. Embrace the natural richness and beauty of fall by incorporating these colors into your next makeup look.
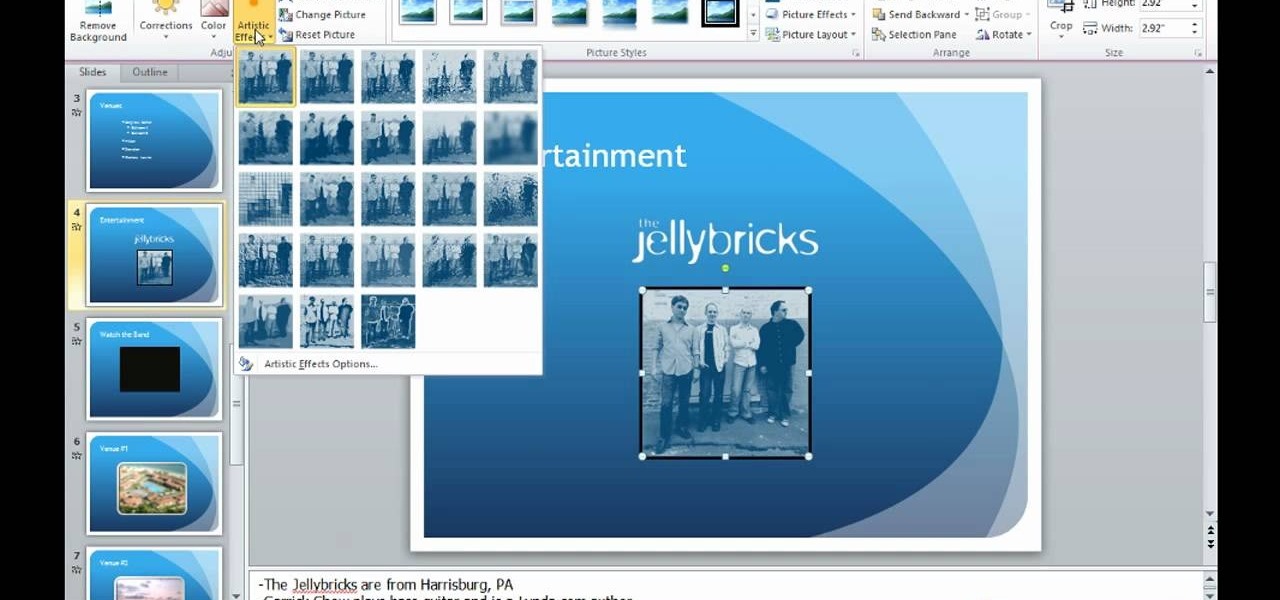
This video describes how to edit images and videos in MS Power Point 2010. For example, we will take a slide with picture added. If you want to edit the picture, first go to the "Picture Tool" button and click on the format tab. If you want to change the contrast and sharpness of the picture use the "Corrections" menu, and to change the saturation, tones, and to do recoloring we can use the color option tab, and then the "Artistic effects" which can be used to see a real time preview like usi...
Learn how to create glowing text in Photoshop with this awesome video! 1. Write any text using text button T on the selected image as a background. Write a suitable text and place it somewhere. 2.Select the text and make it Bold. 3. right click and set Opacity and Fill options. Opacity changes the color of the text as well as its effect. Whereas Fill changes the color only . If you have set it to 0% then you can't see the text if its exist also. Set Opacity to 100%. 4. For glowing text select...
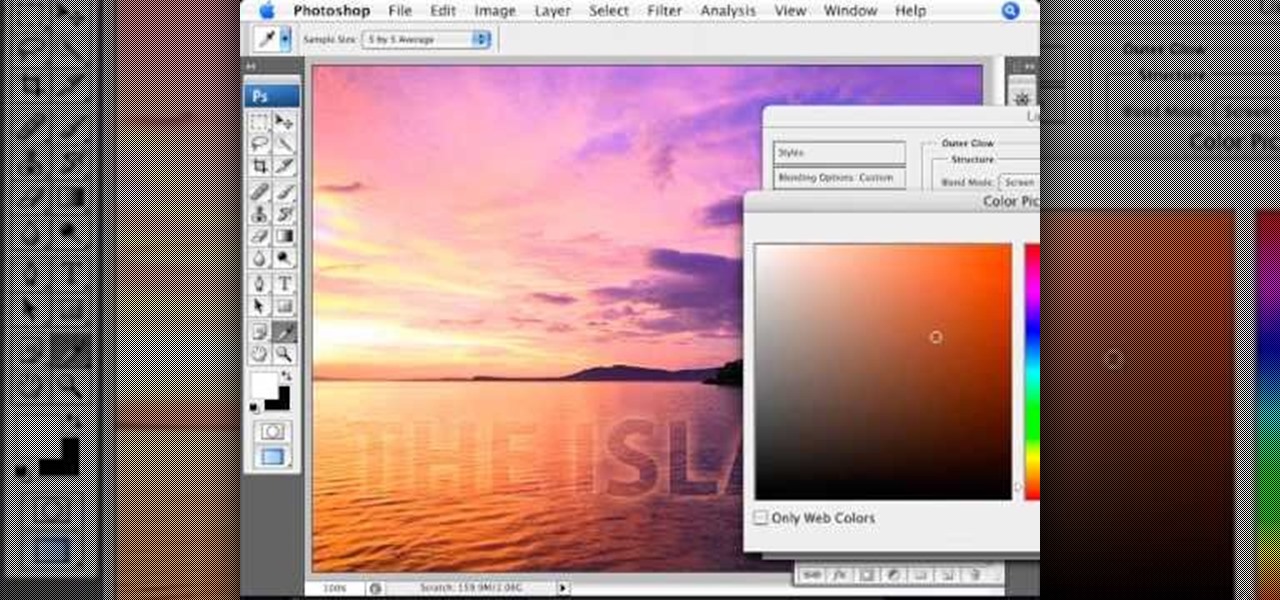
This Photoshop tutorial goes over how to "Pick-up" Color. Using the Info Palette. Sampling up to 4 colors. Measuring distances and angles with the Protractor option.
The personal computer is a strange and powerful entity, capable of bringing great joy. Just as often, you probably want to chuck the damn thing at the wall because it doesn't work right. If you want to pull a prank on a friend that will really upset them, messing with their computer is one of the best ways to do it. This hilarious video will show you how to do three great PC pranks quickly and easily, including changing the contrast on the monitor and pretending to edit websites using Javascr...
The Pixel 4 comes with a new "Styles and wallpapers" app that lets you change icons, accent colors, and more. But if you're on a first-gen Pixel, a Pixel 2, or a Pixel 3, you don't get this feature. On the bright side, there's still a way to use it.
On Instagram, you can write text over any picture or video in your Story, but it may be hard to get your message across with a distracting background. Although there is a "Type" option for Stories, which allows you to write text over colorful gradient backgrounds, the selection is limited to just over twenty options, and there are no options for solid colored backgrounds or translucent overlays.
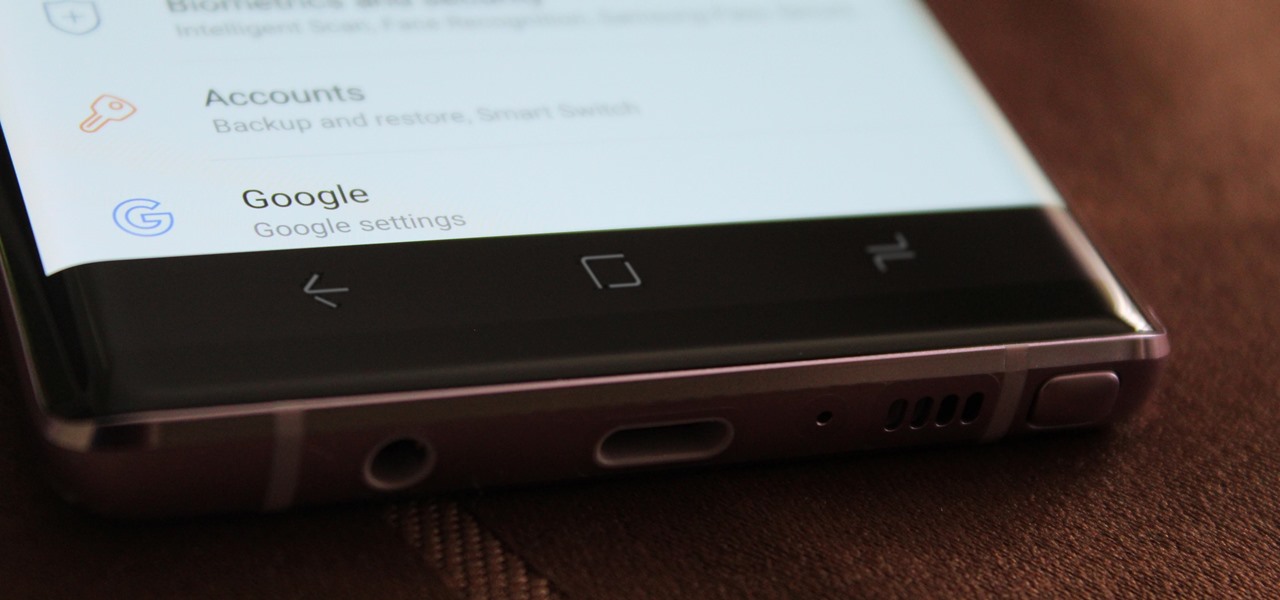
One option you won't find buried in the Galaxy Note 9's Settings is the ability to return the navigation bar to black. Samsung changed the default color to white with the Note 8, removing any ability to bring the black color back. But thanks to a neat app, Note 9 users can do it themselves.
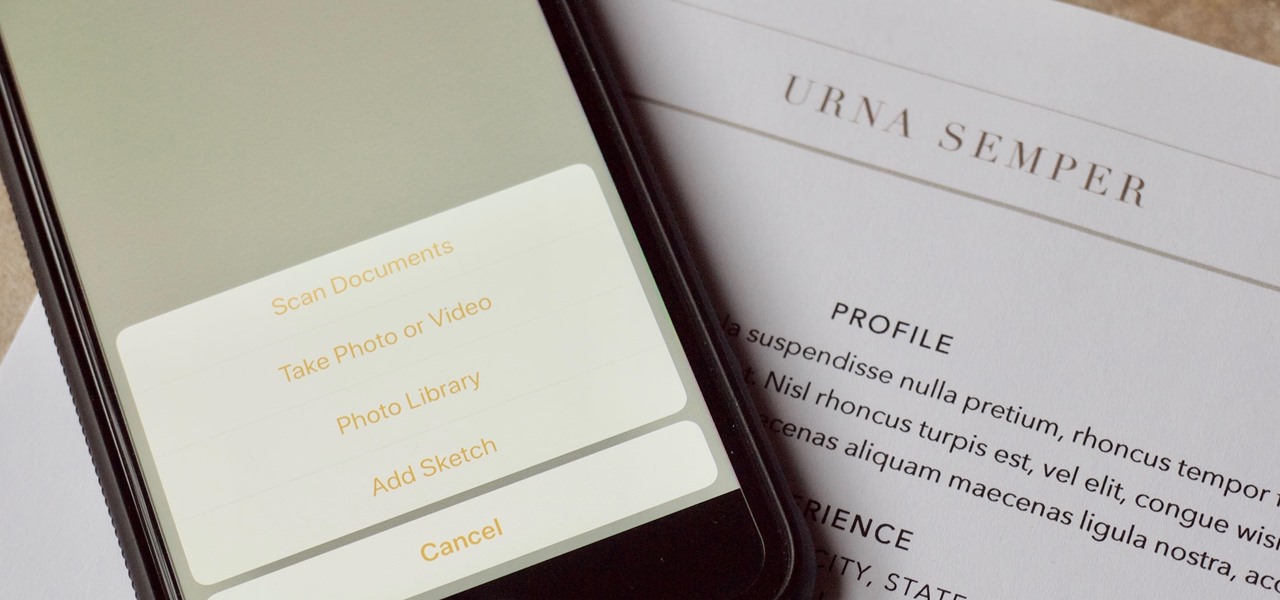
There are plenty of third-party apps for scanning documents on your iPhone, but they can all be tossed out the door since iOS 11 includes one by default now. Instead of a dedicated app, it's included as part of the Notes app, and it's fairly easy to use. After scanning, you can save it, print it, turn it into a PDF, add markup, and more.
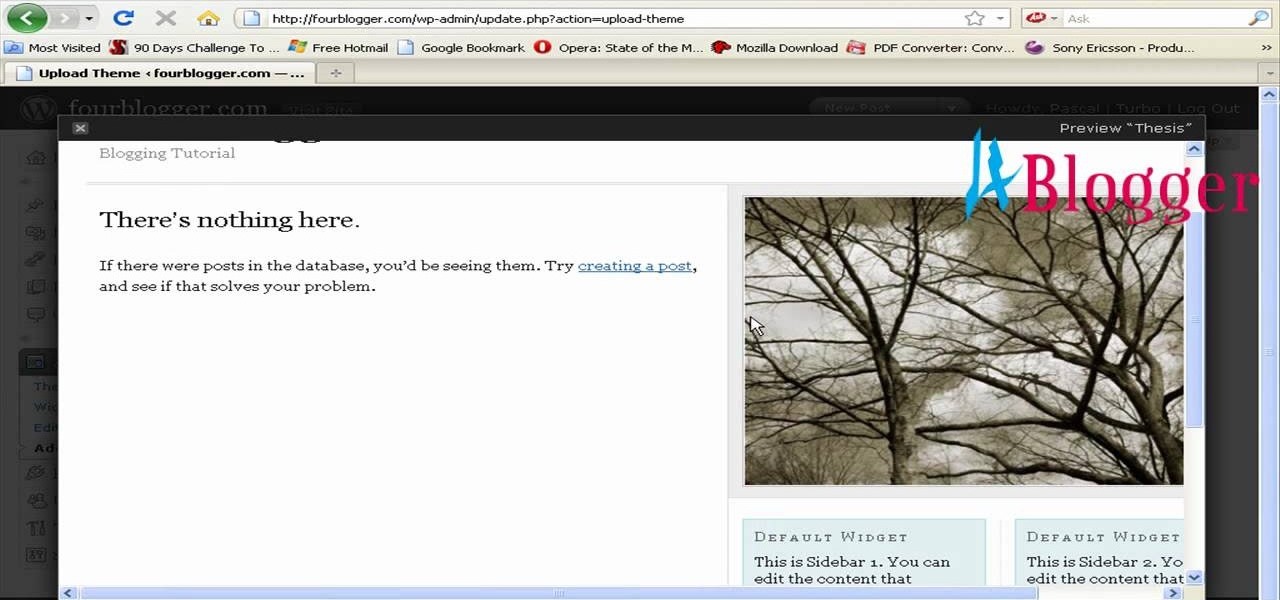
First go to your word press admin and click add new themes in appearance options. Now click on upload and then click browse. Now you have to locate your theme in .zip format and then click install now. If you have successfully uploaded that then you will get a message "theme installed successfully". Now you can click on preview to preview your theme, if you think it's fine then you can click on activate to activate your theme. If you want to change the font color, layout etc. then click on de...
In this video, we learn how to mix automotive or car paint. To begin, you want to look at your car information to find out what kind and color of paint they used on it originally. Once you have this information, you can take it to an automotive shop and they can do a code search for what to mix together to get this specific color. You may have more than one option on how to make the color, depending on what it is and what year your car is. Next, you can have the paint made and tested to see i...
To use borders in Microsoft Word 2007, you begin by clicking on the Page Layout tab. Next, click on Page Borders. This will open a window. Page borders will border the entire page. You are able to custom choose the width of the lines, the style of the border, or the color of the border. The color drop down menu will allow you to choose automatic colors or custom colors. You can also choose to remove one or more of the sides. You can decide which pages to add borders to, as well. There are als...
This video will show you how to create a flow chart in MS Word 2007. First click on the Insert tab. You can see the smart art option, click on it. A "Smart Art Graphic" window will appear.
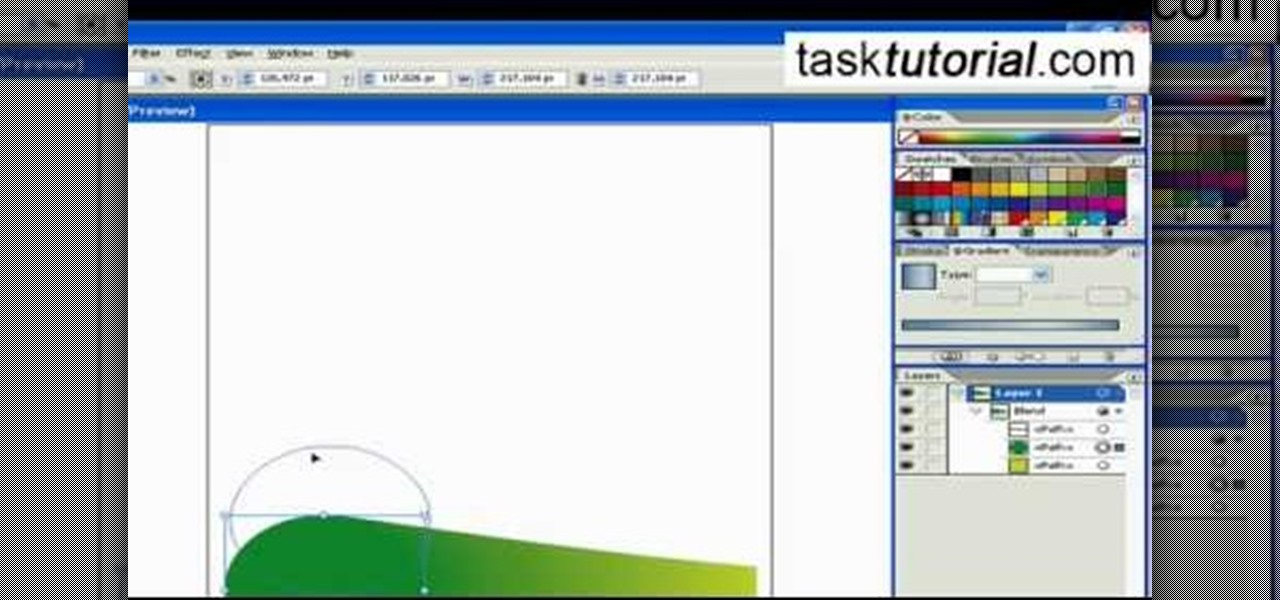
Learn how to blend shapes and colors in Illustrator with this tutorial. Open Illustrator and put the circle with color which you want. Put the square on the color you want. Select the object, go the title bar select the object and then select the blend. You will be shown the result on the screen. Select the square and circle where you place the object by click and drag method. Go to the object and select the blend and choose the blend options. Change in specific steps which you want in the sc...
Swipe actions are an integral multitasking feature of any good email client, and Outlook is no exception. The application allows for two swipe actions at a time, but offers seven total options for those actions. We'll show you how to choose which actions go with which swipes to best tailor the app to your needs.
For those times when you can't get something done by clicking a few buttons with your mouse, the Windows command prompt has always been an indispensable tool. But as much as advanced users have relied on this useful utility, it hasn't seen a significant update since the Windows 95 days.
If you're like me, you spend a lot of time on your computer, which can be damaging to your eyes in the long run. Studies have shown that staring at a computer screen or television up close for extended periods of time can have harmful effects on your vision.
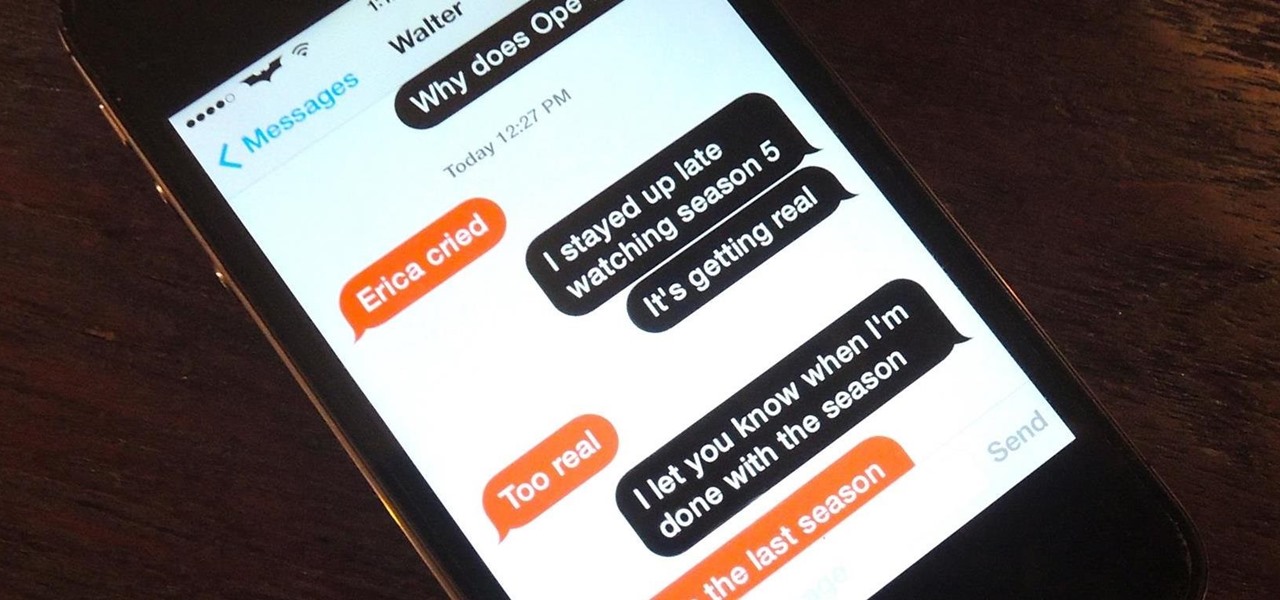
Conversations can be a little stale sometimes, so a little color help add some life. AOL realized this In the early days of AIM, and let you customize your colors just the way you want. Unfortunately, Apple doesn't let you go into your settings to customize your messaging app's colors, but with this awesome and effective tweak you can. All you need is a jailbroken iOS 7 iPhone or iPad, which is easily achieved.
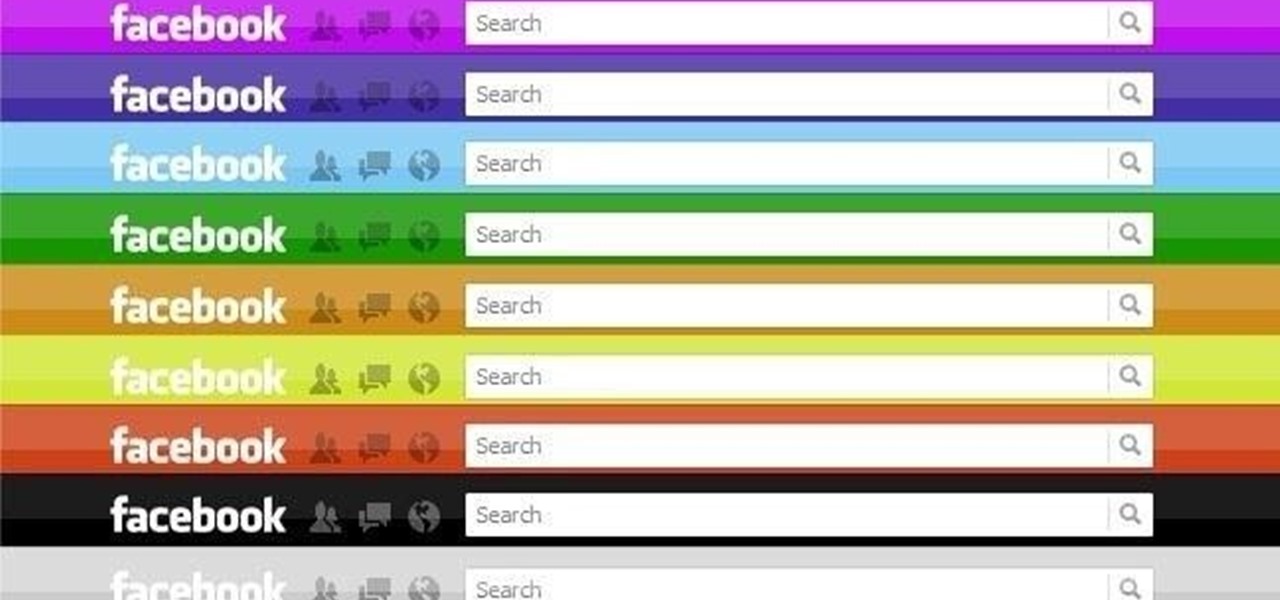
Facebook has always been notoriously difficult to customize. Personally, I think this is an improvement over MySpace's totally open platform (some people should not use code), but users should still have the option to change a few things if they want. While you'll never be able to choose your own background image or add an obnoxious number of aWeSoMe quiz results to your profile, there are a few browser plugins that let you at least change the color scheme.
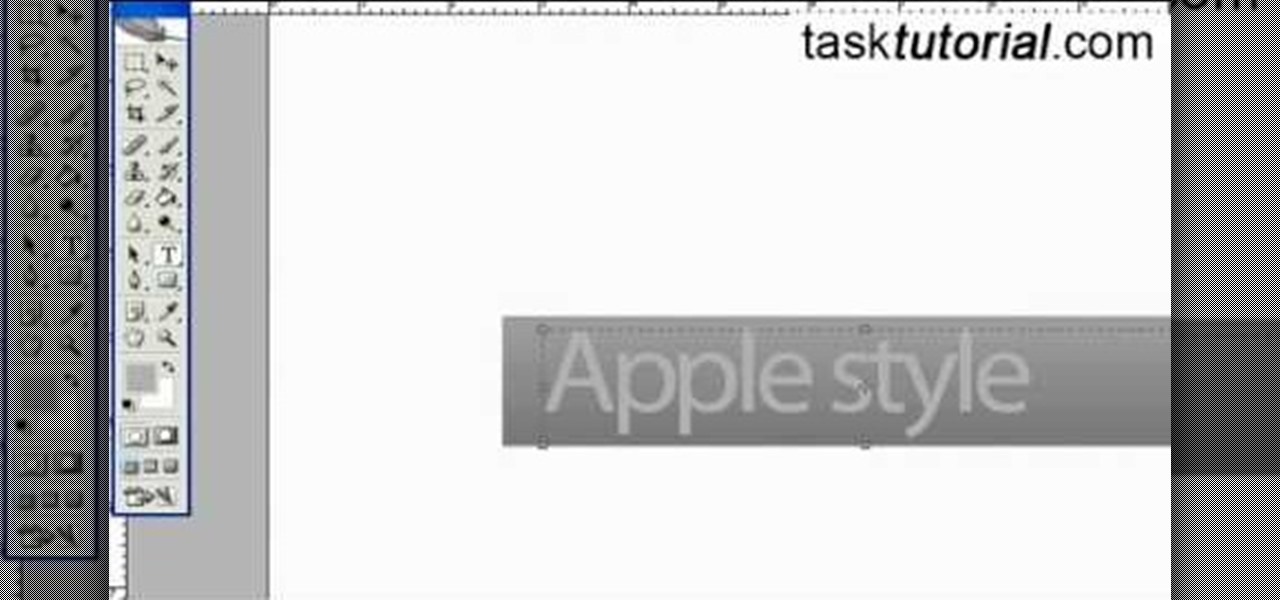
First select the rectangle tool and draw the bar. Now you have to open up the layer style and choose gradient overlay. Now you need to edit the colors as showing in the video and then go to drop shadow option, you have to change the opacity of it to 20%, distance to 2 and click ok. Now type "Apple style" in new layer as showing in the video, set the size of text to 72pt. Now open layer style for the text and choose color overlay and set its color to dark grey, go to drop shadow and choose nor...
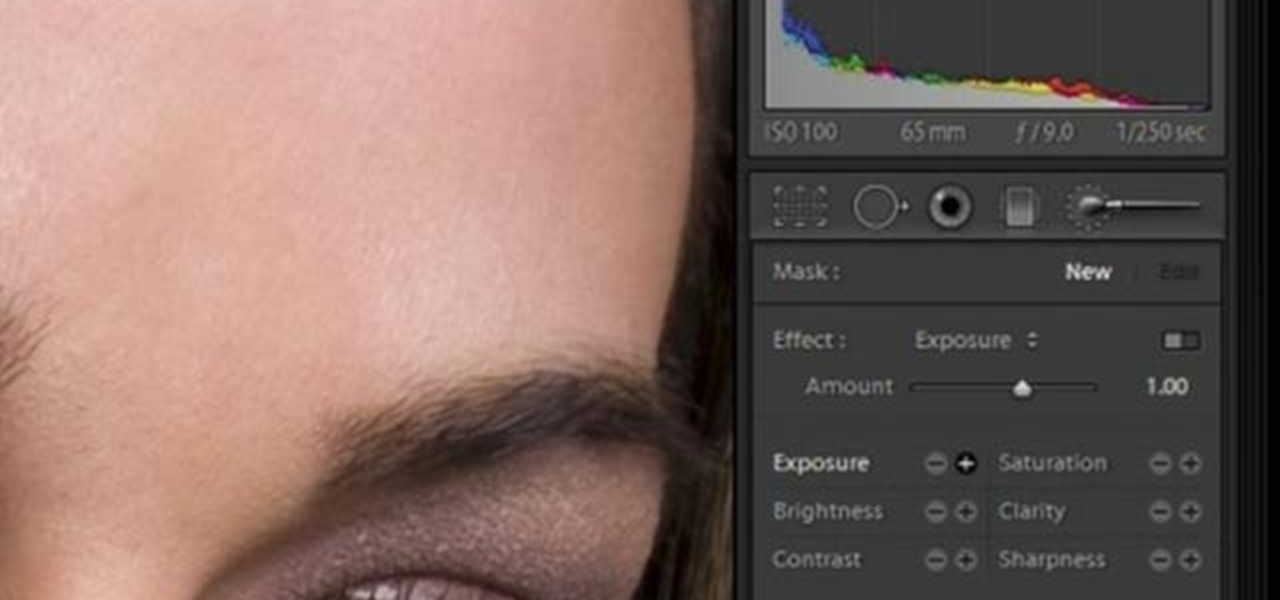
In this software video tutorial you will learn how to soften skin feature in Lightroom 2 in Yanik's Photo School. Select a photo and zoom in to the skin area. Click on the adjustment brush, or ctrl K. Here you can adjust 7 features; exposure, brightness, contrast, saturation, clarity, sharpness and color. But, if you click on the other 'exposure' dropdown menu, you will get these 7 options and additionally a 'soften skin' option. Click on 'soften skin' and it gives you the options to add nega...
This video is a tutorial on creating an Icon Logo in Photoshop Cs4. Go to File and open a new document. In the Layer option, set up a new layer and give it a name. Using the pen tool, create a shape for your logo, it can be anything you like. When you have the shape you want, right click and select Make Selection. Now you can fill the shape with a color. Press ctrl+U for the Hue/Saturation option to get the exact color that you want.
ShowMeAcademy.com shows how to sort data in Excel 2007. Excel has many options for sorting data according to any given column. To sort your data, right click on a cell in the column that you want to sort by. A menu comes up where you will see the “Sort” option. Hold your mouse over “Sort” and another menu comes up showing the different ways to sort. For example, if you select “Sort Smallest to Largest” it will take all the data and sort it from the row that has the lowest figure u...
This is another HelpVids video on technology. In this segment we will learn how to set appearances and themes in the Microsoft Windows XP operating system. The videos starts by right-clicking on a blank area of the desktop, then selecting ‘Properties’. The presenter then clicks on the ‘Appearance’ tab. Clicking on ‘Advance’ will open some very detailed options such as changing the font in a title bar window. You can also change the size of the fonts in this window. The options are truly endle...
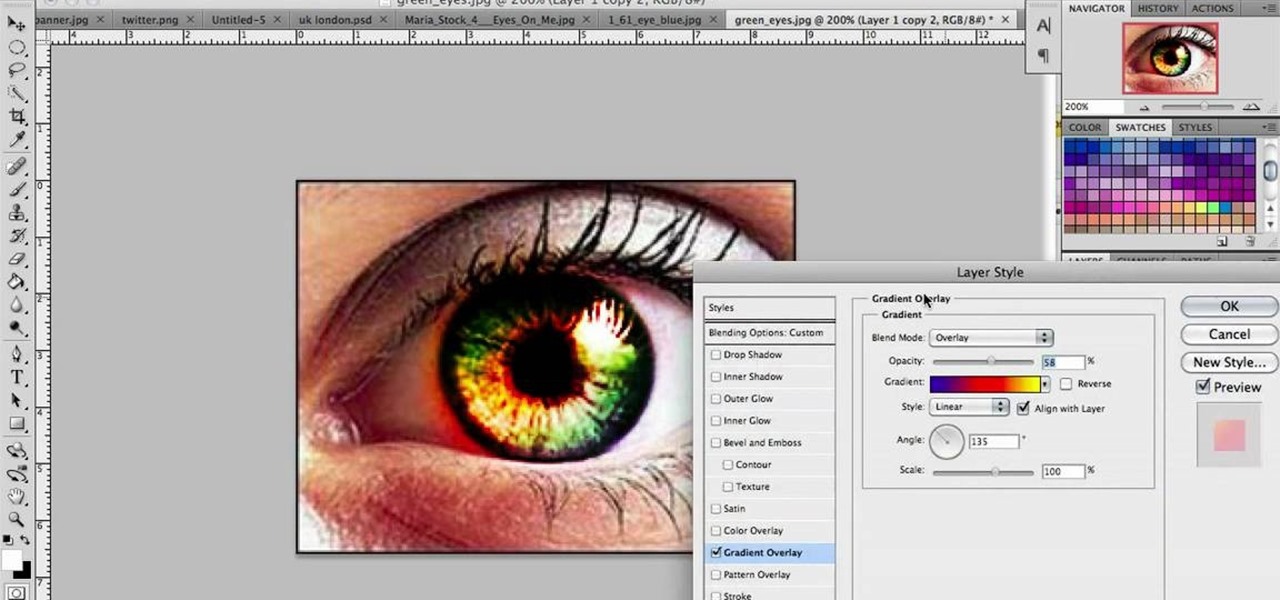
In this video we learn to make green eyes in Photoshop. According to this video, it is very simple to change the color of eyes and make beautiful eyes. First, we zoom in on the eye and with the help of the pencil tool. We select the border of the eye. Then we right click on the selected portion and select "make selection," then using Ctrl + C we copy the selected portion and use Ctrl + v. We can paste the selection on the right hand side. Then, on copied layer we select the gradient. After, o...
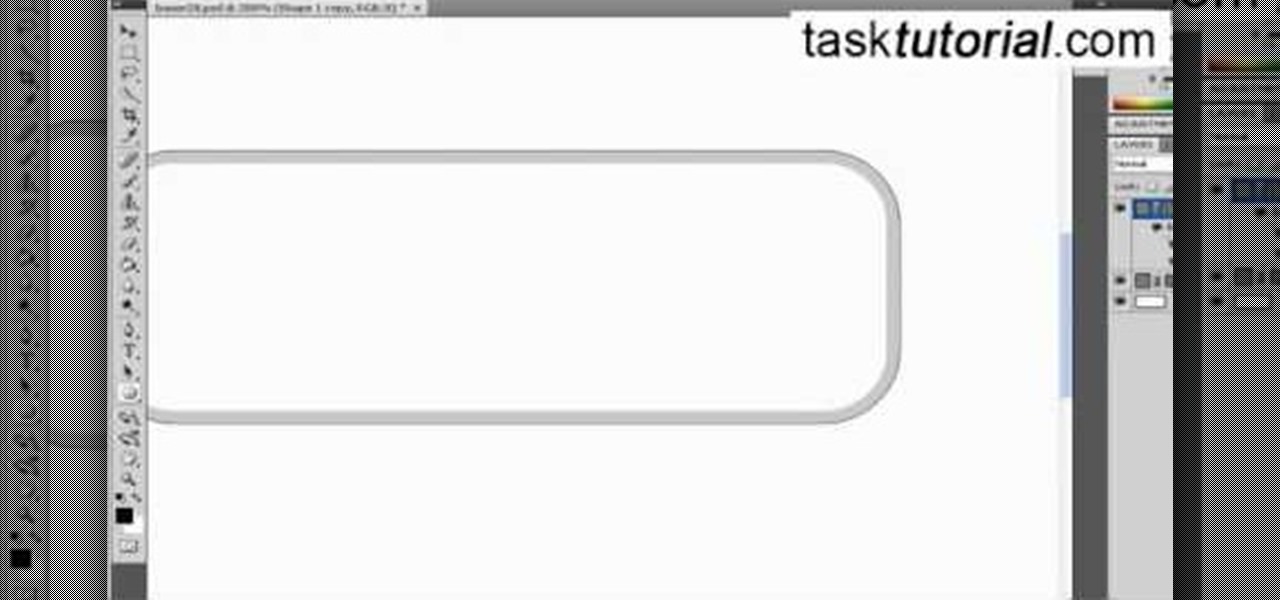
If you ever wondered how to create a buy now button for your website this video shows how to do it using Photoshop. To do this open Photoshop and start with a new file. First draw a rectangle which will be now modified into the buy now button. Set the radius of the rectangle to forty pixels. Fill it with gray color. Duplicate the layer. Open the layer options of the duplicated layer and set the stroke position option to inside. Set its weight to 6 pixels and set its colors to light gray. Now ...
Do you want your house to look dull or colorful? If the latter, then be sure to check out this video to learn how to best utilize the color theory.
You can drag and drop an email onto your Calendar icon in Microsoft Outlook, which then immediately gives you the option of setting up a new calendar entry. You can even color code your various events for easy reference later!
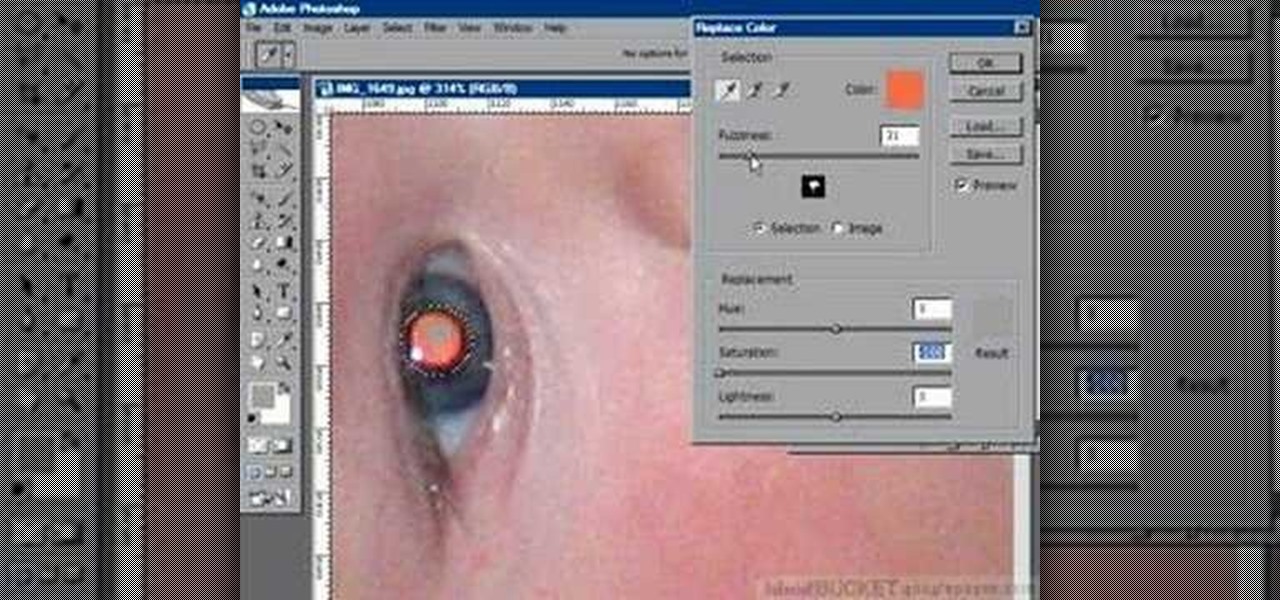
If you have a photograph with an extreme red eye problem, then you will have to take steps above and beyond using the built-in red eye reduction tool in Adobe Photoshop. In extreme cases, red eye will actually contain colors outside of the red spectrum of light. Since the red eye tool only works on this spectrum of light, you will have to manually fix extreme red eye by working on tools that are effective across all different wavelengths of light. The most effective tool at your disposal in t...
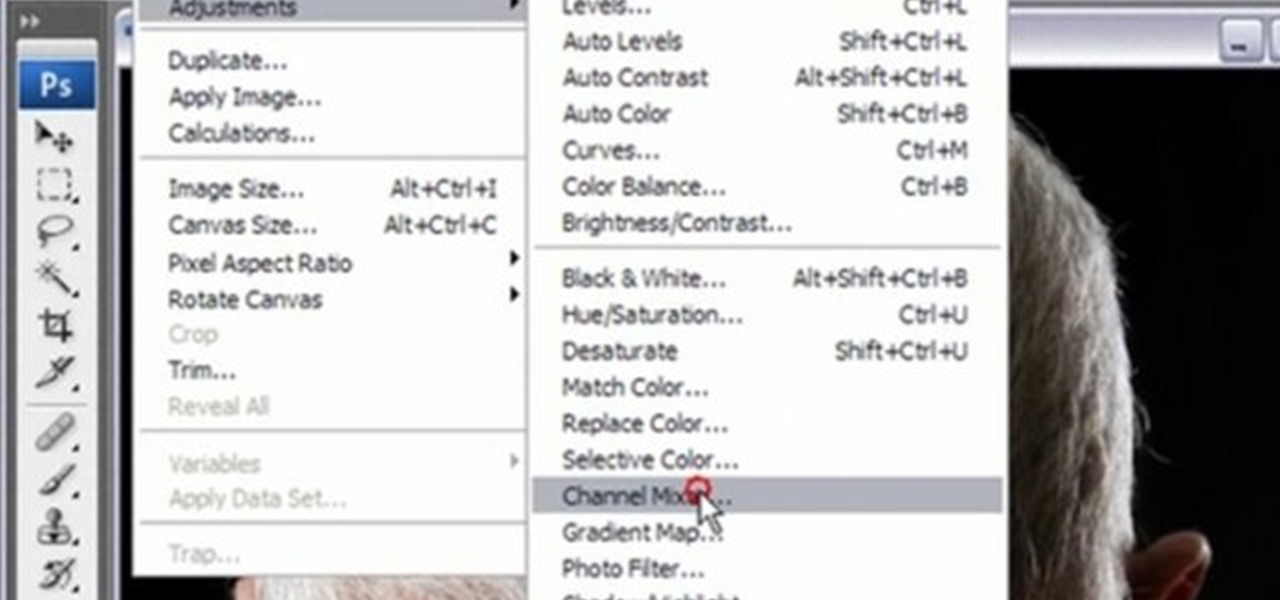
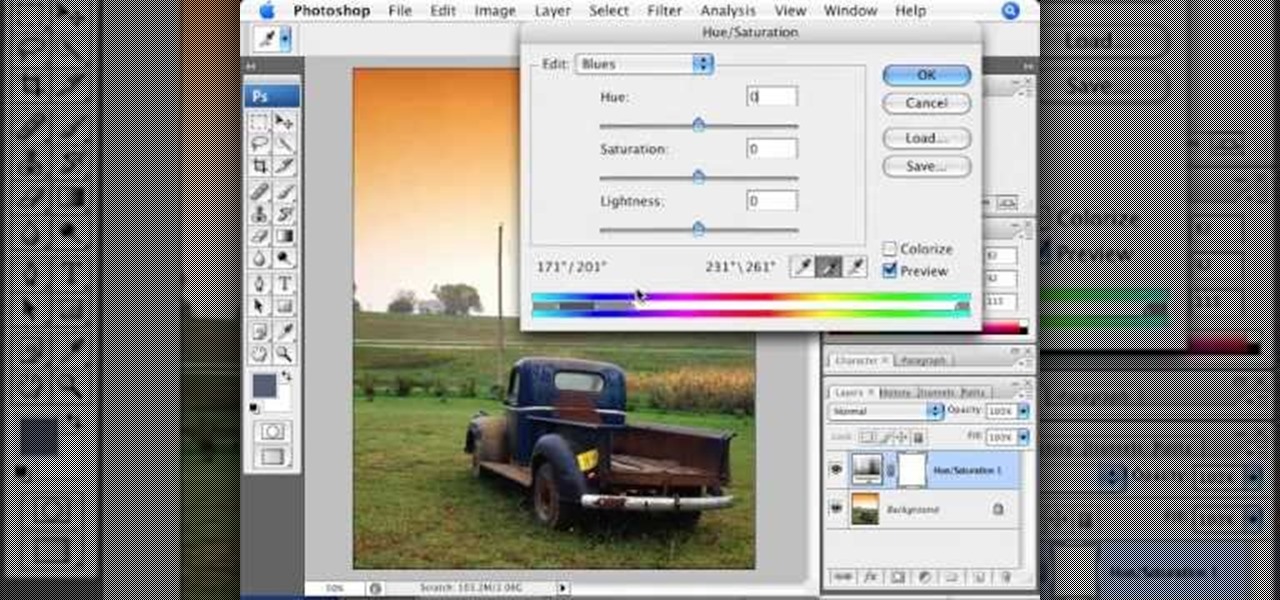
Adjusting the color of specific objects within your images in Photoshop is crucial. Sometimes fine tuning the color of just one component in an image is required. While an image may be adjusted globally at once, this approach lacks flexibility. This tutorial will show you the proper steps from the creation of an adjustment layer to the appropriate and functional calibration of the hue and saturation options. Get the most out of these tools and maximize your productivity in Photoshop.
Many streaming services offer user profiles for different people in your household, some of which also include profile images. In most cases, you can set a custom profile image to better differentiate and personalize your account from the others, and HBO Max lets you do the same, albeit, with limited options.
After months passed since Google first announced the feature, YouTube's dark mode has finally reached the Android masses. Sure, it just changes some colors, but it has been a highly sought-after feature since iPhone users got it months ago.