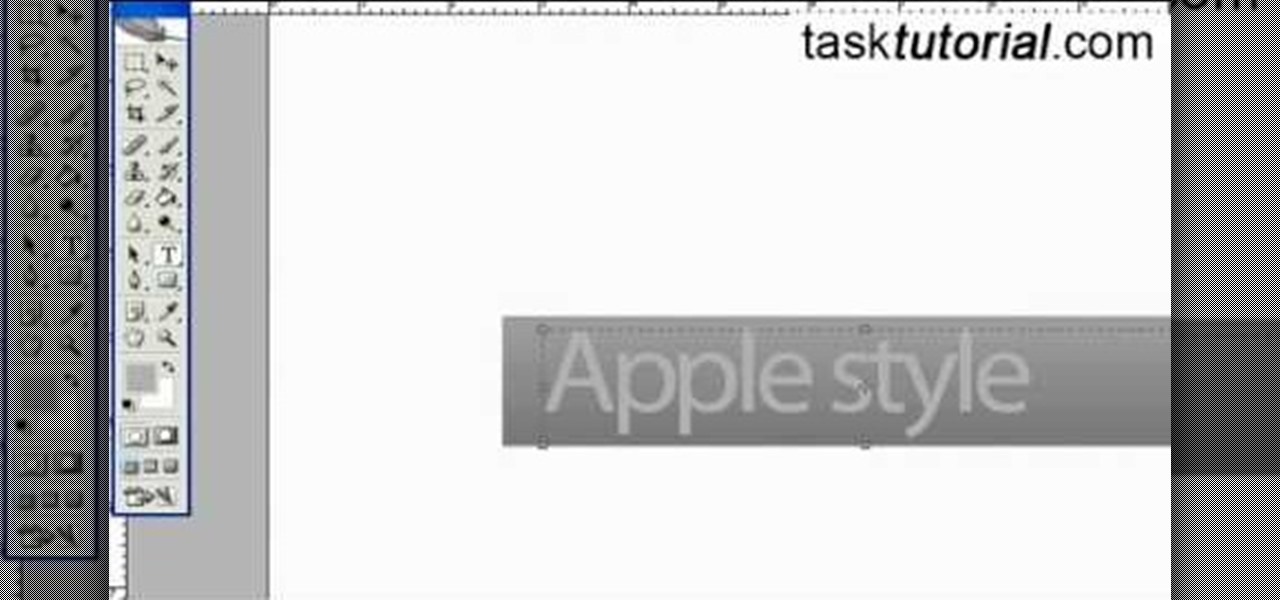
First select the rectangle tool and draw the bar. Now you have to open up the layer style and choose gradient overlay. Now you need to edit the colors as showing in the video and then go to drop shadow option, you have to change the opacity of it to 20%, distance to 2 and click ok. Now type "Apple style" in new layer as showing in the video, set the size of text to 72pt. Now open layer style for the text and choose color overlay and set its color to dark grey, go to drop shadow and choose nor...
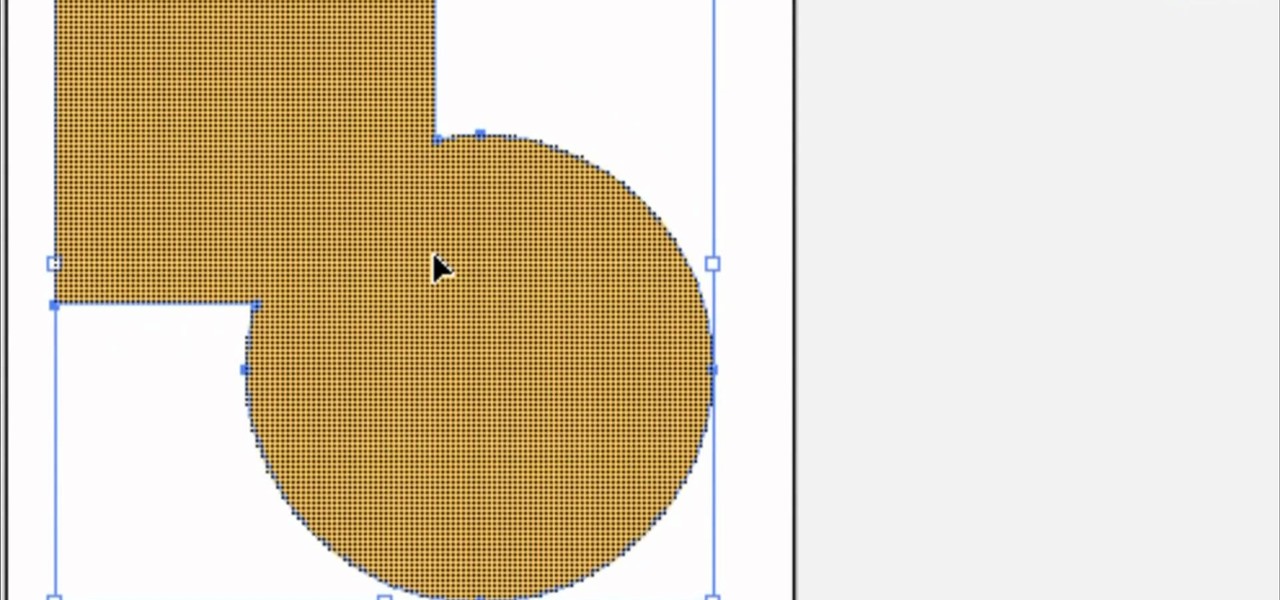
In this clip, you'll learn how to make use of the ever-useful Shape Builder tool when doing design work in Adobe Illustrator CS4 or CS5. Whether you're new to Adobe's popular vector graphics editing software or a seasoned professional just looking to better acquaint yourself with the program and its various features and filters, you're sure to be well served by this video tutorial. For more information, including detailed, step-by-step instructions, watch this free video guide.
In this clip, you'll learn how to make use of the Scale Shear and Reshape tools when doing design work in Adobe Illustrator CS4 or CS5. Whether you're new to Adobe's popular vector graphics editing software or a seasoned professional just looking to better acquaint yourself with the program and its various features and filters, you're sure to be well served by this video tutorial. For more information, including detailed, step-by-step instructions, watch this free video guide.
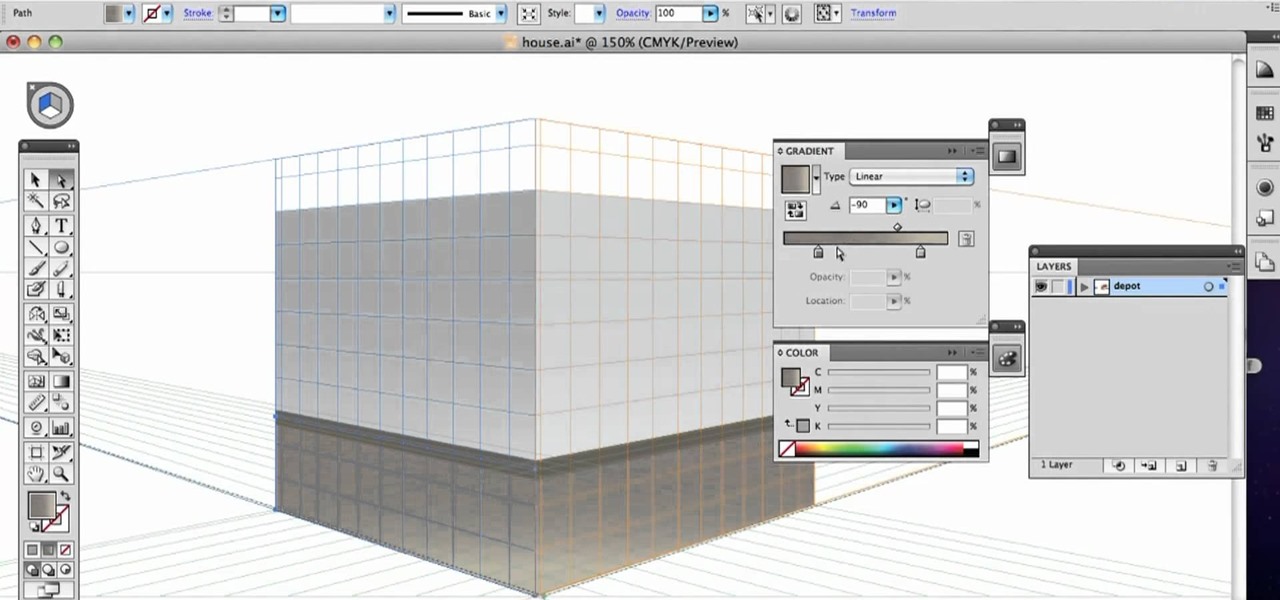
In this clip, you'll learn how to use and work with the Perspective tool when doing design work in Adobe Illustrator CS4 or CS5. Whether you're new to Adobe's popular vector graphics editing software or a seasoned professional just looking to better acquaint yourself with the program and its various features and filters, you're sure to be well served by this video tutorial. For more information, including detailed, step-by-step instructions, watch this free video guide.

In this clip, you'll learn how to make use of the everpopular Pencil tool when doing design work in Adobe Illustrator CS4 or CS5. Whether you're new to Adobe's popular vector graphics editing software or a seasoned professional just looking to better acquaint yourself with the program and its various features and filters, you're sure to be well served by this video tutorial. For more information, including detailed, step-by-step instructions, watch this free video guide.

In this clip, you'll learn how to make use of the standard Eraser tool when doing design work in Adobe Illustrator CS4 or CS5. Whether you're new to Adobe's popular vector graphics editing software or a seasoned professional just looking to better acquaint yourself with the program and its various features and filters, you're sure to be well served by this video tutorial. For more information, including detailed, step-by-step instructions, watch this free video guide.

Looking for instructions on how to use the Selection Tool (V) in Adobe Photoshop CS5? This clip will show you how it's done. Whether you're new to Adobe's popular raster graphics editor or just new to Creative Suite 5, you're sure to be well served by this video tutorial. For more information, and to get started making custom selections in PS CS5 yourself, take a look.
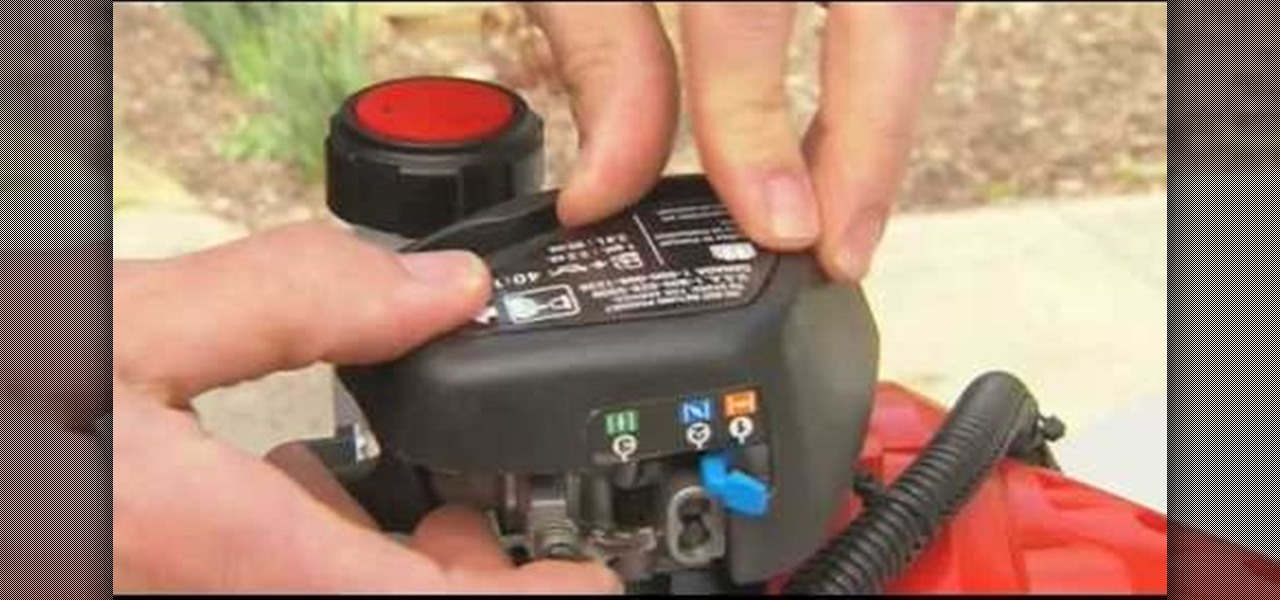
A string trimmer is a handy tool, but you have to maintain it if you want it to work its best. Learn how to do maintenance on both a 2-cycle and 4-cycle gas-powered trimmer. Lowe's home improvement expert, Mike Kraft, gives helpful tips for string trimmer maintenance. Learn how to replace string, change the oil, clean the trimmer filter and more that will help keep your string trimmer working like new.
This video tutorial belongs to the software category which is going to show you how to darken the background in Photoshop using the burn tool. This is an example of how to improve your dodging and burning using the adjustment layers.
In this tutorial, we learn how to remove and install a free wheel. First, take out the skewer from the wheel. Then, take off the nut from the inside of the hub with a cone wrench. After this, go to the other side of the axle and loosen it up. Now place your free wheel tool onto the wheel. Firmly secure the free wheel tool onto the wheel until you're sure it won't come off, with any tools you have available. When you are finished, put your nuts and bolts back onto the axle, then use bicycle lu...
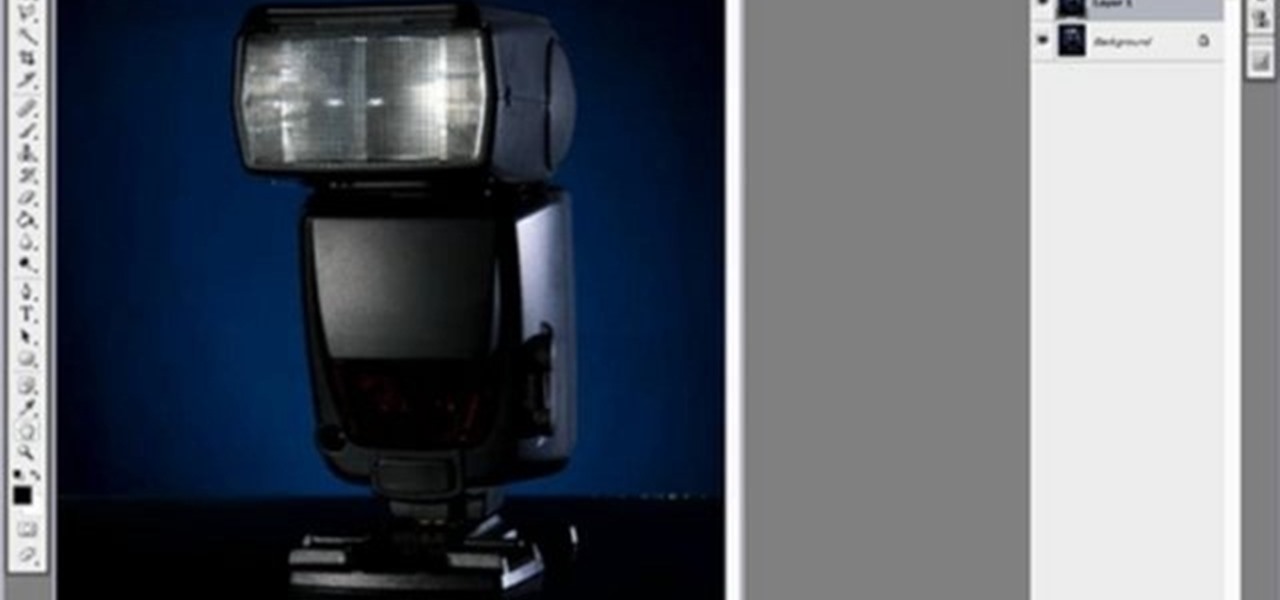
Yanik Chauvin teaches us how to color correct product shots in Photoshop in this tutorial. First, remove some of the black from the image by using your crop tool. After this, if your image is too wide, duplicate your layer and use the marquee tool to edit. Remove any dust spots from your image, to make it look more clear so you have an image that is impeccable. You can do this by creating a new layer and then adding a feather to the image. Continue to go through the editing tools available un...
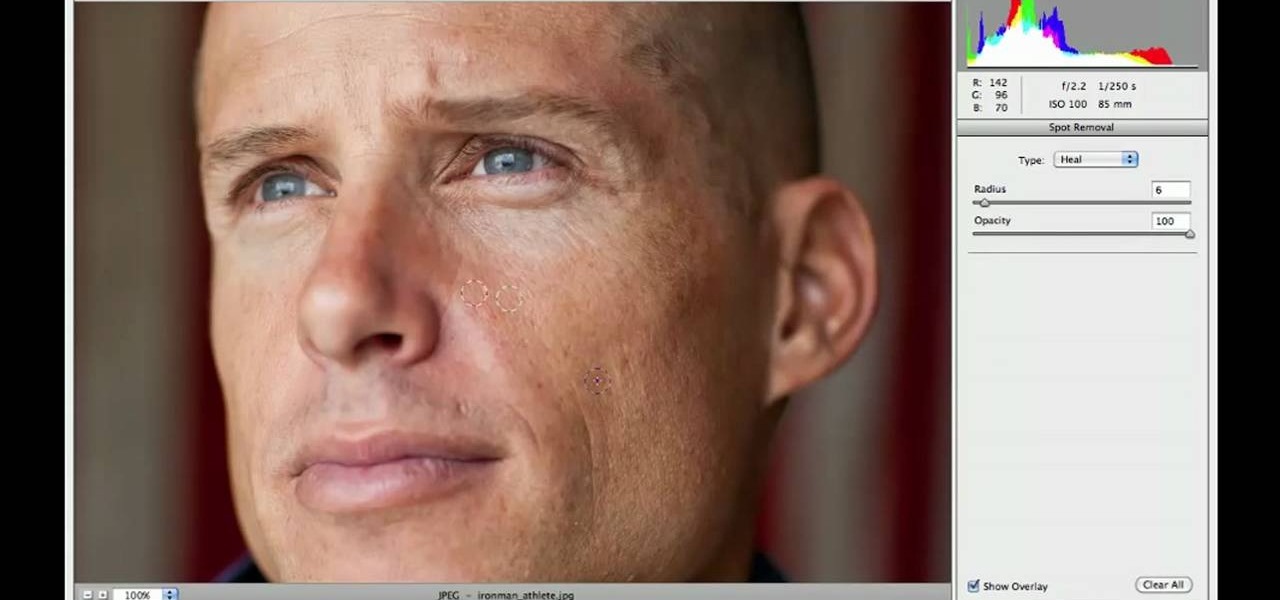
Searching for a primer on how to use the Adobe Photoshop Spot Removal tool? This clip will teach you what you need to know. Whether you're new to Adobe's popular raster graphics editing software or a seasoned professional just looking to better acquaint yourself with the program and its various features and filters, you're sure to be well served by this video tutorial. For more information, including detailed, step-by-step instructions, watch this free video guide.
This video shows you how to work with the pan and crop tool in Sony Vegas Movie Studio and Pro. Whether you're completely new to Sony's popular nonlinear editor (NLE) or are a seasoned digital video professional simply looking to pick up a few new tips and tricks, you're sure to be well served by this free video software tutorial. For more information, including detailed, step-by-step instructions, take a look.
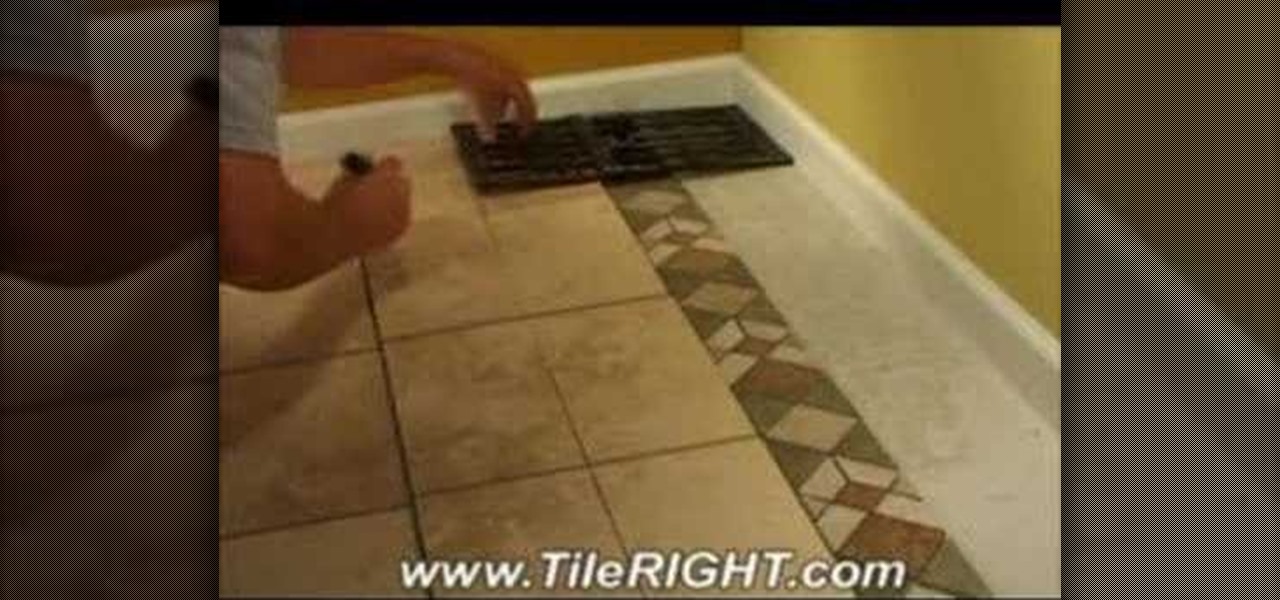
In this Home & Garden video tutorial you will learn how to install a decorative tile border. Decorative borders add a beautiful accent to any room. Start by setting the "measure right pro' tool. Slide the tool open to cover the entire tile and the width of the border. Next move out one eighth for the wall space and lock the tool. Now place the fill tiles on top of the set tiles. Then you slide the "measure right pro' along the wall and mark the tiles. Write the sequence numbers on the tiles a...
In order to insert Word Art, into your document, using Microsoft Word 2007, you will need to begin by opening your document. Next, find "Insert", at the top of your screen. Click on it. This will take you to the Insert Tool Bar. Find Word Art. Choose the style that you would like to use, from any of the styles in the style gallery. When the window opens, you can choose your font style at the top, if you want to change from the default setting. You can also change the font size. Write the word...
If you're looking for some more tips on how to sharpen your lathe chisels, you have come to the right place. In this video tutorial, you'll find out some other helpful tips for making sure your tools are nice and sharp for when you need to carve pieces of wood for any kind of woodworking project. It's easy to follow and will make life easier on you. Enjoy!
It's time to get down and dirty in this next tutorial. If you own a lathe, you may already know that there is a great selection of different styles that can be carved using the right carving tools.
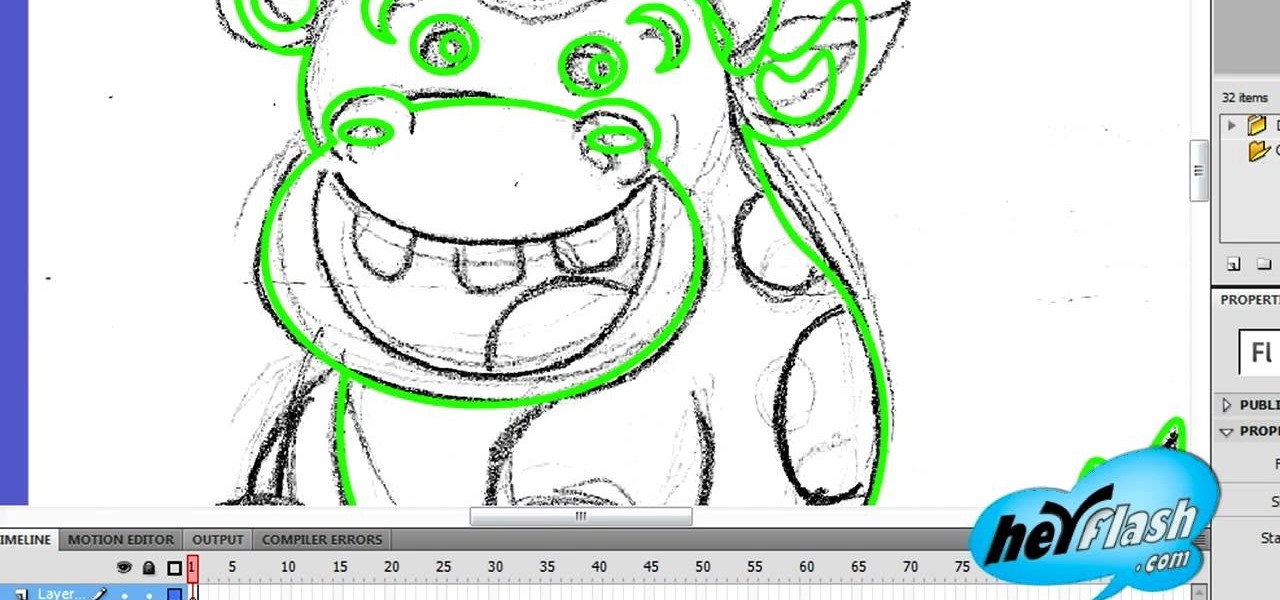
Flash CS4 is not only a powerful tool for creating animations. You can also use it to draw! This video will teach you the basics of drawing in Flash CS4 by showing you how to draw a cartoon cow from a scanned image. He looks good, is easy to draw, and should improve your Flash skills. Now make a movie!
Here's a lesson on how to use the subdivision (sub division) and subsurf (sub surf) tools in most versions of Blender. Whether you're new to the Blender Foundation's popular 3D modeling program or a seasoned graphic artist just interested in better acquainting yourself with the application, you're sure to be well served by this free video tutorial. For more information, including detailed instructions, take a look.
The Dremel 300 series multi tool is basically a shrunken down version of a power drill. With a tinier drill and several different speeds, this tool can be used to create holes in even the toughest of surfaces.
If you have Cinema 4D version 10 or below, then the lack of a spin edge tool has probably given you fits at some point. No more! This video will show you how to spin edges manually using mesh flow in Cinema 4D the old-fashioned way, without using the specialized tools in the newer software.
3D Studio Max is a powerful, but daunting tool for creating beautiful 3D art assets on the computer. This video will teach you how to use one powerful tool in the 3DSMax toolbox, the unwrap tool. Specifically, you will learn how to use it in pelt mapping using an axe as an example.
Check out this tutorial and make Windows 7 you're own by customizing the log in screen. This is fun to do and will, no doubt, make you feel more connected to your PC.
Are you a frequent Youtube poster? Then tracking which blogs and other sites have embedded you videos can be helpful in determining who is interested in your videos and increasing your number of views. When Youtube changed their site recently, they moved the Embedded Player tool that allows you to track that information and used to be under the Insight tab to a new place, causing mass confusion. This video shows you where to locate that tool in the new site layout, allowing you to track where...
Excel's solver tool is a really powerful way to perform nonlinear interpolation. Whether you're new to Microsoft Excel or simply looking to pick up a few new tips and tricks, you're sure to enjoy this free software tutorial. For detailed instructions on how to do nonlinear interpolation within an Excel spreadsheet, watch this helpful guide.
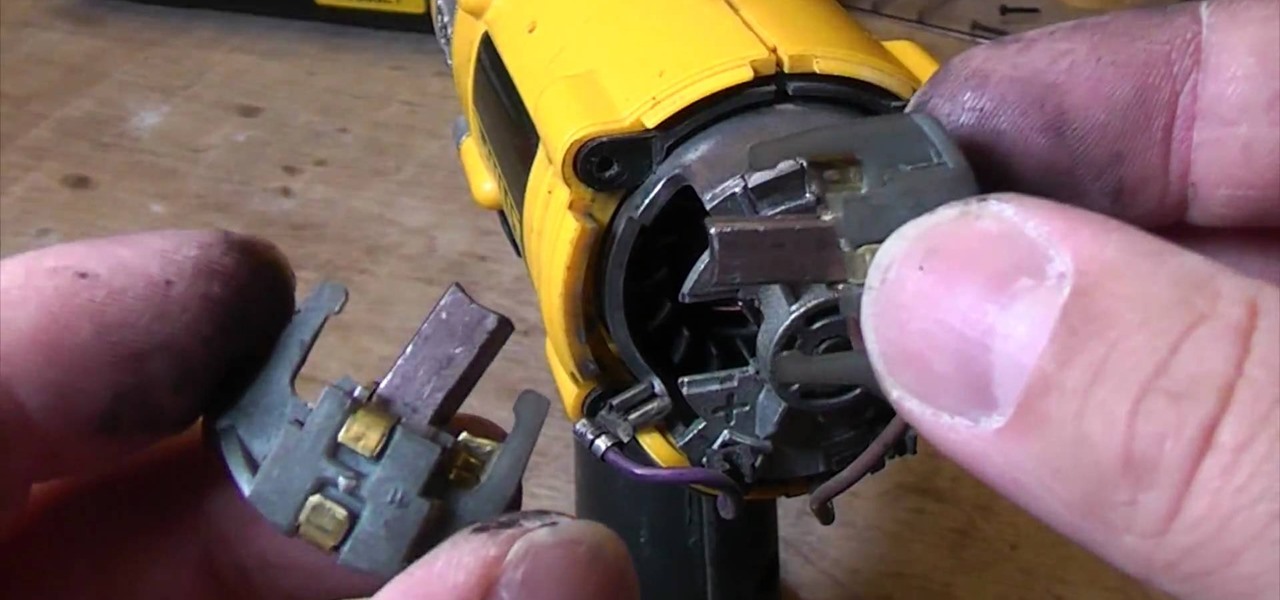
Replacing the brushes on a DeWalt DW988 18v cordless drill takes about 5 minutes to do, which could in turn add a longer life to your drill and keep more money in your pocket. Rather than having to replace a whole drill due to wear and tear, you can replace the parts on them easily, especially if you have a hard time parting with your tools.
A vernier caliper is a great tool to use if you're interested in measuring things externally, internally, and in some cases the depth. It gives you a precise measurement and includes both metric and inch measurements on the upper and lower part of the scale. It's an easy tool to use and can be helpful in certain situations. So sit back and enjoy this tutorial on how to read a vernier caliper. Enjoy!
Take full of Photoshop CS5's new 3D text tool with this free video lesson. Whether you're new to Adobe's Creative Suite or a seasoned graphic design professional after a general overview of Photoshop CS5's most vital new features, you're sure to be well served by this video tutorial from the folks at Brusheezy. In it, you'll learn how to fully utilize Photoshop's three-dimensional text feature to easily create and manipulate 3D titles.
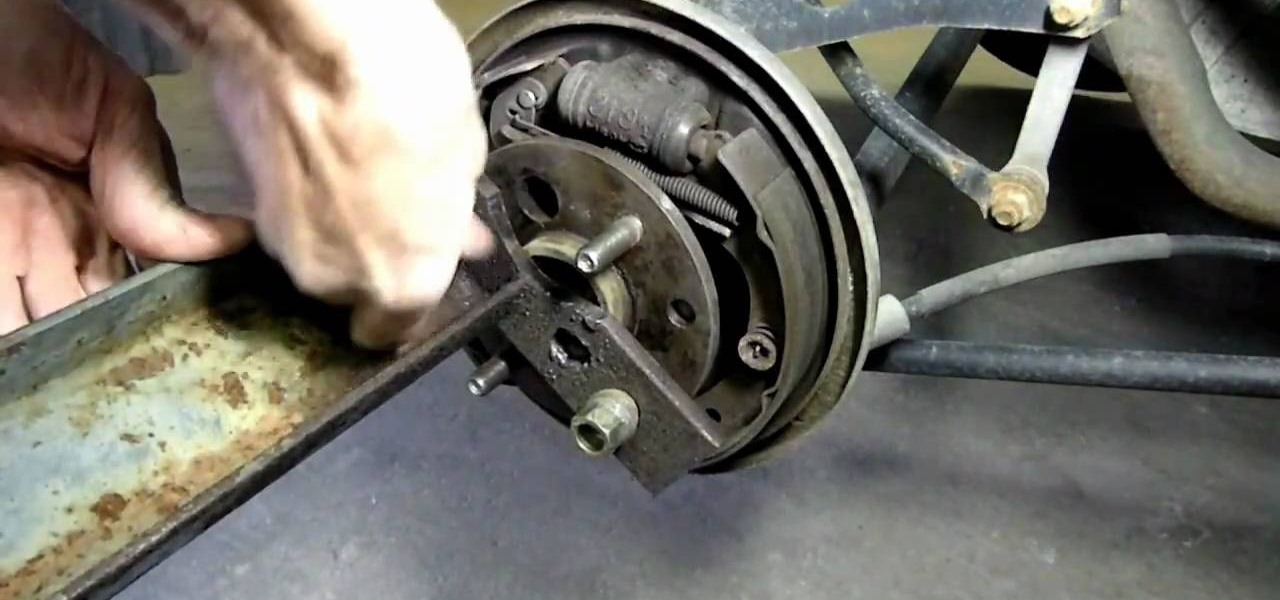
In this video Richpin explains how to remove a bolted hub wheel bearing that has gotten frozen onto the car and cannot be removed by conventional means. He explains how to recognize the problem, presents the homemade tool he uses in the repair, briefly explains how to make the tool, and then uses it in conjunction with a sledgehammer to break the bearing off of the car.
This quick, beginner tutorial will show you how to use the cloning tool in Photoshop version CS4. This is really simple to do and is pretty fun to play around with. You can add more eyes to a person's face, create another dog that looks exactly like your own, and make dozen batches of bread with just using one loaf. So sit back and enjoy!
This Photoshop tutorial is one that is widely used amongst professionals and everyday people. It can be used to add shadows to photos, darken the skin of family, friends, or even models, and even make the sky in a photo look more menacing. This tutorial focuses ont the burn tool and how it can strengthen an image's tone. Enjoy!
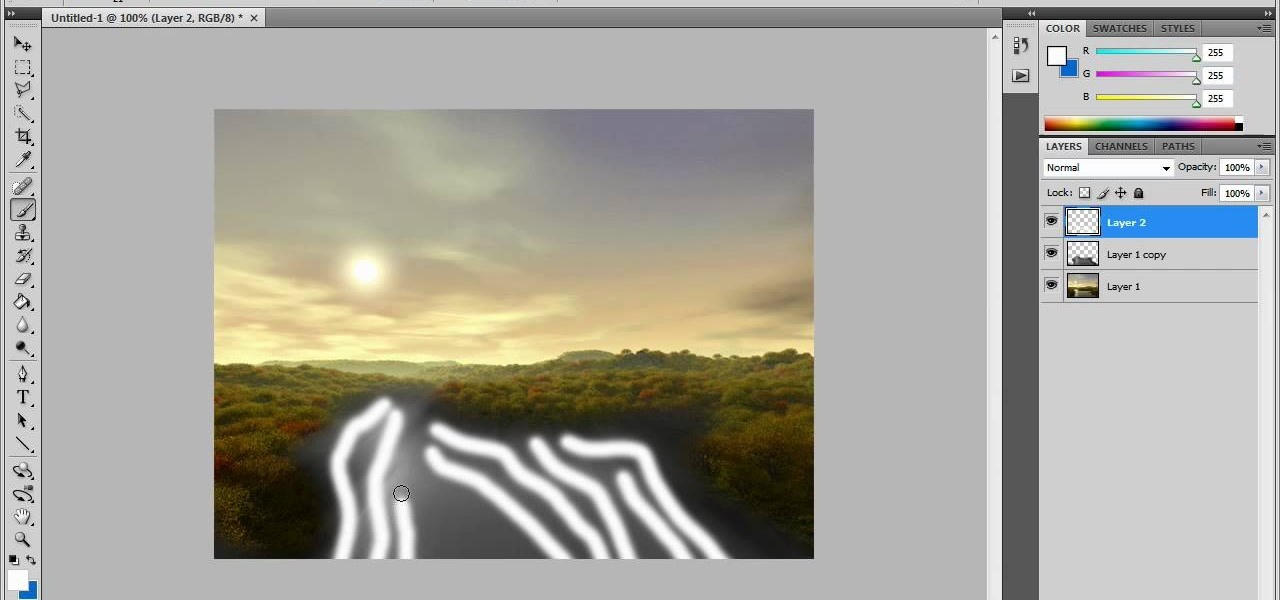
In this video tutorial, viewers learn how to create fog using Adobe Photoshop. Begin by importing the image into the program and duplicate the image. Now go to Filter, select Blur and select Radial Blur. Set the amount to 100, Blur Method to Zoom and Quality to Best. Now select the rectangular marking tool and select the sky. Then open the Hue/Saturation menu and set the Saturation to -100. Use the eraser tool to remove the gray from the edges. Now use the paint tool and paint white streaks o...
In this video tutorial, viewers learn how to change the color of lips in Adobe Photoshop. Begin by importing the image into the program. Select the quick mask tool and then select the brush tool. Now color the part that you want to retouch. This will allow the mask to create a selection. No click on the masking tool to create a selection. Then select the marquee tool. Right-click the selection and click on Select Inverse. Right-click the selection again and select Feather. Make it 1 pixel and...
In this how to video, you will learn how to use Daemon tools lite. First, download the program and install it on to your computer. Click, next and agree to the terms. From here, select what components are going to be used. Click next until you are finished installing. Now you can run the program. It should be on the system tray. The virtual drive should automatically be installed and be called device 0. You will see it if you right click the icon on the system tray. Now you can mount ISO file...
Repairs Universe demonstrates how to remove a Sony Ericsson LCD screen. First, remove the battery from the device. Use a safe pry tool and run it along the side of the phone to unclip the clips and release the top cover. Then, slide the phone forward and release the top cover. Next, remove the keypad from the device. Then, remove the LCD screen by prying the clips oven with the safe pry tool. Use the pry tool to pop the pop clip to fully remove the LCD screen. The new LCD screen is now ready ...
This video shows how to make a real 3d text in Photoshop. First open up Photoshop. Create a new document File > new. Then select width then OK. Fill the background with black. Then go to the text tool and write whatever we want. Choose a font with fat letters. Right click on the text layer and go to "Blending options". Then edit the text in our way. We can create a Gradient Overlay, Contour, Stroke and Outer Glow. We can add any effect we want. Again right click on the text layer and click "R...
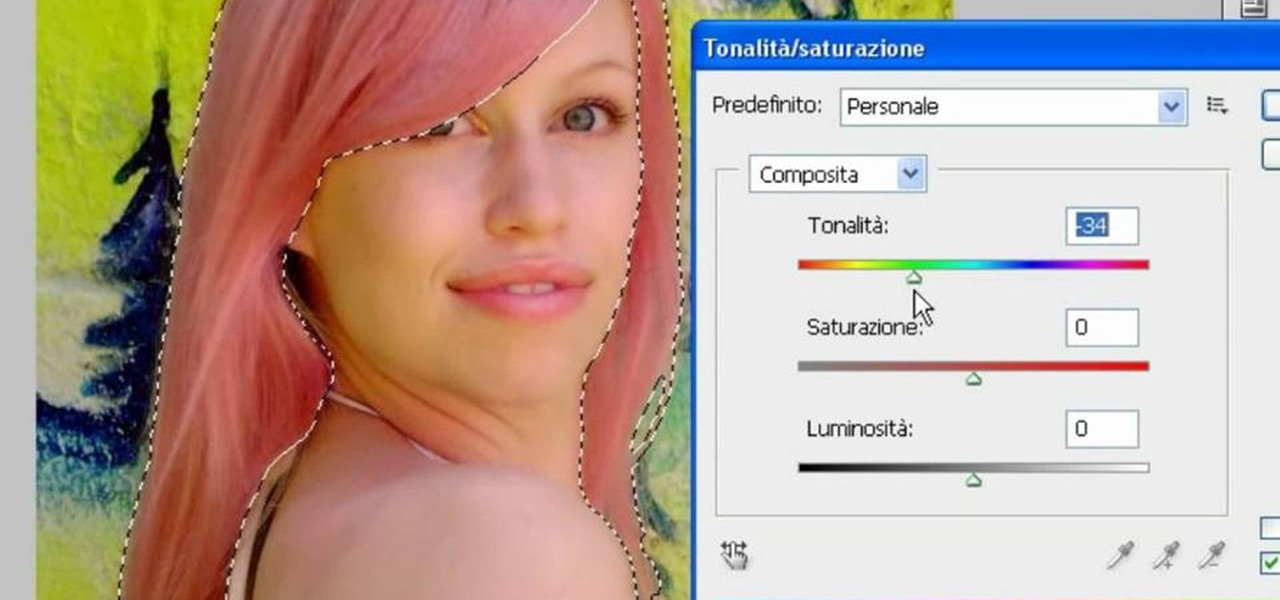
In this video, we learn how to use PhotoShop to change hair color.. First, select the mask tool inside PhotoShop. Now, zoom in on your picture and brush the hair that you want to change the color of. Zooming in and using smaller or bigger brushes will help you be more precise. After this, zoom out and press on the mask tool to create your selection. Then, select the marquee tool and right click and choose "inverse selects". Now, click on "image", "regulations", then "tonality/saturation". Now...
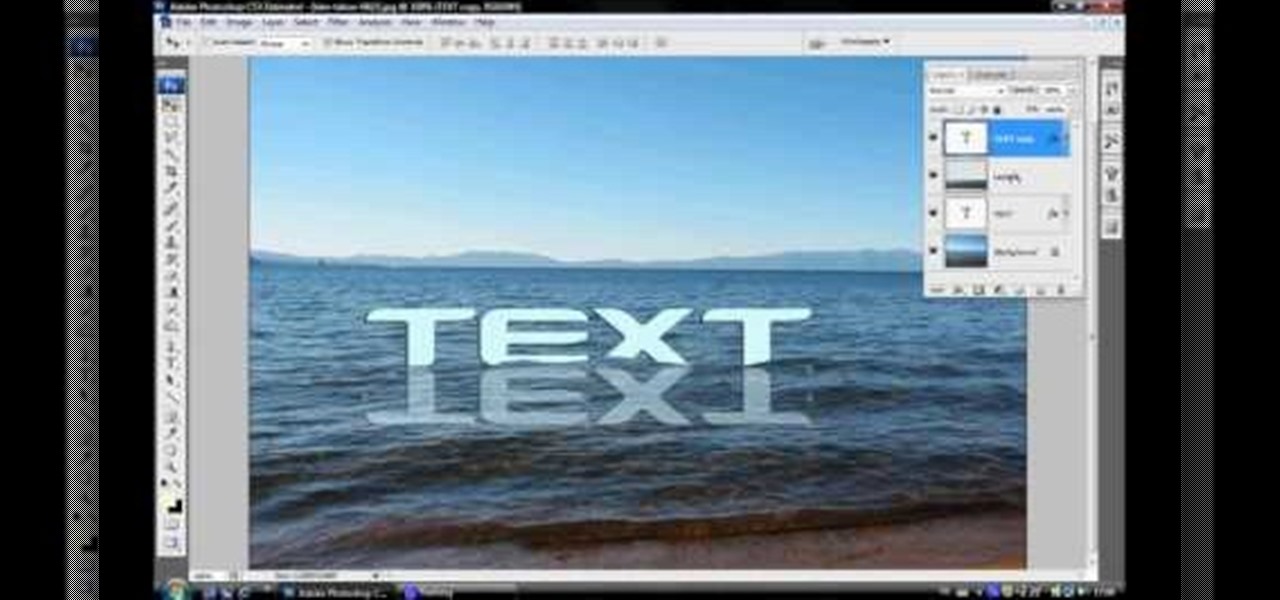
In this video tutorial, viewers learn how to make floating text on water. Begin by importing the water image into the program. Begin by selecting the polygonal lasso tool in the toolbox and select the top of the water. Once you have made the selection, right-click on it and select Layer via Copy. Then select the text tool and type in your text. Create a contour to make the 3D and give the text a light color. Then place Layer 1 over the ext layer and use the selection tool to place it behind t...
In this video tutorial, viewers learn how to use the Tile Visuals tool with the Voice Over application on a Mac OS X computer. This feature will dim the screen so that the user will be able to go over the Voice Over commands. To enable Voice Over, press the Command and F5 key. To tile the visuals, press the Command, Option and F10 key. Now when users navigate through the screen, only the contents over the Voice Over cursor can be visible. To return to the normal view, press the Control, Optio...
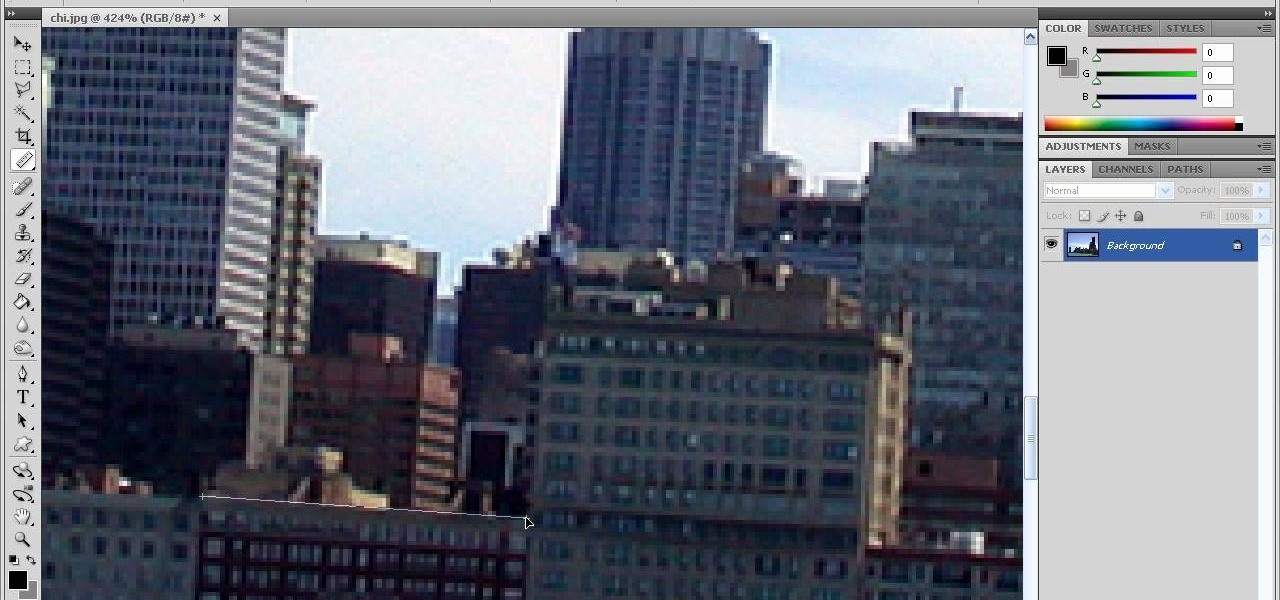
In this how-to video, you will learn how to straighten crooked photos in Photoshop. First, open the photo you want to straighten in Photoshop. Next, use the ruler tool under the eye dropper tool. Select it and zoom in to an area. Find a crooked line to straighten, such as a building rooftop or ground line of some sort. Click, hold, and drag. Next, zoom out. Go to image, image rotation, and arbitrary. Click okay and your image will be adjusted. Go to the crop tool and crop out the spaces. Hit ...