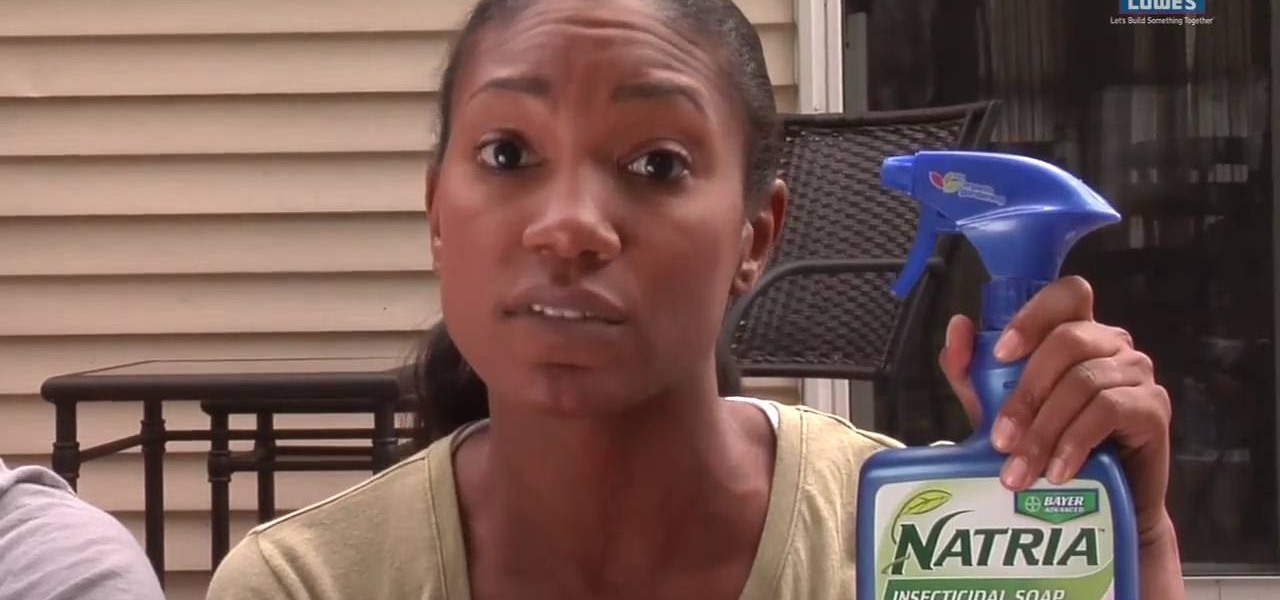
You've worked hard to get your garden in shape— the tilling, the planting, the watering, so when pests and weeds threaten your garden, you'll want to take action. But if you don't want to use chemicals, there are effective organic alternatives. Lowe's has the advice you need for keeping those unwanted enemies out.
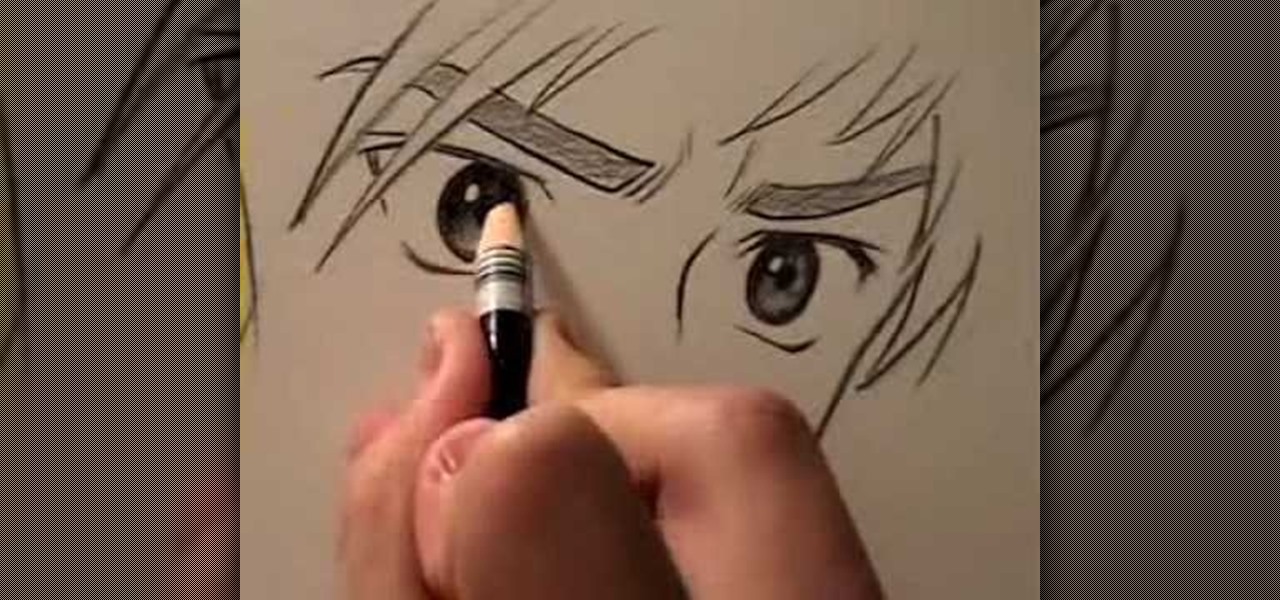
In this video, Mark Crilley presents viewers with four ways to draw anime eyes. The first set of eyes has an intense look to the them, with the face tilted slightly while the eyes are staring at the viewer. Eyebrows are added in a sloping manner in order to create a more dramatic effect and drawing attention to the eyes. The next set of eyes are more hexagonal in shape and look downwards while wide open, creating more of a surprised expression. Thick eyebrows framing the eyes also bring atten...
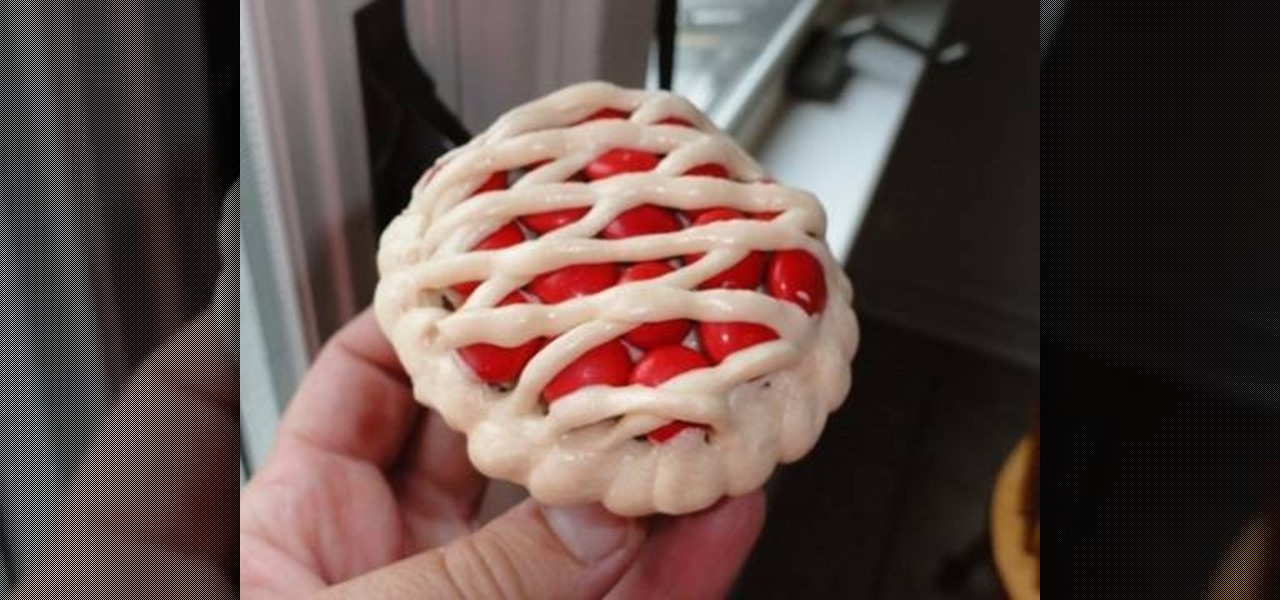
We never thought this would happen. A cherry pie AND cupcake in one? We have officially died and gone to foodie heaven. Make sure you take a closer inspection of these cherry pie/cupcake hybrids, however: These are actually cupcakes decorated to resemble cherry pies using frosting.
We don't know about you, but anything that says "Greek goddess" in the label gets us instantly interested. In this tutorial, you'll learn how to look like a Greek goddess by making a knitted headband composed of three strands that tie at the back.
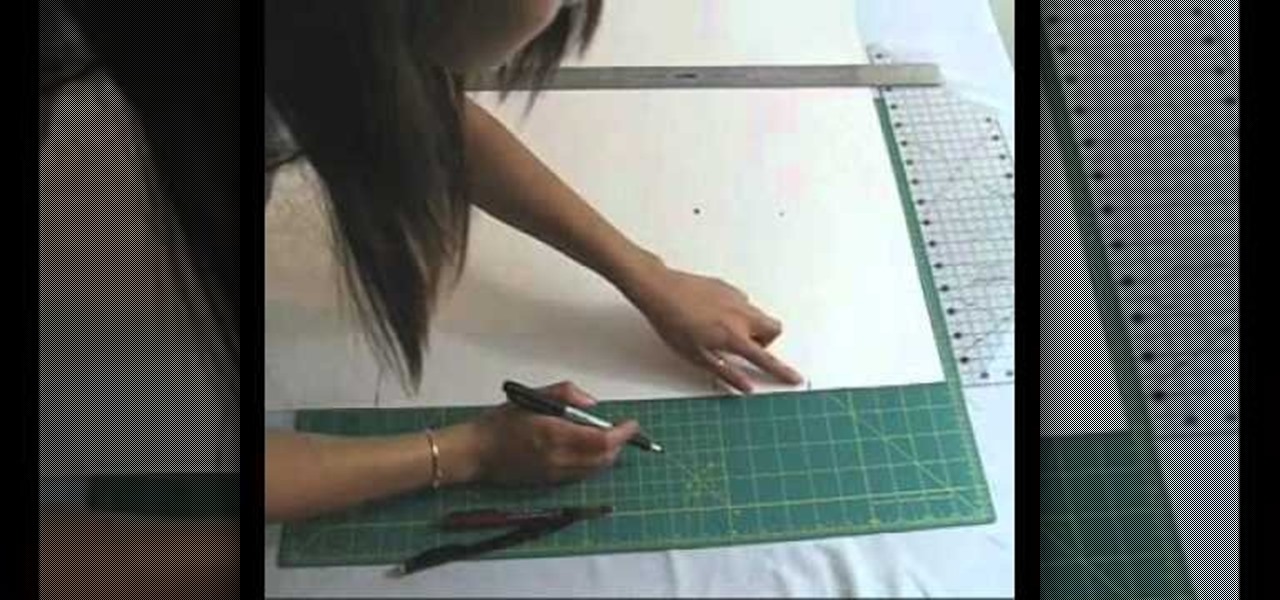
What's the most efficient way to become a fashion designer? By challenging yourself to creating your own clothes from the ground up. And while you probably already know this means cuting, sewing, and embroidering your fabrics, it also means making your own patterns.
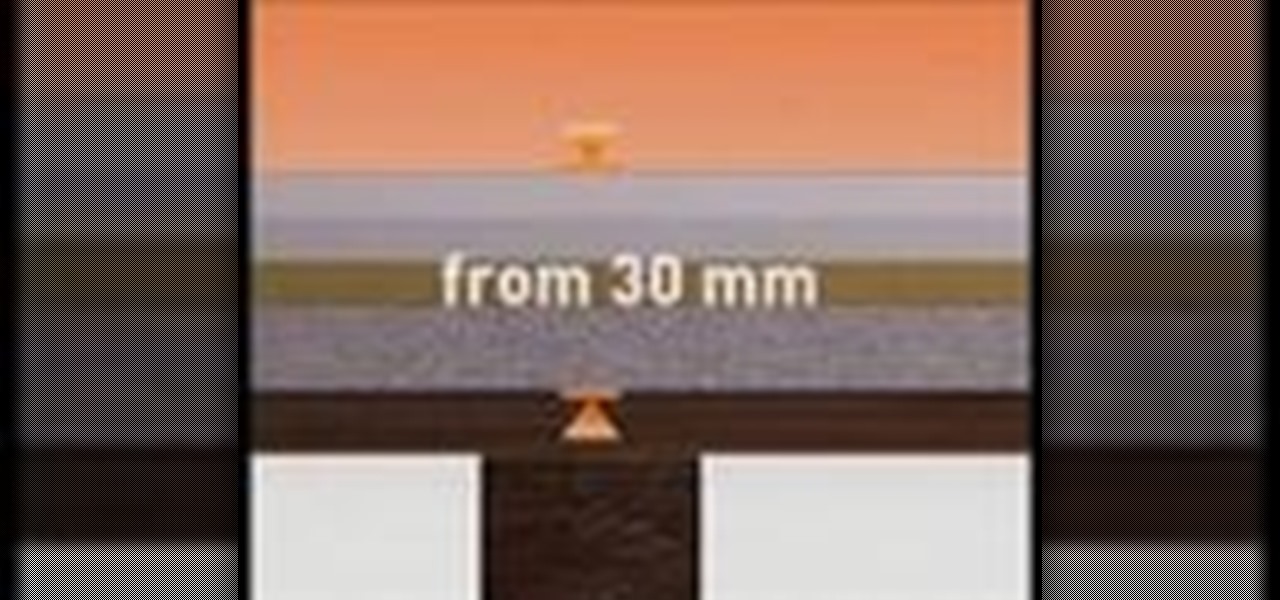
In this video, we learn how to install dry acoustic flooring with Fermacell. To start, you will level the floor and apply compound if you need. Next, you will lay the Fermacell around the room on top of the leveling compound. Push the flooring tightly together so there are no spaces in between them. You may need to cut the flooring to make sure it's the correct shape for the wall. After this, apply flooring adhesive to the seams to make sure they are secure as they are laid down. After this, ...

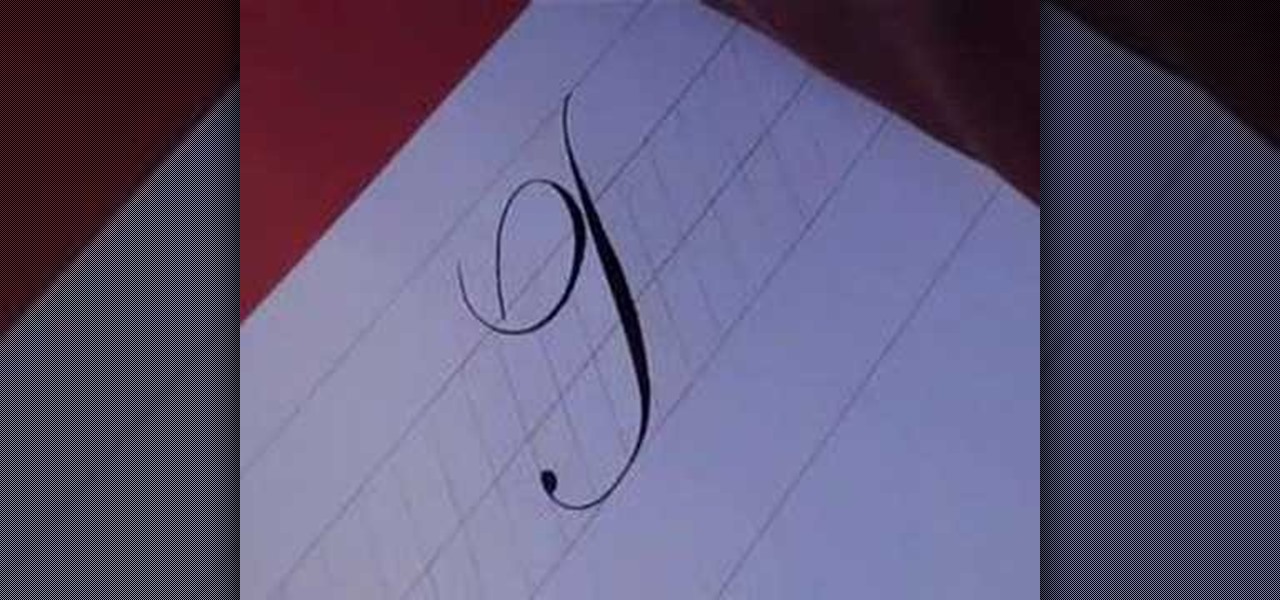
In this video, we learn how to write numbers in calligraphy copperplate. To write the number five, you will simply make the shape of the number, but add in a thick edge to the bump and curved edges to the end. To write the six, use a thick line on the side of the number and a thin line for the circle in the middle. To make the seven, the top should be curved and thick, and the lower line should be very thick with a straight edge. To make the eight, draw the number so that the left edge is thi...
In this video, we learn how to create an engraved text effect in Photoshop. First, start a new document in Photoshop and make it as large as you want it. Now, select the foreground color as a dark gray. Next, grab the rectangle tool and draw a shaped layer, making the color whatever you want it to be. Now, go to "layer", then "layer style", and "gradient overlay". Go to the gradient bar and mix light and dark grays or black to make a metal or chrome look as you prefer. After this, write in yo...
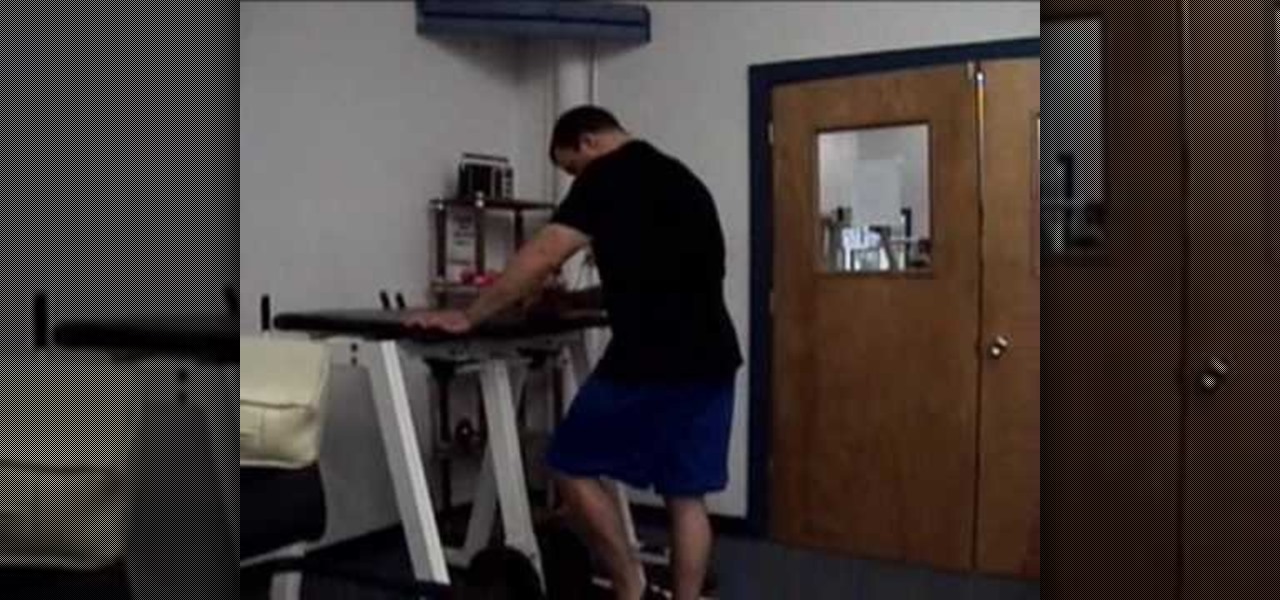
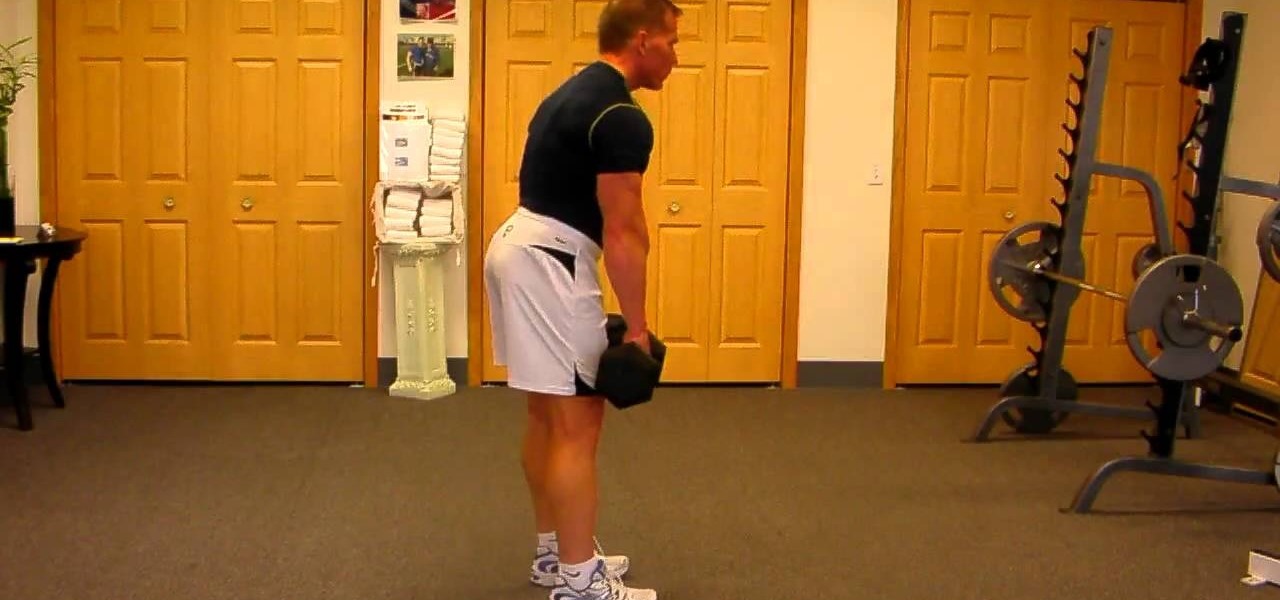
In this video, we learn how to use the reverse hyper to protect and rehab the back. First, you need to lay down on the machine correctly. Make sure your core is out and your arms are holder the levers. Now, lift your legs up on the straps and slowly lower them down. Continue to do this as you work out, this will result in a great work out in just a few reps. As you continue to do this you will be able to do heavier weights. This will help protect your back from injury and get it back into shape!
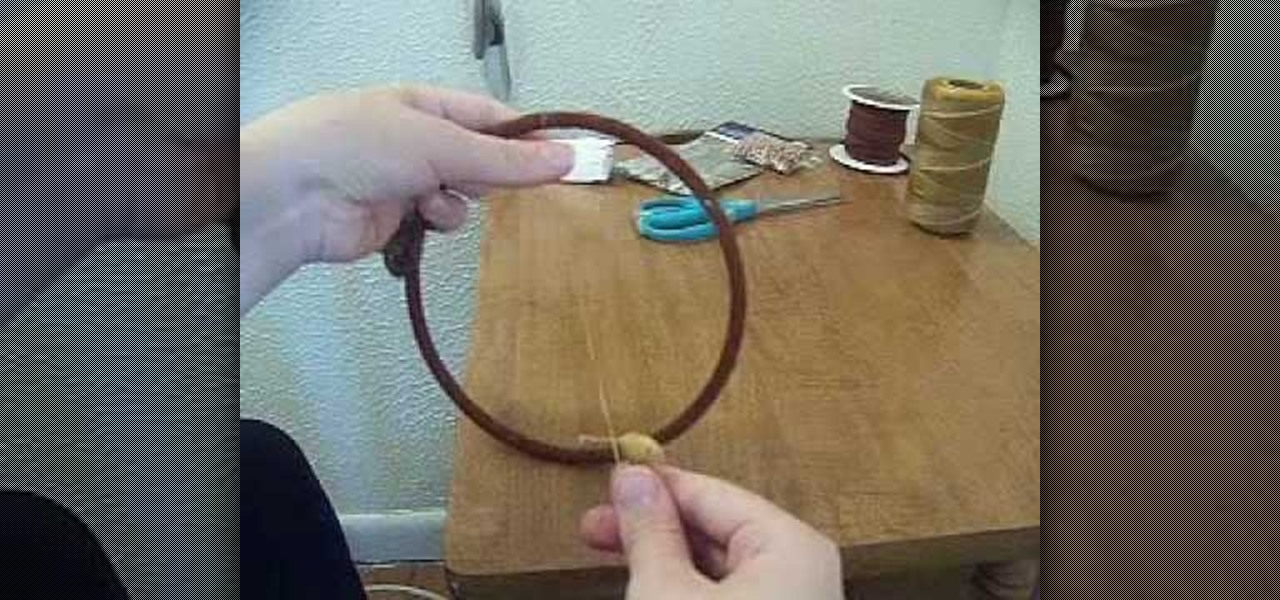
In this tutorial, we learn how to make a dream catcher. You will need: 1 metal ring, leather, sinew, decorations, scissors, and a clothes pin. First, wrap the leather tightly around the ring. Clip the clothes pin on the top so you don't have to hold it as you go around the circle. After this, remove the clothes pin and cut the leather off. Then, tie it at the bottom with a double knot. Next, measure the sinew to 3 yards, then pull it apart. You will be left with very thin strings. use a folde...
In this video, we learn how to write the letter H in calligraphy copperplate. To make the upper-case letter, start off drawing into a thick line, with a curve at the end of the letter. Make the curve end touching the line, then draw it out to the right side of the letter, bringing it back down to a line to make the "h" shape. Next, draw a line across the two lines with a curve at both ends. To make the lower-case letter, start by drawing a thin line to make a loop at the top, then bring it do...
Don't be a bore and think that all necklaces have to end with a single clasp! While single clasp closures are common, they can also be a pain sometimes to open and close (if you've ever had a tight necklace that moved during the day to the back of your head and you didn't know where the clasp went then you know what we're talking about).
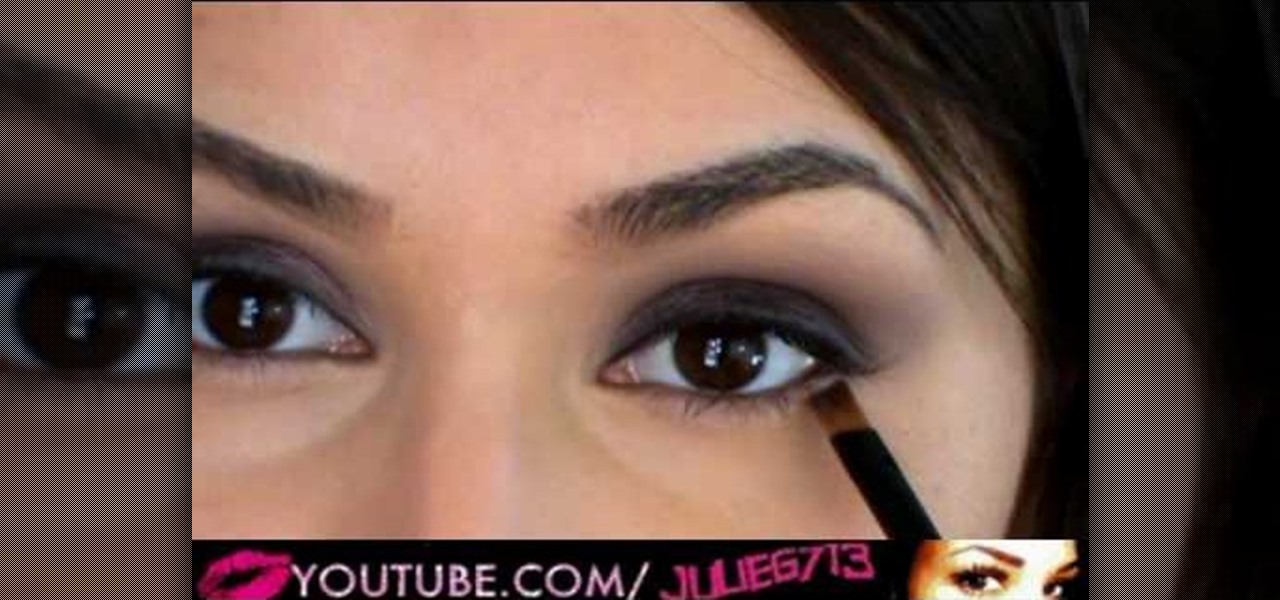
There exists a small set of makeup skills that is essential for your fashionable survival in the lipstick jungle: How to do the perfect red lip, how to shape and drawn in your brows, and how to do the perfect smokey eye. With these skills you'll be able to create a makeup look to suit any occasion, and we guarantee it.
When we first saw Lady Gaga donning this, well, gaga headpiece at the Grammy Awards, we were wondering what the Fortress of Solitude was doing on her head. The headpiece, composed of what look like stalactites crystalized with thousands of swavorski crystals, looked like an Abstract Expressionist sculpture, and made little sense.
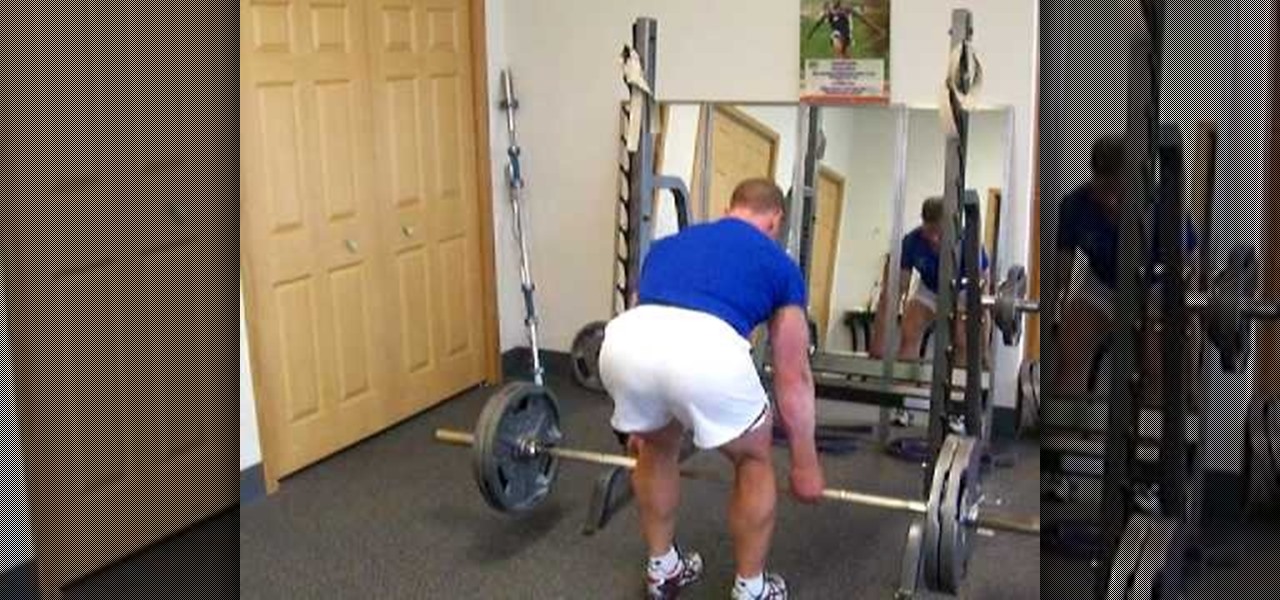
Do you want sculpted, V-shaped lats that make your backside look like God's gift to women? Then check out this fitness tutorial to learn how to do the dead lift, an exercise move that involves picking up a heavy weight from the floor and bringing it to your hip level.
During the summer it's almost impossible to not wear skimpy clothing to the beach, whether you're a guy or a girl. So whether you're planning to look in a bikini or swim trunks, it's important to appear toned and at your best.
Most Rubik's cubes are not well-made or well-taken care of. They creak and turn slowly, acting like the cheap pieces of plastic that they for the most part are. There are ways though, even for cheap cubes, to make them work much more quickly and smoothly than they do out of the box. This video will show you a great method for breaking in your Rubik's Cube. It bears some risk of breaking your cube, but if you're careful your cube should be in better shape than ever when you're done, allowing y...
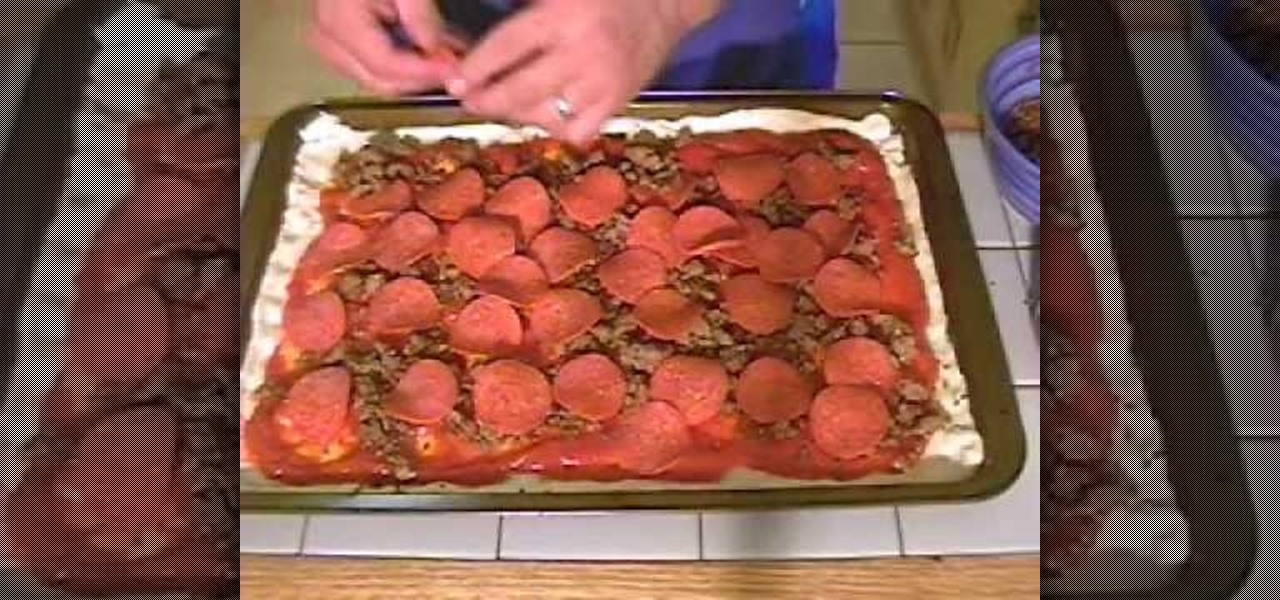
In this video, we learn how to cook pizza at home. First, butter or grease the bottom of a baking pan. Next, purchase pre-made dough from the grocery store and lay it out onto the pan, then spread it. Roll out the dough until it's the shape of the pan, then spoon on your sauce onto the dough up until you reach the crust. After you have spread as much dough as you would like, add on your favorite toppings to the pizza. You can place on sausage first if you like meat, before you place on cheese...
In this video, we learn how to face paint a snake design. First, dip a paintbrush into dark green paint and place it on the forehead. Bring the brush down in a snake shape until you reach the cheek. Make a lump at the bottom of the snake followed by a small line for the tail. After this, dip a different brush into white and make a small dot on the face to make eyes, then make two teeth fangs. Also fill in the bottom to make the rattle on the bottom of the tail. Next, use red to make a snake t...
In this video, we learn how to write the letter T in calligraphy copperplate. Start by drawing a thick line that follows out a loop that curves to the left hand side. After this, create a loop at the top of the line, on the left hand side. Draw this out and cross the line over the top to make the T shape, ending with a slight curve at the end. To make the lower cased letter, draw a thin line, then draw a thick line over it, then cross a thin line across the top middle of the letter. Now you w...
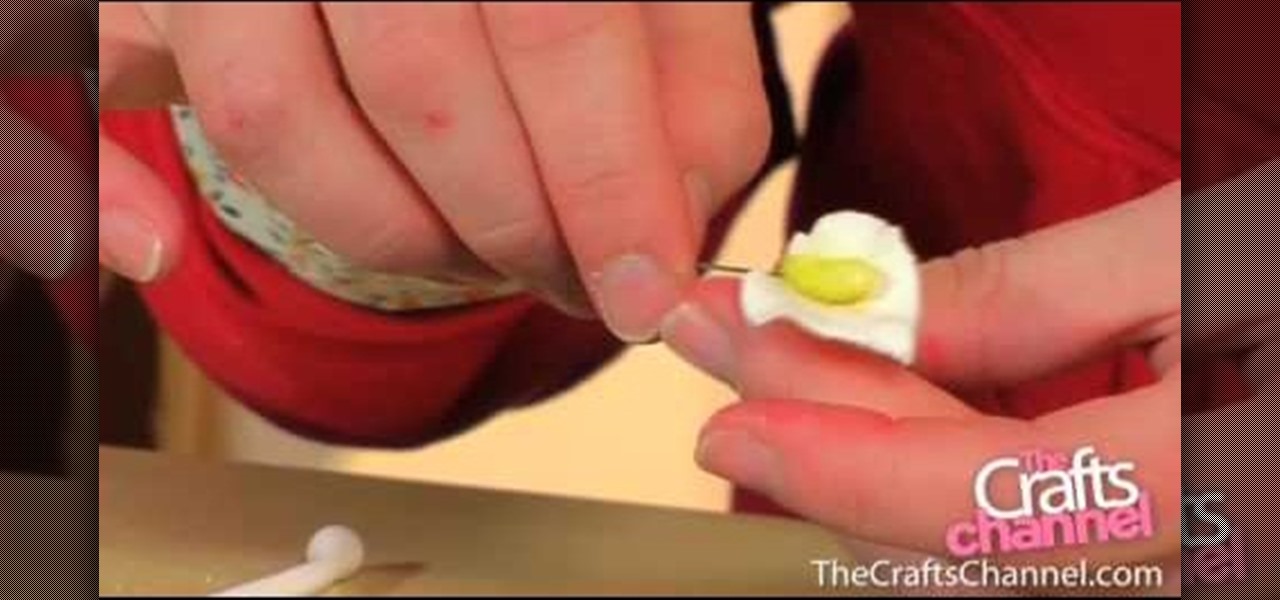
In this tutorial, we learn how to color a sugar crafted lily petal. Insert your paste onto a green wire, then cover the paste with clear edible glue. Then, place the piece into yellow sugar sprinkles. After this, create your petals out of gum paste and push down on the edges to create a petal shape and feeling. Next, apply the glue onto the center of the flower and add this onto the piece that you just made, wrapping it around. After this, wait for it to dry and you will have a beautiful lily...
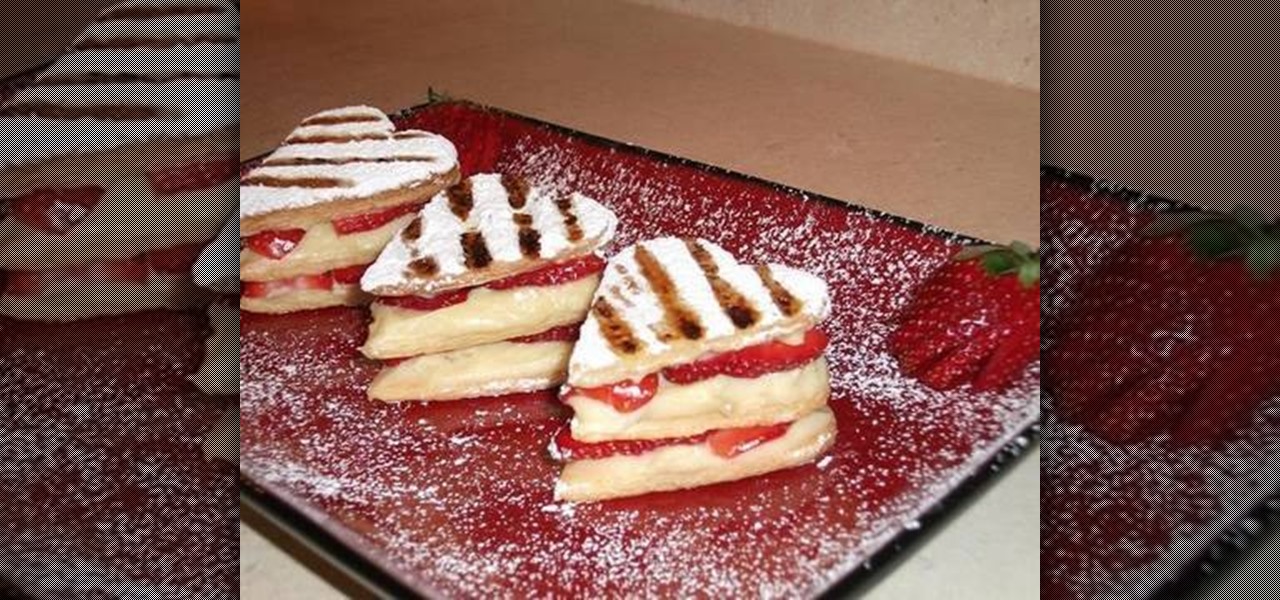
Are you ready to taste one of the most decadent, rich, and creamy desserts out there? Then check out this recipe for making French Mille Feuille, a three layer cake made from puff pastry alternating between layers of cream or whipped cream in between. These Mille Feuilles, also known as Napoleons in the United States, are specially shaped into hearts to commemorate Valentine's Day.
In this tutorial, we learn how to create a Gwen Stefani inspired pin-up hairstyle. Start off by brushing your hair out, then use a curling iron to curl individual section of hair, then when you are done with each section, pin it up in a cylinder like shape. Continue to do this throughout your entire head of hair. When you are done, take your hair out of the pins and gently brush through it. Make sure to brush easy to avoid making your hair too frizzy. After this, use hair gel and comb through...
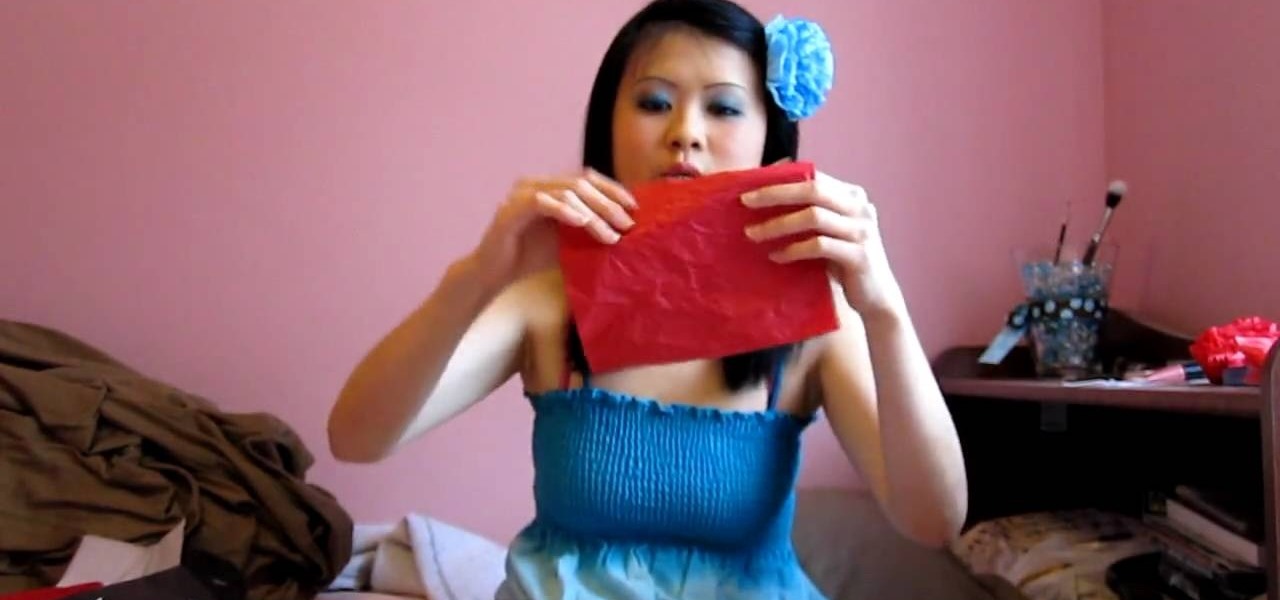
In this video, we learn how to make a flower hair accessory from shopping bag tissue. First, grab your tissue from any shopping bag and fold it down until you have a rectangle, then cut on the sides to make several different rectangle shapes. Next, start to accordion these together until you reach the end of the papers. After this, grab the middle of the tissue paper and tie a rubber band around it. Next, start to push up the tissue from both sides until you reach the bottom. After this, you ...
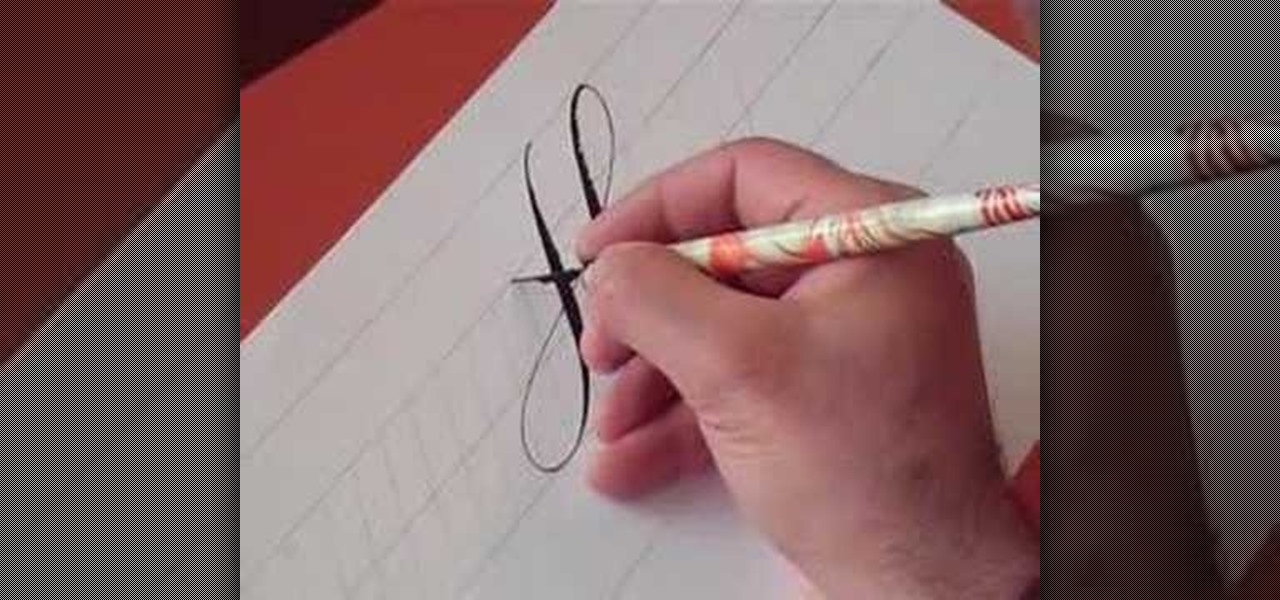
In this video, we learn how to write the letter "S" in calligraphy copperplate. First, dab your calligraphy into ink, then start to writ on a your paper. Make a large half bowl shaped curved line, then make a loop and go down, creating a curved line with a dot at the end. To make the lowercase letter, make a thin line, followed by a thick outer line that curves into the large line making a lower case s. When you are finished with both of these, you will have beautiful letters that look great ...
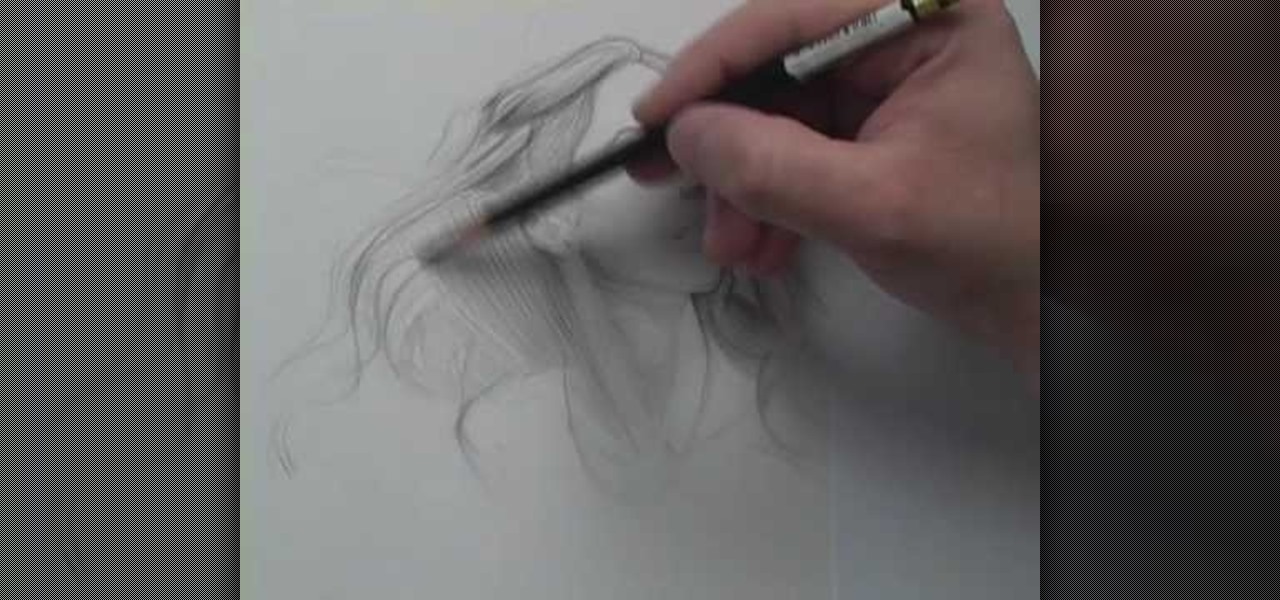
In this tutorial, we learn how to draw wispy hair with Matthew Archambault. When drawing these, you will first start off with a light pencil to make the hair look soft. After this, you will want to make the shapes of the strands look unique, then work from light to dark with the different strands. Use a harder pencil mark when you draw the outline of the hair. Make sure you don't do hard edges at all, everything needs to be soft. make sure you are drawing the hair outwards to make it look lik...
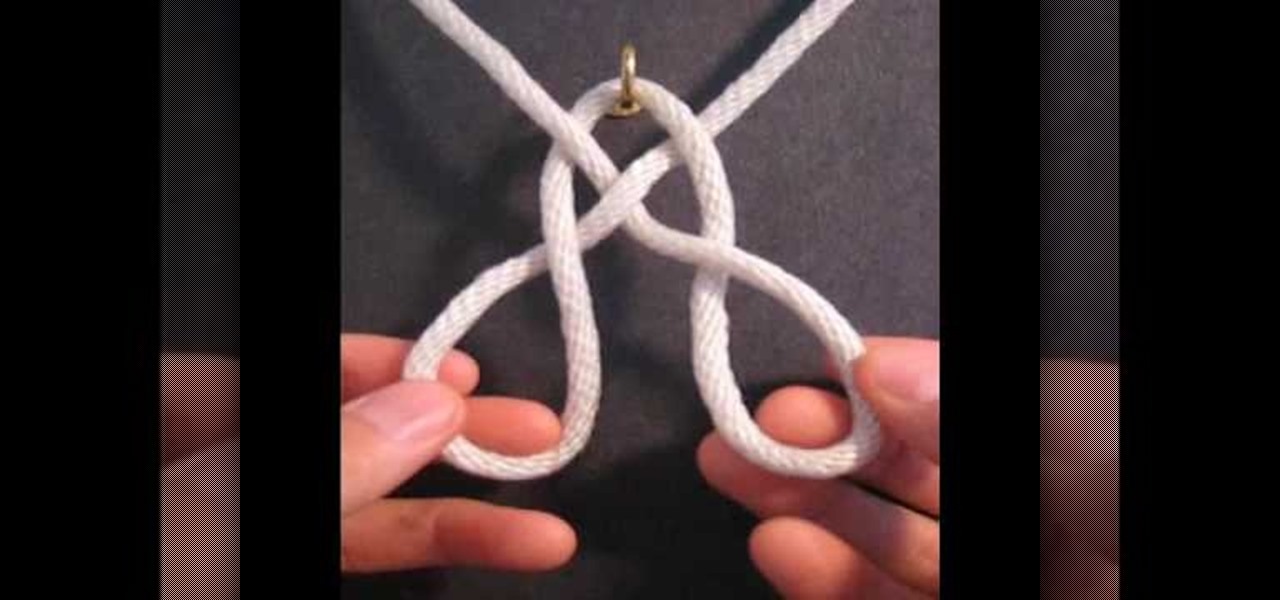
In this video, we learn how to tie a triskelion knot. First, create the knots base by tying a knot at the end of the ropes. After this, weave the knot by pushing a side loop into the side loop next to the end pieces. Once you push these through the middle, push the ends through the loops and then pull the sides tight until you have a "y" shape. After this, your knot will be finished and you can use this however you would like. You can turn it around the see the best design on the rope and enjoy!
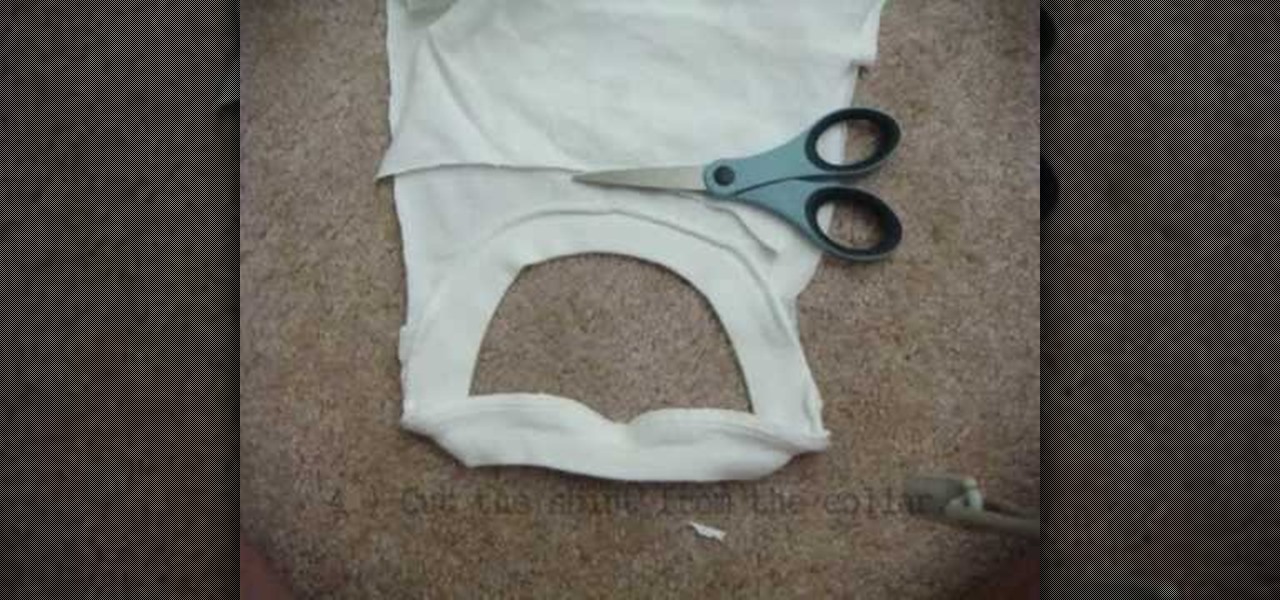
In this video, we learn how to create a knotted tank top. First, you will need to take a shirt that is too large, the cut off the sides of the two sleeves down to the bottom. Next, cut the shirt from the collar and make strips out of the excess fabric. Tie the strips on the back of the shirt going to the front of the shirt and tie it. You can also make a chain shape to make this look more unique. When you are finished with this, you will wear a tank top underneath it, then you can wear this c...
In this tutorial, we learn how to make a snowflake with beads. You will need: clear crystals, beads, and thread. First, string six beads onto the thread. After this, string a crystal next to the beads. Now, tie this and start to repeat the process on the left side of the beads. Continue to do this process until you have created a shape that looks like a snowflake. You can do as many or as few of these as you would like. This creates a beautiful necklace, or you can use it as a bracelet if you...
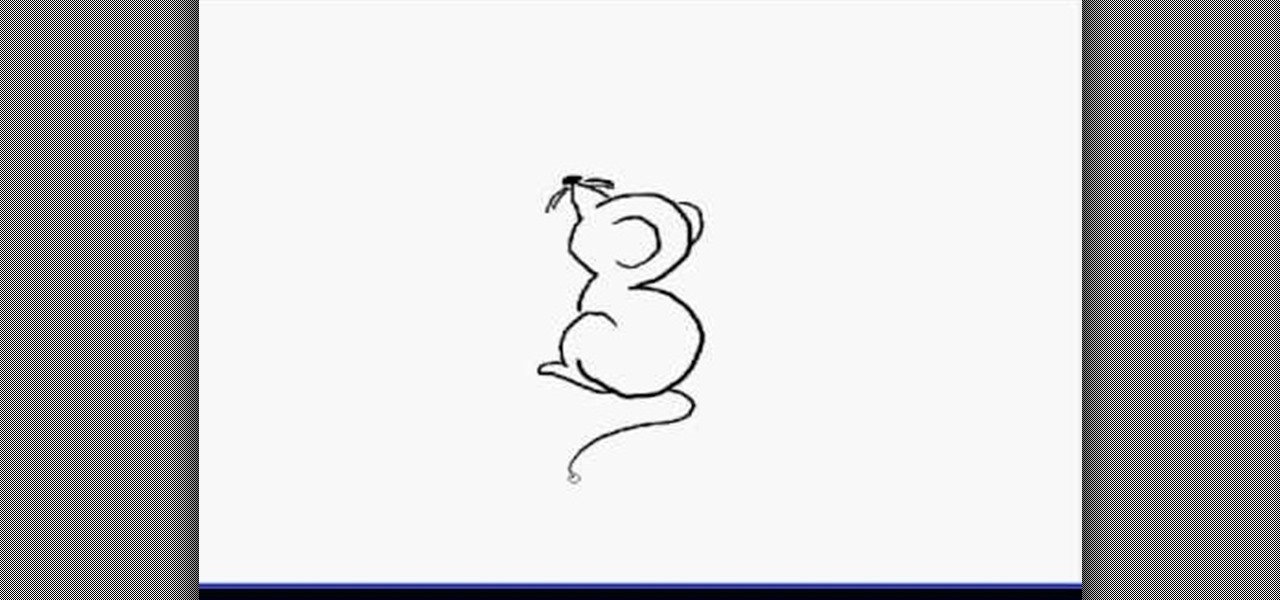
In this video, we learn how to draw a cartoon mouse from the number three. First, draw out your number three. Now, create a triangle shape on the end of the top of the three, then add in a circle and whiskers. Next, add in a half circle on the first hump of the three, then connect the body of the mouse going down the end of the three. Add in a tail at the bottom of the number, then add in a foot next to the bottom of the three. You can adjust this drawing how you prefer and add in any other d...
In this tutorial, we learn how to make a pendant and adjustable cord necklace. First, grab your pendant and guide a small metal ball onto the bottom of it with a needle. Next, place a spacer through the top and another ball on the top of that. Now, take your pliers to bend the needle to keep the balls in the same place. Keep twist it until you make a loop shape with it. Now, place a string into the loop and then make a knot with the two ends of the string. This will now become your necklace a...
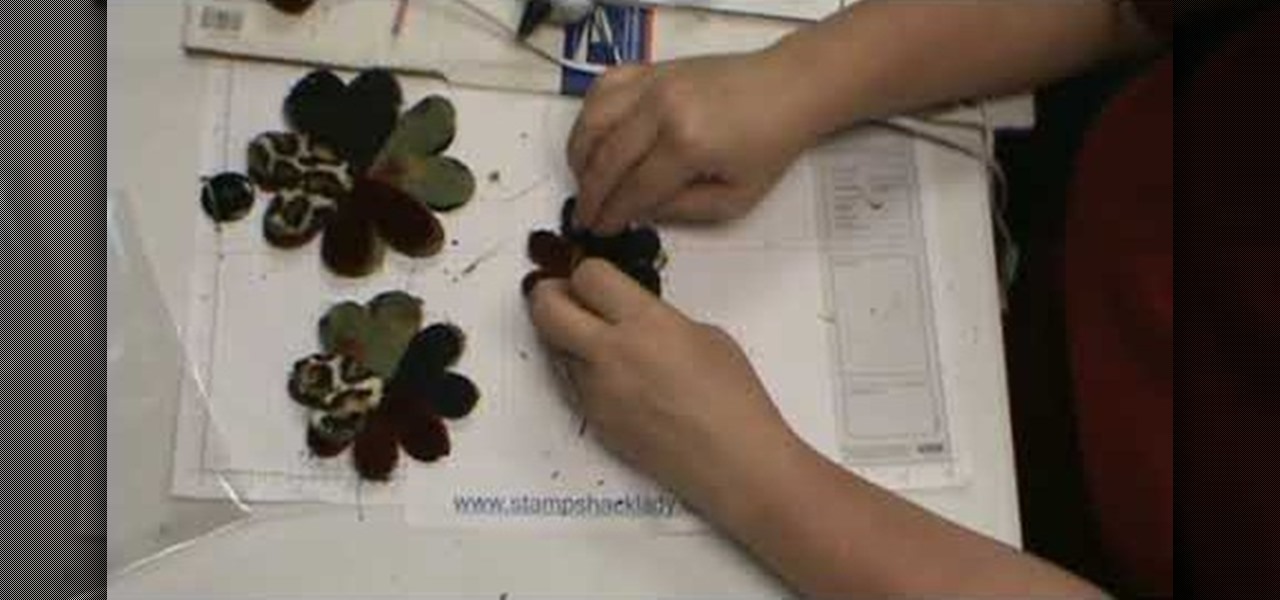
In this video, we learn how to assemble a flower-fold die-cut with a glue gun. First, cut out different fabrics in the flower shape. Put them all into different piles according to their sizes. After this, put hot glue into the middle of the fabric and fold the flowers in half. When finished, put the pieces together with hot glue going in a circle. Continue to do this with all the different sizes. When you are done, all the colors of fabrics should show, then place a button in the middle with ...
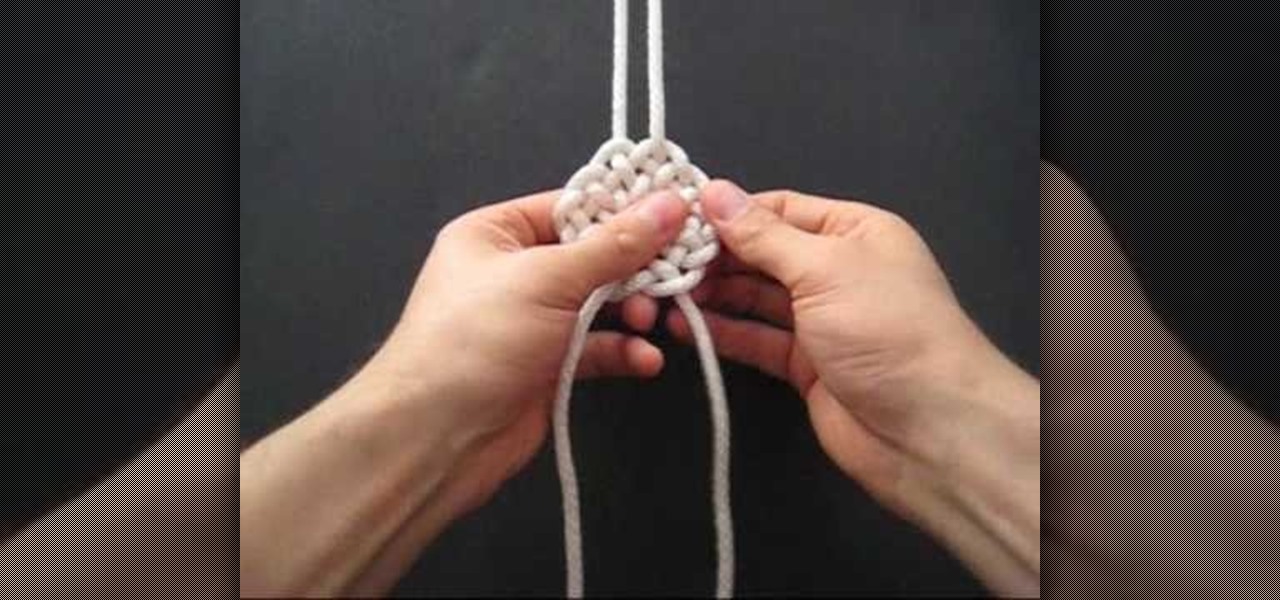
In this tutorial, we learn how to tie a compound double coin knot. First, take two strings and make a loop with the left one, then loop right right one into that. Tighten these together, then bring the end of the right working string over the loop and through the bottom of the shape, then continue to thread it through. Now, repeat this on the left side with the left string. Next, loop the right side of the string and push through the loop with the end of it. After this, tighten up the ends of...
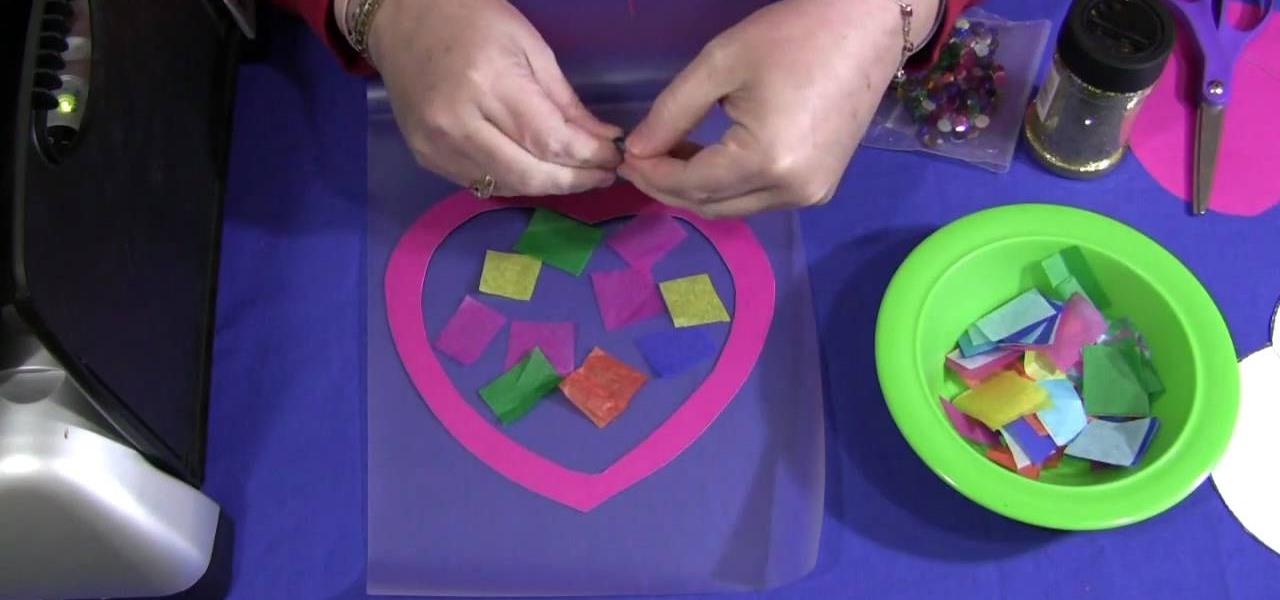
In this video, we learn how to make a sun catcher with your kids. First, you need laminating paper, two paper hearts, and scissors. First, cut the center of one heart out by sticking your scissors in and making your way around the heart. Next, place the outline of the heart inside of the laminating pouch, then decorate the inside of it how you prefer. You can use whatever you want to decorate the inside, including: glitter, crayon shavings, tissue paper, etc. Next, place the paper inside of a...
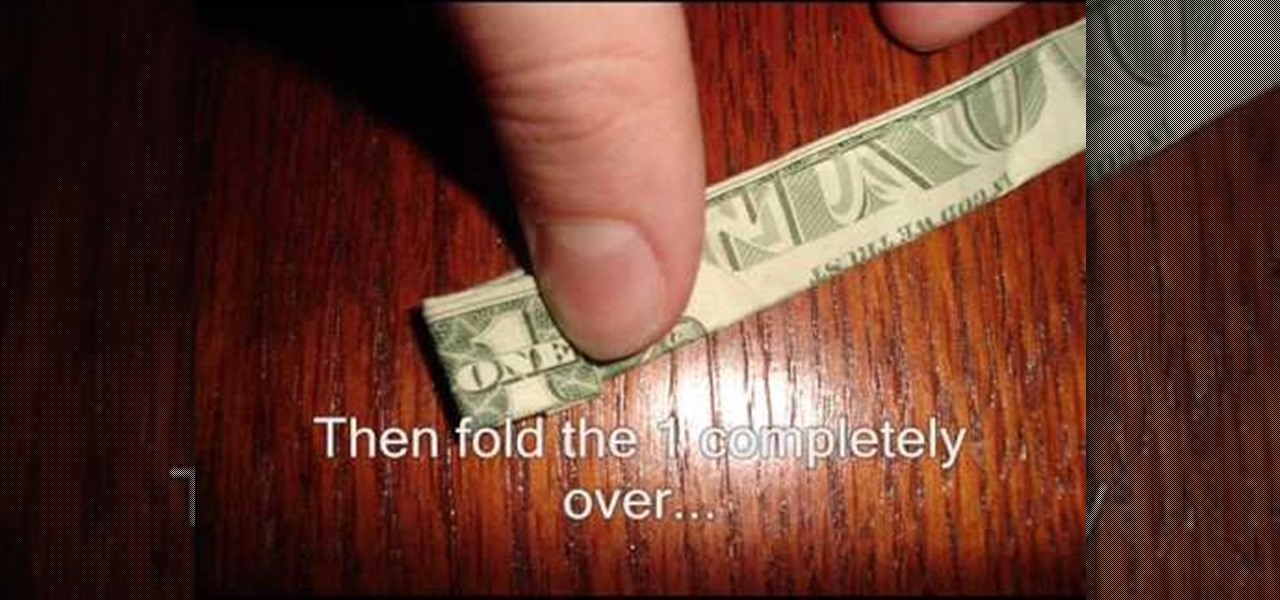
In this video, we learn how to fold a ring out of a one dollar bill. First, fold the white edges in at the top and the bottom. Next, fold it in half and then spin it around 180 degrees. Next, fold it in half again, then take the white edge on the right side and fold it down until you can see the 1. now, make a backwards "L" shape and fold it back down, then curl it up. Now fold the L underneath and curl the extra part underneath the 1. Now, place this on your hand and you can wear it as a ring!
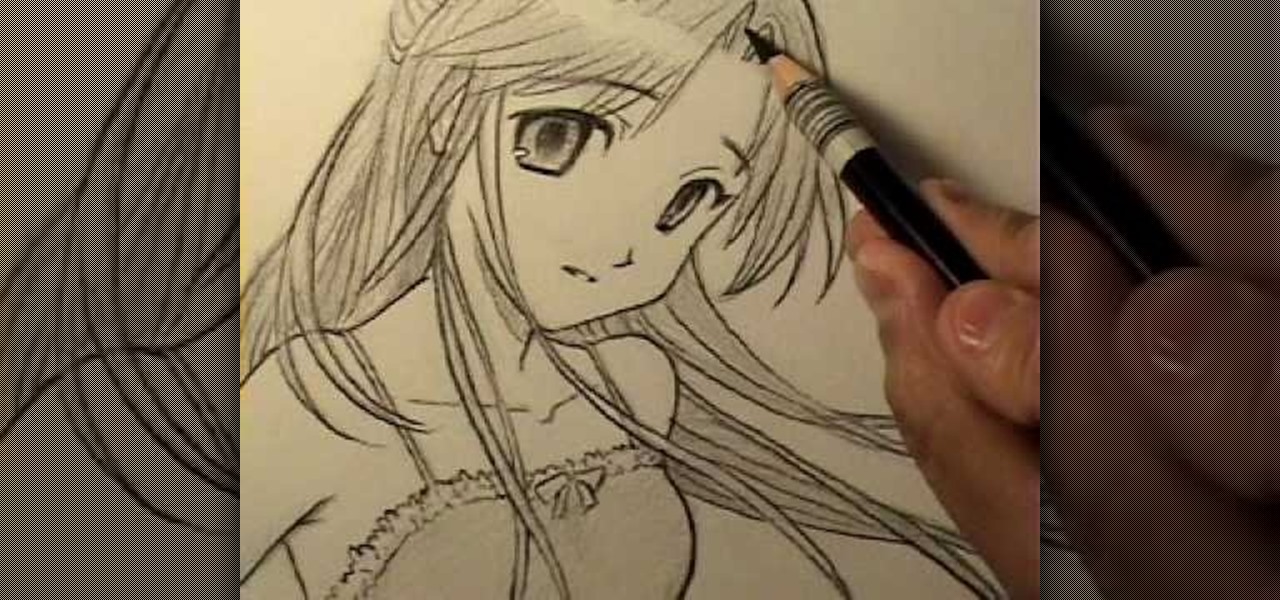
Yes, we know, most manga girls look innocent anyways (though the same isn't always true for their personalities), but this manga girl is truly adorable and friendly-looking. Of course, the big, bright childish eyes and pursed lips probably help with that.
Shoo Rayner teaches us how to draw penguins in this tutorial. Start off by drawing a boxed shape for the body, then draw the head and beak onto the top. After this draw on the windows as well as the belly and the feet of the penguin. Use a light pencil while you are doing this, since it's just the outline. After this, draw the inner body of the penguin, then start adding further details. Use a darker pen or pencil to draw over the outline and create the entire penguin. You can draw from the s...
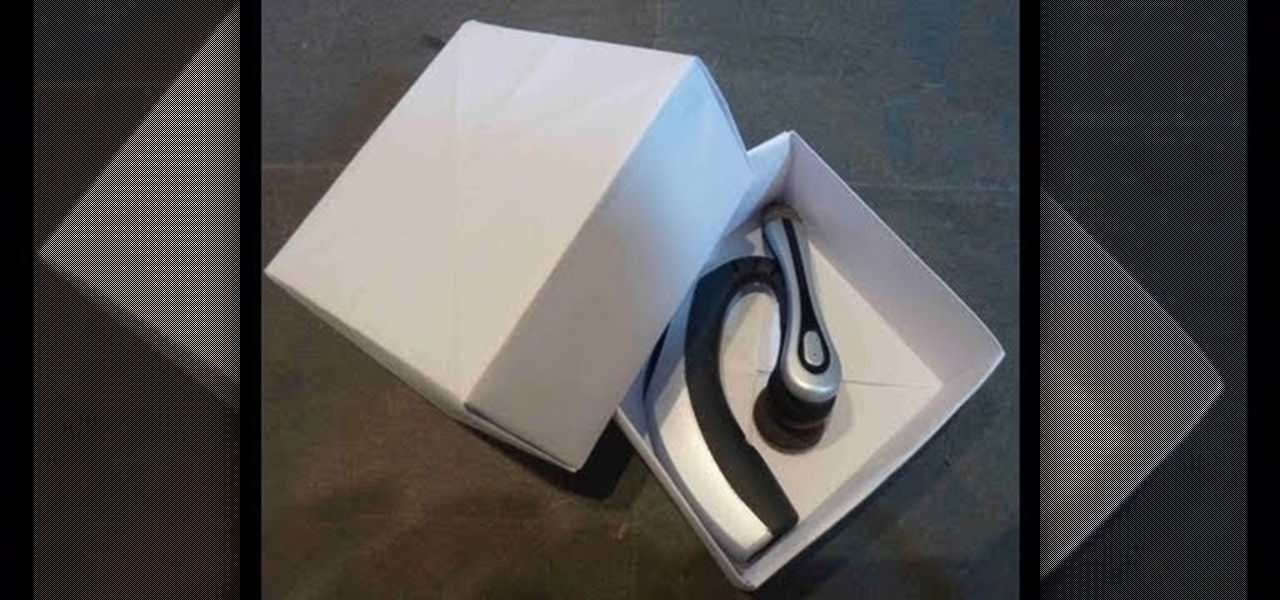
Don't get us wrong: We adore gift boxes, as they let us both conceal a gift and make the gift look more appealing by wrapping up the box in pretty wrapping paper and smacking a bow on top, but there's one big gripe we have about them. They either come in Small, Medium, or Large. So if your gift doesn't exactly fit one of those predesignated sizes, then the box is either too small in areas or too large, which is a pain.
Our little sister nearly burst our eardrum when she squeled in glee at seeing cute as a button baby penguins tap dance and jive in the movie "Happy Feet." Baby penguins, being rather spherical in shape and super fuzzy, often become a little girl's favorite animal, and it's easy to see why.
In this tutorial, we learn how to tie the Basket Weave decorative knot. First, hook your string to a hook, then tie a loop that is wide. After this, bring the strings to the top and make a heart shape. Now, twist the two loops on the side and twist them around each other. Now, bring the right string through the right loop and up through the left. Do this for the left string except using the opposite loops. When you are finished, pull on this tightly and release the string from the hook. Make ...