In this video, we learn how to make raw Brazil nuts and hemp cookie bars. First, mix together honey, coconut oil, hemp seed, and crushed Brazil nuts. Add in some fresh lemon zest, then mix everything together until it's well combined. When you're finished mixing, roll the dough out with a rolling pin until it's thick enough for a cookie. Place in the freezer after you have cut these into your preferred cookie shapes. Leave them in the freezer overnight, then take them out and you will have yo...
In this tutorial, we learn how to change your body features with makeup. To enhance the cleavage, you can purchase a product called Beautiful Breasts. You will first take the matte color and start to define where the breasts and cleavage are. Make the angles natural and make sure the makeup is blended so it's undetectable. Apply shimmer to the collar bone and shoulders to give a glow as well. The products work for any size and any shape and will give you extra enhancement. There is also a pro...
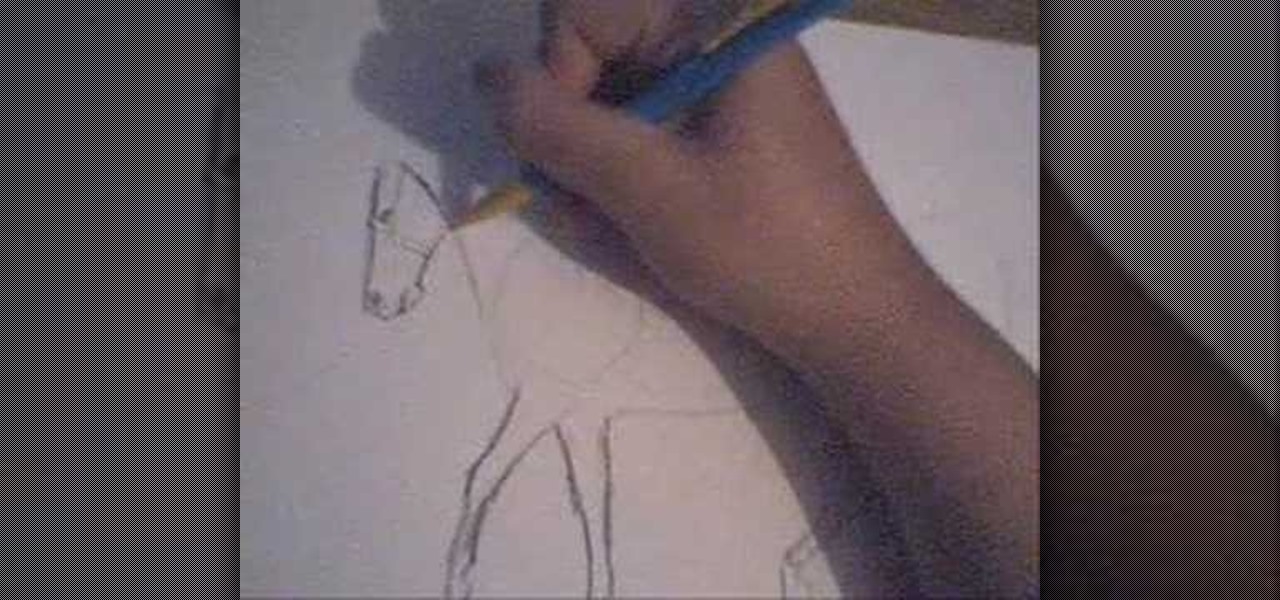
In this video, we learn how to draw a horse. First, draw the outline of the horse's body. Start with a circle for the head and wispy lines for the rest of the body. Make large shapes that connect to see where the mass of the body will be. Next, draw in the head, tail, back, and legs of the horse. After you have the outline finished, erased the lines inside of the picture. Now, draw in details on the horse. Add in lines to show where the hair is, then draw in the nose and eyes to the face. Als...
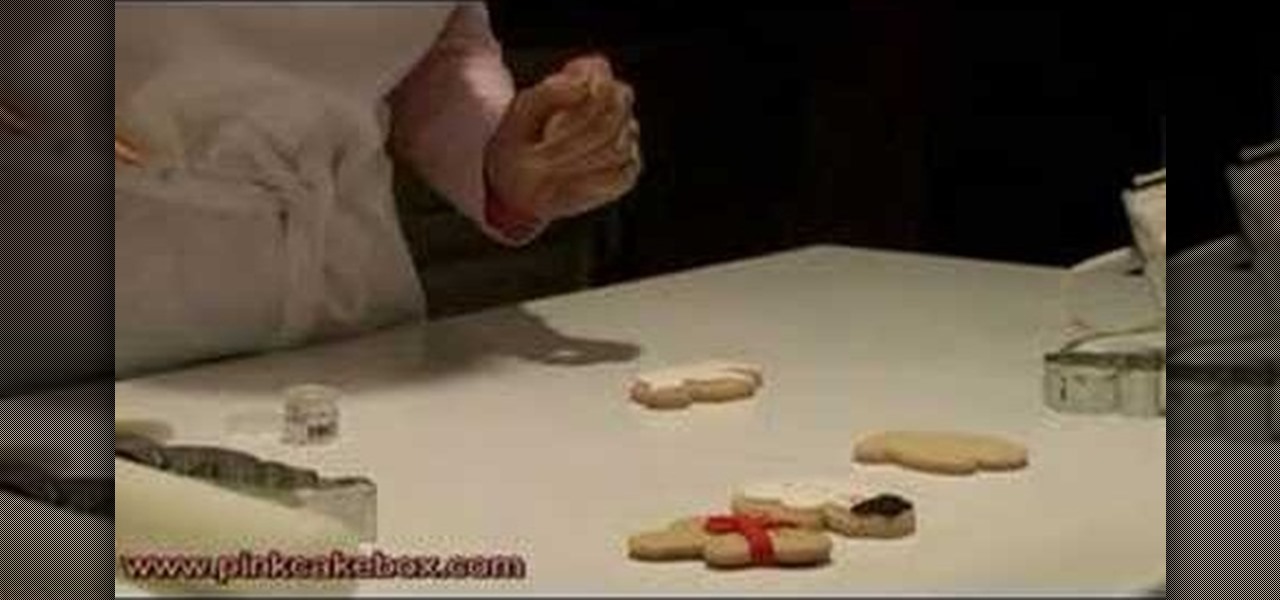
Dove cookies make such great treats to give to friends and family. Doves are traditionally representative of peace and healing, and so sharing doves (albeit in cookie form) with those you love shows that you care for their well being.
In this tutorial, we learn how to use Fiskars Decorative Edge scrapbook layout. First, you will need to pick out the templates, pictures, and paper that you want to use for this project. Now, place the stencil over the card stock and cut out the stencil shapes you want, stars work best if you are doing a fun child theme. Now, apply these to your base card stock, and arrange a frame over the background. Now, apply the picture to the page and add on the stencils you just cut out. Add in quotes ...
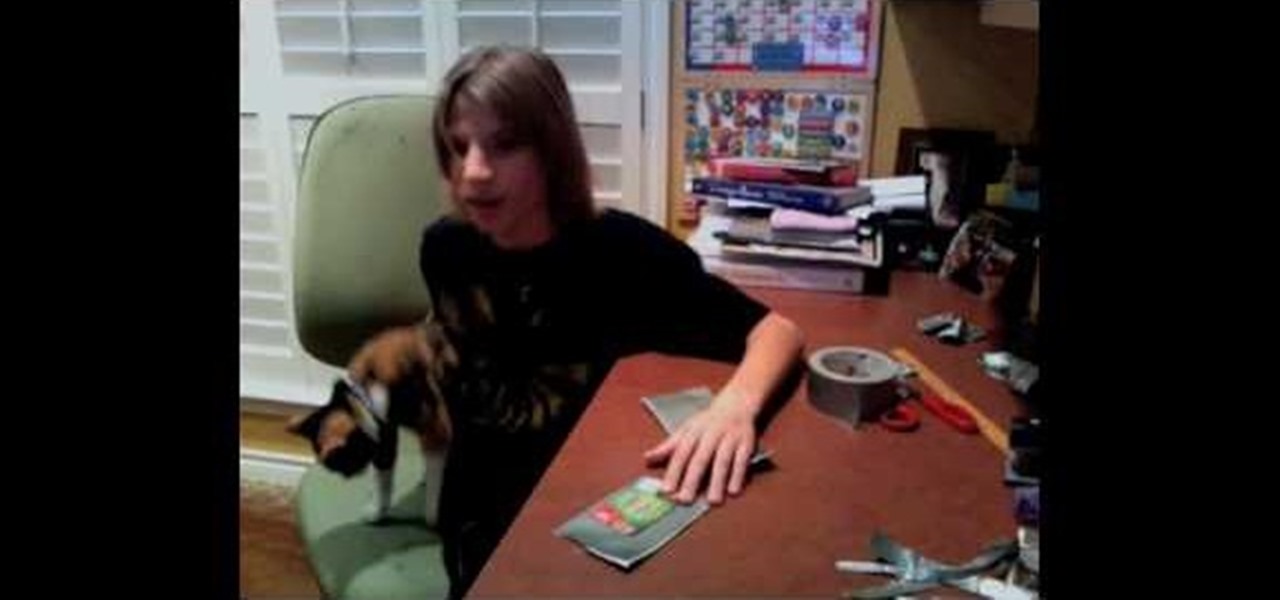
In this tutorial, we learn how to make a wallet with card holders from duct tape. First, you will need to cut out duct tape in several strips to the size you want. You can use any color of duct tape you want. Next, you will start to overlap the duct tape on top of each other so there are no stick sides, then finish it by overlapping the last piece. Continue to do this, then fold it in half to make a wallet shape. Next, you will make card holders. Measure out how large the holders should be by...

In this tutorial, we learn how to make mozzarella cheese. First, add sea salt to water, then add in cheese curd. Now you will need to work the cheese with gloves over your hands. Start to knead your cheese until you form it in ball shapes and it feels like it's elastic. After you do this, rub the cheese and get any bumps out that are still inside of it.To store this, stretch it onto a piece of plastic wrap, then tie a string around in small balls to cut out smaller pieces of the cheese. When ...
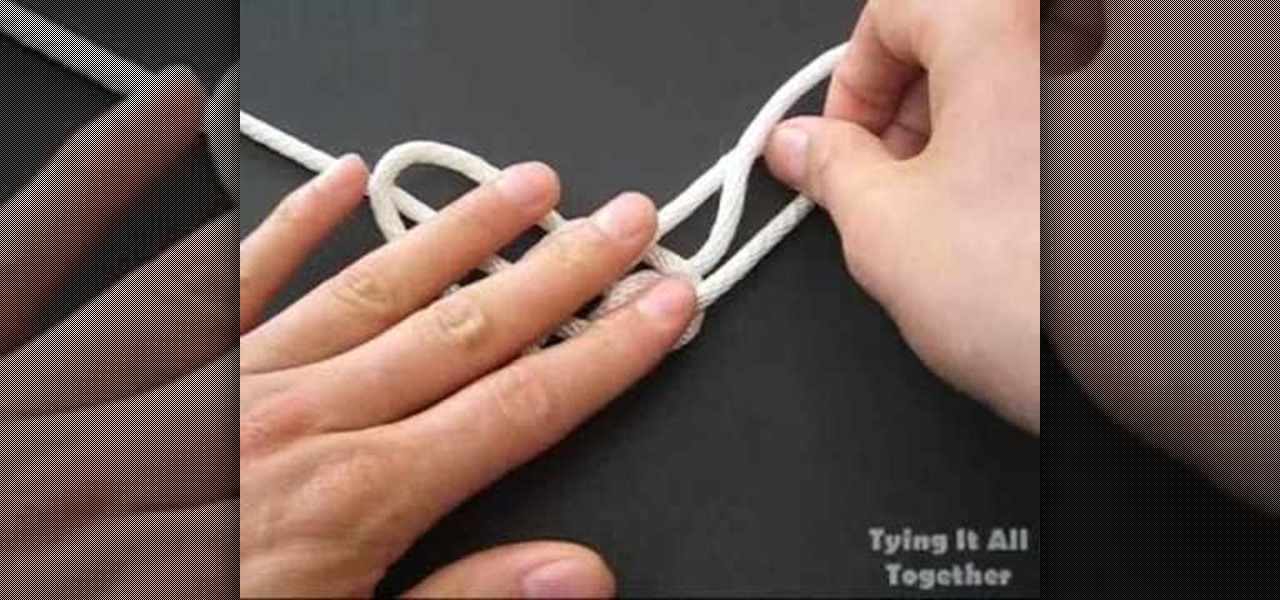
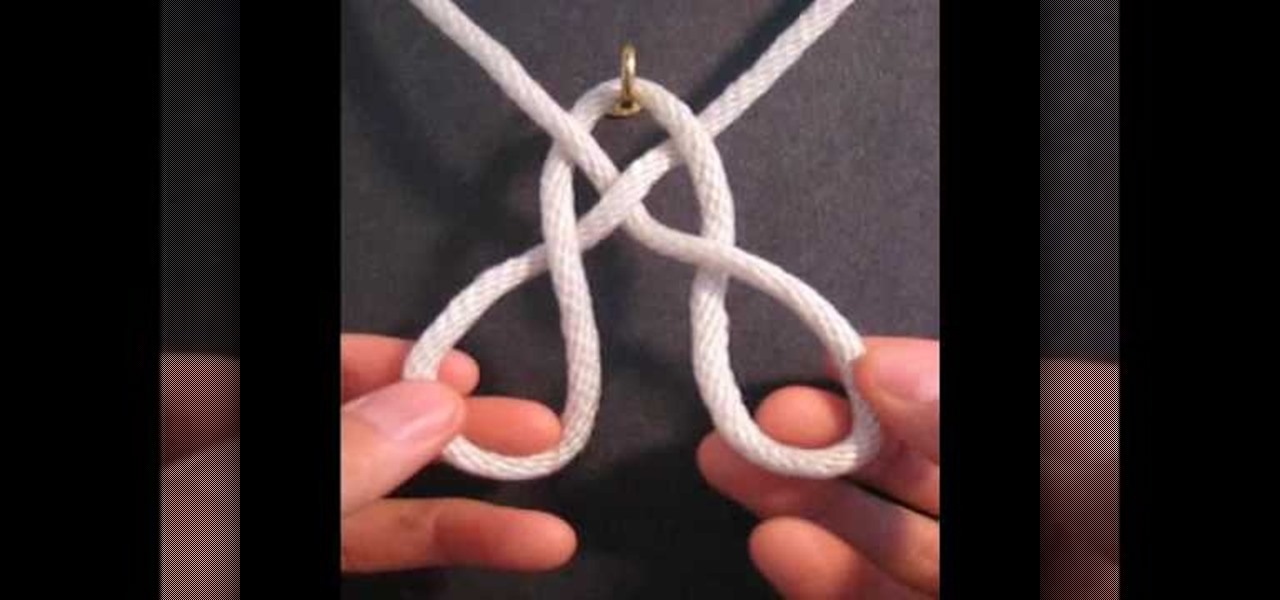
In this video, we learn how to tie the longhorn knot. First, make a spike with your rope, then push the rope around it and through it, making a circle. Then, push the loops on the bottom down and make a pretzel shape with it. Bring the left hand side string down and pull it through the loop, then do the same with the other side. Next, pull the strings on the top up to make larger loops, then pull the string through the left loop. Now, do this to the other side of the rope as well. To finish t...
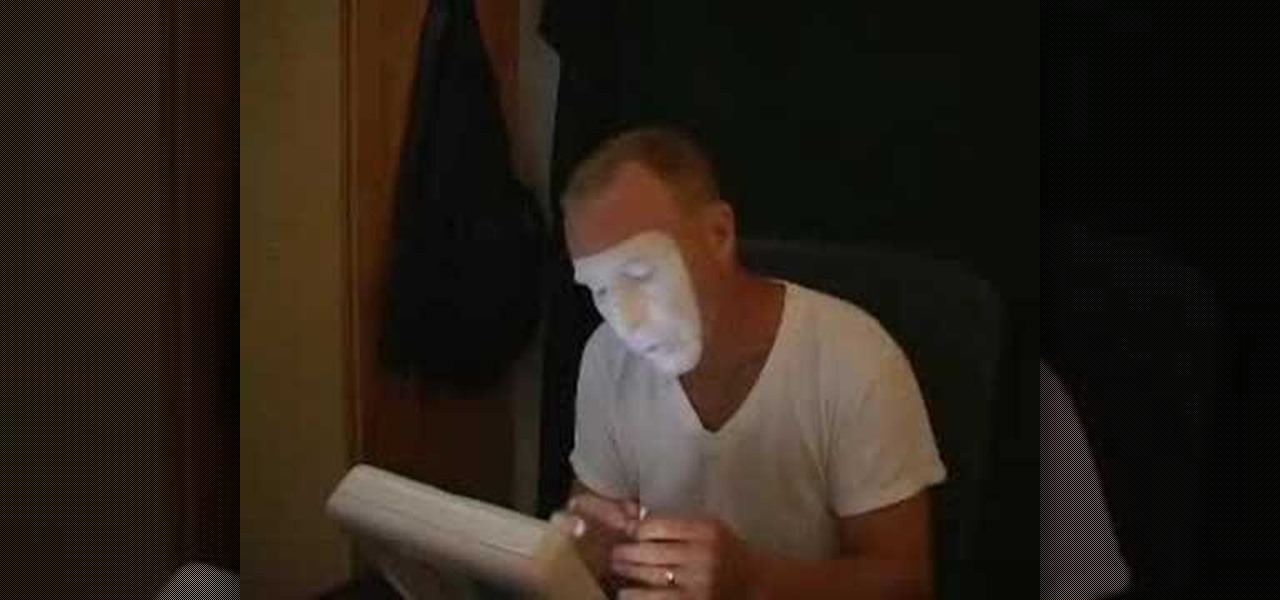
In this video, we learn how to apply mime and clown makeup. To start, outline your face in a mask shape. When you are done with this, apply white paint to the face until it's on thick and you can't see your skin color any longer. If you make mistakes, use a q-tip to clean up, then run it around the edges to make it a clean line. After this, use a q-tip to remove some paint from the eyebrows. Now, take black paint and paint it onto where the eyebrows are at. When you're done with this paint th...
In this tutorial, we learn how to use the feature keys for your Cricut machine. There are six feature keys on every cartridge. The first is the shadow feature key that create a matte to highlight your letter. The shadow blackout key creates a solid matte that doesn't cut out the holes in between the letters. The charm feature key puts a charm top on the top of letters. The sign feature key puts letters inside of a small sign post, making it one inch from top to bottom. The slotted feature key...
In this tutorial, we learn how to draw Totoro. Start off with the ears, then connect the top of the head around them and continue to draw the rest of the head. Fill in the eyes and the nose on the face, then make lines on the side of the face to show whiskers. After this, draw an egg shape as the rest of the bottom, then add hairs onto the stomach area. Draw small little lines on the bottom of the character to make it look like he is sitting on something. To finish, draw the character holding...
In this video, we learn how to make chocolate dessert cups for an event or party. First, tape a cupcake pan and paint pink colored hot chocolate into a shape at the bottom. Next, add in melted chocolate to the individual cups. After this, place in the refrigerator for 10 minutes, then push the cups out of the trays. Then, you can place icing or cream into the middle of them and serve to guests. These only take a short amount of time to make, and everyone will love them. It's a great way to ke...
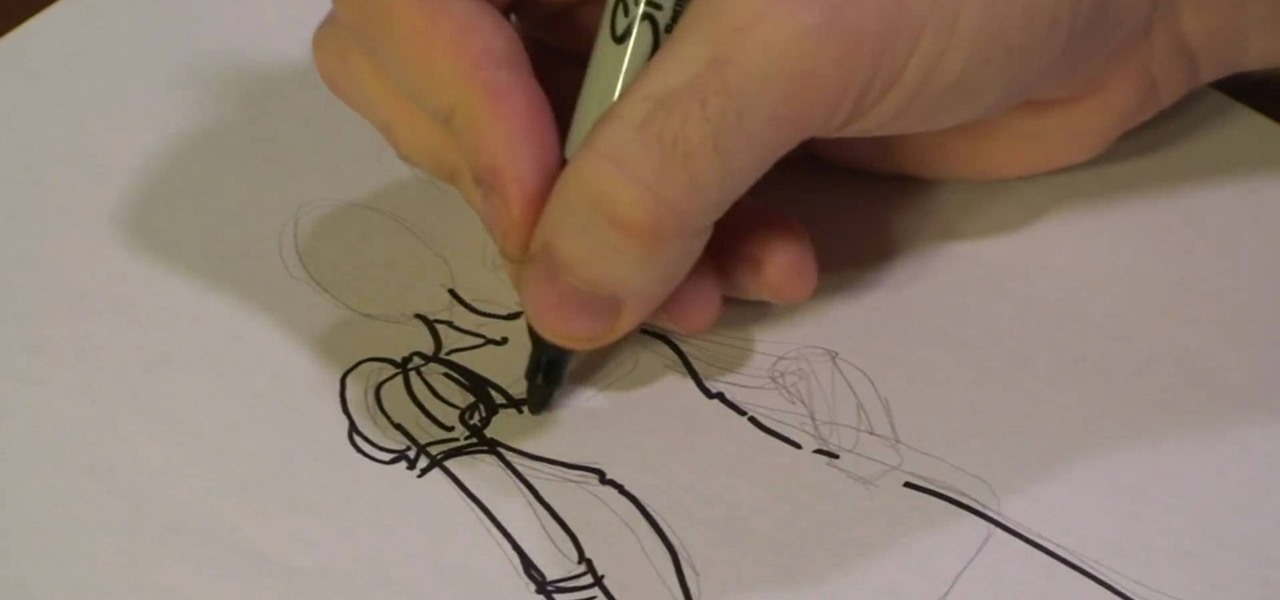
In this tutorial, we learn how to draw couture dresses. First, sketch the body onto the paper and then outline it with a black permanent marker. Make the lines soft and outline the body to have curves like a real woman. After this, start to add in the details of the dress, making the shoulders poof and adding accents to the side shoulder. Next, start to polish up the drawing by defining any lines and making different shapes. Make sure to draw the dress exactly how you want it, showing how it ...
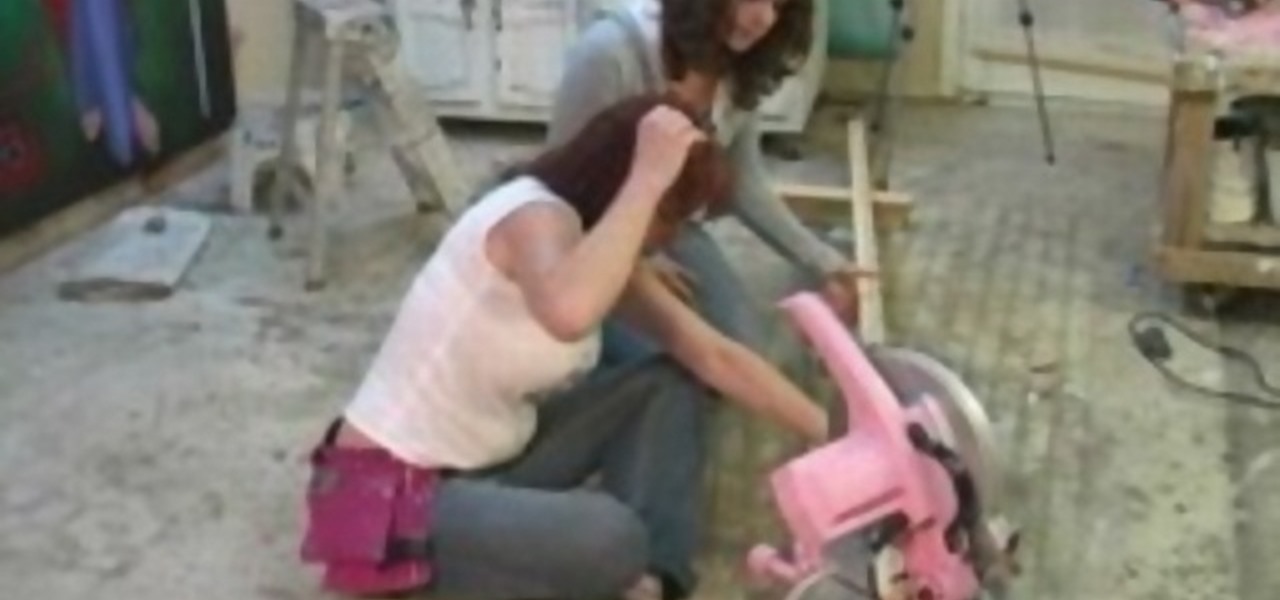
In this video, we learn how to build a canvas frame stretcher. First, you will need to choose lumber that is the size you want your stretcher to be. After you do this, use a hammer and nails to connect all of the pieces of wood together so you have a square shape. You will need to hammer in a lot of nails so the frame stays in place. Use a saw if you need to cut any points down or make it smaller than you have it. When you are done, screw any additional nails into the frame and make sure ever...
In this video, we learn how to tie the basket weave knot. First, place the string on a hook, then cross the two sides and make a loop. Next, make the loop wider and take the right and left strings up, then pull the loops down to make a pretzel shape. Now, twist the bottom loops around and place one on top of the other. After this, push them on either side of each other, then bring the right string around and loop it through the left loop, then bring the left string into the right bottom loop....
In this video, we learn how to make a "puppy love" box for Valentine's Day. To key to creating this box is a thin strip of paper that has teeth (pointy spikes) at the end of this. Turn this into a heart shape, then tape it around the heart to make a perfect box. It will be easier to find your center and cold it in half, then place it on the box. Glue the heart onto a black card stock to situate it, then tie a cute ribbon along the edge of the heart. This is very cute and a great idea for Vale...
Origami is an art form that requires time, patience, and the ability to fold things in order for it to take a 3D shape. This next tutorial is an easy video on how to make an origami box. You can use three magazine papers so that you can actually hold things in it. It's good for holding things in like paper clips, orange peel, and much more. So sit back, pay attention, and enjoy!
In this tutorial, we learn how to make a paper football for distance. First, take a piece of copy paper and fold it in half on both sides, then fold in half again, making a crease. Next, fold the bottom of the paper down into a triangle shape. Continue to fold this down, making a right and then left triangle until you reach the bottom of the paper. When finished, you will have a small strip of paper left on the bottom. Tuck this piece into the pocket that you created with the triangle pouches...
In this tutorial, we learn how to get a baby doll inspired makeup look. First, apply primer to the eyes, then outline your eyes with white eyeliner in the shape you want your eyes to be. Next, use black liner to outline around the white that you just applied, then a brush to blend it out. After this, use a shimmery white color to highlight underneath the brows, then brush a purple over the black liner to make it a softer color. Next, apply more white to the areas that you originally drew the ...
If you own a Traxxas Rustler, Stampede Bandit, or Slash RC vehicle, then this next tutorial may be for you. In the tutorial, you'll be finding out how to clean the transmission to your machine. Just like a car, keeping your RC vehicle in tip top shape is important for ensuring that your machine will last for a very long time. So if you need help with cleaning out your transmission, check out the tutorial above and good luck!
In this video, we learn how to make friendship bracelets adjustable. First, tape both sides of your bracelet onto a flat surface. After this, bring both ends into a circle shape at the ends. Now, take any color of string and make a loop with it over the ends of the bracelet. Now, put one end over the other and then put it through the bracelets and into the loop. Then, pull the end of the thread and put the bottom over and under the top piece. Then, put it through the bracelet and tighten it. ...
In this video, we learn how to make a bow out of a Starburst wrapper. Now, place clear tape of the wrapper and fold down the edges. Now, fold the wrapper in half and then in half once more. Make it so you have an accordion design with three different peaks on the wrapper. Now, cut a small strip of tape out of the piece of tape and wrap it around the middle of the bow. After you do this, flare out the edges to make it look more like it has a bow shape. Now, take a bobby pin to the bottom of th...
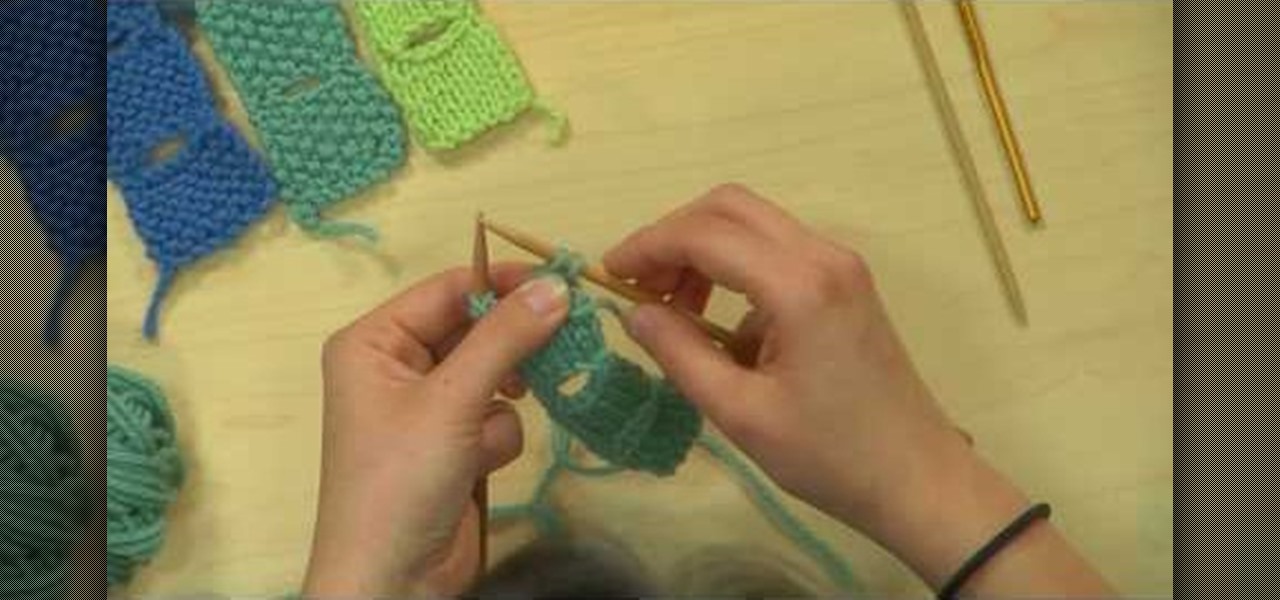
These tulip buttonholes are both pretty and all-purpose, usable for just about any knitting project that requires buttonholes. Composed of a petal-shaped hole rimmed at the edges with a briaded knit, this tulip buttonhold project is simple and great for knitting beginners.
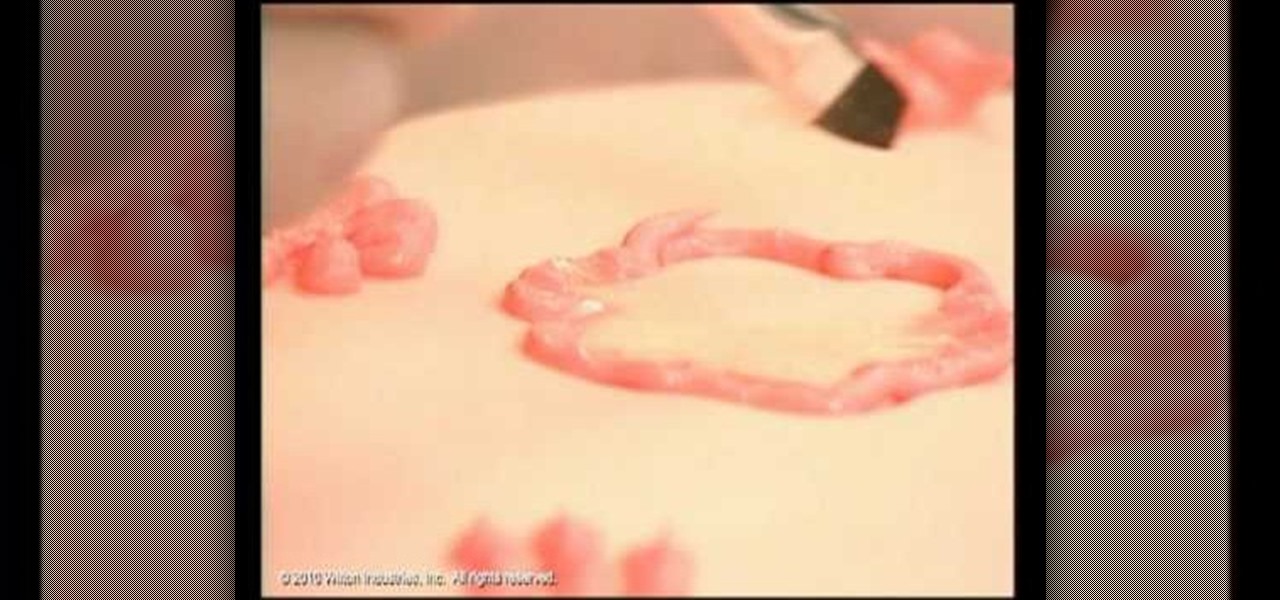
As you'll quickly learn in cake decorating, the outcome and success of your designs stems entirely from the type of tip on your icing bag. Tips range from star shaped to round to square and everything else imaginable, all to give you a limitless variety of ways to decorate your cake or cupcake.
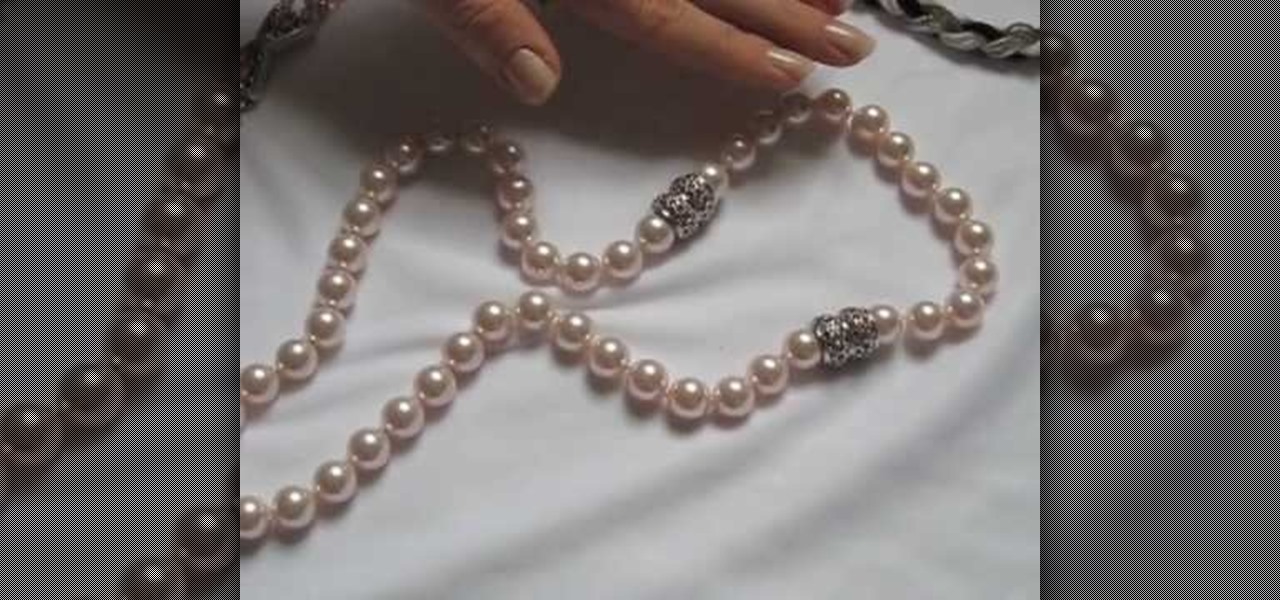
Jewelry clasps don't seem all that important, right? After all, when compared to the shape of your beads and the color scheme of your jewelry piece, a clasp is merely the finisher, something that helps close off your necklace.
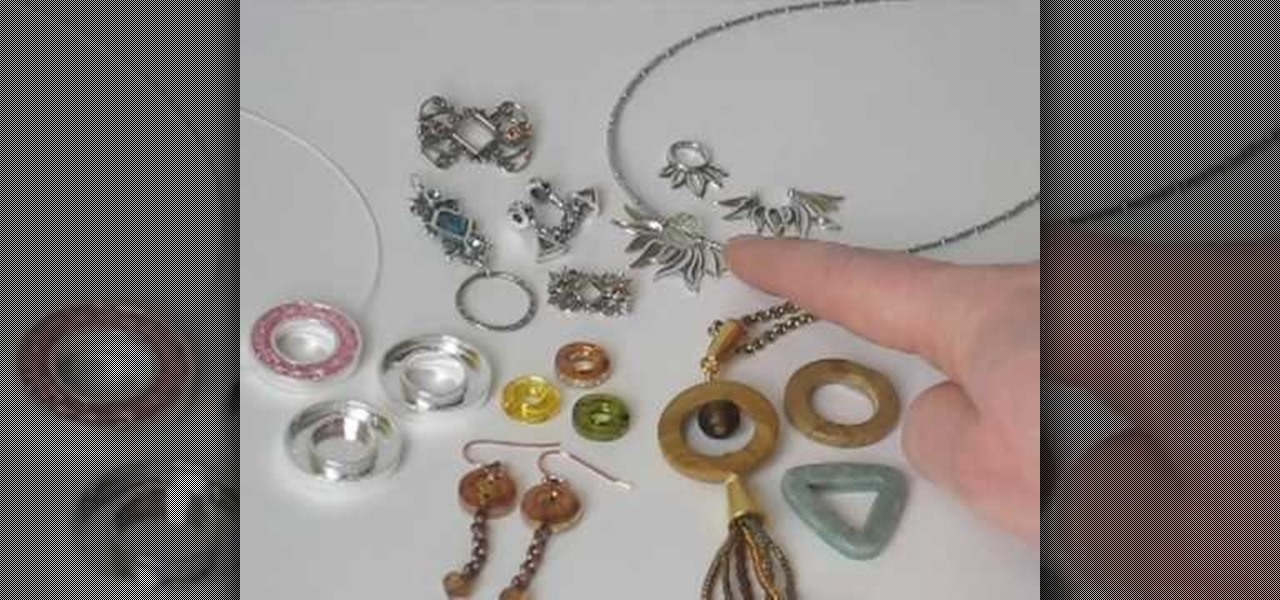
Bead frames are pretty simple to understand. Rather than simply stringing beads onto a pendant or necklace, you can attach them to bead frames, which come in all shapes and varieties, to make a novel design that can take advantage of negative space. It goes without saying that elaborate bead frames make the entire design more ornamental, whereas a simple round wooden bead base helps put the spotlight on the bead in the center for a subtle glamour.
In this tutorial, we learn how to draw transparent objects. Start out using light pencil markings, and draw the basic shape of the bowl. After you have the round top and have make it three dimensional, add shading to the bottom circle in the bowl so that you can see the bottom of the inside. After this, add shading to the side of the bowl to give it a realistic feel like it's sitting on a table. Next, use your eraser to remove some of the shading, then fill in darker pencil marks onto these s...
In this tutorial, we learn how to draw Timmy Turner. Start off by drawing the head, making the front round and the body will be a triangle shape. The back of his head should be a triangle as well. Draw two large circles on the face, followed by arms and legs coming off of the body. Next, draw ears onto his face followed by a shirt and pants on his legs. Draw Timmy's mouth with a large smile and two teeth at the top. His eyebrows should almost touch in the middle, then don't forget to add on h...
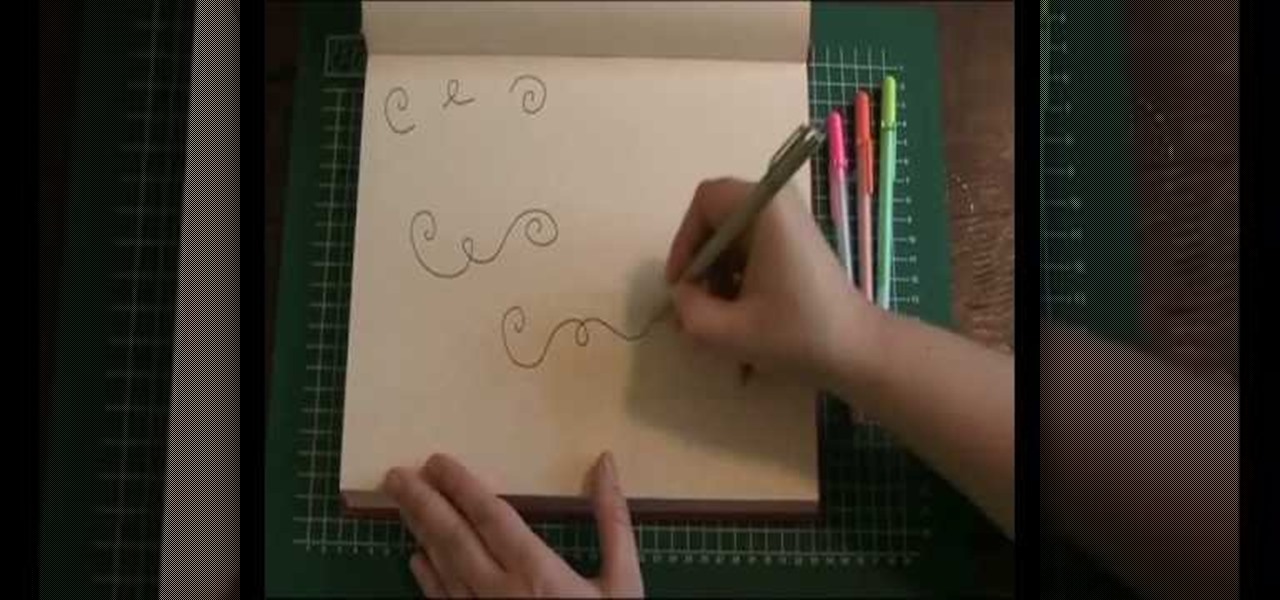
In this video, we learn how to draw a doodle with Marieke Blokland. Start off by writing the letter "e" in cursive, several times, making the letter larger as you go. Link the e's together, then when you get to the bottom of the paper it will be just a scribbled loop. Now, on the next page, draw more of these looped e's, dragging out the lines. On the next paper, draw spirals going from smaller to larger and going clockwise and counter-clockwise. Start to incorporate all of these shapes toget...
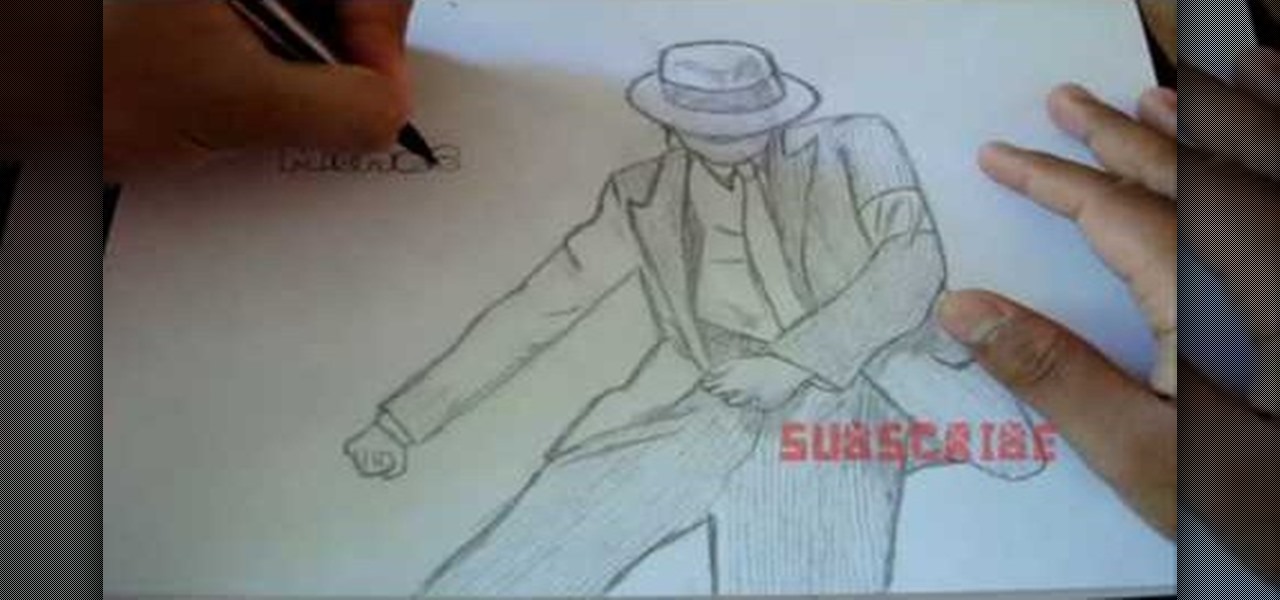
In this video, we learn how to draw Michael Jackson. Start out by drawing the body shape, outlining the clothes first. Draw details on the pants and shirt, then add a hat on top, shading the face. Now, draw hands onto the drawing, along with shoes on the bottom. Next, add details to the hat and a tie to the shirt with a collar. After this, draw on a belt and shading and lines to the jacket and pants. Add shading underneath the hat to make it look as though the face is underneath, then when fi...
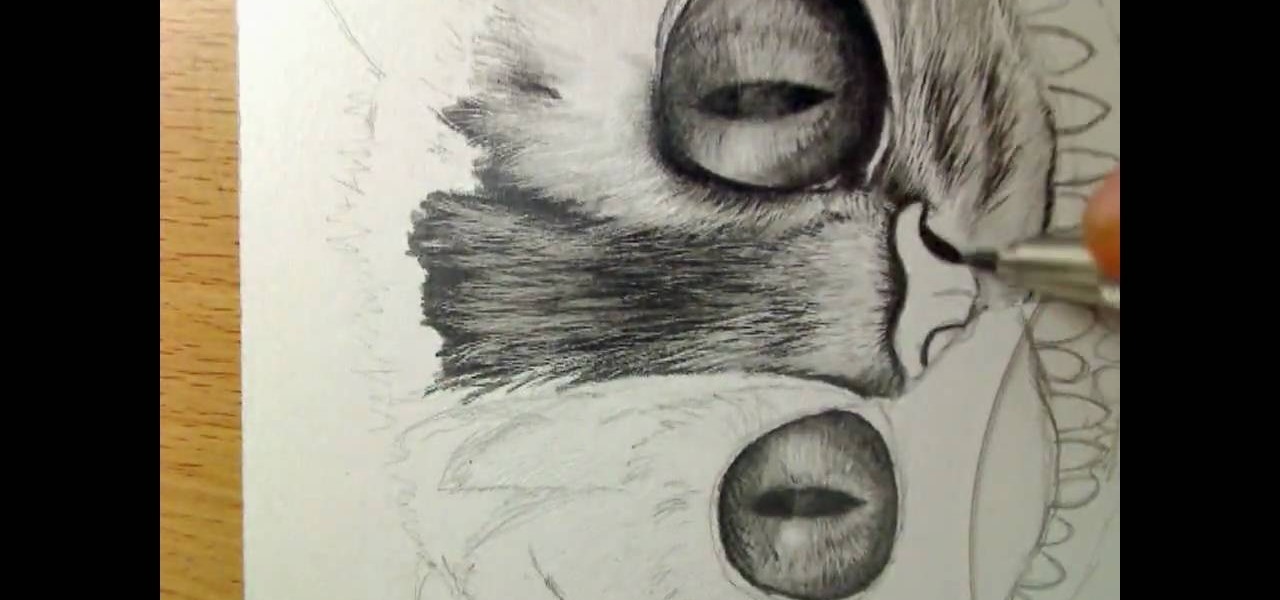
In this tutorial, we learn how to draw Cheshire cat in Tim Burton's Alice in Wonderland. Start out by drawing the large eyes, then drawing in the nose and face around the cat. Add in the many teeth, then draw on the ears of the cat. Shade in the eyes and make the pupils diamond shapes for a more realistic cat look. After this, shade in areas and make it look as though there is hair on the cat. After this, shade in the nose and add hair around the outside of the cat. To make this look more rea...
In this tutorial, we learn how to set up the L drill in pool. To do this, you will place all of your balls in an "l" shape on the pool table starting from the middle of one side of the table. Place the balls about two inches apart, then star to make the horizontal line for the balls. Place these two inches apart as well. After this, you can place your shooting ball next to the balls and hit each of them into the same corner pocket as the last one. This is a great way to practice hitting balls...
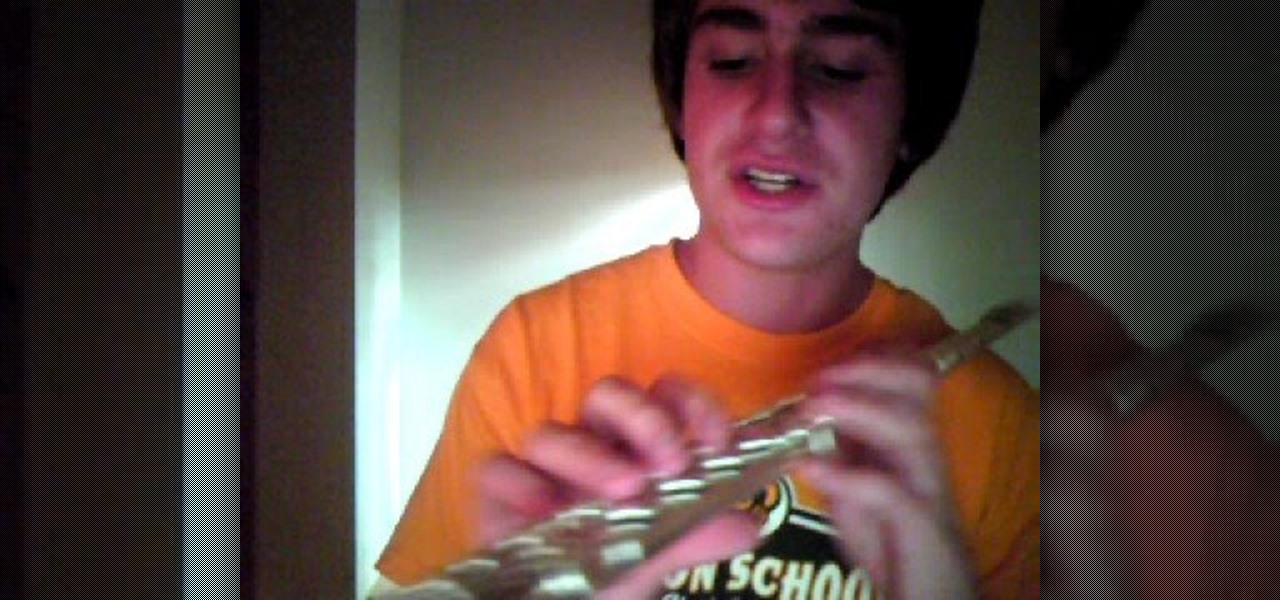
In this tutorial, we learn how to play the flute for beginners. To make a sound, you will put the hole directly onto your lips and make the shape of the hole with your lips. Then blow into the hole, trying different positions with your lips. You will place your fingers on the different key holes, and remove your fingers depending on what notes you want to play. You will press down keys on the sides to change the air sound as well. You will start out learning the different keys and notes, then...
In this Arts & Crafts video tutorial you are going to learn how to fold an origami ninja star. Take a normal paper. Fold it diagonally from one corner and cut off the extra portion to make a square. Fold it in half and cut into 2 rectangles. Fold each piece in half along the length. Fold both ends of each piece in opposite directions to make a triangle. Now fold the ends again to make a bigger triangle at both ends of each piece of paper. Each sheet will form a 'Z' shape. Now place one sheet ...
First, bring the thread up and then make a diagonal line and bring the thread through again. Bring the thread through again below the diagonal line on the left side. Then, put your needle thread through the 'x' and make sure your loops are even. After this, bring your thread through and even up your stitch. Now thread through on the right hand side and go through the next 'x' shape. Continue to do this, and you will see the Vandyke stitch start to take form as you go on. There will be a verti...
In this video, we learn how to do sit ups to lose love handles. First you will need to lay down facing the ceiling and cross your arms over your chest. Raise your body up using your stomach and try to touch your elbows to your knees. Continue to do this and remember to breathe while you are doing this. Do as many crunches as you can, and try to do different variations to change things up. When you are finished, do more exercises and stretch your body out. Doing these every day can help you lo...
In this tutorial, we learn how to make a paper rose with a paper towel. First, roll one end to the other, then stick your finger inside one end and pinch the tip while twisting a few inches down. This will be your bud and your stem for the flower. Keep twisting down until you reach halfway to the end of the flower. Now, fold the loose piece on the bottom so it's parallel to the stem. Then, twist the leaf and wrap it around the bud. Then, shape the bud to the type of flower you want, then enjo...
In this video tutorial, viewers learn how to fold a paper airplane. Begin by folding the paper vertically in half. Then open the fold and fold the 2 top corners to the center crease to form a triangle. Now fold the top point down so the it tucks underneath the fold to form a envelope shape. Then fold the 2 top corners to the center crease to form a triangle once again. Now fold it vertically in half and fold the wings down so that they are aligned with the bottom of the plane. This video will...
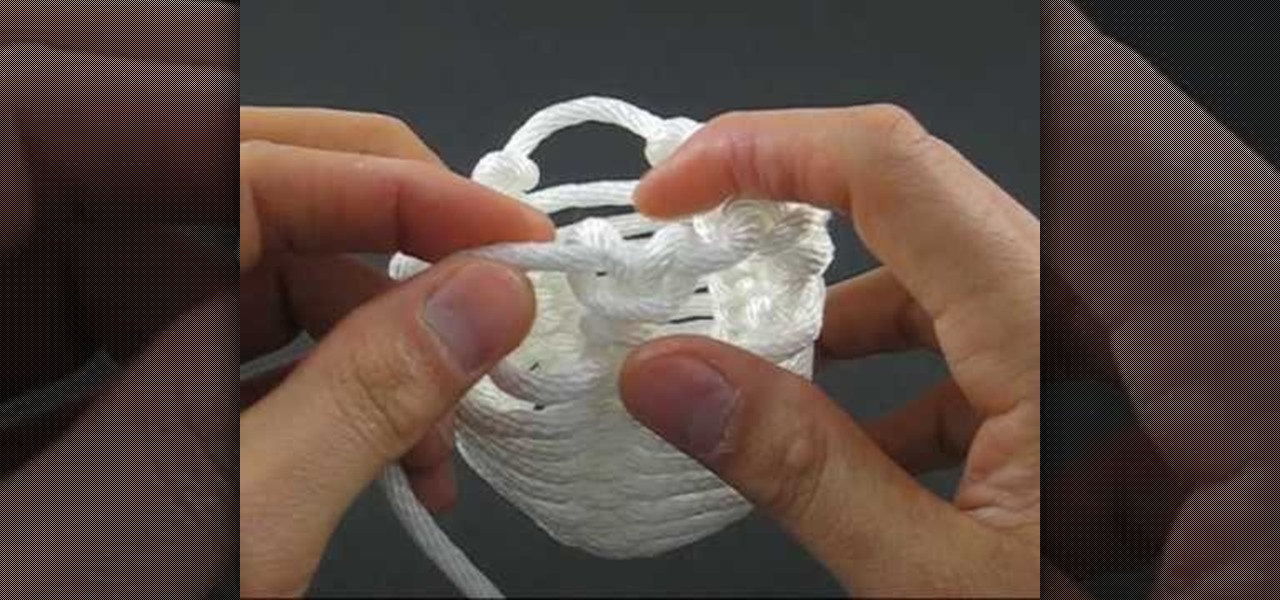
In this video, we learn how to tie a honey rope basket knot. To do this, you will need a 10ft of nylon rope. Start off by tying a counter-clockwise slipknot at one end of the rope. After this, pull the loop of the slipknot out four inches. Then, tie a second slip knot clockwise next to the first slipknot. Draw the loop length of the second so it's equal to the first. Next, continue to create slipknots next to each other until you've done five. No, hook your working end into the first loop and...
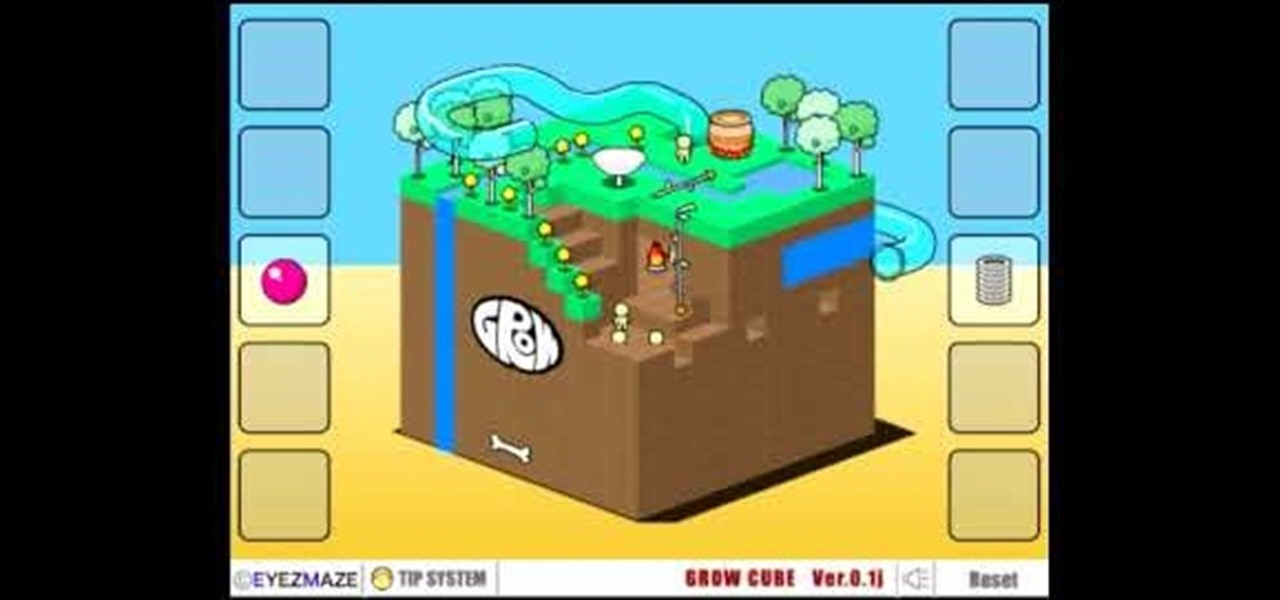
In this video, we learn how to win the Grow Cube flash game. First, make a square shape on the lower right hand side of the square. After this, start to make a line going from this, up to the top and going down to the side. Next, you will start digging on the lower left hand side, then use a tube to help you get to a new level. Keep digging in this same spot, then you will see a door appear. Use the first on the top to get a level up, then continue digging down in the same spot and you will w...