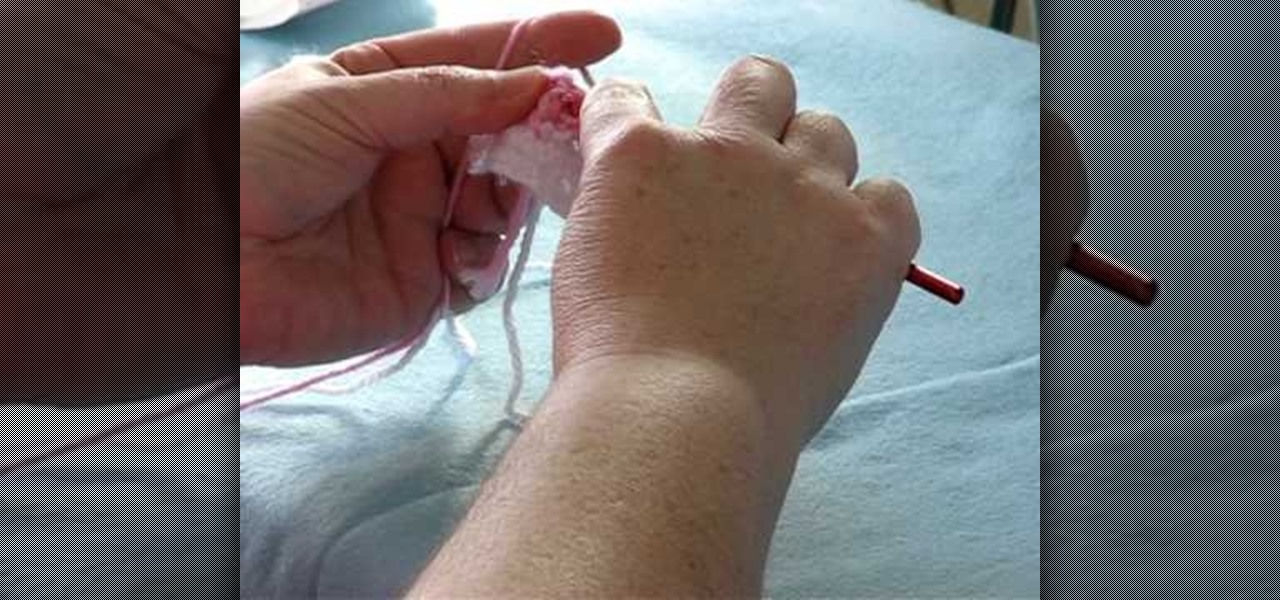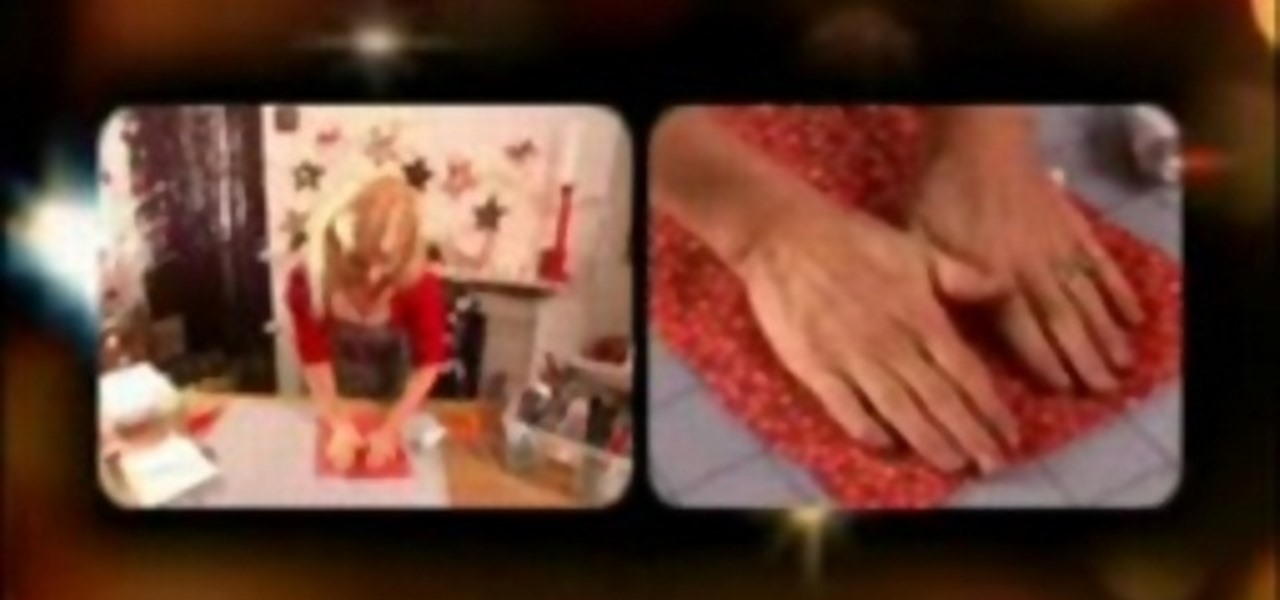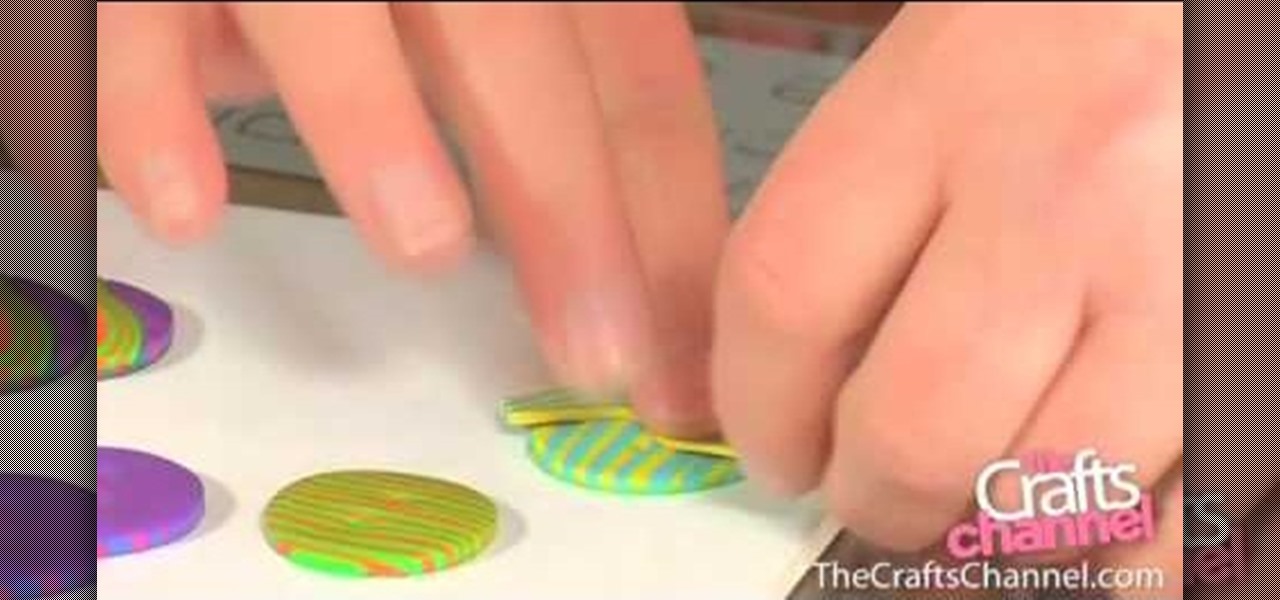
In this video Corinne Bradd explains the steps involved in the creation of stripy fimo buttons. It is rather simple and requires only a few materials such as polymer clay, rollers, cutters and needles. At the start you have to place clay pieces (varying color) in the form of a rectangle one on top of the other and fusing them together by making use of rollers. After they have been fused they are shaped into circles by making use of cutters. Holes are punched into the circle by making use of n...
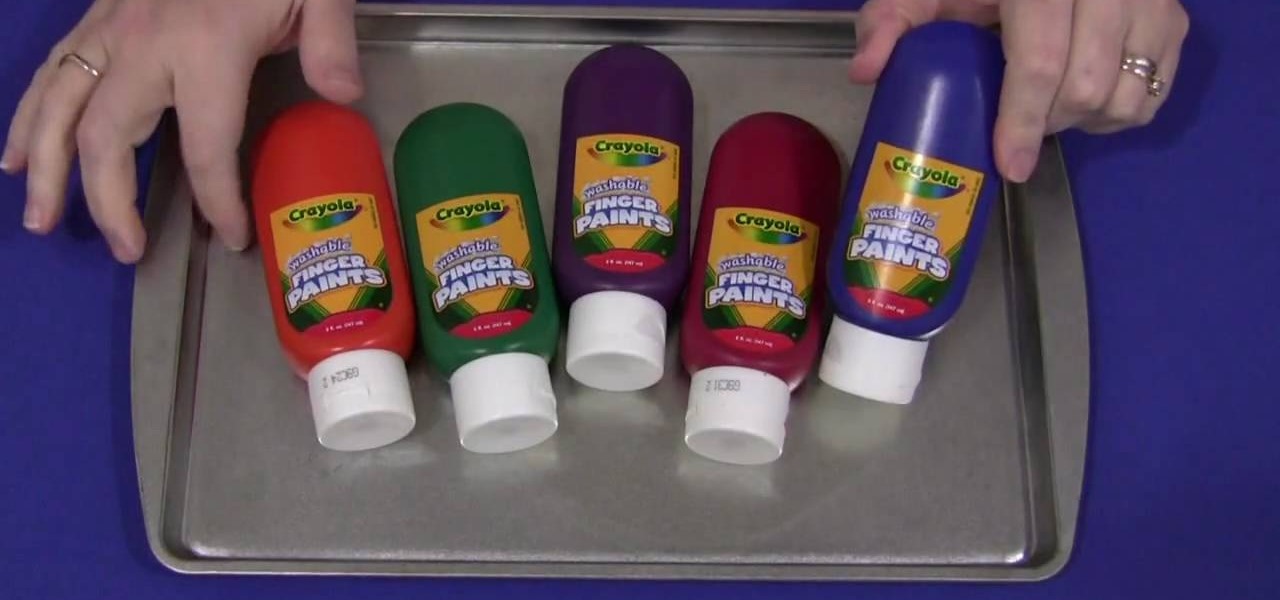
Shelley Lovett from childcareland demonstrates a fun activity involving finger paint that parents can do with their children. She uses finger paints and a pan to make a virtual canvas that is self contained and easy to clean up. She first recommends that only one color be used. She indicates that by using multiple colors, it may result in a brown ugly color and therefore should be avoided. She then spreads the paint onto a flat pan. After the paint is on the pan, parents and children are able...
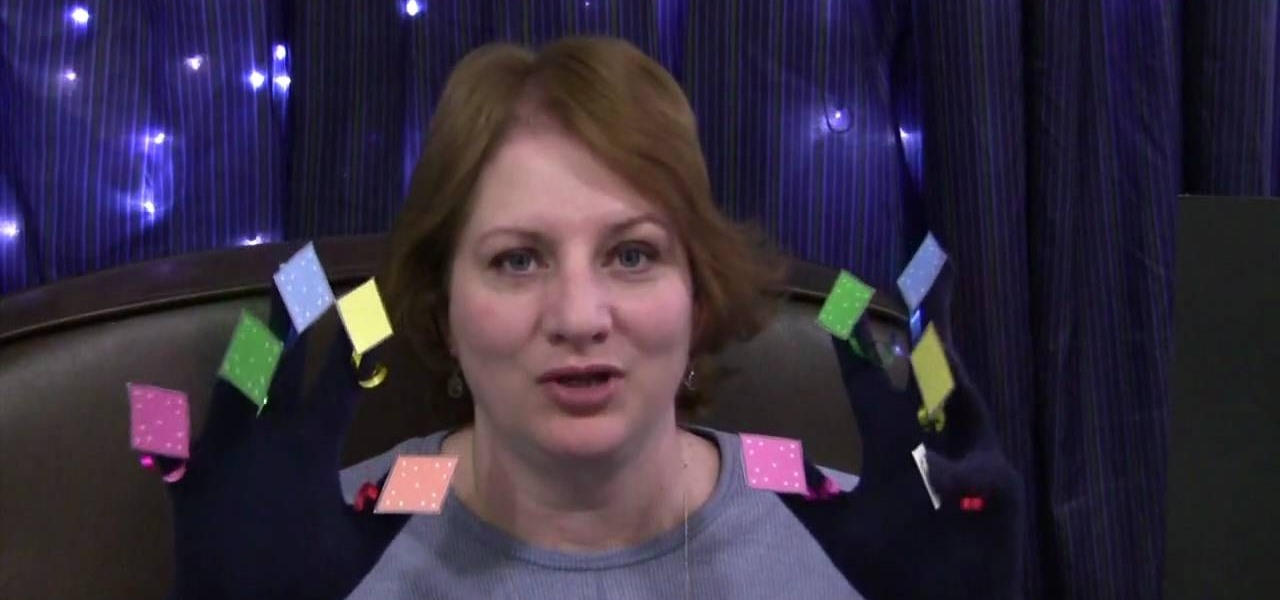
In this how-to video, you will learn how to teach your kids the Ten Little Kites song. First, cut out different colored pieces of paper into kite shapes. Paste them onto the finger tips of two gloves. The words of the song go to the tune of Ten Little Indians. The lyrics go: One little, two little, three little kids. Four little, five little, six little kites. Seven little, eight, little, nine little kites. Ten little kites flying through the sky. Count them, Count them, Count them with me, t...
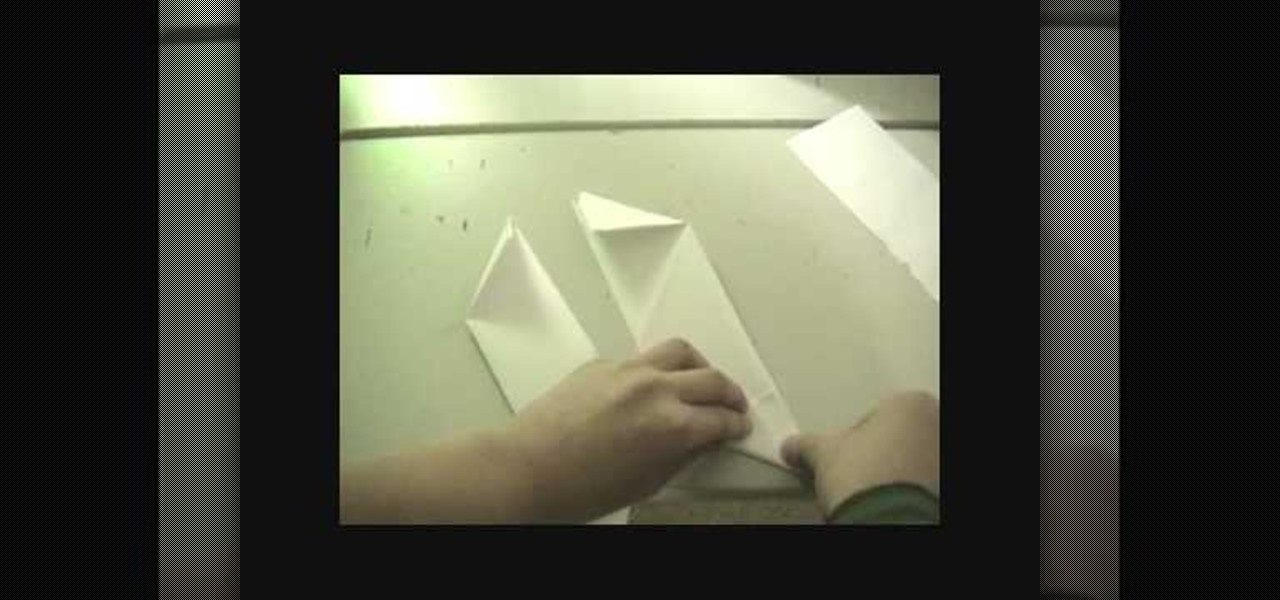
In this Weapons video tutorial you will learn how to fold a ninja star (shuriken) out of paper. Take a square piece of paper and fold it in half and tear it off to get two pieces of rectangular paper. Fold each piece of paper in half lengthwise. Then fold one end of each paper like a triangle. Fold the other end in the opposite way. Now fold both the ends to get a bigger triangles and the final shape of the paper should be like ‘Z’. Put both the pieces over each other in the form of a cross. ...
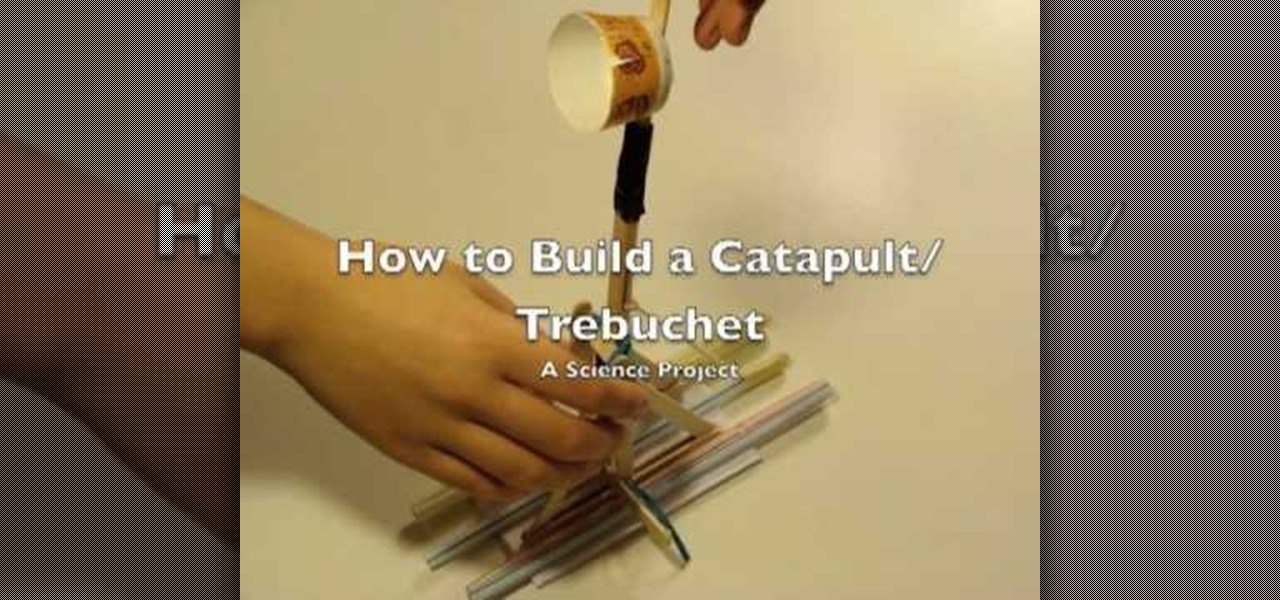
This video demonstrates how to make a catapult out of popsicle sticks. For this project, you will need the following: 7” rubber bands, a box of popsicle sticks, a hot glue gun, a Dixie cup, and tape.

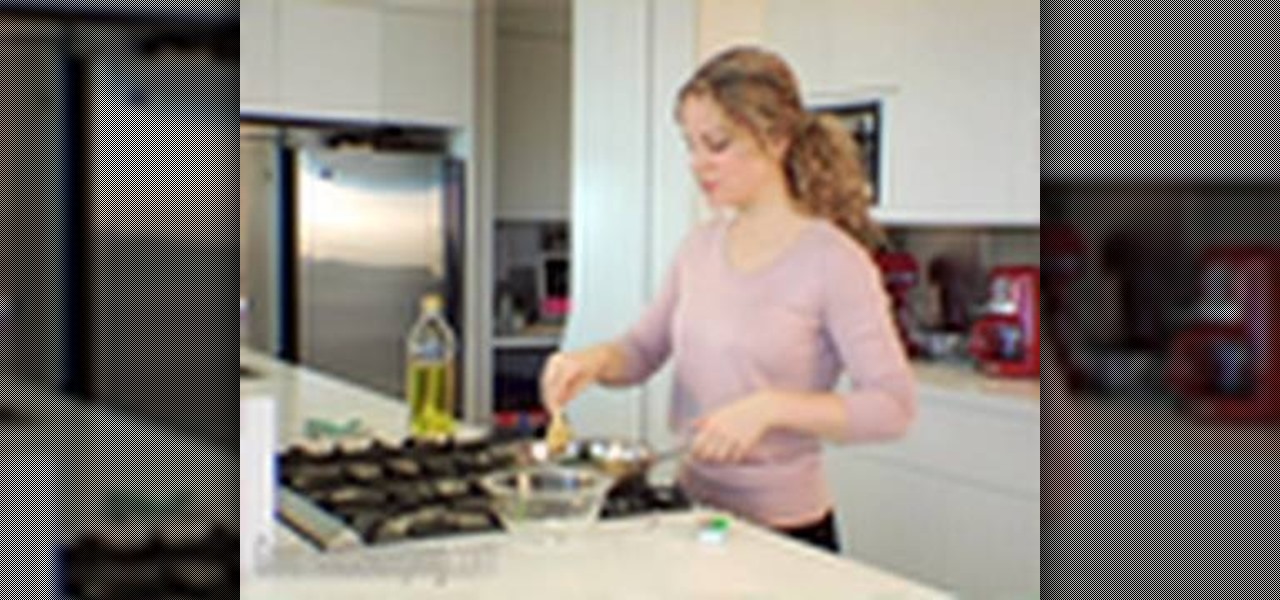
This video illustrate us how to cook boneless pork loin chops. Here are the following steps.Step 1: Take the pork and wash it properly with water and vinegar to remove smell from it.Step 2: Now mince the pork in the grinder to fine consistency.Step 3: add the spices of your choice to it along with curd and lemon juice and leave it to marinate for at least two to three hours.Step 4: Now take the marinated pork and shape it small ball .Step 5 : Flatten the balls and insert wooden sticks in it.S...

The narrator describes how to paint your nails with gold leopard print. Using two coats you can now have gorgeous, glossy nails within a short amount of time. First by making an x shape (like a French tip) then with a second coat going over with gold. Finally by "striping" and "spotting" your nails (like a leopards skin) it finishes off the look. This is a simple process that anyone can follow through with. The end results are fantastic nails resembling leopard pattern. What you need: Gold Sh...
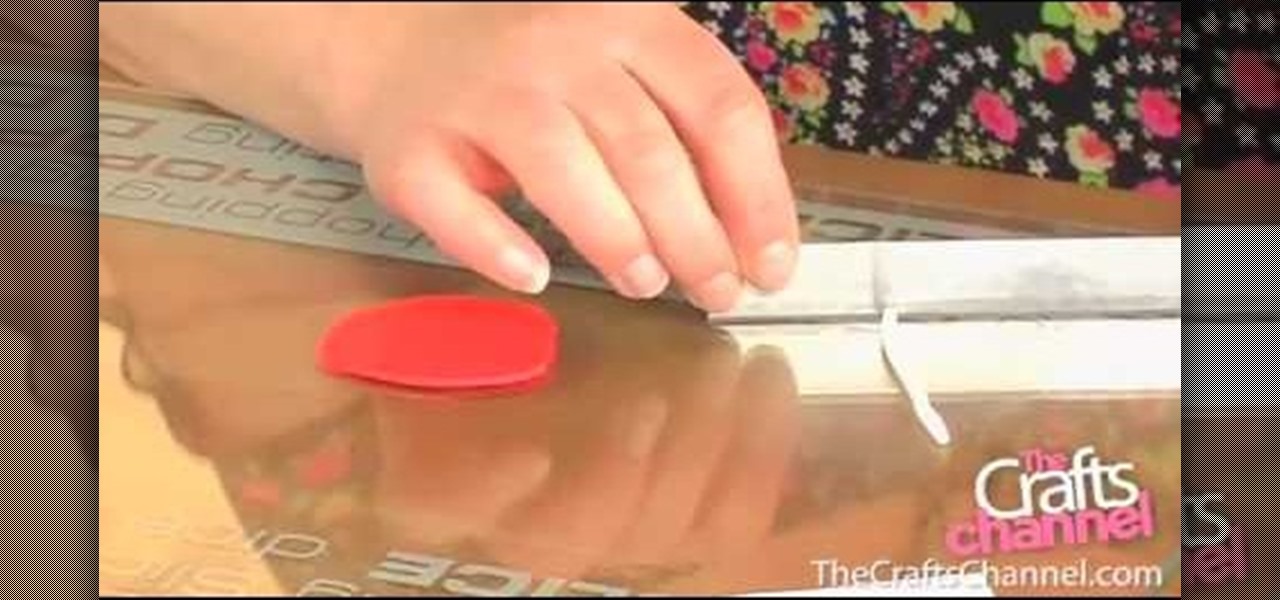
The Crafts Channel teaches viewers how they can make spotty fimo buttons! First, take a piece of fimo and roll it out to about it's a few centimeters thick. Take another color and roll this into a thin long snake shape. Then cut this long snake into lots of tiny slices. Lift them off and put them onto the surface of your rolled out clay. Next, roll over this clay and take a baking surface, cut out the clay with a circular cutter and take away the excess clay. Now with a needle, make your hole...
This is a clear video showing how to easily draw a 3D letter 'B'. First of all you start by just writing the letter 'B' normally; and then you double outline all of the lines you have drawn, both inside and outside of the letter. Color it in with a block color for a 2-dimensional letter. Then its time to make it 3D! In the middle you just add lines parallel to the 2D letter, and also around the top and left sides of the shape; color this in with a darker color, and voila! You should now have ...
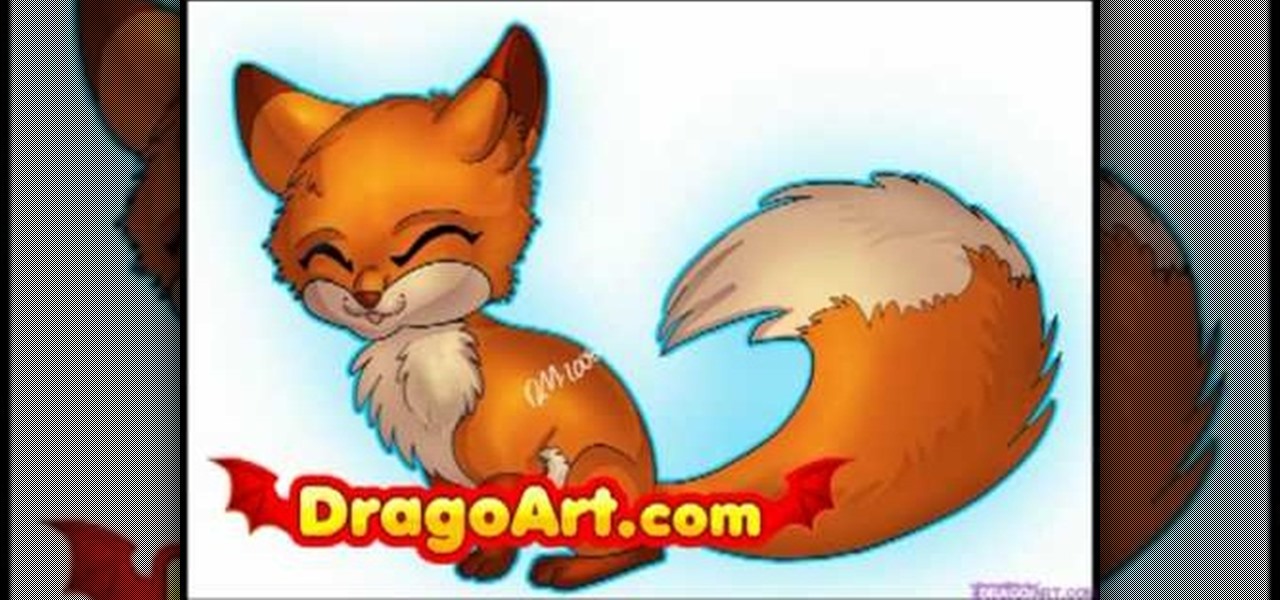
This video illustrate us how to draw an animated fox step by step. Here are the following steps:Step 1: Take a piece of paper and pencil.Step 2; Draw a small oval shape, this is the face of the fox and within this face draw two lines representing the eyes. Draw a small circle between and a bit lower then the eyes representing the mouth.Step 3: Draw the body of the fox by drawing a hands free semicircle and extend the semicircle with two very small circle on the lower side representing the leg...
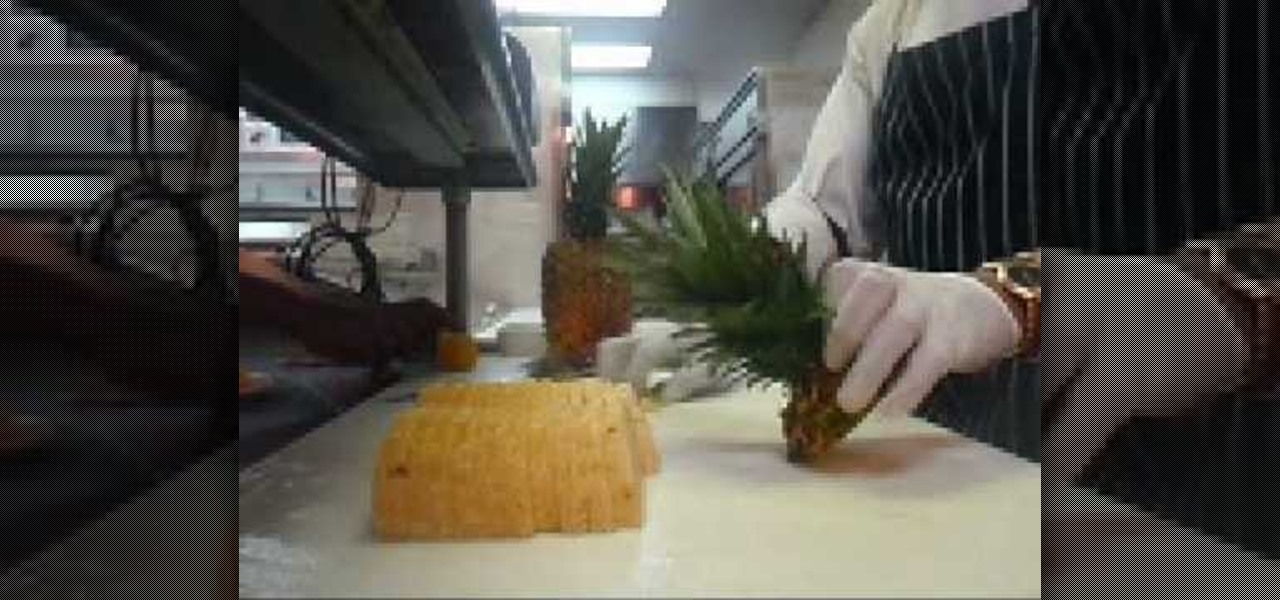
Rene S Frivaldo the "Chefingala" shows us how to cut and display two pineapples on a platter in less than 5 minutes. The top and bottom sections of a pineapple are first chopped off. The pineapple is then halved. The center on each half is then removed by cutting out a v-shaped wedge. The skin together with the eyes are then remove. Both the pineapple halves are then sliced into sections and placed decoratively on the platter. The pineapple crown is sliced lengthwise and placed as a decorativ...
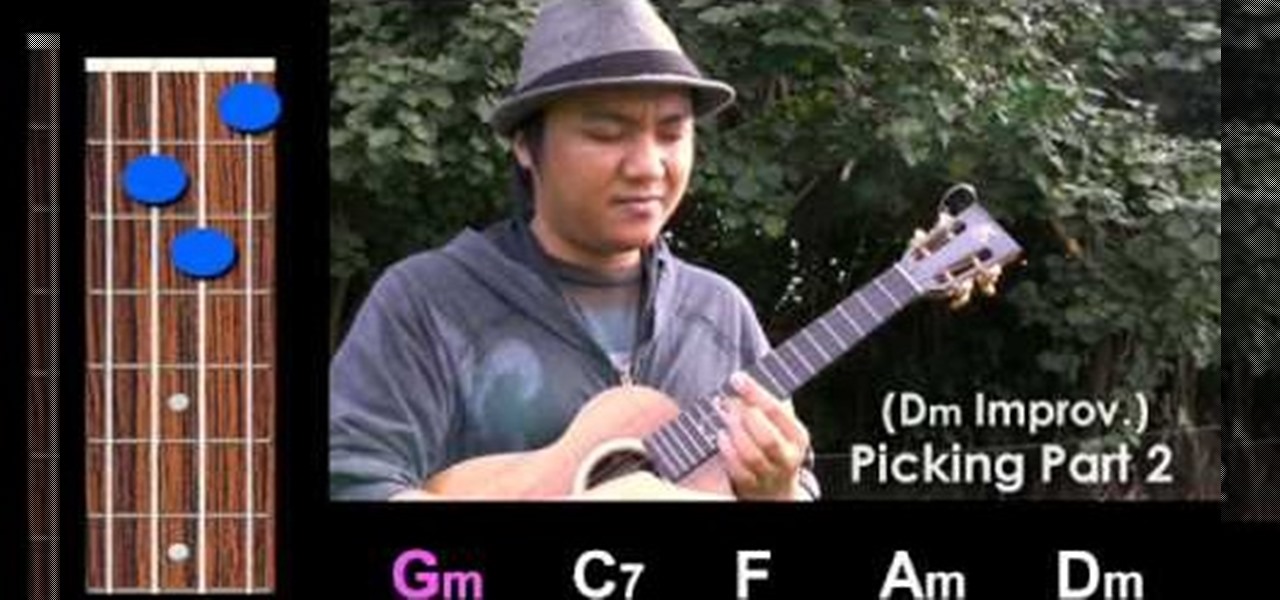
In this how-to video, you will learn how to play the Carlos Santana song "Europa" on a ukulele. You will need a tuned ukulele and knowledge of basic chord shapes. The chord progression consists of the chords Gm, C7, F, Am, and Dm. End the previous progression with the chords Gm, A7, Dm, A7, Dm. Repeat these progressions in succession. These two progression make up the majority of the song. If another person is playing the chord progressions, you can do improvised soloing over the entire song....
In this video, we learn the snuff out your candle by snapping your fingers trick! The first thing you need to know is how to snap your fingers! You will want to make a check mark shape with your fingers close enough to the candle flame to where the flame will go out right when you hit your finger next to the flame. You will want to practice this in your home before you try it out in front of friends or family. It should take you only a few tries before you got the technique on just how to do ...
In this video, we get tips on how to get into shape and add fitness into our lives. One alternative to get fit is to just add fitness into your everyday routine instead of having to add in a specific work out regimen. Something you can do is take the stairs instead of the elevator and park further away from the store. You can also place things to keep active at your desk including weights and doing leg exercises. While on breaks, you can also do exercises with co-workers. All of this exercise...
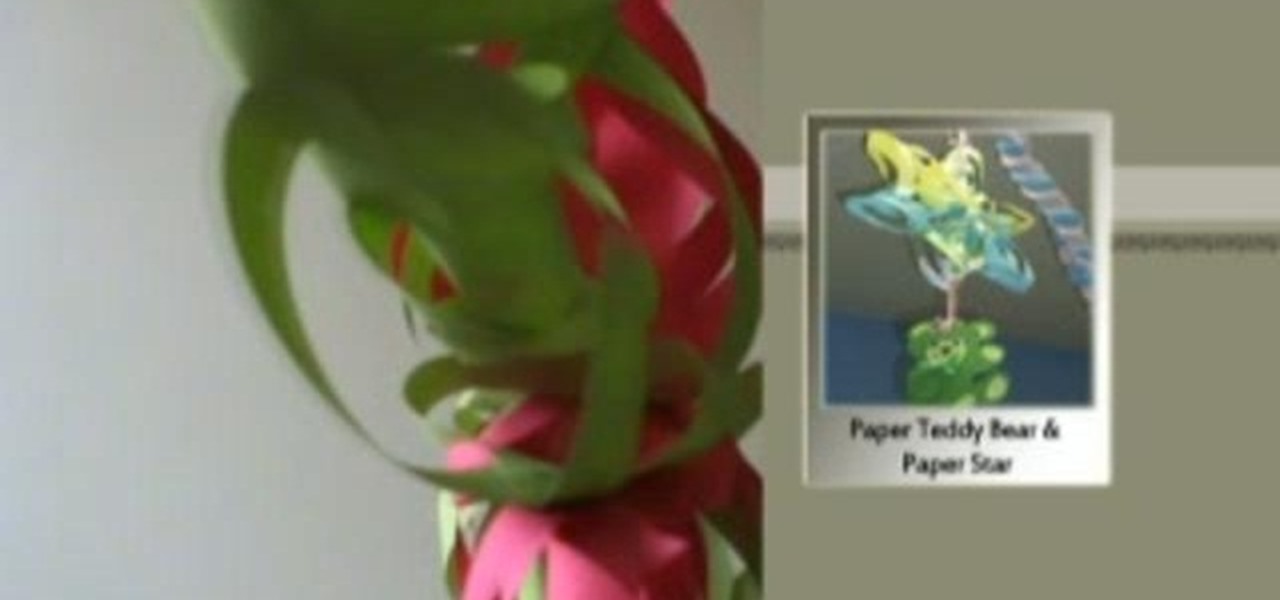
This is a great instructional video on how to make a decorative paper star. The materials you need are color papers, ruler, stapler, scissors, adhesive tape, pencil and cutting pliers. Take a paper and make a square of 20 cm side. Now fold the paper twice and get a triangular shape. Now draw four lines on it. Then cut along the lines with the help of scissors. Take the middle square and staple it. Then go to the back side and staple the ends. Repeat this process and get a star. You can make t...
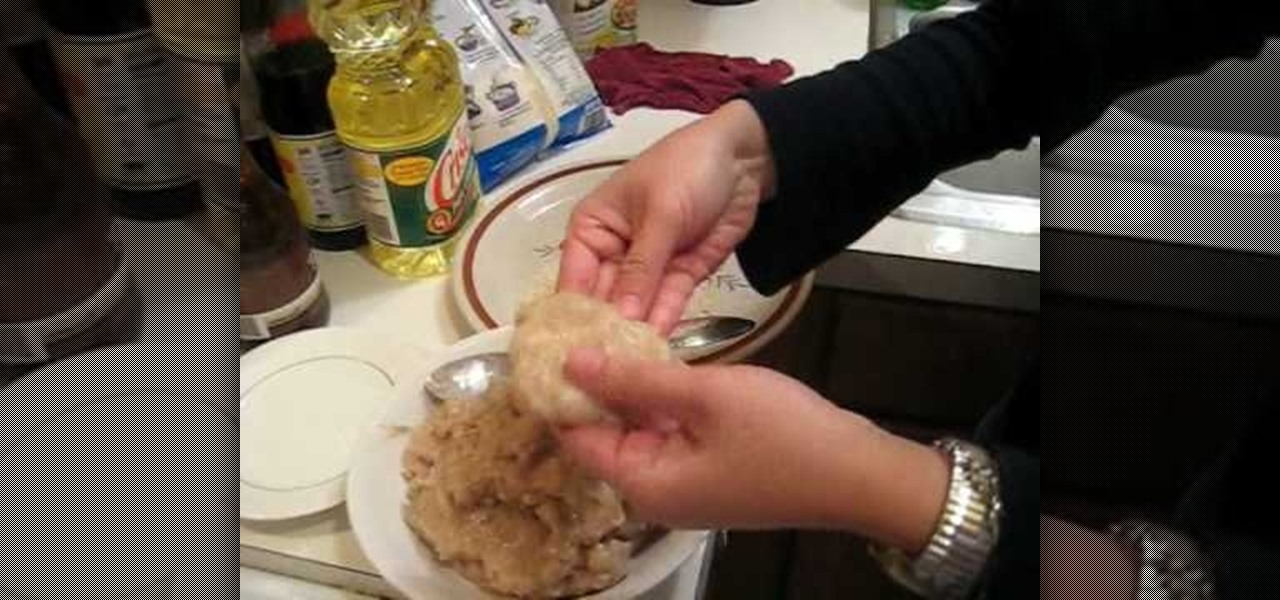
This video is about how to cook Thai shrimp cake. The first step that you will have to do is to peel the shells of the shrimps off. After peeling the shells, the next step is to blend the shrimps. Then the next step is to stop the blender once the shrimps have become smooth enough. And just simply put the salt, sugar, and pepper. Then blend the shrimps again. After blending, place the blended shrimps in the freezer for fifteen minutes. After 15 minutes, prepare the frying pan. Before dipping ...
This video is a tutorial on how to paint nails with cheetah print and rhinestones. The tools shown by the instructor consisted of nail polish and makeup sponge. The first step taken where to cover the tip of the nail in a white polish with a burnt orange colored finish. A sharpened pencil is used as an art tool to shape round circles onto the corners and center back of the nail made of a dark brown nail polish. The instructor then takes a glittery gold color to make river like patterns runnin...
Donna teaches how to do a front-post, back-post crochet stitch. First of all you'll need yarn and a hook. Start with a single crochet. Donna uses white to create the single crochet and to create a heart, goes over the single line with pink to create a double crochet. To create the double line, go around and through. from front to back, through the single post. Always have the yarn going through the same side. The basic method using the pink, is to make the design in a "V" shape. Using this me...
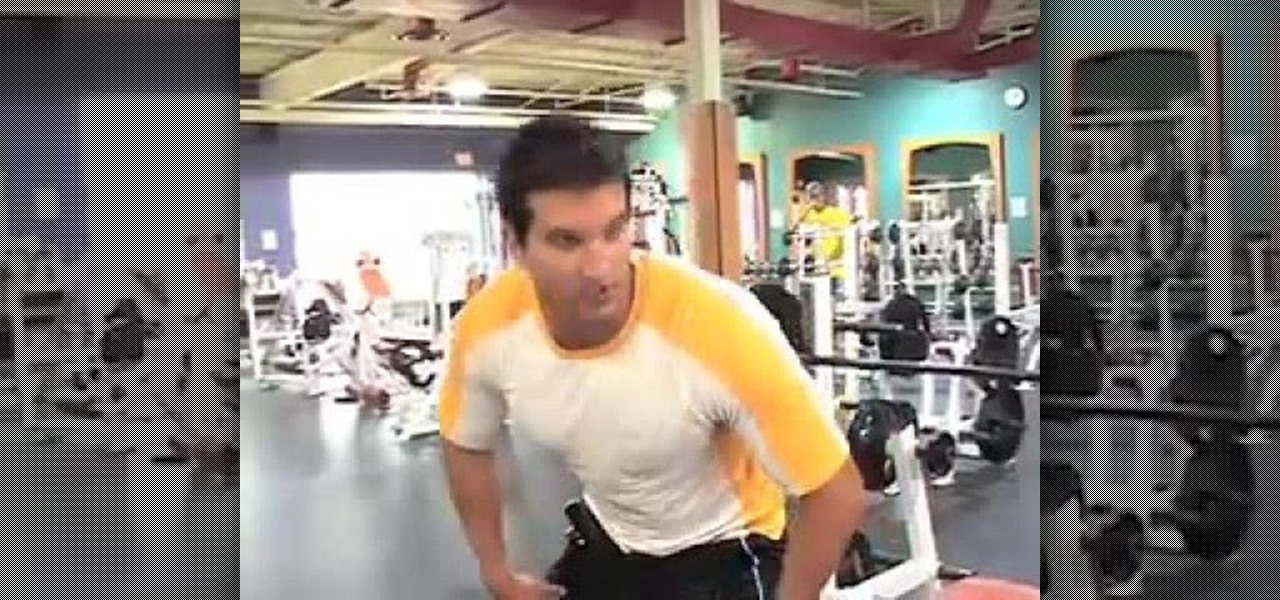
Getting into killer shape can be a lot harder than it seems. It takes a lot of hard work, dedication, and knowing the right approach. Trainer Vince Del Monte shows you seven exercises to have a killer workout.
Maria from [www.stamininspirations.blogspot.com stampininspirations.blogspot.com] shows us how to make a 4x4 mini double accordion picture album. You will need a 4 x 9 in. piece of designer paper, a 4 x 9 in. piece of card stock, a 3.5 x 8.5 piece of designer paper, two 3.5 x 12 in pieces of card stock and two 4 x 4 in pieces of chipboard as well as some smaller pieces of designer paper and card stock and some ribbon. Rubber cement, a scorer and some double sided tape are also needed. Maria s...
Learn how to make a unique rose from clay that can be given as a gift to your special someone. 1. Make about 20 tear-drop shapes out of the clay. 2. Flatten each of these to form petals. 3. Roll one of the petals up to form the center. 4. Curl each of the other petals around this center. 5. Stretch the base of the flower downward to form the stem. Add clay as needed to make the stem the desired length. 6. Form leaves with the remaining "petals" by creasing them and attaching them to the stem.
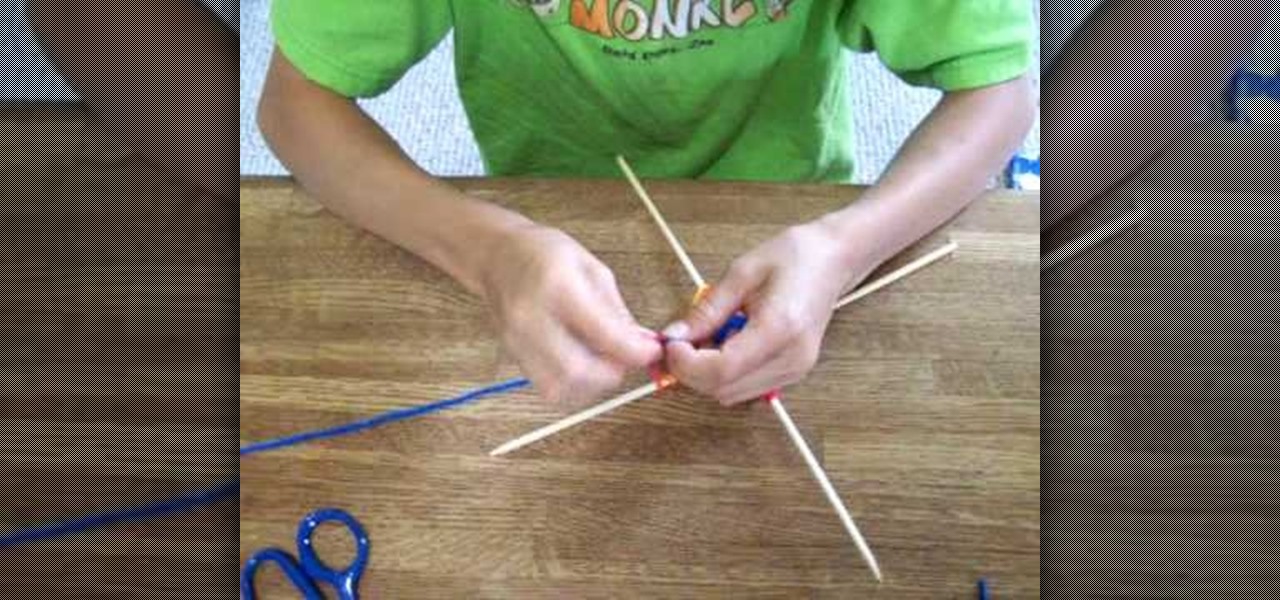
In this video and boy and a woman are showing you the steps to create a "God's Eye" or "Evil Eye". The materials that you will need are 2 sticks, yarn of your selected colors, and scissors. First, you take 2 sticks and use the yarn to knot around the middle wrapping diagonally to form a "t" shape. Then you take another piece of yarn, hold the end in the middle, and start wrapping around each stick going over one and under the next. Continue this pattern until you are done or unless you decide...
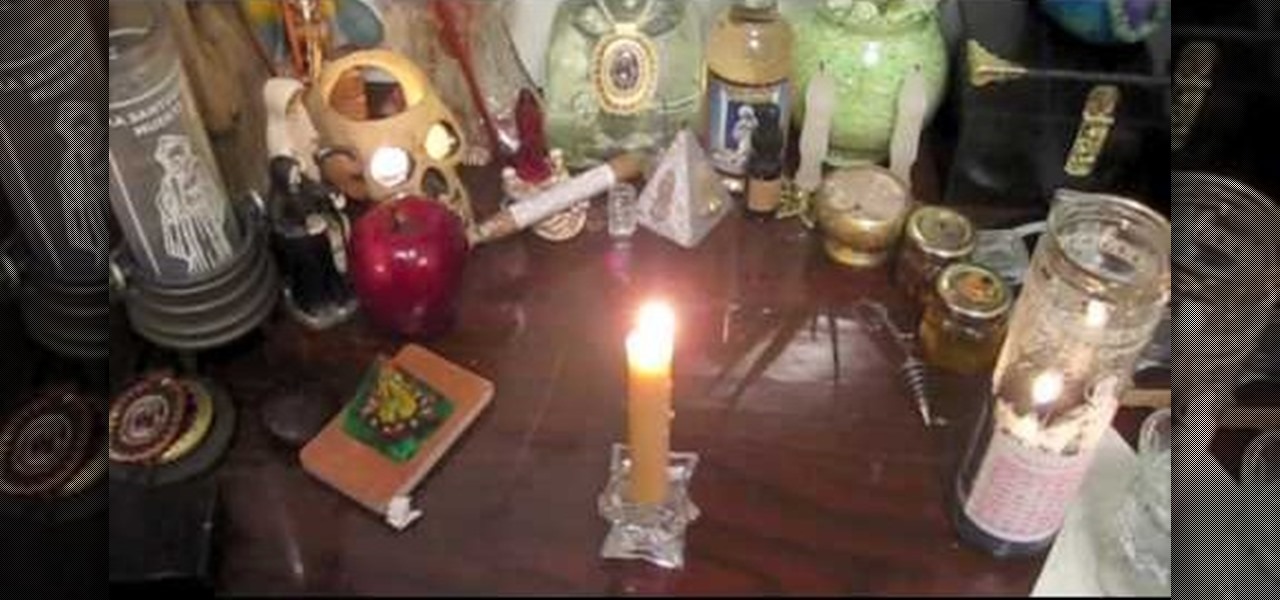
Be a DIY superstar and impress your friends with your newfound craft skills by turning simple votive candle holders into a hanging candle tree. You can do it all with simple home supplies and by following the instructions in this video.
Good Housekeeping is known for its helpful tips for women. It brings useful tips for women who are dieting. In the following some tips are given to loose weight:
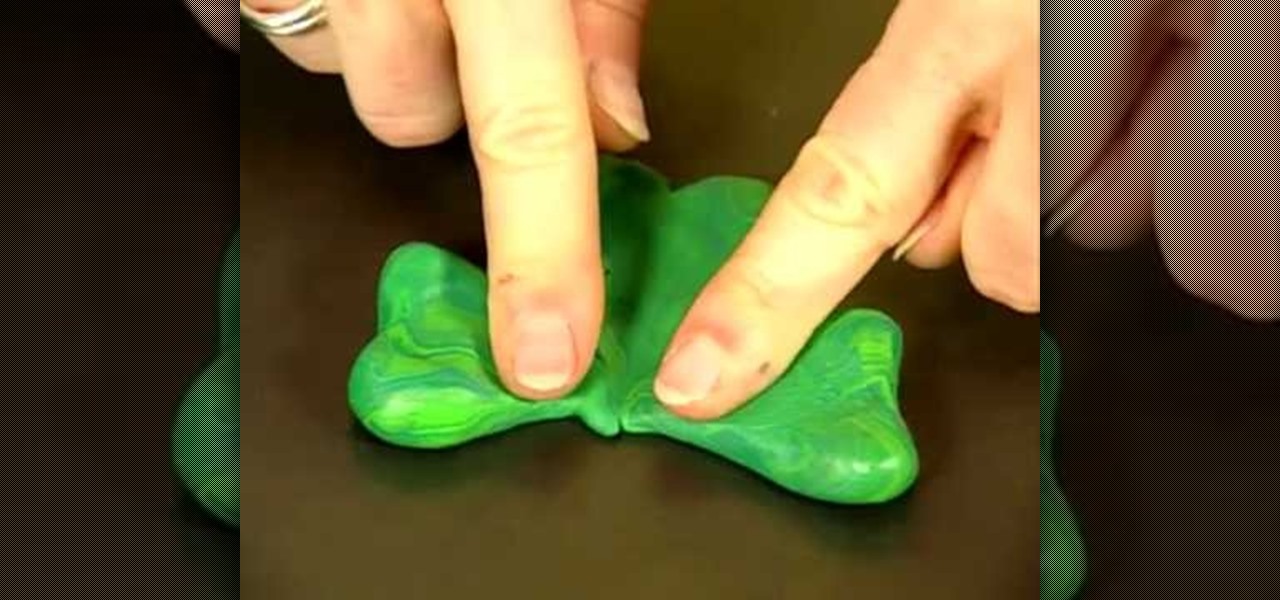
In this how-to video, you will learn how to create a lucky charm. It is a symbol of good luck among the Irish. You will need a baking sheet, green polymer clay, a paper clip, pencil, and a key ring. Roll three one inch balls from the clay. Shape them into the clover leaves. Next, put them on a baking sheet and stick the pointed ends together. Set a paper clip in the center and flatten a piece of clay to seal the paper clip in. Draw lines in the center of the leaves with the pencil. Bake it ac...
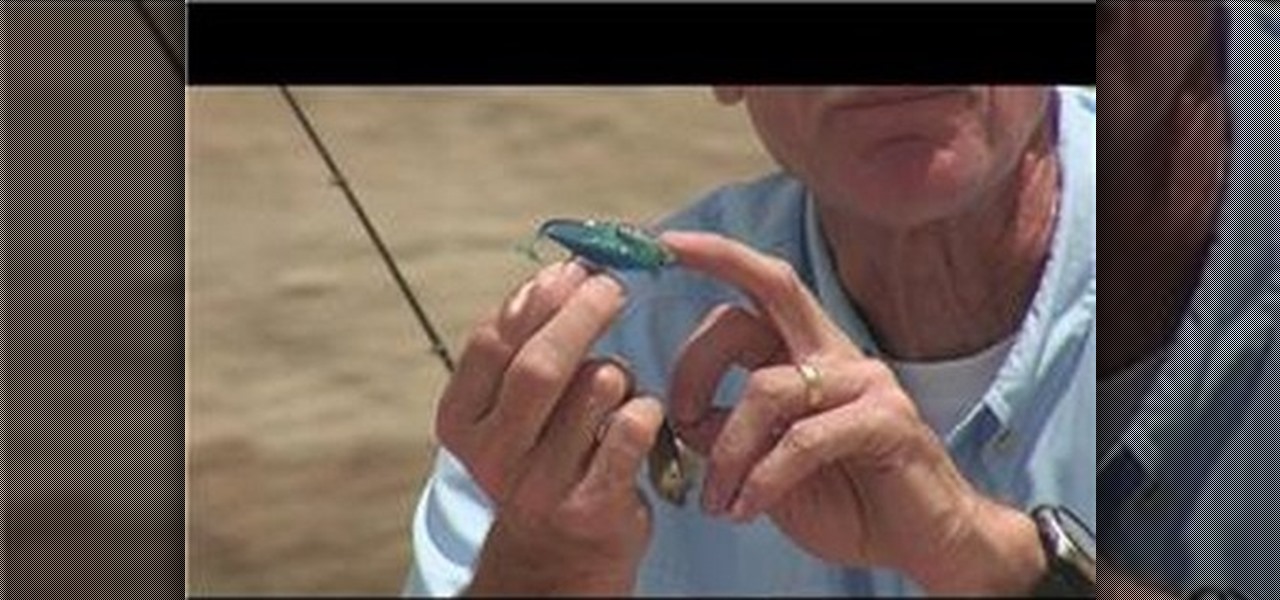
In the summer and fall, swim baits are very effective in luring in forage fishes that have reached their maximum size. In this video, expert Wayne Gustaveson gives an overview of what swim baits are and how you can use them to catch more fish. Swim baits are plastic figures that imitate small fishes. There are various swim baits to chose from and one thing fishermen look for in the bait are the specific sizes and shapes. Each swim bait also contains a core components that is reusable. This in...
This video details how to draw a penguin that is skiing downhill. You start off by drawing the eyes in an oval shape, and drawing a line cutting them in half for the eyelids. Don't forget dots for eyes! Following that, you draw the penguin's mouth and the top half of the body, including the flipper. You will next draw the ski poles and the lower half of the body. Of course, in order to ski the penguin will need two feet, and two skis so you should probably draw those too. You can now add deta...
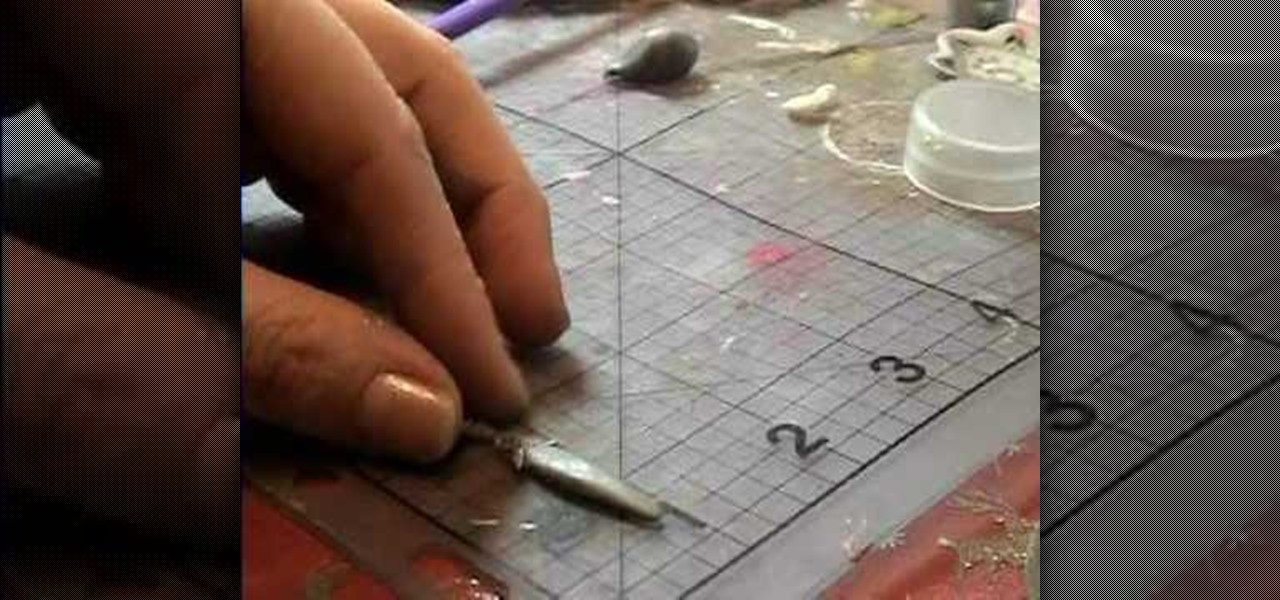
Garden of Imagination is demonstrating how to make a miniature knife for the doll house. This knife has a clay blade and a metal handle. The metal handle is made of a hanging earring finding. Now some black clay is taken. It is rolled and flatten and made into the shape of the blade. Now this is fixed to the handle and some glue is applied so that it stays permanently. Now the knife is ready. Now this is to be baked and after that some glaze is applied using brush so that it gets a shining ef...
This video shows how to make a mini salad out of clay. The first thing you do is get a very thin large green oval shaped piece of clay. Then add details to make it look like real lettuce. You can put some holes in it and tear it up a but. Then put it in a pan and with a blow dryer heat it up until it hardens up. After you heated it tear it up in very small pieces. Then get small pieces of orange clay and cut it up small to. This will be the carrots. Mix it all together and but some tls which ...
This video shows you how to make your own home made Christmas reindeer decorations. You need some floral fabric, scissors, a few feathers, and some artificial eyes. Draw a reindeer template on some cardboard, using a cookie cutter if you wish, and cut it out. Paint some glue thinly on the reindeer shape. Lay the fabric on the glue and spread it out with your hands. You can use anything for this, even wrapping paper. This crafty look is very fashionable at the moment. Attach the plastic eyes a...
Watercolor painting is a great way to get introduced to the world of painting and fine art. The free flowing nature of watercolor allows you to start out simply as you refine your craft. You can make any shape or image that comes to your imagination. In this video series, learn how to paint birds in watercolor.
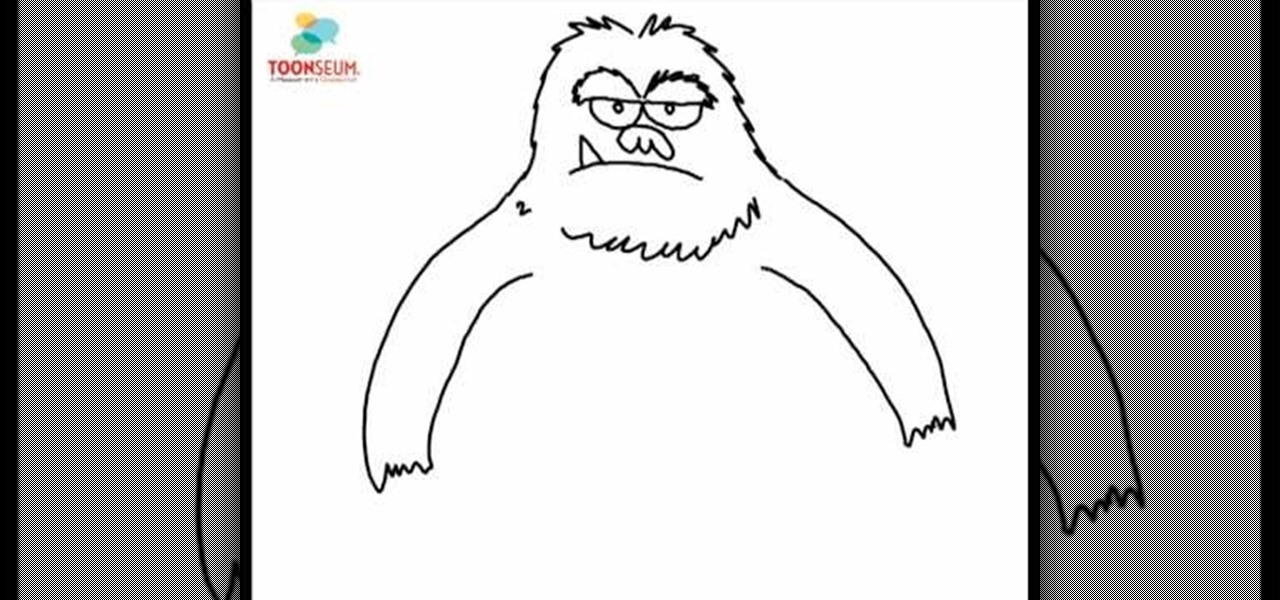
In this video, Joe Wilson, executive director of TOONSEUM explains how to draw a sasquatch. He starts with the eyes, by drawing a B letter on it’s side. Next he draws a pair of pupils and eyebrows. Next, he creates a nose, and a mouth. In order to make the sasquatch look angry he places a triangle shaped tooth sticking out from the mouth. After this, he starts creating the head and body outline. With this finished, he adds hands and feet to the sasquatch. After tweaking the expression a bit, ...
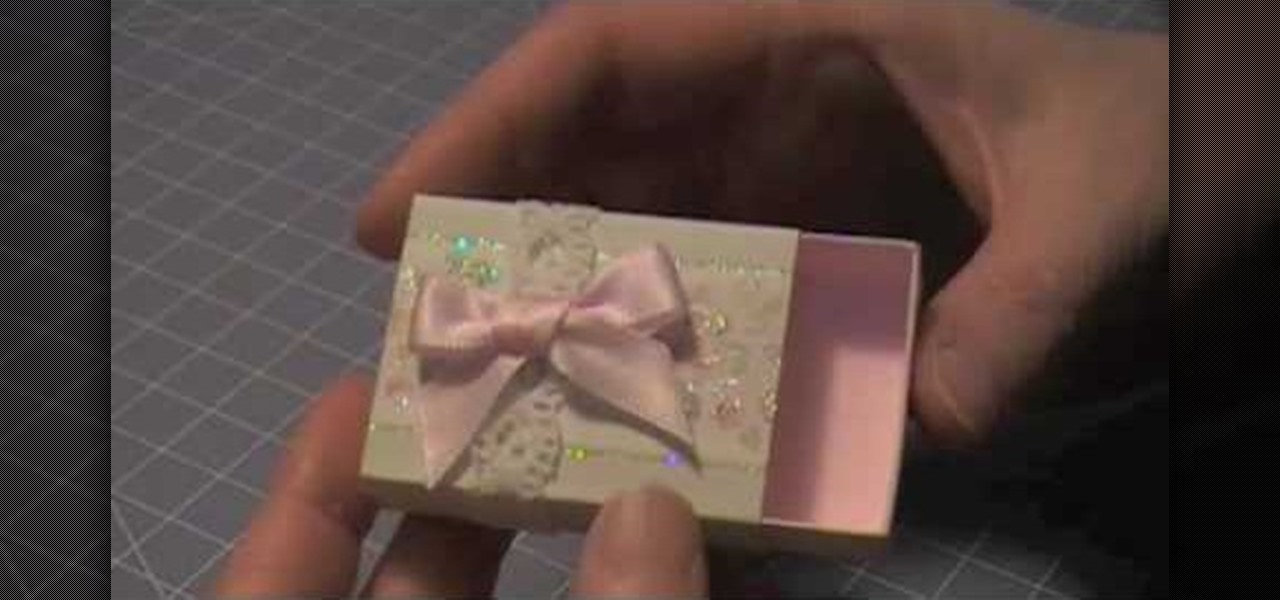
The Artful Paper Doll demonstrates how to make a Marie Antoinette inspired matchbox. Trace the matchbox template onto a piece of decorative paper. Score the template on the creases and then cut the template out of the decorative paper. Fold the creases up. Affix the creases into a square basket shape with dabs of glue to hold the flaps closed. Fold and glue the ends of the box sleeve together. Slide the basket into the sleeve to form the matchbox. Embellish the box as desired. The box can be ...
This is a video montage of Facebook emoticons while Metallica plays loudly. The website Facebokemoticons presents Facebook shapes, symbols, smileys, and emoticons that are available for download off their website for free. They demonstrate the various keystrokes for smile , wink, tongue, curly lips, kiss, grumpy, glasses, sunglasses, upset, confused, shark, gasp, Pac-man, squint, devil, unsure, frown, cry, Chris Putnam, robot, heart, angel, Kiki, and penguin. Then, they show a close-up of eve...
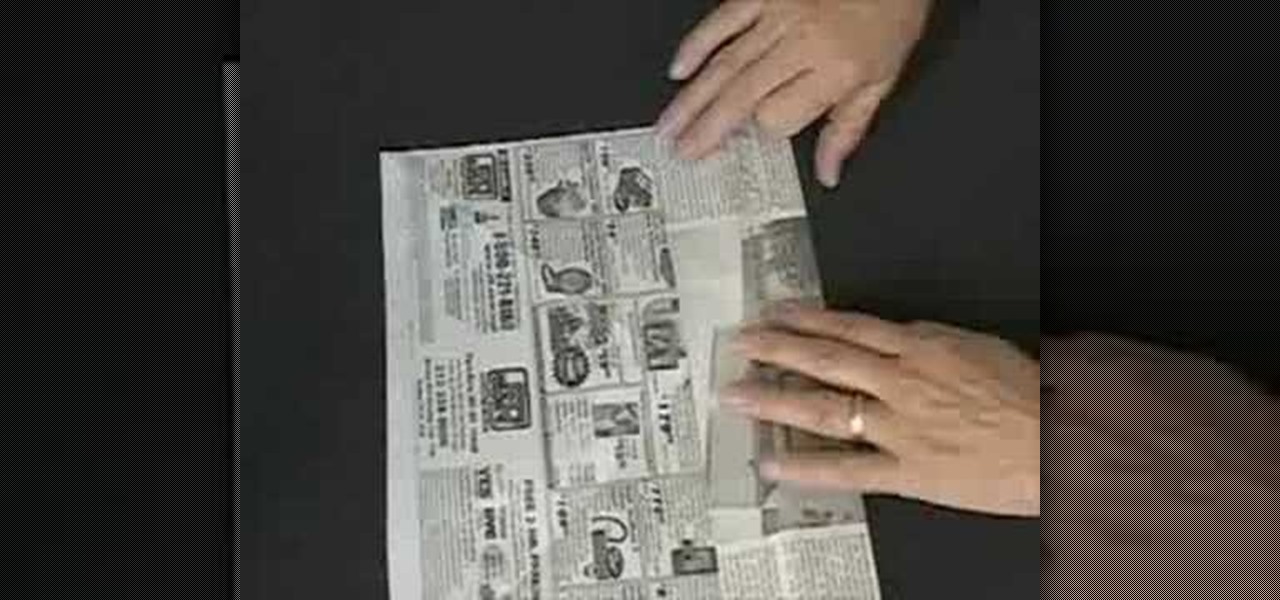
Have you ever thought about creating small boxes out of newspaper? Tomoko Lipp shows you a simple folding and cutting method to do this. Making these can be another way to recycle and be environmentally conscious. You might also consider using them for a unique gift box idea or for storing small items. All you'll need is some newspaper, a pair of scissors, and a pen to mark a few measurements.
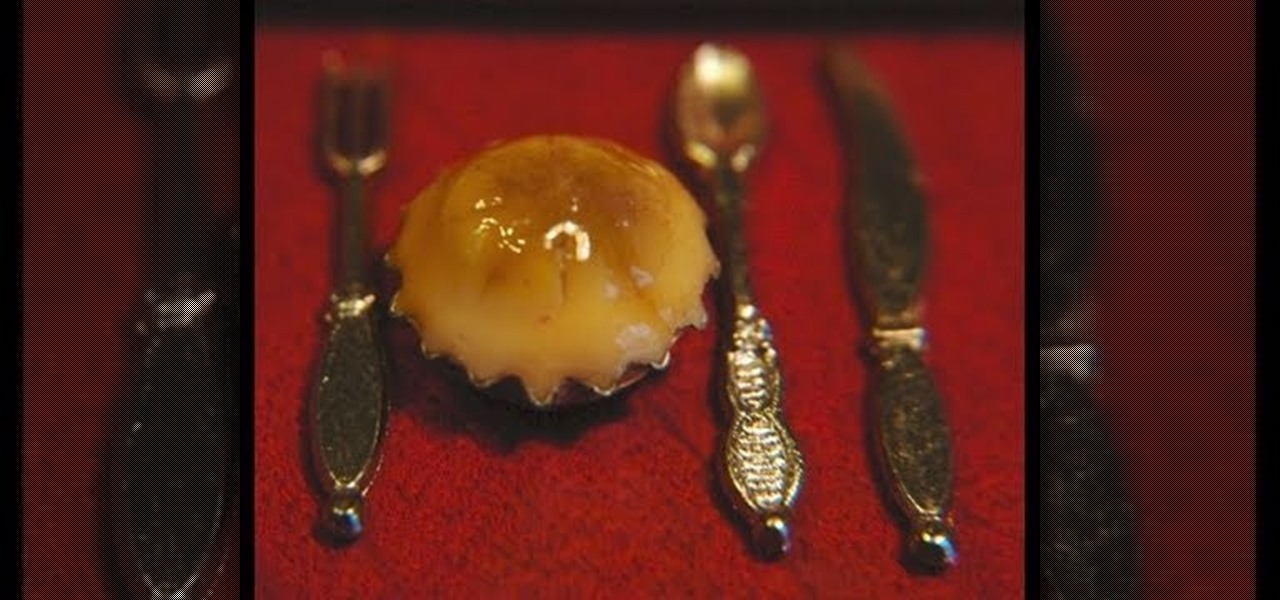
Garden of Imagination demonstrates how to make miniature polymer clay pot pies. Find miniature bottle caps in the scrap booking section of the craft store. You can use a regular sized bottle cap to make a big pie. Roll a piece of ecru clay into a ball and mold it into the bottle cap. Round the top to give it a pot pie shape. Use a small blade to create seared lines into the pie top. Brush mustard yellow pastel to tint the top of the pie. Brush a brown pastel accent on the top of the pie. Bake...
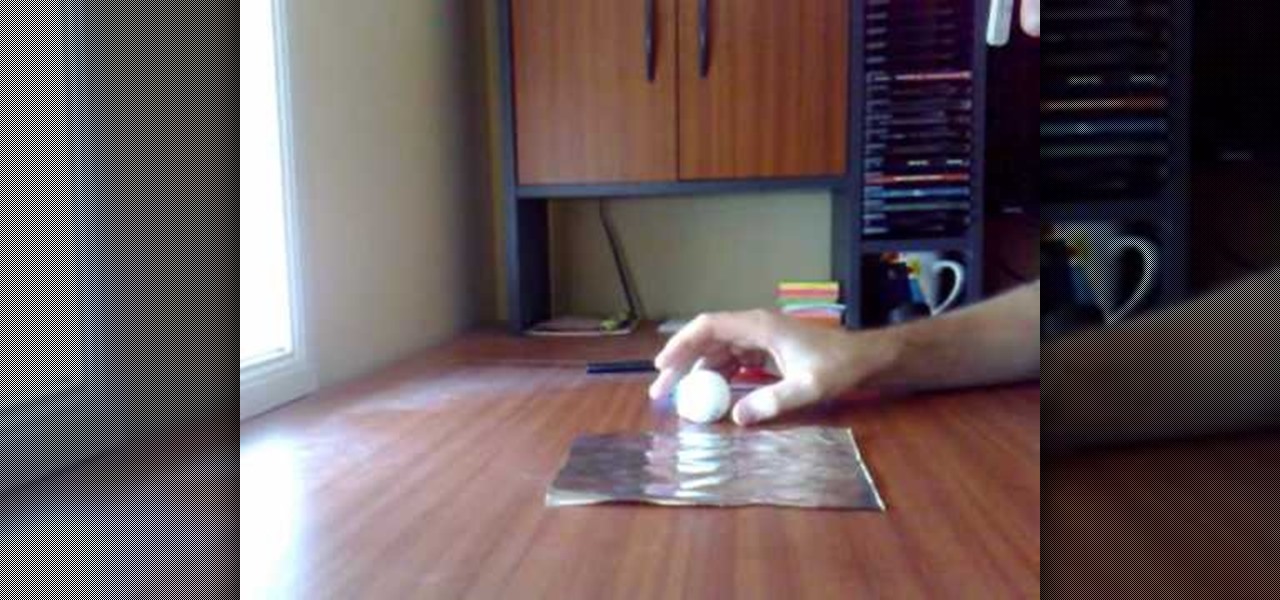
This video demonstrates the easiest and fastest smoke bomb that a person can make. Supplies include aluminum foil, standard ping pong ball, a pen or pencil, and a flame lighter. Wrap the ping pong ball with foil, being extra careful not to tear the aluminum foil. Use the pen to create a funnel shape with the foil. Remove the pen. Now, light the bottom while holding the top. The smoke is toxic, so don't inhale. Make sure the smoke bomb is on a non-flammable surface as it gets very hot. Also, w...
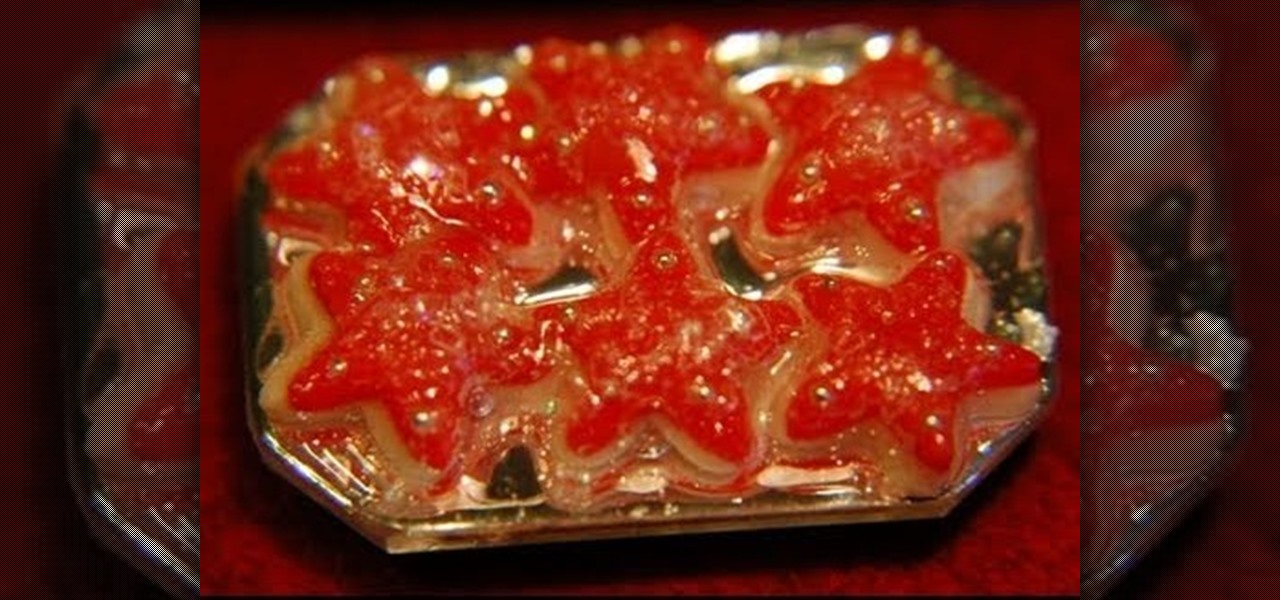
This video shows how to create mini decorated Christmas cookies using polymer clay. They are about the right size for a dollhouse. She shows the process of cutting the clay out in both colors, using a star stencil for the cookie shape and also the frosting. Make sure to have the frosting piece be a little bit smaller than the cookie so that it appears to be sitting on top. She also shows how to place the decorative silver pieces onto the clay. She explains how long to bake these pieces, and a...
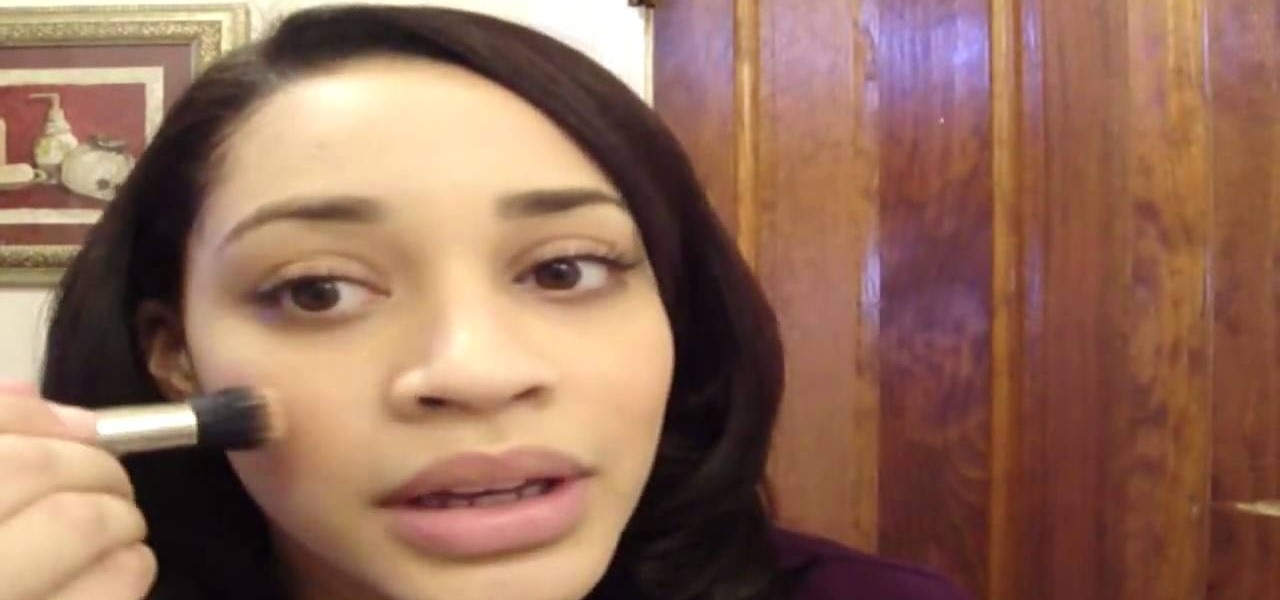
It is a demonstration of a cream blush with a # 130. We will be using a steela convertible collar and a color called camellia which is #1 and is used mostly as a blush which nice and bronzy. You firstly stamp the brush onto the blush and then lightly tap the brush onto your hand first so as to ensure you won't have too much of blush on your face.
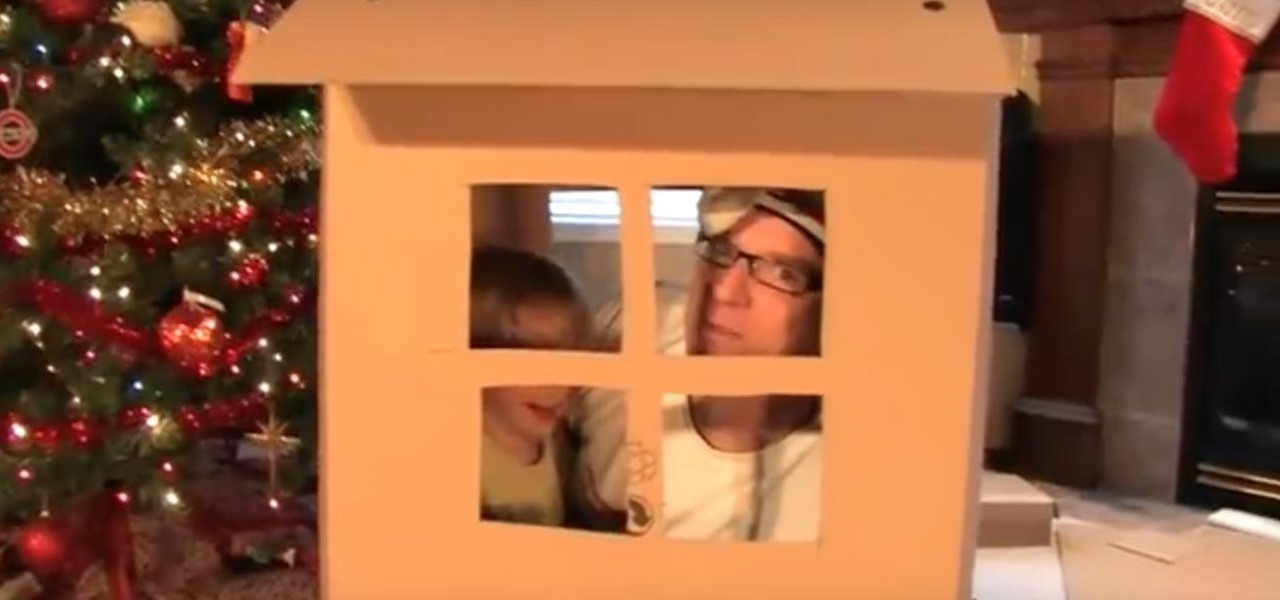
In this video tutorial, learn how to make a cardboard house with leftover cardboard that you may have sitting around from the holidays. You will need cardboard and plastic box rivets.