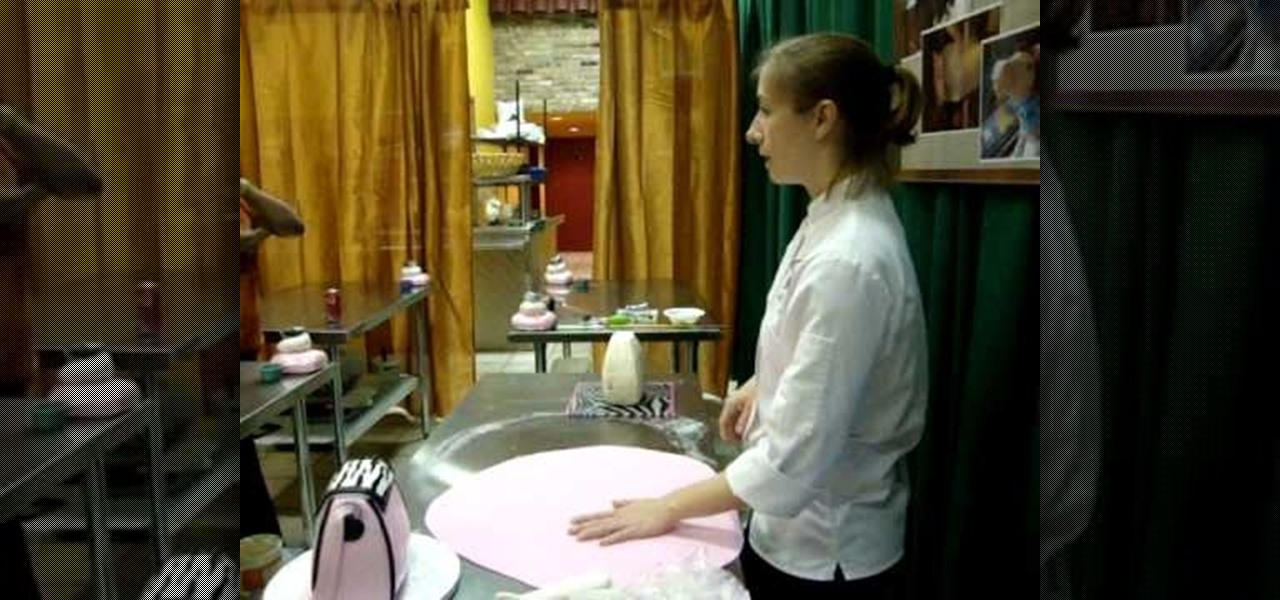
In this tutorial, we learn how to decorate a bronze beauty cake with fondant. Start off by coloring the cake with a light bronze or buttercream color. After you do this, you will need to mix up some medium brown colored icing and place it into a piping bag. When you do this, you will pipe this all around the sides of the cake. When you finish with this, you will color the fondant the same color brown and then roll it into a circled shape to make beautiful flowers. Lay these on the cake and th...
In this video, we learn how to paint nails with an orange, white, and brown theme. First, apply an orange shimmer polish from the top to the bottom of the nail. After this, let them dry and then grab a brown nail polish with a pointed brush. Then, draw on three stripes from top to bottom with the brush. After this dries, use another pointed brush to draw three flowers in a row on the nails. Use the brown to create the details for the petals. Then, you will finish this off by applying four sma...

In this tutorial, we learn how to make & decorate a vintage retro rose romance cake. Start out by rolling out fondant that has been mixed with yellow coloring. Once this is rolled out, you will lay it over the cakes and then cut off the excess fondant from the bottom. Do this on all the layers of the cake until it's fully covered and completely smooth. Then, you will use the same fondant to roll into small flowers that you will apply around the outside of the cakes. Use icing to help the rose...
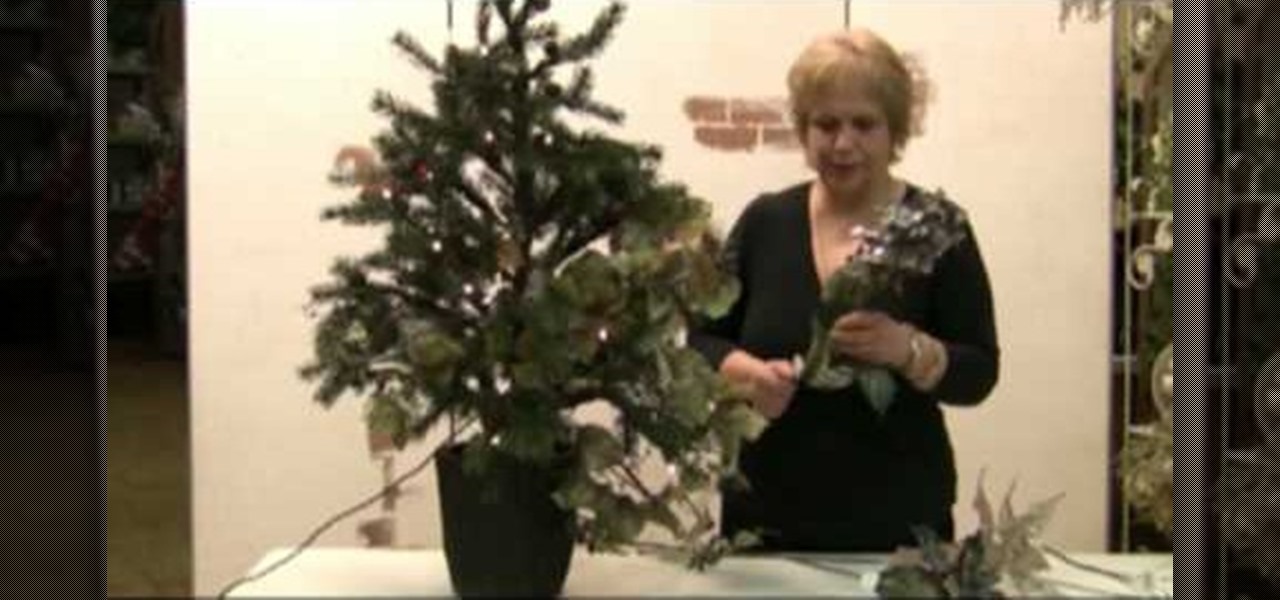
In this tutorial, we learn how to decorate your Christmas tree like a pro. Before you do anything else, put something together that is going to look good that you can place in your tree. Put in different types of flowers, bushes, and garland to make a pretty piece to place inside of your tree. Once you do this, you can shape the branches in the tree around this, then continue to place the elements from the main piece all around the rest of the tree. Add in a long string of matching ornaments,...
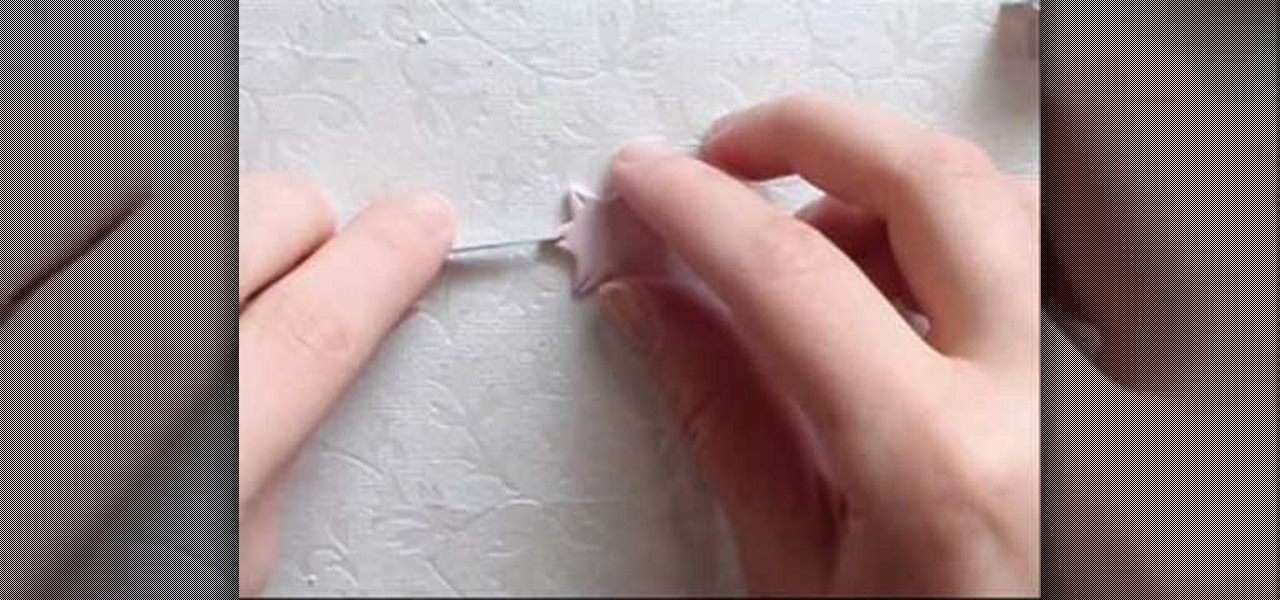
In this tutorial, we learn how to fold a paper rose. First, you will grab a napkin and unfold it. From here, roll the napkin around two fingers. Then, take it off and go two inches down from the top. Roll around this quickly, stopping half way. Grab the corner of the napkin and bring it up. Then, pull the rest down and continue to twist. Take your flower and make a leaf, then twist around the stem tightly. Put your fingers in the middle of the rose and use your finger to swirl it around. This...
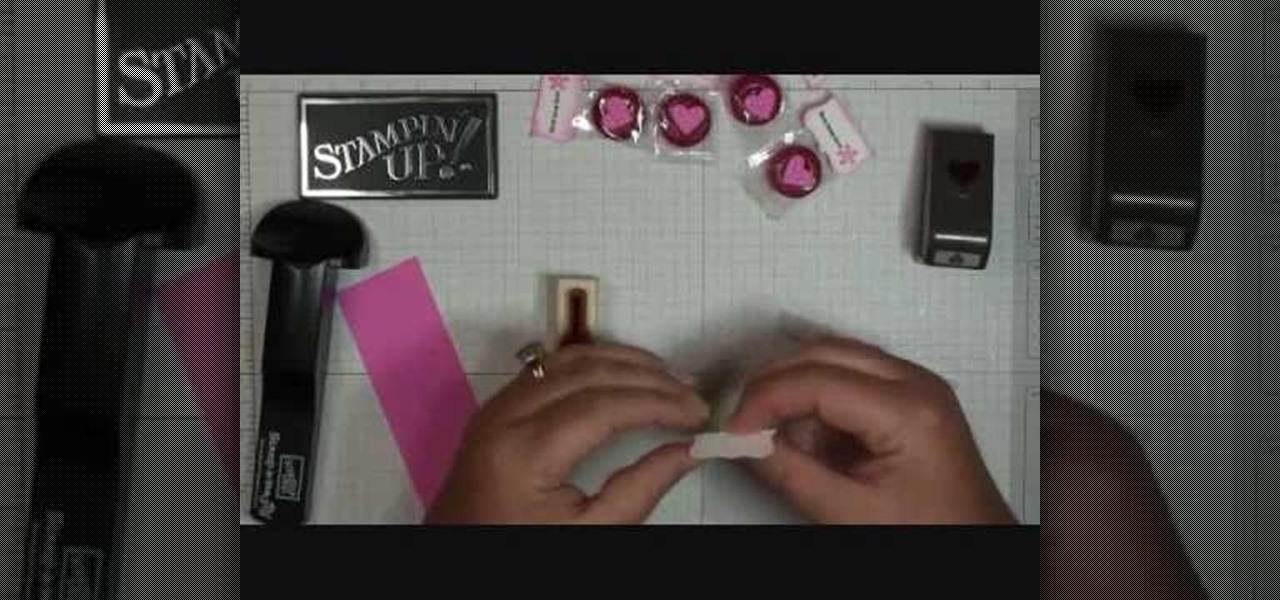
In this video, we learn how to make Life Savers treats. First, use the curly label punch and punch it out of a white paper. Next, fold this in half and then use your stamp-a-ma-Jig on card stock with a love and flower stamp. Use a black and pink marker to fill in the colors of the stamp. Next, stamp this on the piece that was folded in half, then punch out a heart and use sticky strip to adhere the individual life saver to the middle of the sentiment. Once finished, apply the heart and you ar...

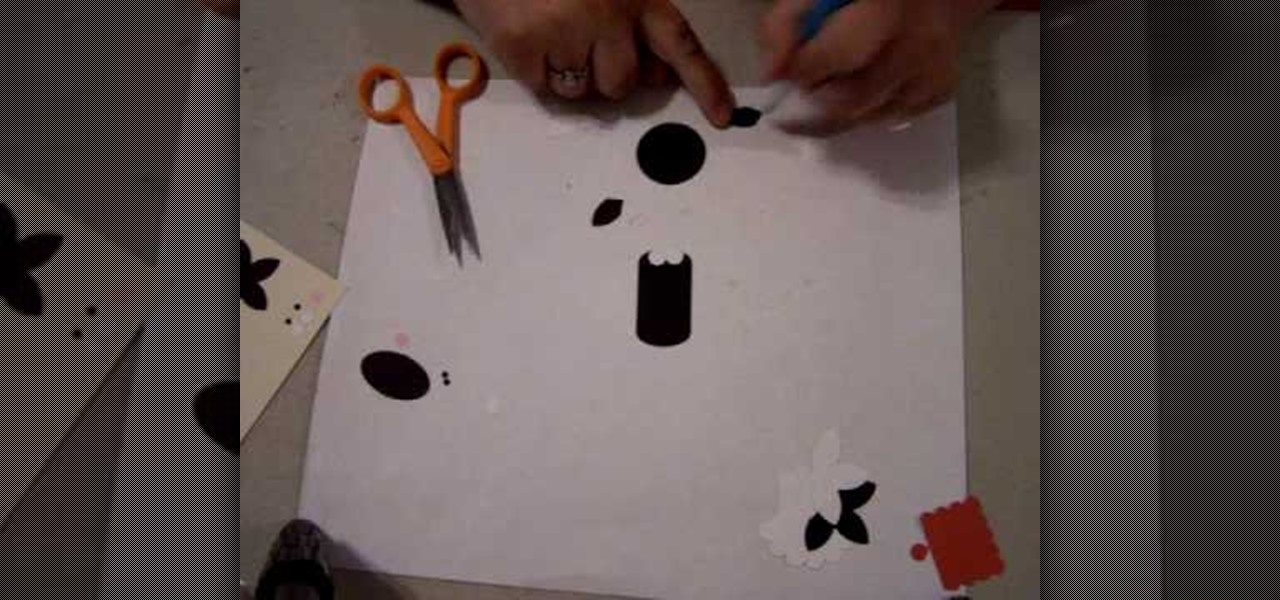
In this tutorial, we learn how to make a cat punch using Stampin' Up! products. First, you will need to use the: circle scalp punch, circle punch, oval punch (black and white), and five petal punch (black and white). You will also need two small circles each of black and pink for the eye and cheek area. Once you have all of these punched out, you will be able to assemble the head. Use the circle as the head and apply the white and black circles in the middle for the eyes. Use the flower punch...
Yeah, we know the title of this video sounds confusing (dichroic what?), but a tri-strand necklace with a dichroic glass pendant is simply a fancy term for a necklace composed of three strands with a glass pendant hanging from the bottom.
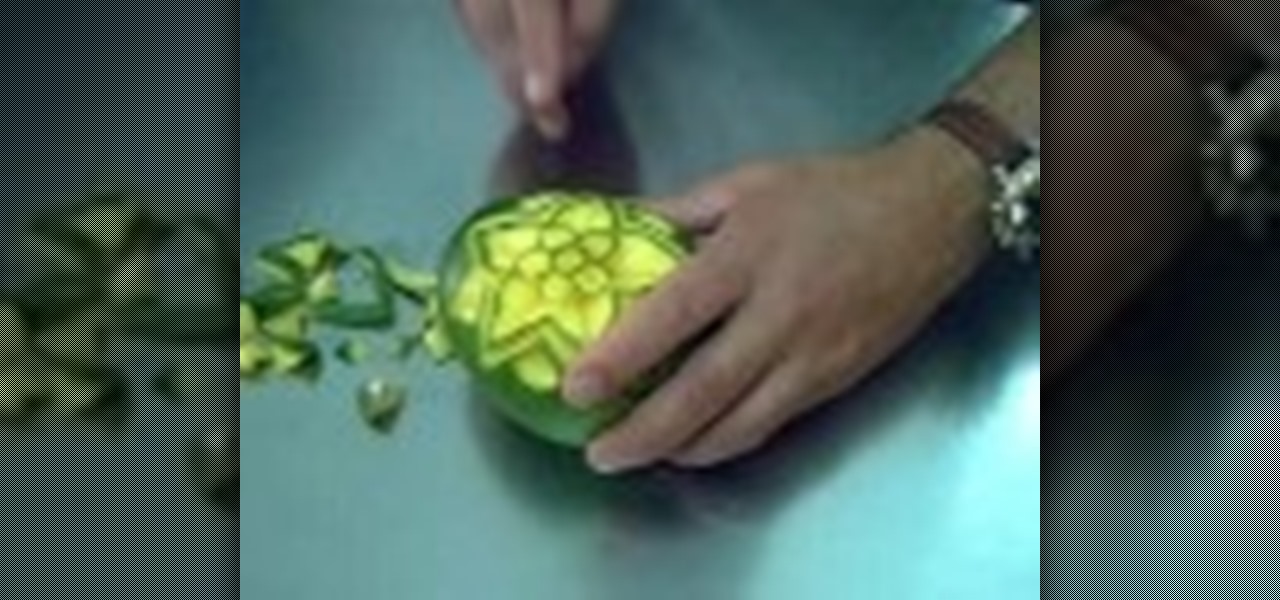
In this video, we learn how to carve a mango creatively. First, cut small circle in the middle of the side on the mango. Next, cut out circles around the middle to make a cute flower shape! Make sure you take the middle peel out so you can see the yellow of the mango show through. Carve in leaves on the side where the petals are. Continue to carve a smaller line to make the image look shadowed. Use your own talents to make this all your own and be as creative as you'd like to be. When finishe...
Do you have a shopaholic girlfriend whose 30th birthday is slowly coming up? It's true that a lot of women dread their 30th, but your gal pal will be simply delighted at her bash if you bake and decorate this purse cake for her.
Cherry blossoms aren't just special because they're Bath and Body Works' best-selling scent of all time. No, in addition to their delicate floral smell, cherry blossoms are special because they are the first flower buds to open in spring. Spring officially stars when you see the cherry blossom trees bursting into color, and what a wonderful way to celebrate the new season!
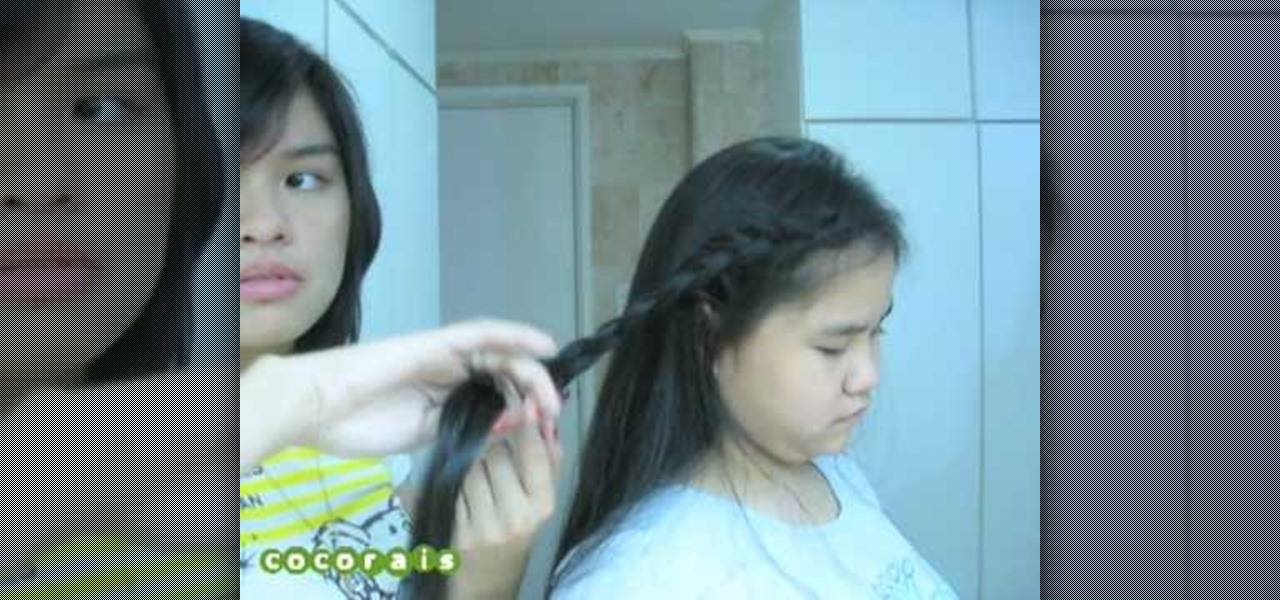
In this video, we learn how to do a yukata inspired hairstyle. First, brush out the hair, then bring the top section of the hair and start to braid it. Continue to braid it until you read the end of the hair, then tie it at the end. Now, set the braid aside and put the rest of the hair up in a pony tail. Push the hair together in a bun, then pin it together with bobby pins. After this, take the braid and wrap it around the bun, then secure it with more bobby pins. To finish the look, add in a...
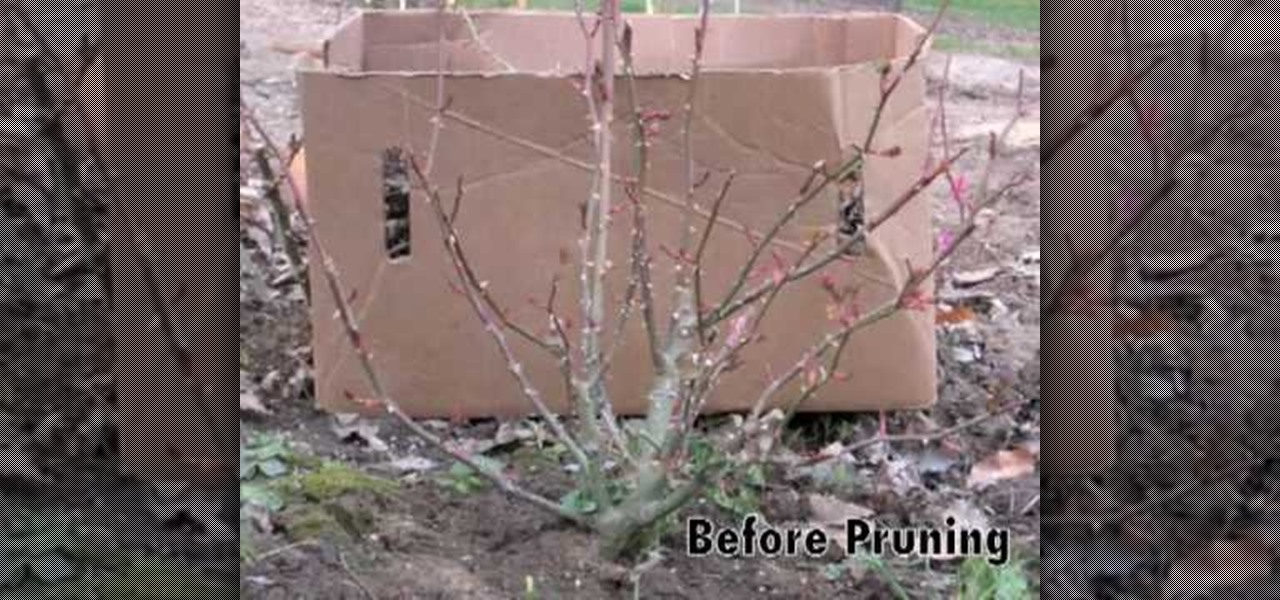
In this video, we learn how to prune roses in the spring. When you prune the roses, you want to cut the branches with shears at the bottom of the plant. Cut any of the dead parts that you see before the flowers start to grow back. If you see any short stubs that haven't and won't grow out, trim those off as well. Leave any healthy branches to keep growing, but trim the tops of them. When you finish, you should end with just a few branches left that are ready for the new growing season. Remove...
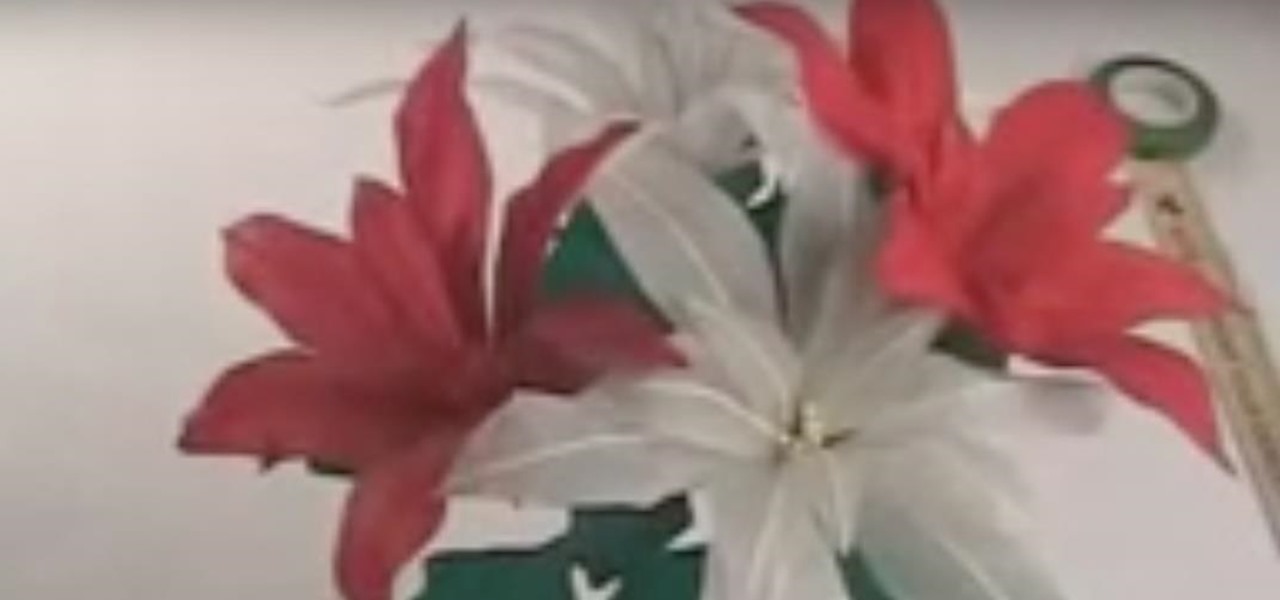
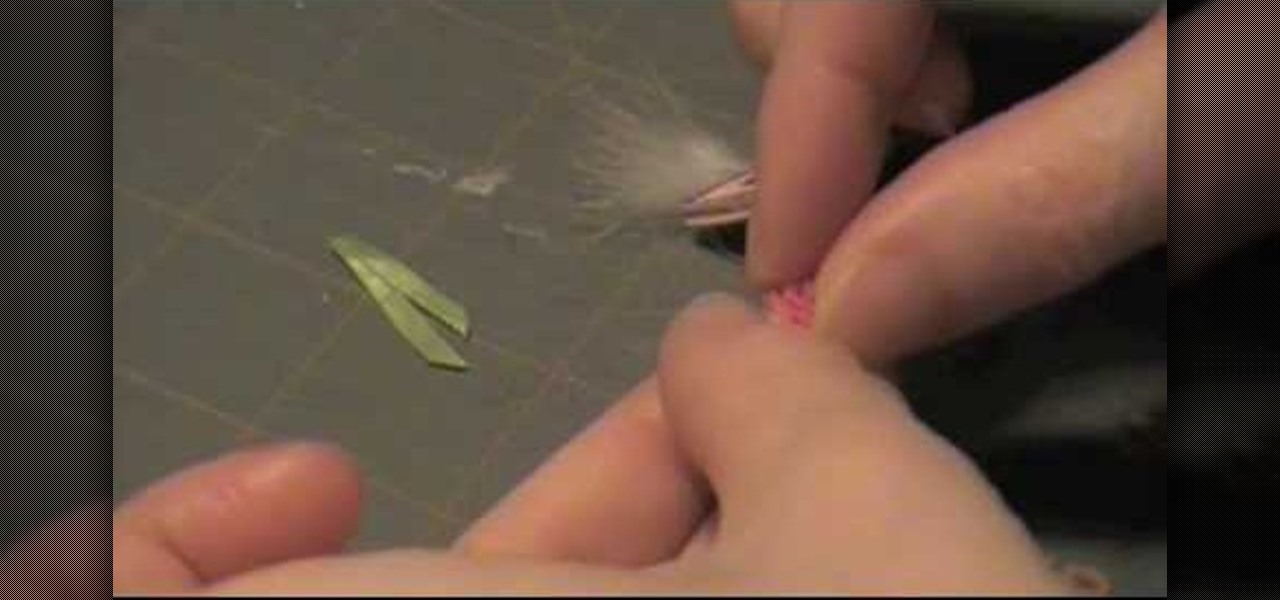
In this tutorial, we learn how to make a lily out of paper and pipe cleaner. First, lay your hand flat on a piece of copy paper. Next, trace your hand with a pen or pencil, then cut it out with scissors. Now use a pencil or pen to curl the ends of the fingers you just cut out. After this, combine two pieces of gold pipe cleaner together and bend in half. Then, place a green pipe cleaner in the middle and make a twist to keep in place. To finish, wrap your paper hand cut out around the gold pi...
This video tutorial is in the Arts & Crafts category where you will learn how to make a multi-layered embossed floral gift card. Take a piece of 11 x 8 1/2 inch Stampin' Up card stock and fold it in half. Next you punch out layers of colored paper of rose red, very vanilla, regal rose and blush blossom colors of different sizes as stated in the video using the Boho Blossom Paper Punch. Now you take a Sizzix Big Shot Die and cut out a craft paper and set the cut outs aside. Now you got to stam...
We believe that cupcakes are good no matter what the topping: sure, it's nice to have a nice fat glob of vanilla buttercream icing on top and maybe a candy flower or two topping the thing, but when a thing is good we'll gobble it up whole either way.
First, cut out pattern pieces. You will need 8 leaf patterns in total. Now, put two leaf patterns together and attach to a leaf with glue. Add a wire in the middle of the wire and glue it closed. Now, stretch your petals to give fullness, you should have 13 petals in total. With your finger, smooth glue onto the petal, then clip wire off of the petals.
Here at Wonder How To we LOVE spring buecause it allows us to indulge in the girliest of girly prints - flowers, hearts, crunchy granola hippie peace signs and happy faces - without restraint and without looking like a seven-year-old ready for church.
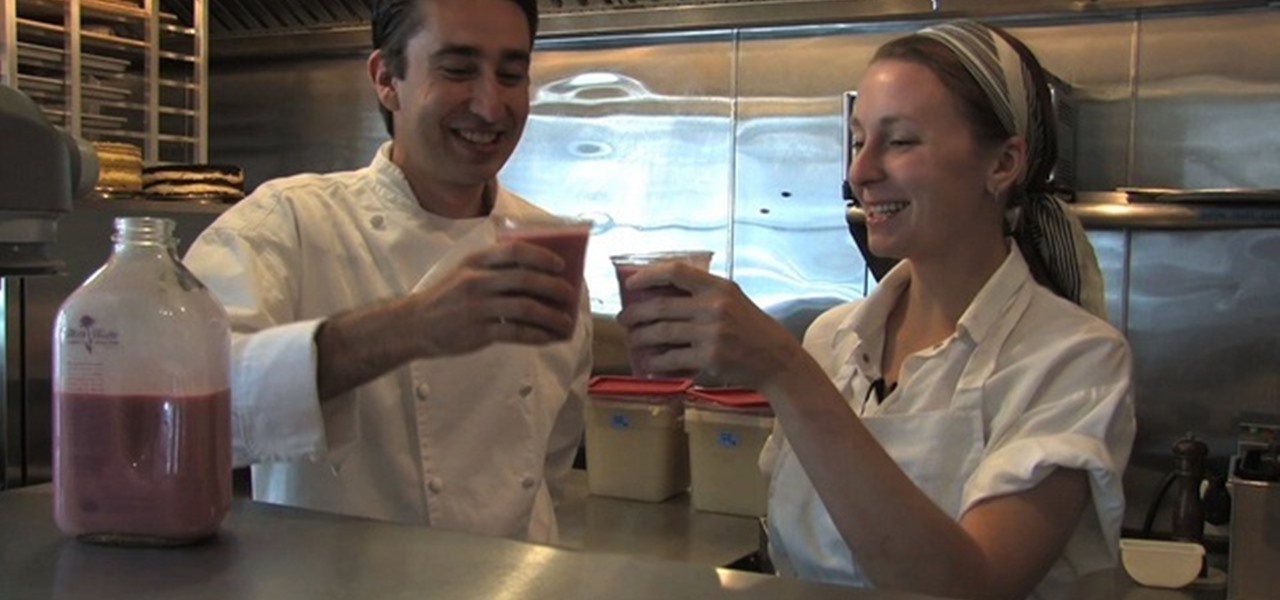
In this tutorial, Michael Crupain shows us how to make strawberry flavored milk. To do this, take 200 grams sugar and put it into a large mixing bowl with 180 grams of elder flower sugar. Also add 65 grams of yogurt and whisk together until everything is well combined. Now, you can whisk in 665g of fresh strawberry puree and 1 quart of milk. Now, you can pour the milk into a pitcher and place it into a fridge until it's chilled. When you're ready, you can serve as you like and enjoy as you pl...
Piping cones are indispensible when applying flowers, leaves, and frilly trims on cupcakes and cakes, and cones with particularly fine points can be used to apply henna in intricate patterns.
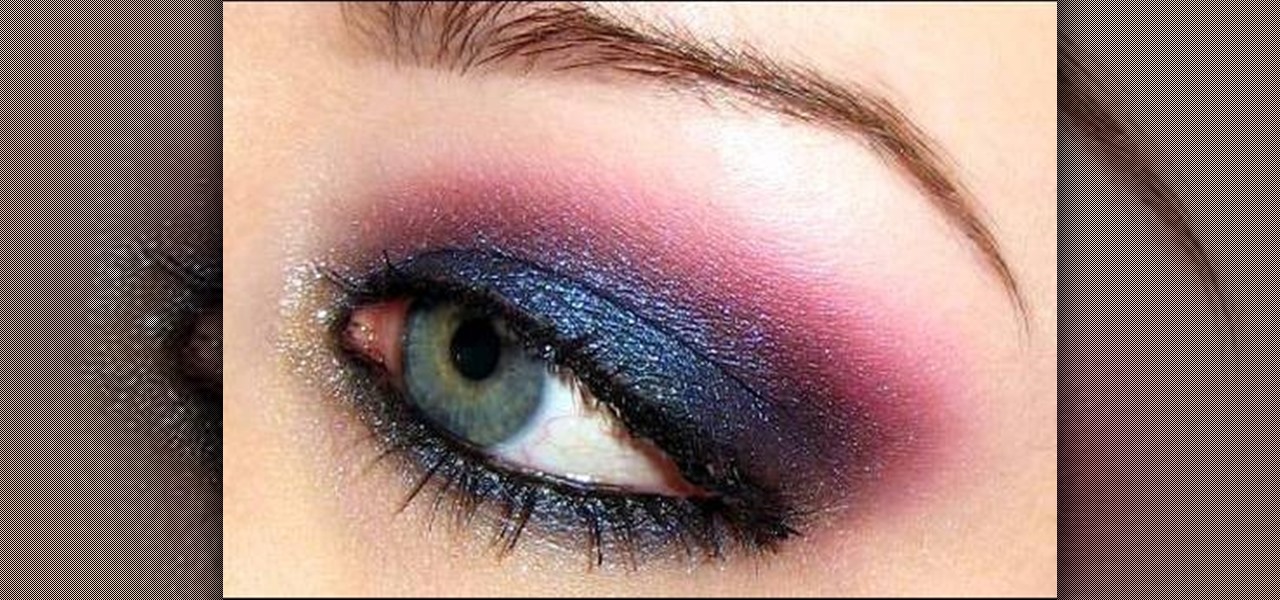
Live on the edge and kick up your beauty routine a notch to create a look that will drive your parents crazy! Create an edgy, rock 'n' roll makeup look with help from this makeup tutorial hosted by Goldie Starling. Stop hiding behind a boring and safe makeup routine and take your face to a brand new level! Products used to complete this look include the following:
Chrysanthemums are a beautiful flower to have in your garden for color and for picking to take into the house. There are two very important factors with planting mums. One is that you must have the right kind of chrysanthemum and two you must plant it at the proper time. There are two types of mum plants. One is the garden center plant and the other is the mail order plant. Scott, on the video, recommends the mail order plant. The garden center plant will only last one season where the mail o...
In this Arts & Crafts video tutorial you will learn how to use markers & water to create a watercolor stamp look. You can use rubber and acrylic stamp for this. You will need water based markers, minimister and card stock. Select you stamp and color it with markers as you would do in a painting. For example, you can color the leaves green and flowers red. You can also apply different shades. Then spray water with the minimister and stamp the image. Just stamp and lift, don't keep it too long ...
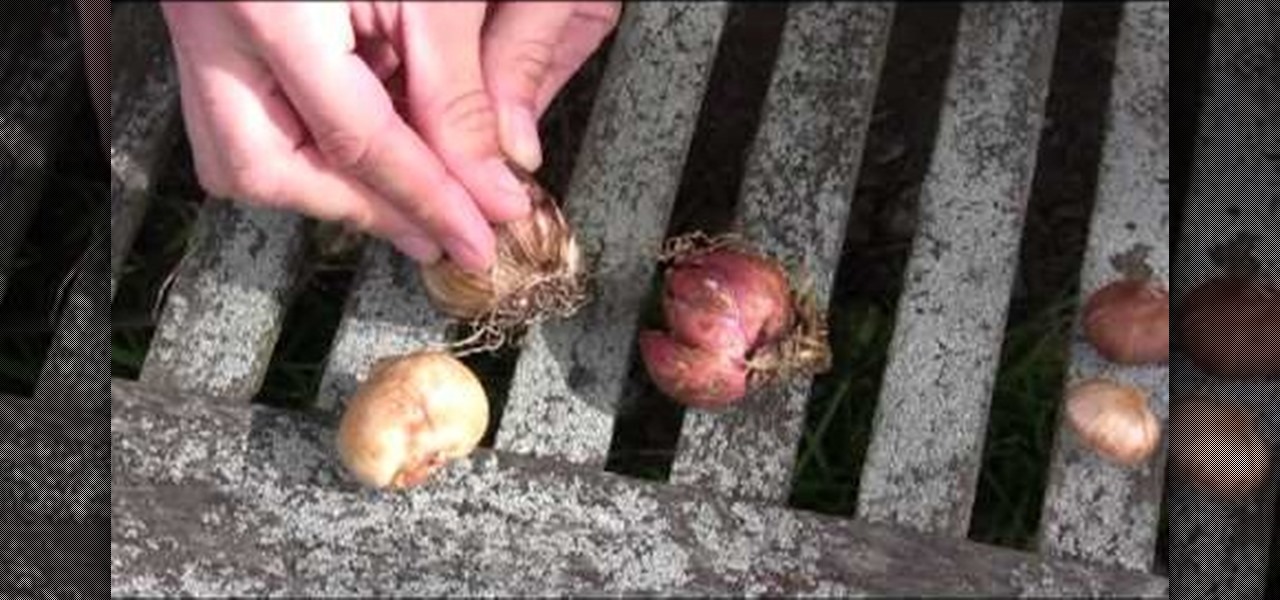
In this tutorial, Scott Atkinson shows us how to identify different types of bulbs. Common types of bulbs are: tulip, daffodil and lily. These are most easily identified but there are many that appear in flowers. A core looks similar to a bulb but it is a solid tissue and doesn't have an leaves, just a hard core with a protective covering. There is also tubers which are what potatoes and other foods grow from. These cause eyes to form and create different types of things to grow. You will now...
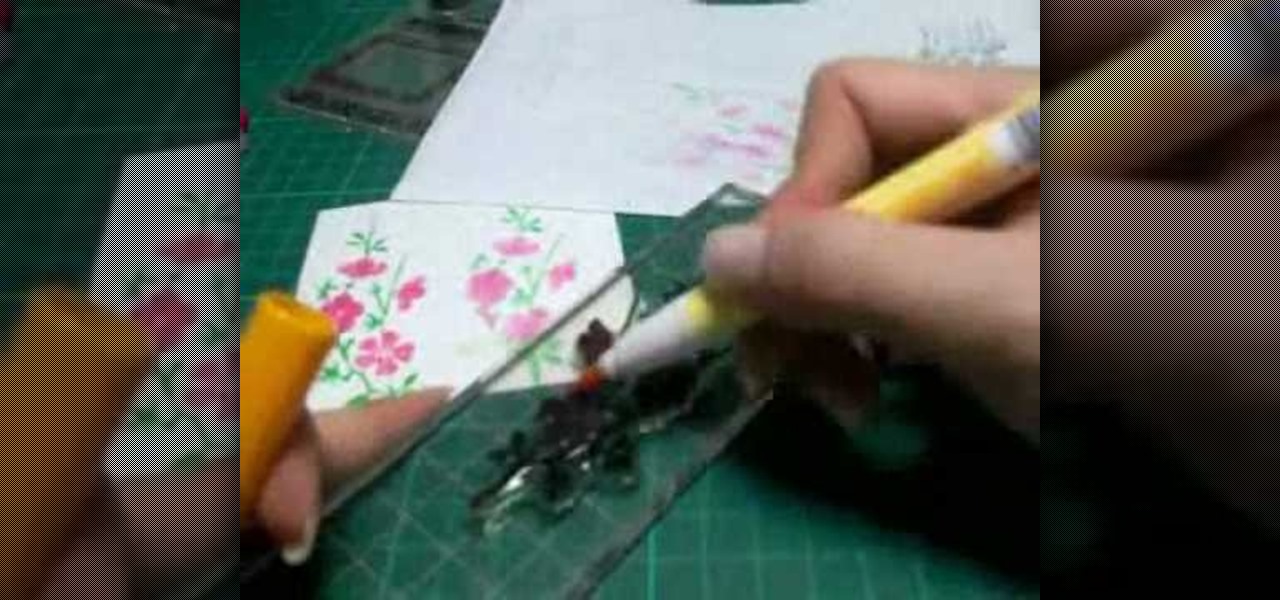
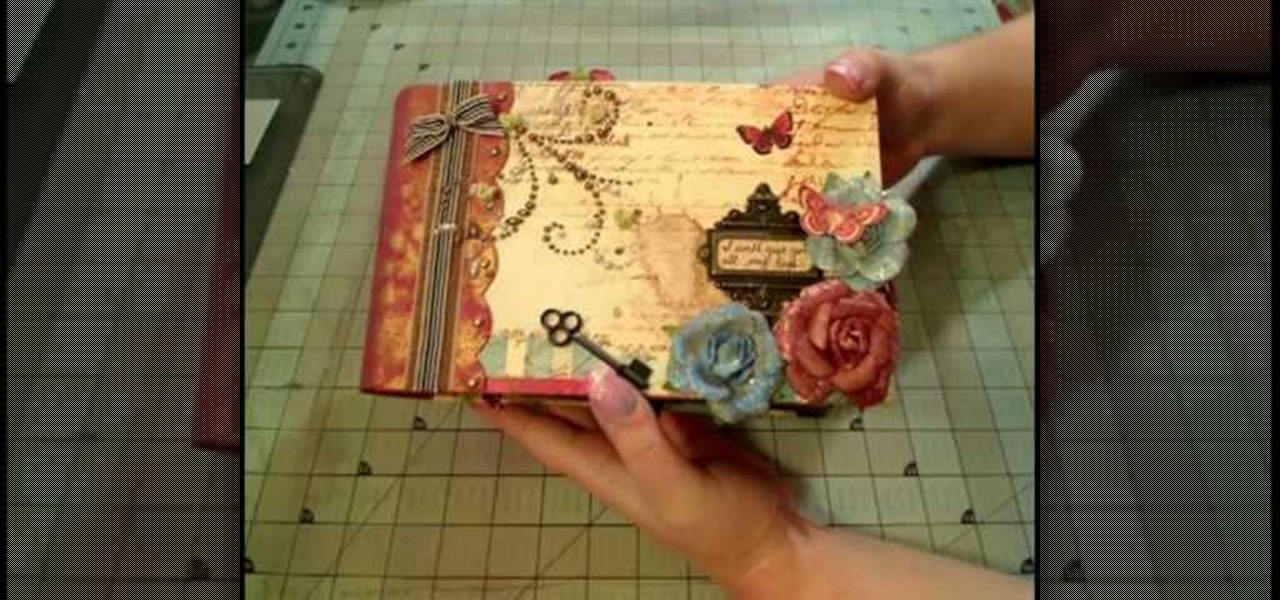
How to make a Prima "Pastiche" Paperbag Album. The demostrator shows us how to make a Prima "Pastiche" Paperbag album. Take a french paper, apply fix some pearls, old keys, artificial flowers, key mantle, all this for the back cover of the album.
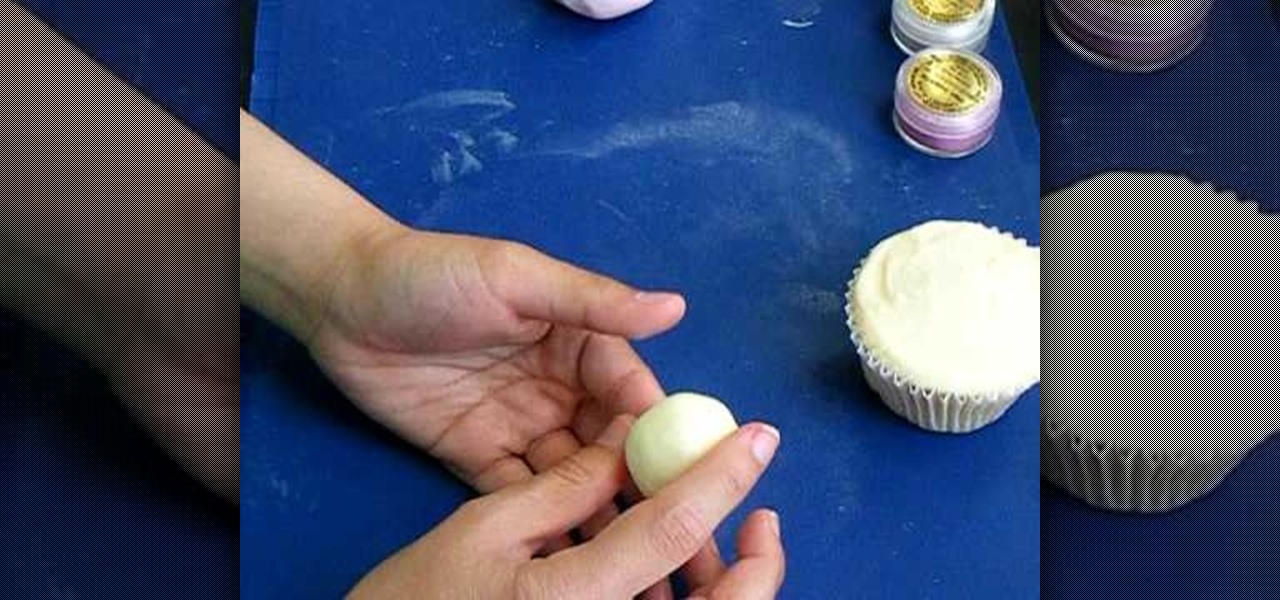
In this video tutorial, viewers learn how to ice cupcakes. In order to ice a cupcakes, users will need a piping bag, tips, coupler and a spatula. Screw the coupler at the end of the piping bag and select a tip to put on the end of the coupler. Fold the bag 2-3 inches downward and place it into a cup to hold it. Now scoop some icing with the spatula and place it inside the bag. Squeeze the bag to bring the icing down and tie an elastic on top to close it. Viewers will learn how to 3 different ...
Love4Nails shows step by step tips for achieving this look. Begin by choosing a background color. On top of the base, apply white polish. Then apply a smile line on the top portion of the nail as you would when doing a French manicure. Then fill in the nail. If its not perfectly straight its ok because it will be covered. Next, apply glitter polish on the white area of the nail. With the white polish make three dot and use a dotting tool to extend them, creating flowers. With the original blu...
In this video Bob describes how to plant bulbs. Bulbs are among the easiest flowers to grow. They don't like "wet feet" so always plant your bulbs where it's sunny. In the Spring the trees don't have their leaves yet so you will have a lot of different places to plant your bulbs. Your bulbs, depending on the size will go in to the soil at different depths. You can plant them singly or plant a bunch of them at once in one hole, just space them and cover them well. Make sure to mix compost or p...
You start out with putting a rater big lump of clay on the potter's wheel (the turn table if you want) and make sure you got water close by. By using your hands and your fingers you then start to shape the clay lump into the size you want it. Keeping both the clay and the hands wet all the time. Once the pot starts to get the size you want it to be, you start to give it a more detailed shape. In this case it is a bit wider in the top than in the bottom. Once your satisfied with the shape, you...
Learn how to make a unique rose from clay that can be given as a gift to your special someone. 1. Make about 20 tear-drop shapes out of the clay. 2. Flatten each of these to form petals. 3. Roll one of the petals up to form the center. 4. Curl each of the other petals around this center. 5. Stretch the base of the flower downward to form the stem. Add clay as needed to make the stem the desired length. 6. Form leaves with the remaining "petals" by creasing them and attaching them to the stem.
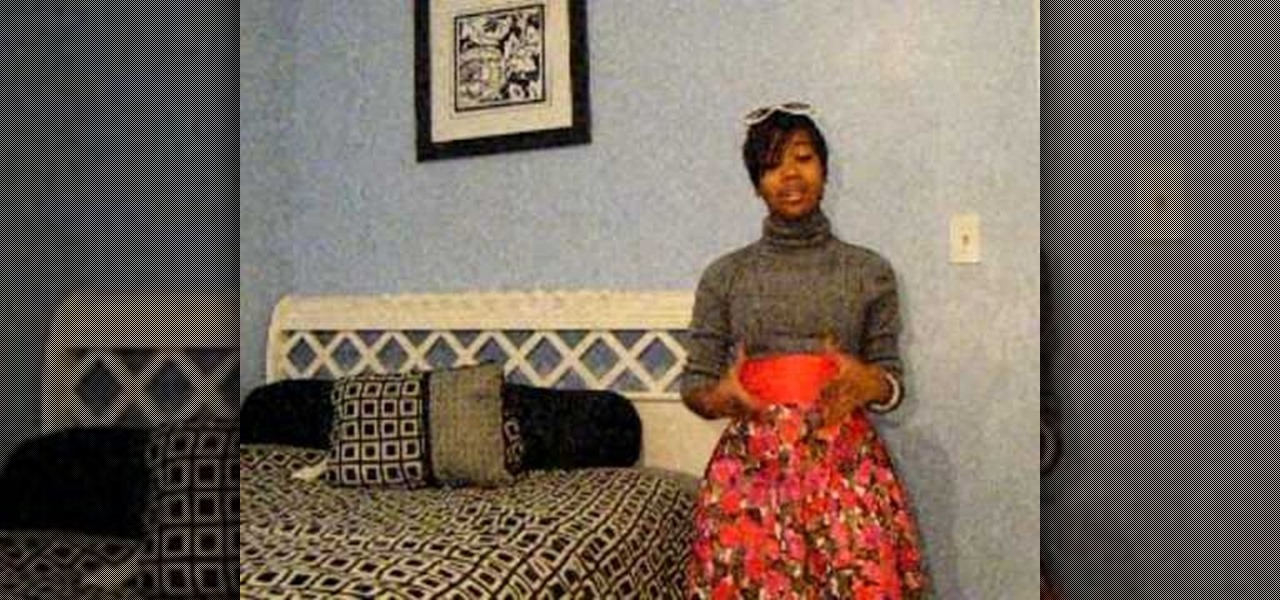
In this video, you will learn how to wear a bold flower print skirt in three different ways for going to school, a job interview or going out to a club.
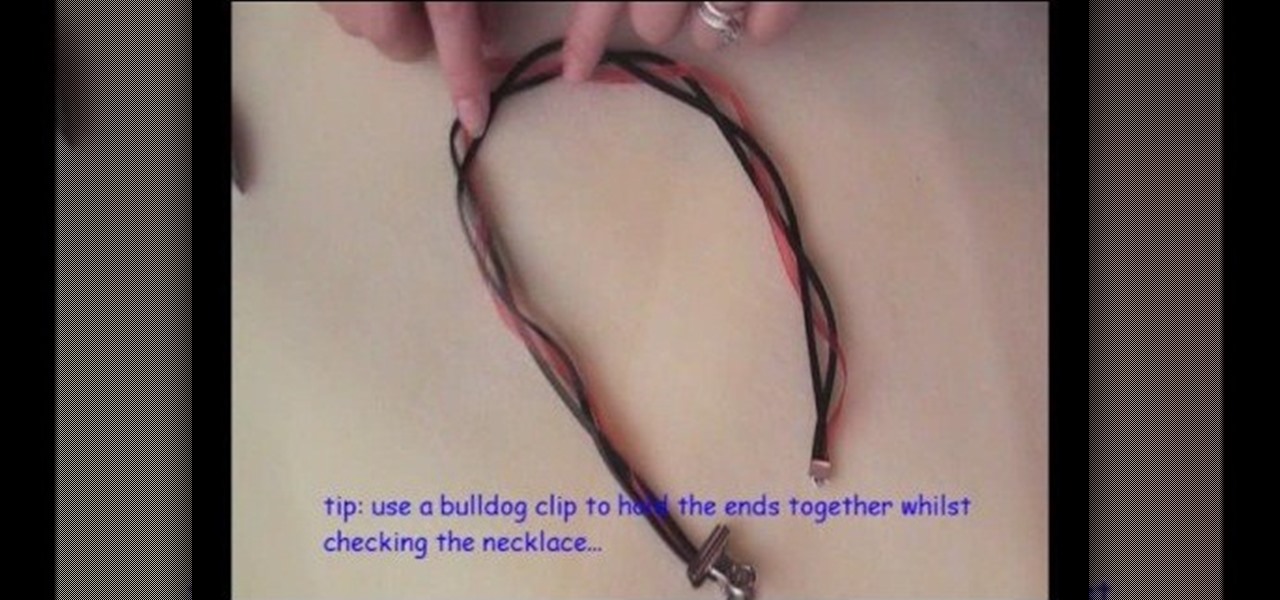
This video is in the Arts and Crafts category and you will learn how to make a Victorian-inspired necklace using an old ribbon. This is a very simple and easy way of making a necklace. Take a ribbon of about an arm’s length, tie it around the neck and check that the length should be OK. Then you can take a bunch of beads or a flower or some such suitable item which is fixed on a wire to put on the ribbon. Tie a knot around the wire and then turn the wire around the ribbon and your necklace is...
To make a carnival themed paper doll follow these steps. First cut out all of the body parts for your paper doll. You may use any type of patterned paper that you would like. Next decorate the paper by adding more paper, sequins, drawings, etc. Next punch holes into the body parts so that you can put them all together by using string. Next you can make the dolls clothes out of paper, small flowers, sequins, glitter, etc. Finally you should add the clothing to the finished doll body and finish...
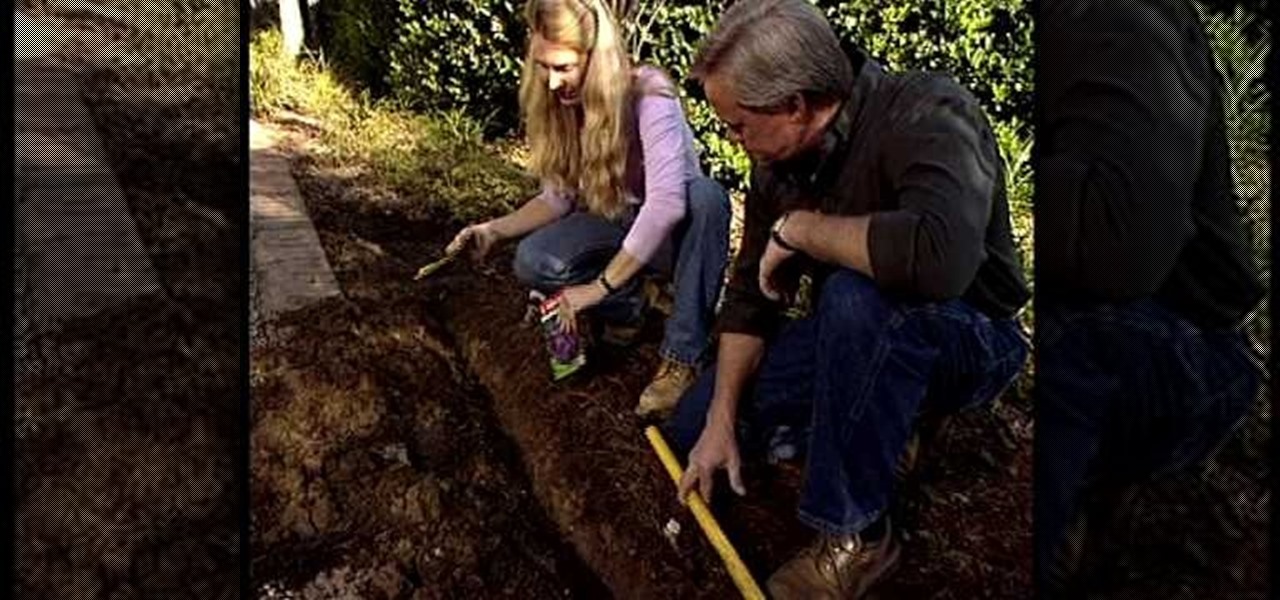
Danny Lipford shows how to grow a more colorful flower garden in early spring when there is not a lot of overall growth. He displays how he plants tulips and daffodils in the fall so that they bloom in the spring. He digs a troth about 6 feet long and 6 inches deep. After sprinkling bulb food in the troth, Lipford plants the tulip and daffodil bulbs, arranging them so each uniquely appears every other bulb. Lipford's assistant advises that he re-plants the tulips every year, since while they ...
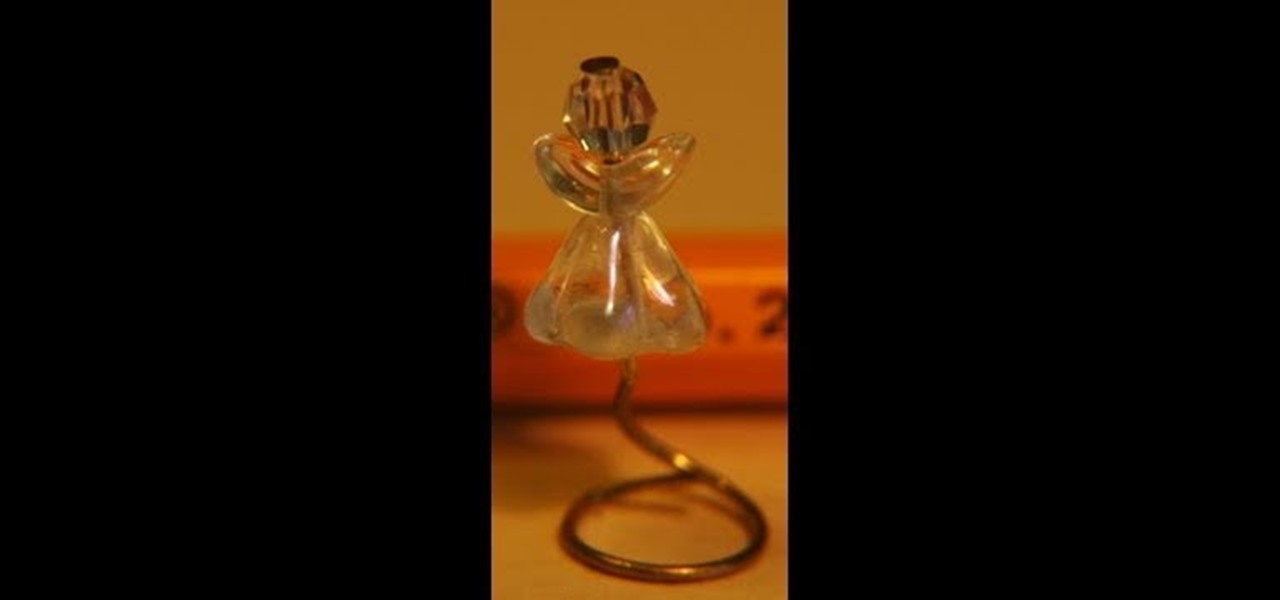
In this demonstration garden of imagination shows how to make a doll house Christmas tree angel topper ,which is less expensive and easy to be made at home .First she inserts a round bead in an eye pin which is for the crown of the angel and followed by crystal ball .after that small glass wings are inserted and then followed by a flower crystal which will be inserted upside down so it will look like an angel skirt and then inserts a bottom of an earring for the base and fixes tightly as it s...
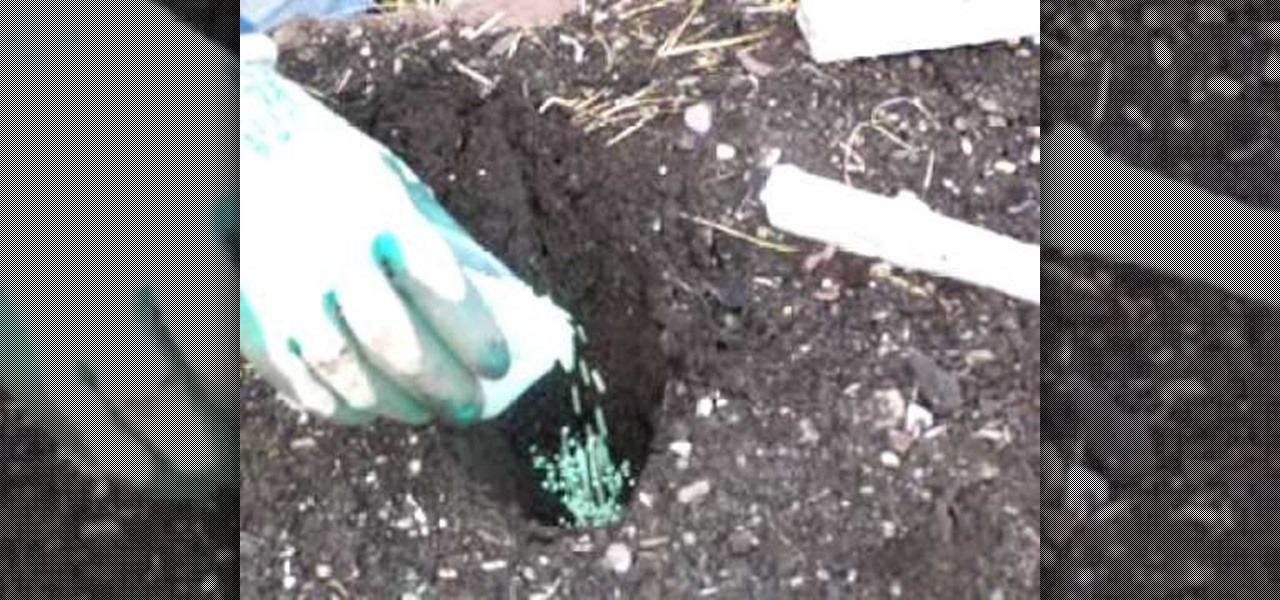
The Dahlia Guy is going to show you step by step how to plant dahlias. First, you want to bury your tubers at 2-4inches of depth and place a stick right next to the eye so you know exactly where the dahlia will be. Also, you want to place a timed release fertilizer in the hole and then cover it up with the dirt. Now, take a 16inch long stick and use that to space out the dahlias in your garden. Some tips to use are use name tags at the beginning of the of the planting and at the end of the di...
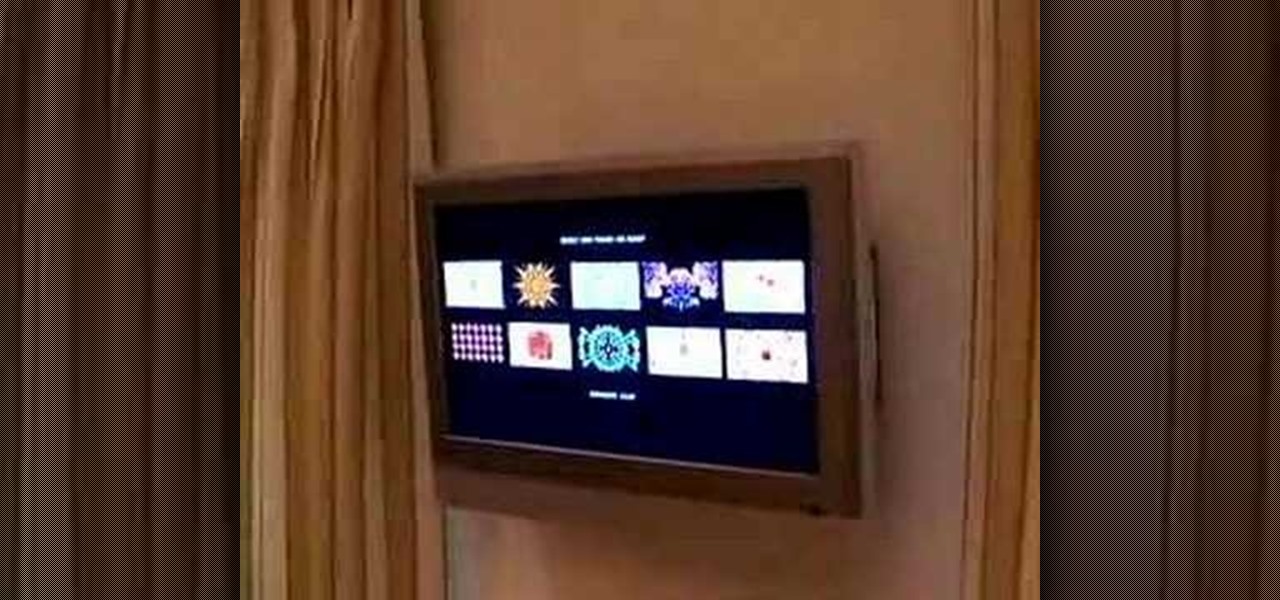
YOUTUBE A gentleman describes how to convert your flat screen TV into a piece of art. Using his Sanyo flat screen hanging on the wall, he demonstrates how entering a DVD into the built-in DVD player using a Detour brand DVD can improve the overall look of the room. The DVD plays the program "Wall Flowers", a high quality image without sound, that constantly changes in patterns and images. He then closes by showing how the TV images can add to the decor of a room. After watching this video, yo...
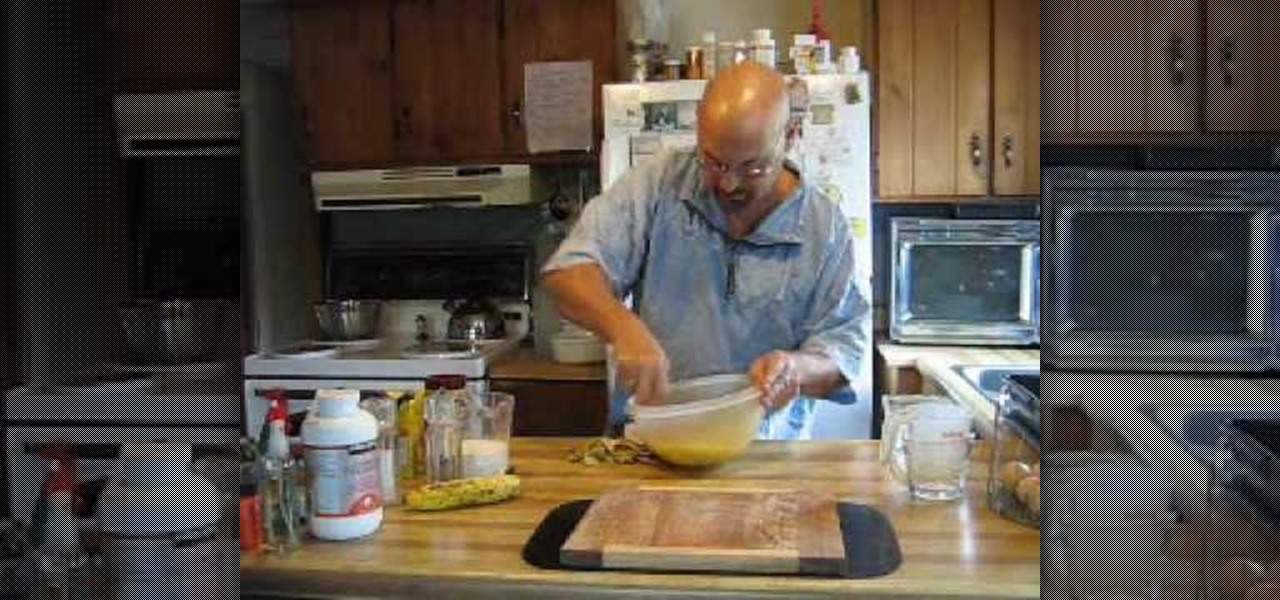
The Simple Chef is going to show you how to make everyone's childhood favorite and that's banana bread. You want to begin by taking two bananas that are past ripe because that's when they're the softest sweetest and peel them. Throw the peeled bananas into a bowl and mash them up. Now, add two eggs, 1/2 cup of sunflower oil, 3/4 cup of sugar and blend that all up. While blending you should preheat the oven to 250 degrees, and then grease a casserole dish. Once the mixture is blended you want ...
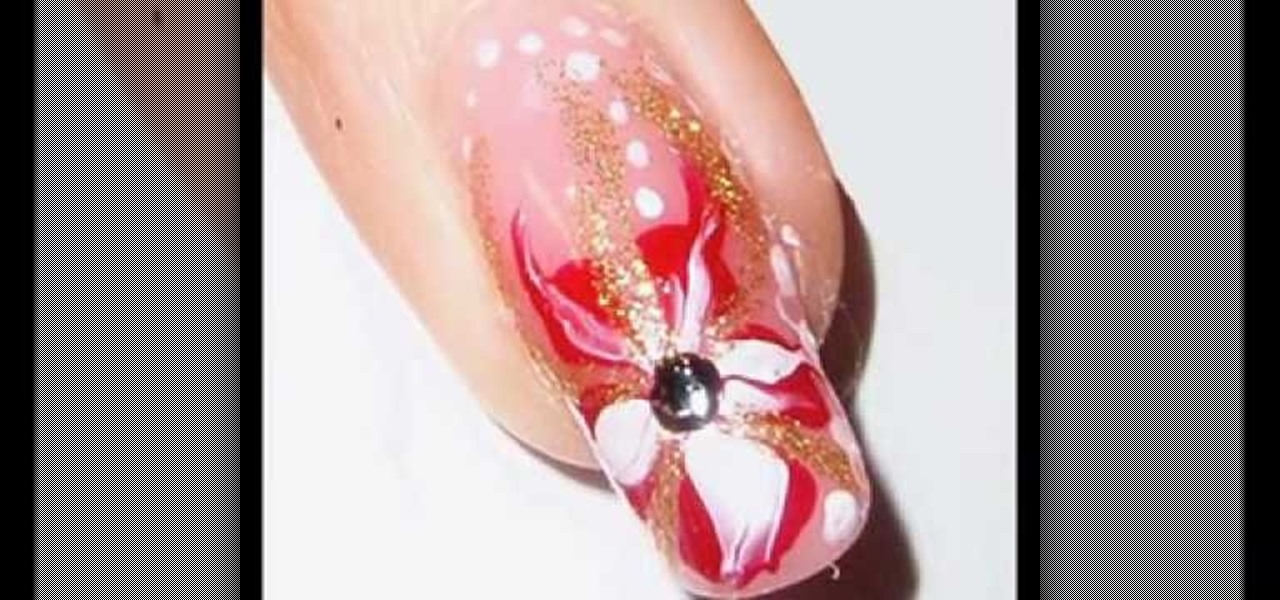
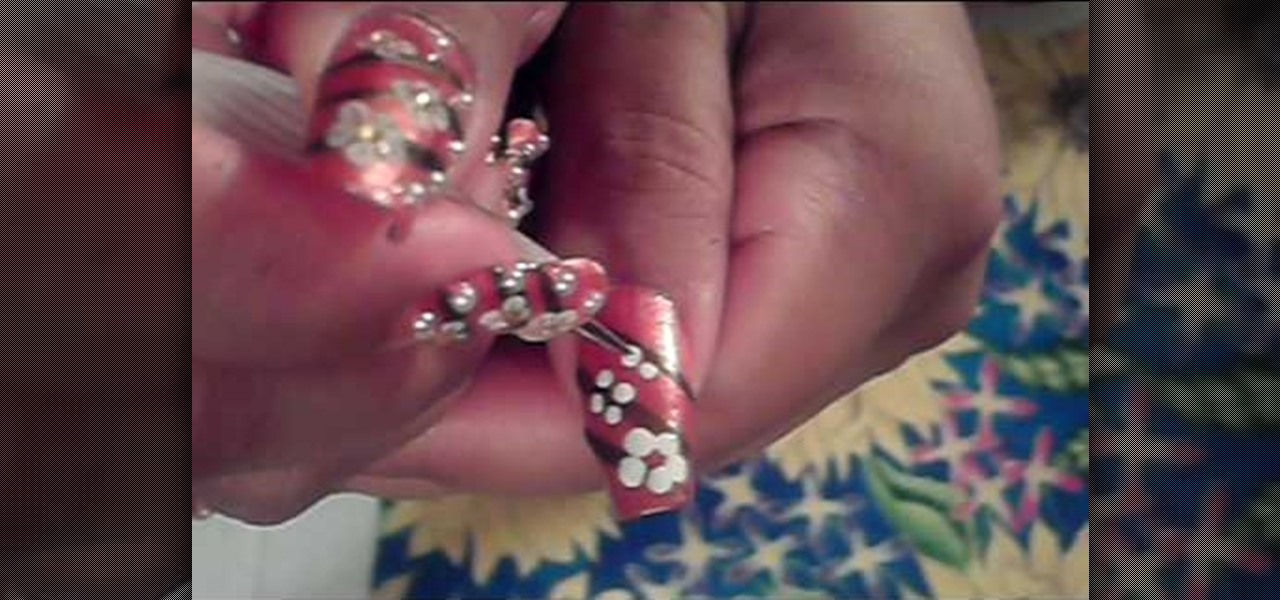
This is an interesting video presentation about "Flower Nail Art Tutorial". The steps are as follows, the first step is Apply a thick coat of clear polish on your nail and then apply 5 red dots in circle in the fourth finger and a white dot in the middle and then draw a line from the center through the red dots. After drawing each line, clean your brush and now draw lines from between the dots to the center and then draw golden strips between petals and draw a black dot in the middle and draw...
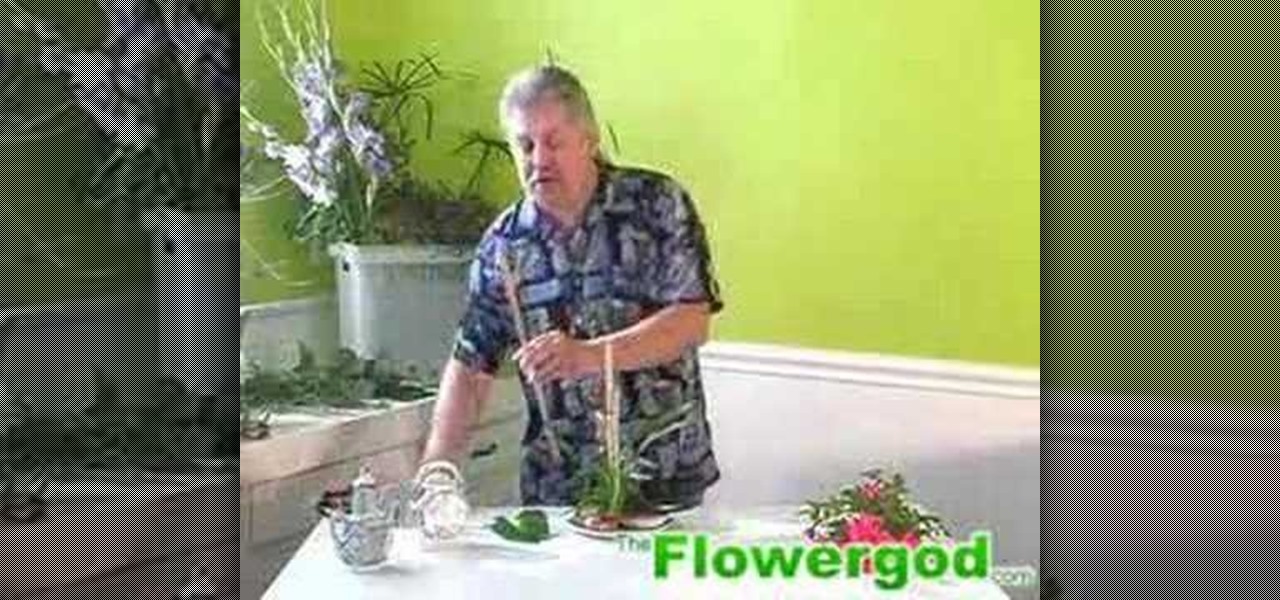
The editor in the video designs an Asian 'Tea Set Arrangement'. He has put a green flower foam on a dish and a small bowl is also kept on the dish. He takes sprouted iris bulbs and arranges them next to the foam and then puts the chopsticks on the small bowl. He fixes ivy leaves on the foam and then arranges bamboo foliage in the middle. He takes three bamboo sticks, one long and two small in size. The longer stick is placed in between and the smaller ones on both the sides. After that he pla...