Use a simple mathematical formula to find the circumference of a circle. The circumference of a circle can be determined by using the formula 2 times pi times the circle's radius. Pi is equal to 3.14. If a circle's radius is 10 centimeters, first multiply pi times 2. Pi, or 3.14, times 2 is 6.28. The next step then is to multiply 6.28 times the circle's radius. Since the circle's radius is 10 centimeters, multiply it by 6.28. This gives you 60.28. 60.28 inches, then, is the circumference of t...

Sue McMahon, Cookery Editor of Womens Weekly, shows how to decorate your Christmas cake, in this video. She begins by turning over a rich plum cake to have a smooth surface for the decoration. Next, she pours some brandy over the cake to moisten it. She uses apricot glaze and spreads it evenly over the surface and sides of the cake. She kneads ready-made marzipan to make it smooth. Next, she dusts some icing sugar on the work top and rolls over the marzipan into a circle, large enough to cove...

In this video, we learn how to make a cover for a tipi. First, put windows all around the bottom of the tipi. Then, take a tarp and cut out the top of it to make it into a circle shape. Then, cut out a hole from each side and put a rope in it for the top of the tipi. Wrap this around the sticks that you made the tipi with and then cover up the top of it with an additional tarp. This will protect you against water and other natural elements! Enjoy decorating and have fun making your tipi!

In this tutorial, we learn how to draw Demon Realm Pain. To start, you will draw the outline of the character with a pencil. Draw the headband on him first, then draw the eyes, nose, and mouth. After this, draw on the top of the head using a half circle, then draw on the horns on top of the hat. After this, draw on freckles to the character's face and then shade in around the different areas. After this, you will start to draw in additional details around the face and shade in where needed to...

In this tutorial, we learn how to draw Sonic the Hedgehog in Paint. First, draw a round circle for the head and then connect the spiked hair to the back of it. From here, draw in the arm and the hands as well as the body and the legs. After this, draw on the socks and the feet. Then, draw in the details of the character and the rest of the shading. From here, color in the blue and the whites on the body and then color in green on the eyes. When finished, make sure to save this and then you're...

In this drawing tutorial, we learn how to draw a chibi Sokka. Start off by drawing a round circle for the head of the character. After this, draw on the ears to the sides of the head. Then, draw on the hair on the back of the head followed by the facial features. After this, draw on the body, but don't draw a neck because this character doesn't really have one. Once you have the outline finished, start to use a darker marker to create the clothing and other details onto the character. Clean u...

In this video, we learn how to draw Hinata. To start, you will draw a circle with lines in between it to place where the eyes will go. Next, you will draw in the eyebrows and the other details around the face. After this, draw in the bangs and the hair, adding lines for them to show the different details. After this, you will draw in the area of the neck and then the clothing on the upper body. Finish off the details in the eyes and then shade in the hair and around the body. When finished, s...
In this tutorial, we learn how to draw a plan view. To start, you will draw a horizontal line with a point in the middle. After this, draw lines from the point where you want to draw the buildings in the picture. Then, draw boxes inside the lines that you drew out. Then, you will draw in vertical lines on the bottom of the page, which will act as the ground. Around this, draw circles with scalloped edges for the trees. From here, draw in the rest of the details for the buildings. Finish this ...
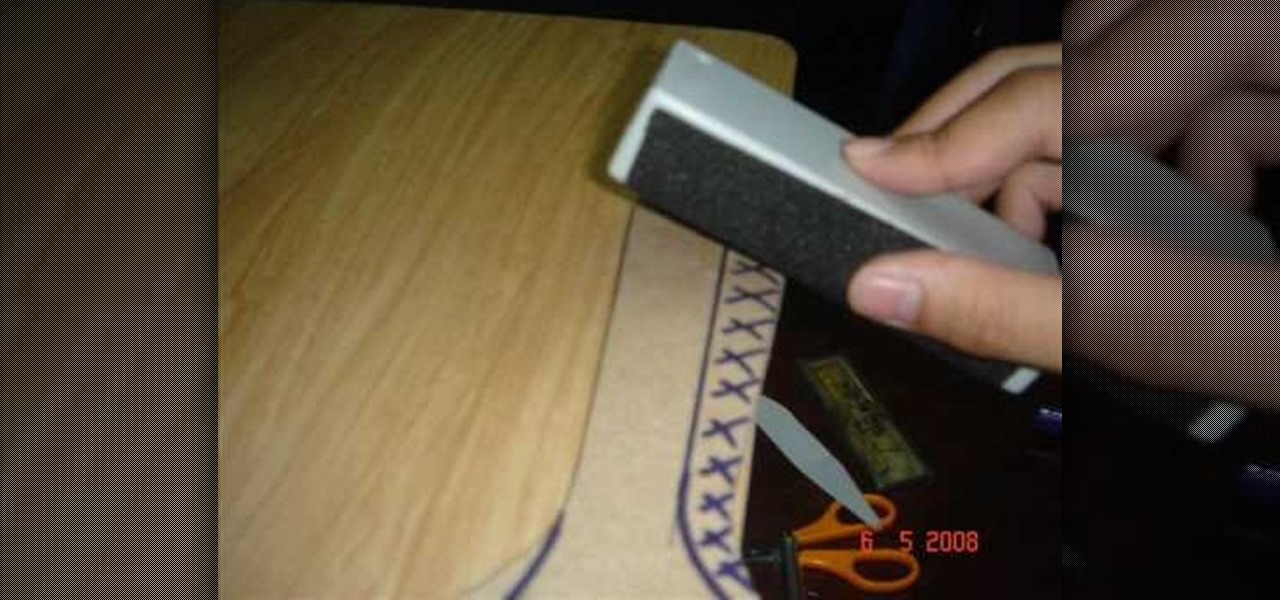
In this tutorial, we learn how to make a Kufi cap with Threadbanger. First, grab a thick black jersey material and your added material of choice. Cut the fabric in a circle pattern to make the size of your head. Then, cut the band material for 3 inches longer then your head measurement. Fold the material and create the bands with thick cardboard. Once you do this iron the bands down and then fold the added material down as well. Adhere the piece pieces together while still folded, then sew th...
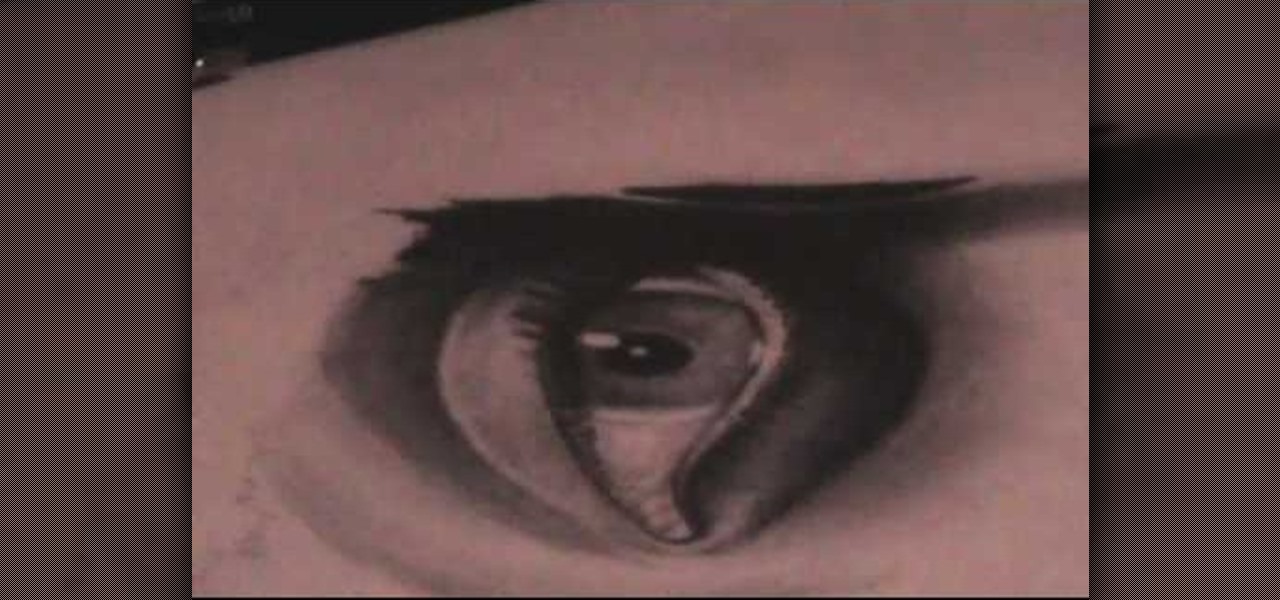
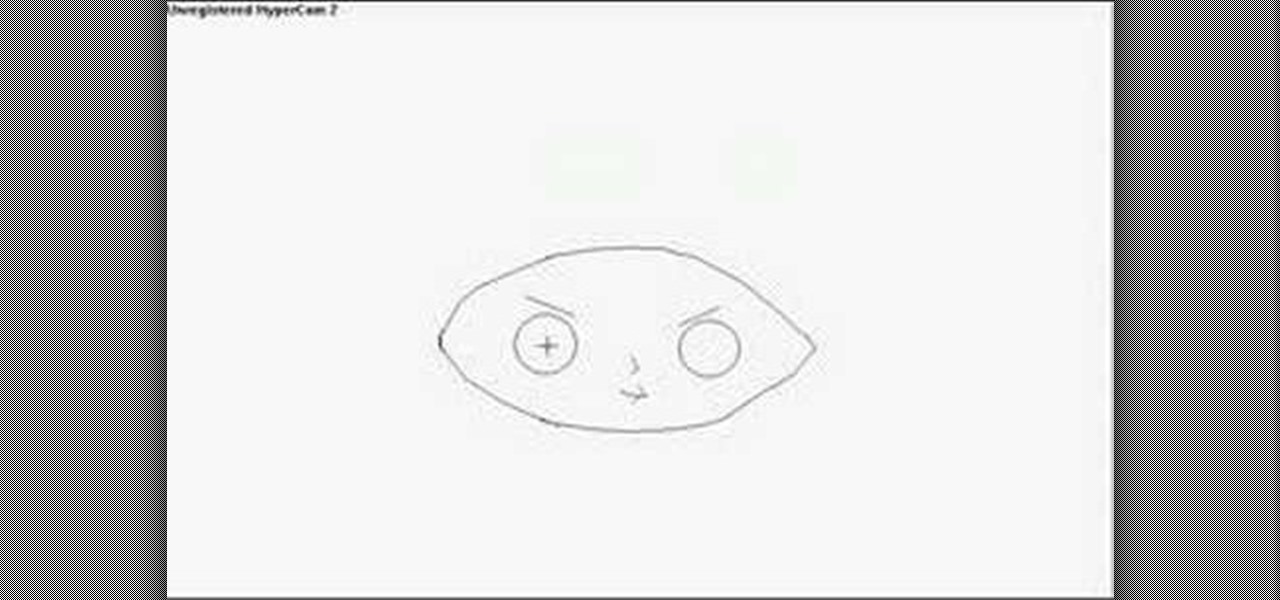
In this video, we learn how to draw a realistic mouth, nose, and eyes. Start out by drawing the outside shape of the eye, then draw in the details inside the eye. After this, shade in the pupil and add a white circle to make the eye look glossy. From here, add in the eyebrows and add darkness and lines to make it look more realistic. For the mouth, you will first draw the outline of the lips, then draw the teeth on the inside followed by additional details. Make the teeth different shapes and...
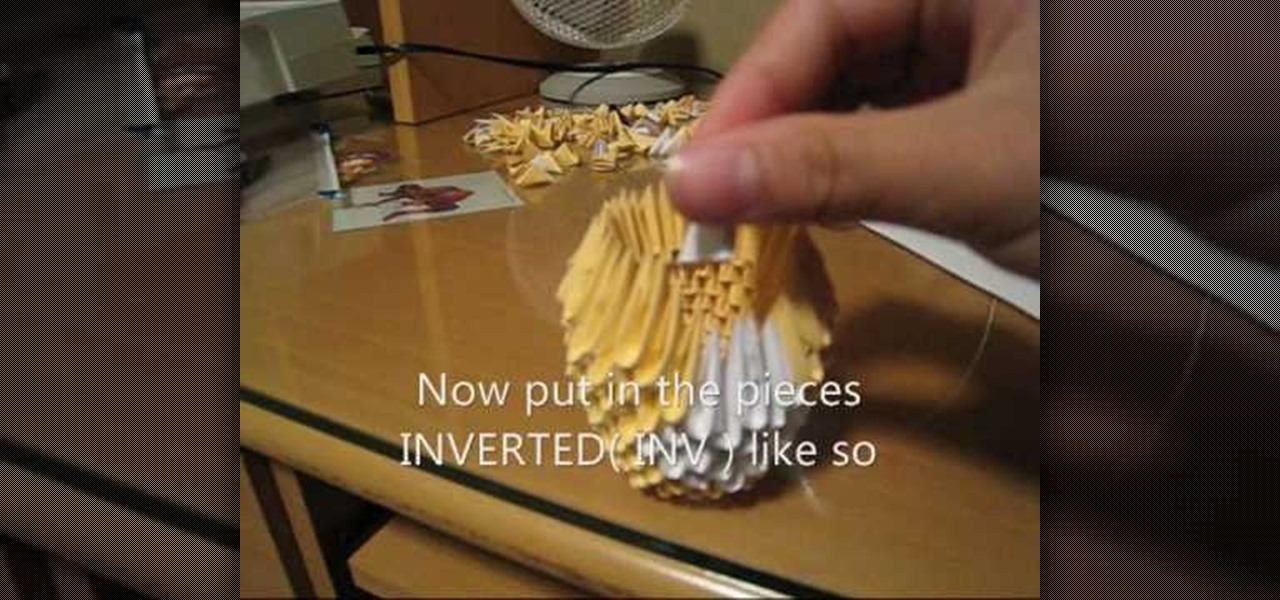
This is a video tutorial in the Arts & Crafts category where you are going to learn how to make a modular origami fox. First you make a lot of triangles of yellow, white and one black color. Join two yellow triangles as shown in the video to make a unit. Make 18 units and combine them in to a circle. Next you add another level but with 3 white pieces. Now add 4 white pieces on the 3 whites. Then you add 5 whites on the 4, 4 whites on the 5 and 3 whites on the 4. Fill up the body with yellow p...
Forget circle and square-shaped wedding cakes - pillowy clouds of icing and cake are the way to go! Be original without compromising your unique style by learning how to bake and decorate this lovely stacked pillow cake.
In this video, we learn how to perform a basic pirouette. First, start in fifth position with the right foot in front. After this, push the foot out to second position while opening the arms. Next, step the right foot into fourth position with both feet turned out and both heels on the ground. Next, lift the right leg into a turned out circle, while turning out the knee. To land with the left, cross the right leg behind. The last part is to do the actual rotation, spotting the head to get the...
In this video, we learn how to create a minimal back to school makeup look. First, you will need to shape your eyebrows and apply brow gel if they look bad. Next, apply foundation and bronzer as you need it on your entire face. If you have dark circles around your eyes, use concealer to help remedy the darkness. Next, you will want to apply a thin layer of eyeliner to the top of the eyes, following your natural line. You can use a purple color instead of black if you want a cute flare. Now, c...
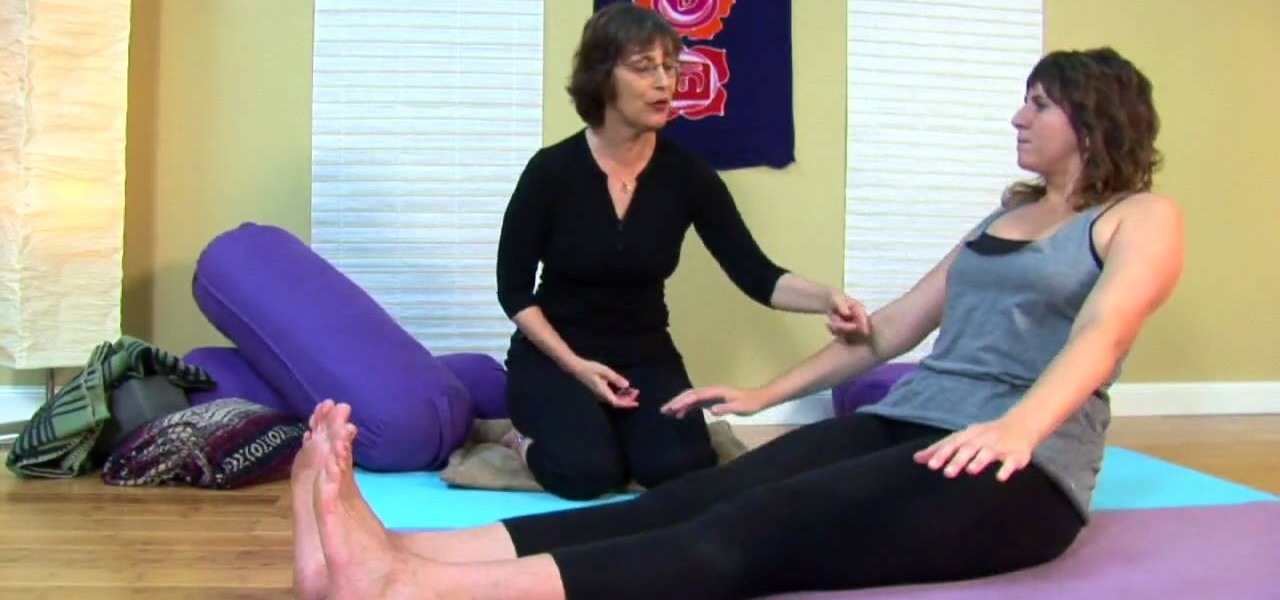
In this video, we learn how to lose belly fat through yoga with Cindy Mastery. Start out in a seated position with your legs out in front of you. Then, bring your hands out in front of you. As you exhale, make a circle motion around your feet. Engage your core and keep your shoulders leveled during this exercise. Do this several times, then go into starting position. Now, bring your fingertips over your toes and reach your fingers up to the sky. Bring the arms up, then reach back down to the ...
In this tutorial, we learn how to draw wings. To start, use line options to make curves that bend out and turn into a long and thin wing. You can copy and paste this wing so that all the different parts of the wing are the exact same. After this, use a free hand brush to draw curved lines onto the top of the wing outline. After this, start to add circles and other details to the wing. You can fill it in with color or add in more feathers where they would be on top of the wing. To finish, save...
In this video, we learn how to draw cartoon style mouths. Start out by grabbing a marker and drawing a round circle, then draw a shape on the inside and draw teeth on the top and bottom of it. After this, draw a tongue inside of it. For the next mouth, draw a curved line with teeth on the top, then a tongue in the middle. For the next mouth, you will draw a long tongue sticking out of a mouth. These mouths can be used in a number of different pictures, depending on what kind of face you are g...
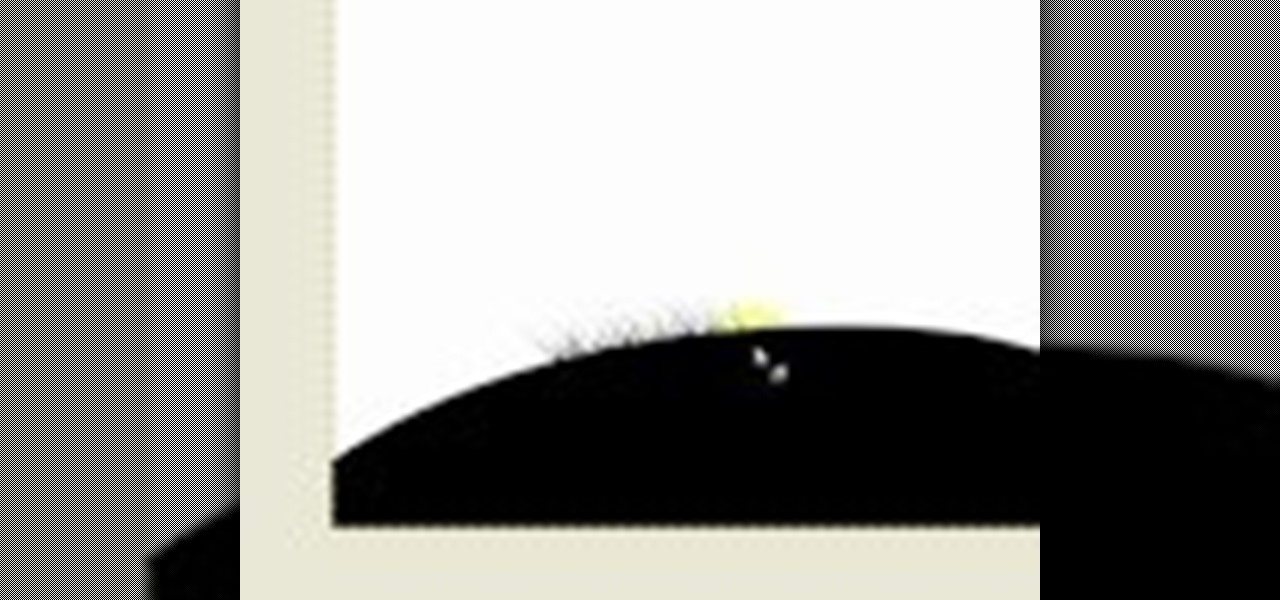
In this video, we learn how to do a grass silhouette effect in GIMP. First, draw a black mound and then close off your selection. After this, turn the path into a selection and fill it in with a black color. Next, select your smudge tool and use a small circle brush. Set the rate up to 95, depending on the length of grass you want. Now, use your mouse to push up on the mound and you will see wispy pieces of grass form where you are moving your mouse. Cross them over and cover as much of the a...
Make a creative and fun felted cuff bracelet! This could be a difficult task for beginners, but overall it's an easy craft. You'll need a needle felting machine for this though, which means you might have to hunt one down or improvise. Watch and learn how to use the needle felting machine to create a cool felted cuff.
In this tutorial, we learn how to draw a cute and blue cartoon bird. First start out by drawing a circle for the head, an oval for the body, and then an oval wing in between the both of them. After this, trace over the lines to make squiggle marks on the wings and on the rear end of the bird. Add on an eye and pupil to the head, then draw a beak with an open mouth, making it a "v" shape in the middle. Then, color the entire bird blue, leaving the beak orange and the eye outlined in black. To ...
Are you a radio control car enthusiast who's never moved beyond the store-bought toy models from Radio Shack? Then this nine-part series of videos is what you've been waiting for. It breaks down how RC engines work in exhaustive detail, including whole sections on carbs, pipe tuning, fuel mixing, and super chargers, among other topics. You may not be able to put your own RC car together entirely from scratch after this, but you will have a broad, deep understanding of how their engines work a...
Keith Ferrazzi teaches you how to be outgoing. Although it is difficult to talk to people you don`t know, you might miss out on opportunities if you don`t. Only by reaching out to people, you will meet them and they may get to know you enough to perhaps be of help to you in your carreer. You have to learn how to speak up. One way is to pick a role model in your social circle who is outgoing and watch how they behave and listen to what they say. Joining a Toastmasters group is also recommended...
In this video tutorial, viewers learn how to make a 3D flower pop up card. The materials required for this are 5 pieces of paper, scissors and glue. Begin by folding the paper in half 3 times and then fold down the sides to a triangle. Now fold a bit of the triangle flap up to make a slimmer triangle. Then cut around the top with a half circle shape. When opened, it will be a flower shape. Cut one of the pedals off and decorate it. Make 7 more flowers and glue the points together. Now take a ...
Drawingnow.com not only shows you how to draw the moon, but also shows what could be described as, drawing everything but the moon. Since your paper is white and so is the moon you will start off by drawing your circle and adding light shading in the bottom half of your moon. Now you can start with your black marker, pastel or drawing instrument of your choice, blacking out the rest of the paper around the moon. With the rest of your page blacked out, it really accentuates your moon and almos...
This is a great instructional video on how to make ribbon flower. First you have to take 12" long pink color ribbon. Now you have to use a needle with a linen thread.You have to stitch in the edge of the ribbon. Now fold the ribbon to look like petals of flower.Now add one small stitch to join the ends together. Then knot off the thread. Now add crystal effects along the flower edges. You can then use chunky glitter. You can also use power pals. You can now use the circle punch now. You can u...
This video shows us how to build a garden bench out of cinder blocks. Before you get started, you need to refer to the How To sheet #320 for all your materials and make sure you have everything you need.
In this Home & Garden video tutorial you will learn how to make an accurate boomerang. Material required are 4-6mm thick ply wood or hard board or paper-mache, saw and some spray paint. Search for and download boomerang plans from the internet. The boomerang has three protrusions or handles equally spaced with each protrusion being 14cm long and the diameter of the circle at their ends being 4.5cm. Trace the plan on the plywood and cut it out with a ‘U’ shaped saw. Next draw out the line for ...
In this easy to follow video, the artist will walk you through her simple illustration of Hammer Bro, one of the infamous villains in the Mario Bros. video game series. She begins by breaking down the character's beak, head and helmet into basic shapes, (such as triangles and half circles) and then pencils in the detail. Finally ending with the shell and arms, she leaves you with an excellent depiction of the Hammer's character. Given that you have something to draw with and something to draw...
Start by drawing a triangle at the top of the tree. This will act as your first part of your tree. Then draw the second part of the tree. To do so draw another triangle that is bigger than the first. Then you will need to draw a third and final triangle for the bottom of your tree. Make sure that this triangle is bigger than your first and second triangles. Make the bases of the triangles wavy so that they resemble branches. Add the base by adding a small rectangle and a circle for the stand....
Drawing Stewie from The Family Guy on your computer is fairly easy. First you're going to make a horizontal oval, then draw what looks like a football shape just in between those lines. Now erase the excess lines outside of the head shape. Next, insert two circles-fairly far apart on the head-with a slanted line above both for the eyebrows. A small line in the middle pointed towards the right makes Stewie's nose, and a simple mouth is completed with a three small lines at the bottom. Draw two...
1985rey teaches you how to draw SpongeBob Squarepants on your computer, using Paint. To start with an existing picture of the character to get the look and feel, use the brush tool, using black and make a large spongy head. Add circles on the side to make it look like 3D. Draw the eyes, eyebrows, nose, cheek and mouth with teeth and tongue. Once you're done with the head, continue drawing the body, with legs and pants and also the hands. Now you can start coloring in with a yellow for the who...
Learn how to draw Eeyore from the Winnie the Pooh book series. 1. Draw a circle for Eeyore's face and add in his ears. 2. Draw his body as almost an egg shape and add in his front legs as cylinders. 3. Add in his back legs and tail and add details to Eeyore's face. 4. Add eyes and mane and start to add color to his body. 5. Continue to color Eeyore and finally add shade.
Learn how to apply makeup for hooded eyes. First apply a light base to the eyes. Use a light shimmery color to the lid using a flat brush. Add a medium to darker color on the crease. Use the darkest color above the crease and blend in well. Small circle motions work best in blending the colors. Use a color close to your skin tone to blend in the area from the tear duct to the eyebrow. line the upper lash line with a silver liner to bring attention. Using a pencil brush, smudge darker color on...
The Style Diet's Anna Saccone takes us through the process of getting a gold and smoky eye look using basic everyday makeup!
It's easy to paint fantasy flowers on your nails. First, apply a thick coat of yellow nail polish. While it is still wet, take orange nail polish and make seven to eight dots in a circle. Next, take a toothpick and going from the center of each dot go to the center of your nail so that they all meet. Add three pink sparkles to make a triangle and let it dry thoroughly. After that, apply a top coat to make it last.
Linoleum asphalt mosaics, also called Toynbee Tiles, are artworks permanently embedded in pavement. In this video I'll show you how to construct your own from inexpensive materials. You can get real linoleum (don't use vinyl flooring) for this project by ordering free samples online. By cutting out a mosaic design in the linoleum and sandwiching it between layers of paper, wood glue, and asphalt crack filler, you can affix the mosaic very permanently to an asphalt surface, such as your drivew...
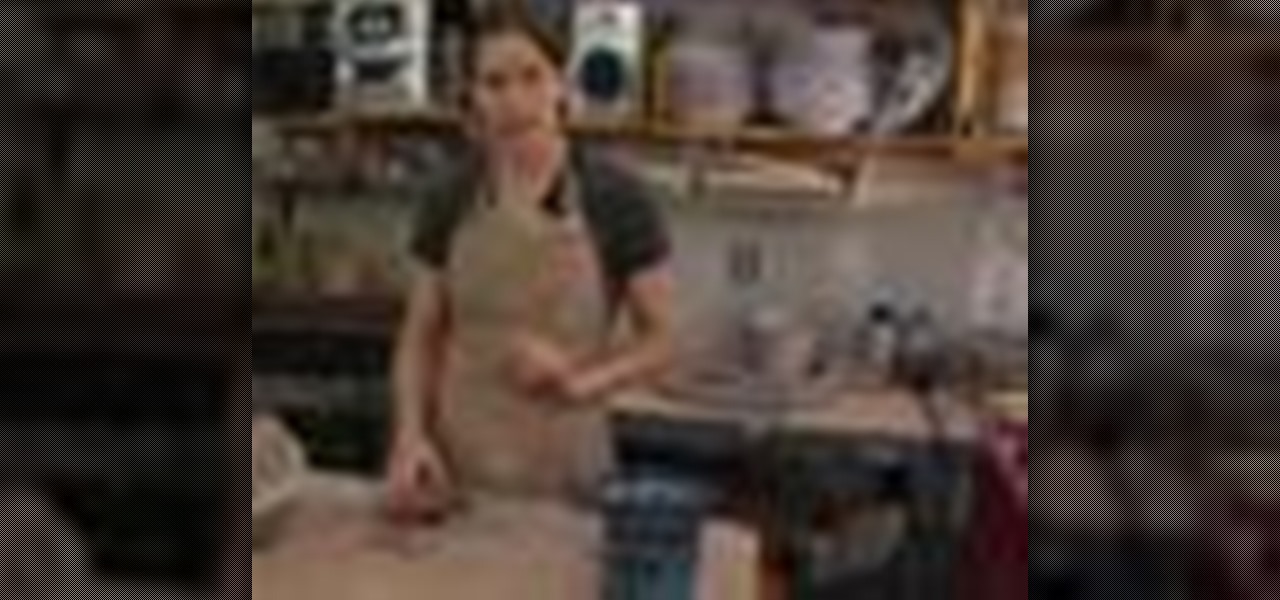
Clay pottery is a fun and creative art form that can be done with slabs of clay and not only on a spinning wheel. This free video clip series will show you several tips on how to construct a clay queso warmer and open a world of design ideas for you.
This two part how to video teaches you sliding and gliding hip hop moves. Learn how to moonwalk, slide in a circle, and how to put c-walking and gliding together with this dance tutorial. Watch this video and you'll be sliding in the clubs in no time.
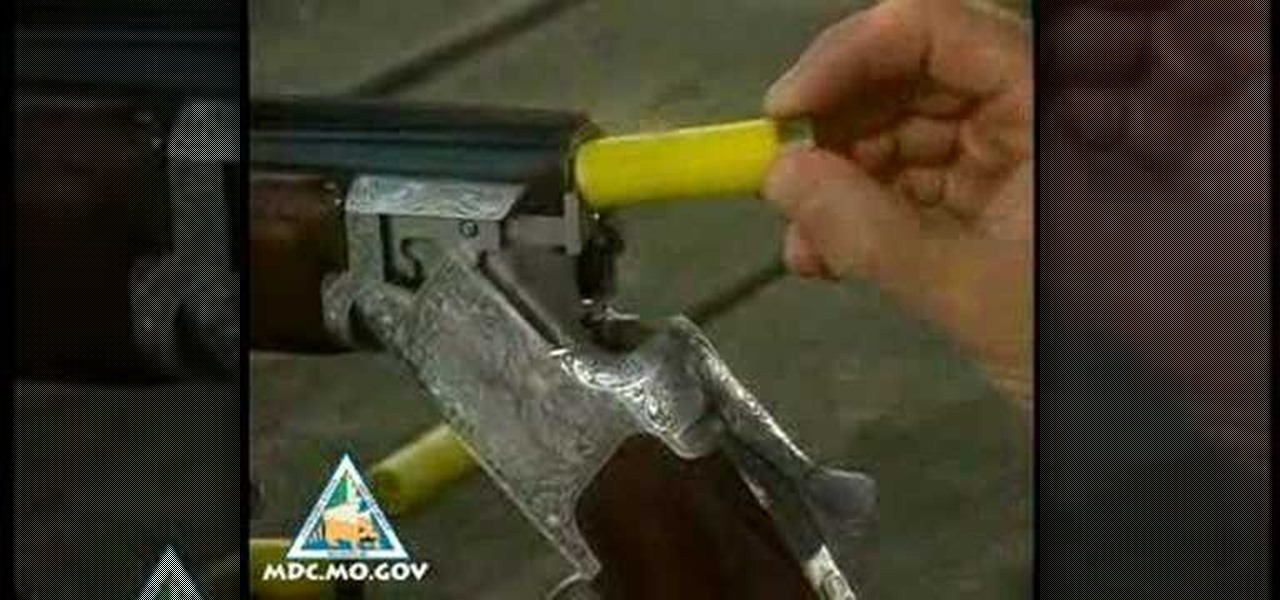
When shooting a shotgun, you don't really have to aim--just point and shoot. Whether you hit what you're shooting at depends on how well you did your homework. "Patterning" your shotgun allows you to choose exactly the right brand of shells, size and type of shot and type of choke required for the game you're pursuing. Set yourself up 40 yards from a 30-inch circle target, and bring along several brands of shells in various shot sizes. Use some form of rest like sandbags on a table or a rolle...
Unusual magnetic phenomena observations are found here. First, we see a rotating and revolving ball magnet in a pyrex bowl. The revolving was expected; the rotating was not. Is this the same phenomenon as the Earth rotating around it's axis as it revolves around the Sun?