How to Make a Lattice Top Pie Once the base of your pie is made, roll out a thin, circular piece of dough. This circle should be just a bit larger than the base of the pie. With a pizza cutter, cut 1-inch wide lines through the dough. Starting with the longest strips, place one strip horizontally on top of the center of the pie and one strip vertically on the pie. The strips should form a “plus sign” on the pie.
In this how to video, you will learn how to tell the difference between a tunable and non-tunable bodhran. A tunable bodhran has a tuning mechanism to allow you to adjust the skin tension. A non-tunable bodhran is actually tunable, but it just needs more time to do so. A tunable drum has the tuning mechanism in the inside. They are lugs pressing on an inner hoop. When the key is turned clockwise, this will make it tighter. Make sure to go crisscross rather than around the circle when tuning. ...
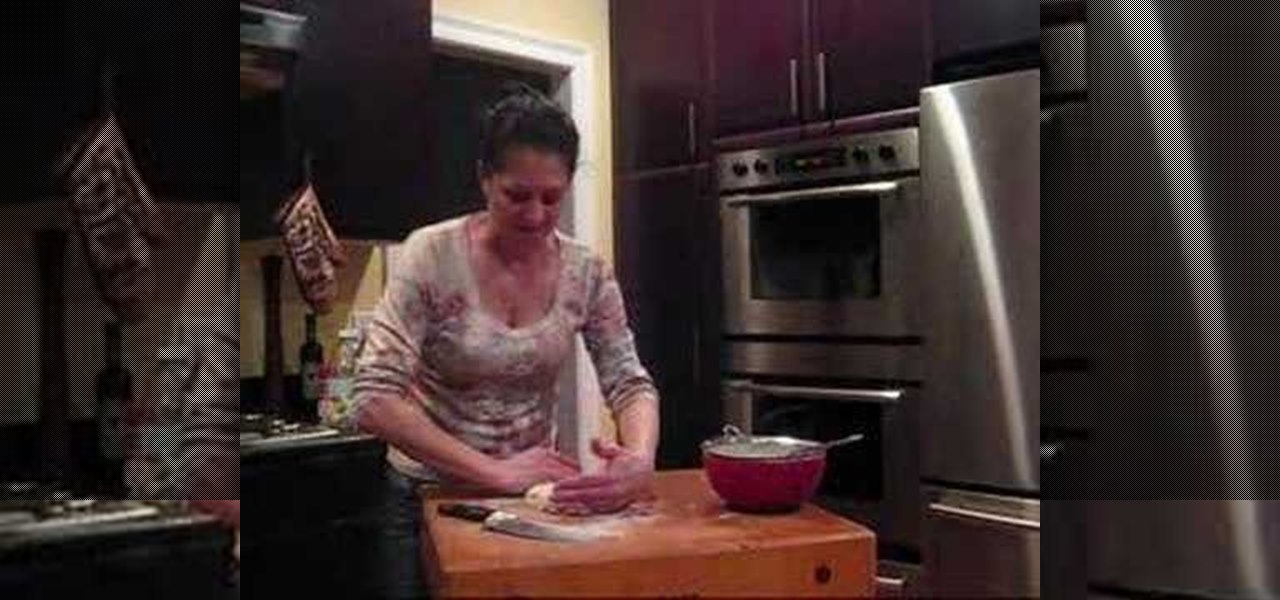
Maria demonstrates how to make pita bread. First, she runs hot water over her mixing bowl to warm it. Then, take a cup of warm water and dump it in the bowl. Add one package of active, dry yeast. Then add a tablespoon of sugar. Let that sit for about five minutes. It should bubble up in that time. Next, add a teaspoon of sea salt, two tablespoons of olive oil, and one cup of flour. Using the dough hook on her mixer she stirs in the flour. Next, add a half cup of flour at a time to the mixture...

In this how to video, you will learn how to draw a cartoon fish. First, draw a circle for the body. Add a curly fin at the top and bottom. Next, draw a triangular shaped tail at the back. With the basic outline finished, draw in the details of the face, such as the eyes and pointed mouth. Re-trace the outline of the fish with a bumpy line. Next, draw in bubbles near the mouth. Draw details in the fins such as lines running through them. Add some texture lines through out the body. Once this i...
The first part of the dance routine to Every Little Step is to step to the right and bring your left foot to your right. Now do a step to the left and bring your right foot to your left. Repeat. The next step is to take your right foot and move put it in front of you. Now take the same foot and move it behind you. Next, make a circle going counter clockwise using only three steps. Repeat these moves from the time you stepped foward. Now repeat the four steps you made going from side to side t...
This video is part of the lawn fawn card series and it explains the making of a card using border punches and a stamp.The materials required are a set card-polka dot basics from paper tray ink.This card has a variety of dots on it. Remove the big open circle polka dot and lay it on the aqrualic and place it on a plastic bock with grids on them.Using a color box cover the stamps with ink.Now place the block over the card so that the grid lines with its length and press on it.The polka dots wil...

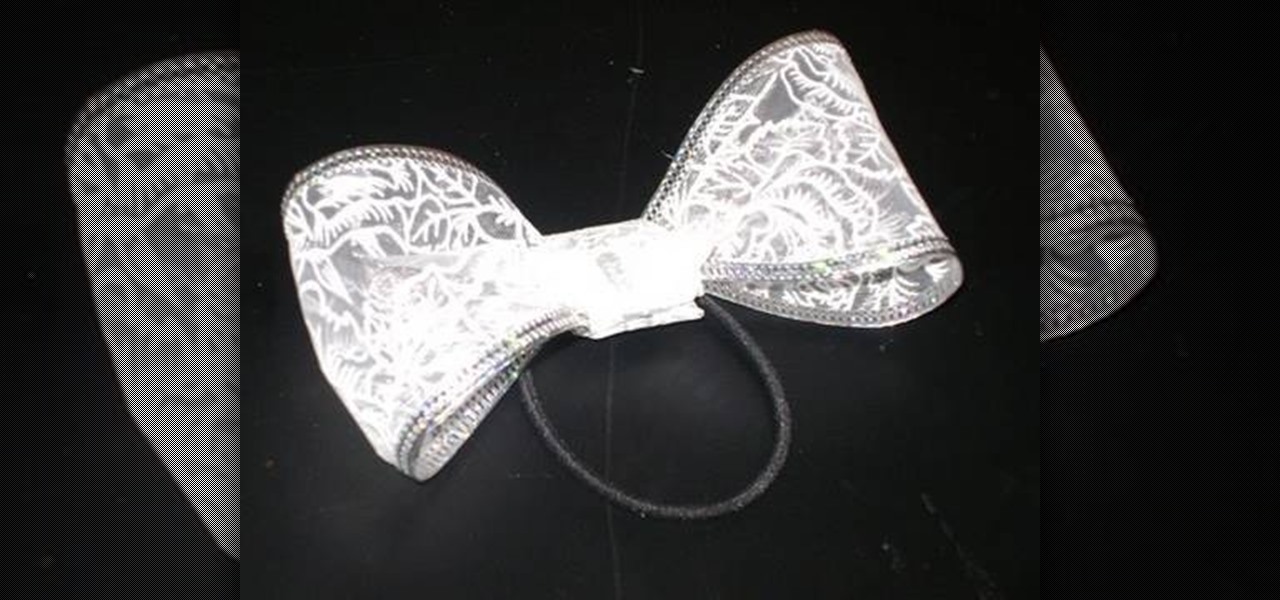
Materials required are lace, hair band, scissors and glue. Start by cutting off a piece of lace around ten inches length using a scissors. Now apply glue at the edges of one end of the lace. And then join the other end of the lace together to form a circle. Now hold this lace at the middle and then push in the middle. Press in at the centre so that it is divided into a Bow as shown. Spread the edges a little to make it appear fine. Now cut off a piece of lace around four inches using a scisso...
This video teaches us how to make shaker cards. These are cards that have a sort of window where you can see glitter or confetti moving about when you shake the card. You start off with your card base. A good size is 6" by 8". You take your front image, either a picture you have or stamp one yourself. Attach this image to the front of your card base. Line your image with thick double sided tape. Don't leave any gaps or your glitter will leak out. Next you cut your window. This will be the ver...
First of all you have to start with the bungee band pony tail at behind. You can use the brush on your back hair to make it appear bigger. Use your brush on the underneath of the back hair to make it appear wider and it should appear to have a body. Pick small locks at the back and brush it outwards so that it looks that you have more hair than actual. After this you have to gather all the hair at behind. Now you have to wind it and bring it all towards your head. Now use a hair pin to grip y...
Krazyboytx shows viewers how they can use spell Florida water. You can use Florida Water to cleanse your alter and for your candles. First, you will need a camfur block. Use one of the four pieces of the camphor block and put this piece into a zip-lock bag. Crush this camphor block up into the zip lock bag to get small crystal pieces. Fill up your bowl as much as you can with one block. Next, pour in some of your Florida water up to about it covering the stones. Put this on your alter until i...
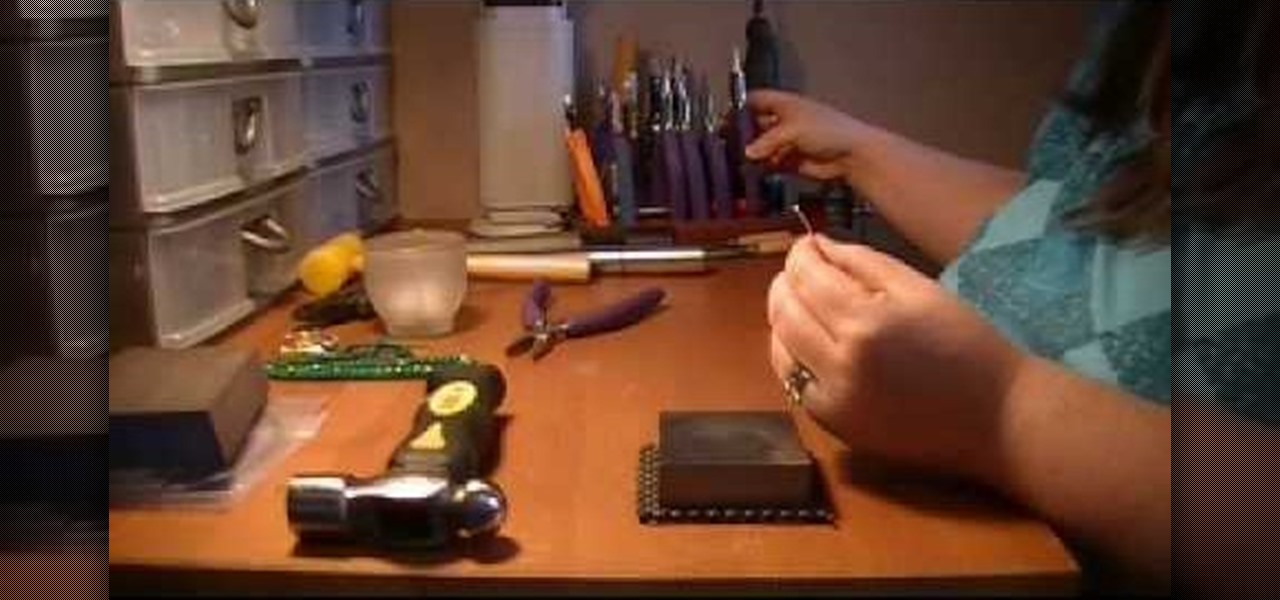
First of all you need roll of wire around 1 or 1.25 millimeter thick. Now take the roll of wire and using a round nose pliers bend the wire about 5 cm. now take a flat nose pliers and the hold the ends and bend it round to make a hook. Now taper off the end and then straighten the wire. This shall be the top portion of your pin. Now take round nose pliers and then wrap it in a complete circle and then repeat it two more times. This shall produce three loops and you can also adjust the length ...
This video is a Microsoft Word 2007 tutorial on working with pictures. To insert a picture in your document, click on Insert and select Picture, then find the picture, select and insert it. To resize the picture without distorting it, click and hold on the corner circles. You can adjust Brightness and Contrast by using the various choices within these settings. The Recolor setting gives you a number of options for changing the coloring of the picture, such as sepia, black and white, or graysc...
This video demonstrates how to make a balloon sword and heart. To make a sword, pump up a balloon as long as possible and tie the end. Twist the balloon at this end making a small ball. Bend the balloon at around 20 cms in length and twist both the ends of the balloon at the same level as the ball creating a loop. This is named the 'elephant bend'. Now insert the long end of the balloon into the loop leaving behind a small part. Your sword is ready.To make a Heart flower. Take a red balloon a...
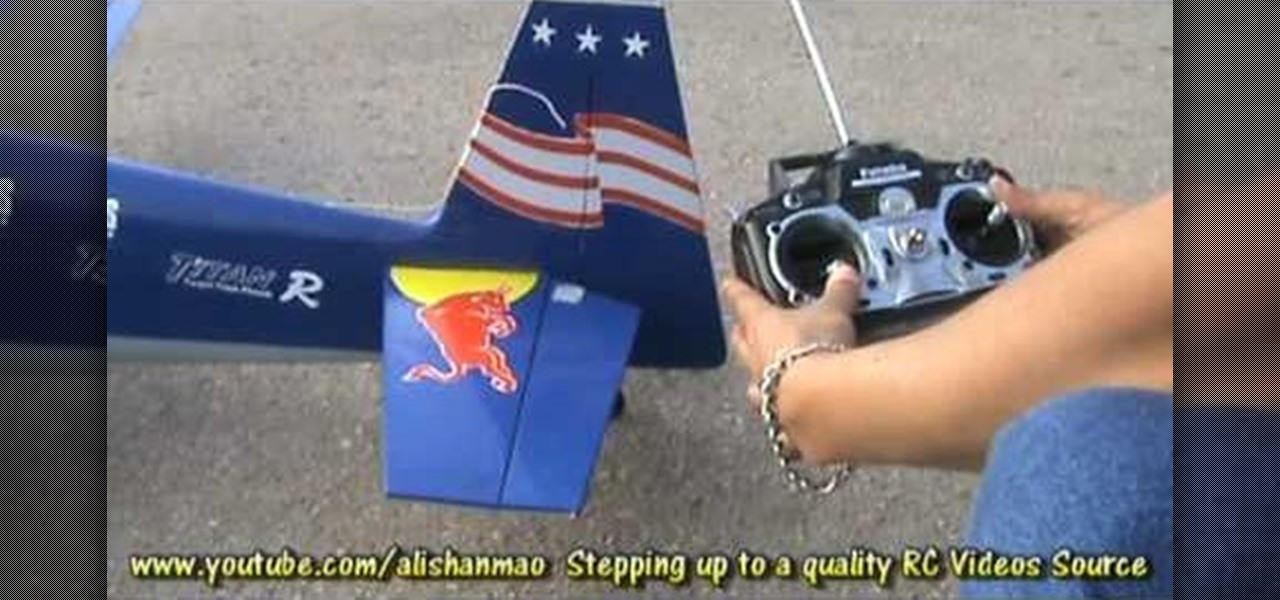
First of all you have to loose the altitude by taking a circle or two around in the air. On the final turn make a good straight approach to runaway and don't use too much ‘ailerons’ then. Just use the controls ‘rudder’, ‘elevator’ and ‘throttle’. Also watch for the cars or the traffic where you are going to land. Keep constant low ‘throttle’. You have to maintain good ‘idles speed’. You might want to adjust and remember the trim settings. After touch down, don’t pull on elevator. Just cut the...
ARHSphysics shows viewers how they can build a simple barometer using household items! First, you need to get a container that is the height of an index card. Your best bet is to get an empty soup can of food can. Make sure you wash the can. Now, you will need a latex glove, cut a semi circle from the glove and attach this to the top of the can using a rubber band. Get two straws and attach them together at the ends. Cut a slit in each one and attach the straws. Attach the straw to the top of...
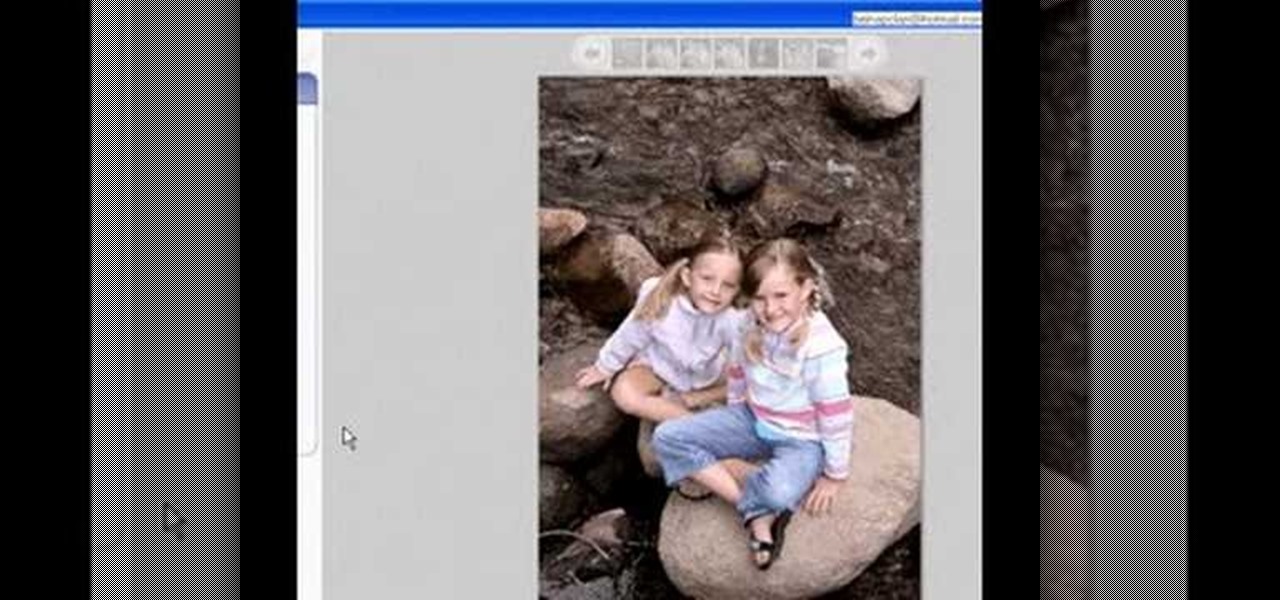
Begin with starting the program Picasa. If the program has been opened, choose an image for editing. Double click on one of the images and it will open. On the left of the screen there is an editing toolbar. The next option after this is to Crop the picture. Click "Crop Picture". Then choose the format you want the picture to be cropped to. Then hit Enter.The next option is "I'm Feeling Lucky". With this option you can give the picture the best color possible.Following with Redeye Repair. Cho...
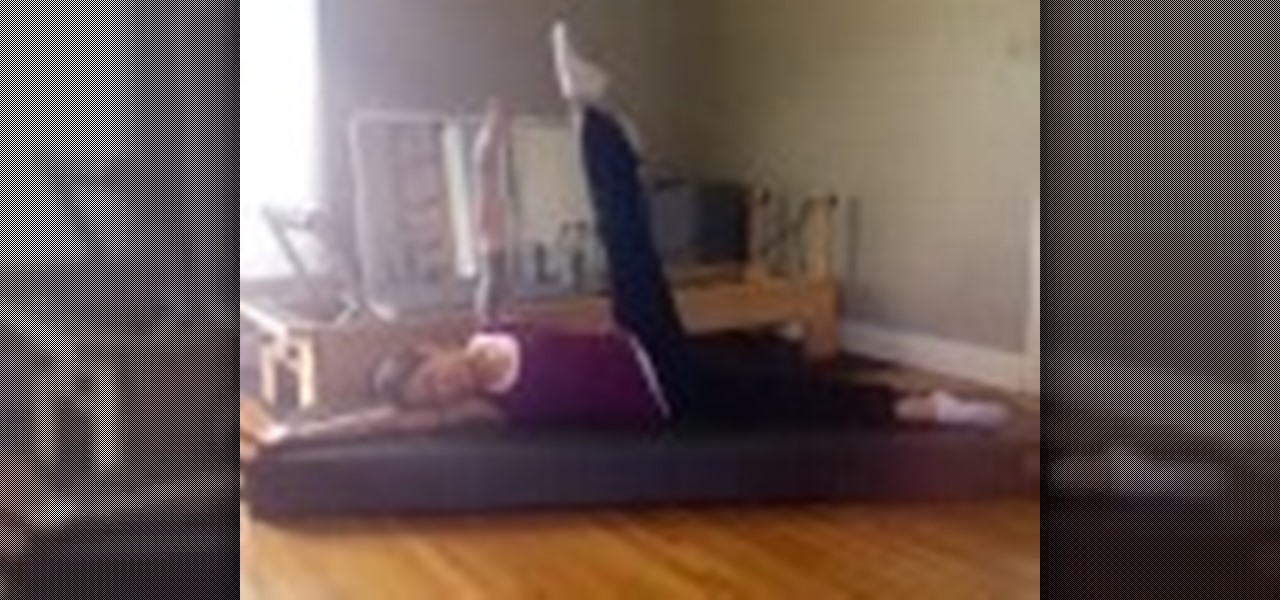
In this demonstration, Erin Huggins shows Pilates exercises that can be used to firm and tone legs. Start laying on our left side with your arm above your head and your head resting on your arm. Your legs should be straight. Start by pointing your right kneecap (top leg) to the ceiling. Then lift it straight up to a 90 degree angle. Flex your foot at the top of the move and keep it flexed when you drop the leg. A variation of the move is to keep your foot pointed and bend your knee as you pul...
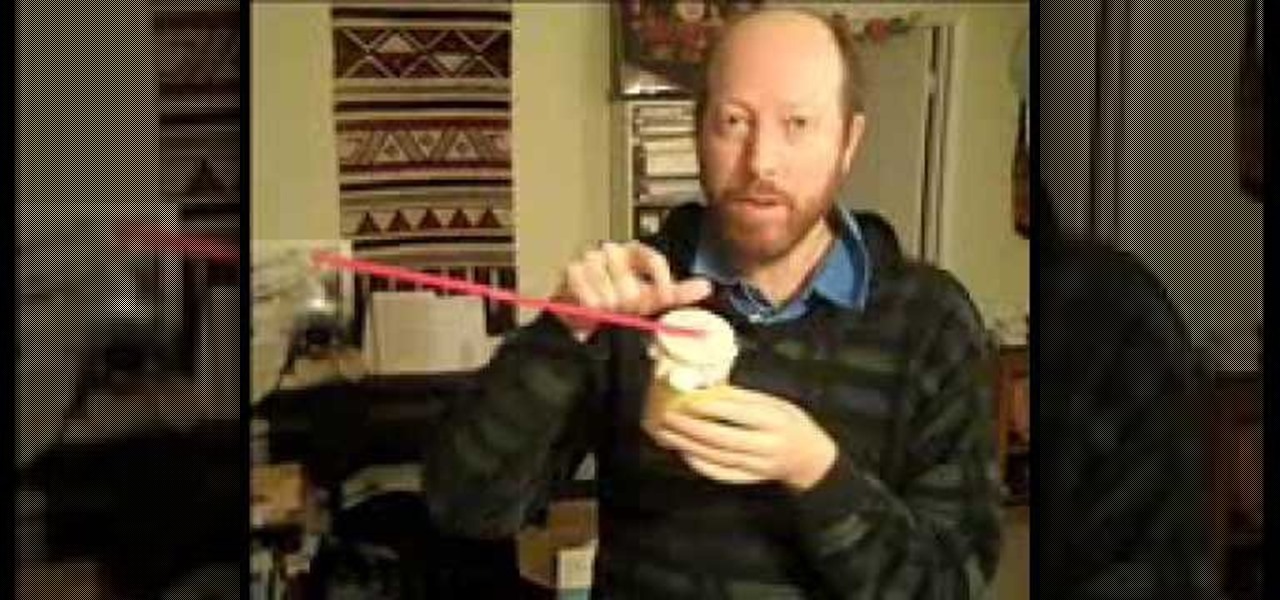
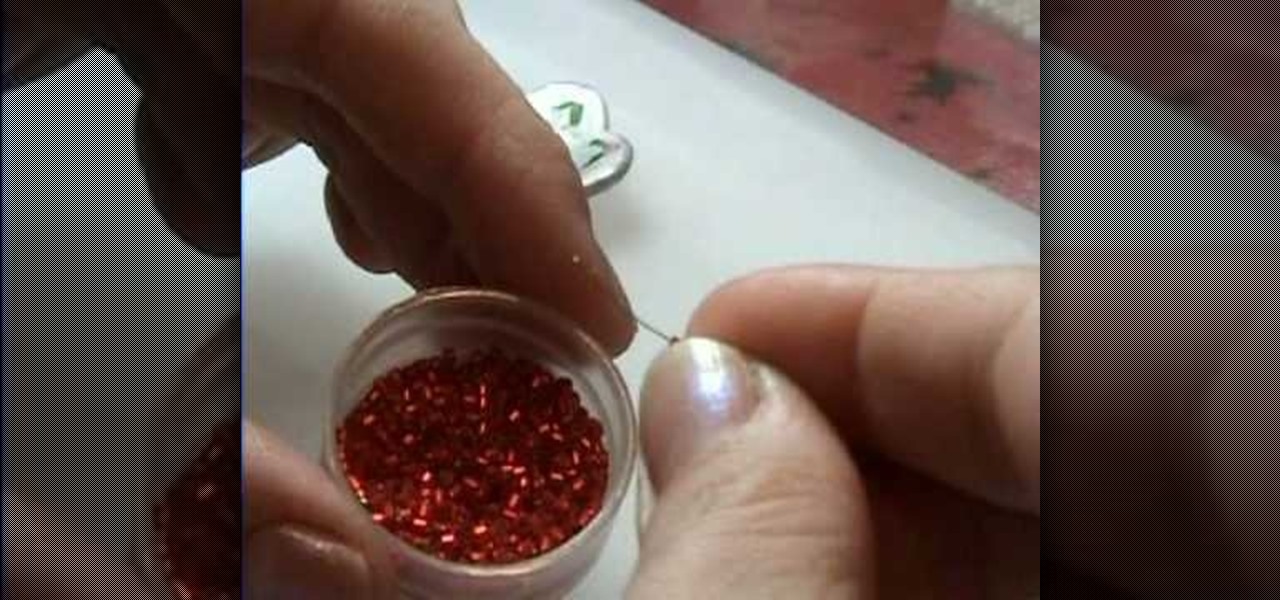
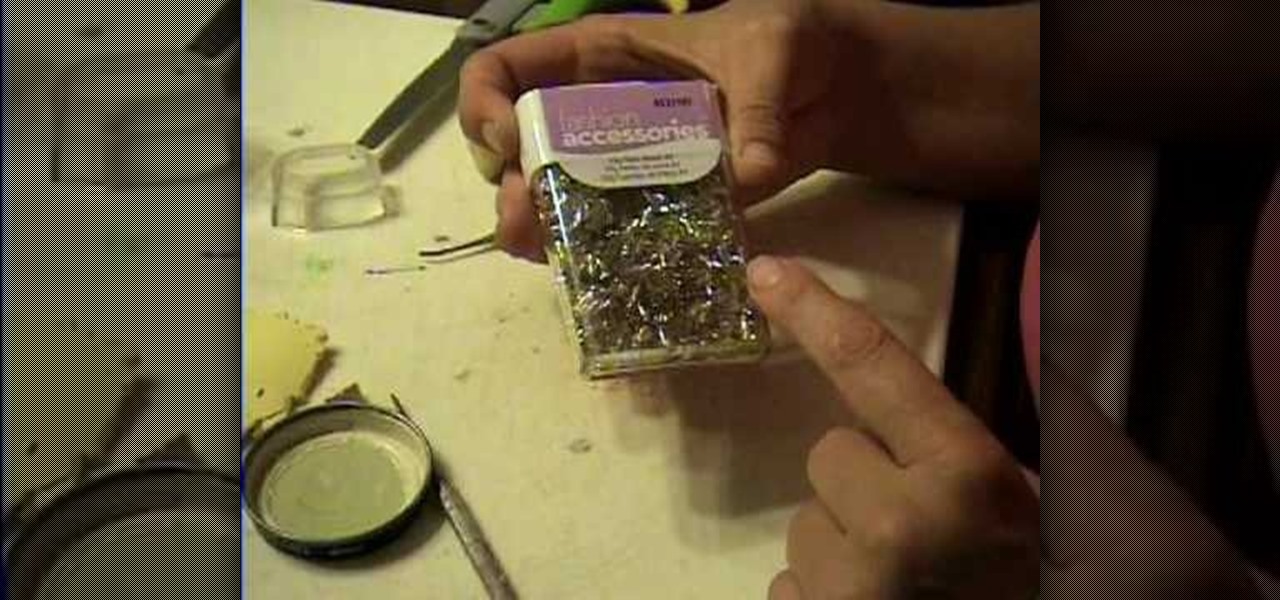
For the fairy sized princess tiara you will need 32 gauge silver wire, silver ball beads, seed beads (your choice of color) and 4 mm crystal beads. Start with about 6" of the wire. String a seed bead to the center of the wire- and twist one or two times to secure it in place. Then bring both ends of the wire together- and clip so that they are even. Next string a 4 mm crystal bead over both pieces of wire and press snugly next to the first seed bead already strung. Then add a silver ball bead...
Making your own hoop earrings can be fun and easy. In this video we learn to make gold-filled beaded hoop earrings with some wire, pliers, beads and an empty pill bottle. Take a 6 inch piece of 20 gauge wire and wrap it around the pill bottle. Then you take your round nose pliers and bend the tip of the wire in a 90 degree angle ending in a circle. You can be creative with what you put on for beads. In this video it shows a purple focal bead and 30 plain beads. So you would put 15 of your pla...
Garden Imagination shows viewers how to make a polymer clay mini birthday cake for your dollhouse. First you will want to start off with yellow clay and roll it out on your pasta machine at level 1. Fold this yellow clay in half and use a shape cutter to cut out the cake. You can find a shape cutter at Hobby Lobby and use a circle scare or any shape you want. Cut out two pieces - one for the top and one for the bottom. Next, you will want to use size 8 font on your computer and type "Happy Bi...
This art and craft video shows you how to create a bunny head out of polymer clay. You start it by creating a round ball for the bunny head. You can then make it into a bead by using a small screwdriver (if you wish it to be a bead). You then take some additional clay and shape it into flat ears, fold them over to make them look floppy and attach them onto the round ball (head). The presenter then shows you how to add eyes, by pressing beads onto the face of the bunny using a needle. You can ...
As you apply the wrap you want the most pressure down by your toes and the least up your leg above your ankle. That keeps swelling out of your feet and back up toward the heart. Start by wrapping around the base of the foot. As you move up toward the ankle you will begin wrapping the ankle in a figure eight going around the ankle and then around the foot. You want to wrap the ankle 3-4 times to give it some good stability. Then wrap the ankle in circles around the ankle and then up the leg. Y...
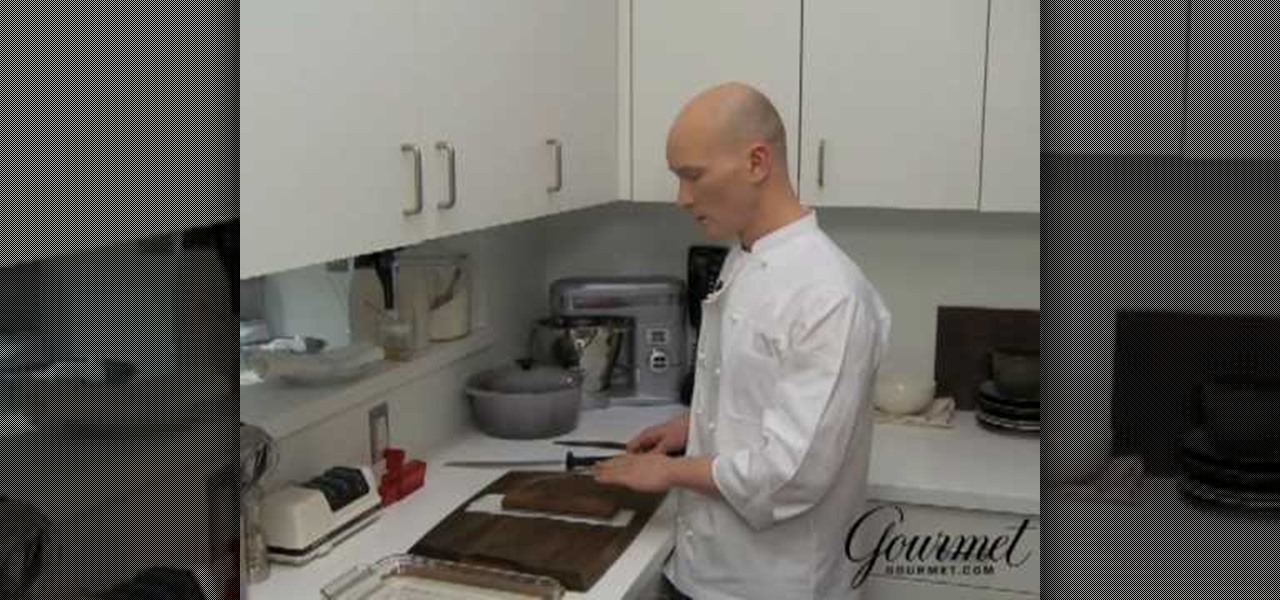
Food editor Ian Knauer demonstrates a simple method for using a whetstone and a steel to keep your blades sharp. Just follow along and learn how.
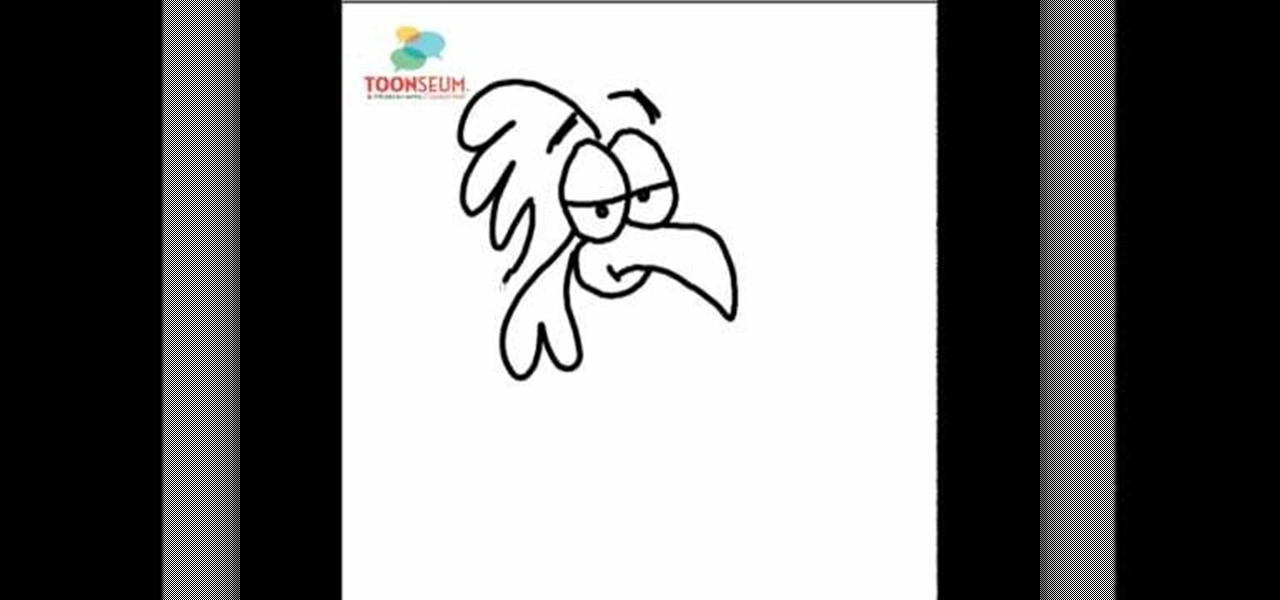
the video starts out with Joe talking you through the basic steps in how to draw or sketch a chicken. Starting with the eyes, shaped like to ovals, side-by-side, touching. Drawing a curved line all the way across each one to represent the eyelids and two small dots to form the eyes. Next draw a sharp curved line down from the eyes forming the beak, with a c like shape towards the back, connecting back to the eyes completing the formation of the beak. Draw an upside down, narrow heart at the b...
The video helps us to make sterling silver hoops earrings. It is one the popular style of earrings. These earrings can be made of different sizes, shapes, forms whatever we like. This art and craft work is shown by Natalie.
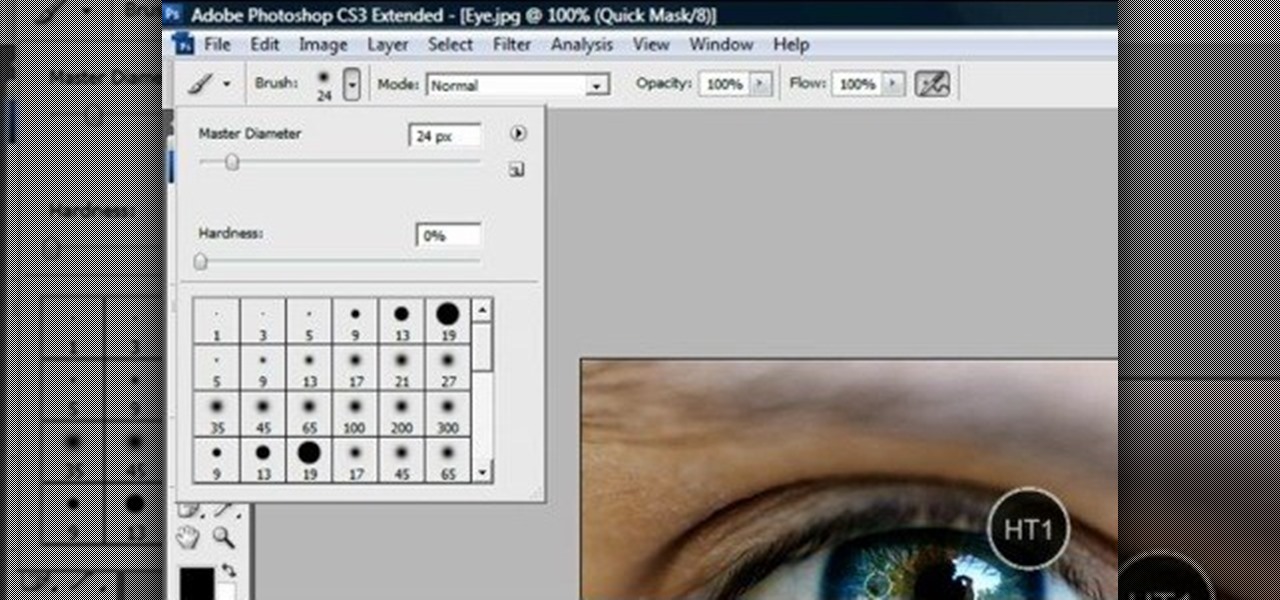
This video shows “How to change eye color in Photoshop CS3” First open the eye picture you want to change. Now select brush tool by
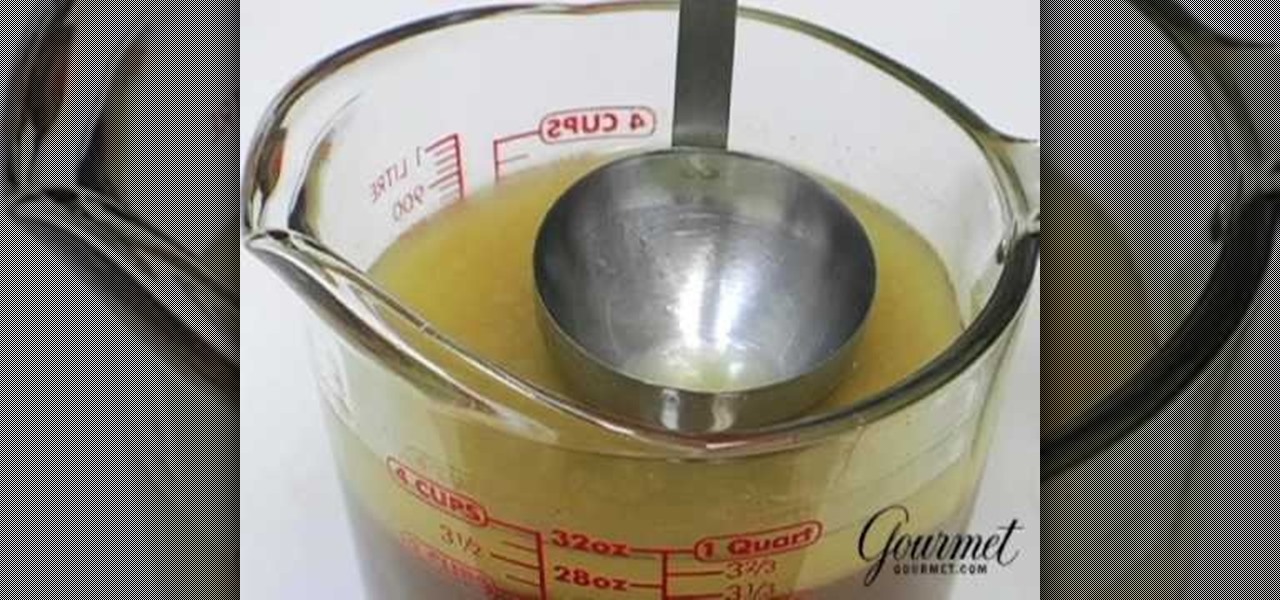
De-fatting turkey stock is very easy. All you need to do is use a specially made measuring cup that is made to de-fat stocks. Take the pan juices and the pre-made turkey stock and pour it into the measuring cup. When you pour the stock or pan juice into the measuring cup the fat will rise to the top of the cup because it is lighter When you pour the stock out of the measuring cup, the stock will come out, and the fat will stay in the cup. If you don't want to get a specially made measuring cu...
Click in File and New to create a new document, press OK and select the text tool and click once on your file and write something, then close the window. Click in move the active layer to make easier to move the text. Go again to the text tool and click on the Color to change the text color. Press Crtl+O, select the background layer and change the color to the one you want, now select the bucket tool and click on the background to paint it with the color you have selected. Go back to the text...
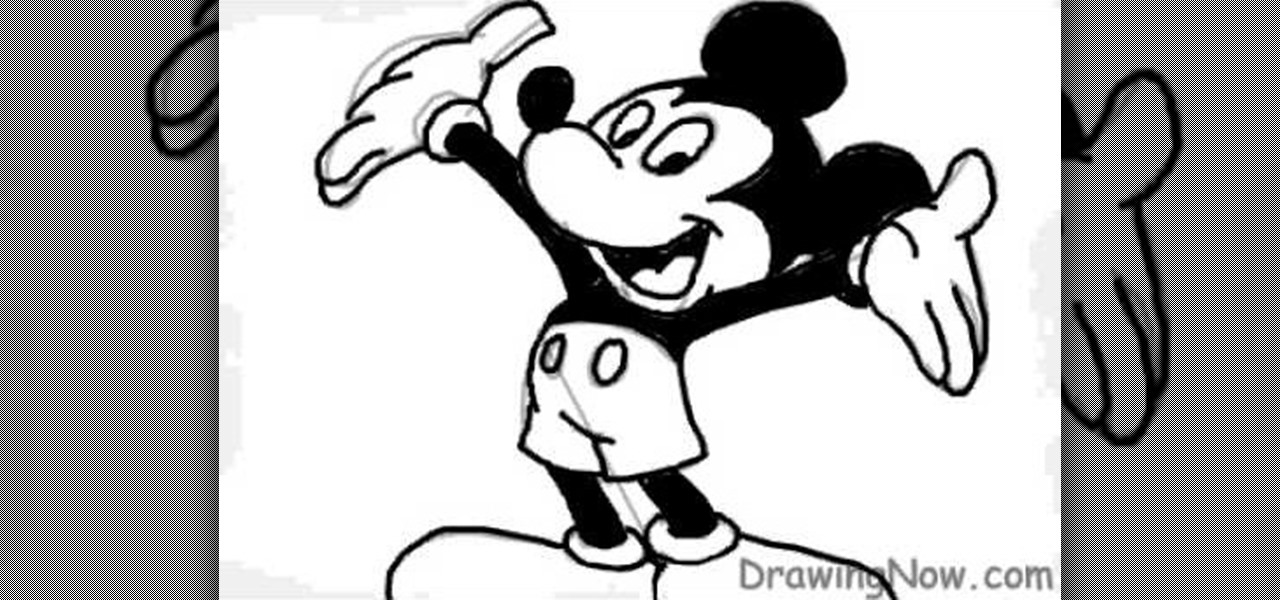
The video is about how to draw a Mickey Mouse in a computer. First draw a little big circle, as head. Then make ears by adding two ears to it. Then draw nose attached to the open mouth. Make eyes above the mouth and nose by putting two rounds. Then make hands like extended to back. Then make the body, slightly bent backward. Then draw legs to the body. Add shoes to the legs. This is the sketch of the Mickey Mouse. Then make the boundaries bold. Darken the round tip of the nose. Color the eyes...
Concept/ 3d character artist, Xia, teaches viewers how to draw an old man's face. Draw an elongated circle that will serve as the face. Make a horizontal line on the upper portion of the face and draw the eyes. Draw the nose and the eye brows accordingly. Achieve an older look by drawing creases along the nose. Draw the ears right along the same level as the eye line. Add more creases on the forehead for a more aged look. Draw deep cheekbones. Start drawing the beard. Add more creases below t...
Follow this simple step by step video demonstrating a series of stages involved in crocheting a kids beanie cap. Prepare the tools you are going to use, which will be mainly a hook for crocheting and woolen thread. Since the beanie cap is intended for kids one should choose a nice lively color. The first step is to make sure to tighten the first stitch. Afterwards make six consecutive stitches, and then make a loop by twisting it over. Pull the string through the slipknot and pull inwards. Yo...
The video begins with a piece of paper with questions 6 and 7 on from section 1.3. The narrator introduces these two questions as both having to do with graphing on a number line. Starting with question 6, which asks the person to graph -11/4 on a number line, the narrator draws a number line with the numbers up to -5 on the left, up to +5 on the right of 0 in the middle. She starts by showing -3 as an example, and then draws a black dot on the line at the point of the number 3. She then illu...
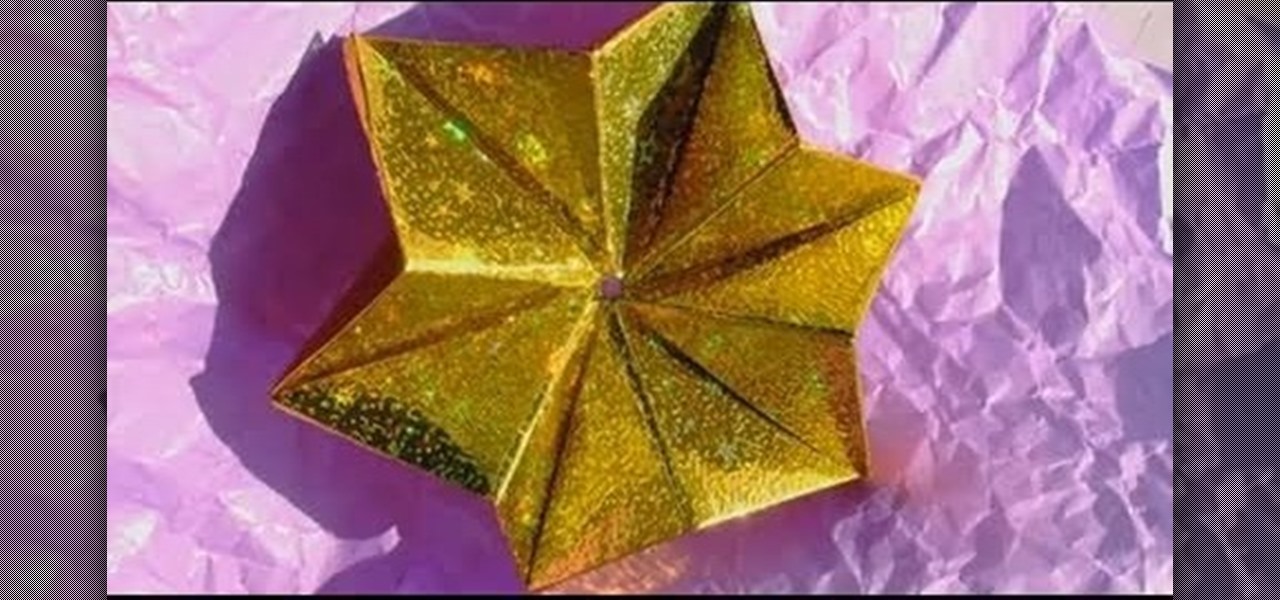
In this video you can learn how to fold a modular origami star. Create four quadrants of the star point. Crease and unfold the first square origami paper in half both vertically and horizontally, making four equal quarters. Set the creases. Fold precisely each corner of the square in towards the center point. Run a pencil or straight edge over the creases to set. Complete a triangle star point. Hold the paper at an angle to resemble a diamond shape. Take the left center point and fold it to t...
Watch this video to learn how to prepare an easy lobster appetizer. Your guests will gobble them up in no time! Ingredients four (1 lb) lobsters six cups mesclun (baby greens) one cup lobster stock one shallot, peeled and finely diced cup vinaigrette one tsp fresh lemon juice Freshly ground white pepper to taste Fine sea salt to taste one bunch fresh chervil for garnish Preparation Cut shelled claw meat into inch wide strips. Cut the legs and shell that covers the tail meat. Cut the tail meat...
Make simple snowflakes from paper. You can tape these snowflakes to a window for a nice winter decoration or paste them onto a piece of folded construction paper for a great winter card.
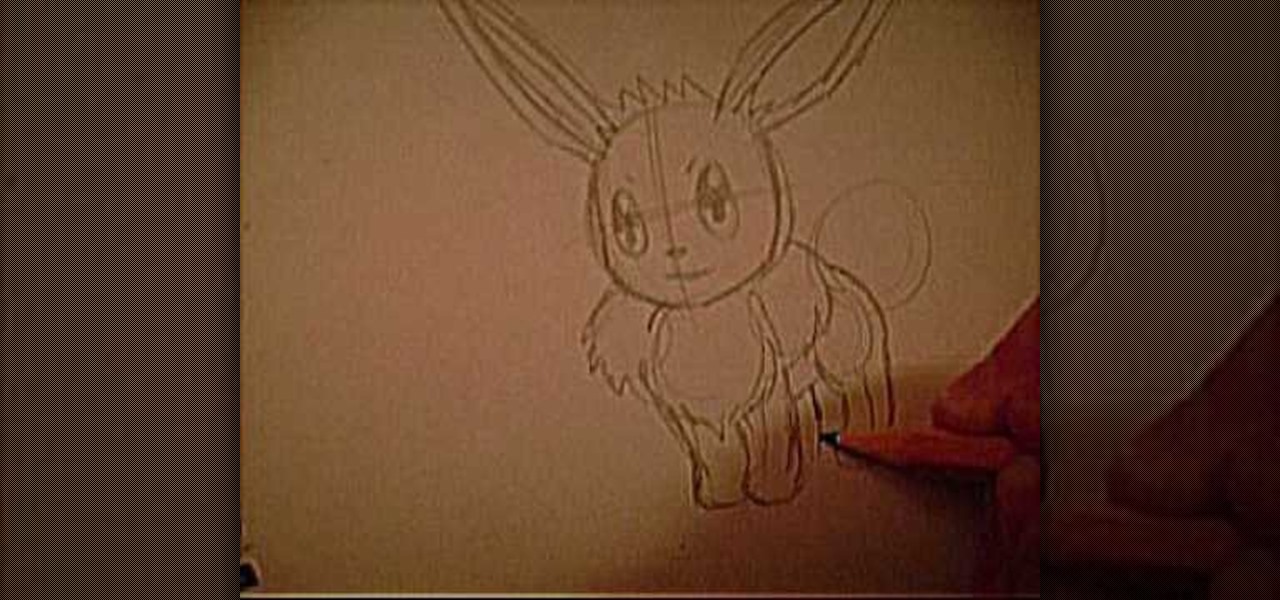
This video explains how to draw Eevee from Pokémon. Start with two circle shapes, one for the head and one for the body. The shape for the body is a little misshapen as you see here. You will then draw the facial guidelines and then draw the lines for the large pointed ears. You will draw in the inner shape of Eevee's ears as you see them here, then draw out the circular eyes using the facial guidelines you drew in step one. Color in the eyes and make sure you leave white to add that glazed l...
Chef Jason Hill is at the Mission Tortilla Factory in Anaheim, CA to show you how to make restaurant quality tortillas. Add butter at the end and you're good to go!
Just follow these eight steps to draw the monkey head: Step 1: First, we need to draw a big circle.
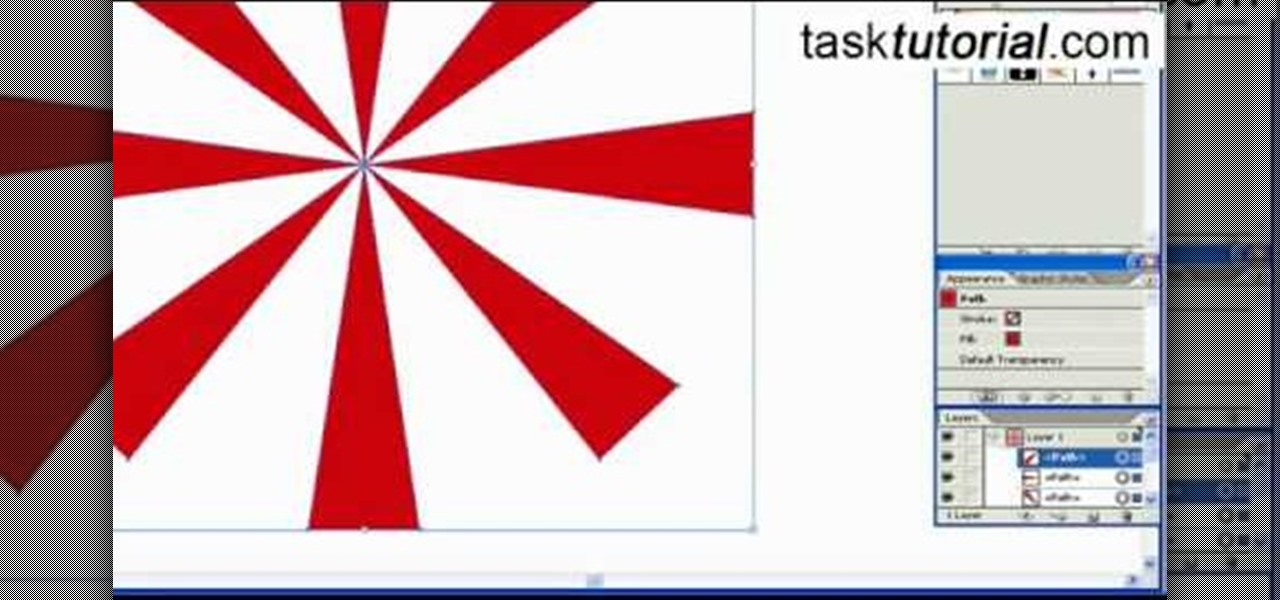
This video is about creating sunbursts using symbols in Illustrator.
Michael Weiner (2D Illustrator) explains that before drawing an elf ear, one should have a clean white sheet and a drawing utensil (HB Pencil). Especially a light graded pencil helps to save time. While drawing an elf ear one needs to draw the outer line of the ear i.e. to draw a small base of the ear. In the step, you would need to draw the point which connects the outer line of the ear for example, the outer line of a leaf. In the step, after completing the base of the ear, you would need t...