In this video, we learn how to mix automotive or car paint. To begin, you want to look at your car information to find out what kind and color of paint they used on it originally. Once you have this information, you can take it to an automotive shop and they can do a code search for what to mix together to get this specific color. You may have more than one option on how to make the color, depending on what it is and what year your car is. Next, you can have the paint made and tested to see i...

To use borders in Microsoft Word 2007, you begin by clicking on the Page Layout tab. Next, click on Page Borders. This will open a window. Page borders will border the entire page. You are able to custom choose the width of the lines, the style of the border, or the color of the border. The color drop down menu will allow you to choose automatic colors or custom colors. You can also choose to remove one or more of the sides. You can decide which pages to add borders to, as well. There are als...

If you make a flub at a store and buy a shirt in the wrong color you're usually stuck with it (unless, of course, you were smart and saved the price tag just in case). But in Final Cut Pro, anything is possible, even changing the color of a shirt to fit your taste.
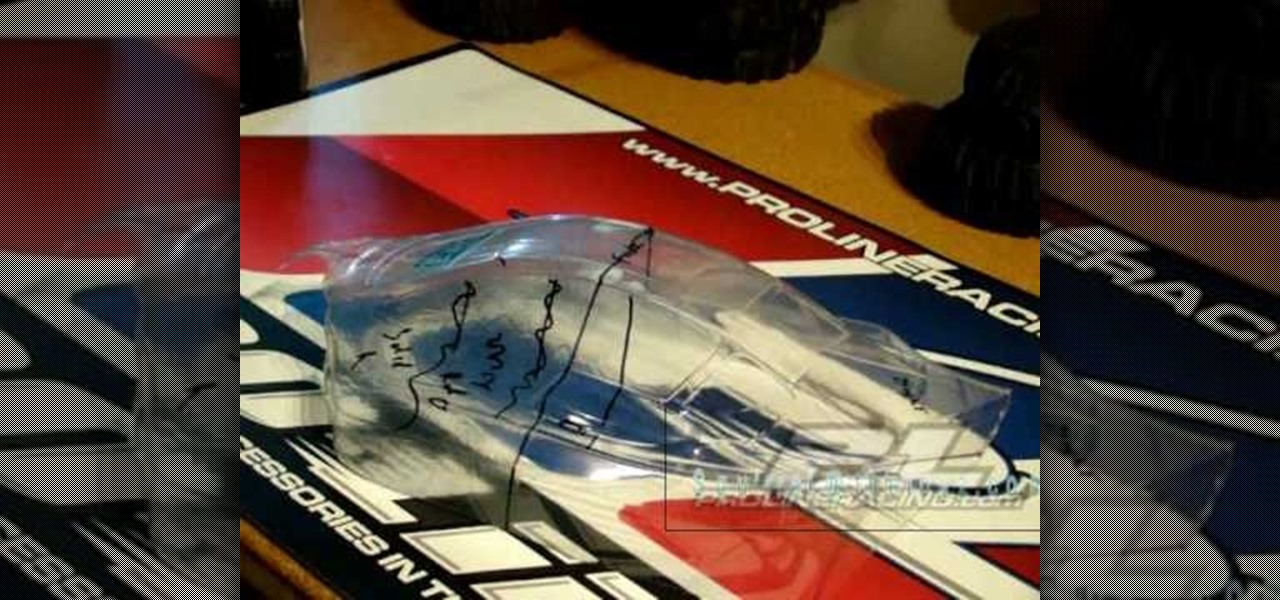
If you want to paint a fade on your model cars you should first pick colors that will work well with each other. First, you should plan out your step. Divide the car into parts of the car where you will places your colors. You should designate where you mixing and solid areas are before you begin to paint. You should carry your mixes far and blend them well. When you do this, you'll want to lift up your airbrush a little bit. For fading, go to a solid color, and as you go to a new color lift ...

To make a lotus out of a single sheet of paper, use a colored, square paper sheet with a different center color (optional). With the colored side facing outwards, fold the sheet diagonally in half creating a center crease. Open up and repeat the step with the other corner to obtain a center point. Carefully fold the 4 corners towards the center point to form a smaller square. Repeat the same procedure with this square. Flip over and repeat the same procedure over again. The next step is optio...
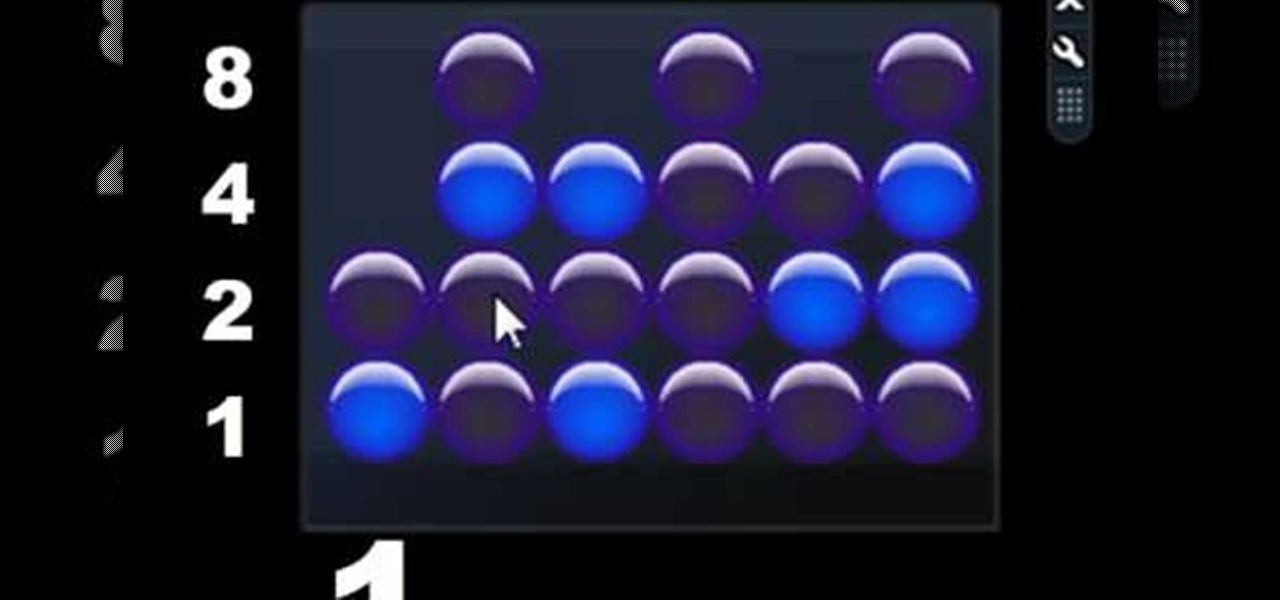
Sydus 93 teaches You Tubers how to read a binary clock by demonstrating the following process: A binary clock is made up of four rows and six columns of colored or uncolored dots. The rows, from bottom to top, represent the numbers one, two, four and eight. From left to right, columns one and two represent hours, three and four minutes and five and six are seconds. In order to tell time using the binary clock, begin at the left of your chart and simply determine which dots are filled in and a...

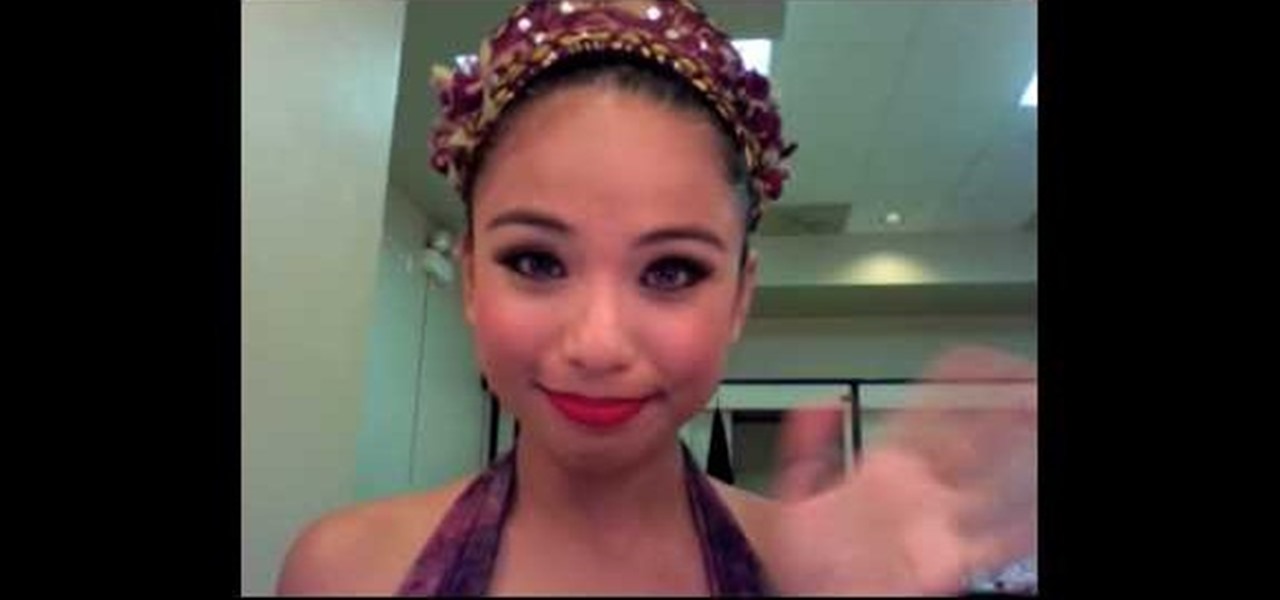
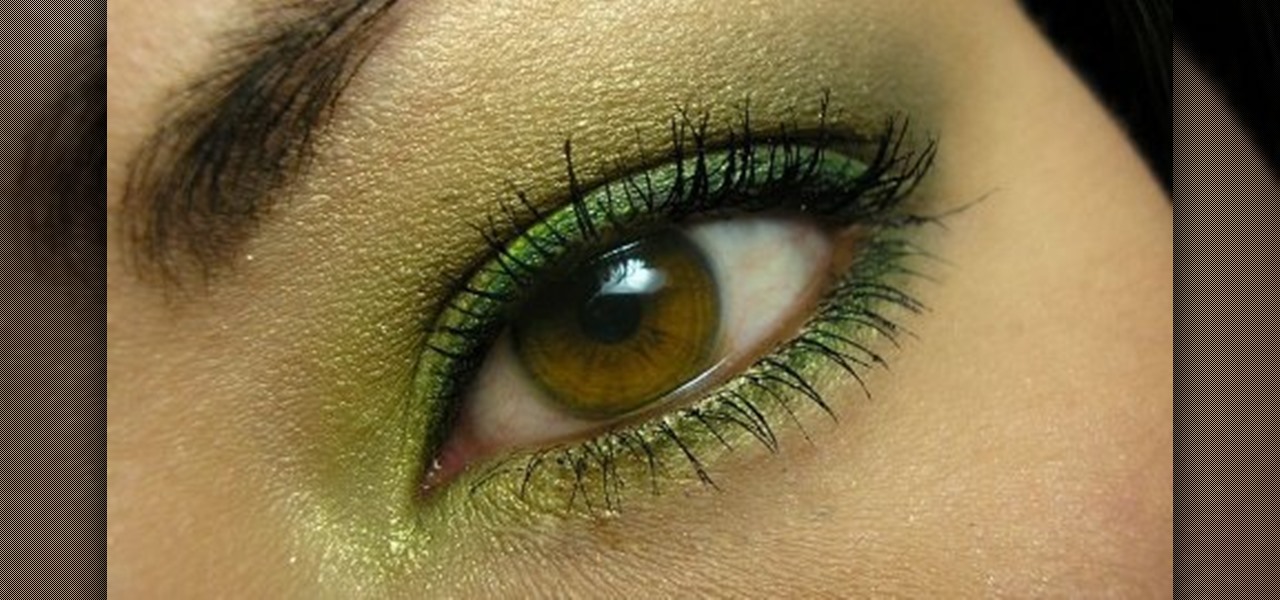
Before applying any make-up start by thoroughly cleansing the face and moisturizing after cleansing. Start with a good concealer to cover up and blemishes or dark spots. Apply liquid foundation with a stipple brush to ensure all over coverage of the entire face. Now using another brush apply your face powder, you can try MAC skin finish in your own personal skin shade. For the eyes, start with a white shadow and apply all over both lids. Now, take a medium-brown color shadow and apply to the ...
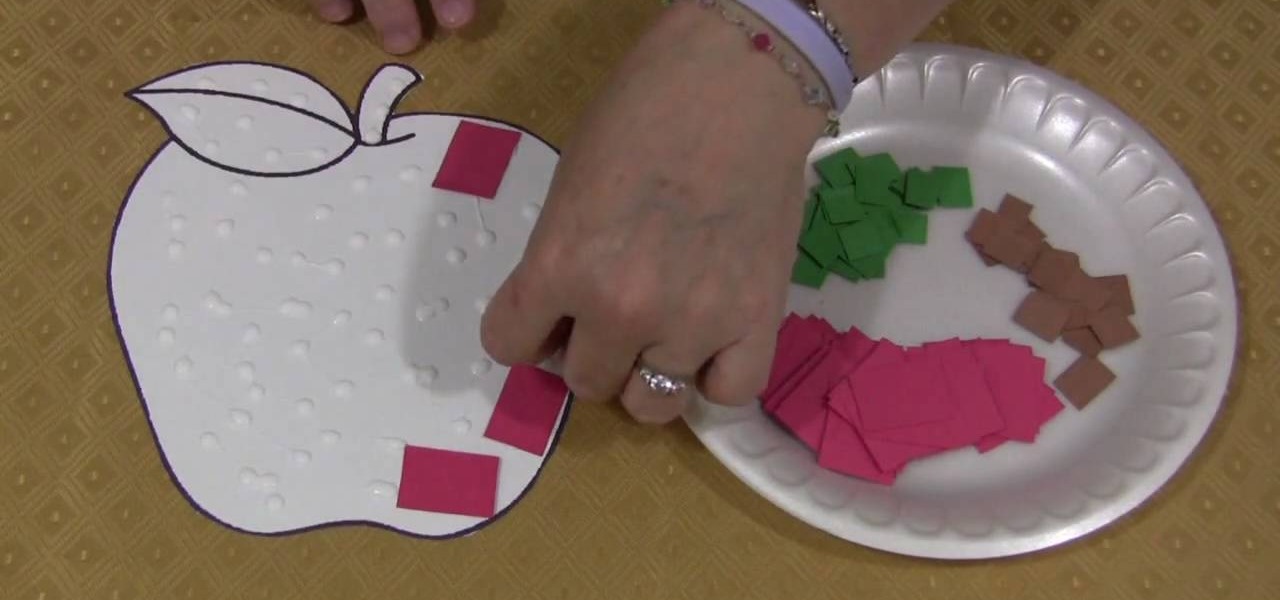
Shelley Lovett of Childcareland shows us how to make a mosaic apple using colored construction paper. This is a fun to do project, which enhances a child's motor skills. The basic outline of the apple is available on the website. It can be printed out and then cut out. Shelley has used red, green and brown colored construction paper, the traditional colors for apple. But she also stresses that we should let children use whatever colors they prefer. It will make the project so much more fun. S...
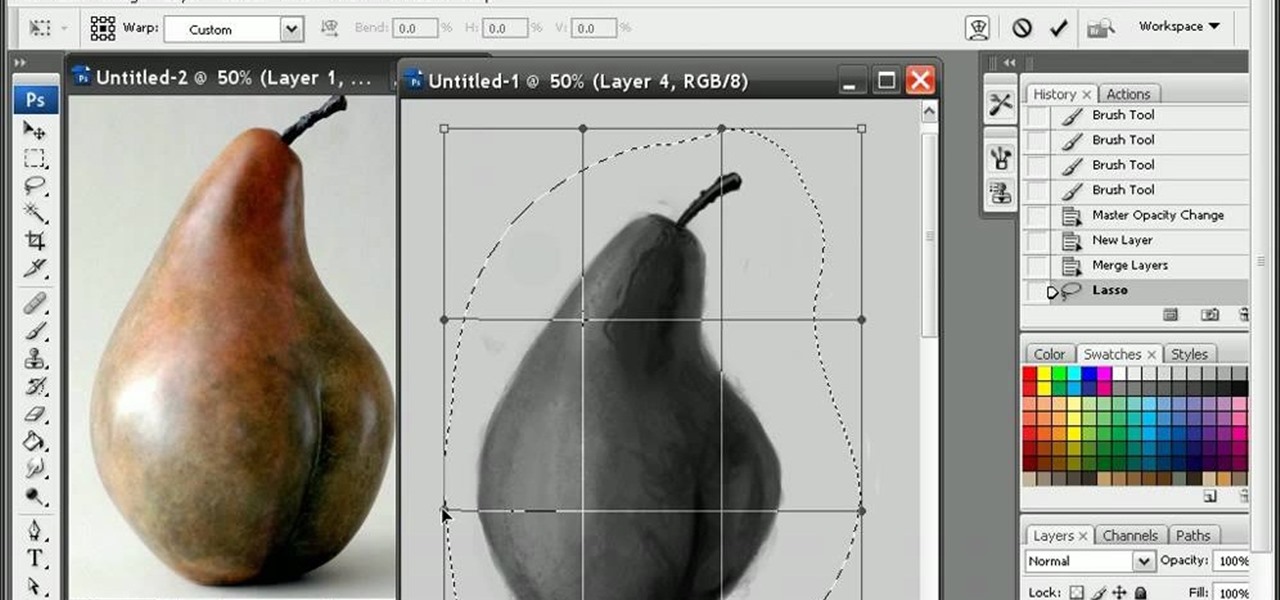
If you are looking to improve your Photoshop skills by learning how to digital paint in it, this video shows you how to do it. To do this, open a new Photoshop canvas and select your brush to paint with. In this example the author shows how to paint a pear for demonstration purposes. You start by drawing a rough sketch, just using your paint brush and reference an image of a pear that you find in this tutorial. Now do the dark textured work on the non lighting side as shown in the video. Now ...
This tutorial shows how to make tiny molded roses and leaves that you could put on cupcakes. To start you only need a few ingredients: icing sugar, water, paste coloring, fondant icing sugar, and a piping bag (optional). Mix all ingredients together, then put them in a bag so they stay soft. Make the color of the rose or petals any color you want. Knead the dough so that you will have the color you would like. Next, break off a piece of the kneaded dough and form it into a cone shape. Break o...
To fill a gouge on a table edge you start by using auto body filler. Auto body filler is a two part substance. The catalyst is red and the resin is grey. When they are properly mixed it will be a uniform pink color. To keep the substance from spilling out of the damaged area put a piece of tape on the side of the table. Take some filler and force it down into the cavity formed by the tape along the side of the table. Let it dry for 3-4 minutes. Take the tape off and use a knife to trim off th...
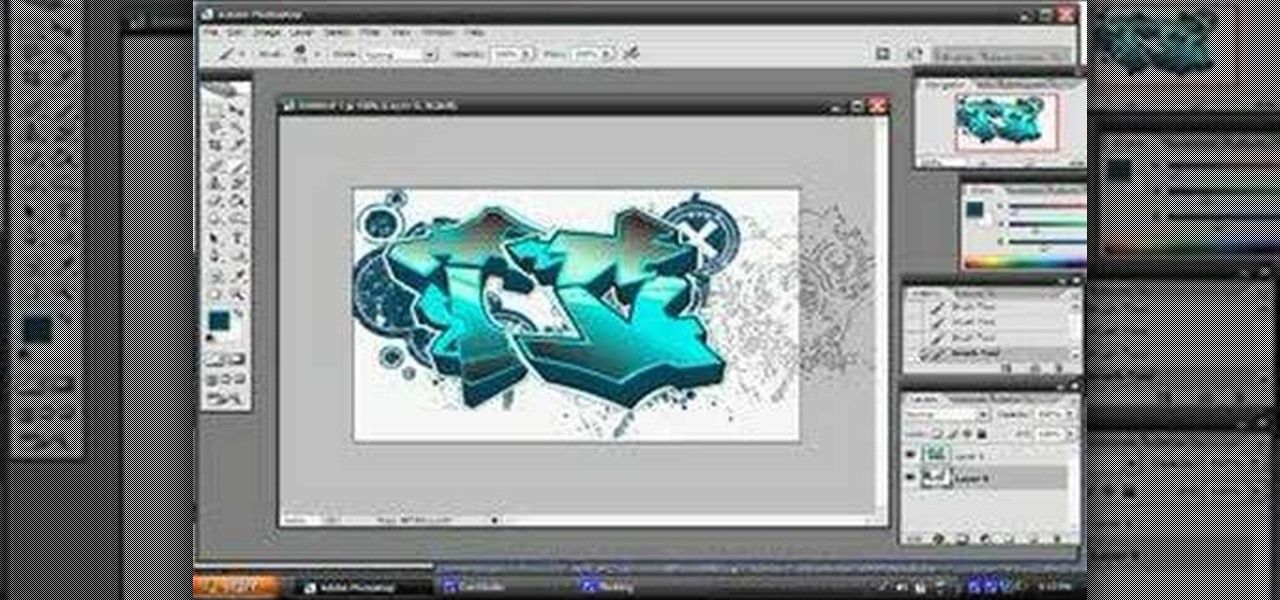
Walagers helps us learn how to make graffiti in Photoshop. First, go to "Select" and click on "Color Range". Use the eye dropper tool to select the color of the background, then press delete. Next, press "alt" and double click on the background layer to convert it to a normal layer. Using the brush tool, select the type of brush you want and the brush's size. Brushes can be downloaded from Brusheezy.com. Use the eyedropper tool to select part of the graffiti. It is recommended to use the same...
This video will walk you through the process of creating your very own icon to use for your email by using Adobe Photoshop. Photoshop is a great tool to use for a variety of purposes and in this instance can make the perfect icon in just minutes.
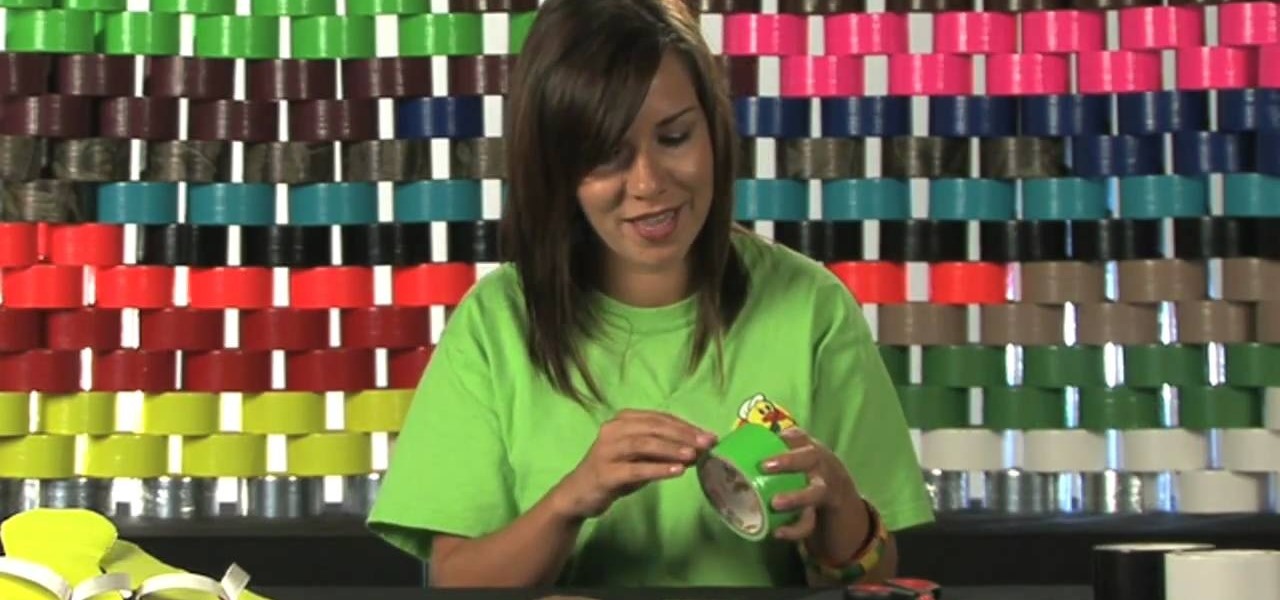
This video is about how to make duct tape flip flops. For this you need cardboard, scissors, and three different colored tapes. Follow a few easy steps: cut two identical slipper shapes out of cardboard. Paste the first colored tape on the cut pieces. Fold second colored tape three times to make it thinner. With the help of the scissors create a hole and pass the second colored tape through it. Paste the tape at the back. With the last tape, strengthen the joints above the hole.
Open the Adobe Photoshop program. Choose a picture with a head shot. This maybe something that is already in your pictures folder on your computer, downloaded from the internet or transferred from your flash drives, and those photos you may have scanned and saved in your computer.
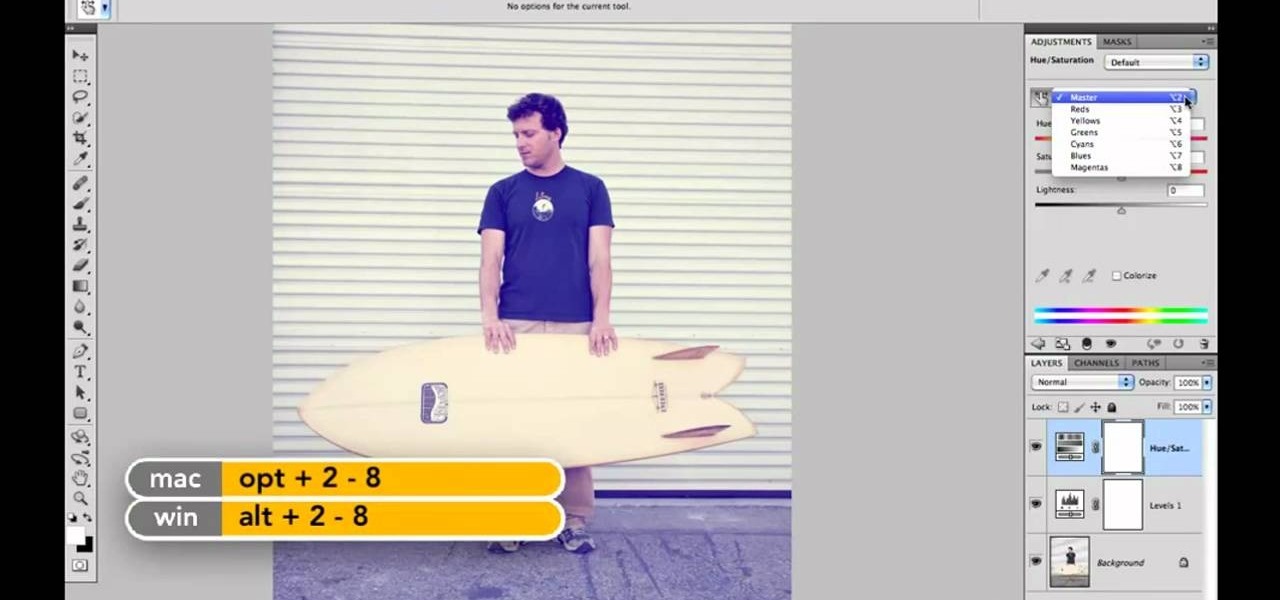
Simon Plant of ProPhotoInsights.com shows how to use Photoshop to blend colors in images. He uses a photo of his son standing in front of Stonehenge to take us through each layer of the photo to alter the levels of hues, saturation, and opacity. The key to blending colors is a matter of playing with different hues and saturation levels in Photoshop to get the subject in the foreground to match the background. Follow Plant's thorough tutorial to find out how to get professional looking photos ...
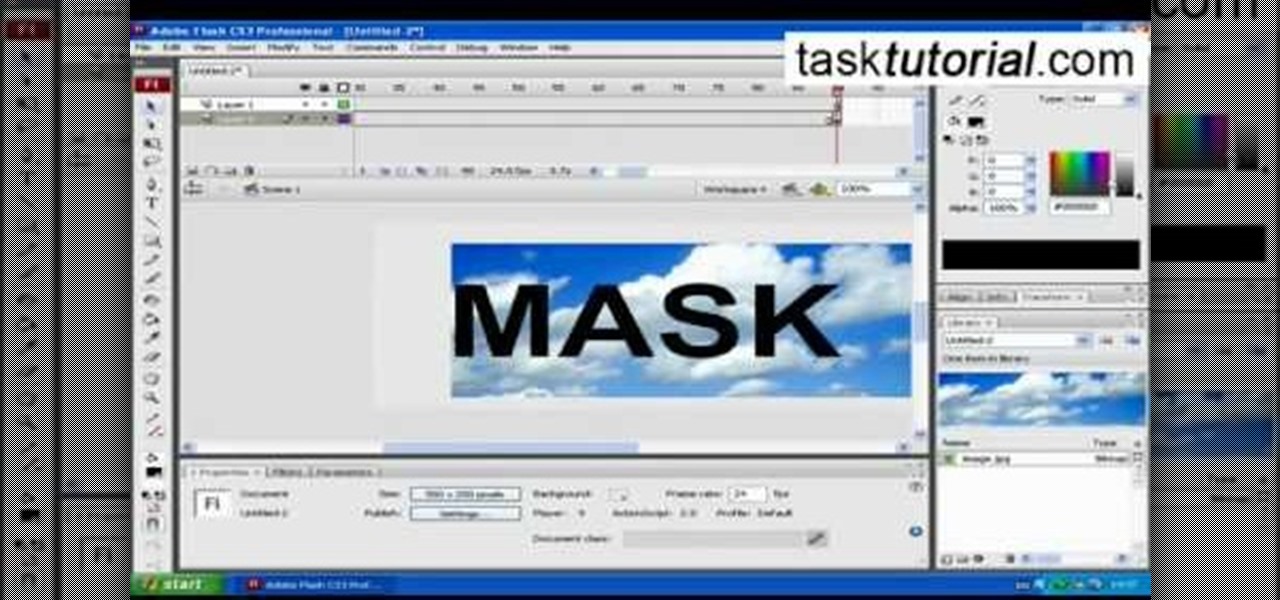
clipping mask Sponsored by SimpleRetouch.com Start by creating a task with the name Mask, then Choose a color and a font size.
It's easy to add a new yarn color in the middle of your row. See how to change colors in the middle of the row when knitting, with this easy, up close demonstration by Judy Graham, Knitter to the Stars.
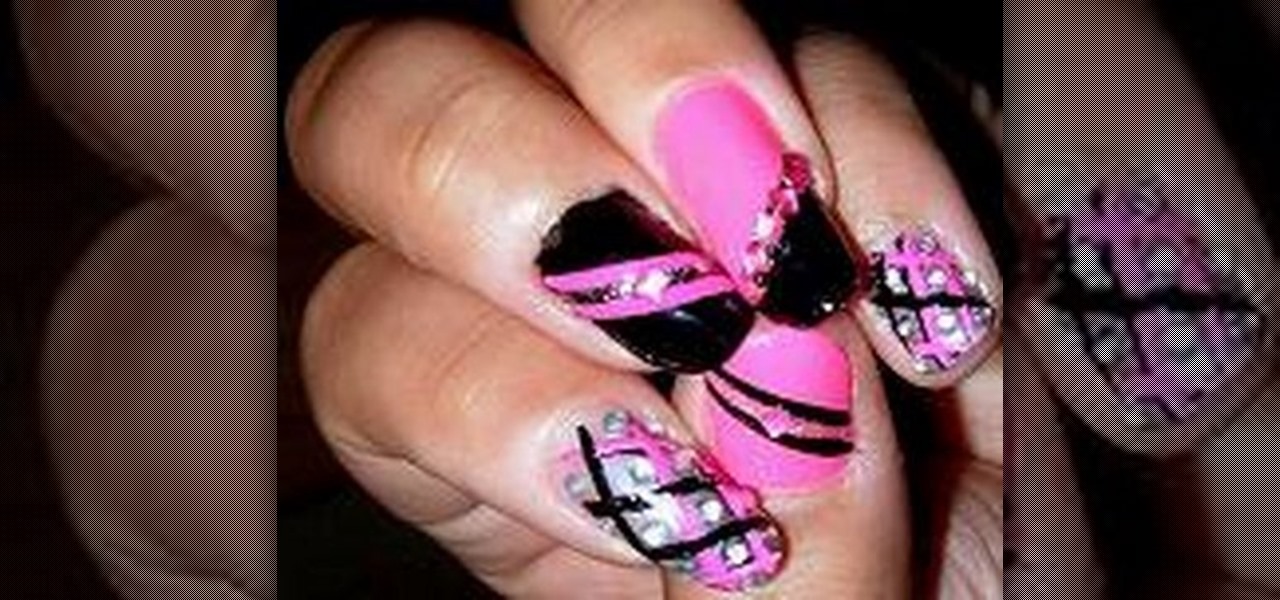
Lauren, AKA QueenofBlendingMUA has joined the ranks with the other YouTube beauty gurus. Lauren is a makeup artist with a large collection of eye makeup & nail art video tutorials. Her eye makeup look span from everyday makeup to creative, more expressive party looks. Her nail art/ manicure looks are also lots of fun. Check out this nail art tutorial video to learn how to create a hot pink and black nail art design. Search QueenofBlendingMUA on WonderHowTo for more beauty videos.
This video shows you how to create beautiful make-up using the loreal hip products. Products Used:
In this tutorial, we learn how to get Leona Lewis' Avatar themed "I See You" makeup look. First, you will need to apply black eyeshadow to your entire lid up until you reach the crease. After this, use a brush to blend the color out and create a winged effect on the outside corner of the eye. Next, apply this color on the bottom lash line, making a slightly smudged effect with your finger. From here, you will apply a teal colored shadow all over the eye and on the outside flare as well. Then,...
To apply a correct eyeshadow, take a flat brush and press it on the sham pain color and drag it slowly. Then gently apply it on your eyes. You should do it softly, because if it shows one layer of color and another one on your skin, then it will not look nice.
Learn how to apply makeup for hooded eyes. First apply a light base to the eyes. Use a light shimmery color to the lid using a flat brush. Add a medium to darker color on the crease. Use the darkest color above the crease and blend in well. Small circle motions work best in blending the colors. Use a color close to your skin tone to blend in the area from the tear duct to the eyebrow. line the upper lash line with a silver liner to bring attention. Using a pencil brush, smudge darker color on...
Instead of damaging hair with bleach and crazy color, small colored extensions give the same effect without the commitment. Use them for a night out or even as part of a Halloween costume. Check out this video hair styling tutorial and learn how to apply colored hair extension.
With Crayola Recoloritz markers you can color and recolor for endless coloring adventures! These unique wet-erase markers wipe clean quickly and completely. These markers are a great way to teach your children to color between the lines. With this how to video you and your children will learn to use Crayola Recoloritz markers.
Paper embossing stamps a design into the paper, but doesn't allot for any color. Ink and chalk can both be applied to an embossed design for color and to bring out the shape of the embossing. Ink can add vibrant color, while chalk adds a soft finish to the embossed design. Watch this video tutorial and learn how to use ink and chalk on embossed paper.
This video tutorial will show you how you can mix henna in order to dye your hair. Henna hair dyeing does not induce a dramatic hair color change for most brunettes and darker hair colors.
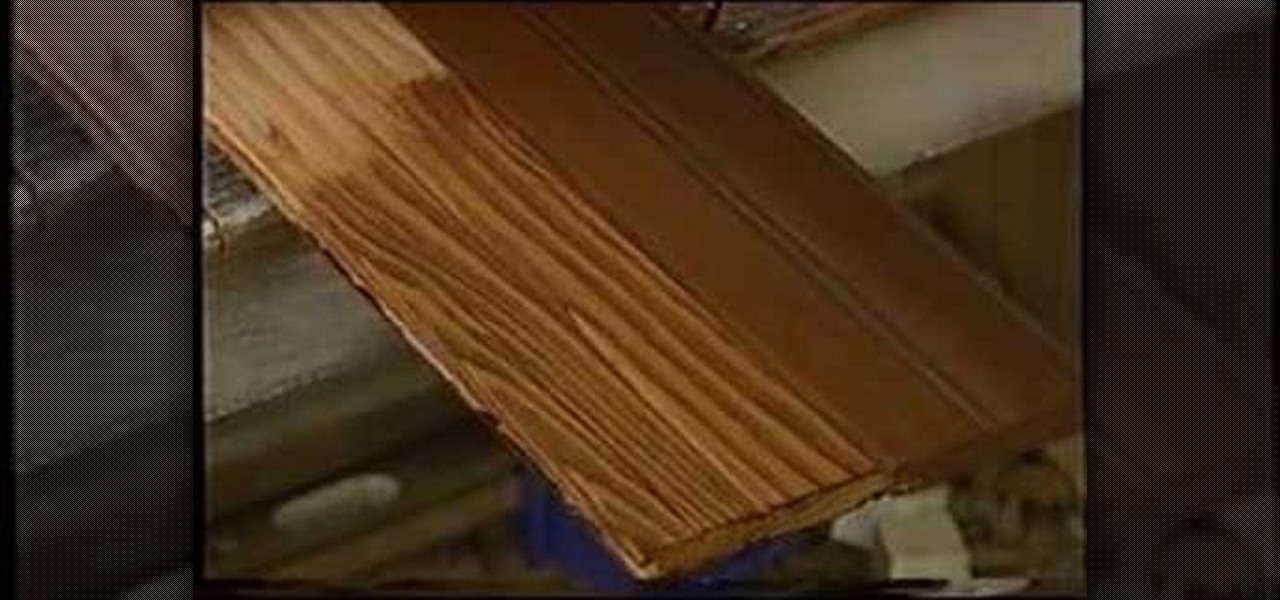
Tim Carter demonstrates how to stain wood to get the color you want. Watching these video tips allows you to be able to apply wood stain to match almost any color. If you get the right color stain and apply it properly, your new piece of wood will match color-wise and allow the grain of the wood to show through.
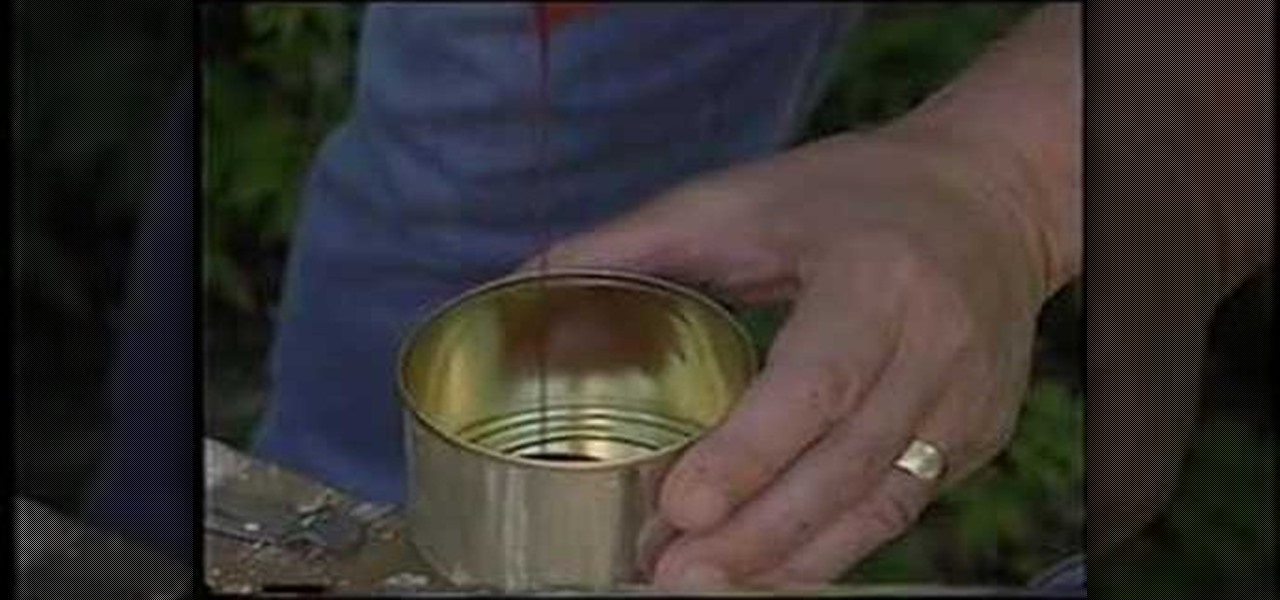
Tim Carter demonstrates how to blend or mix paint colors to get the perfect color for your job. Great video shows how blending paint colors really is easy and useful on any paint job.
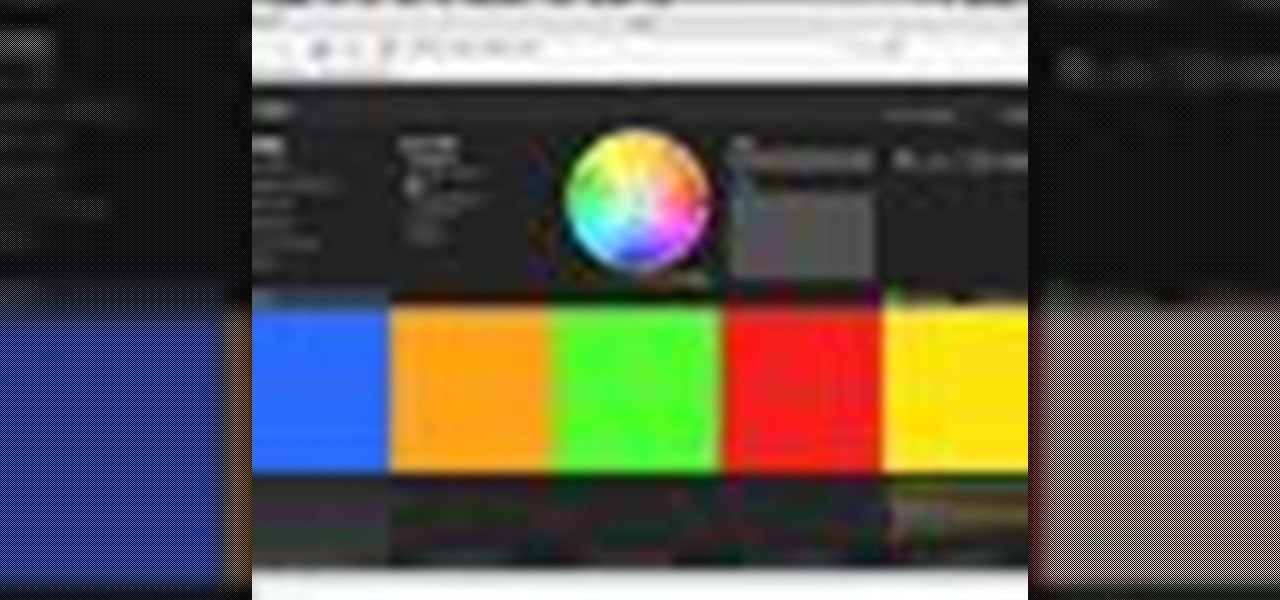
Kuler is a beta Adobe application at labs.adobe.com. It allows you to choose color schemes using rules or completely at random, then export the colors as an Adobe Swatch Exchange file for use in all of the Creative Suite applications. In this video tutorial you will learn how to create color schemes using Kuler.
If you're a fashion designer using Adobe's Photoshop CS5, you already know you can do a host of amazing things. One of the things you'll likely wan to do over and over again is check out your creations in different colors. This quick how to demonstrates what you need to do to go from red to yellow, green to blue, mauve to black and back again. Check it out!
Tell your sweetheart he or she has stolen your heart by giving them this adorable two color Valentine's Day heart. Made from white a red paper, it metaphorically symbolizes two parts of a whole coming together.
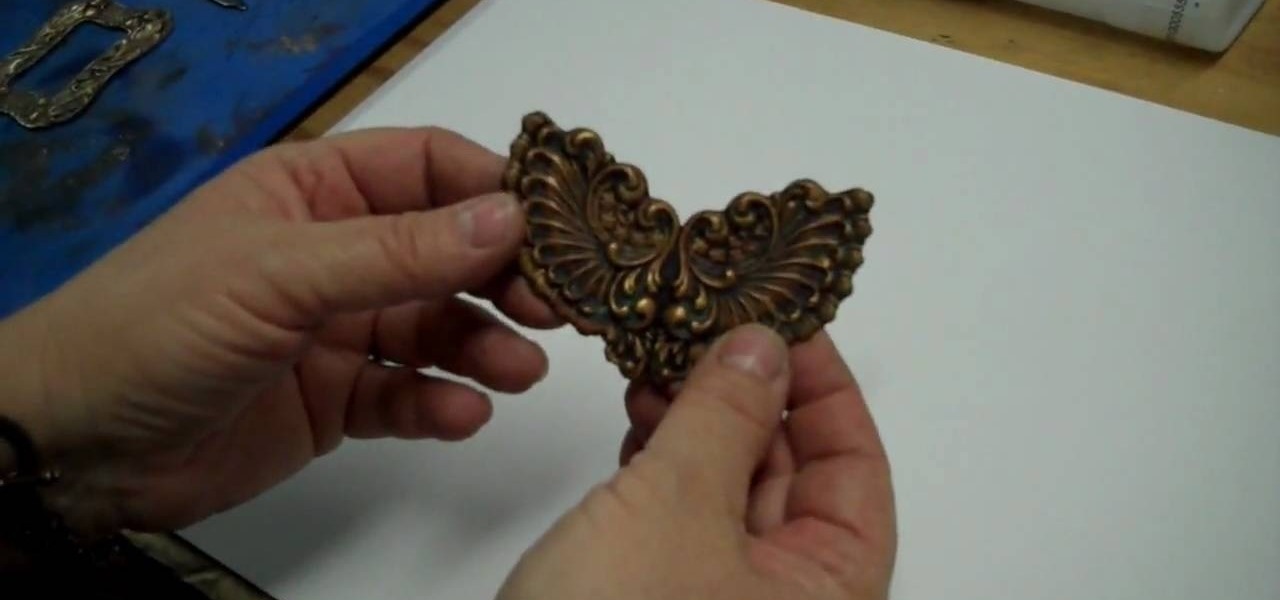
Adding a patina to brass stampings is what gives it an aged, beautifully vintage look. If you've never worked with patinas before, then check out this jewelry crafting video to learn about how to use different types of patinas - including resin and acrylic paint - to make a flower you can attach to a pin to make into a brooch.
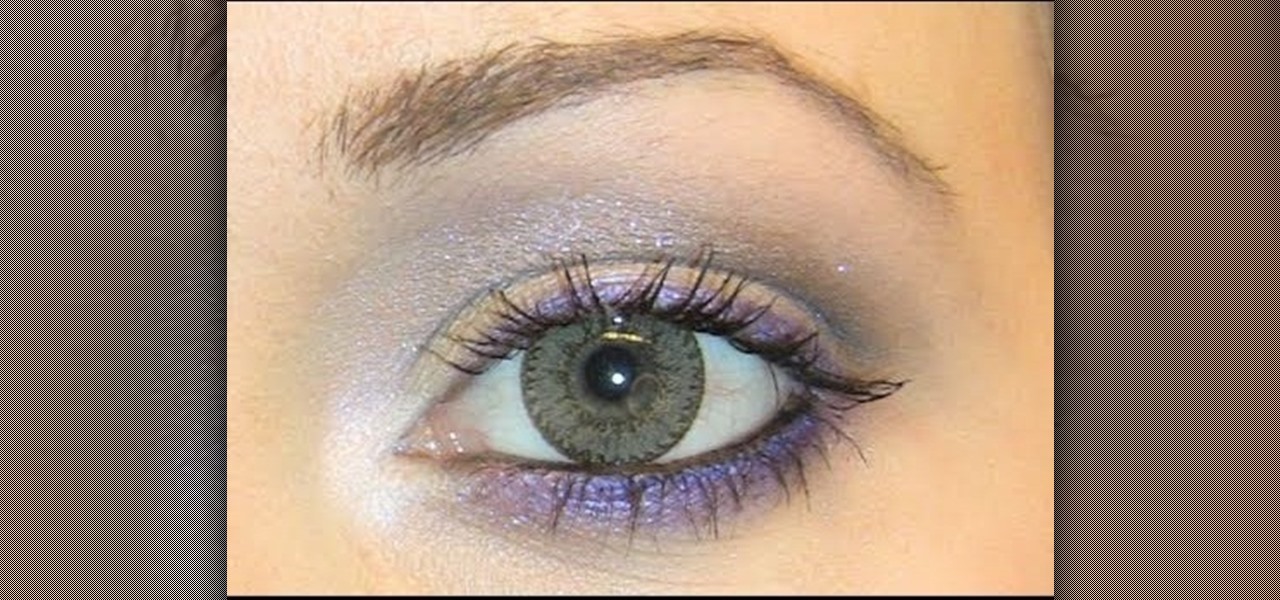
Just as a cute A-line skirt looks good on your friend but somehow not so fetching on you, or a blaze looks like it was made to fit your shoulders whereas it looks baggy and untailored on your friend, eyeshadow colors look different on every girl depending on her eye color.
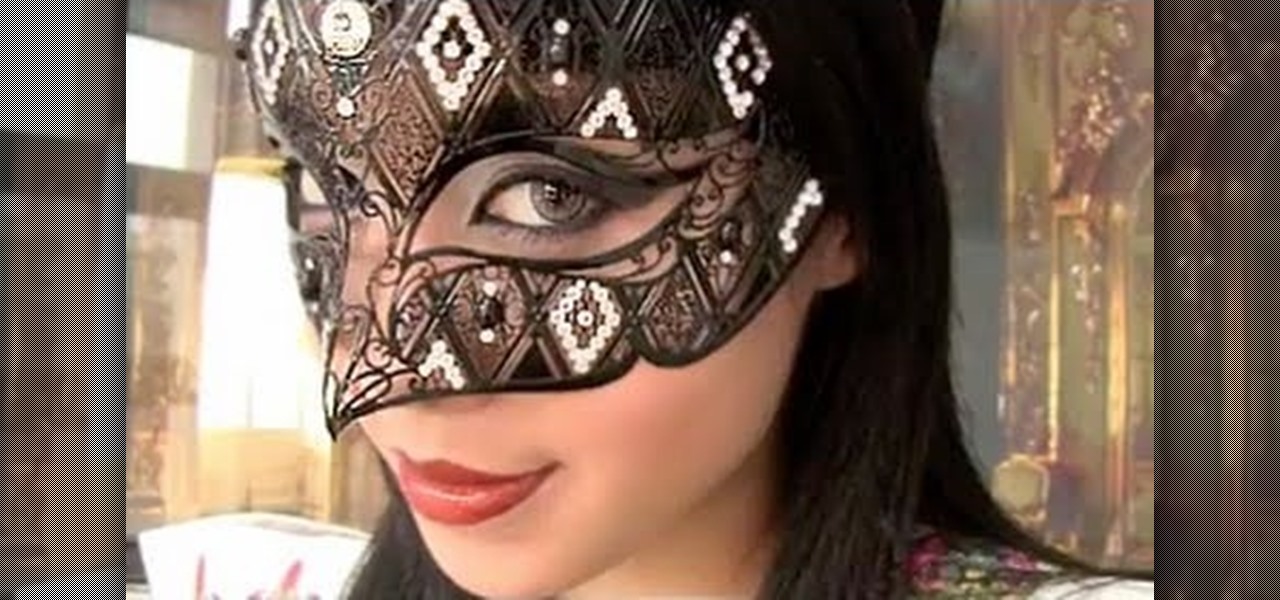
Even during the first Halloween celebrations, masks, disguise, and deceit were the focus of the holiday. Commemorate those tender beginnings by dressing up as a masked masquerade attendee. Wear whatever fancy ball gown you want and then check out this Halloween makeup tutorial by Michelle Phan to learn how to create a drop dead gorgeous masquerade look.
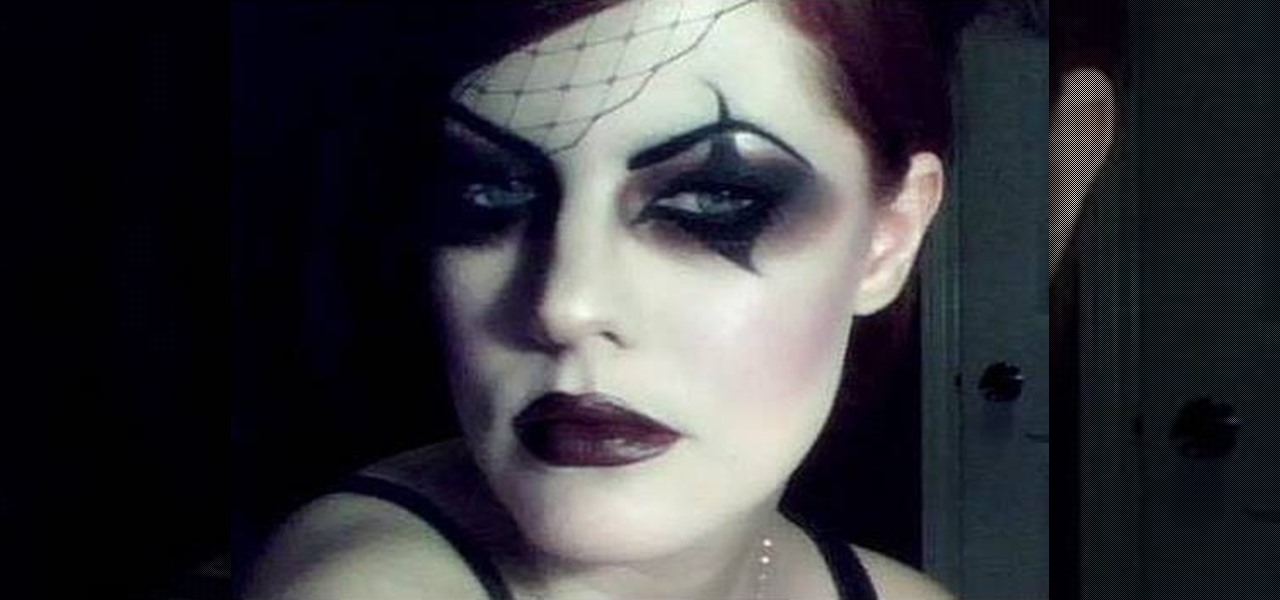
It's funny to us that so many Victorian makeup looks done for Halloween emphasize heavy, dead makeup with lots of deep plums and reds because the Victorians wore little to no makeup (women were basically considered whores if they wore rouge).
An entertaining way of inspiring creativity and also doing something far beyond the norm with just coloring on white paper is creating a scratch drawing board. Basically it is initially black, and then when you scratch it with a pen, or other small, pointy object, it creates a multitude of colors as your lines, allowing you to create fantastic images with that much more creativity! In this video you will learn how to create your own scratch drawing board step-by-step!
In this video tutorial, we learn how to bring out color and enhance tone when retouching a sports photograph in Adobe Photoshop CS5. Whether you're new to Adobe's popular raster graphics editor or a seasoned designer looking to better acquaint yourself with the new features and functions of the latest iteration of the application, you're sure to benefit from this free software tutorial. For more information, watch this video guide.
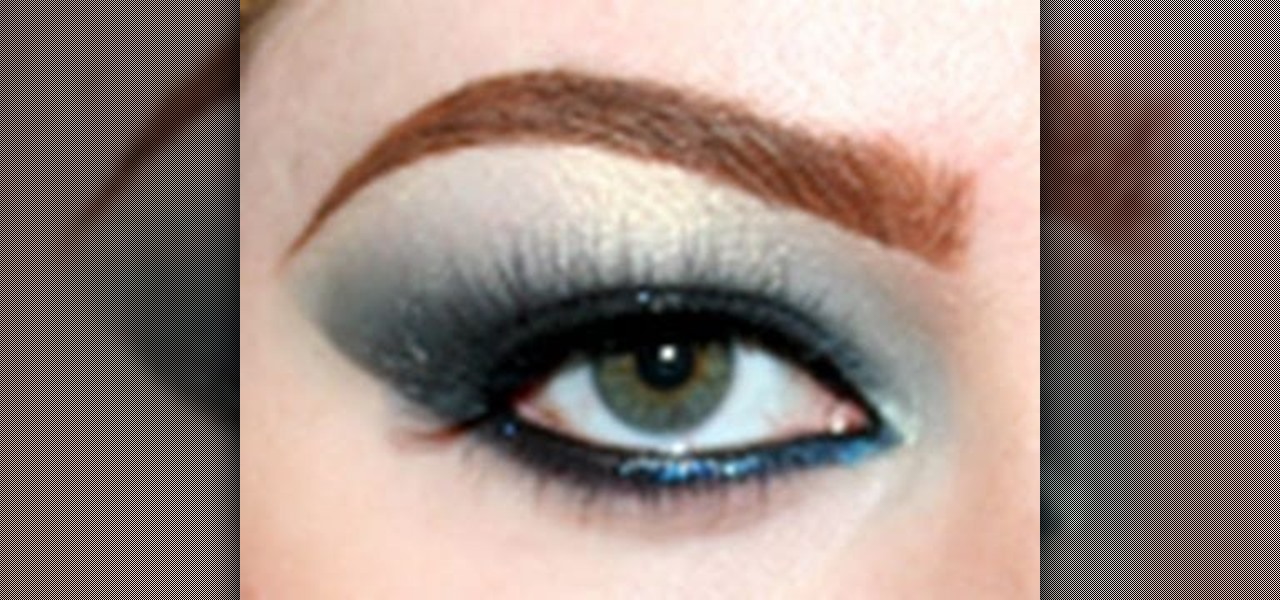
Take a facecation to India by donning this metallic blue look inspired by the exotic and vibrant colors of the Taj Majal country. This intense and smoked out cat eye combines a deep matallic blue waterline, matte black shadow extended outside the corners of the eye, and pale blue shadow in the creases.
In order to create 3D lettered signs in lights, you will need to first create an object. Open Illustrator. Type your letters on the page. Adjust the font to the style you would like. Click on "effect". Then, click on "3D". This will allow you to rotate the image for the angle that you will want to see it at.