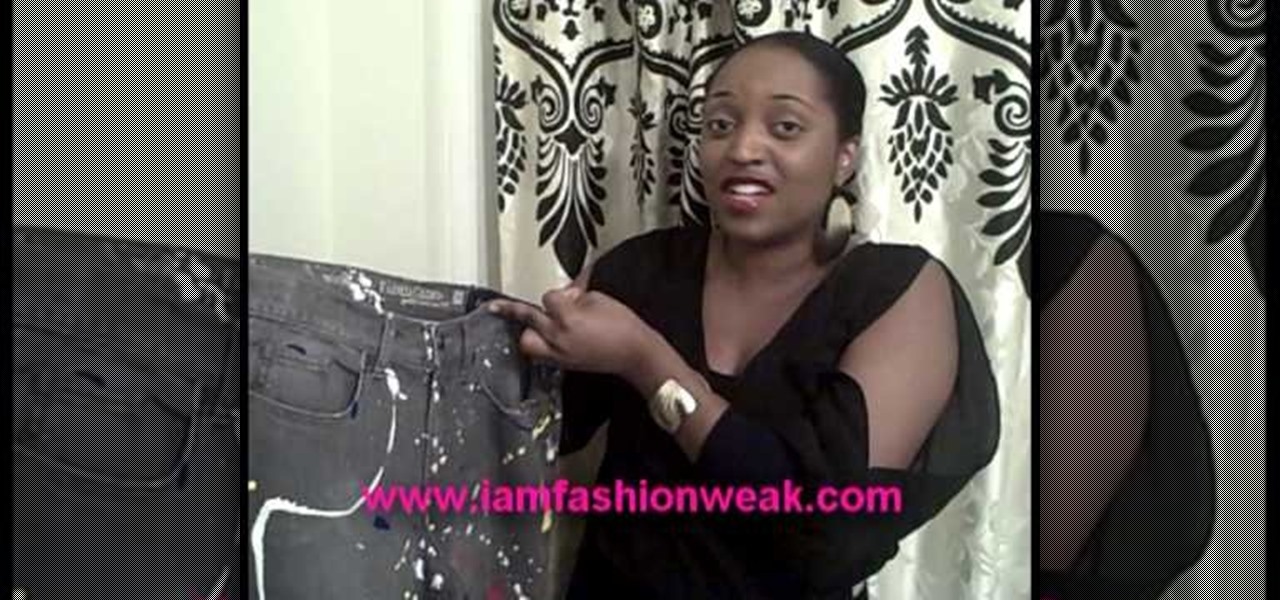
Angela and Shane from I Am Fashion Weak demonstrates how to bleach and paint splatter your own jeans. All you need to bleach your jeans is bleach and a measuring cup. If you bleach black jeans, you can get tan and gray shades. A bathtub is a safe place to bleach your jeans. Crinkle the jeans and pour the bleach over the crinkled spots until it changes into the color you want. After you bleach the jeans, wash them and dry them. You can also use a sanding technique to give the jeans a distresse...
This video demonstrates how to make rootwork oils for spell craft. This will take an investment of time to get the most out of this. You must have a preservative in your oil for this project. Here, you will need to use either jojoba oil or vitamin E oil. These will not have to be used as the base, but they will need to be present for preservation.
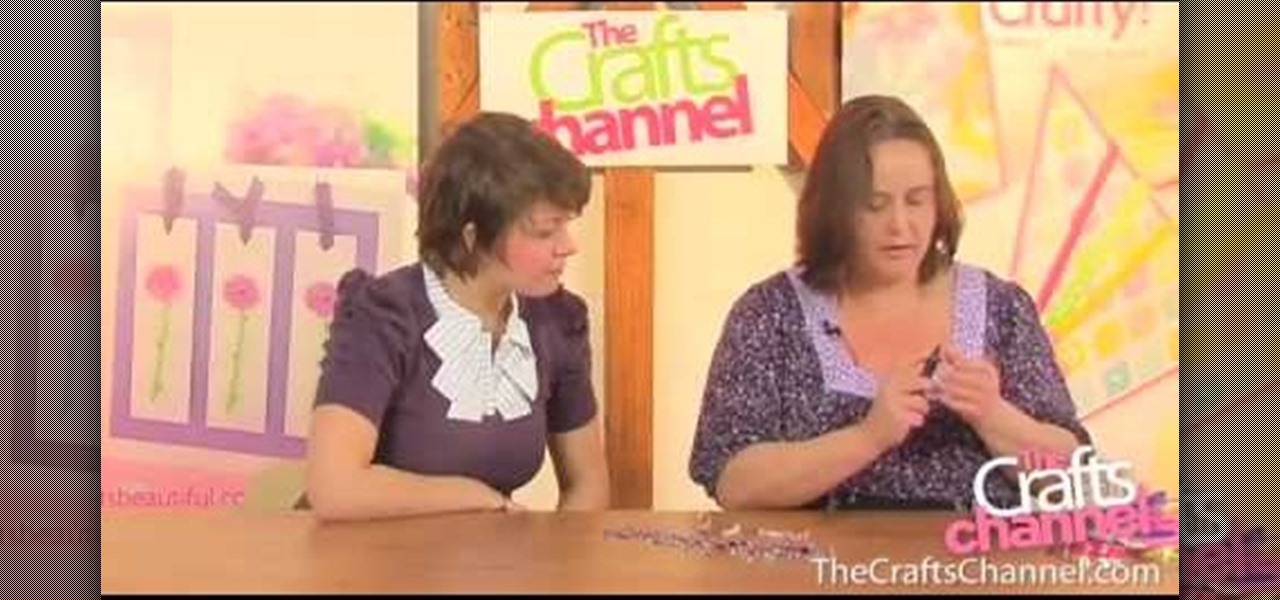
The Crafts Channel teaches viewers how they can make spotty fimo buttons! First, take a piece of fimo and roll it out to about it's a few centimeters thick. Take another color and roll this into a thin long snake shape. Then cut this long snake into lots of tiny slices. Lift them off and put them onto the surface of your rolled out clay. Next, roll over this clay and take a baking surface, cut out the clay with a circular cutter and take away the excess clay. Now with a needle, make your hole...
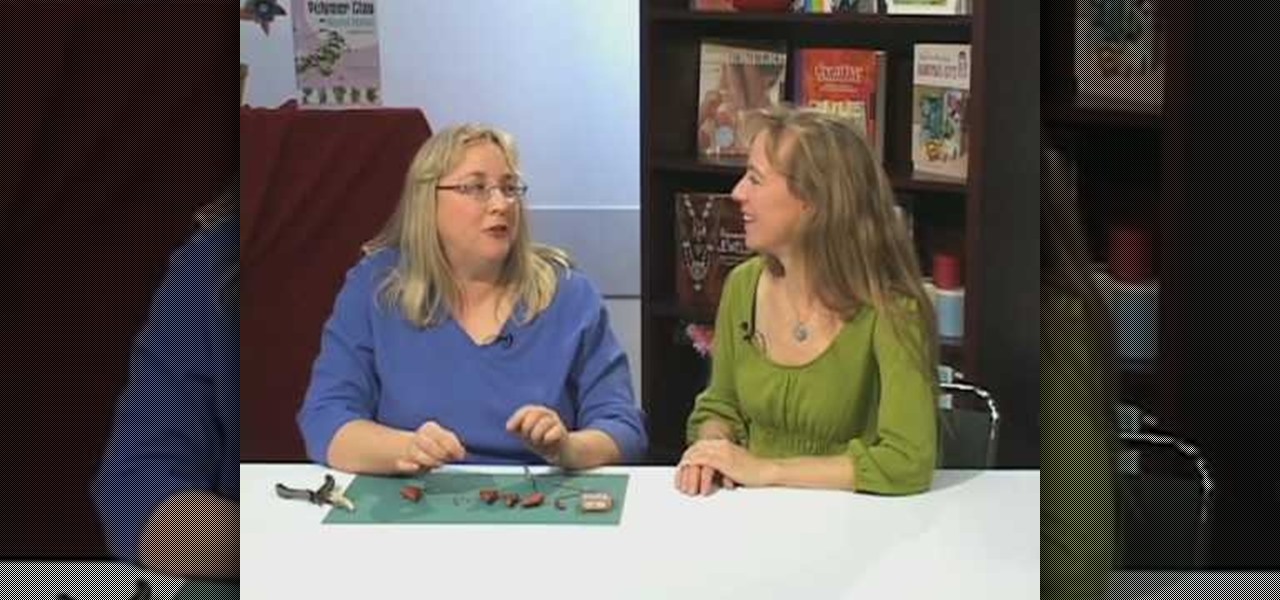
In this video the crafts channel demonstrates how to make a crystal cluster ring. Start with a pen about the size of your finger and wrap your thin gauge wire around it completely twice. Give the wire a simple twist. Put your beads on the wire, then bend the wire around into a circle. Next wrap the wire again around the base on the stone setting. Be sure to wrap it tightly. After twisting the wire tightly around the shank of the ring cut the wire. Use a pair of round nose pliers to create a f...
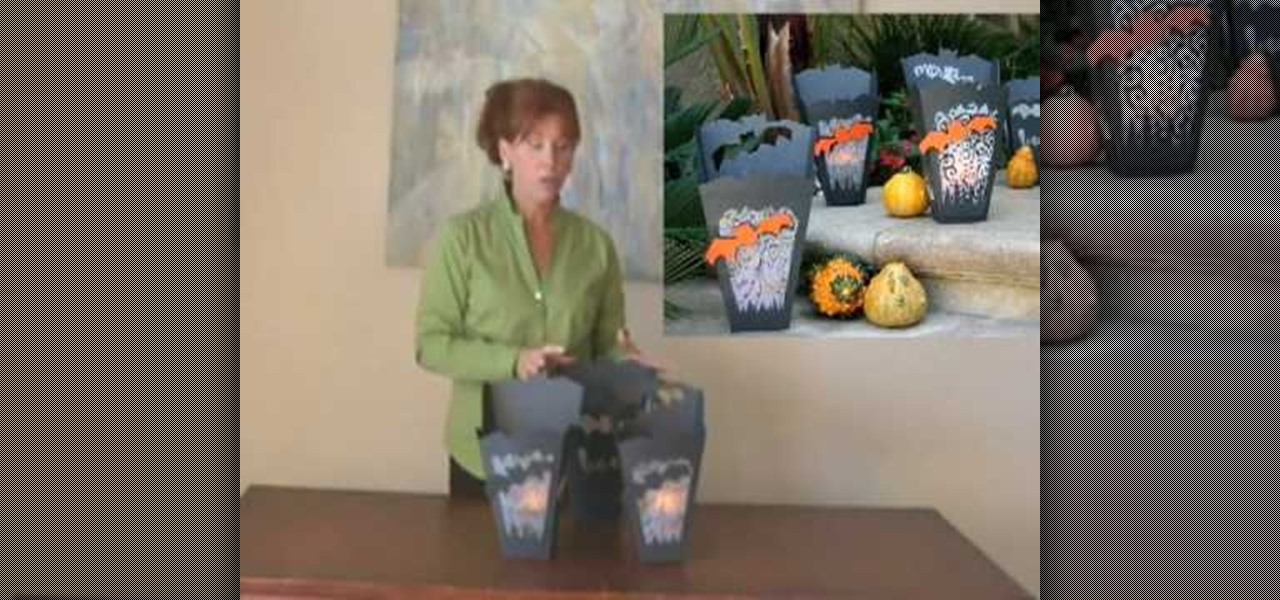
In this video tutorial, viewers learn how to make a Halloween lanterns. Users will need to visit this website: jennadeangeles/] and download the Halloween template. The materials required for this project are: download template, vellum, poster, rubber stamps, metal ruler, glue and orange card stock. Begin by cutting out the lantern with the openings as well. Now stamp the vellum with some black acrylic paint. Finish by closing the lantern with glue. This video i...
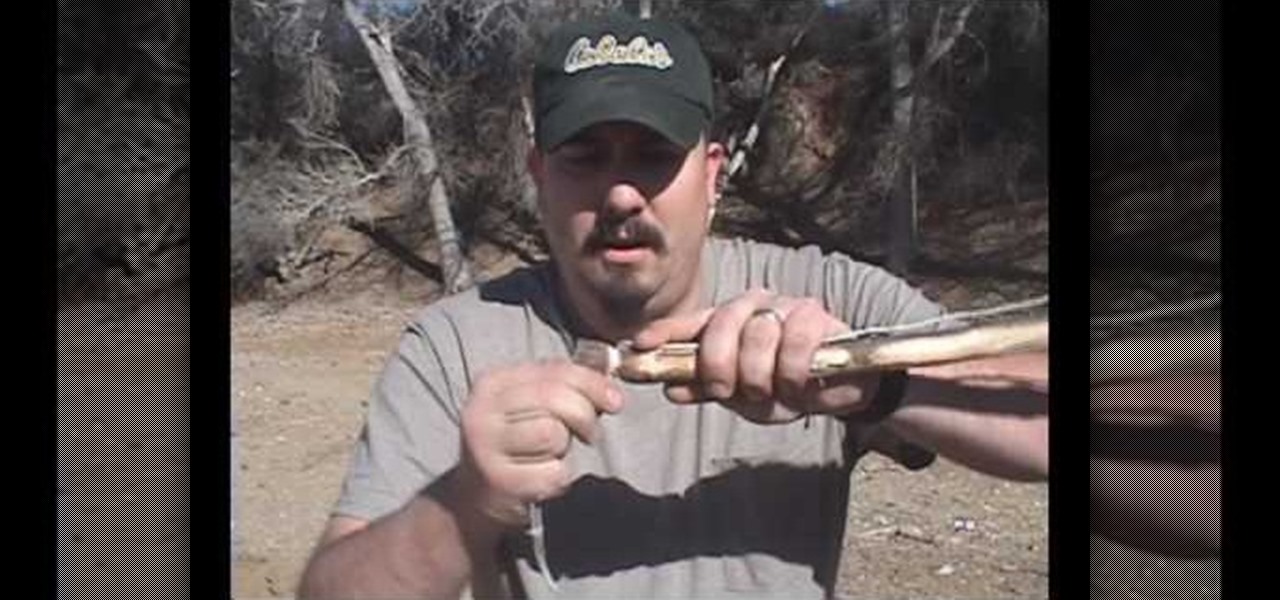
There are various tools to be made and a number of items to be used during a disaster. One can utilize the wood logs for firewood. A bow drill can be made by just crafting the ends of a long wooden stick into necks so that plastic wires can be notched and it can be used made into a bow. Any stone with holes can be used as a notch. This notch holds the end of the bow drill. The wire of the bow drill can be wrapped in a stick and then vigorous forward and backward movement of the bow drill arou...

In this two-part tutorial, learn how to create cute pew bows out of ribbon. Perfect to accent a craft project such as a scrapbook or to fasten on a headband, learn how to make these bows easily with these step by step instructions in this two-part video tutorial. Do it yourself and make these adorable bows for any occassion.
In this Arts & Crafts video tutorial you will learn how to attach an eye pin to a French hook. The video is from Jewelry Making Fun. For this you will need nose pliers, an eye pin and a French hook. One way of doing this is to hold the French hook in one hand. With the pliers twist one end of the loop on the French hook to open it slightly. Then put the loop of the eye pin into the loop of the French hook and close the loop with the pliers. The other way is to open the loop of the eye pin, pu...
Watercolor painting is a great way to get introduced to the world of painting and fine art. The free flowing nature of watercolor allows you to start out simply as you refine your craft. You can make any shape or image that comes to your imagination. In this video series, learn how to paint birds in watercolor.
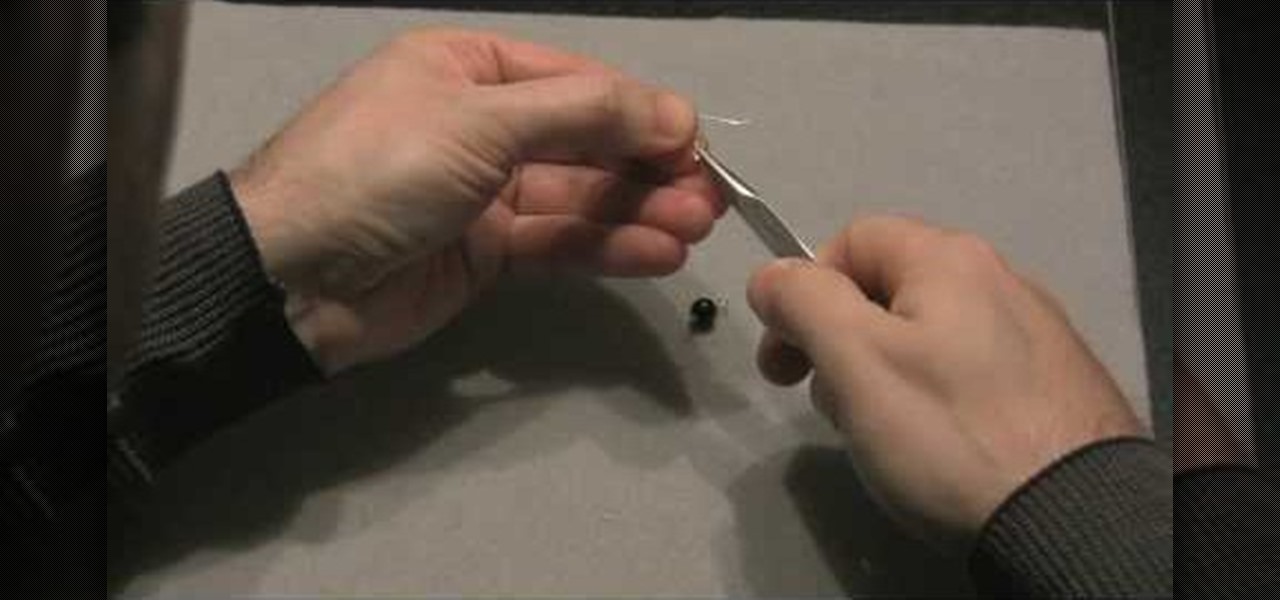
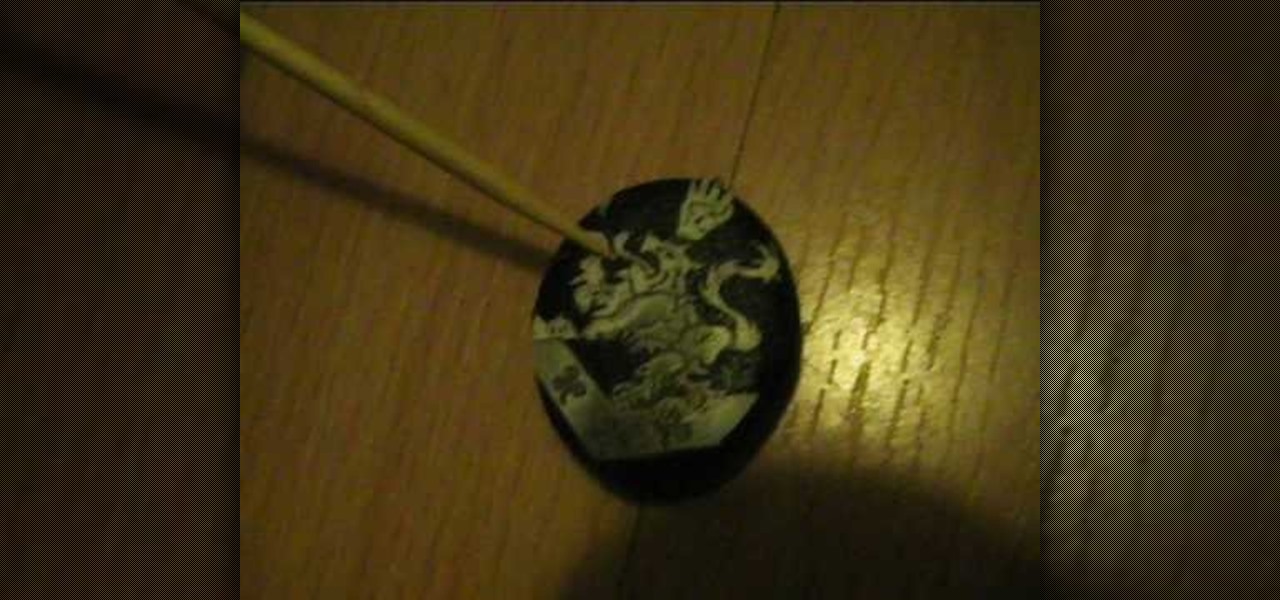
In this video, Alice demonstrates how to make a crest necklace using simple things. For making this necklace she collects some materials such as oblong shaped rock or polymer clay, some paints, a computer print of a cullen crest and so on. She uses the ordinary black paint to paint the rock completely. Next, she collect a computer print of a layout for the culler crest and carefully cutout the shape and using craft glue she stick it on the painted rock to see it fit. she takes some white pain...
Vofgofm33 shows viewers how to use autotune with Skype! First, select Mixcraft program and set up MixCraft for Autotune. First, you need virtual audio cable. Set this up and have the track audio on. Next, you will set your output to VAC. Then, you need to have where you want to use auto tune have input set to VAC - this will be Skype. This can also work with any program. For instance, you can use this with MSN, AIM or any where that you use your headset. When you need to get this effect on Sk...
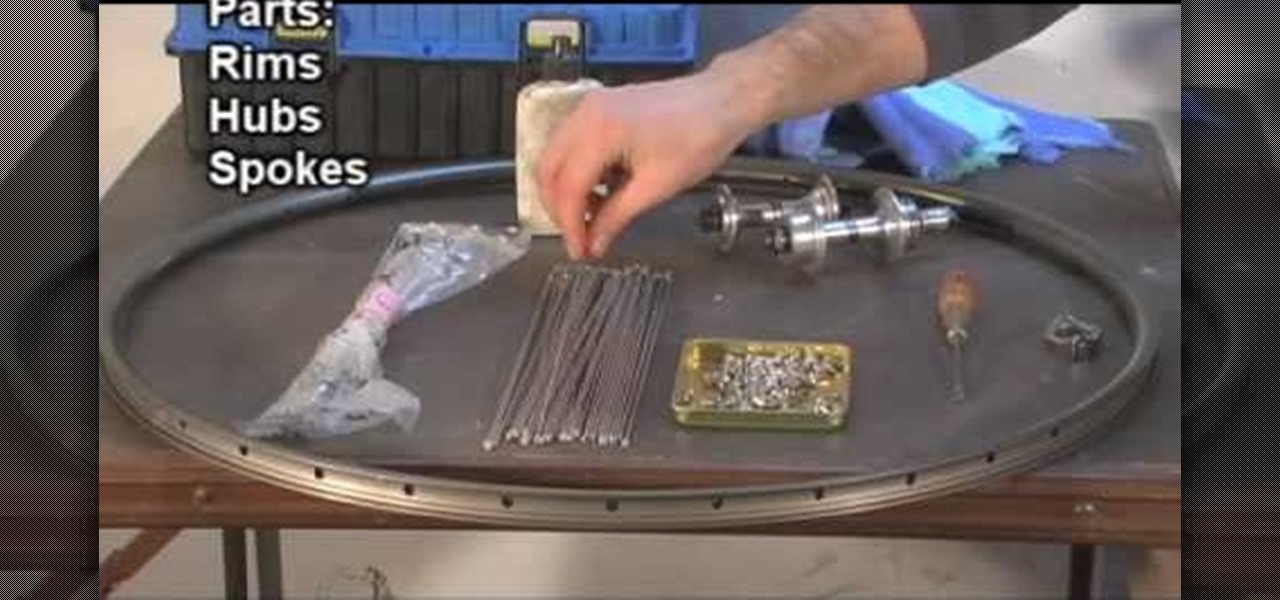
This is a five part series on how to build a bicycle wheel. It will cover lacing and truing a wheel. There is nothing like crafting something with your bare hands, especially if that something is a bike wheel. There is something inherently rewarding and zen like about wheel building hub using a 36 hole rim.
This video is in the Arts and Crafts category and you will learn how to make a Victorian-inspired necklace using an old ribbon. This is a very simple and easy way of making a necklace. Take a ribbon of about an arm’s length, tie it around the neck and check that the length should be OK. Then you can take a bunch of beads or a flower or some such suitable item which is fixed on a wire to put on the ribbon. Tie a knot around the wire and then turn the wire around the ribbon and your necklace is...
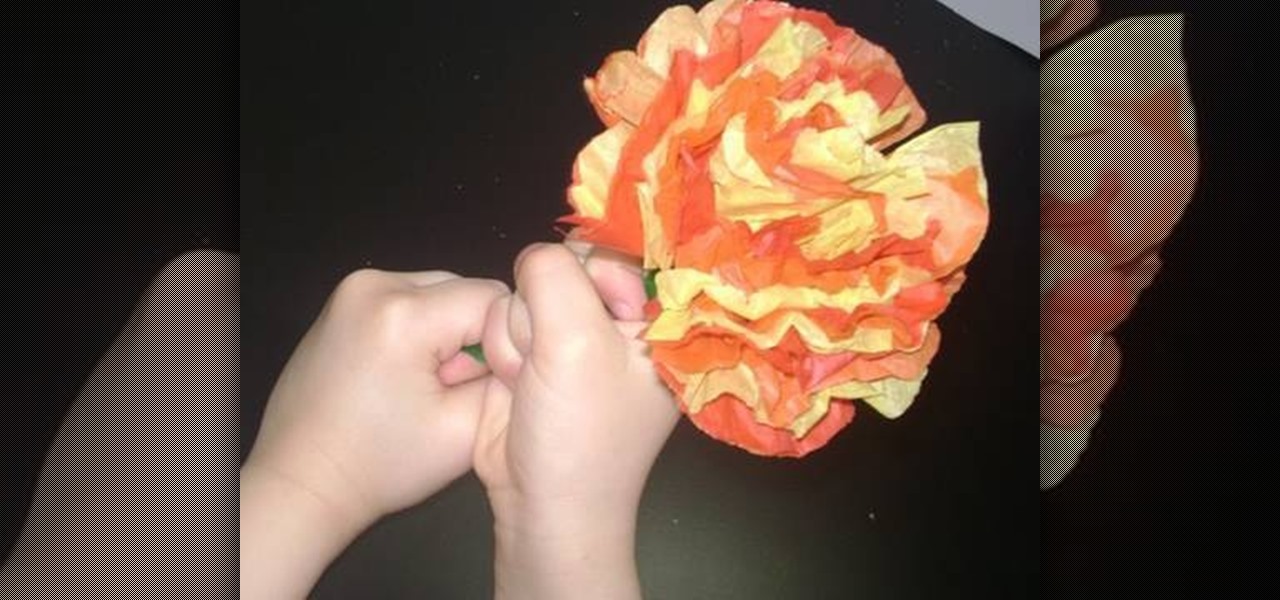
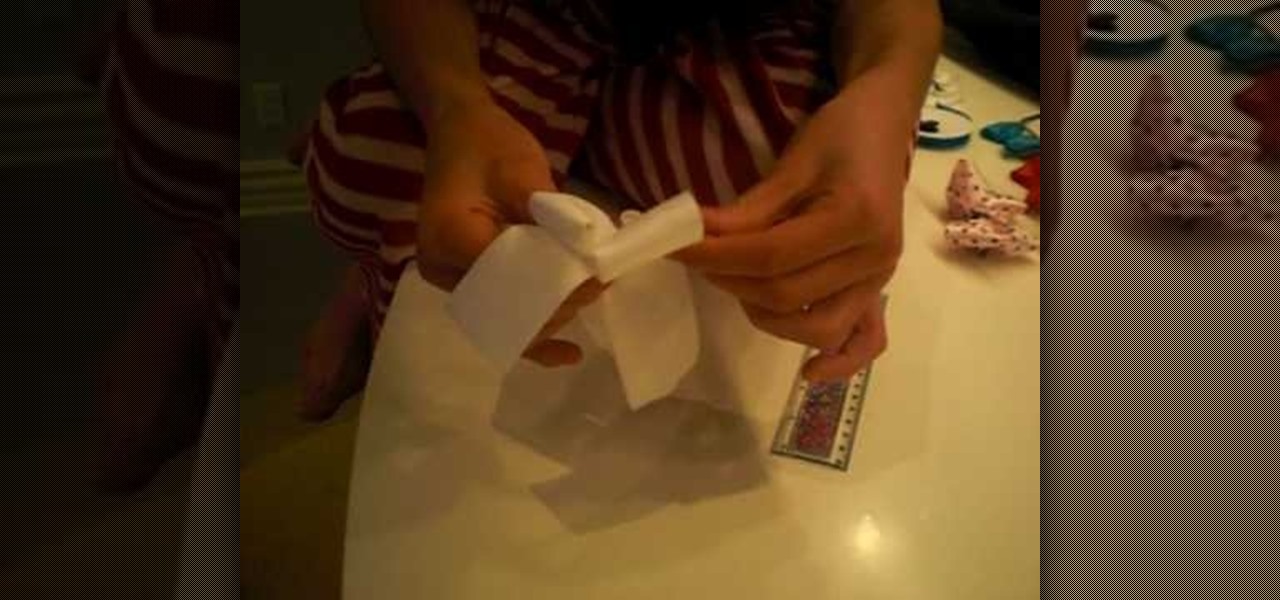
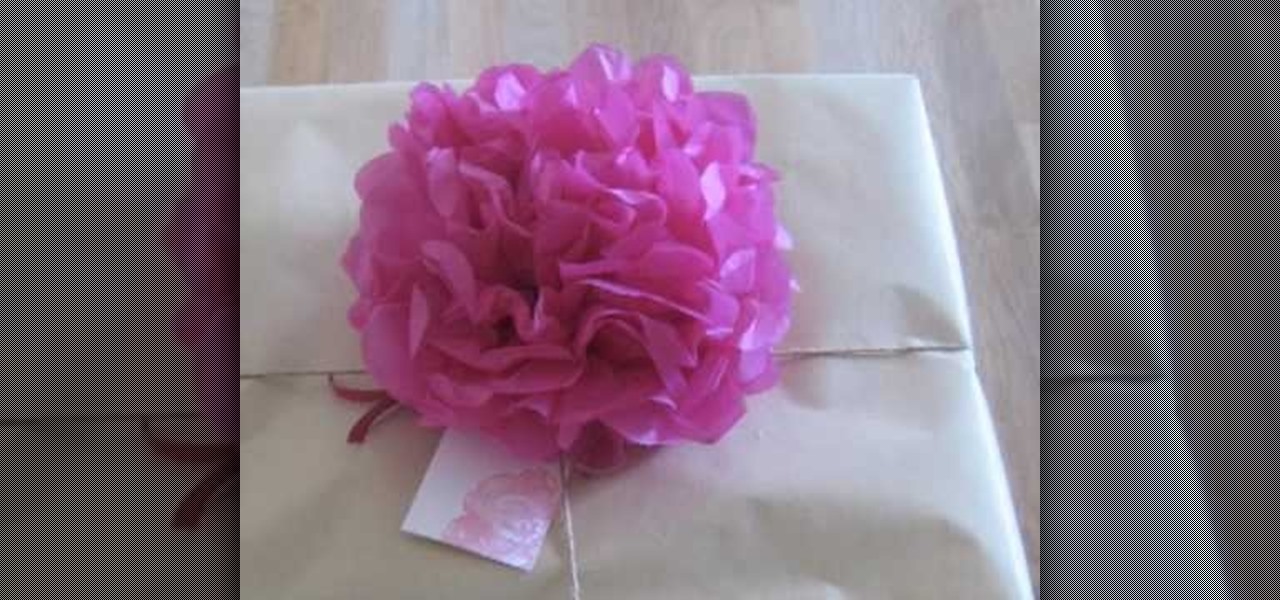
In this video you will learn how to make a tissue paper flower. The video begins with a little introduction to their website simplekidscrafts.com where you can learn more easy crafts that you can do with your children. The materials you will need to begin your project are colorful tissue paper, pipe cleaner, and scissors. This is a very easy to follow guide and only takes around two to three minutes to do. The host shows all of the steps to making her flower by filming an above view over her ...
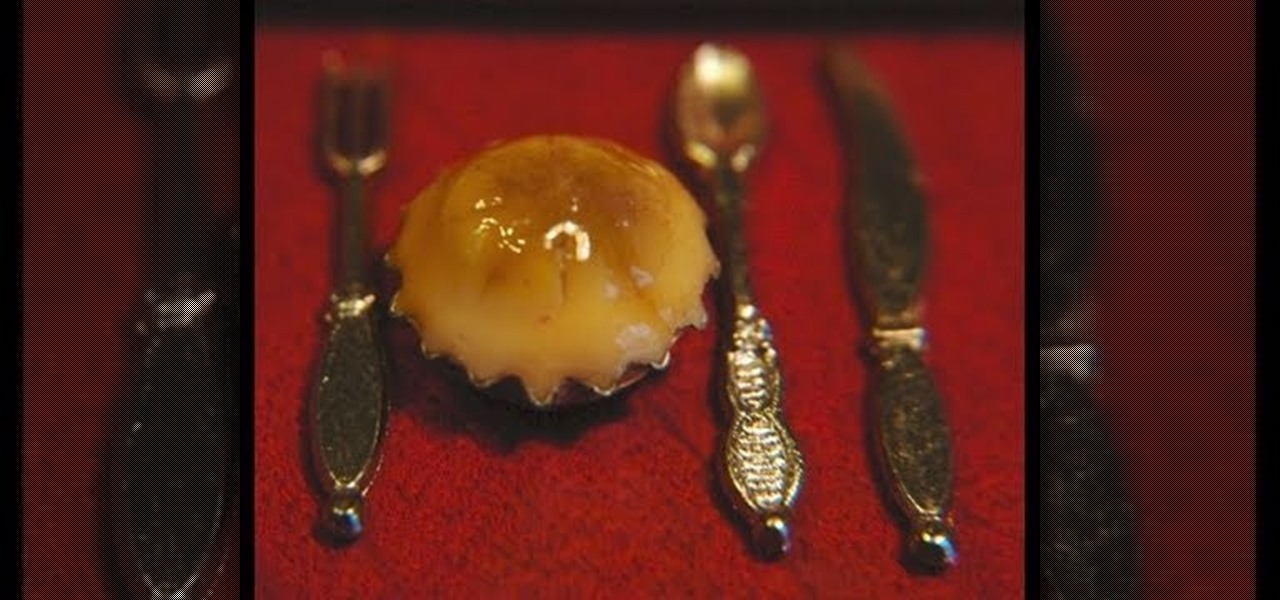
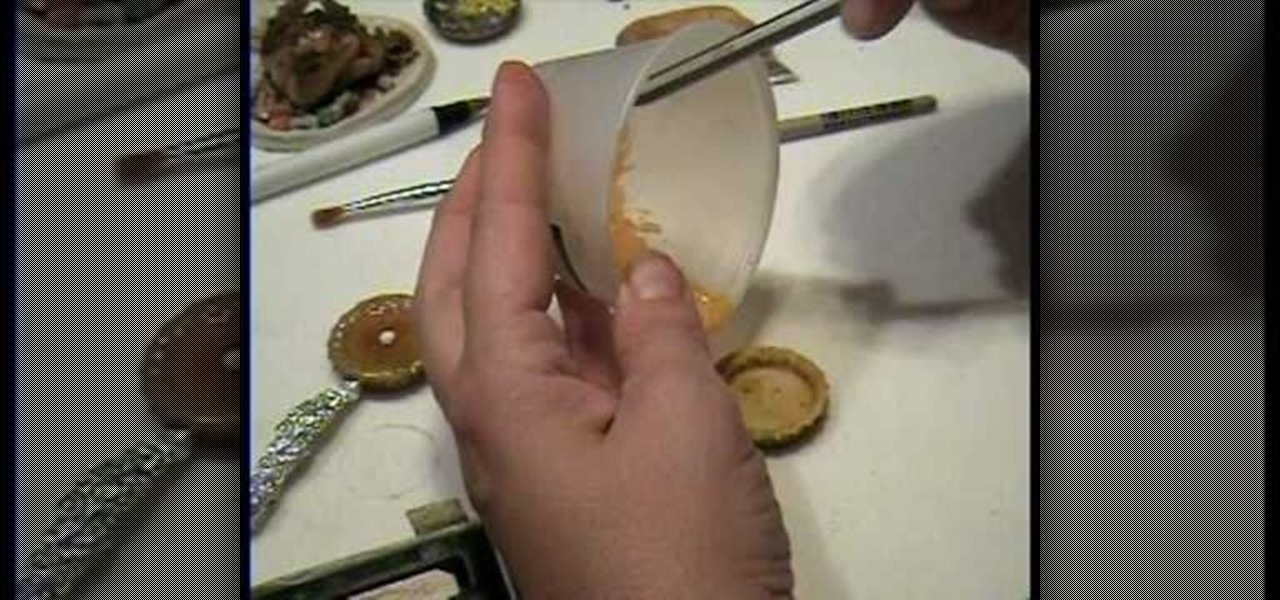
Garden of Imagination demonstrates how to make miniature polymer clay pot pies. Find miniature bottle caps in the scrap booking section of the craft store. You can use a regular sized bottle cap to make a big pie. Roll a piece of ecru clay into a ball and mold it into the bottle cap. Round the top to give it a pot pie shape. Use a small blade to create seared lines into the pie top. Brush mustard yellow pastel to tint the top of the pie. Brush a brown pastel accent on the top of the pie. Bake...
American Girl Doll earrings are easy to make and here's how we can do it. First, find some sticky-sided jewels (they usually come on a sheet) at any regular craft store. Then you are going to need a roll of what is called zots-they are little blue dots found at any scrapbooking store. Place the sticky side of the jewel down onto the blue dot, lift, and now the zot is connected to the jewel. You can then stick these directly onto the doll's ears and you have American Doll earrings! You can mak...
Terri Sproul shows how to use a really cool technique to make an embellishment for a card. You first need to find a roll of aluminum that is self adhesive. Work on the back of the aluminum, the side with the adhesive. Use a stamp to lay out your design on the back, by stamping the image on the back. Then you must trace the outside of the image. Use alcohol inks to add color to the aluminum. Then she cuts the image out with her scissors. Then she uses a glue dot to place the piece on a card sh...
In this video tutorial, viewers learn how to create a faux suede technique on cardstock. Users will need a plastic stamp pad. This stamp pad will be used for rubbing, so it should be an extra or an old stamp pad. Users will need to re-ink the pad once in a while. This will give the cardstock a textured look. It will give an old age, distress look. Simply take the stamp pad and rub it over the cardstock. This will pick up the texture of the cardstock. This video will benefit those viewers who ...
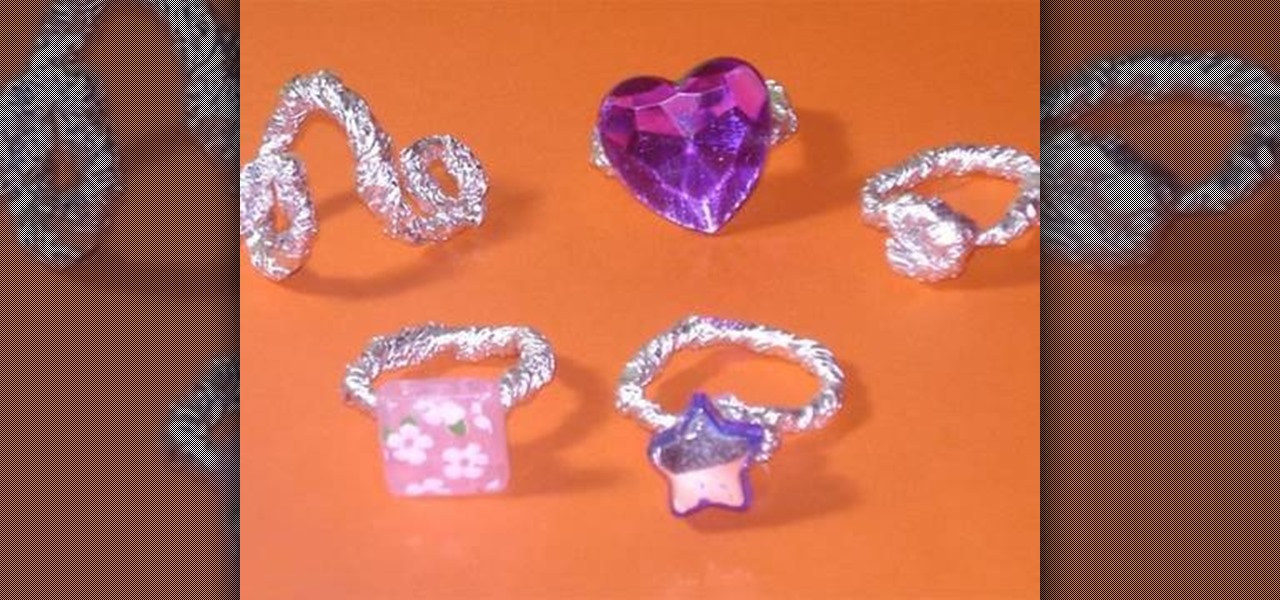
In this video tutorial, viewers learn how to make aluminum paper rings. This video provides all the materials required to make the rings. The materials required include: aluminum paper, glue, plastic gems, beads and the bottom of any decorative element for the top of the ring. Begin by folding the foil into a thin line and twist it. Now bend the foil around your finger to shape it into a ring. Then tie and wrap up the top. Put some glue on and add the bead or gem to the center. This video wil...
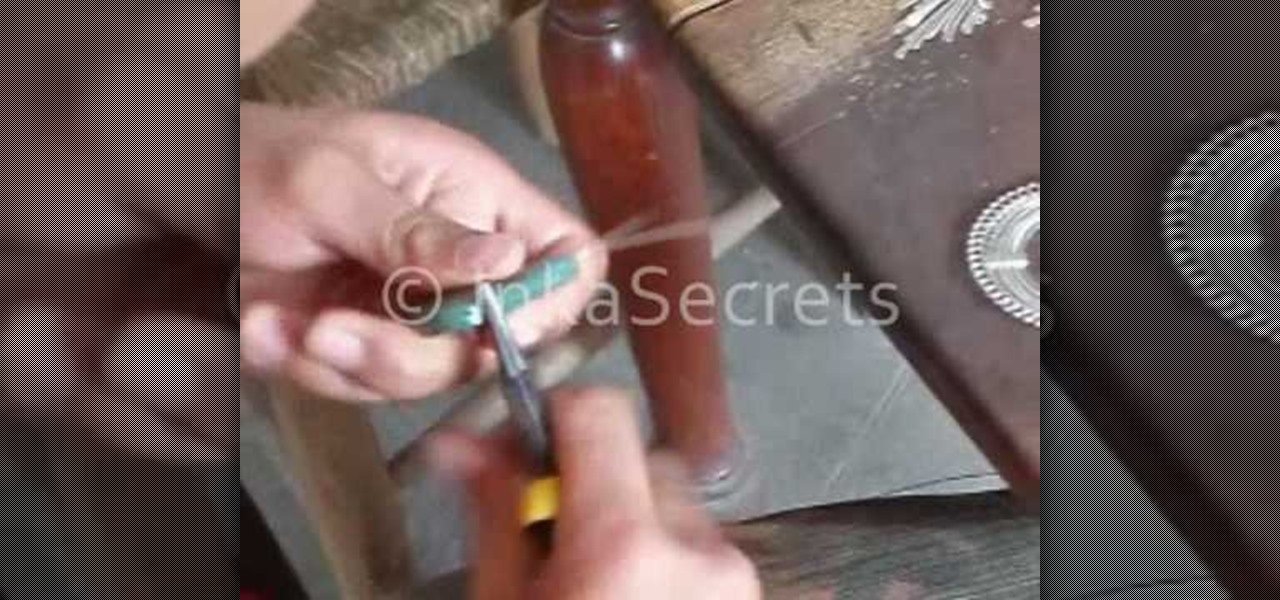
In this video a Peruvian Inka necklace is begun by selecting and washing precious stones. The stones begin as varied sizes and irregular shapes. These stones are then coarsely ground down to the desired size and shape. Finer grinders are used to get the exact shape and make the stones smooth. The polishing of the stones comes next. After much polishing these stones are ready to be placed in handcrafted Peruvian Inka necklaces. Each of these tedious steps are shown in abbreviated video clips o...
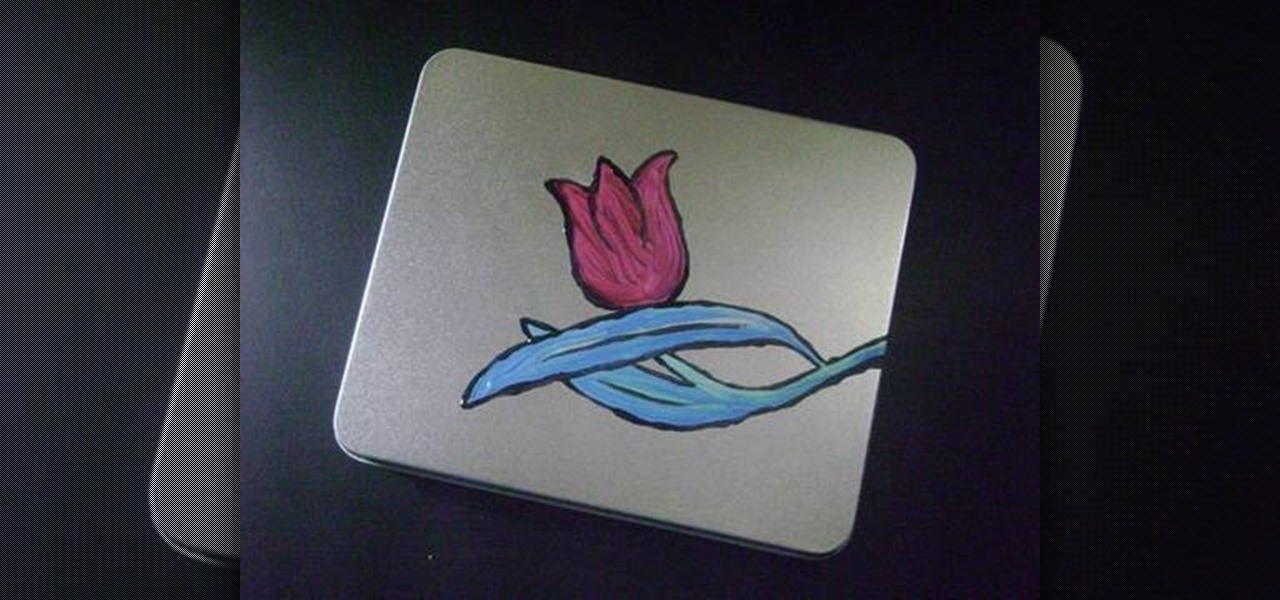
Simple Kids Crafts demonstrates how to make a decorative painted tin case for a mom's jewelry. To make the decorative case, you will need one recycled tin case with a lid, paint, and thick and thin paintbrushes. First, use the thin paintbrush to paint green stems of grass on the tin. Then, use the blue paint and a thick brush to paint grass blades on the tin. Use the red paint to paint a large red flower on the tin case. Let the paint dry. Use a thin paintbrush to accent and outline your flow...
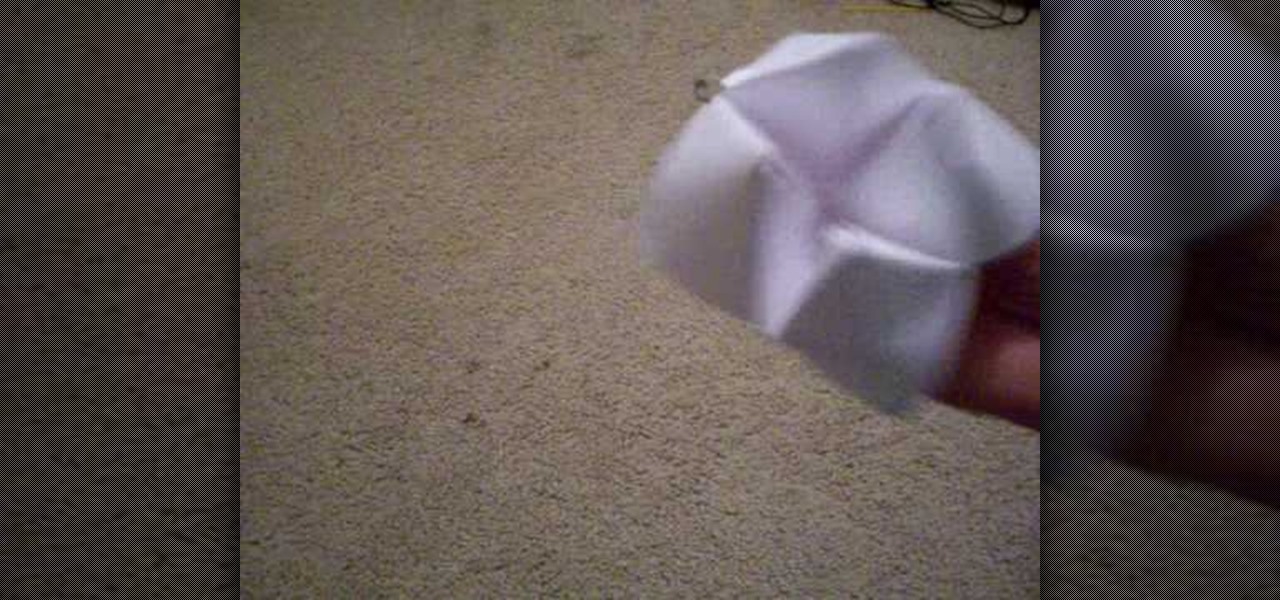
This video, for simplekidscrafts.com, tells us how to make an origami necktie. This is a very easy crafts project, suitable for kids and adults alike. It doesn't require a long list of materials, only a sheet of origami paper is needed. The sheet of paper is then folded ten times to transform it from just a square of paper into a decorative origami necktie. The video has no audio instruction, but encourages you to follow the folding technique exhibited by the child in the video. The camera is...
She's doing it again; turning the ordinary into the extraordinary! Carolyn Braden is taking sea shells collected from a recent vacation and incorporating them into a decorative wreath. Using a hot glue gun and thick satin ribbon wrapped on a Styrofoam ring, a simple inexpensive wreath can be created with anything you can find attached. Don't be afraid to be creative. Using thick ribbon will help create a lovely pattern behind whatever you choose to glue on the wreath. The other idea Carolyn h...
Simple Kids Crafts demonstrates how to make a flower out of a toilet paper tube. For this project you will need one toilet paper tube, paint, a paintbrush, glue and scissors. First, paint the toilet paper tube and let it dry. Then cut the toilet paper tubes into rings. Scrunch up a ball of tissue and glue it closed. Bend the painted rings into flower shapes. Attach the flower shapes to the tissue ball. Paint the tissue ball. Next, paint the inside of the flower shapes. Let it dry. Add decorat...
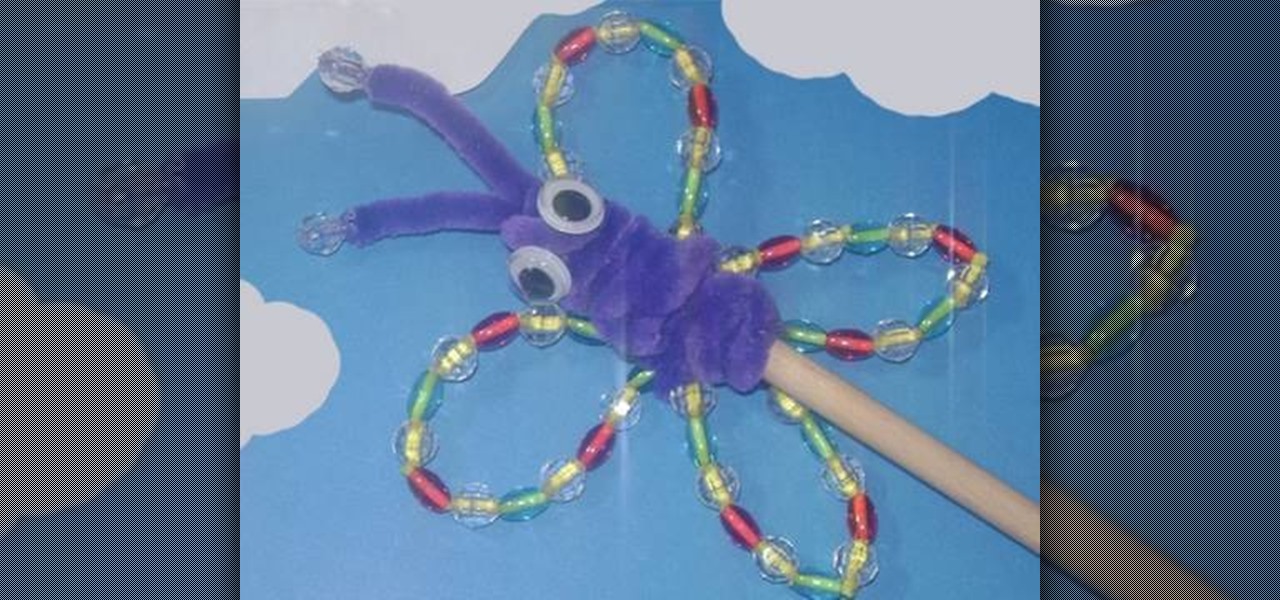
In this video tutorial, viewers learn how to make a garden rainbow butterfly puppet. This video describes all the materials that are required to make the butterfly puppet. The materials required include: beads (blue, red and transparent), 5 pipe cleaners (2 yellow and 3 purple), 2 googly eyes, a stick and one glue stick. This video provides a visual demonstration for viewers to easily follow along. The video is at a step-by-step pace and allows viewers to pause or rewind the video. This video...
We have all experienced a screwed up heart, and in this episode of "Look Learn & Create" we learn to turn that experience into some cute art!
This video teaches the viewer how to make a bow for your hair. You need a few materials to do this including 12 1/2 inches of ribbon that is approximately 1 inch wide, Two to three inches of contrasting ribbon for your center piece, a glue gun, 5 inches of craft wire and a hair clip. You can chose the colors or create several different ones to coordinate them with your wardrobe. They take only about 5 minutes to complete as long as you have all the materials on hand. Make sure to have a pair ...
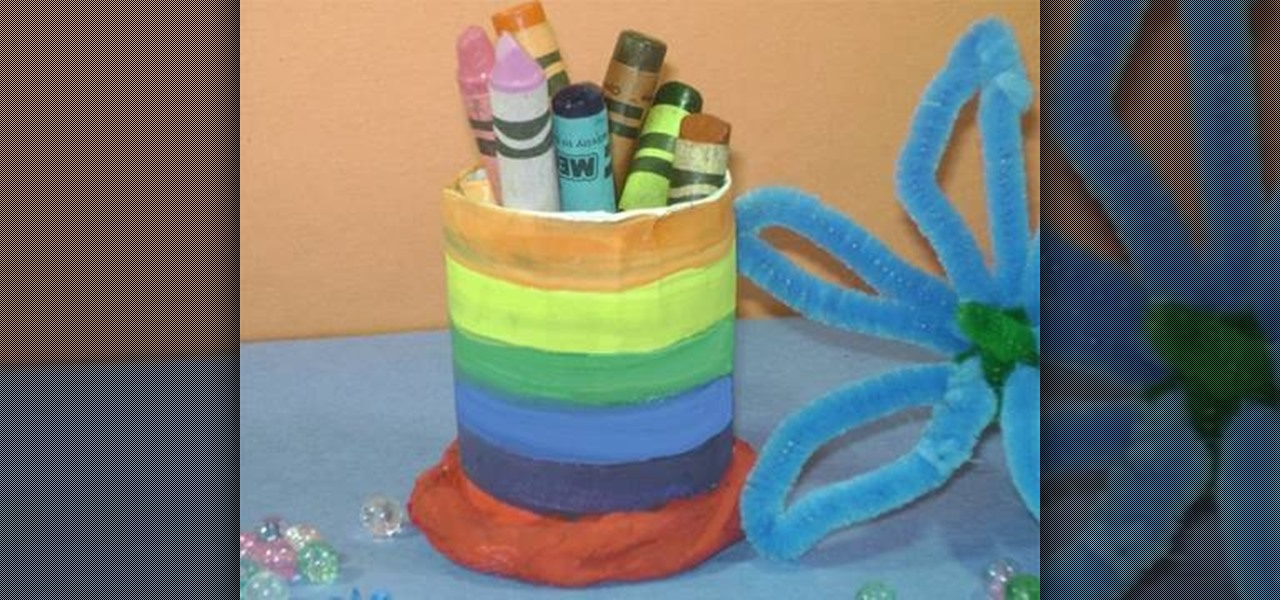
In this video tutorial, viewers will learn how to make a simple pencil holder. This is a child's art and crafts activity. The video provides all the materials that are required in order to make the pencil holder. The materials required include: a toilet paper tube, paint, paint brush, glue, scissors and a sheet of white paper. Users simply decorate the paper with paint and wrap it around the toilet roll. Next, cut another piece of paper for the bottom of the roll and secure it with some tissu...
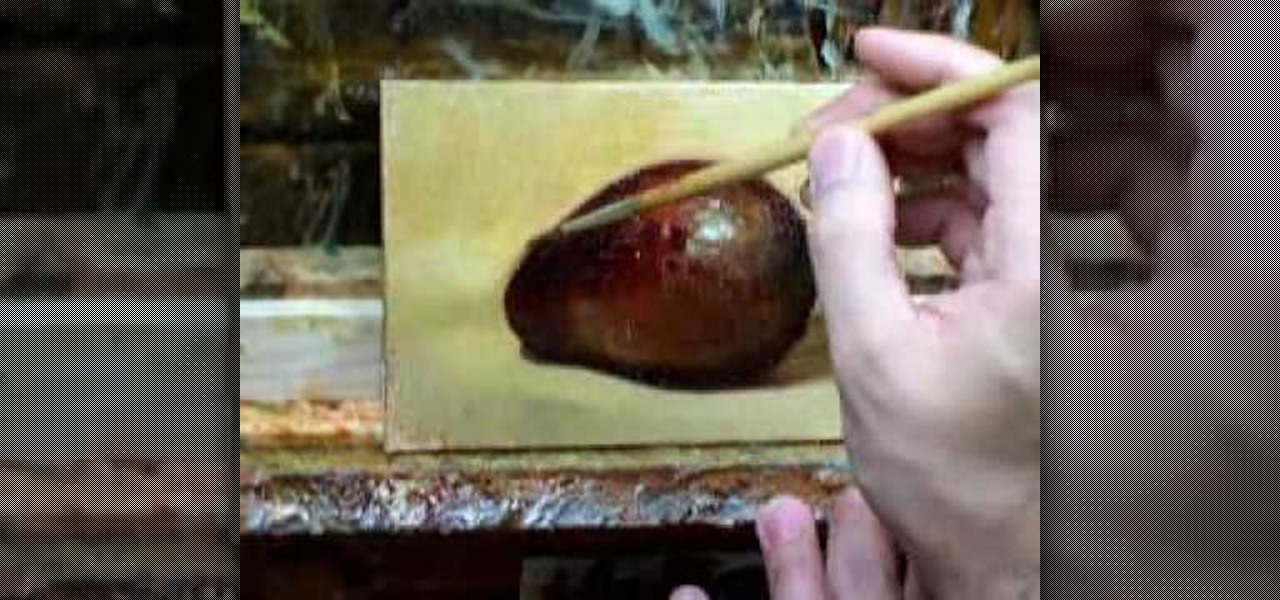
This is a silent video by artist Dan P. Carr. It is filmed in fast action, the video is approximately 3 minutes long but in real time the painting took 50 minutes to complete. It is done on a small canvas with oil paints. It shows the development of the avocado from a simple outline drawing to the final product that is 3 dimensional and uses light and shadow to give a sense of depth to the painting. According to the artist he paints a simple object like the avocado daily as a practice exercis...
This video teaches you how to make small polymer clay pocket mirrors. You can put these in your purse or even wallet. It is a good gift, as you can customize them for the person you indent to give. Get small mirrors from a craft store. One technique is to make a separate cover for the mirror using clay. Another technique is to cover the whole mirror with clay. You can also create two separate covers. One on the back of the mirror and the other for the front. Stick the clay on the back of it a...
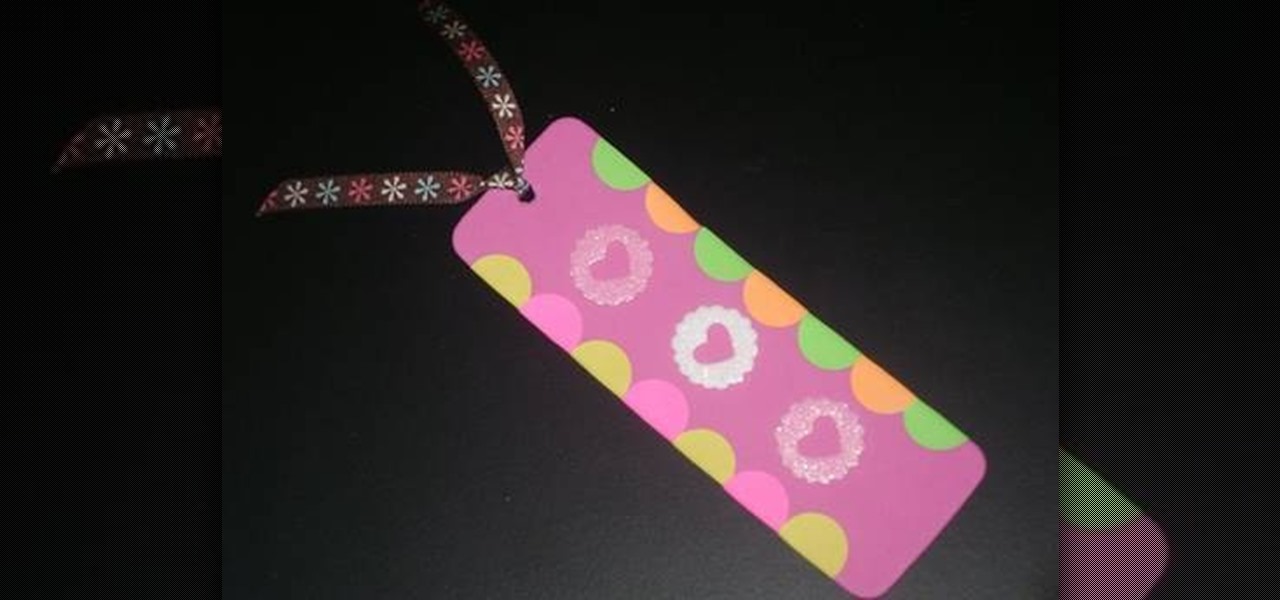
Take a colored foam and cut it to a bookmark shape. Mostly the bookmarks are tall rectangles. Decorate the foam bookmark using markers. Now design it for looking more beautiful. Use stickers to add additional decoration. Collect stickers from a craft store that offers a large variety of scrapbooking stickers. Cut the foam sheet and be sure to get along with the theme of the bookmark. For example, if a child drew horses on his bookmark, cut out horseshoe. Decorate the cut-out if necessary. Add...
Learn how to recycle and reconstruct your denim jeans: Craft side Look, Learn and Create with Stefanie Girard and Jean Therapy with Scathe G. Allison demonstrate how to recycle and reconstruct your denim jeans. You can make a bag out of your jeans by using the leg as the strap. Customize jeans by adding patches to the legs and ruffles to the bottom. All the projects use simple sewing machines and stitches and don't require extra tools. A skirt can also be made by sewing together 14 pairs of d...
Have you ever wanted to create a miniature pumpkin pie model out of polymer clay without the hassle of complicated crafts books or manuals? Have you tried making miniature clay models in the past and have had them disintegrate when drying the clay? This video will tell you step by step, how to create a miniature pumpkin pie out of polymer clay using a bottle cap, a fork, a small flashlight and a pen. This is a fun project for the family, and won't disappoint.
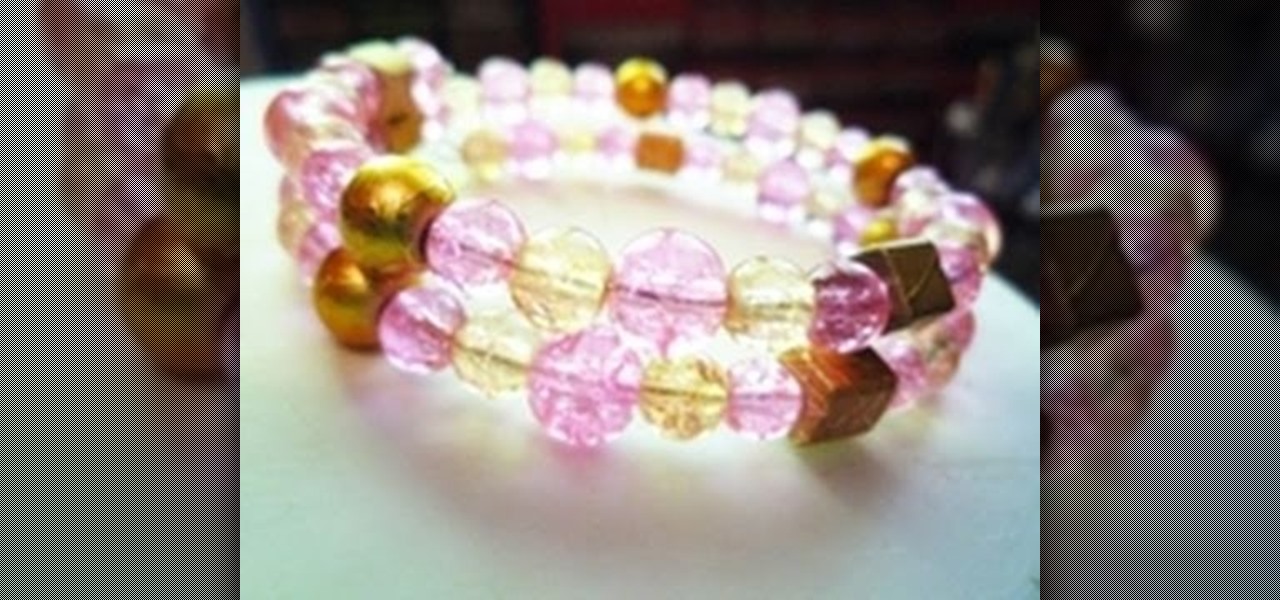
In this video tutorial, viewers will learn how to make a memory wire bracelet. This video provides all the materials required to make the bracelet. The required materials include a memory wire (bracelet size), heavy duty wire cutters (memory wire shears), round-nose pliers and several beads. First, determine how thick you want your bracelet to be and cut the wire according to that size. Now, layout the design of your beads; make a loop on one side of the wire and add the beads on. Once finish...
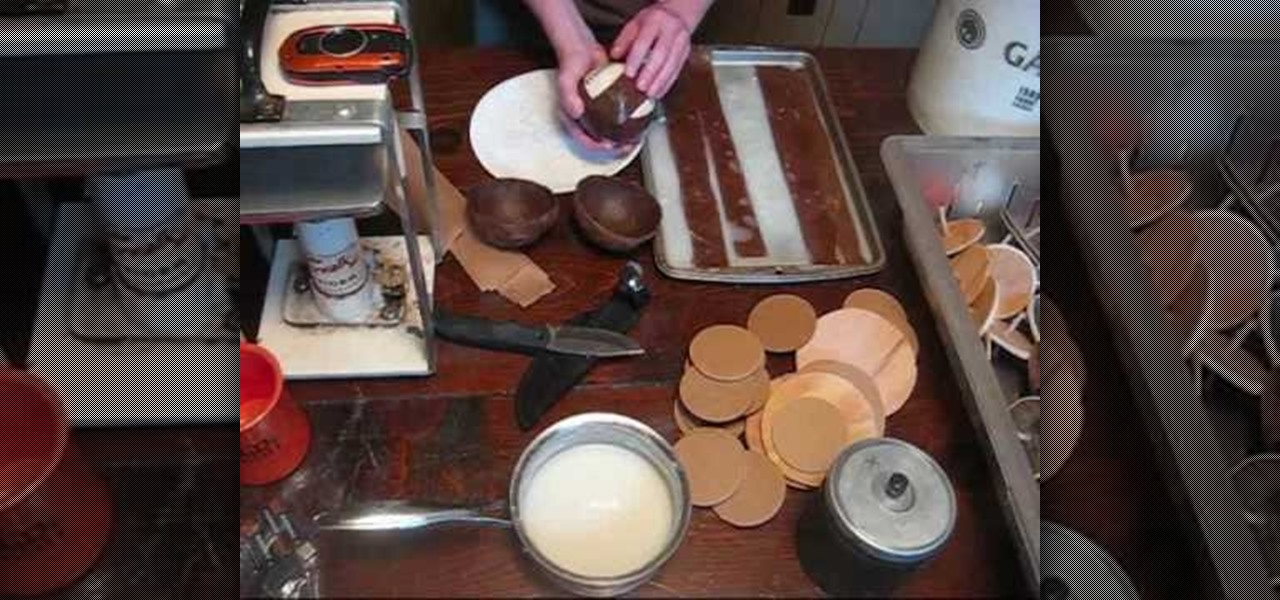
Nighthawkinlight teaches you how to make firework hemispheres. You start with a softball that will be the basis for the strips of paper you construct the hemispheres from. You take craft paper about an inch wide and soak them in a thin wheat paste. You start applying them on the softball in a pattern that doesn't create a lot of layers on top of each other. You need to spin and squeeze the shell to let all the air out. After you've added two layers of paper, clean off the excess wheat paste w...
In this video tutorial, viewers learn how to make a paper flower. This video provides all the materials that are required in order to make the paper flower. The materials required include: colored tissue paper, scissors, and 10 cm of colored string. Begin by cutting the tissue paper to preferred size. Fold 1cm on the tissue paper, flip it over and do the same on the other side. Continue this until you've reached the end. Tie one end of the string onto the middle of the tissue paper and fold t...
In this video tutorial, viewers learn how to use the traditional Japanese stab stitch binding to make books. Stab Stitching is used mainly for office documents and in essence is two or more very strong, long staples that bind together loose sheets up to 25mm thick. The video provides all the materials required to make a book. The materials include: filler paper, two sheets of card stock(must be same size as paper), string, pencil, ruler, ice pick, X-acto knife, needle(must be same thickness a...
Gamer Dude 5000 Arts and Crafts Demonstrator offers a short tutorial with a single sheet of 8 1/2" X 11" paper and pair of scissors. First you fold the corner of your paper out till the top half of your paper and the side of your paper is flush. You cut off excess paper with a pair of scissors. When you open the paper back up, you will have a square sheet of paper that you can fold. You fold all the corners of your square in to the center. Then you flip it over to the back and repeat. Once do...
Marion teaches us how to use a technique involving lace and glitter mist to make the lace look vintage. The lace can be placed in a bucket to spray the glitter mist from Tattered Angels onto the lace. Doing this in the spray bucket allows you to avoid spraying anything else in your work area. Marion uses the Old Lace Glimmer Mist, Suede, Cream de Coco, and Sherbert spray colors for this technique. This combination of the sprays allows you to create an old and vintage look on lace that can be ...
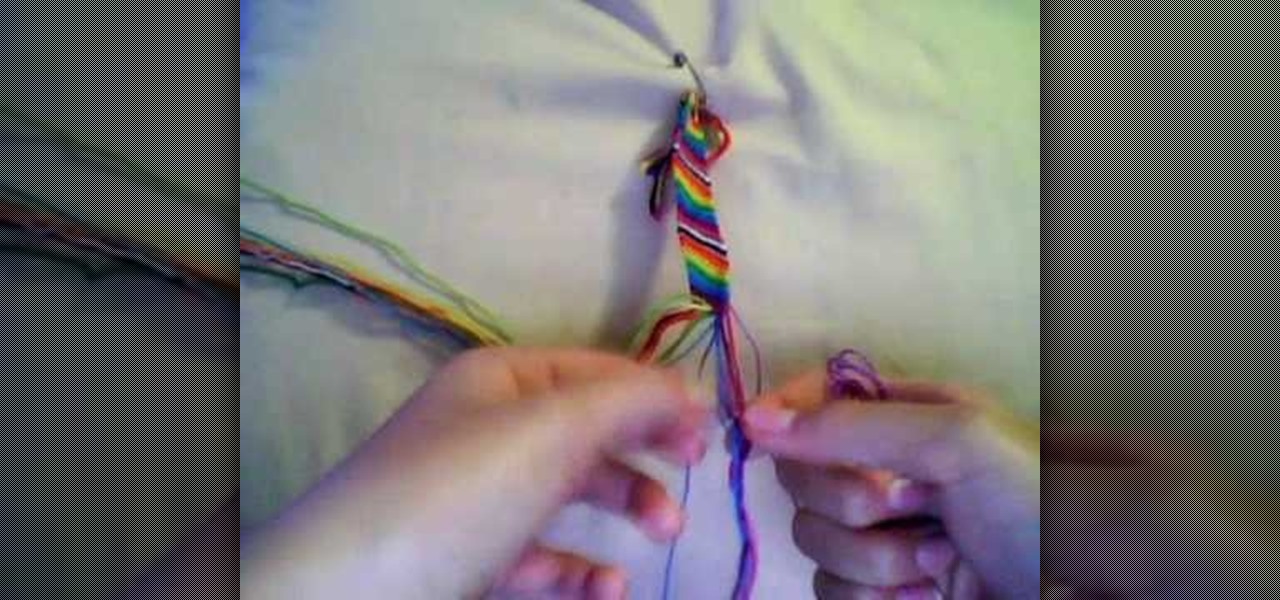
Learning how to make a piece of jewelry can be a daunting task, but this straight forward tutorial gives you all the skills needed to perfect the craft of making friendship bracelet. Starting with just a few simple pieces of string, one can make this very simple DIY project. Although the materials are cheap to procure, the end result is anything but cheap looking. The candy stripe design adds to the charm of this whimsical bracelet. Make one for all your friends today!