While you can hook up your Craft Robo to a computer, you might sometimes want a little extra mobility. You can load your designs onto an SD card and cut out your favorite shapes directly from the card. No cords needed!

Trying to figure out how you can get the Master Finger Achievement on the hot new iPhone game, Cut the Rope? It's actually quite easy! You have to play level six, then just follow along with the tutorial and the achievement is yours!

In this tutorial, we learn how to make an array of paper roses. Use any colors of paper you want with this to add a special touch to them! Now, you will take the pattern or color of your choice and fold it up into a square. after this, fold it into a triangle and then cut the edges of this off. After this, cut the bottom off and open it up, it should be a flower shape with a hole in the center. After this, repeat with several other papers and then cut the flowers up into halves. From here, yo...

In this tutorial, we learn how to make a colorful paper turkey. For this, you will need: colored paper in red, orange, yellow, white, black, purple, and brown, a bag, scissors, and glue. Now, take the orange, purple, and yellow papers and cut out two teardrop shapes of each. Then glue them to the top of a brown paper bag. Then, cut out eyes using the black and white papers. Glue these onto the top of the bag to make the eyes, then use the brown to cut out the sides of the turkey, and glue on....
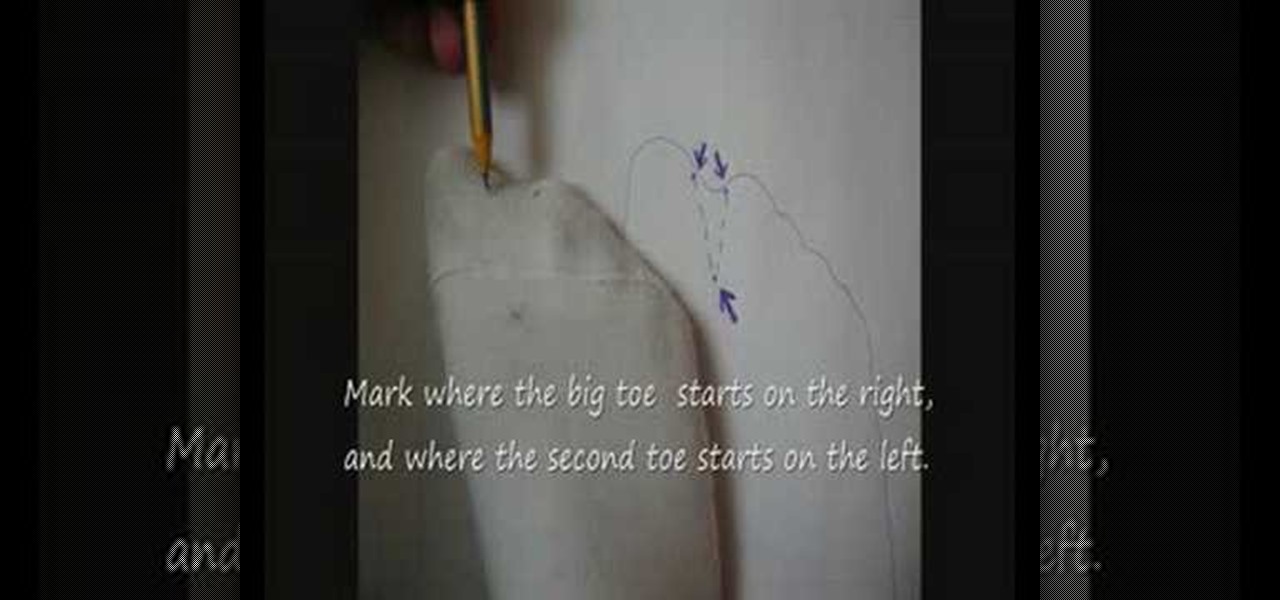
In this video, we learn how to make Tabi socks. You will need: pair of socks, thread, a needle, and scissors. First, you will turn the right sock inside out and put on your foot. Then, you will spread your big toe and second toe out as much as possible. From here, you will use a pencil to mark on the foot where you want to cut. Then, take the sock off and cut it out where you marked it. Take the needle and thread and sew along the shape that you cut out, to create separation between the toes....

In this tutorial we learn how to recycle plastic bottles to make a toy windmill. First, cut the bottle in half so you just have the cap end of it. Then, use the scissors to cut strips in the plastic, all running next to each other. Once you have all of these cut, pull the strips out so they are flared away from the cap. Then, twist these so the are all going backwards from the cap and place a stick on the bottom of these, connecting with the cap. Now you can use these as a toy windmill, enjoy...

In this tutorial, we learn how to scribe break an acrylic sheet. You just need a Stanley knife and a straight edge to do this to any acrylic sheet. First, put some gloves on and safety glasses. From here, level out the area you want to cut on your sheet, then clamp the angle while laying down. Next, use your knife to cut along the edge, going over the same spot several times. Press down hard to ensure it's completely cut. To finish, all you have to do is to bend the excess piece down and it s...
In this tutorial, we learn how to recycle cans to make garden decor. First, use small scissors to poke a hole in the top of the can, then cur around the top of it until you have removed the mouth. After this, cut a rigid design in the top of the can and then cut five slits going down on all the sides. Push these down, then cut the sides of them so they are slightly rounded. From here, you will attach these to another can that has been spread out with tons of different slits. Place this on a r...
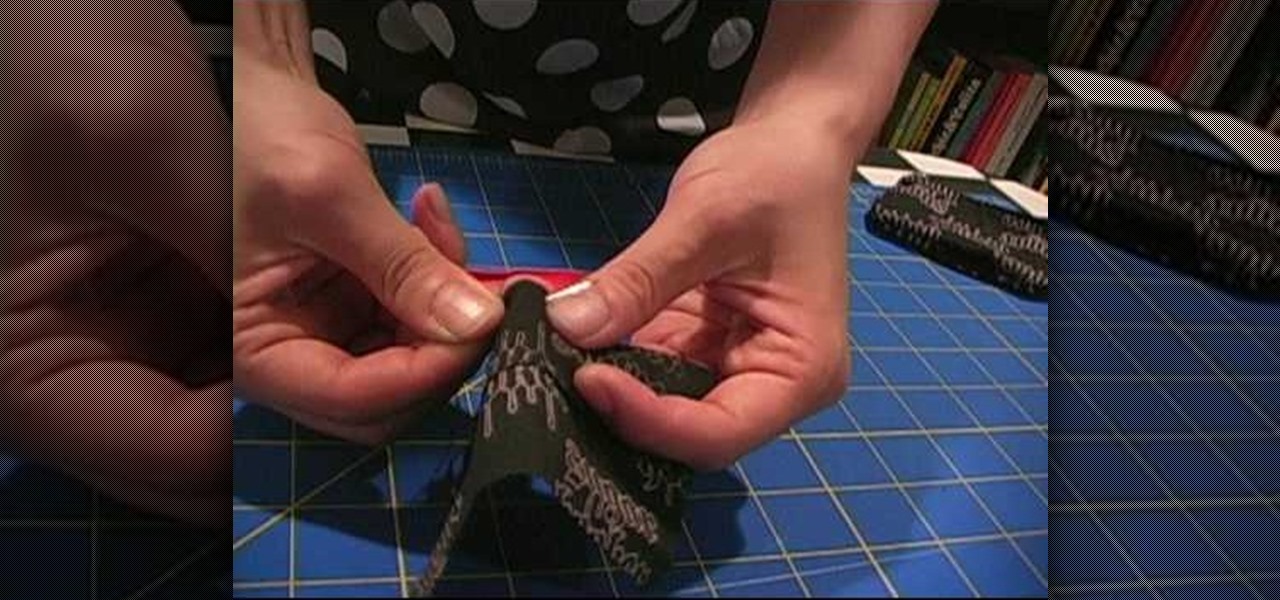
In this tutorial, we learn how to make fur suit hand paws. First, take your fabric that looks like fur and has a cotton lining. Then, cut out the different pieces you need to create the paw shape. Now, sew the pieces that you cut out onto the fur and then cut it into the shape to fit onto your hand. From here, you will sew this together with a bottom piece, then you can sew the paws together and place it on your hand to wear. Add in any additional details you would like, then wear these where...
In this tutorial, we learn how to make a Duct tape hat. First, grab a hat that you want to duplicate and measure it out with a piece of paper. Then use this piece of paper as reference to how you will cut your pieces of duct tape. Now, cut the duct tape and stick them together to create the top of the hat. After this, you will connect the other areas of the hat together and make the bill of the hat. This will need to be thicker than the other areas and you will also have to cut it into a curv...
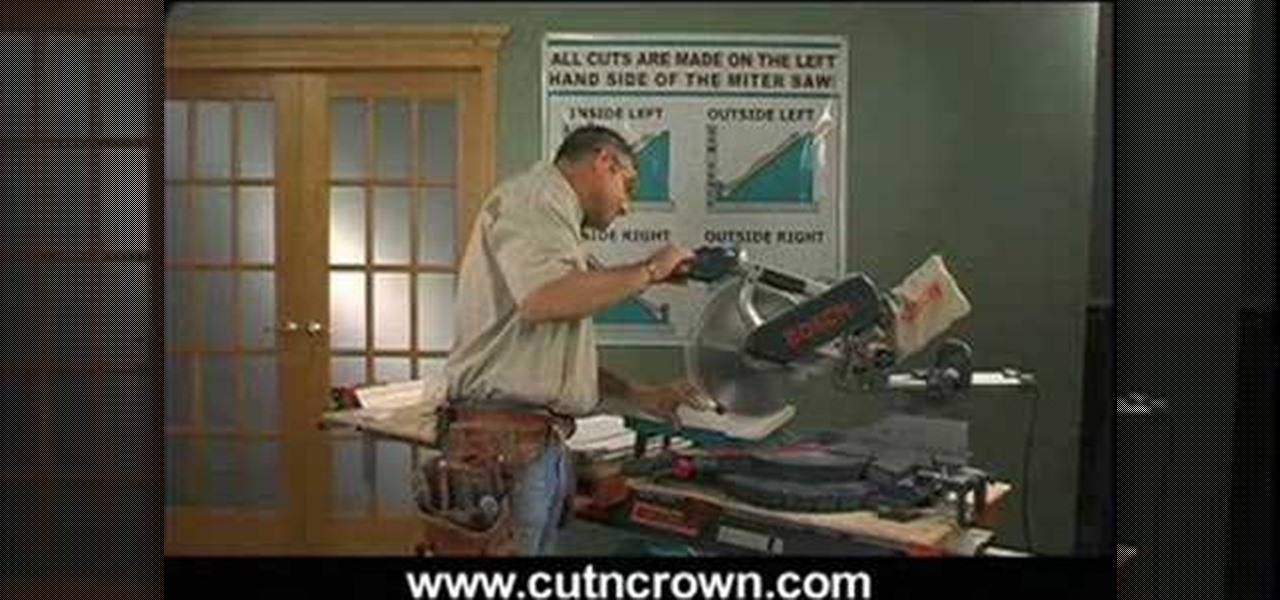
In this tutorial, we learn how to cut crown molding perfectly for your home. First, you will need to determine what spring angle your crown molding is. It comes in 38 degrees, 45 degrees, and 52 degrees. If you buy the wrong kind, it will not match your crown molding and will look odd. Once you have figured out what you need, you will need to cut the molding on the side that is on the back side of the bottom. You will also need to drop your block next to it to get it cut at the right angle. W...
In this tutorial, we learn how to make your own summer dress. First, take a tank to and measure it out on your chest. Then, mark the shirt and cut it. Then, take another color tank top and cut off the opposite area that you just cut on the other tank. Take another piece of fabric now and measure it out to fit your body. Then, attach this to the bottom of the dress and sew all of the pieces together with a sewing machine. Try it on when you are done and then enjoy wearing your new homemade sum...
In this tutorial, we learn how to add fringe to a dress. First, take the dress that you want to add fringe too and hang it up. After this, mark on the dress where you want to add the fringe to it. Once you have marked this up, you will need to grab your scissors and start to cut. Cut up from the bottom to the top of where you marked. Cut in very thin strips, not thick so they move with you when you wear it. After you are finished, wear this with your favorite accessories and you're finished w...
In this tutorial, we learn how to make an over-sized fashion bow fashion accessory. First, take your fabric and cut it to the desired size you want the bow to be. Cut this in a square shape at first, then sew the sides of the square. Then, fold this in half and pull in the middle of the square. Cut this in the middle to make a hole. Then, turn this inside out and push out the edges. Put an additional square of fabric around the square in the middle, then shape it out to be a cute bow to wear ...
In this video we learn how to make a zipper purse or mini fanny pack for your belt. First, fold a bandanna in half and cut out a rectangle. Then, cut a rectangle out for the belt loop too. Next, take one of the bigger rectangles and cut it about 1.5 inches from the top. Then, sew these two pieces together using a needle and thread with white thread. After this, pin down the zipper to the back and sew up the sides. Then take the other piece and stitch it to the front side of your other rectang...
In this video we learn how to make a decorative paper rose. First, take a piece of paper and cut several heart shapes out of it, making them different sizes. Once these are cut out, curl the edge over with a toothpick, pencil, or by hand. Set these aside, then use a grab a green sheet of paper. Roll the edge of the paper up and then cut the rest of the paper from it. Create a leaf in this and then tape it all around. Now, twist this tightly and place the curled ends of the heart shapes away f...
Print out a black and white image of the Firefox logo, then paste it to some solid sheet metal or thin wood. Then cut out your Firefox shape. Make sure not to cut yourself! Then sand the edges, drill a small hole and run your chain through!
The relationship between meat and meateater has never been more abstract. Most people can't even identify where on an animal's body their meat comes from! Watch this video to learn where the different cuts of turkey are on the bird.
In this tutorial, we learn how to make a paper snowflake from scratch. First, take a CD and trace around it on a piece of paper so you have a perfect circle shape. After this, take your scissors and cut out the circle. Next, take the circle and fold it in half, then fold it from the right to the left in half again. Then, take it and flip it so the "v" is pointing towards you, then take it from the right to the left and fold it again. After this, face the point away from you, then use your pen...
In this tutorial, we learn how to distress and cut up jeans to destroy them. First, you will grab an old pair of pants that you want to have a distressed look on. First, you will need to take some sand paper and rub it on the front of the jeans in the thigh area. After you do this to your liking, you will take your scissors and cut a small hole going down the legs. Use your hands to make the holes larger, then leave the frays at the end for a more distressed look. When finished, wash them off...
If you are a girl with long hair and thinking about cutting it short, hang on a minute. Watch this video first. It will teach you how to create a cute faux bob that will let you try out short hair without doing anything dramatic. If you still want it afterwards, cut away!
In this tutorial, we learn how to make the perfect hole for your destroyed denim. First, you will need to grab a pair of sharp scissors. Make small horizontal cuts around 1 cm apart. Once you have made as many cuts as you want, you will use tweezers to pull out the fray that is on the bottom of the cuts in the jeans. To create nicks and grindings, use a Dremmel tool on the jeans. This will help you sand down the area of the jeans you want the hole to be and create a distressed look. When fini...
Birds are feisty little creatures, especially when it comes time for grooming. If you want to trim your bird's wings, you have to cut those feathers off, and this video shows you how to do it. This technique is the easiest way to go about cutting feathers off your bird's wing, and here it's demonstrated on an Eclectus Parrot. Find out more information at the Olathe Animal Hospital.
Thirty dollars a month may be a little steep for an unlimited data plan for iPad users. To cut down on your data usage, you can download the Offline Pages app to browse articles or blogs offline. InstaPaper is another account you can use as well, and both will cut down on your data usage per month.
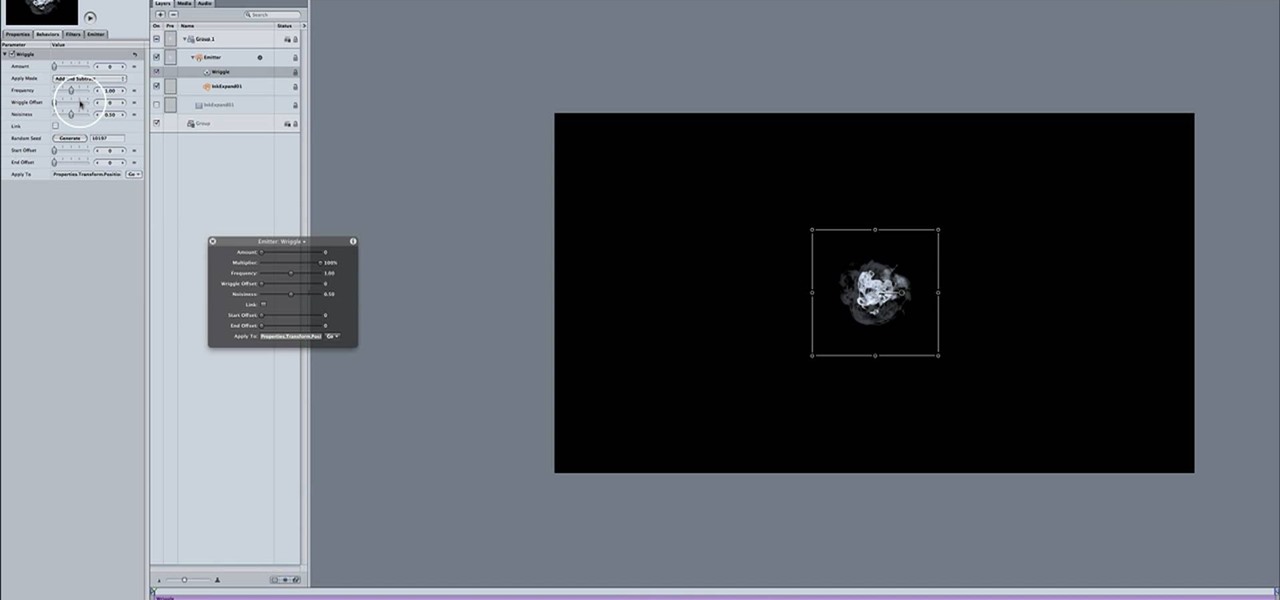
In this Final Cut Studio user's guide, you'll learn how to synchronize particle movement to the beat of an audio track within Apple Motion 4. Whether you're new to Apple's popular motion graphics and compositing software or a seasoned video professional just looking to better acquaint yourself with the program and its various features and filters, you're sure to be well served by this video tutorial. For more information, including detailed, step-by-step instructions, watch this free video gu...
In this video, we learn how to make a "purt" or a "shirse". To start, grab an old shirt with buttons and measure out an area from the top to cut down. After this, cut the area out cutting the top and the back of the shirt. Then, take a sewing machine and sew the sides together. After this, grab a tie that you have and wrap it around the front of the shirt that you have just sewed. Now, when you want to look like you are wearing a shirt and tie without actually wearing one, you can slip this o...
If you're creating a family scrapbook, cutting and cropping is more than just a few straight cuts. Use your creativity and these cropping techniques to help you shape and display your treasured photos in a beautiful album.
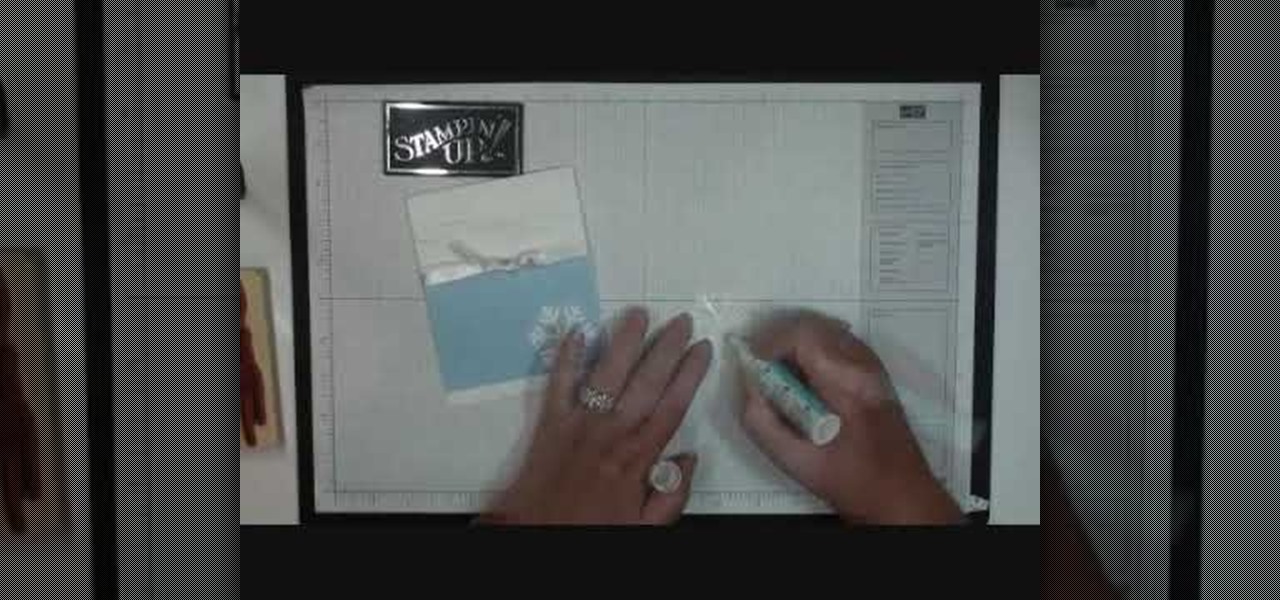
This video tutorial is in the Arts & Crafts category where you will learn how to make a quick and simple Christmas card with Stampin' Up! You will need the bashful blue classic ink, a bashful blue cardstock cut at 3" x 4 1/4", a piece of whisper white cut at 4 1/4" x 11" and scored at 5 1/2", a piece of whisper white organza ribbon and scrap cardstock for two snowflakes. Cut out the snowflakes with the jumbo snowflake punch. Stick the bashful blue on the whisper white cardstock. Using the hea...
Like leading ladies Mia Farrow and Michelle Williams before her, Emma Watson recently chopped off her hair - almost all of it. Watson debuted her new pixie haircut a few days ago, proclaiming she'd wanted to do it for a long time and that it felt liberating.
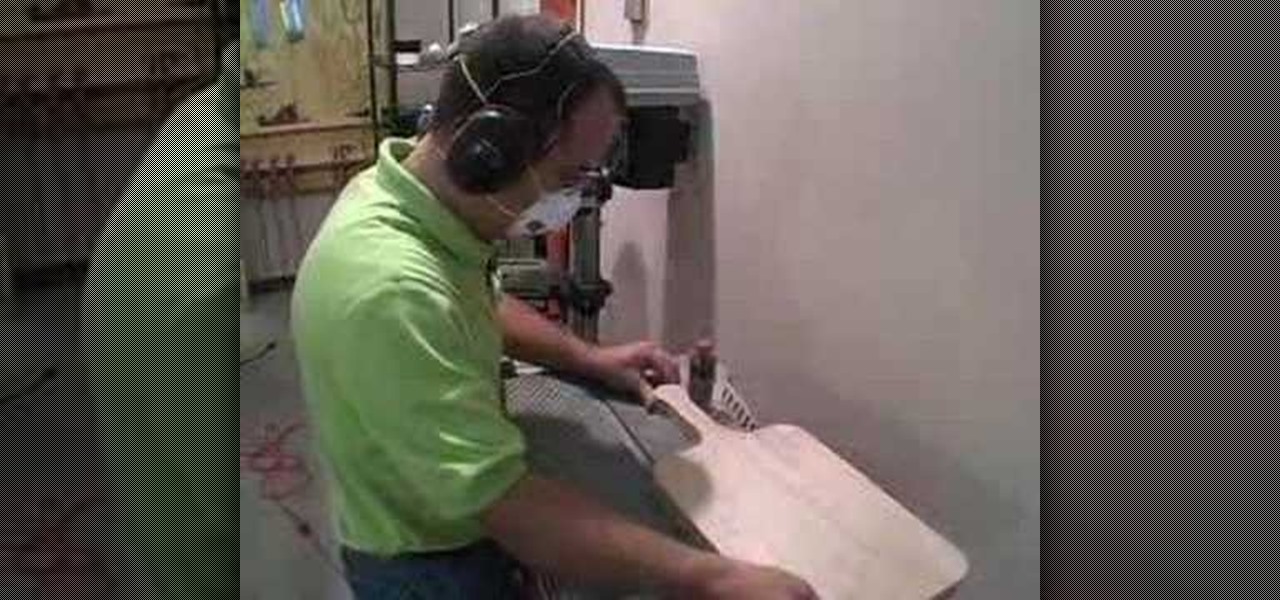
If you are just starting out in woodworking, there are many basic projects that you can tackle. The birdhouse, storage shelf, and the cutting board. Making a cutting board isn't too difficult and once finished, can be used to give you a space that you can chop fruits, veggies, and meat on.
In this video, we learn how to make a mouse hat with construction paper. You will need: 2 small pompoms, 1 large pompom, poster board in blue, black, white, and yellow, lace, scissors, and glue to make this. First, cut the blue piece of construction paper on once side, then twist into a cone shape and tape it together. After this, take the rest of the blue paper and cut it into half circle shapes for the ears. Now, take the yellow paper and cut it into a smaller half circle and place inside t...
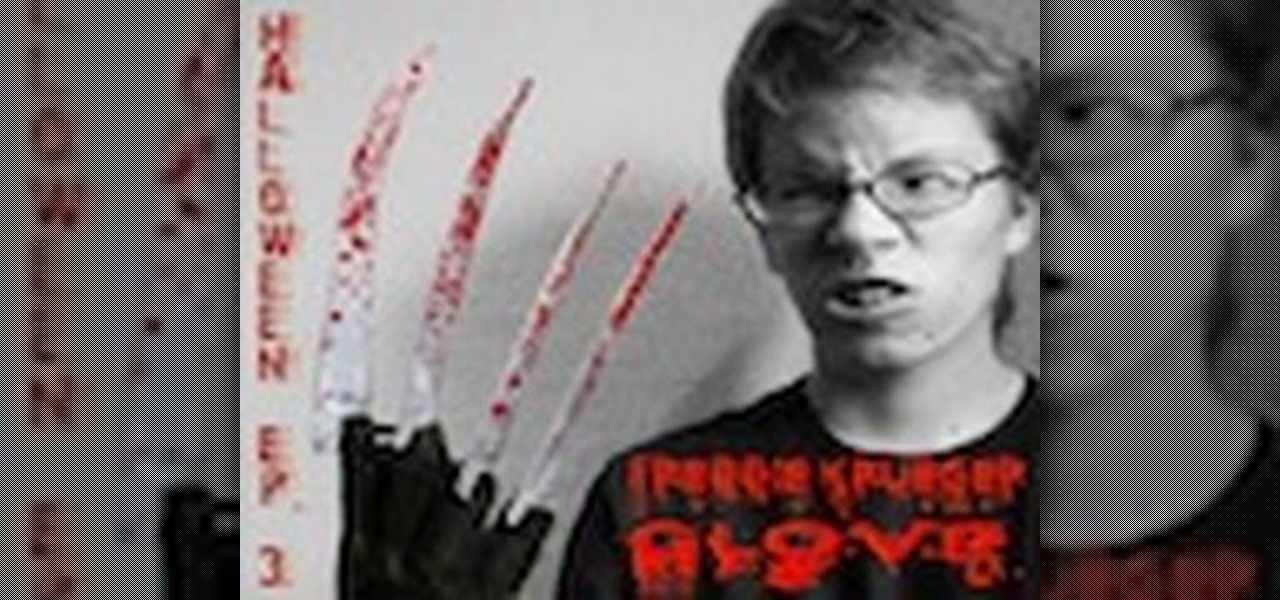
In this tutorial, we learn how to make a Freddie Krueger glove. You will need: a saw, sandpaper, silver spray paint, black paint, brown paint, old glove, tin from a can, plexi glass, shiny cardboard, and a hot glue gun. Start off by using your paper roll to cut off a strip of it that will start on the joints of your hands, then cut this in half. After this, make a cut in the top of it and on the sides of it. Do this again for the four fingers, then wrap it around the glove fingers. After this...
In this video, we learn how to make a tee a stylish one shoulder tank. First, lay your shirt down on a flat surface. After this, cut the shoulder off one side, then cut a diagonal line down the other side, removing the other shoulder completely. Next, take a round brass ring and attach it to the first shoulder to connect the front and back of the shirt. When you are done with this, you can wear your shirt and enjoy! If you want more of a professional look, you can sew the ends of the shirt so...
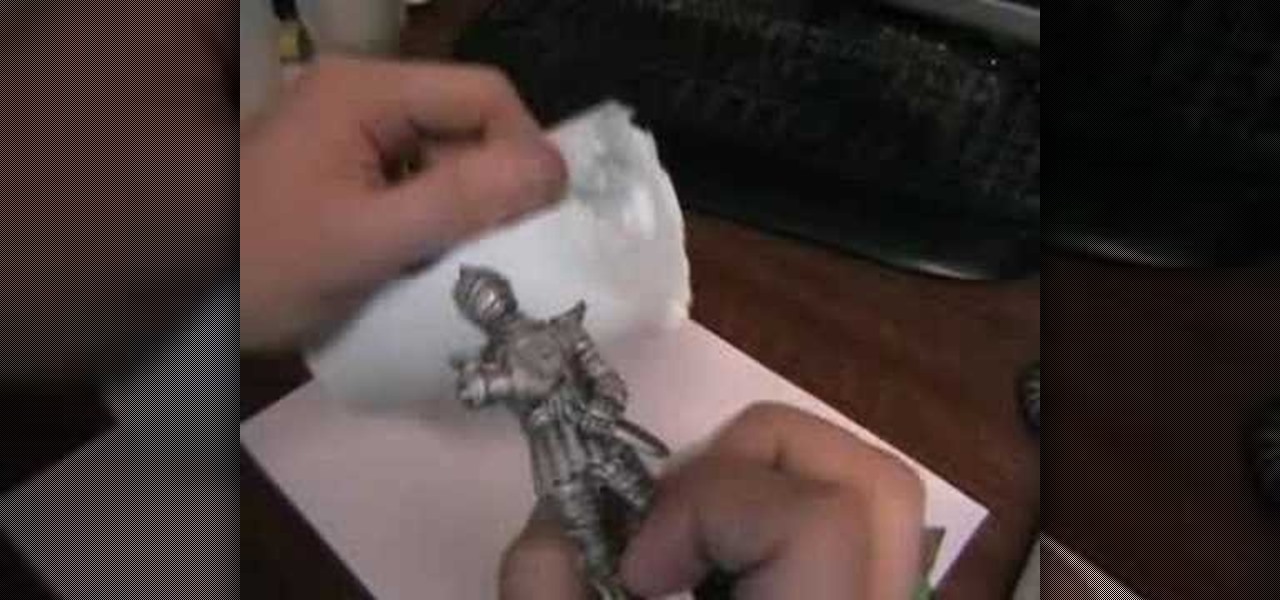
In this tutorial, we learn how to make a silicone mold of a toy figurine. First, roll out clay and press the bottom of the figurine into the center. Next, use a plastic bottle to create the mold box. Cut the bottom off of the bottle, then press the bottle into the clay to make sure the figurine is centered. Now, press the bottle down into the clay and make the silicone mixture. When you're done mixing, pour it into the bottle. Pour in a stream to avoid any bubbles inside of it. Let this sit o...
In this video, we learn how to punch down a 12 port patch panel. Start off by grabbing your cable and using scissors to cut off the outer covering of the cable. Next, use the wire scissors to cut off the end of the wires (about 1-2 inches). After this, place the stripped down wires into the appropriate spots that correspond to the colors that are on the 12 port patch panel. After you finished this, you will need to grab your punch down tool. Use this tool to push down on the wires, then it wi...
In this tutorial, we learn how to make a lily out of paper and pipe cleaner. First, lay your hand flat on a piece of copy paper. Next, trace your hand with a pen or pencil, then cut it out with scissors. Now use a pencil or pen to curl the ends of the fingers you just cut out. After this, combine two pieces of gold pipe cleaner together and bend in half. Then, place a green pipe cleaner in the middle and make a twist to keep in place. To finish, wrap your paper hand cut out around the gold pi...
This video tutorial is in the Arts & Crafts category where you will learn how to make a multi-layered embossed floral gift card. Take a piece of 11 x 8 1/2 inch Stampin' Up card stock and fold it in half. Next you punch out layers of colored paper of rose red, very vanilla, regal rose and blush blossom colors of different sizes as stated in the video using the Boho Blossom Paper Punch. Now you take a Sizzix Big Shot Die and cut out a craft paper and set the cut outs aside. Now you got to stam...
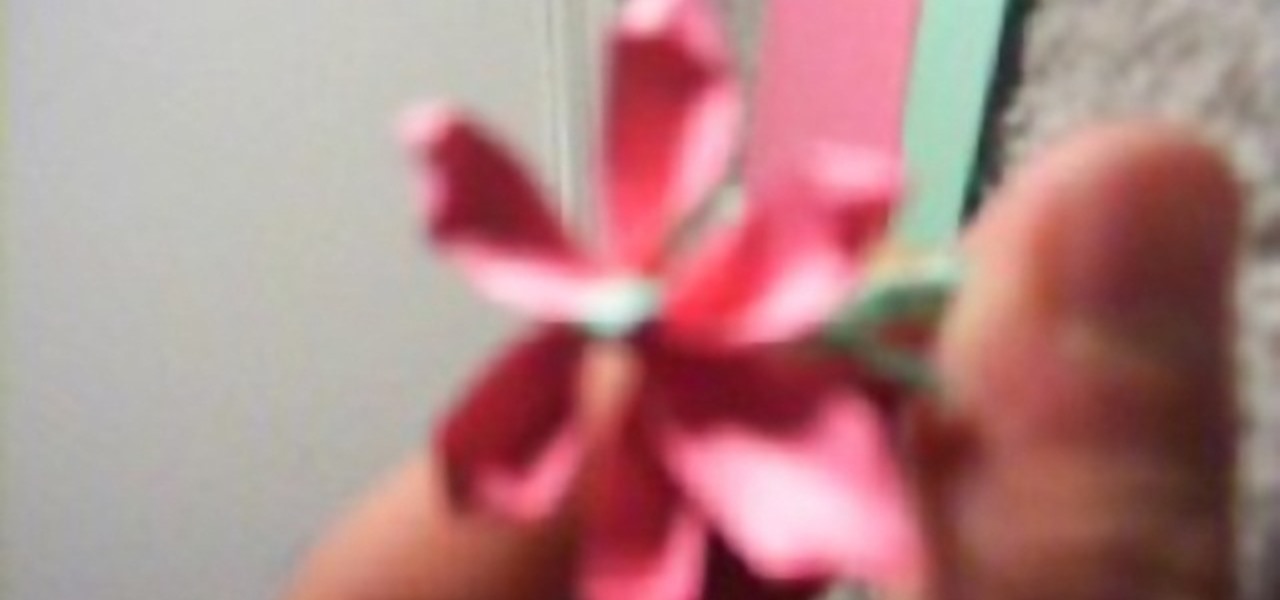
In this tutorial, we learn how to make paper rose with construction paper. First, take a piece of pink paper and cut a thin strip out of it. Next, take that strip and fold it in half twice. Now, cut the paper in half so you have several strips of paper. Now, fold in the strips to make them look like petals. Next, cut two thin strips out of a green piece of paper and craft them into the shape of a stem. Then, cut thin strips out of the green and shape them into leaves. After this, combine the ...
In this tutorial, we learn how to make a paper turkey. You will need: a pen, tape, scissors, and papers. First, outline your hand on all the pieces of paper, then cut them out. After this, stack them together and then tape them. Next, cut out and apply the wattle of the turkey. Next, draw in eyes and feather details on to the turkey. When you are finished, you will have a cut turkey made in just a few minutes. This is a great project to do with children and only takes a few short minutes. Whe...
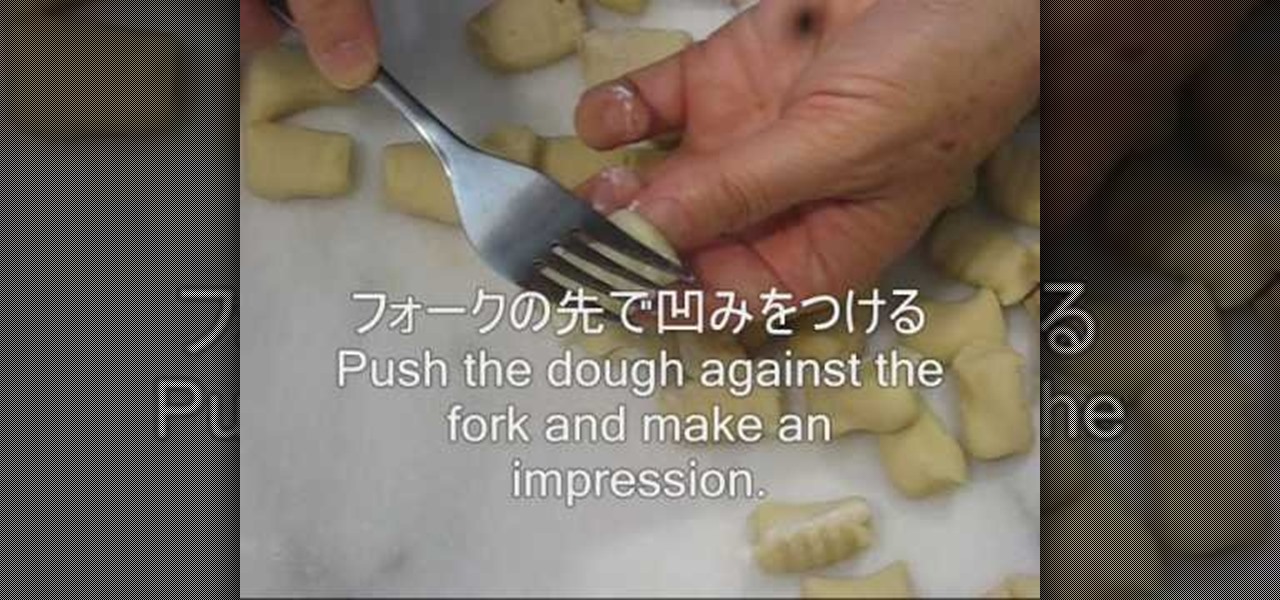
In this tutorial, we learn how to make potato gnocchi. First, microwave 1 lb of potatoes until they are soft. Next, let them cool, then peel them and cut them into cubes. Now, mash them with a masher or food processor. After this, add in 2/3 tsp salt, 2 tbsp grated Gorgonzola cheese, 1 1/4 c flour, and 1/2 egg. Blend until everything is well combined, then make the dough into a ball. Cut part of it off, then roll it into a thin roll 3/4" in diameter. Now, cut the roll into 1 inch piece and pu...