In this video, we learn how to make a custom DIY dog gate. Tools you will need are: lattice and wood, hinges and screws, saw and power drill, cut outs from a hobby store, and a closure. After you gather all the parts, start to build the dog gate. Use the wood on the bottom and top to help support the lattice wood that will face the outside. Once you have the entire gate built, you can use cut outs from a hobby store to make the gate more festival. Simply nail these to the outside of the gate ...

In this video, Rick show us how to cut monitor feedback with StudioLive 16.4.2. First, assign your microphone to ox 1. Then turn it up and go to the master output of Ox 1 and turn it up until you hear feedback happening. Then, hit the select button on Ox 1 and you can change the compression for any channel. Take out low rumble by putting the low band on and putting it in shelf mode. This will create a high pass filter. Take out frequencies below 130 hertz and then go back to ox 1 master and t...

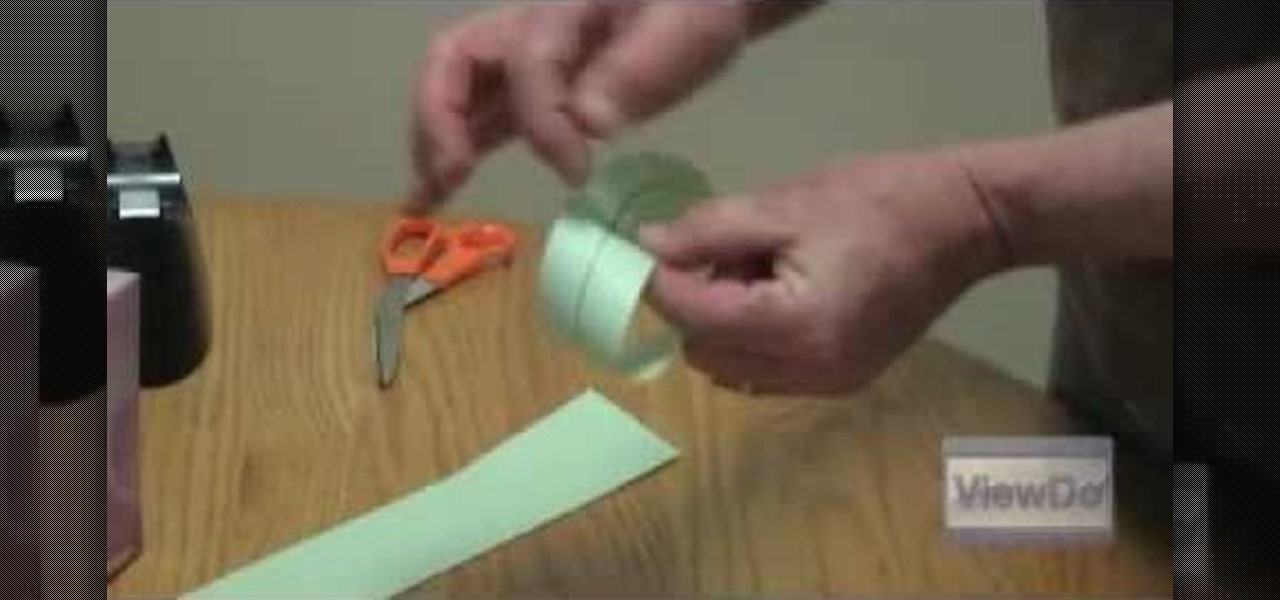
In this video, we learn how to make a great 3D paper snowflake. First, fold a square blue piece of paper into a triangle. Then, draw lines from the middle to the top going in the triangle shape. Cut these lines on both sides, avoiding the middle and the very top. Make sure you don't cut in the middle either. After this, open up the folder and take the inside. Roll it up and then tape it together so there's a ring on the inside. Flip it over, then make another ring on the top side and tape it....

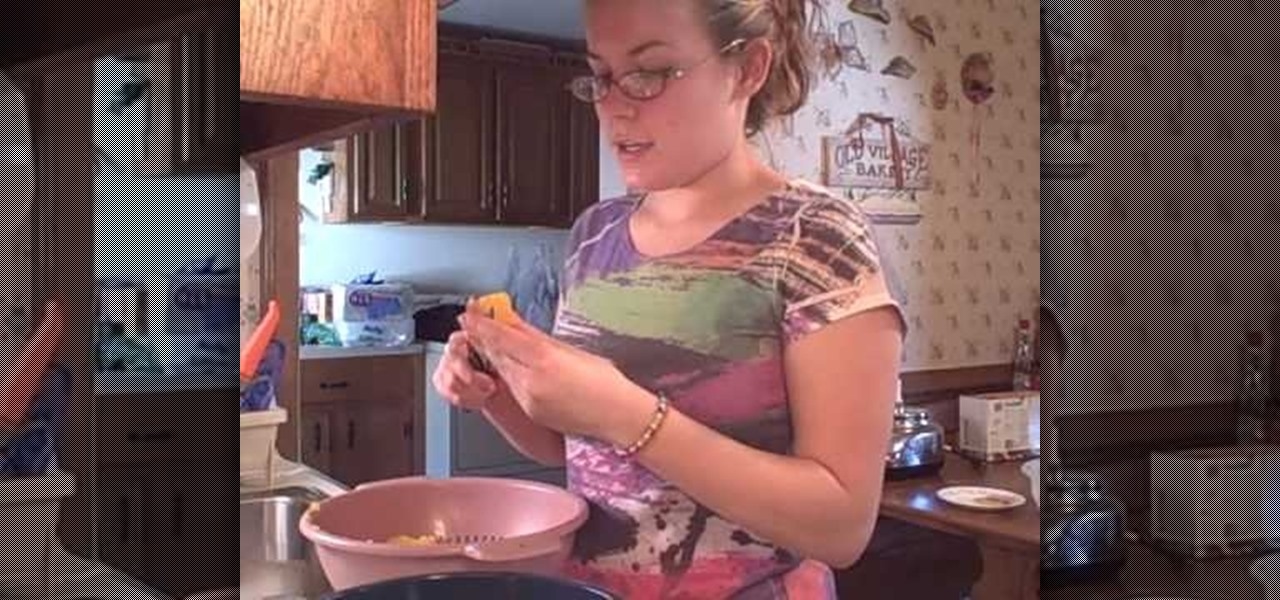
In this tutorial, we learn how to prepare celery with Skinny and Mini. First, you will clean your stalks of celery and dry them off. Then, remove the stalks one by one from the bunch and chop off the tops of them so there are no more leaves. Next, cut the stalks of celery in the middle and then chop them in half. Now, bunch the celery together and cut them into small cubes with your sharp knife. After this, repeat the process with the rest of the celery in the bunch. Use this chopped celery i...

In this video we learn how to fold a very simple paper football. First, take a piece of paper and cut out a strip from it or fold it into a strip. After this, fold a triangle in the strip of paper. Once you have this, fold up to create another triangle and keep folding up until you reach the top of the strip. There will be one small piece of excess paper left on the strip. You can either cut this off or tuck it into the pocket that you made while folding the triangles. Use this to pass the ti...
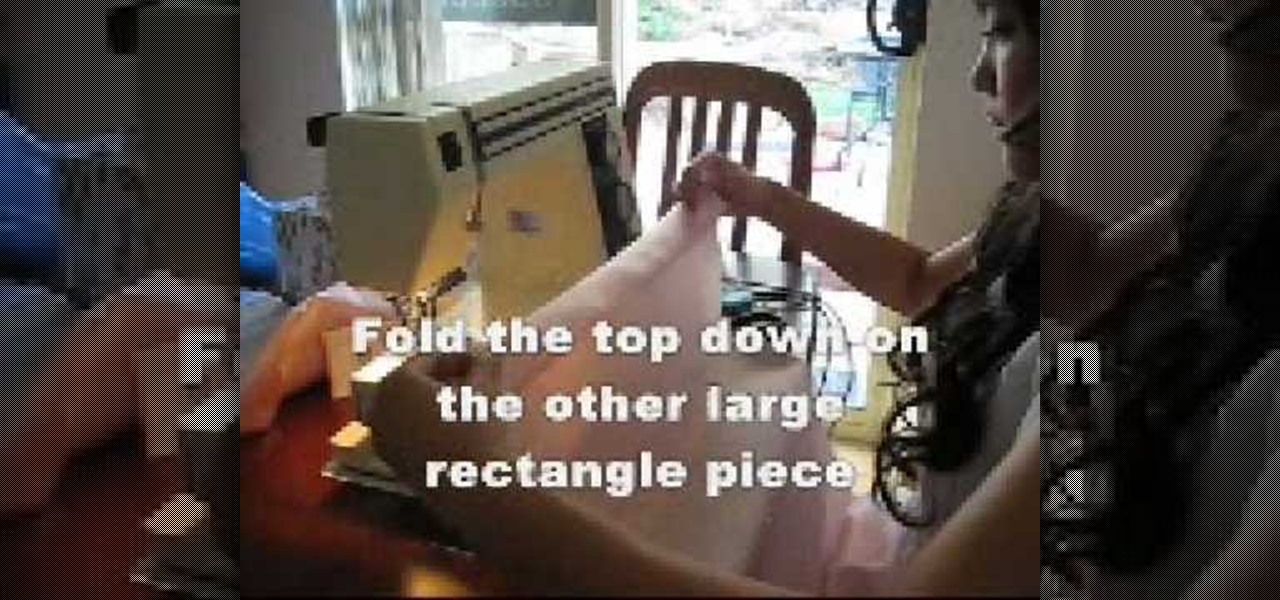
In this tutorial, we learn how to make a basic princess pillow case. First, you will need to have a large piece of pink silk fabric. Lay this out flat, then cut out a 45x75 cm rectangle. Once finished, separate the two pieces of the fabric, then cut a new piece 45x20 cm. Then, lay the fabric facing up and lay some lace on top with the frills facing inward. Sew together the fabric and lace all the way around the entire pillow case. Fold the top down on the other large rectangle piece, then rep...

In this tutorial, we learn how to install crown molding to your room. First, choose the right size and style of molding for the room, then measure your room to find out how much you need. After this, you will need to buy a saw to cut the molding when you're ready to install. After you have the pieces cut, you will need to place these against the wall and then nail them in with a nail gun. Secure the molding to the joints in the ceiling and to the studs in the wall. To finish, putty the holes ...
In this tutorial, we learn how to make fur suit eyes for a mask. First, grab a simple paint pallet that has dips down in it for the paint. Then, cut the dips out of the tray they come in with a small saw. Then, grab a hot glue gun and melt down the middle of the dip so it's hollow. Then, apply hot glue to the top of the hollowed out eyes. Then, apply felt around this and cut it out so you can see the eye. Push the material through the bottom to create the pupil, then your eyes are finished.
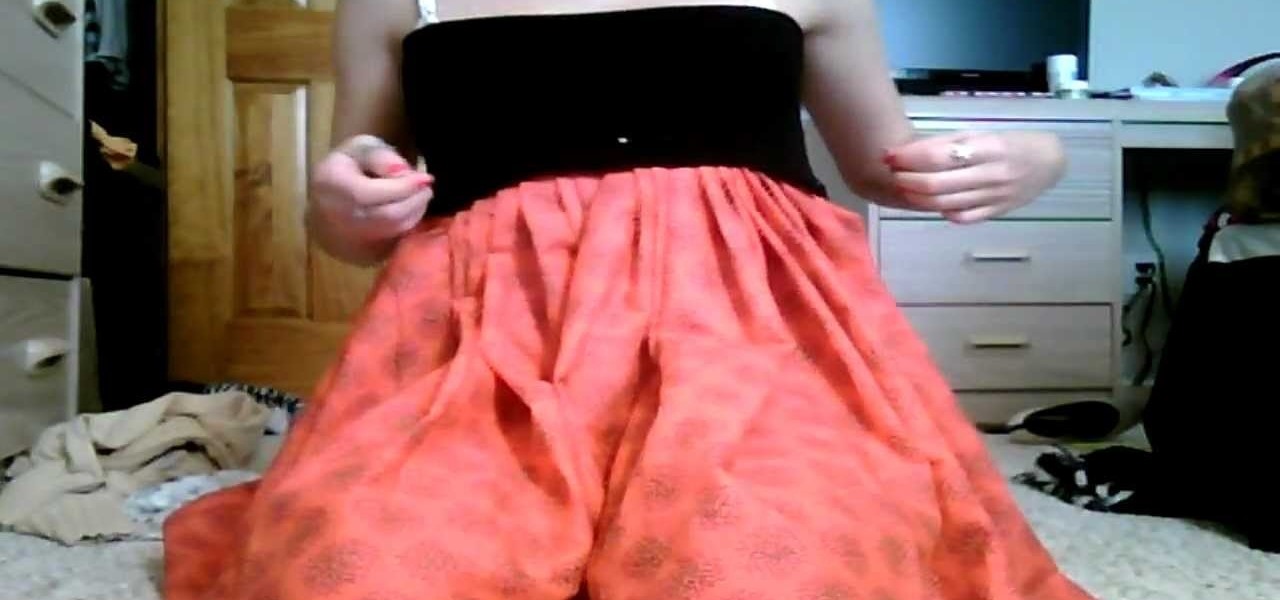
In this video we learn how to make a your own poufy bubble dress. First, grab a black stretchy shirt and cut the arms off of it. After this, take the fabric that you want to use for the skirt and lay it down, creating little peaks on the top of it. This will give you the volume for the dress, use pins to pin these down. Once you have done this, you will sew the pinned part of the fabric with the shirt that you cut up. Then, take the bottom of the skirt and hem it if you would like and you're ...
In this tutorial, we learn how to carve a turkey. After your turkey has came out of the oven and sat out for around 10 minutes, grab your sharp knife. When you are carving this, you want to carve around the bones so you are getting the most meat off of the bird. Start off by removing the thighs from the turkey and cutting it in half. After both of these are off, but the wings off of the turkey and set on a serving plate. From here, you will use the knife to cut the middle of the turkey and pr...
In this tutorial, we learn how to make a Domo plushie. First, cut out the shape of Domo on a piece of brown fabric. Cut this out twice to make the front and the back. After this, sew both of the sides together with a sewing machine. Make sure to place pins in it to keep the fabric in while you are sewing. When finished, turn the plushie over and stick some stuffing inside of it. Now, sew the section where you placed the stuffing in. Then, you can sew on the face of the character and you will ...
In this video, we learn how to make a colorful tutu. First, you will need to grab all the colors of fabric that you want to use on your tutu. Then, roll up the fabric of each color carefully, then cut it out to the length you have measured for your subject. After this, cut out one more smaller section of fabric from each piece until you have done this with all of the colors. Now, using a piece of ribbon as the waistband, tie each piece of colored fabric onto it, alternating colors each time. ...
In this tutorial, we learn how to laminate stairs. First, you will need to grab your laminate and measure out the stairs. Then, cut out the nosing to the stairs. After this, you will need to cut out the laminate with a chop saw to place it on the front of the stairs so it looks nice and is fully covered on the stairs. You will need to place down glue on the laminate then press it down on the stairs and allow to dry. Behind the front piece you will place another piece of laminate and glue it d...
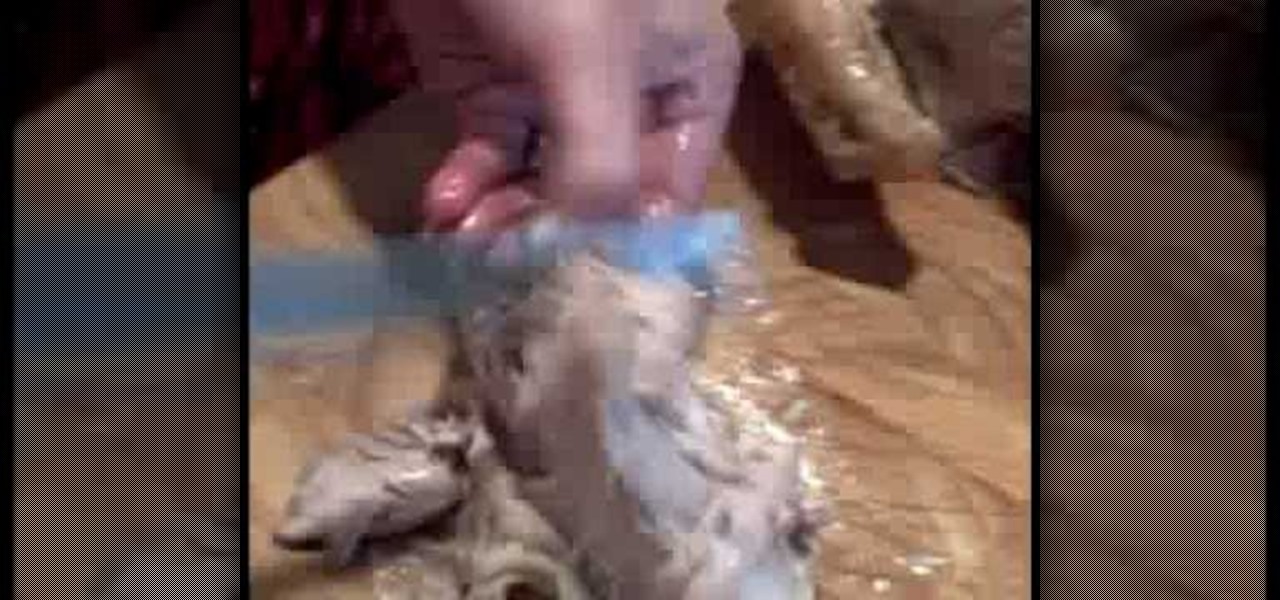
In this tutorial, we learn how to make models and ornaments with salt dough. First, grab a baking sheet and place aluminum foil over it. Now, grab some gloss sealer, salt, food coloring, flour, ribbon, glitter, cookie cutters, and buttons. To make the dough, combine flour with water and salt. Mix this together until you get a dough shape, then roll out and cut into shapes with cookie cutters. Cut a small hole in the top of it, then bake until golden brown in the oven. Tie a string in the hole...
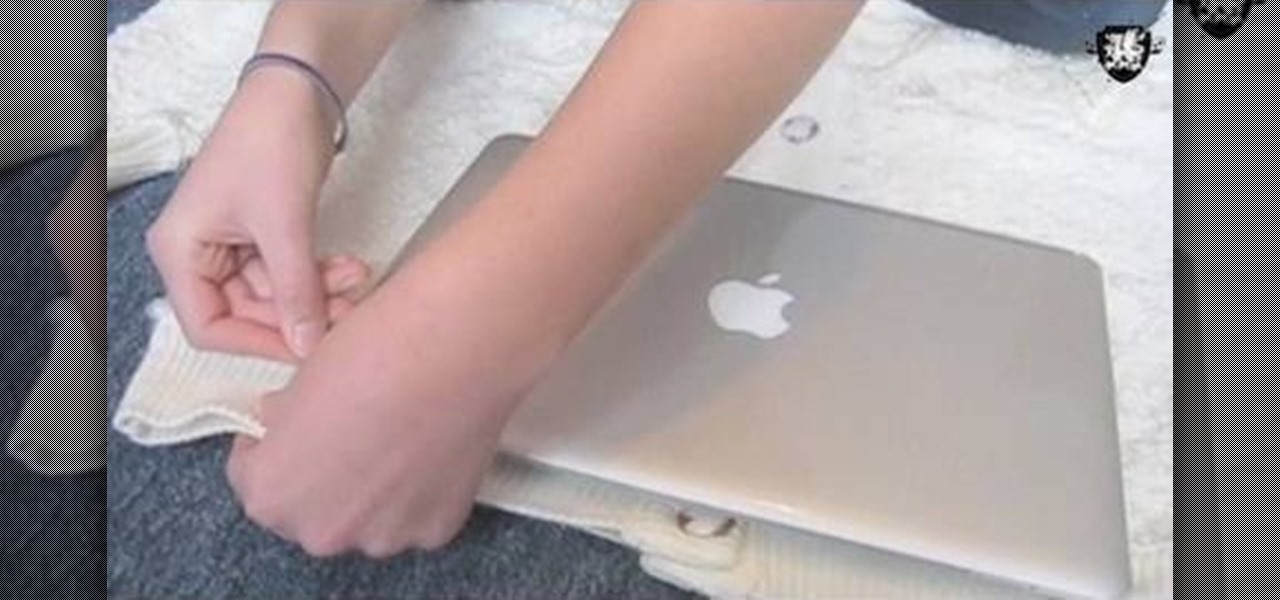
In this tutorial, we learn how to make a sweater for your laptop. First, grab an old large sweater and cut it out to the same size as your laptop. After this, set the rest of our sweater to the side and put the right sides of the sweater together. Then, pin and sew the three cut edges, but do not sew them closed. Sew with a zigzag stitch on the edge of the fabric. After you're finished sewing, use this on your laptop and use the rest of the fabric you have left over to make additional sweater...
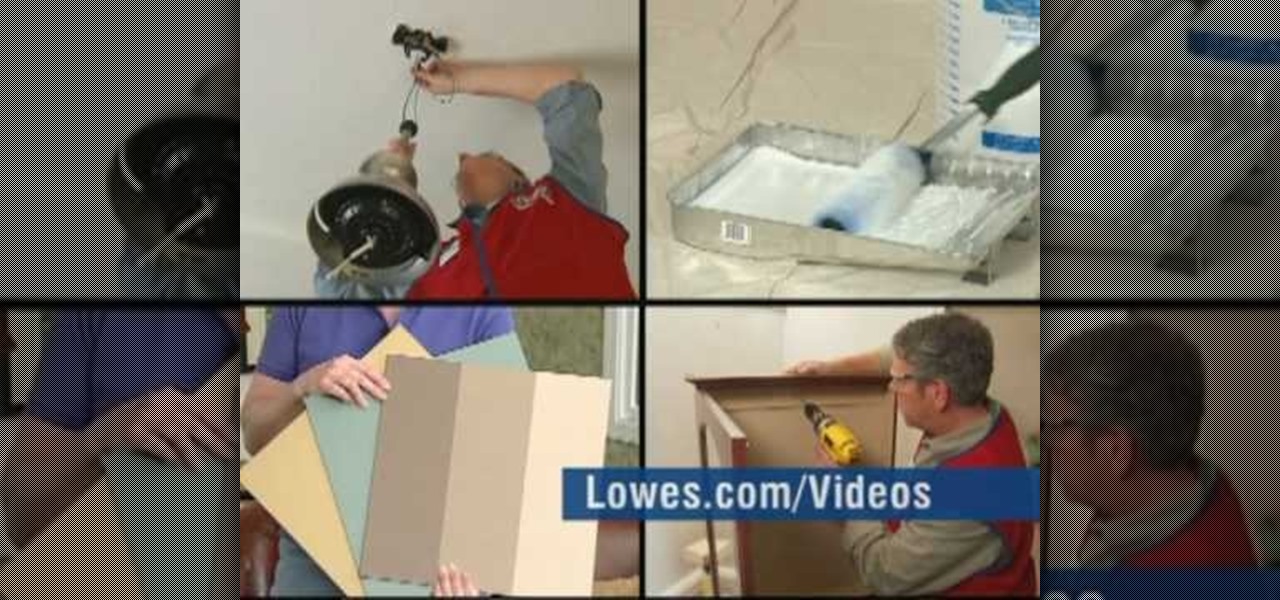
In this tutorial, we learn how to paint with basic latex painting techniques with Lowe's. First, you will need to determine how much paint you need by figuring out the room size. Next, you will need to paint the ceiling and apply blue painter's tape to all the areas you don't want paint to touch. Make sure to stir the paint before you use it and open up windows and fans to circulate the air. Cut the edges by painting around 2" inside first. Once finished with the ceiling, start cutting the ed...
In this tutorial, we learn how to cut your friends in half with film effects. To do this, you will need an actor, a still frame of blood, and some gory looking meat. Have your wounded actor lay on the floor with another actor laying next to him. Then, have them all leave the frame. Next, bring all the footage in After Effects and bring in the meat picture as well. Add blood and the meat in the pictures and remove the lower half of the body. Play with the colors to make it look more realistic,...
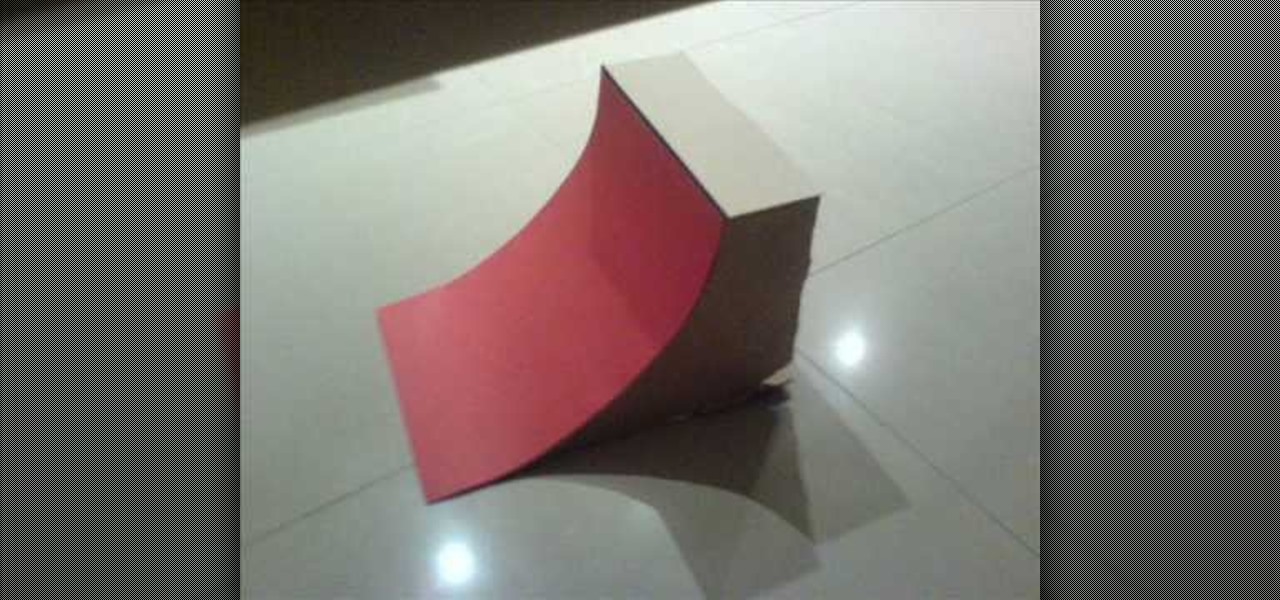
This is a video tutorial in the Hobbies & Toys category where you are going to learn how to build a Tech Deck quarter-pipe. For this you will need hot glue gun, hot glue sticks, coat hanger, cardboard, card and scissors. First cut out the three pieces of the frame out of the cardboard. Then glue a support to the bottom of the 3 pieces. Now glue the card on top of the frame. To make the coping, cut off a length of the coat hanger that is equal to the width of the quarter -pipe and glue on the ...
This is a video tutorial in the Arts & Crafts category where you are going to learn how to make mini album pockets. Take a 6 x 6 piece of card stock and cut it at 3 1/2. Now score it at the halfway mark and fold it backwards. Next score it at 1/2 from both longitudinal edges. Then you cut out along the 1/2 score line on one half of the card. Take a 2 1/2 " circle punch and punch a circle out of scrap paper. With this draw a semi-circle on the wider half of the card and watch the video for fur...
In this video, we learn how to make a tutu for Halloween. First, take your pink fabric and lay it out flat. Next, use your scissors to cut down a folded edge on the top of the fabric. Now you will have two pieces. Next you will roll the fabric down until you reach the end, then you will cut strips out of the fabric. Now, take your elastic piece and tie the strips of fabric onto it. You can use any colors you would like to make this. You can use pinks, oranges, blacks, whites, and any other co...
In this tutorial, we learn how to create a crafters tool caddy for your desk. First, you will need to gather a few pieces of chip board coasters and cut them to the specifications you would like your caddy to be. After you have done this, put your caddy together by locking them together using cut lines inside the middle of each of them. Once you have finished this, place additional pieces of chip boards inside to create different sections of the caddy. Once you are finished, place in your mat...
In this video, we learn how to easily make a tutu. First, you will need to gather all your materials, then cut the length of the ribbon or elastic you need. Then, grab your materials and cut out strips of it to place onto the elastic. After this, tie the tulle onto the elastic going from color to color as you continue. Once you reach the end of the skirt, you will have a cute tutu that is ready to wear. Making this yourself can save you a lot of money, and it can make several rather than just...
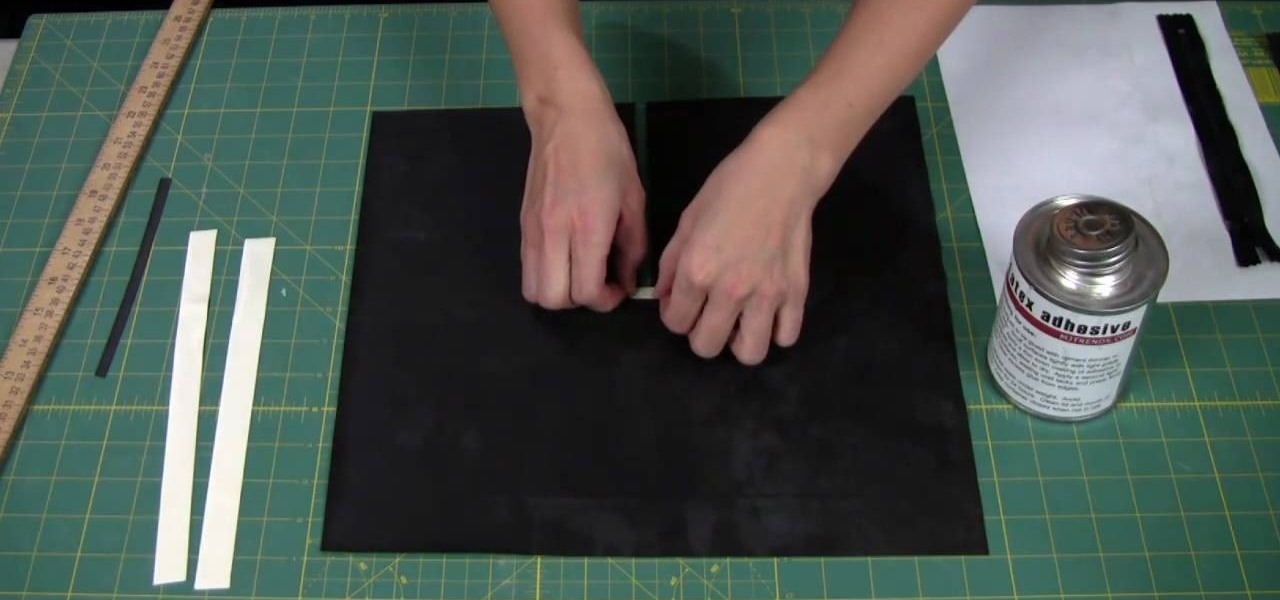
In this video, we learn how to add a zipper to a latex garment. First, apply glue to the zipper, using an ammonia based adhesive in one coat. Next, take a small paint brush from any store and apply a thin layer of adhesive to the zipper. The top will take about 45 minutes to dry, then turn it over and apply another layer of glue to the back. After this, cut two 1/2" strips of latex a little bit longer than the zippers. Also cut a 1/4" wide and 1" long piece of latex as well. Now, apply these ...
In this tutorial, we learn how to make a pumpkin pie with fresh pumpkin. First, take your pumpkin and cut it in half. After this, take out the middle of the pumpkin, then cut it into several large cubes in a large bowl. After this, place the pumpkin into boiling water and cook until they are soft. Once finished, take the filling from the middle and peel the skin off the pieces. Now mash these pieces up using a food processor and add together with the other ingredients for your pumpkin pie. Po...
This video will show how to decorate duct tape creations with Japanese Kanji characters, which are Chinese-based characters. After creating your duct tape stencil which will serve as a backing, you should go online and find a Kanji character which you would like to copy, print it out on paper, and cut it out with scissors. Place the characters on your duct tape and trace around the character, making a stencil of the character you would like. Finally, you need an X-acto knife, which you will u...
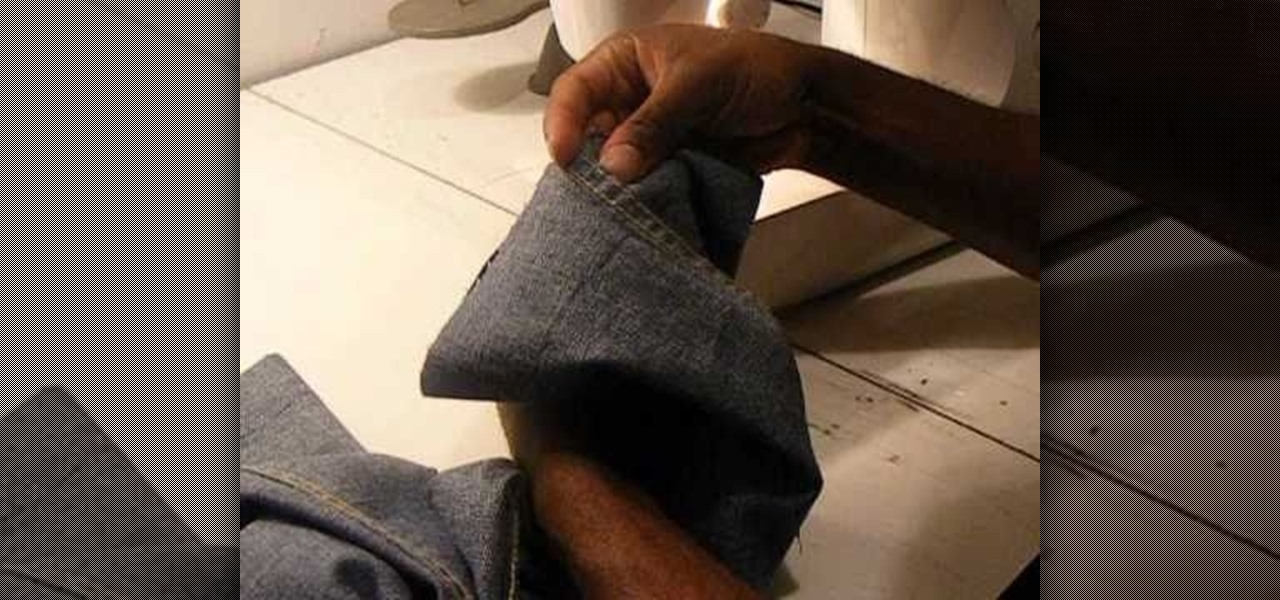
Are your jeans to long? How about your khakis? Corduroys? No matter what kind of pants you have, if they're too long, you can easily shorten the length with a few snips, a few marks and a basic sewing machine. The Brother LX-3125 compact sewing machine is used in this video, but any will do. See how to take a pair of jeans, cut and resew them like new again!
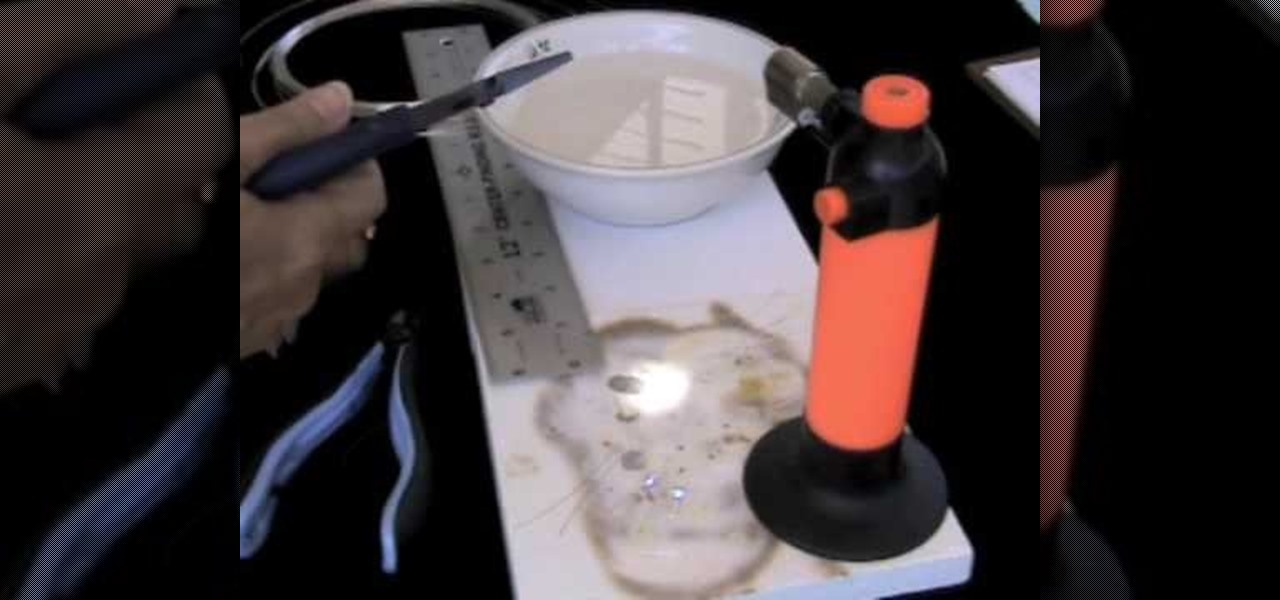
In this video, we learn how to make your own sterling silver headpins. You will first need a torch (one from your kitchen will work fine), a heat protected surface, bowl of cold water, and fine silver. Next, cut out two inch pieces (or longer if that suits you best). Put on safety glasses and turn on your torch. Now, pick up one of the piece you cut and put it into the tip of the flame. Quickly, the silver will ball up at the end of the pin. When it has balled up, place it on the cooled surfa...
This video will show you how to make a 2 dimensional object in a 3D world. A well-known example of this is a mobius strip, which can be made with a strip of paper, scissors, and some tape. After cutting out a long strip of paper, you should take the strip of paper, give it a half twist and tape it together, making a loop. This loop, or mobius strip, exists in a three dimensional world, where by following the loop, you seem to always arrive at the same point. Furthermore, the loop can by cut d...
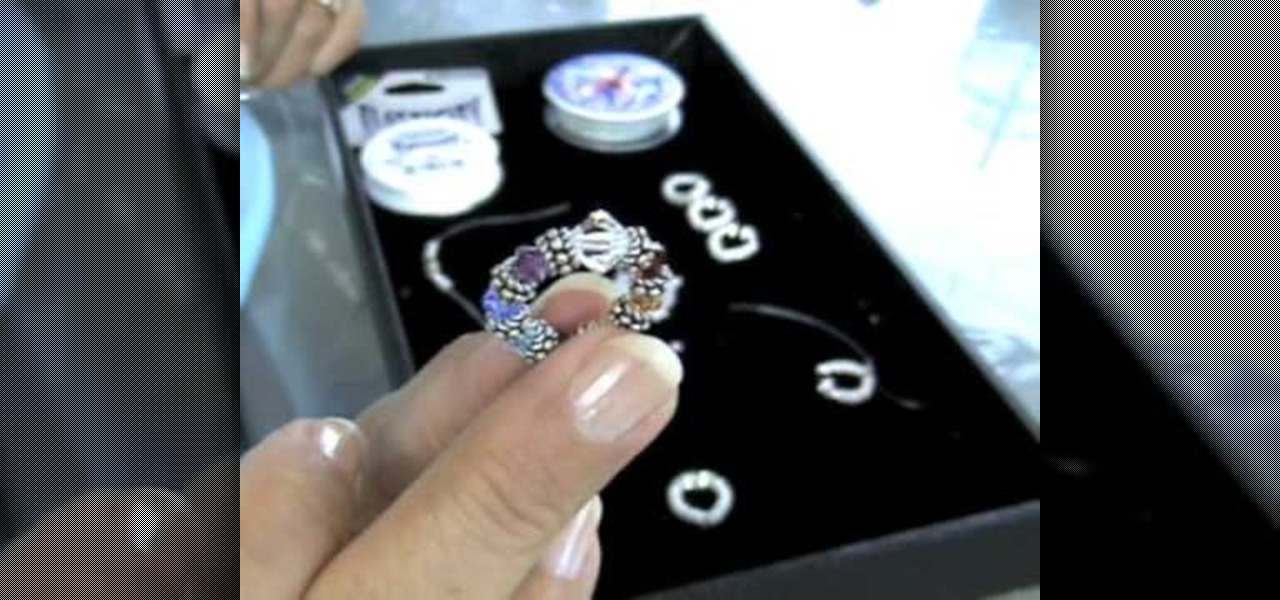
In this tutorial, we learn how to make an elastic Bali bead & crystal ring. First, you need to get all of your supplies together, which include: elastic cord, crystals, glue, beads, and scissors. Start by cutting a 6 inch piece of the elastic cord, then string a bead to the middle of it. Then take a crystal and string it onto one side along with another bead and a silver bead. After this, place more beads around the other side of the middle bead then put it around your finger to see if it's t...
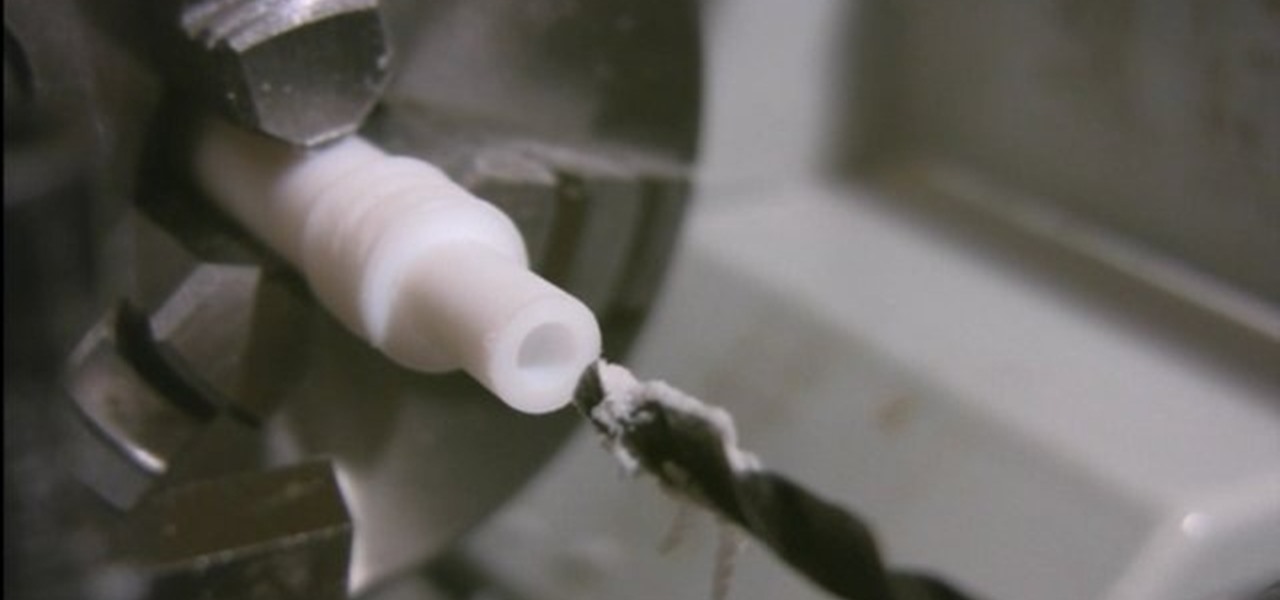
This video will show you how to create wheels for a fingerboard using a lathe. First, you should take a plastic tube and insert it into your lathe, using various drill pieces to cut down the plastic tube to the correct size. After this has been done, a drill which is attached to the lathe and adjusted to go straight through the tube can be made to create a hole through the center of the tube. You can then insert a small piece of metal into the tube in order to create the holder which will att...
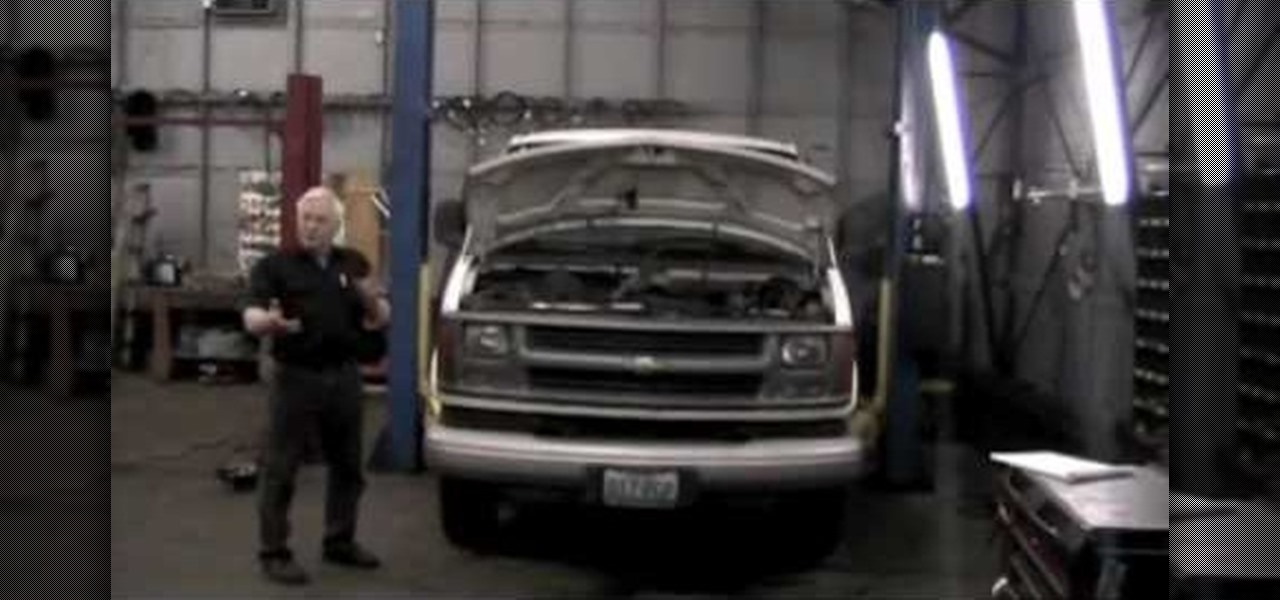
For most vehicles, the way you remove and replace (often referred to as R&R) an engine is by disconnecting everything from the motor and pulling it out of the frame. With the 2000 Chevrolet Express, the book time states 22 hours for R&R of the engine this way. But there is a shortcut, and it cuts the time nearly in half! It involves the backwards approach, where you lift the body of the Chevy Express off the frame, then pull the engine out.
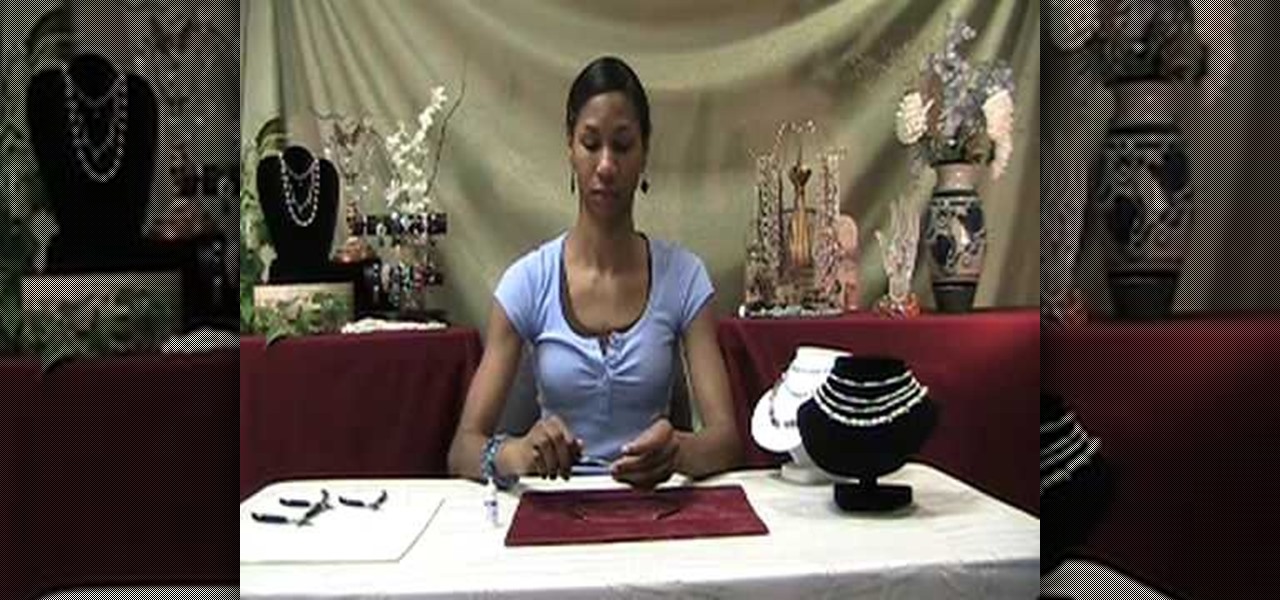
In this video, we learn how to use French wire when jewelry making. First, you want to take your wire and cut it to the length you need, using wire cutters. After this, you will place a stopper next to the pendant or bead that you are applying inside the necklace. Next, string on the clasp to the wire and then bend the end of the wire to the inside of the stopper, then cut the end of that with wire cutters. When finished, your clasp should be secure at the end of the wire and ready to hook on...
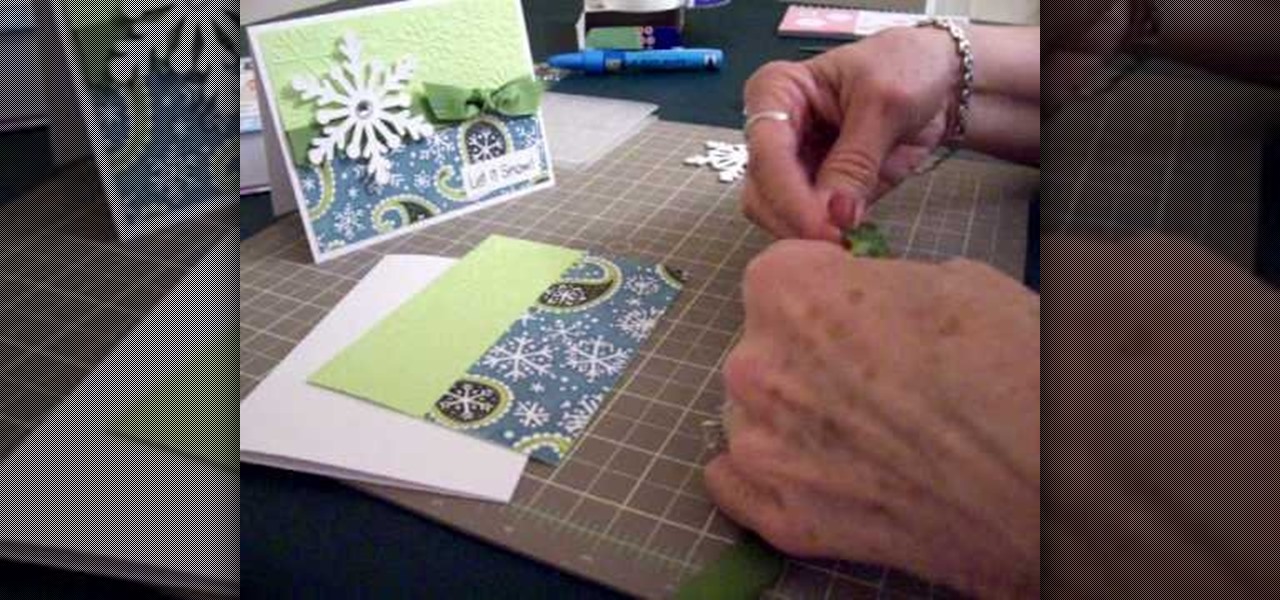
In this video, we learn how to make a snowflake card using Cricut Winter Woodland. You can find the snowflake on page 35 of the manual, then cut it at 3.5", cutting it four times to make it thick and chunky. The top of the card can be run through the Cuttlebug with a snowflake design, and the bottom can have a holiday snowflake print. The sentiment should say "let it snow" and you can place a green bow in the center next to the thick snowflake you make. You can write what you wish on the insi...
In order to pattern a wool blanket shirt, you'll need a blanket, scissors, a needle, and thread.
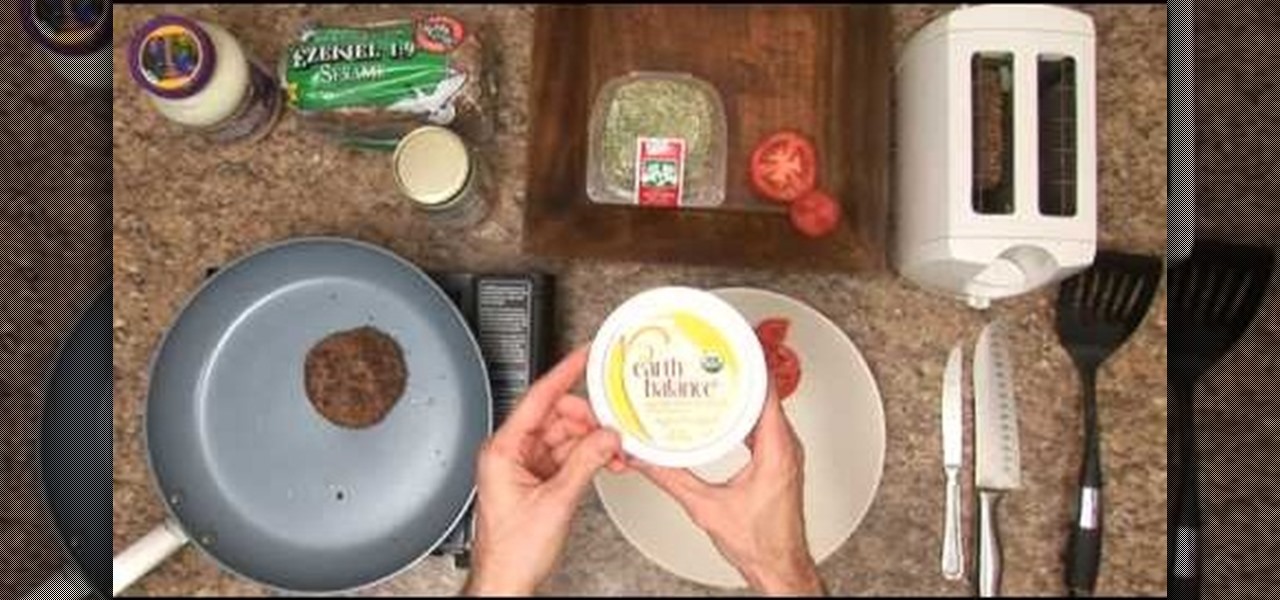
In this video, we learn how to make a vegetarian burger. First, you will need to have a vegetarian burger you purchase form your local store. After this, add some coconut oil to your pan and then place the burger down onto the oil so both sides touch the oil. Now, place some sesame bread into the toaster and start to cut up your tomato into slices. When the toast is finished, apply butter spread to the bread as well as vegan mayonnaise. Then, add on the tomatoes and alfalfa sprouts, followed ...
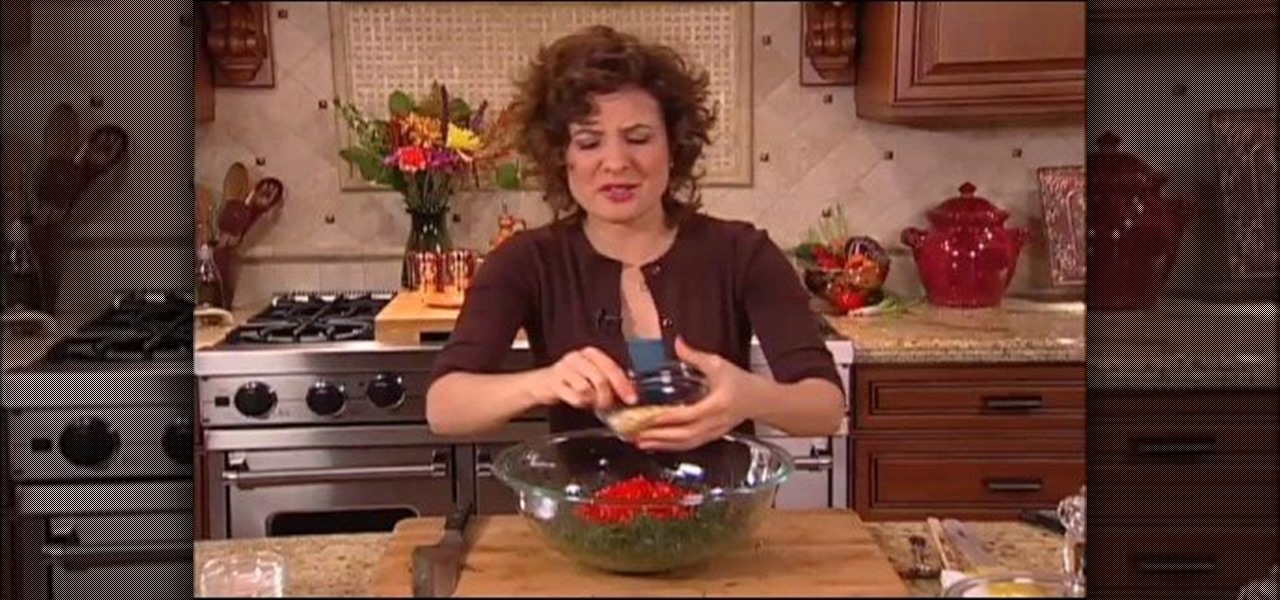
In order to prepare raw Mediterranean kale, you will need the following: kale, pine nuts, olives, olive oil, lemon juice, salt, and red bell pepper.
When you get you're "My Kitchen" cartridge from Cricut, you will need to test the cartridge, in order to make sure it works. Then, you should look at the manual. Remove the pages that you don't need: those in foreign languages.
In this video, we learn how to get Kylie Minogue inspired makeup. First, you will need to get cardboard paper and cut it out into an eyelash shape, cut around the individual eyelashes making them very long. Next, glue on rhinestones to the lashes and set aside to dry. Next, apply a blue eyeshadow to the entire eyelid going up to the brow bone. After this, apply a darker blue in the crease and the outer v, then blend colors together. After this, apply a shimmer color to the inner crease of the...
In order to make a neoprene necklace, you will need the following: neoprene, scissors, end caps, clasps, glue, and 2 pairs of pliers.
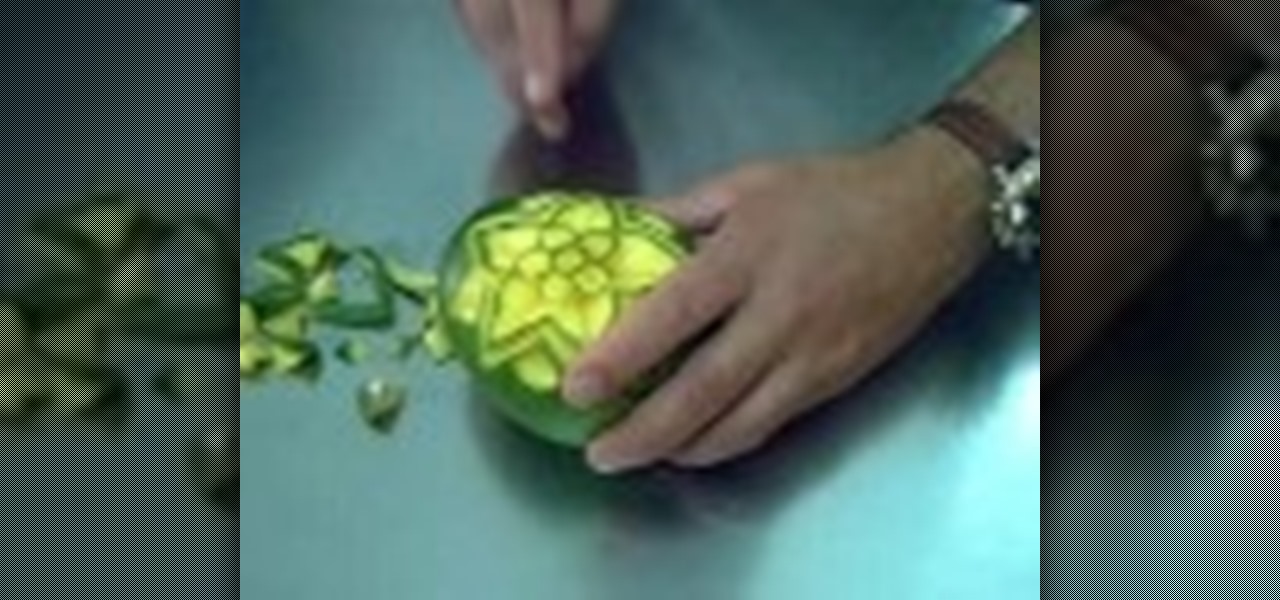
In this video, we learn how to carve a mango creatively. First, cut small circle in the middle of the side on the mango. Next, cut out circles around the middle to make a cute flower shape! Make sure you take the middle peel out so you can see the yellow of the mango show through. Carve in leaves on the side where the petals are. Continue to carve a smaller line to make the image look shadowed. Use your own talents to make this all your own and be as creative as you'd like to be. When finishe...