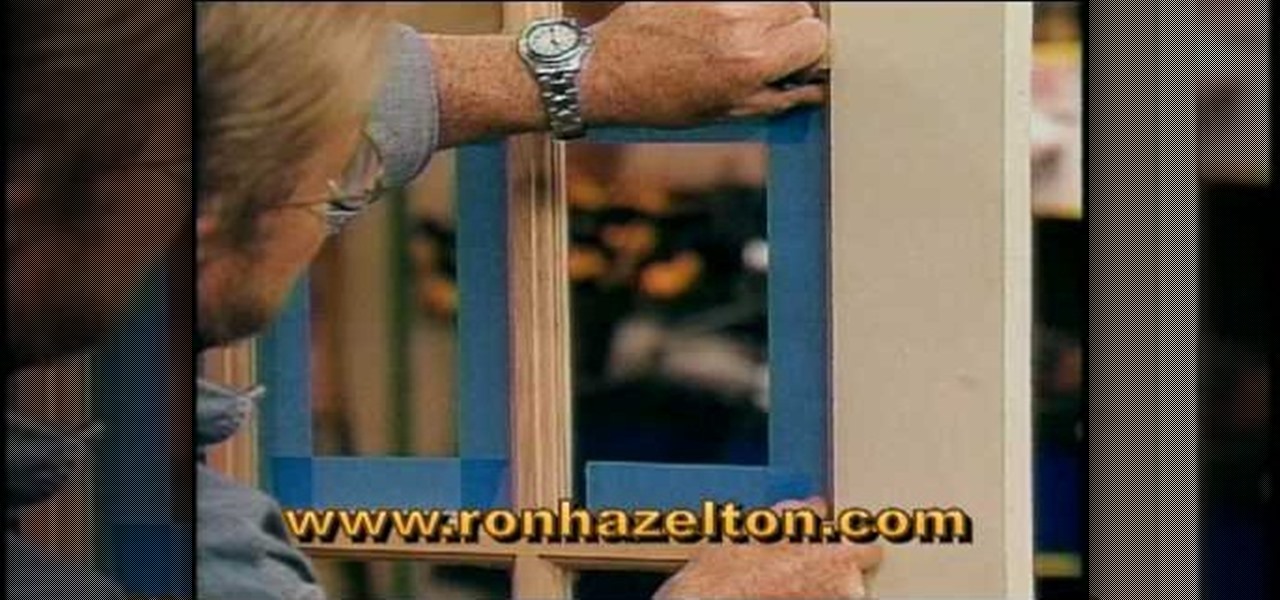
The big question is do you tape or scrape those window frames? If you want to tape. Put two pieces of tape that are longer than the length of each pain. Put them on the top and bottom of the pain. Use your putty knife to hold the tape in place and tear it off a little bit short of the edge. Then put two strips length ways on the pain that is also longer than you need. Take your putty knife and put it in the top corner to hold the tape and tear it off flush to the window frame. Then you paint,...

It's no secret that the enterprise sector is hot for augmented reality, but the move into the enterprise AR software market by one of the biggest names in industrial engineering announces the technology's arrival loud and clear.
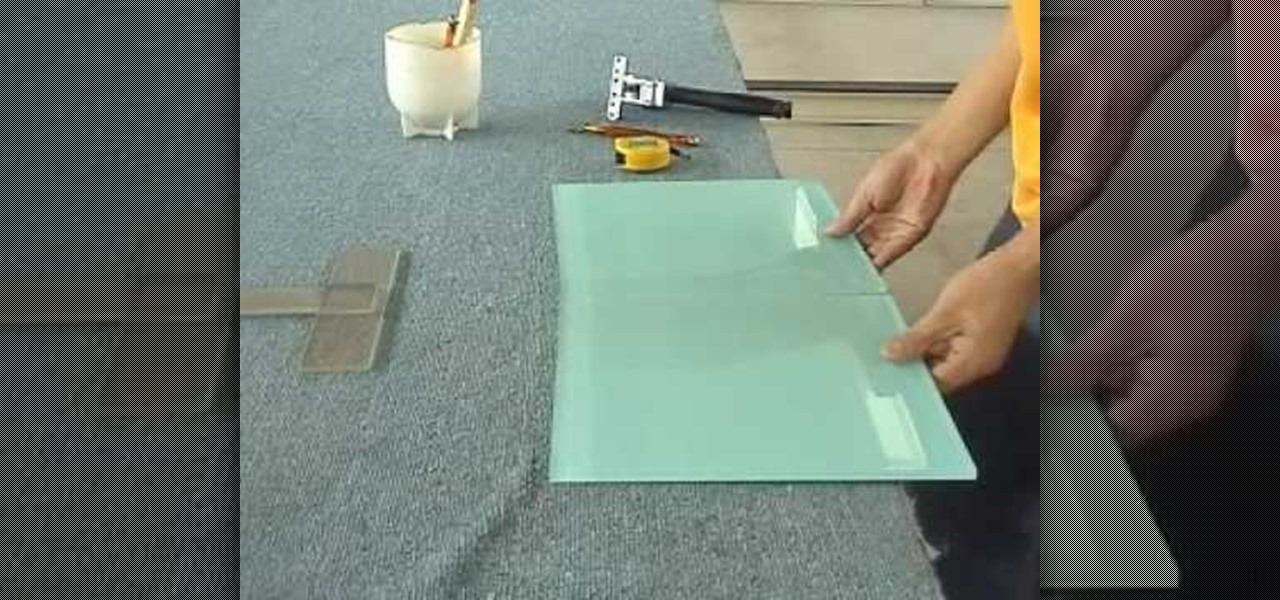
In this video, we learn how to cut large format glass tiles. First, measure out where you want the cut to be on the glass, then cut it with a sharp X-acto knife. After this, use a glass cutter to cut the bottom of the glass and create a crack what will go down to the cut that you just made. After this, break the two sections apart and you will have two piece of tile out of your large one. You can do this on any kind of tile and it takes just a few short steps. When you're done, sand down the ...

In order to create a fleece blanket, you will need 2 layers of fabric, for a no-sew version. Cut them evenly. Cut the 2 pieces of fabric to equal size. Cut away a 4" square from each of the corners. Then, cut 1" strips around the edges. Then, tie each pair of strips in a knot.
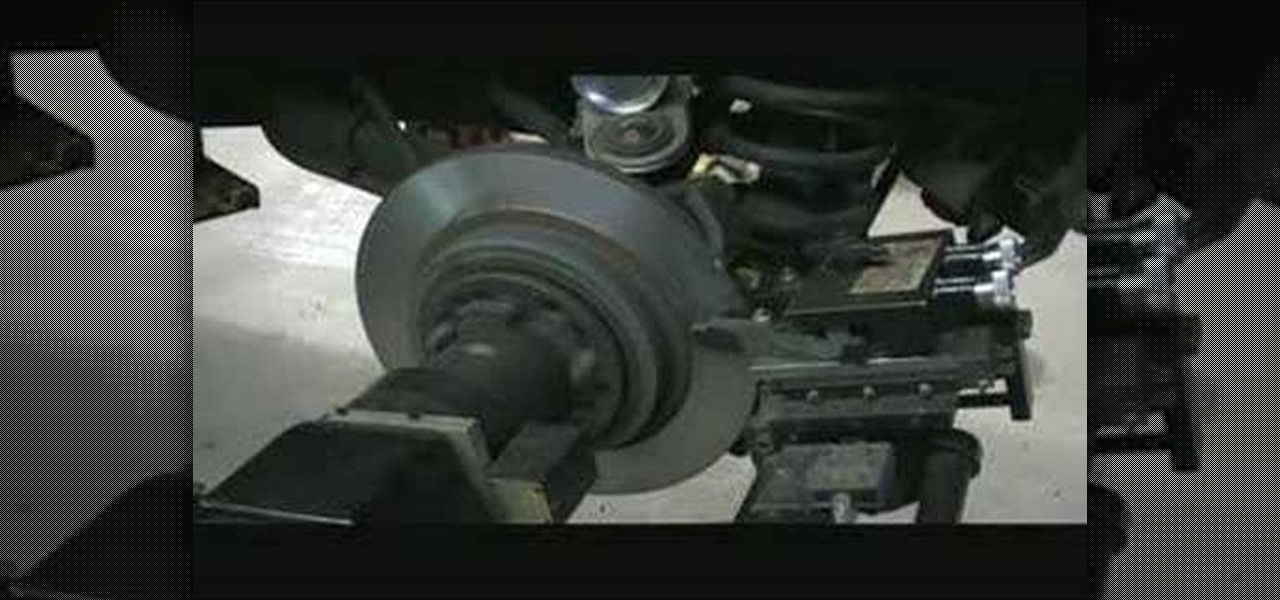
Before cutting the rotors select a centering cone that fits about halfway through the center hole of hub-less rotor or bearing spacer to center the rotor to the spindle. After select two identical clamps that fit the rotor without interfering with the machined surfaces of the rotor. Slide one clamp onto lathe shaft, open end out Slide spring, followed by centering cone. Slide on the rotor and outer clamp followed by the bushing, spacer, and nut. Tighten nut and Install damping strap. Adjust t...
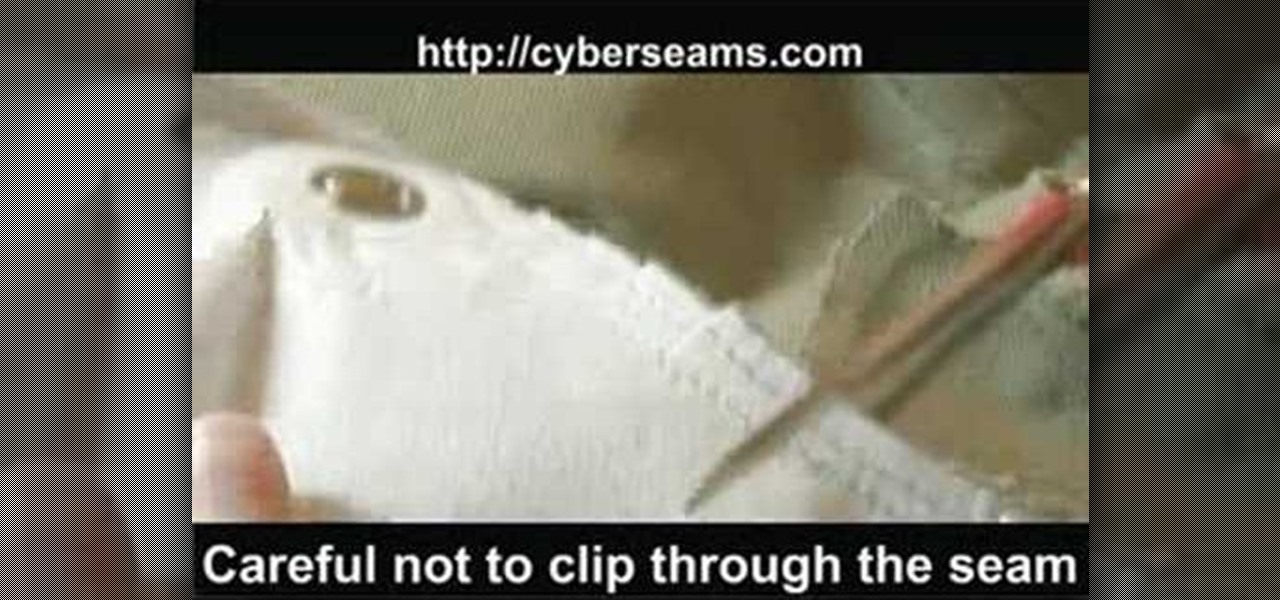
In this tutorial, we learn how to clip curves when sewing with rounded seams or edges. First, you will take your piece of clothing, then grab your scissors. Put the edge of the clothing (with the seam) and lay it flat. Then, put the scissors onto the seams with the very back of the scissors over the fabric. Clip close to the seam, but do not clip through the seam as you are cutting. Once you are finished, you will be able to sew in curves and will be able to easily get around the seams withou...

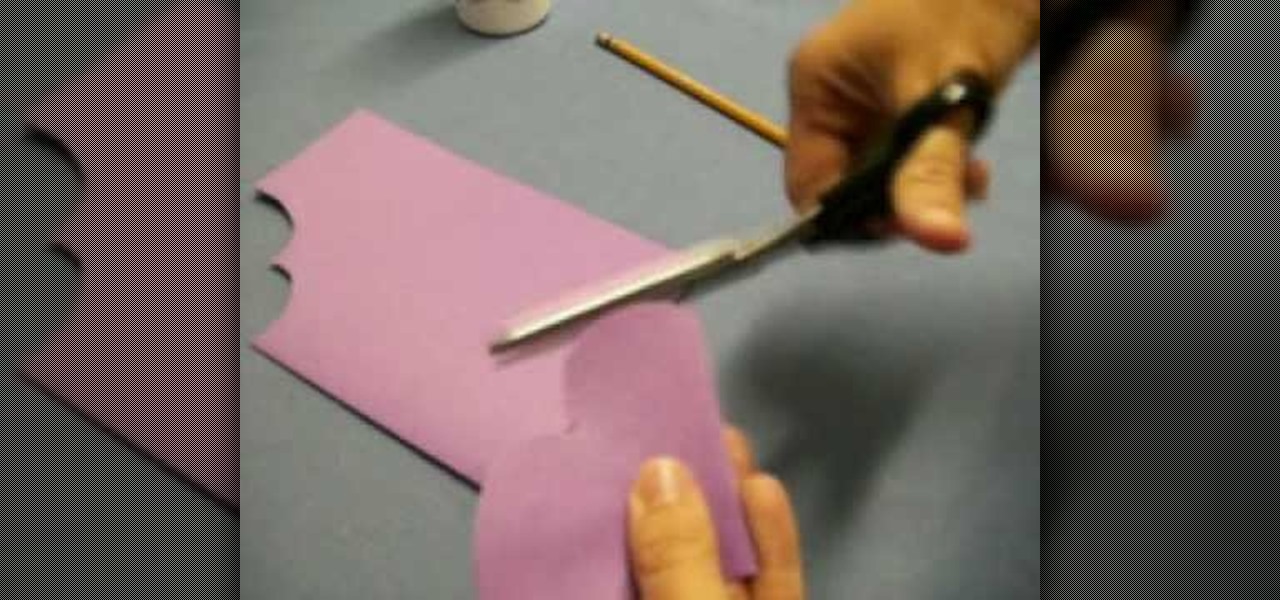
In this tutorial, we learn how to make a heart bookmark. First, take a sheet of paper and fold it in half, folding the crease. Now, take a pencil and draw two heart humps from one edge to the next. After this, cut them out, leaving the fold together. Trim any edges that aren't round, then add glue to the edge of the heart, and fold it over and let it dry. You can now decorate this will markers and ribbons. To use as a bookmark place your page in the center of the heart. This is a great craft ...
In this video, we learn how to cut a piece of glass with scissors, water, and a lighter. First, you will need to grab a lighter and place it under the piece of glass that you want to cut to heat it up. Next, you will place your piece of glass into a sink full of water and cut your desired piece. Make sure to cut carefully, as you can get hurt very easily when dealing with sharp edges of glass. Make sure you are keeping the piece of glass you are using completely submerged in the water, along ...
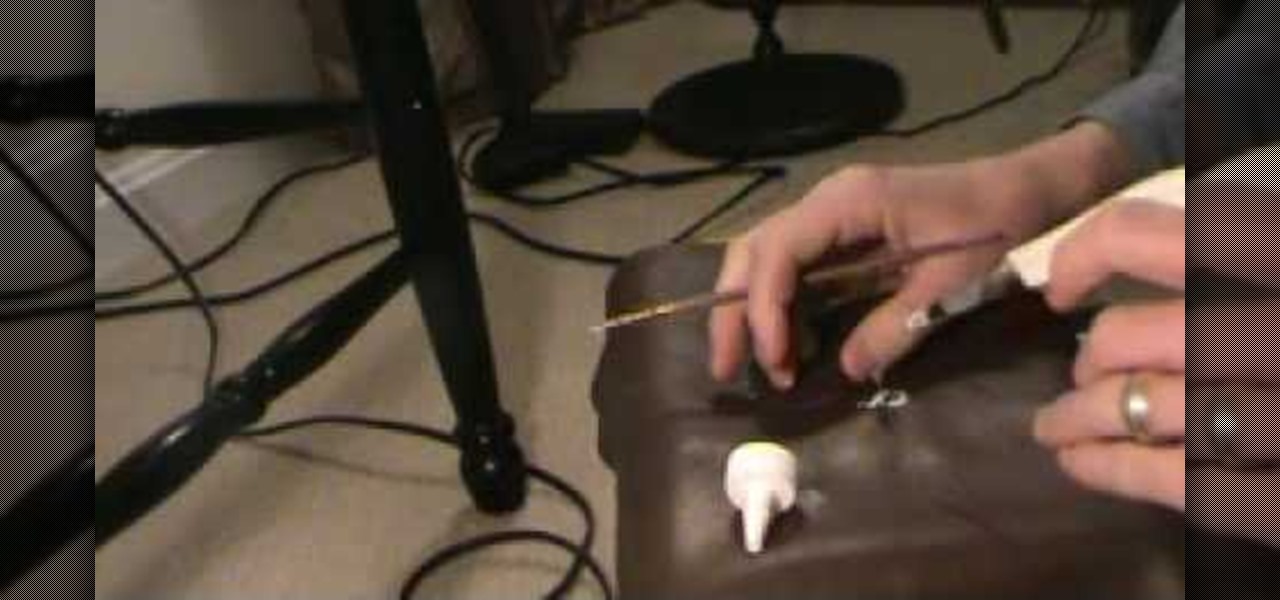
In this how-to video, you will learn how to make a repair in cut leather. This is useful if you have damaged leather you would like to repair yourself. Make a knife cut in the leather, and then cut and place a sew patch into the leather. Push it underneath the leather. Now, glue the sew patch in place with inexpensive craft glue. Rub it around the leather and edges of the cut. Wipe off excess glue with a damp cloth and wait until it dries. Place something heavy on it for a good amount of time...
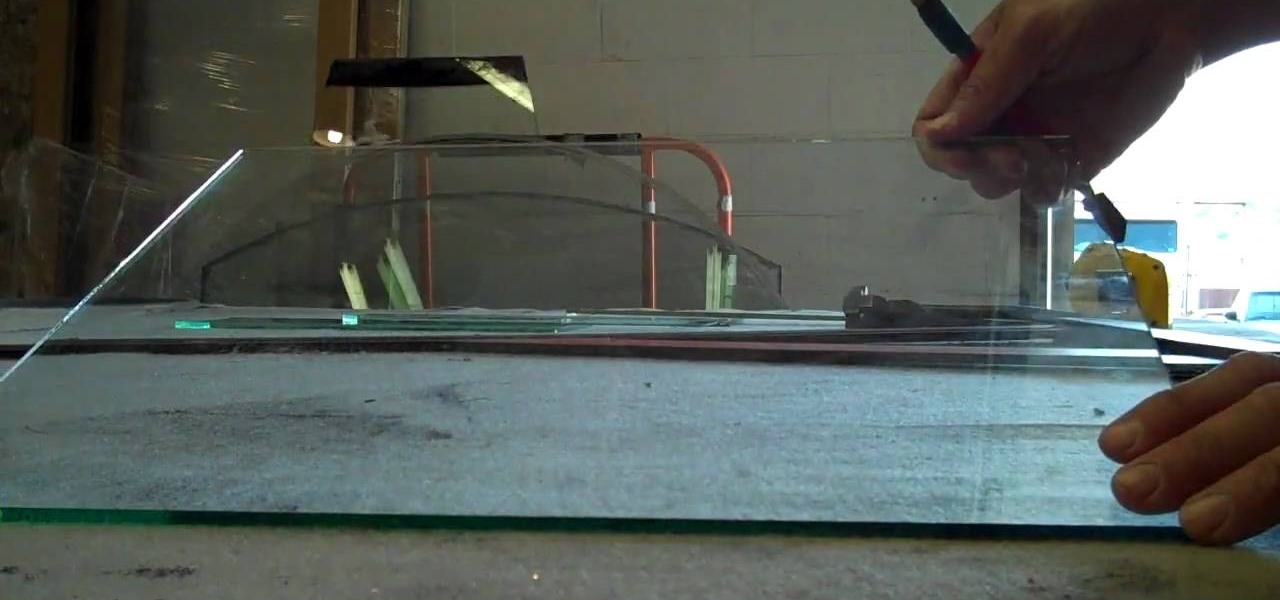
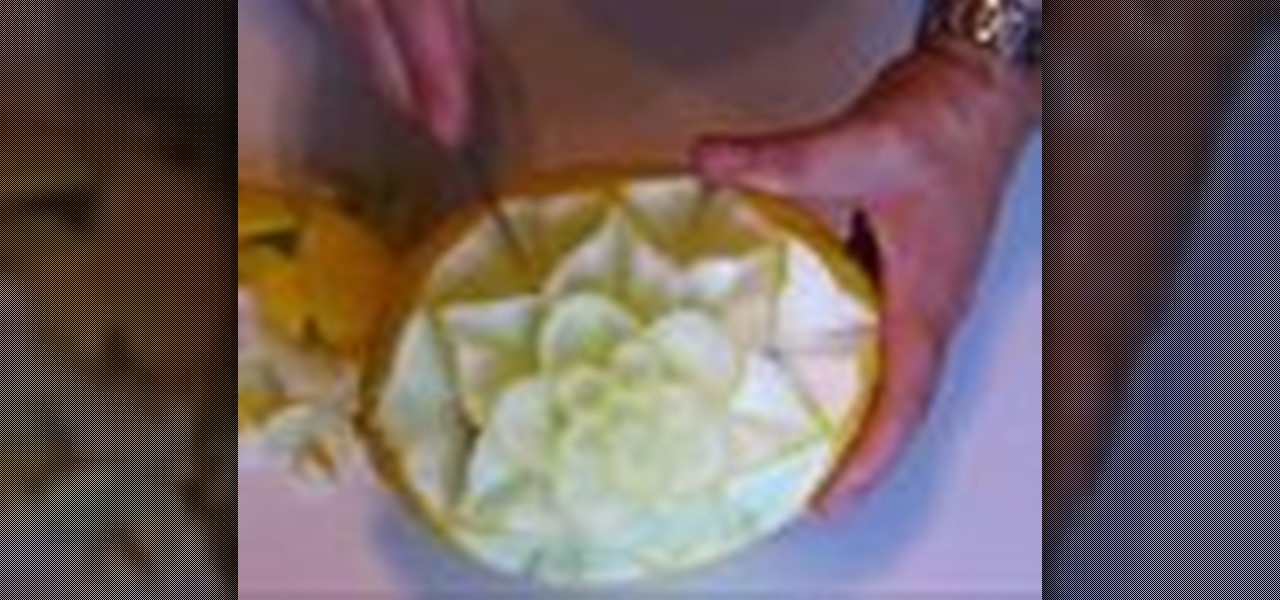
This is a Fine Art video tutorial where you will learn how to cut plate glass. Measure the plate glass and make sure the measurements are correct. Then place the guide along the line of the cut, take your glass cutter and score along the edge of the guide. If the plate is small in size, take the base of the cutter and place it underneath the score mark and apply equal pressure with your hands on both sides of the score. The plate will snap with a nice clean cut. Another way to snap the glass ...
Dragontrap uses 1/2 a yard of three different colors of fleece for this scarf project. She cuts the fleece into strips of twelve to sixteen inches in length and two to three inches wide. Then she sews the strips together lengthwise, rotating the colors of fleece. Once the strips are sewn together, she has a large rectangle of pieced together fleece This is folded in half with outsides together. She sews one edge of the scarf closed and sews all the way down the long edge of the scarf. Finally...
This video shows how to make a very realistic looking bowl of ravioli out of polymer clay, to be used in a doll house. She starts with flesh tone clay and uses a piece of plastic needlepoint to press the pattern of square ravioli into the clay. She trims off the edges and then cuts out the tiny ravioli. She uses the fluted edge of a toothpaste tube to imprint the edges of the ravioli. She uses a mixture of liquid polymer clay and red and brown pastel chalk to make the sauce. She puts the ravi...
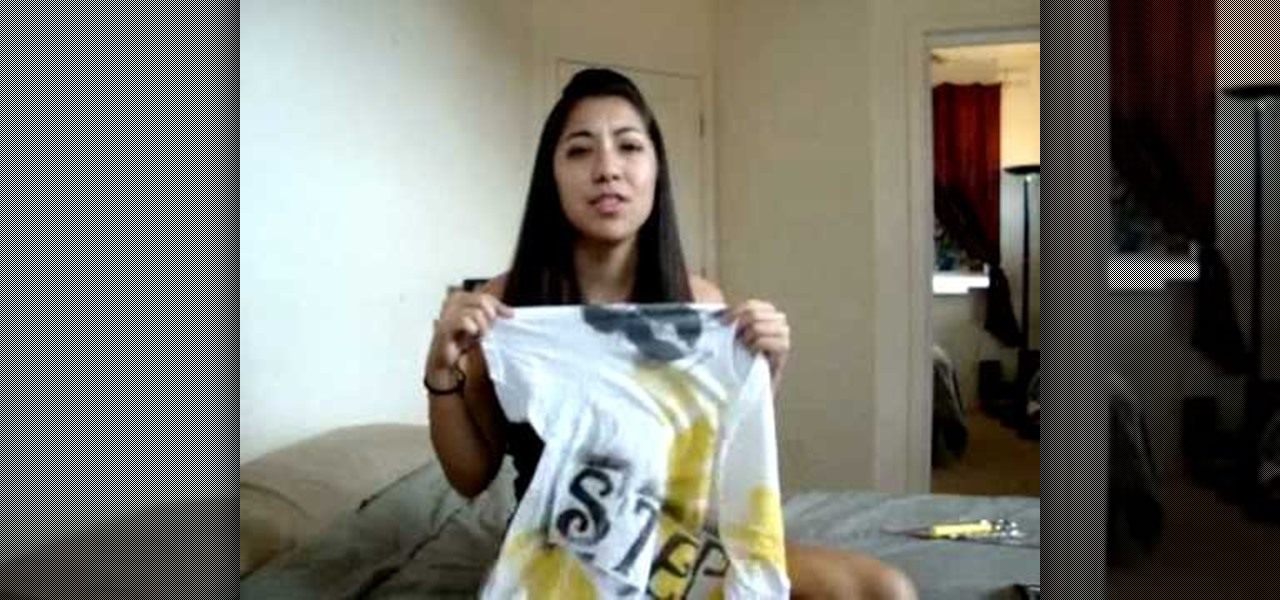
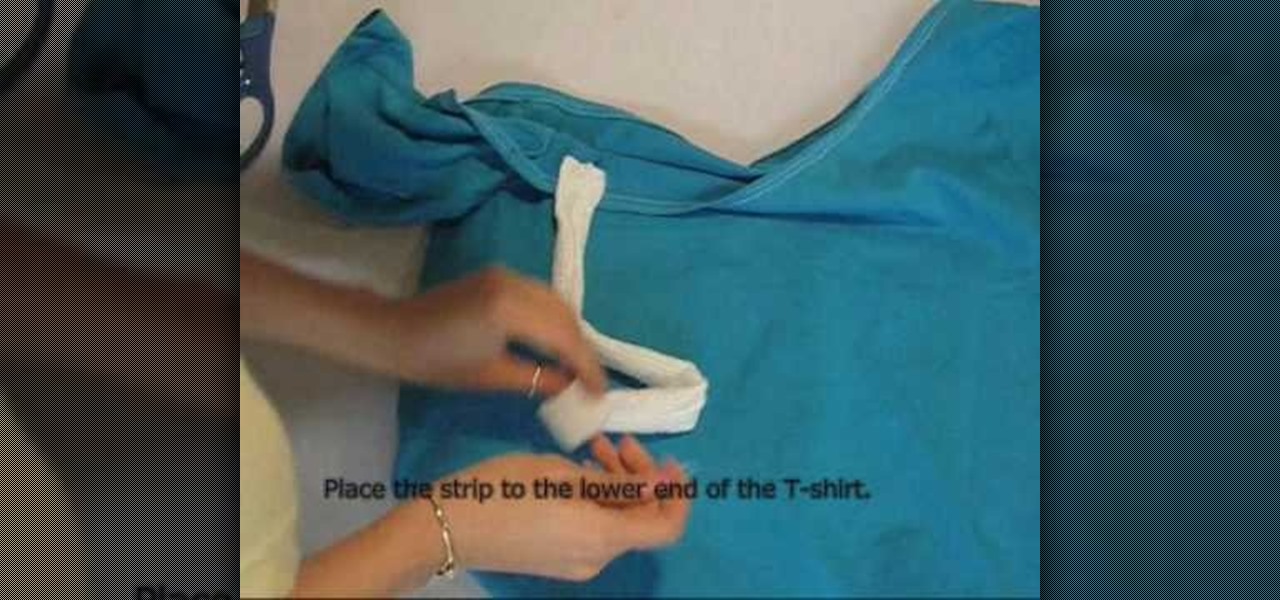
Reconstruct your T-shirts into more stylish attire with this video! The materials you'll need are a T-shirt, scissors, a ruler, and a pen or pencil. First cut off part of the sleeves (this part is optional.) The next thing is to cut the neck all the away around the front and back, cutting off the border. Now it's time to cut the bottom of the shirt right under the hem, underneath the stitching. Keep what you've cut to use for the ties for the shirt. (You can also use string or ribbon.) Measur...
1) First mark your intended cut lines - in this case follow a circular/spiral pattern. All cutting should be done with something like a pumpkin carver.
You’ve finally found the perfect fabric for that new dress – don’t let careless cutting ruin your project.
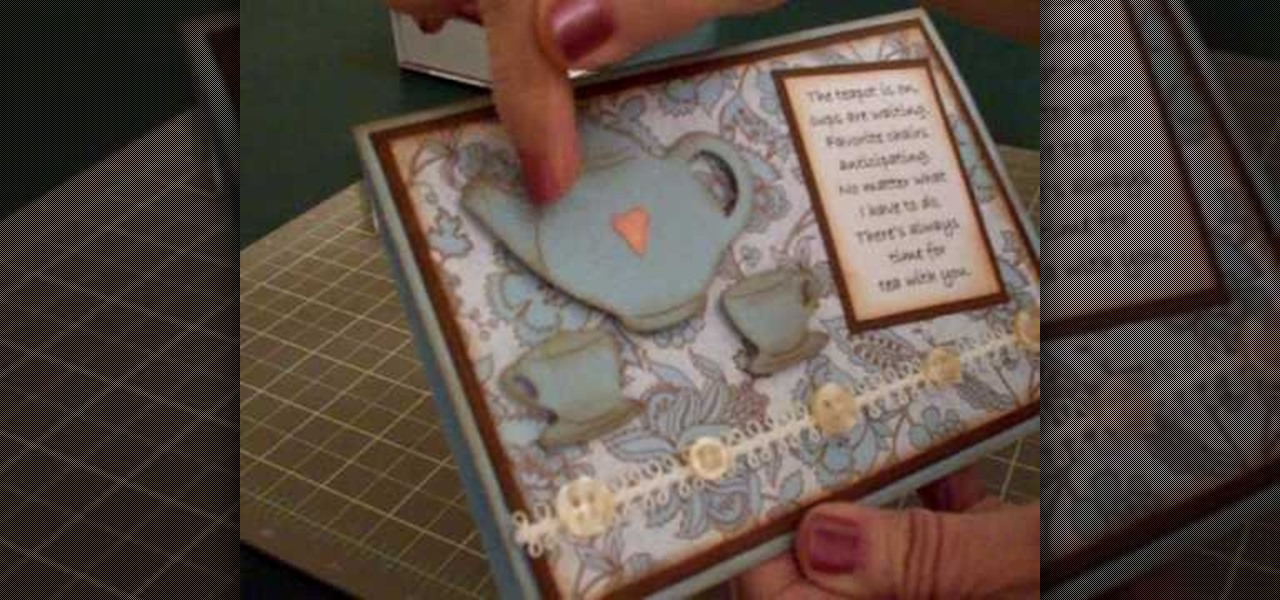
In this video, Mary shows us how to make a teapot card using Cricut everyday paper dolls. First, print out a sentiment that has to do with teapots and fade the edges of the paper. After this, cut out a teapot and cup from the everyday paper dolls on page 43. Cut the teapot and cut twice, then chop them so you can see the details of them. Place this on a paisley or flower background for the card, along with old buttons on the bottom of the paper. Make the card the size you would like, using yo...
This video features an image from Squizzlefly. The card is Spring suite 2. Use a regular A2 size card. Cut 8 1/2 x 5 1/2. Score in the middle. Go down another 1/2 inch and score. Take a ruler across the top of the fold. Make a pencil mark at every 1/4 inch. Should be 21 small hash marks. Measure down 1/4 inch on both sides. Go 1/2 inch in and make a dot every 1/2 inch. Go down 1/2 inch from the fold and make a dot every 1/2 inch. Make long-short, long-short cuts with the dots along the whole ...
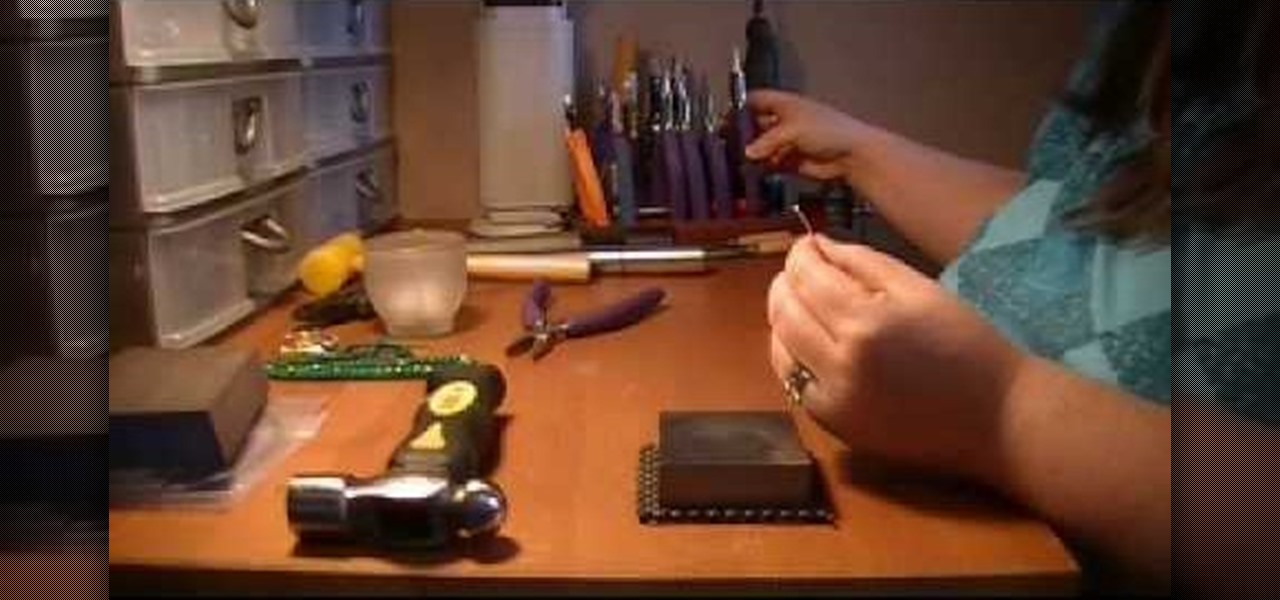
The video helps us to make sterling silver hoops earrings. It is one the popular style of earrings. These earrings can be made of different sizes, shapes, forms whatever we like. This art and craft work is shown by Natalie.
When Pokémon GO developer Niantic launches its Real World Platform for augmented reality gaming, it will run over 5G speeds courtesy of T-Mobile parent company Deutsche Telekom and the edge servers of its MobiledgeX subsidiary, the companies announced today.
Back in the '40s through the '60s, it took very little effort for gorgeous starlet Audrey Hepburn to start new trends. Whether she was sporting a short pixie cute (as in "Roman Holiday") or wearing buggy sunglasses (vide "Breakfast at Tiffany's"), Hepburn was always on the cutting edge.
In this video, we learn how to reconstruct a t-shirt into an off the shoulder top. First, take a large shirt of your choice color and cut along the line on the shoulder, leaving a 1/4" seam allowance. Next, roll the hem and sew with a sewing machine. Next, cut a strap 4" wide and fold in half, then sew along the edge. After this, use a safety pin to pin one side to the shirt and then to the other side of the shirt. After these are secure, draw marks along the neck line of the shirt. Cut out t...
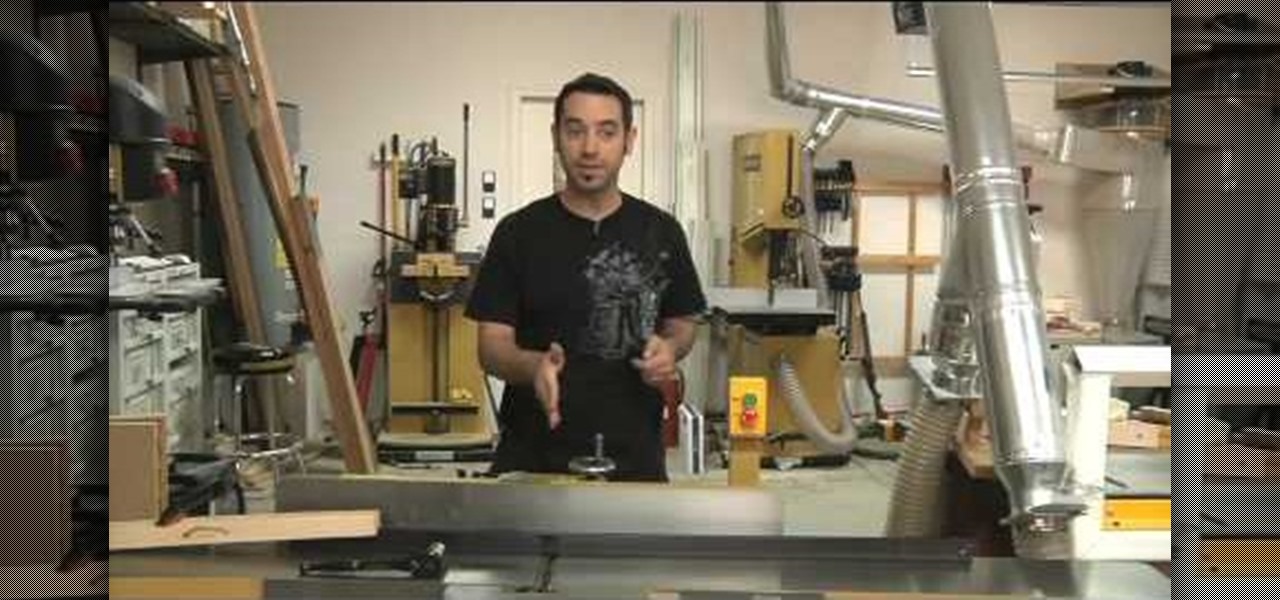
You will to learn set up and calibrate your jointer for optimal woodworking and creating a clean and straight edge on a rough board to later use as a reference. You will also learn a system on how to set up your knives to achieve the perfect cut using a jig and how to select the best jig to work with.
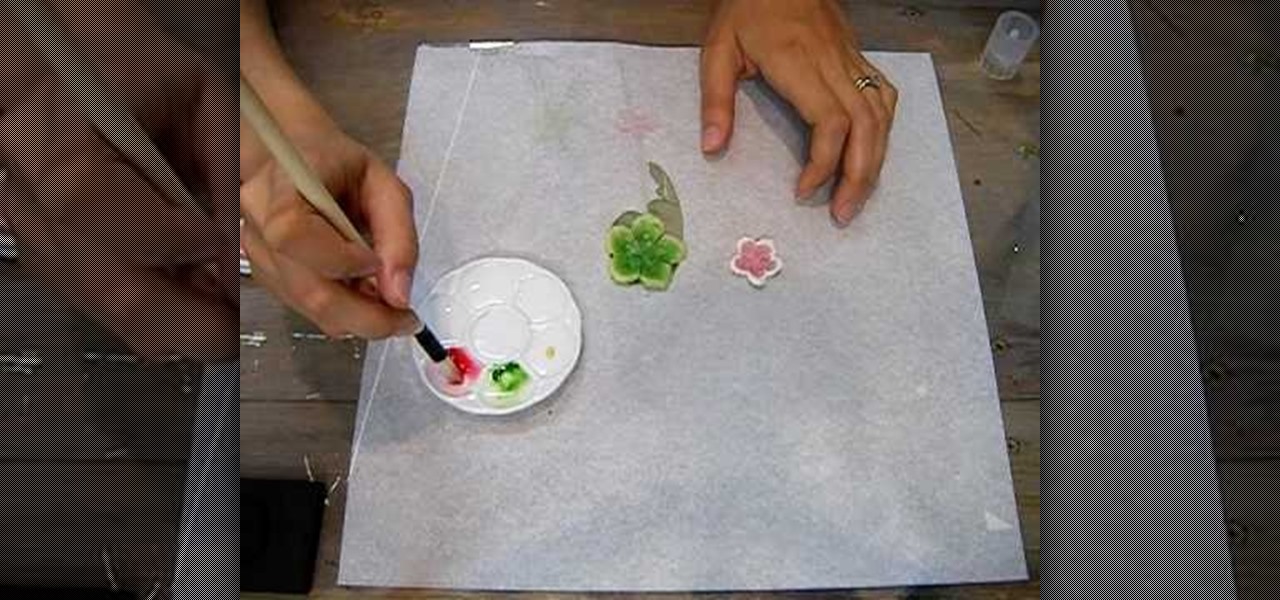
Supplies needed1. flower cut outs (you can buy them from A Piece of Craft)2. Water colors3. paint brushes4. clean water5. heat gun5. Water color pallet
Benson Trenh and Mark Norris show viewers how to build a bottle rocket using common household items. To build this creation you will need tape, a hole puncher, scissors and string. Also use a black plastic bag, or any color, for the parachute! Cut the black plastic bag into a square, any size you would like! Next, take the square and punch a hole at each edge of the square and string the string through the hole tying a knot. You should now have the parachute! For the body of the rocket, get a...
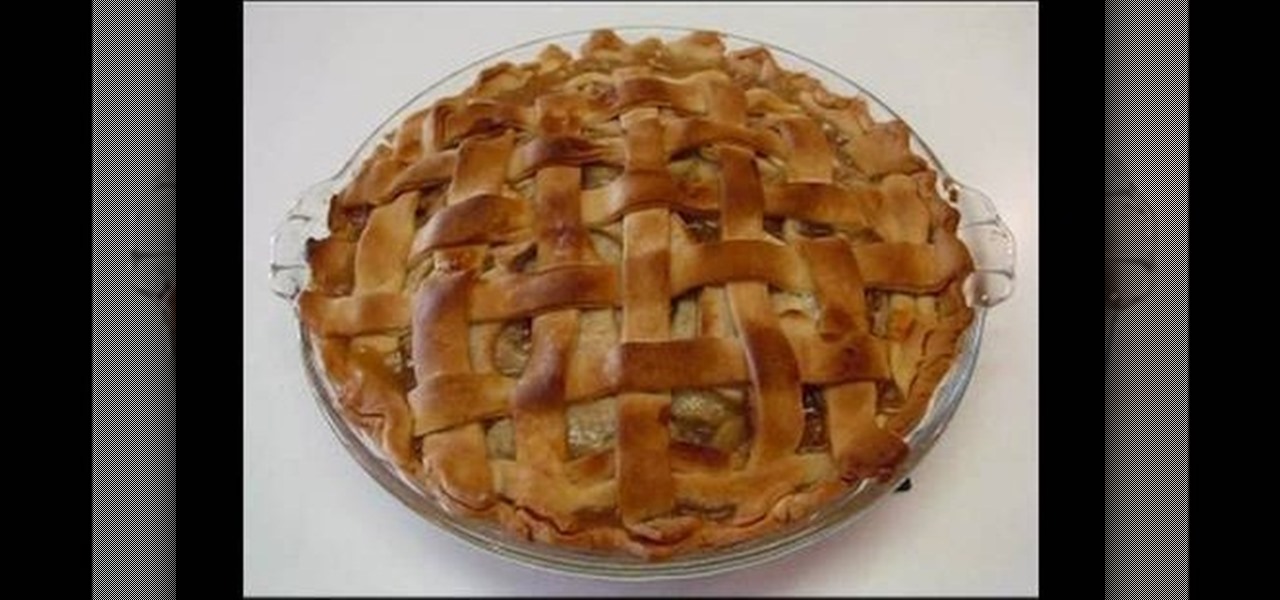
In this tutorial, learn how to make a traditional Southern apple pie with Granny Smith apples from scratch! Betty will show you a favorite recipe that she has used for over 40 years and never disappoints. Enjoy this delicious American favorite any time by following this clip from Betty.
Chef John from Food Wishes has created this video tutorial on how to make a butter pie dough from scratch. First, chop up two sticks of unsalted butter and put it in the freezer. Next, weigh out you flour. It should be exactly 12 ounces. Add a half teaspoon of salt. Put the flour and the frozen butter slices in your food processor. Pulse on an off until the mixture looks like coarse crumbs - not too fine, but no big chunks either. Add half of the mixture of ice water and apple cider vinegar. ...
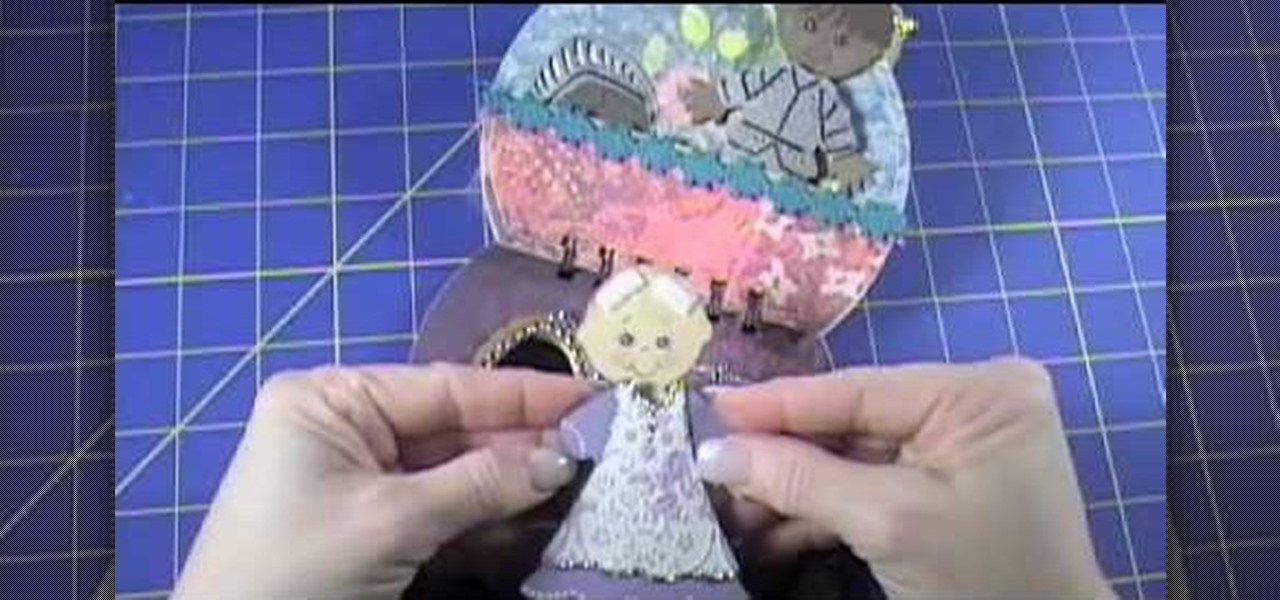
The video describes the making of Paper doll dress up and a Tin Purse to put the dolls inside. You can use the cartridge paper but regular paper should do. She was sticking to the princess themes in this tutorial. The tin comes from provocraft but creative imaginations also offers one. Instead of purchasing a tin you can find a old tin purse maybe once for a over sized set of playing cards. There is a tab feature you can use on the dolls but which children the might come off. She suggests usi...
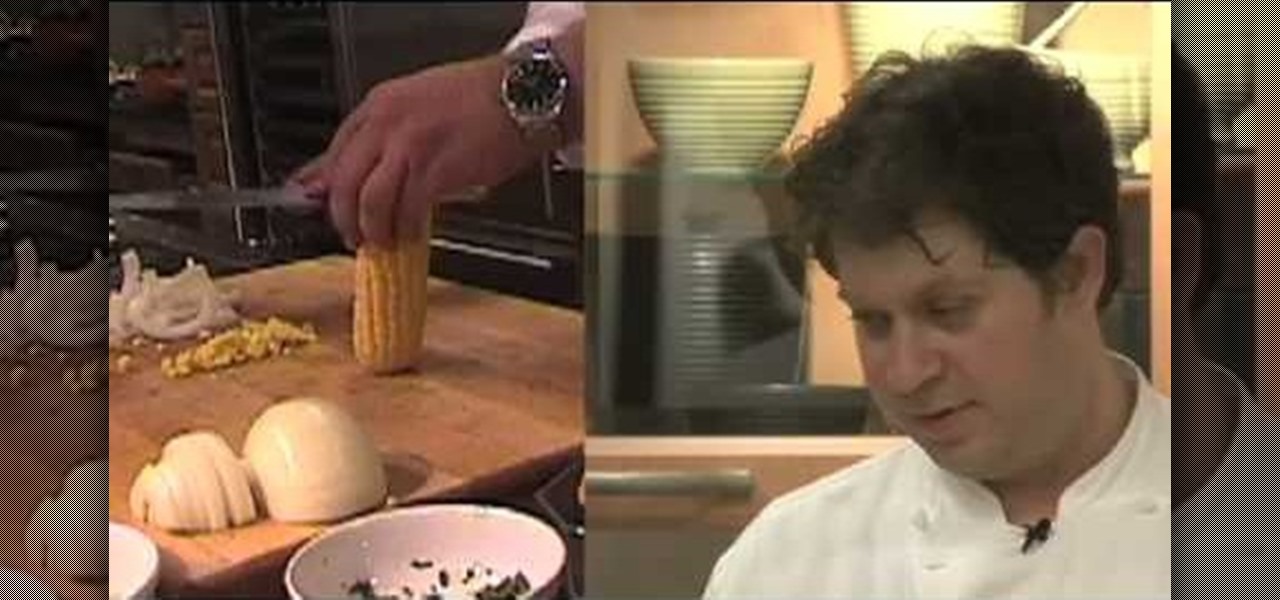
Here, Foodie tips instructs how to cut corn off the cob! First, get your corn on the cob. You will want to place the corn firmly, standing up straight, on your cutting board. Take your knife or cutting tool, place it on the edge and top of the cob and ride it down softly. You'll want to softly and slowly drag the knife down the cob so the corn does not pop everywhere. Hold the corn firmly to help the cob be stable. You can also lay a towel down to further stabilize the cob. Continue doing thi...
This video give you a step by step in how to cut your mango cheeks, and owszat shows you how to do it. Using careful tactics on the mango, you can see a slight edge. Where you distinguish your mango's center point is where you will be cutting from. Tear off your stem to have a flat relying surface. Cutting about five millimeters from the center point on each side, making one slice that releases your cheek, and doing the same for the other side leaves you with two mango cheeks and the center p...
Developed by the same team of engineers responsible for LightWave 3D, modo, lowercase, delivers the next evolution of 3D modeling, painting and rendering in a single integrated and accelerated package for the Mac and PC. And now, modo is a true end-to-end solution that includes true 3D sculpting tools, animation and network rendering! More than just features, modo is a truly elegant integration of technology, raw horsepower and refined workflow. With such a wealth of inbuilt features, however...
Otoro makes peeling oranges look easy. Step 1: Cut off the top and bottom edges of the orange.
Just weeks after being acquired by comedian turned producer Byron Allen for $300 million, The Weather Channel has tapped augmented reality studio The Future Group to integrate immersive augmented reality experiences into its broadcast content.
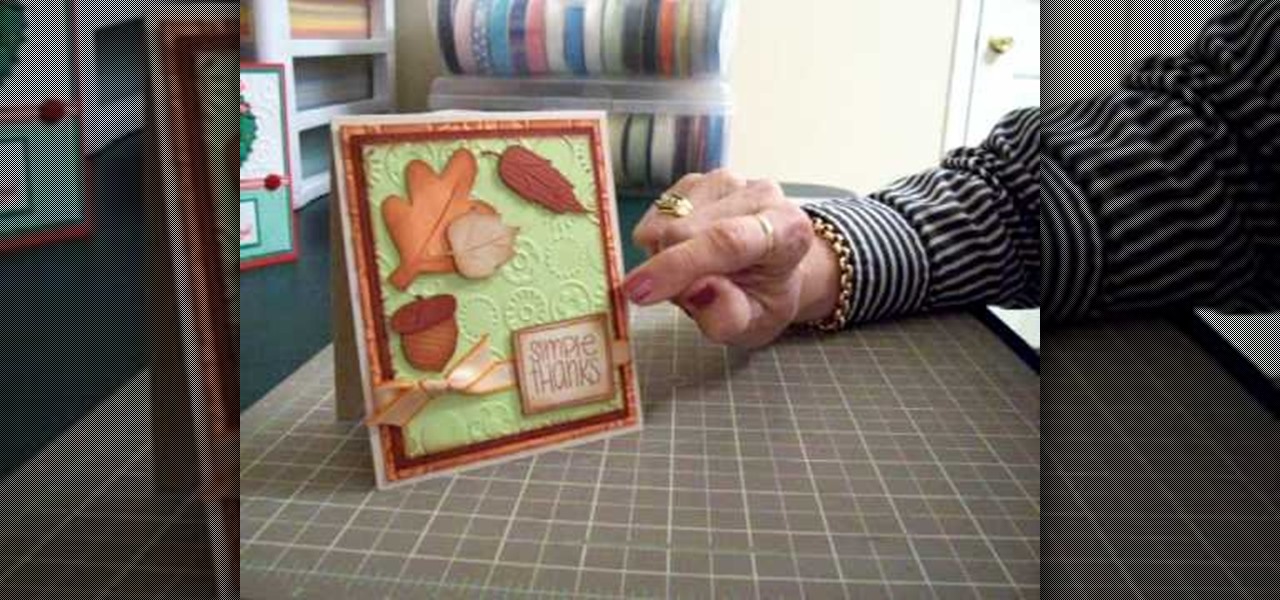
In this video, we learn how to make a thank you card using Cricut Doodle Charms and SYI. The card can be the size you choose. Layer orange, green, and brown mats, running the green and orange through the Cuttlebug using blue dots to give it texture. After this, ink around the edges with brown so the embossing shows up. Use the Cricut to cut the leaves and an acorn, using the Doodle Charms cartridge for one of the leaves cut at 2 1/4". You can also use the Stretch Your Imagination cartridge fo...
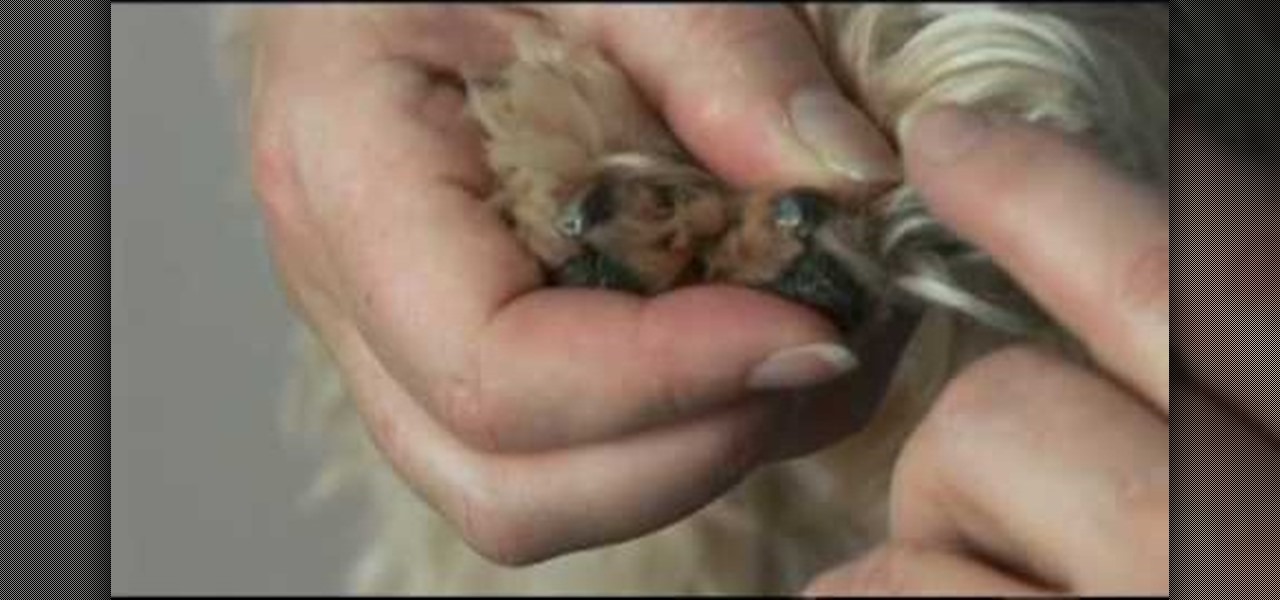
When it comes to trimming your dog’s toenails, there are several instruments you can use. In this video, Patrice introduces you to the toenail clipper and the toenail grinder. To begin trimming your dog’s nails, pull back the hair surrounding the toenails so you can get a better look at the nails. Then separate the toes so you can work with one toe at a time. Using a toenail clipper, cut the nail enough to where you can see the jelly-like substance. You will know when you haven’t cut en...
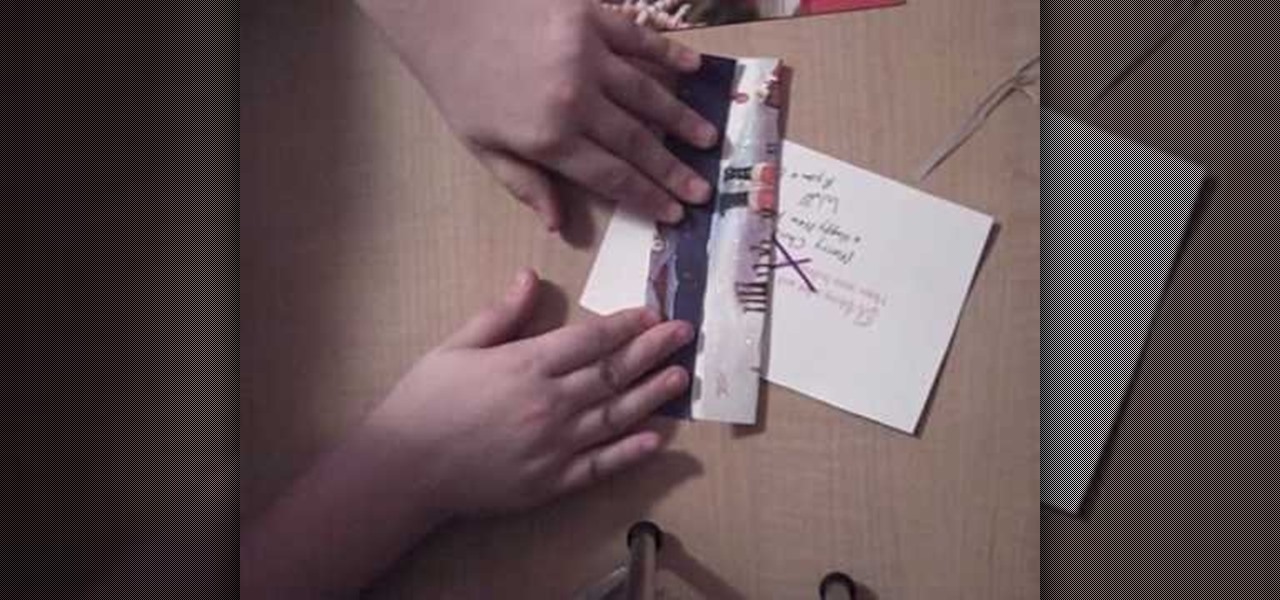
This video shows us how to make a homemade jewellery box out of a Christmas card.For that you need a pair of scissors,a tape,a christmas card,a marker and another card to draw your X with.First take the card and cut it straight down the middle into two pieces.Now take the back side piece of the card and cut off 1/4 of an inch from the left and the bottom portions.This will help to fit the cards together.Next use the extra card and trace an X on both sides of your card piece,in the middle.Take...
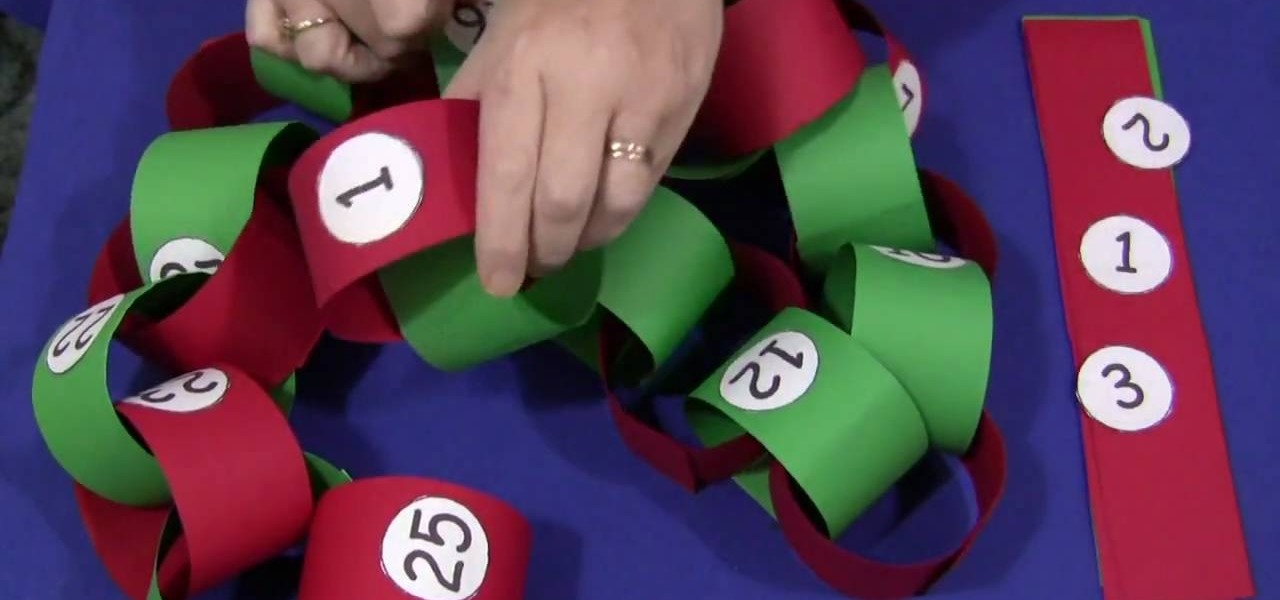
In this video tutorial, viewers learn how to make a Christmas countdown chain. The materials required for this craft are: construction paper, paper cut into small circles, glue and marker (optional). Begin by cutting the green and red construction paper into even strips. Users may choose to write out the numbers or print them out onto paper. Then cut out the numbers into small circles and glue them in the middle of the strips. Alternate the color of the strips each day. Then put the edges of ...
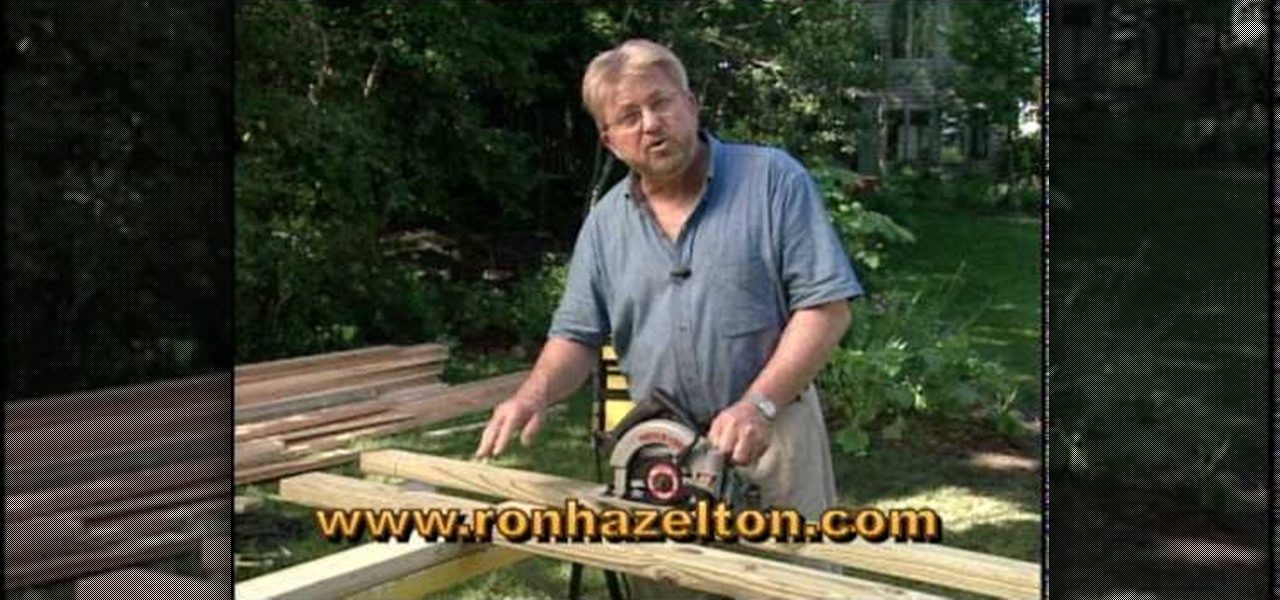
Ron Hazelton shows how to rip cut a very long piece of wood using a circular saw instead of a table saw. First, place sawhorses approximately every 4 feet under the wood. Choose the correct blade for the wood. Affix the circular saw with an edge guide. Set the blade depth so that the blade barely goes past the wood. Put scrap pieces of lumber on the sawhorses under the wood. Then the long rip cut can be a zip.
Chef John Gargone explains in detail on how to handle a knife, and also shows a knife cutting demonstration blind folded. Chef John shows you how to speed slice with a French knife. He uses a 10" knife and a 16" knife for more heavy duty chopping. You want high carbon steel so it holds an edge and will never rust.
Check out this home painting how-to video. Learn the proper techniques for applying paint to your ceiling and walls, along with tips on how to use brushes and rollers, how to cut edges on the ceiling, and how long to wait before removing painters' tape. Follow along with the steps to achieve an even finish in this interior design project. Watch this video tutorial and learn how to apply interior paint to ceilings and walls.
To make a support halter top shirt, you will need: Pattern for a basic bodice