In order to create 3D lettered signs in lights, you will need to first create an object. Open Illustrator. Type your letters on the page. Adjust the font to the style you would like. Click on "effect". Then, click on "3D". This will allow you to rotate the image for the angle that you will want to see it at.
Learn how to apply makeup for hooded eyes. First apply a light base to the eyes. Use a light shimmery color to the lid using a flat brush. Add a medium to darker color on the crease. Use the darkest color above the crease and blend in well. Small circle motions work best in blending the colors. Use a color close to your skin tone to blend in the area from the tear duct to the eyebrow. line the upper lash line with a silver liner to bring attention. Using a pencil brush, smudge darker color on...
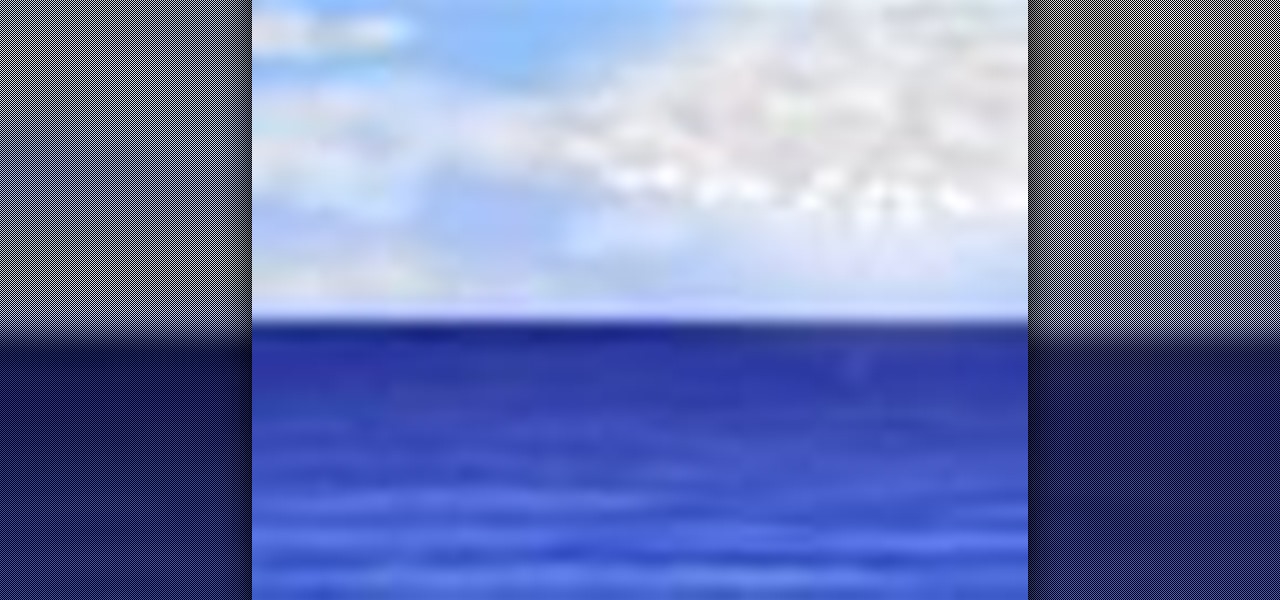
Pixel Perfect is the "perfect" show to help you with your Photoshop skills. Be amazed and learn as master digital artist Bert Monroy takes a stylus and a digital pad and treats it as Monet and Picasso do with oil and canvas. Learn the tips and tricks you need to whip those digital pictures into shape with Adobe Photoshop and Illustrator. In this episode, Ben shows you how to create cloud over a sea in Photoshop.

Instead of damaging hair with bleach and crazy color, small colored extensions give the same effect without the commitment. Use them for a night out or even as part of a Halloween costume. Check out this video hair styling tutorial and learn how to apply colored hair extension.

It's magical! The Magic Light Brush knows what color you are using and magically reveals the color of clear Color Wonder paint. This is a great mess free product to use for your child's next art project. This tutorial teaches you and your child how to use the Crayola Color Wonder Magic Light Brush the next time you want to paint.

With Crayola Recoloritz markers you can color and recolor for endless coloring adventures! These unique wet-erase markers wipe clean quickly and completely. These markers are a great way to teach your children to color between the lines. With this how to video you and your children will learn to use Crayola Recoloritz markers.

Paper embossing stamps a design into the paper, but doesn't allot for any color. Ink and chalk can both be applied to an embossed design for color and to bring out the shape of the embossing. Ink can add vibrant color, while chalk adds a soft finish to the embossed design. Watch this video tutorial and learn how to use ink and chalk on embossed paper.
This video tutorial will show you how you can mix henna in order to dye your hair. Henna hair dyeing does not induce a dramatic hair color change for most brunettes and darker hair colors.
This video will teach you how to create a wonderful Dr. Frank-N-Furter inspired look for the next time you watch the Rocky Horror Picture show.
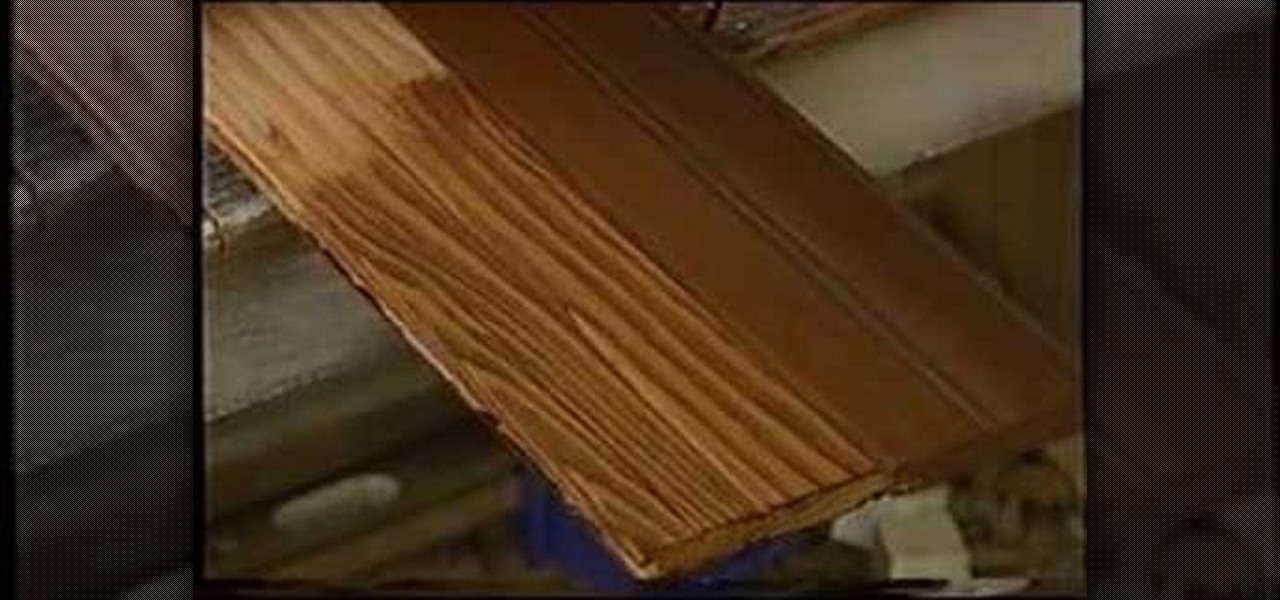
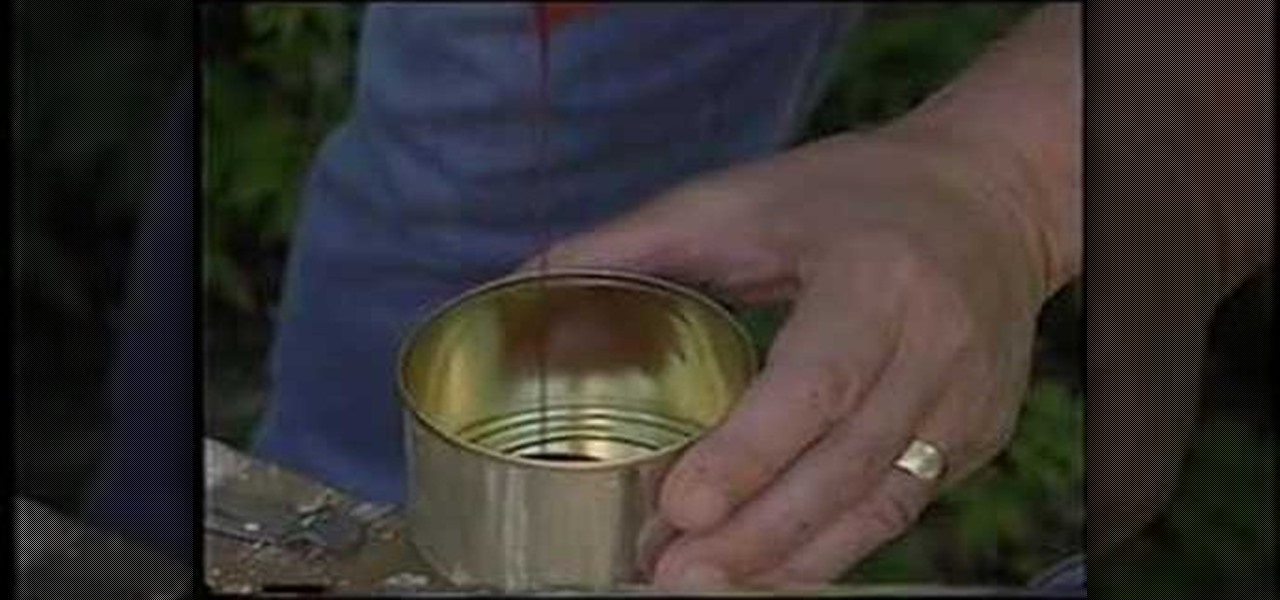
Tim Carter demonstrates how to stain wood to get the color you want. Watching these video tips allows you to be able to apply wood stain to match almost any color. If you get the right color stain and apply it properly, your new piece of wood will match color-wise and allow the grain of the wood to show through.
Tim Carter demonstrates how to blend or mix paint colors to get the perfect color for your job. Great video shows how blending paint colors really is easy and useful on any paint job.
This C++ programming tutorial goes through the use of functions, pointers, how to make fullscreen, and changing colors per line.
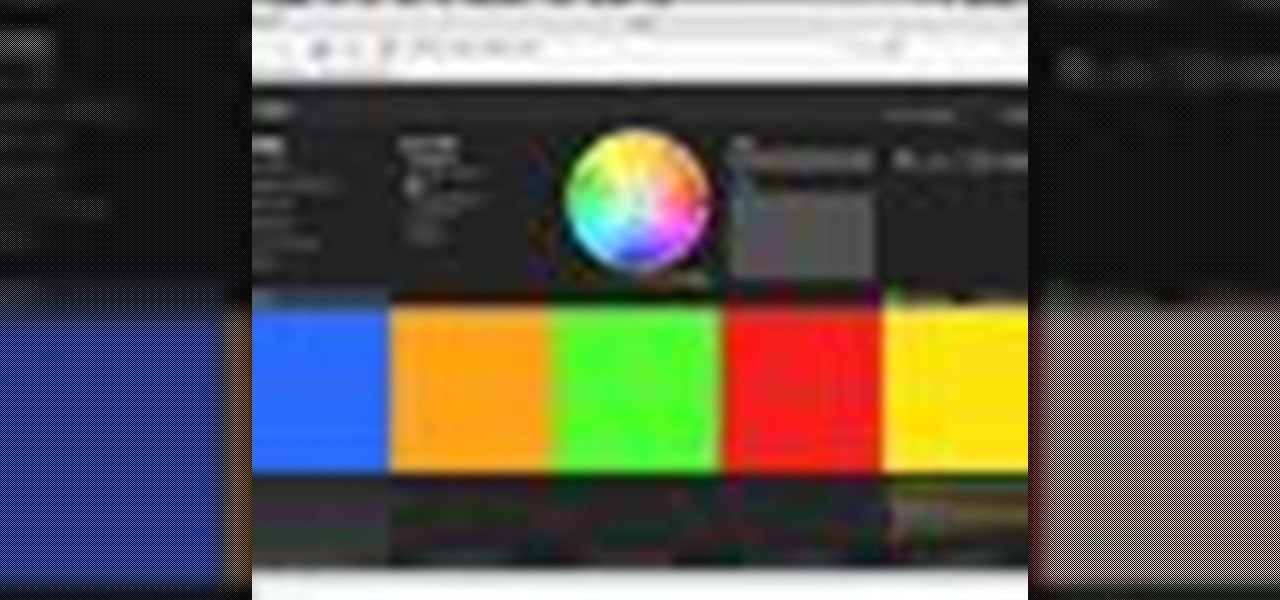
Kuler is a beta Adobe application at labs.adobe.com. It allows you to choose color schemes using rules or completely at random, then export the colors as an Adobe Swatch Exchange file for use in all of the Creative Suite applications. In this video tutorial you will learn how to create color schemes using Kuler.
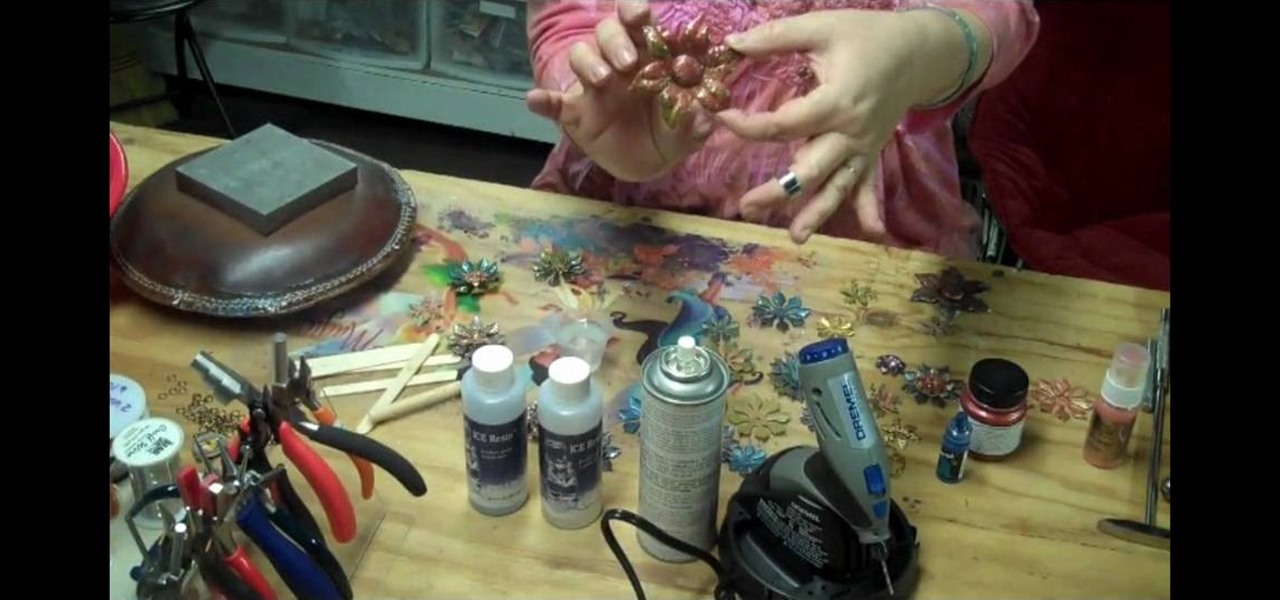
If you enjoy creating vintage inspired jewelry, then there's no way you can get around not using brass stampings. Already infused with a rusty colored hue, they're very antique-looking and their colors can be altered. Check out this jewelry crafting video to learn how to color vintage flower brass stampings using materials including acrylic paint and resin.
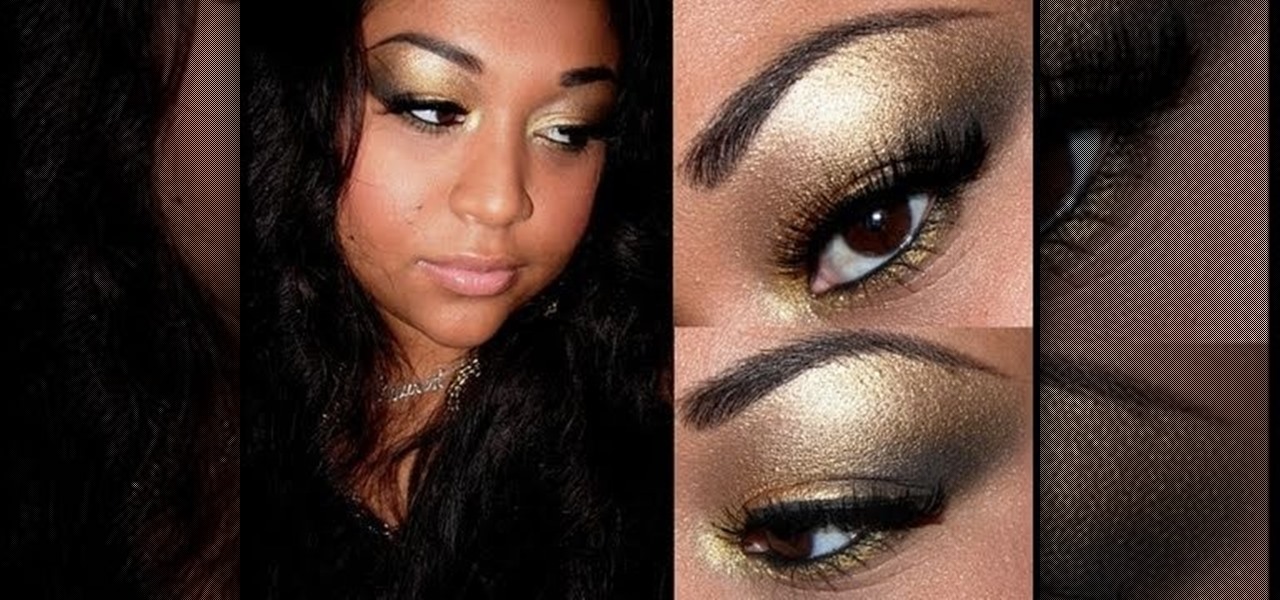
You should always base your eyeshadow color choices on the color of your eyes, but there are in fact some colors that look amazing on everybody. One of these universally flattering hues is gold. Whether you have brown eyes or green, gold brings out the tiny golden flecks in your iris.
In this video we learn how to make a candy DNA model. First, purchase some black licorice and another color. Grab two each from the pack and then purchase some gummy bears. After this, pick out four different colors from the gummy bears bag. Take your scissors and put the licorice together. Cut one inch pieces so you end up with six of them. These will represent the sugars in the molecules. Once you do this, you will take the string and push it through the holes that are in the licorice. Laye...
In this video, we learn how to change hair color in Photoshop CS3 and CS4. First, open up your image and zoom in on the hair. From here, you will click on the selection tool with a circle to select your image. Now, make sure this is the perfect size for the entire image. Right click and make sure it's sized out right. Now, select the hair and a red marker will appear. Select the whole surface of the hair, and as you get to the short hair use a smaller circle tool, don't worry about the smalle...
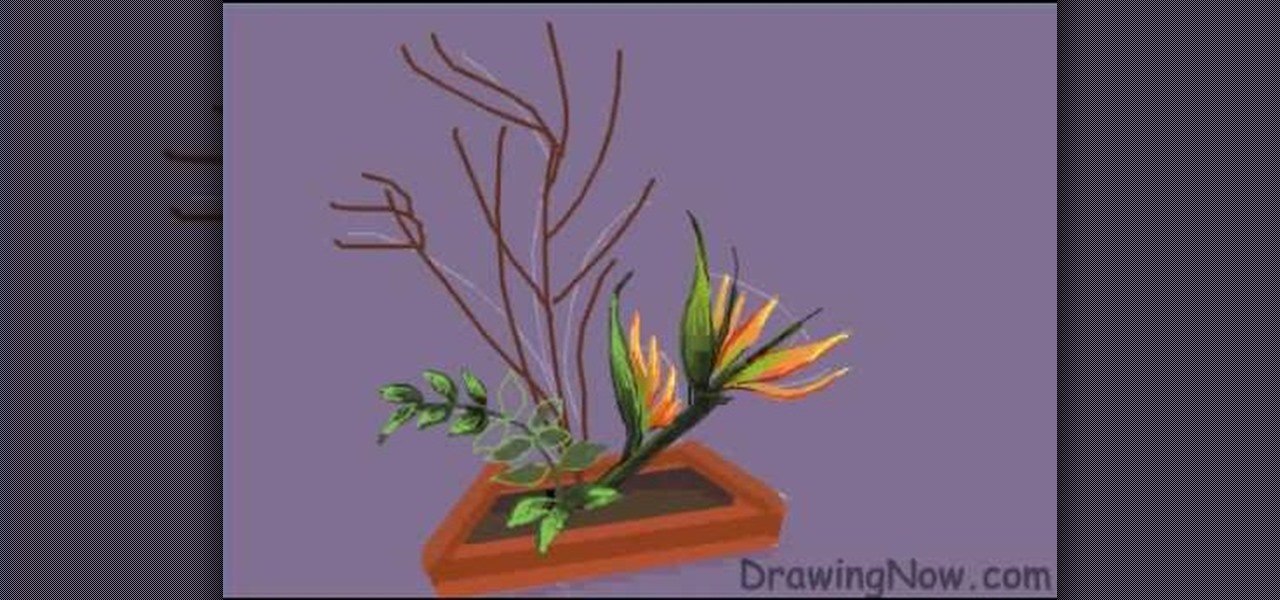
In this tutorial, we learn how to draw an arrangement of flowers. To start this off, you will need to draw lines on the paper where you want each of the flowers to go. Once you get this figured out, draw on each flower individually. After this, add in the detail to the flower to make it look more realistic. From here, fill in the colors to the flowers and then color in the stems on them as well. After this, you will make a box that they are sitting in and color the bottom of it brown for dirt...
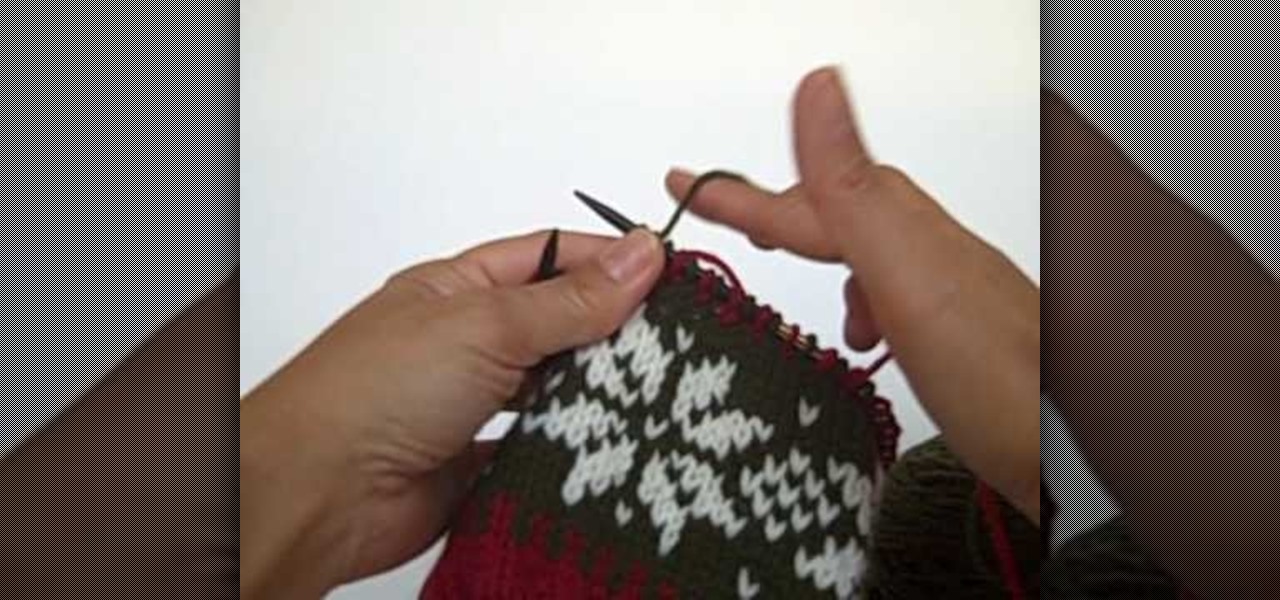
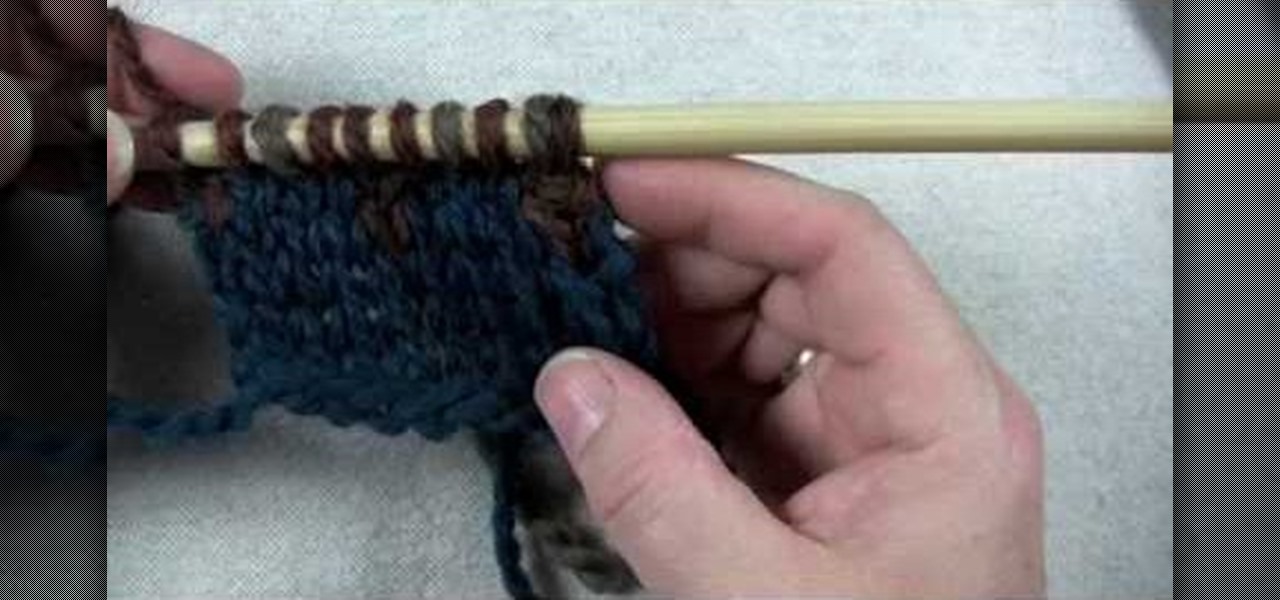
In this video, we learn how to knit with two colors of yarn. Carry your yarn in the hand that you are most comfortable with. Then, don't tension it around your pinkie so you can control the yarn. Now, put your dominant color over your forefinger and the accent finger on the bottom of your forefinger. This way, you will be able to turn your hands to decide which color is going to go up and over the needle. Once you have this technique down, you will be able to continue to knit until you have t...
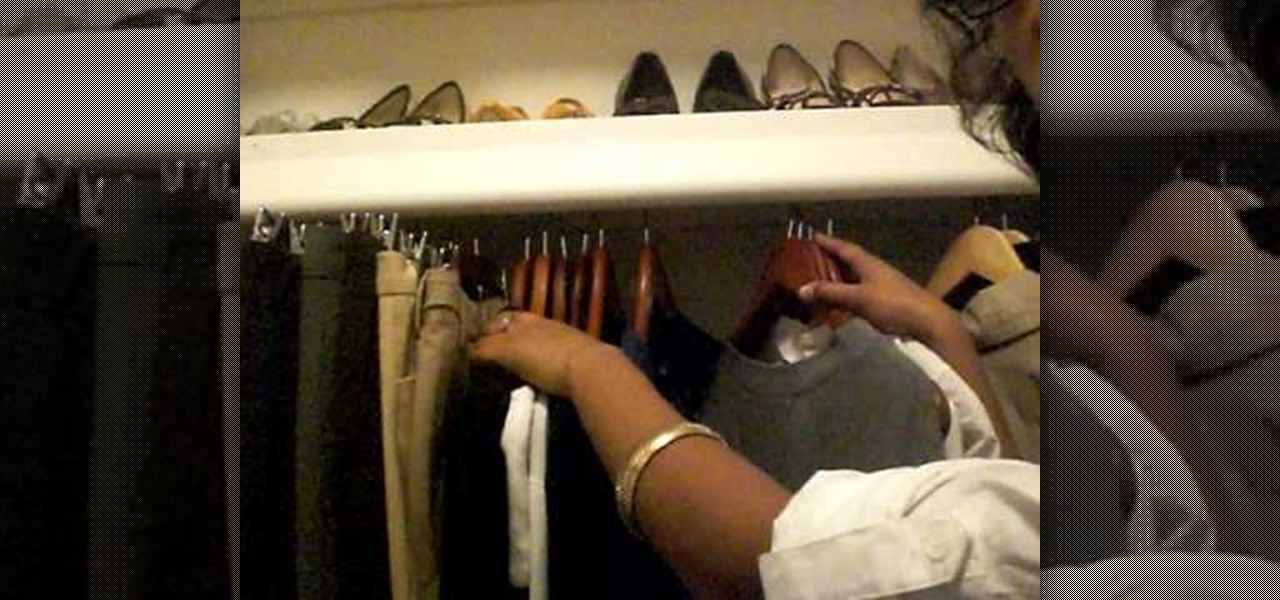
In this tutorial, we learn how to organize your closet by establishing a wardrobe system. If you have tops that you wear during the day, put these on a different colored hanger than your nighttime tops. Color code these in your closet and then hang up your nighttime tops with a light wood or your choice hanger. If you have other random tops, you can hang them according to how you would wear them the most. Dresses can be hung on another color hanger and then pants can be worn on another color ...
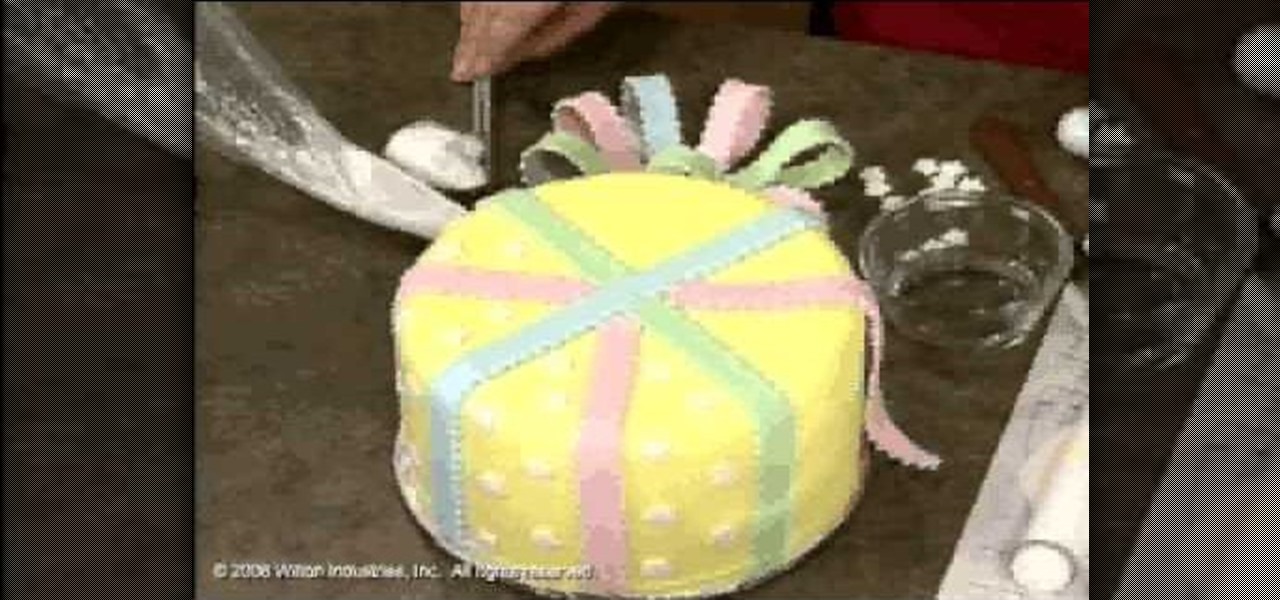
In this video, we learn how to use fondant when making & decorating cakes. Fondant is a dull type of sugar paste that you can form different shapes with and add colors to. When you add the color to the fondant, simply work it with your hands until the color runs all the way through and is smooth. Roll it out when finished, then you can apply it to the cake. To apply it, you will simply drape the fondant over the cake so it's hanging off on the sides. Then, flatten it out on the top and sides ...
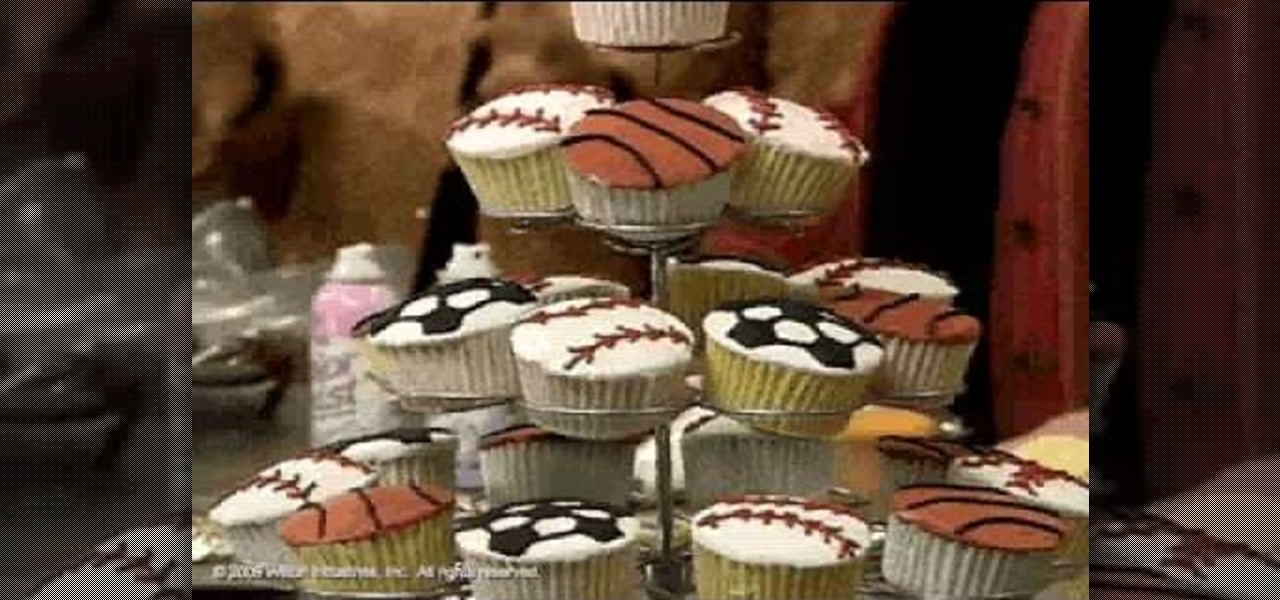
In this tutorial, we learn how to get creative the next time you make cupcakes. The first way to make a cute cupcake is to cover it with tall icing and then sprinkles, you can add a candle for a birthday. You can use different colors of icing to make it more exciting, then add a sugar color decoration to the top of it. Use airbrush in a can to color the icing on top of the cupcake. Kids can help you with this and have a lot of fun! You can also make a sports cupcake by using different colors ...
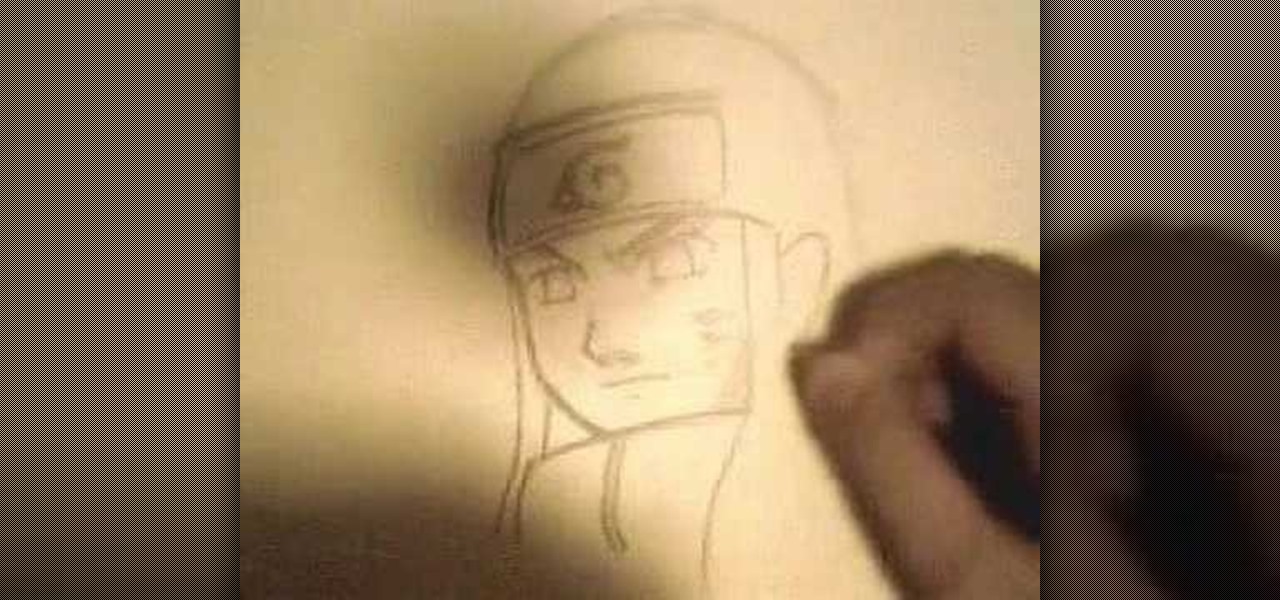
In this tutorial, we learn how to draw manga Neji. Start off by drawing the outline of the character. Don't forget to include the parts where the facial features, limbs, and hair are at. From here, you will use a darker pen to draw in the rest of the character. Next, you will start to draw in the additional lines and shading to make the character look more realistic. Once you do this, you can start adding some color! Use any colors that you would like or use the normal colors that are on Neji...
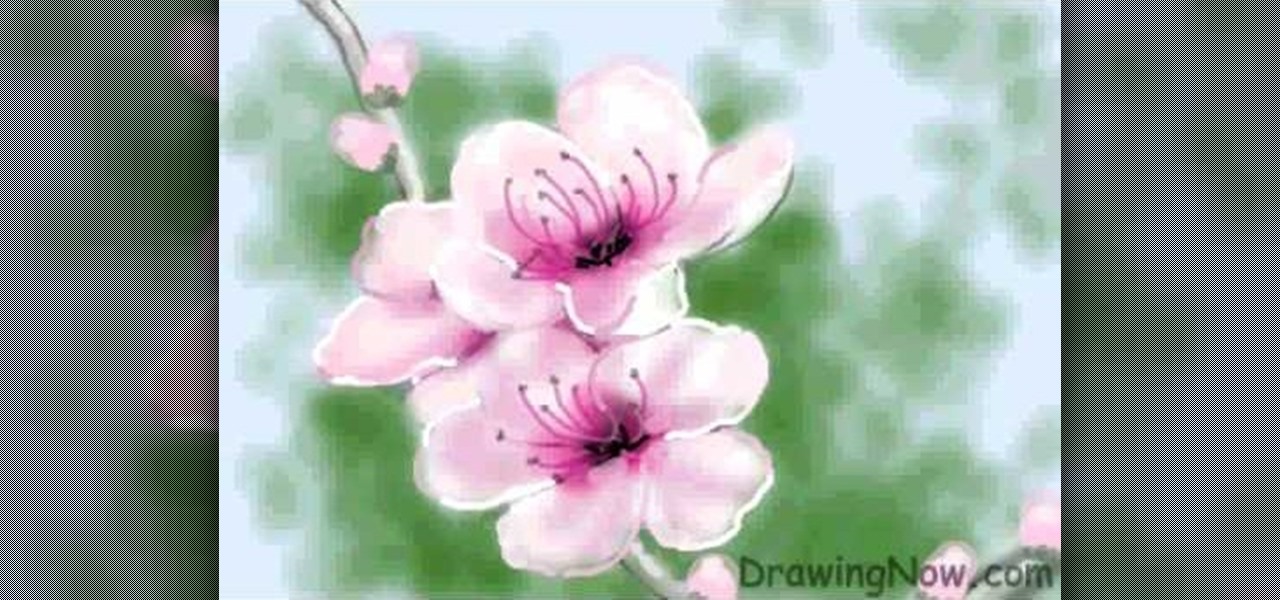
In this tutorial, we learn how to draw a peach blossom. First, draw the vine where the flowers will be. Then, draw the petals for the flowers, creating a basic outline. From here, you will color in the middle of the flowers with black and then a darker color of what the petals will be. After this, color in the petals and then create the background of the drawing. Next, color the vine in where the petals are on. Then, add white to the edges of the petals to show light hitting them. When finish...
In this video, we learn how to manage two different colors of yarn with Eunny Jang. You can do this all on your left hand, right hand, or with both of your hands. It's all about what is most comfortable for your, even if it's something different. Start out with all your yarn in your right hand then knit with one yard at a time. This means to just knit as usual by dropping the yarn and picking up the next color. This can be a bit tedious because you will be constantly stopping and starting. Yo...
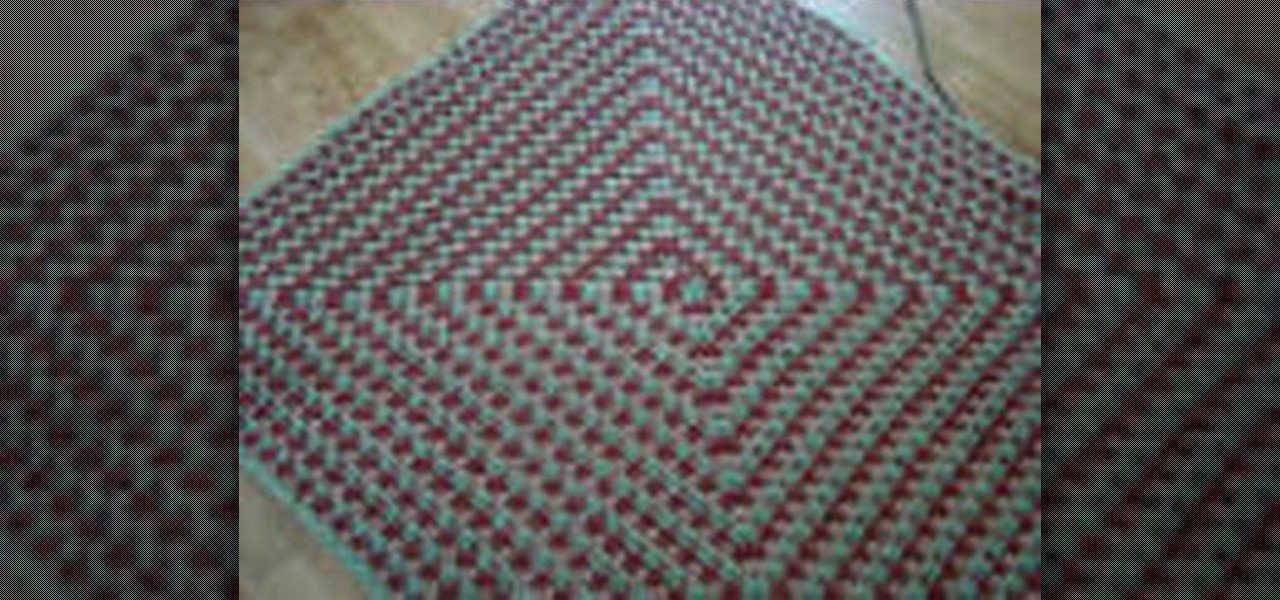
In this tutorial, we learn how to crochet a super fast 3 color granny square. Start out with your first color on the crochet needle. Then, chain four and put the needle back into the first chain. Before you pull everything tight together, you will move your middle finger into the stitch with your thumb so when you pull it will wrap around your fingers. Then, chain three and do this over twice more to create the outlining area around the hole. From here, you will use two other colors using the...
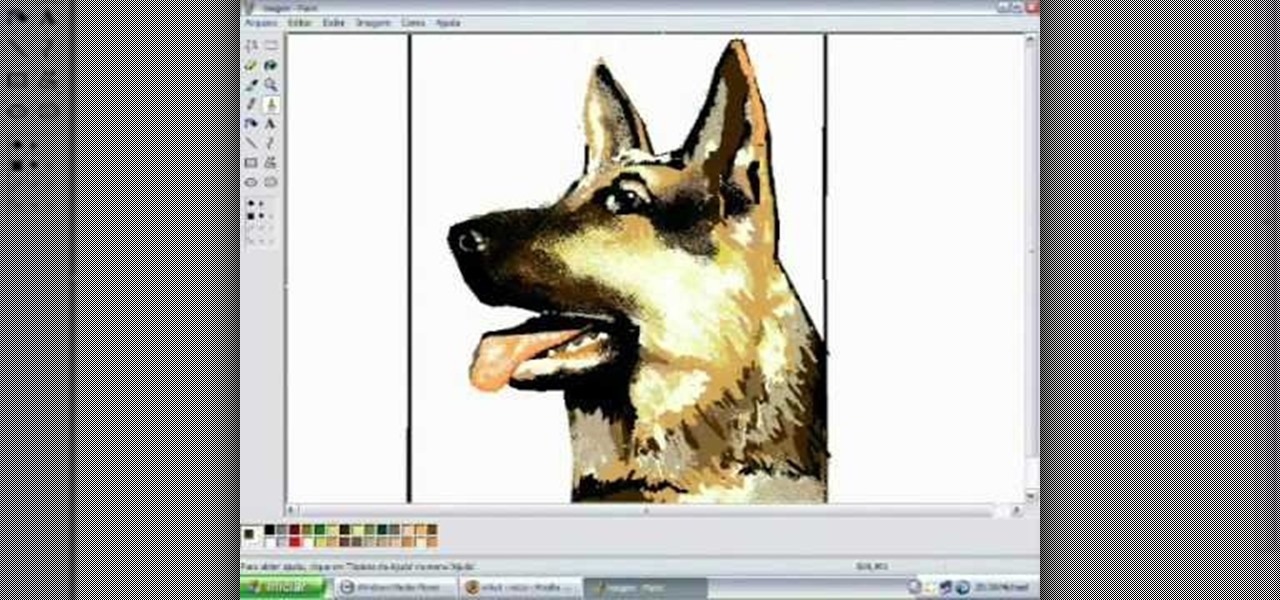
In this tutorial, we learn how to draw a dog in MS Paint. You will do this by using Paint and your mouse, not using a tablet or a pen on the PC. Start out by drawing the outline of the dog in the middle of the page. Next, fill in the nose, mouth, and eyes with black. Then, color the tongue and draw on the ridges of the teeth in the mouth. From here, you will spray paint the color of the dog onto the edges. Spray brown around the edges, then add in white, tan, black, and other colors to make t...
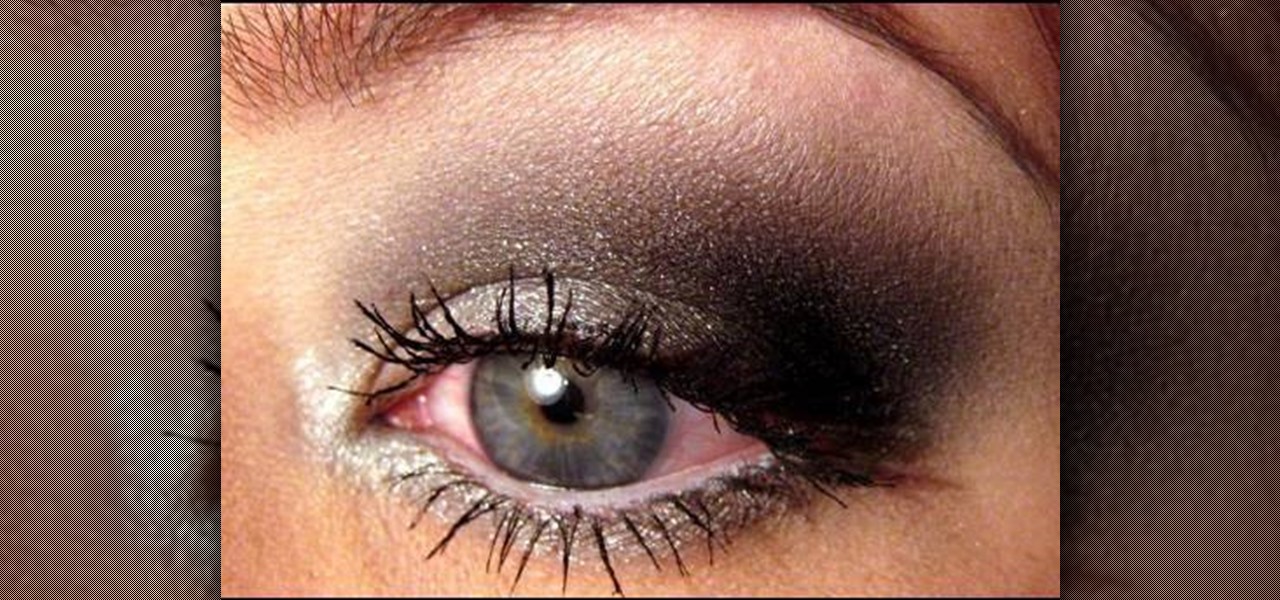
In this tutorial, we learn how to apply a silver smoky makeup look for a hooded eye. Start out with a silver color brushed all over the eyelid. After this, brush a darker color in the crease of the eye, blending in the outer corner of the eye. From here, blend this up towards the brow bone. Place black on the outer corner of the eye to deepen the area, then blend out. After this, apply a light shimmer underneath the brow for a highlight and blend with the bottom colors. Apply the silver color...
In this video, we learn how to apply eyeshadow. First, you need to see what your skin tone is and research colors that work best with it. Then, you need to get the right tools. Once you have the right brushes and eyeshadow colors, you are ready to apply. Some brushes that might work include: fluffy, straight, small and large. Now, close your eyes and dab the eyeshadow onto your choice of brush. Brush the color all over the eye, making it darker on the end of the outer edge of the eye. Then, a...
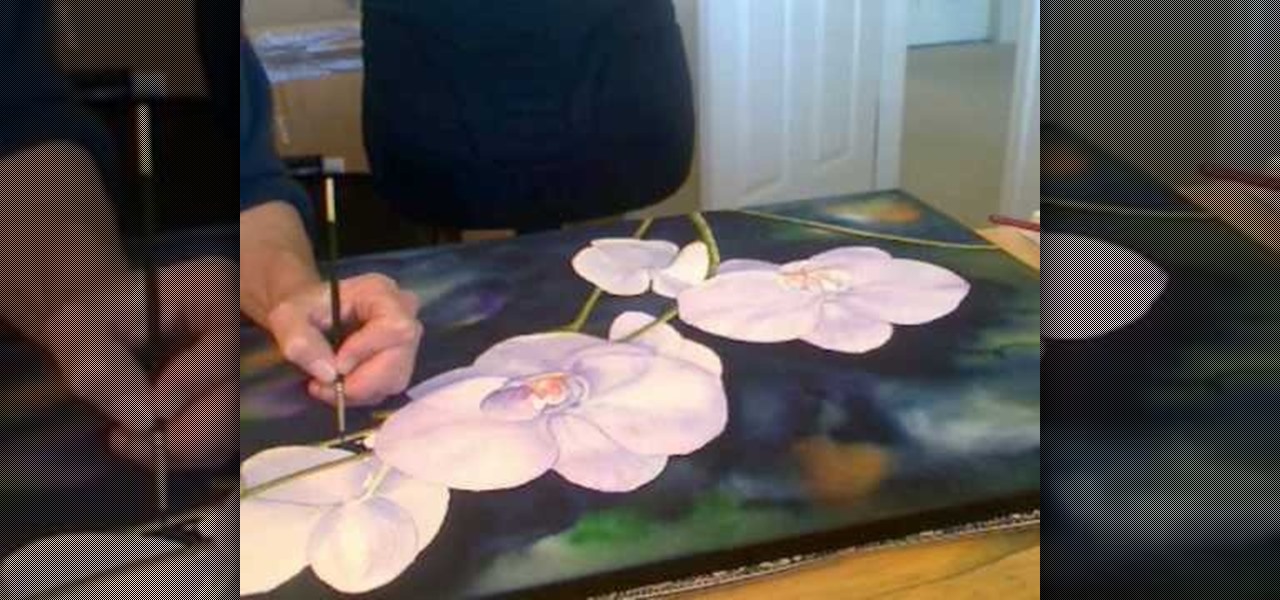
In this video, we learn how to pain orchid flowers with watercolor paints. Start out by using a light lilac color on the petals. Use a thin brush to push the colors around on the picture so you have slight shading around the different petals. Use a darker purple color in the middle of the flower. Then, use a yellow color in the very middle. Add in a green leaf and stem on the bottom of the flower. Use a paper towel to smudge any excess moisture or water off of the flower to make it more prist...
In this video, we learn how to draw a funny cartoon bird in CorelDraw X4. Start out by opening up CorelDraw and using the pen to sketch out the shape of the bird. There is no set way to draw this, just be creative with the drawing. Add in the hair, eyes, beak, and body to the bird. Give it crazy eyes that are different sizes and wacky colors. Fill in the bird with different colors, also filling in the colors of the eyes and adding in details to the beak. Continue on to fill in details and col...
In this tutorial, we learn how to create a sea nymph makeup look. Start by applying purple shadow the eyelids, then apply a darker purple color over the top of it. Now, on top of this, blend a black to the eyelid colors, then line the top and bottom of the eyes. Draw a rough outline on your face next where you are going to apply the sequins. Start to color in your face where the sequin face mask is going to be, and color it blue and bright yellow, or whatever matches your mask. When finished,...
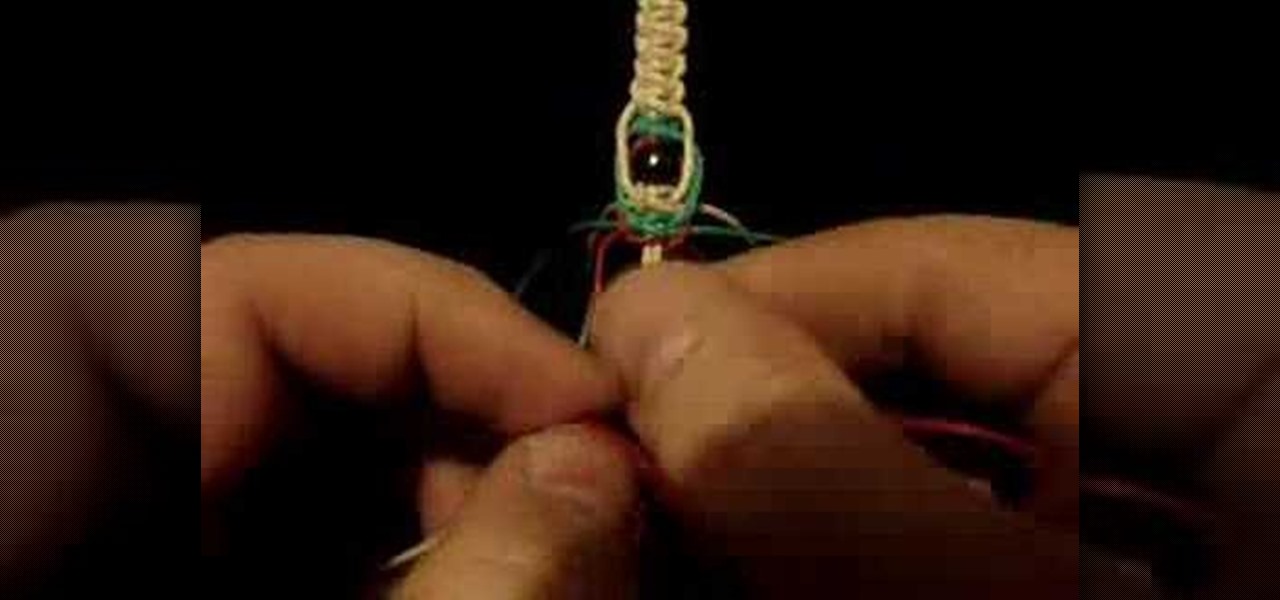
Phish bone keychains feature a highlighted midsection with three different colors of hemp (in this video we use regular rafia-colored hemp, red hemp, and green hemp) that surround wooden beads.
In this great two-part video you'll learn how to change the basic color scheme of the Arjuna X theme on WordPress. The video uses the program GIMP, a free image editing program as an alternative to Photoshop, to help create new images for your header and page.
In order to paint palm trees on your nails, you will need the following: white matte base nail polish and a variety of other colors. You will need toothpicks, if you do not have fine brushes in your polish.
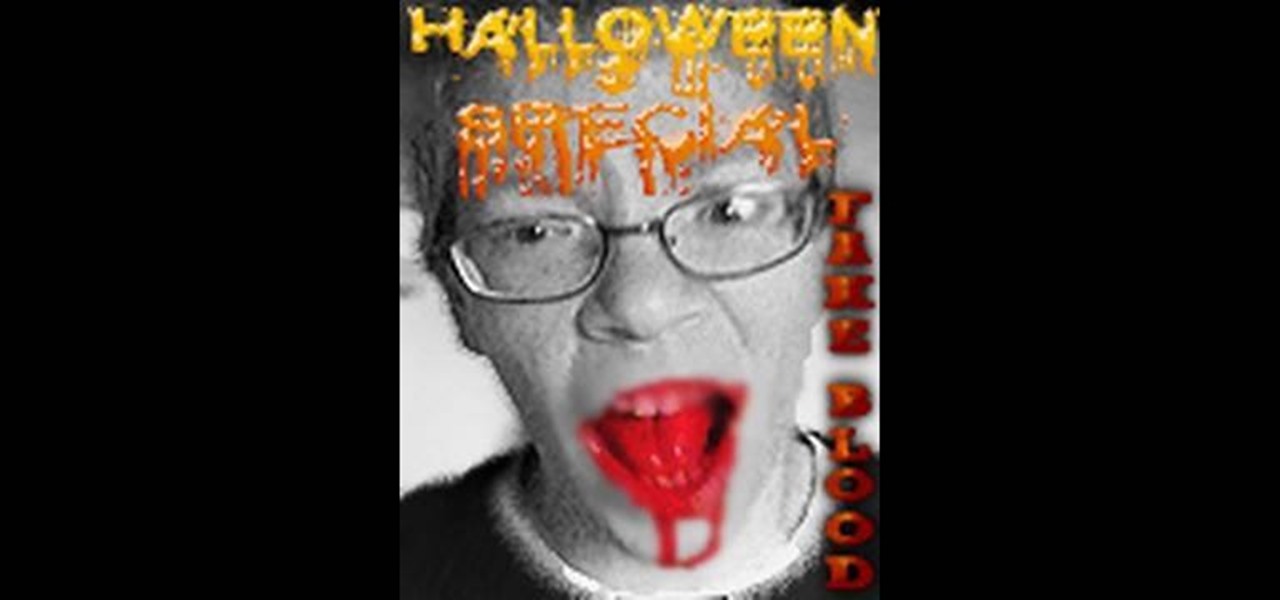
In this video, we learn how to make fake blood for Halloween. You will need: small bottle, teaspoon, cut, clear syrup, red and blue food coloring, and corn starch. First, pour some syrup into the cup, then add in 2 tsp corn starch and mix together. Next, drop in some red food coloring and mix together. After this, add in blue food coloring and mix it together so you have blood red colors in the cut. When you are finished, you will have fake blood that you can use on Halloween at home and it w...
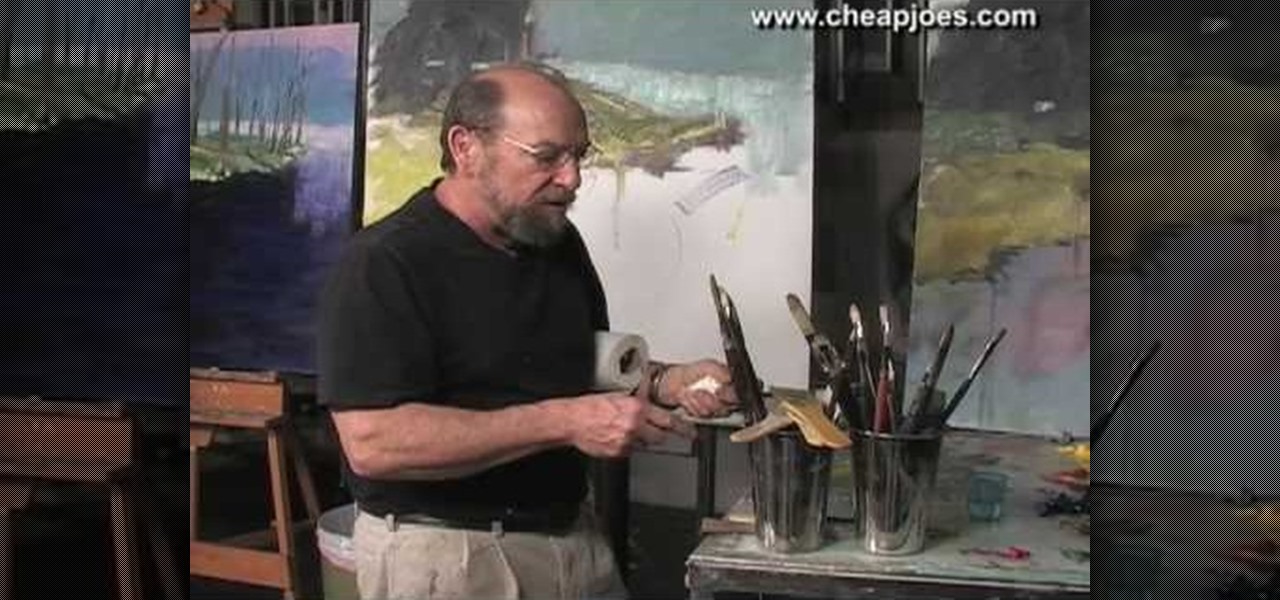
In this video, we learn how to use different brush types and colors in water coloring. While you are creating a painting, you will notice that you need to use different types of brushes to create different effects on your canvas. There is nothing wrong with this! You can use many different strokes and brush sizes to achieve what you want on your painting. Pay attention to what stage of the painting you are in, as this will help you decide what types of brushes to use, depending on the style y...
In this tutorial, we learn how to draw Walt Disney character, Dumbo. First, draw the ears flying out in the air, then draw the head outline around it. After this, draw in the trunk outline, the eyes, and the hat. Next draw in the body and legs of the character as well. Next, color the background of the drawing and then start coloring the character in with gray. Next, use a paintbrush to outline the body, then add in any details you see fit. Color in the inside of the ears and then color in th...
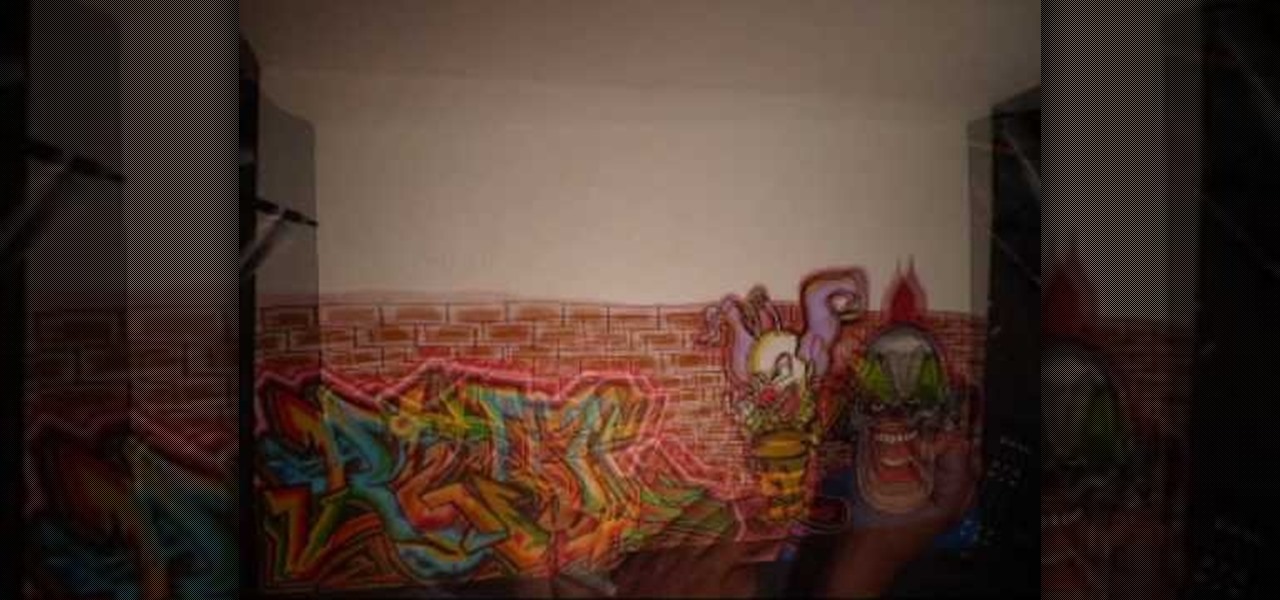
For this fun drawing tutorial, graffiti genius Wizard does two things he's never done before: 1. He graffitis his own last name, "Real," and 2. He colors in his graffiti, which includes clowns that could scare the pants off of the Joker, a bumpy brick wall, and a teeny bumble bee/clown hybrid who's more creepy than cute.
In this tutorial, we learn how to use a stranded color work pattern. Start with a basic pattern to help you learn how to do this. Use a chart to help you keep track of where you are and what you have done. Use a sticky not over the rows so you don't get ahead of yourself. Start off with the color that is first, then continue on to do the other colors that are on that row. When finished with this, remove the sticky note and continue onto the other colors that the chart shows. On the first stit...