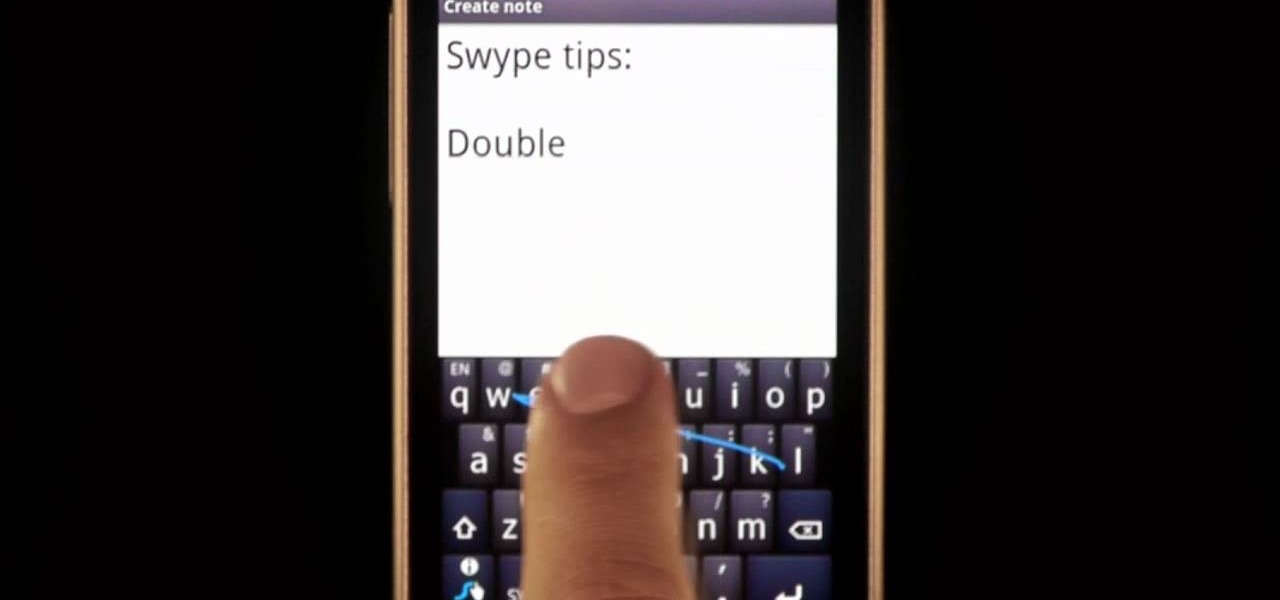
Typing notes with Swype is as fast and easy as you can get and in this clip, learn how to tackle less common word combos like double letters. For example, how would you type "cool", "common", "letters" or "bubble"? In this quick tip tutorial from the makers of Swype, learn how to add these words to your texts and not lose a second of speed! So, follow along and get started typing things like "speed", "follow", "Google".. there is no limit to the "speedy" words you will be sending!
Are you tired of wrinkled clothes? Have you ever had to iron one of your shirts more than once? Get tips and advice on how to fold your various items from ShaNay Norvell in this free clothing care video series.

Looking for a unique picture frame? Learn all about decorative picture frames including rustic frames, veneer frames, ornate and dark wood frames and more in this free video series about professionally framing pictures.
This film was awarded the Green Ribbon in Itami Film Festival, 1993. Learn how various techniques of animation work and see some amazing examples- including an animated pin up girl! The film is in Japanese dialogue with English subtitles.

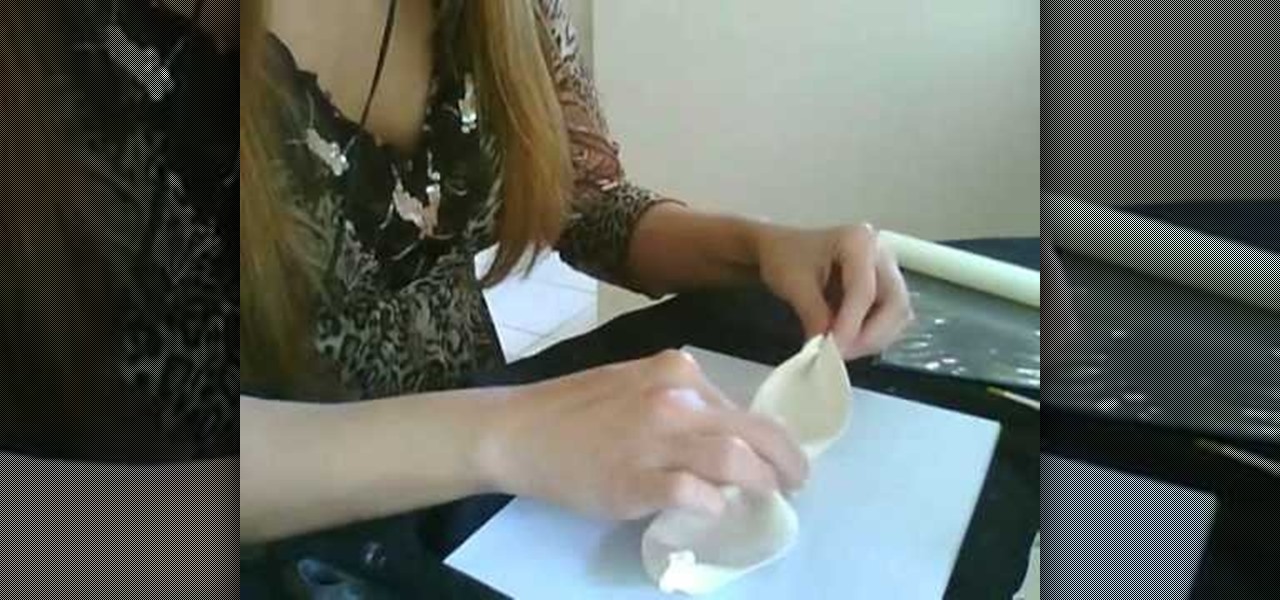
In order to make a pair of baby shoes from gum paste, you will need the following: a pattern/template from Cake Central, gum paste, a paint brush, a knife, foam, mini flower cutter, rolling tool, a cutting tool, a quilting tool, dust brushes, snowflake luster dust, and edible glue.
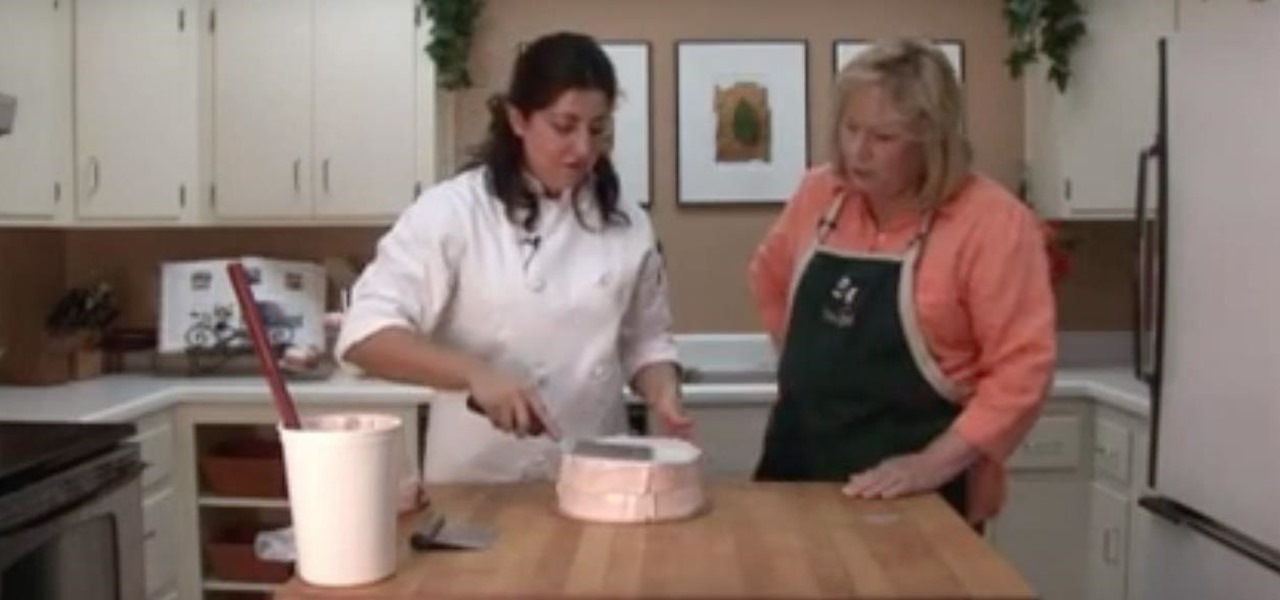
The first thing that should be done when icing a cake with buttercream frosting is to wrap the cake in plastic wrap and chill it in the freezer. This will ensure that when you trim the top of the cake there will not be as many crumbs. After triming the top of the cake to make it even, turn the cake over so that the bottom of the cake is now the top. Now take a piping bag filled with buttercream frosting fitted with a large basket weave tip and pipe horizontally going around the entire cake.

Chocolate curls can make any dessert look rich and exciting. Melt together six ounces of semi-sweet chocolate chips. Keep the pan on a low heat and add two tablespoons of shortening. Stir it and be sure the chocolate does not burn. Once the chocolate has melted and looks silky and smooth transfer the chocolate mixture to a loft pan lined with foil. Refrigerate for two hours until the chocolate has set. After the chocolate has firmed back up remove the foil from the pan. Now remove the foil fr...
1. Use a piece of gum-paste, fondant, or candy clay about the size of a tennis ball 2. I first will roll about 1/2 of the dough through my pasta machine to a medium thickness (#4) or roll your fondant to approx 1/4 in. thickness 3. You could also use a pizza cutter or knife to cut the strips. Take two strips out to be the bow tails and then cut 2 strips in half to make thin little loops for fill-ins 4. Hang the loops over a dowel or large stick such as a broom handle (about 1in wide) 5. Wet t...
Create positive home energies with feng shui astrology. Learn how to incorporate ancient Chinese traditions with modern feng shui principles to decorate and design a comfortable living space with this free video series from a leading feng shui practitioner.
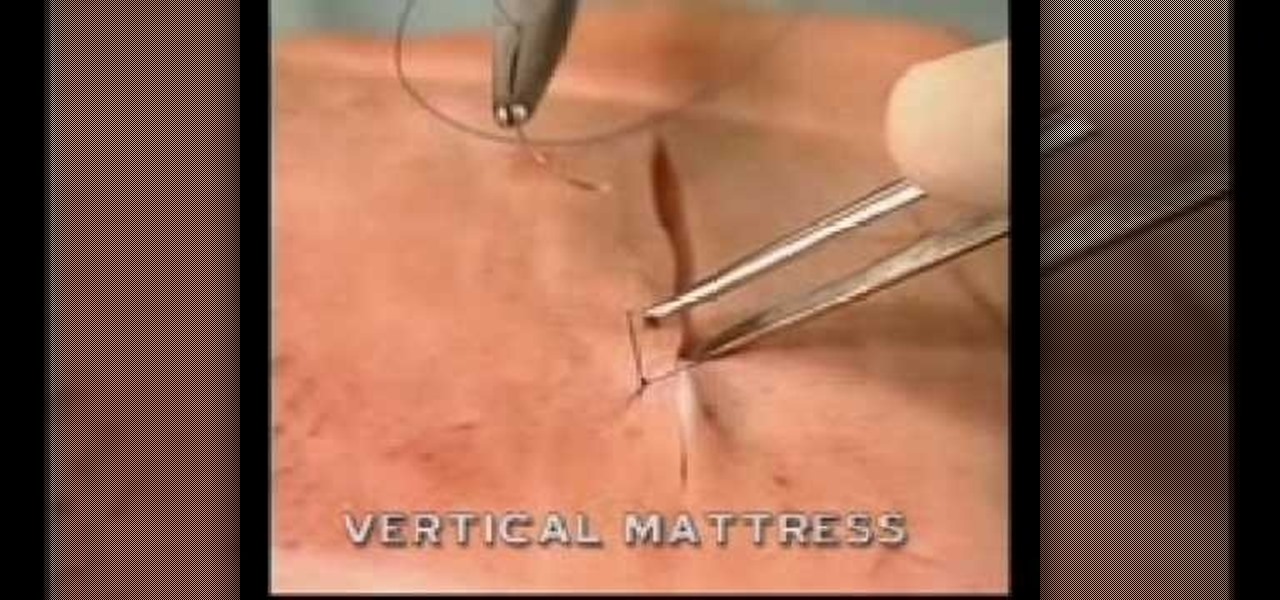
There are almost as many types of sutures as there are types of wounds that a human can sustain. This video instructs the viewer in performing one popular type of suture: the vertical mattress stitch. This type of stitch is relatively simple and strong, and thus a good choice for many types of wounds.
This quick how-to video is a demonstration on how to decorate an iced cake with butter cream blossoms. Grab your piping bag and start making some flower petals with some butter cream.
Learn how to turn your patio into a Texas themed hangout with the help of this free video on Texas style decorating and home decor.
Looking for a crafty and clever variant on the traditional three-tiered cake? Make it a topsy turvy cake with a slanted, angled look! You can make a creative cake using fondant frosting and these decorating tips. Make sure your cake has enough support!
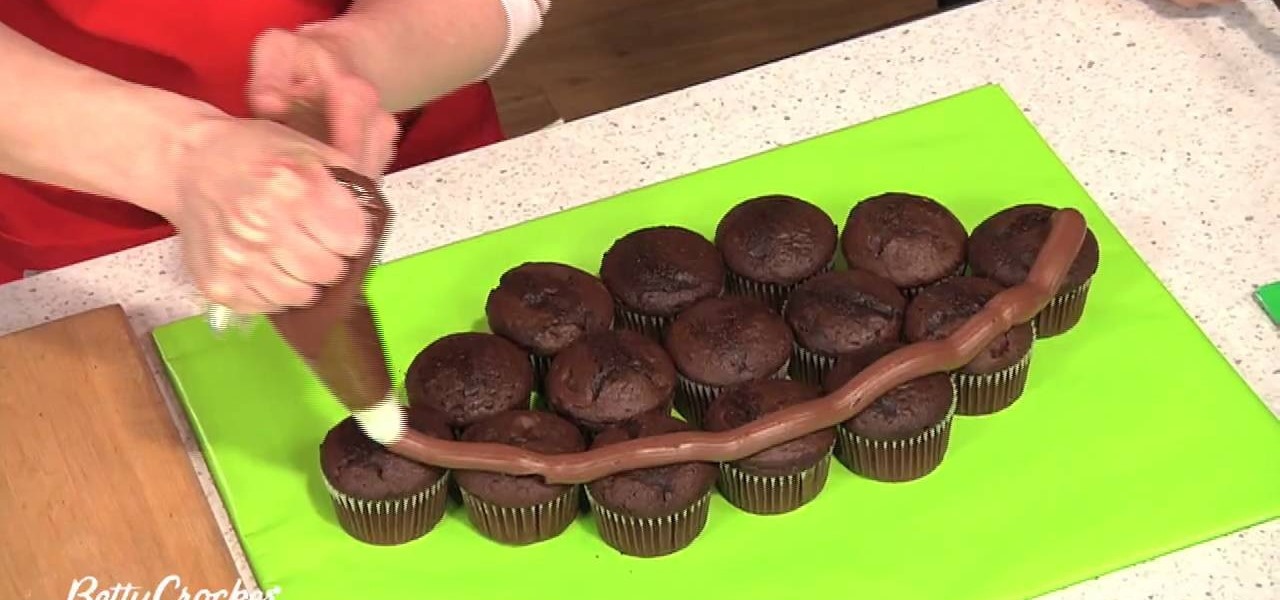
BettyCrockerTV shows viewers how to make pull-apart football cupcakes! First, you should cook cupcakes, and then arrange the cupcakes on the platter. Start with three rows of three cupcakes. Next add two on each side! Then add one on the end to finish this off. Now it should look like a football. Now to frost, you should not frost each cupcake. Instead, pipes frosting on to all of the cupcakes in the shape of a football. It should take 2 cups of frosting. Now, after piping frosting onto the c...
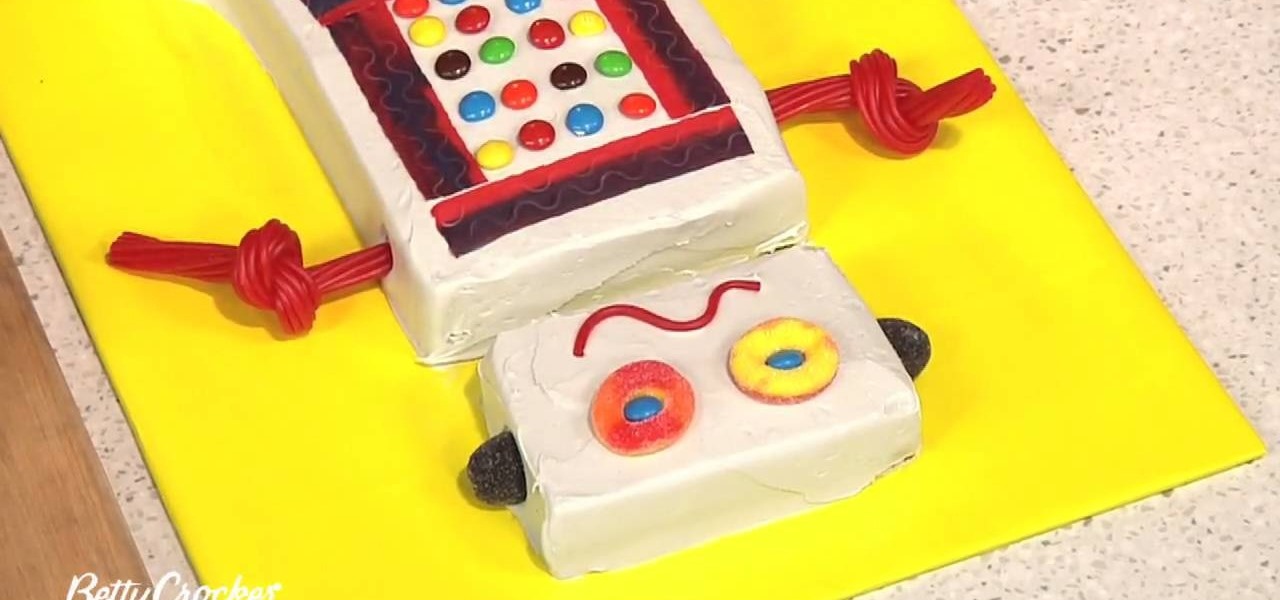
In order to make a Robot Cake, you will need the following: a 13 x 9” cake. Remove the top layer of the cake, by cutting it off evenly. Next cut off a 3” strip from the top and the bottom of the cake. Cut away 1/3 of one of the strips. Place your cakes on your serving platter or a cake board. Cut away from the lower level to bevel the edges.
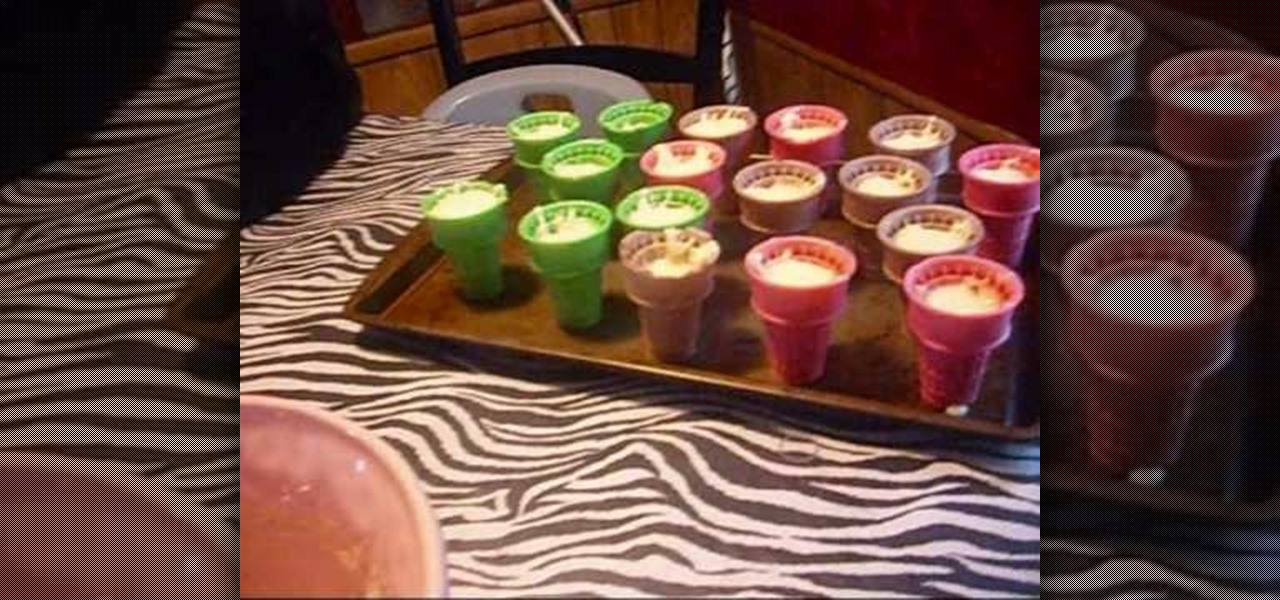
Cinco de mayo is just around the corner so for your fiesta try out these margarita cupcakes. These are perfect for kids and adults alike because there is no alcohol in them but they have all the color and fun that you expect from a Mexican party.
Royal icing is essential when it comes to cake decorating. This how-to video is a step by step guide on how to make royal icing for cake decorations. All you need for royal icing is merengue powder, powdered sugar, and water,
Wondering how to shape the fondant into a beautiful rose you can decorate your cakes with? This how to video is step by step demonstration on how to make the center and the the leaves of a fondant rose.
Cutting out letters from modeling paste or gumpaste can be very awkward. This how to video shows you how to use letter cutters on fondant with some ease. So watch, learn, and start decorating.
Learn how to make fondant monkey cupcake toppers to decorate your cupcakes. Cool sugar art video!
With the quick flick of a spatula, your cake will have textured swirls. Tuck parchment paper under the cake to keep everything even. Work frosting with a spatula to warm it up before you spread it. Make sure swirls go all the way to the edge. Always use fluid motions.
Watch this video to learn how to finish seams on a multi-tier cake for weddings or other events.
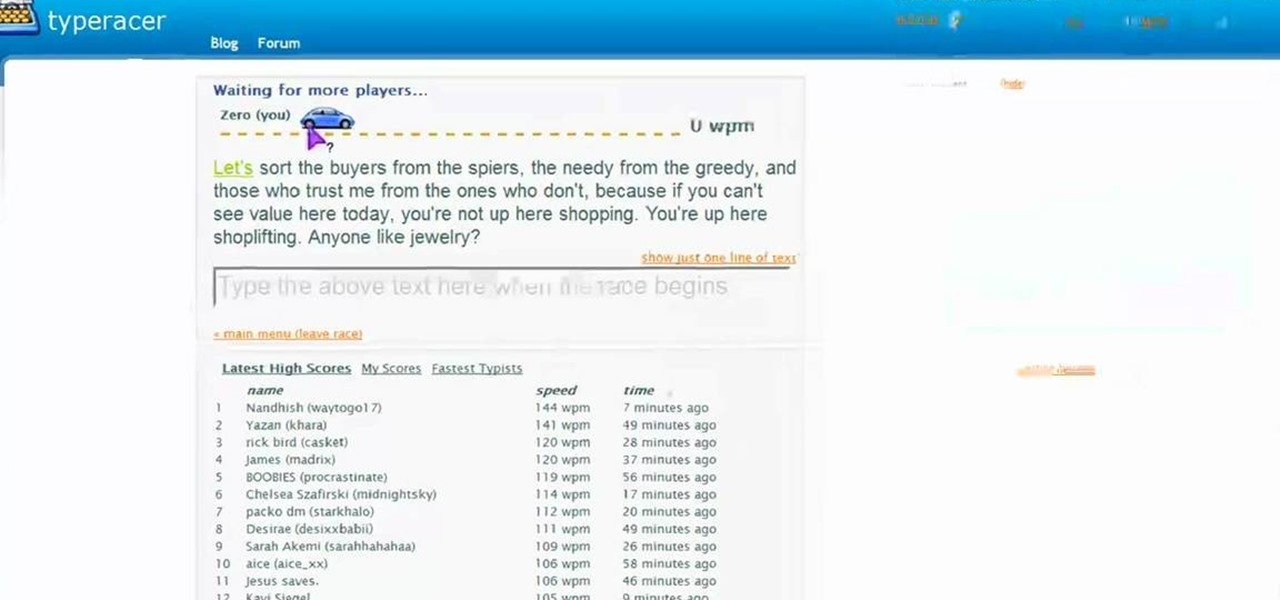
In this tutorial, we learn how to improve your typing speed. First, log onto your internet browser and go to the website, Typeracer. Once you are on this site, you can create an account and start to type on it! When you are on this, you can go into different types of races, then see what your scores are against other people. You continue to type until you win the race you are in. Once you are finished typing, you will see your stats and you will be able to improve from there. This is a great ...
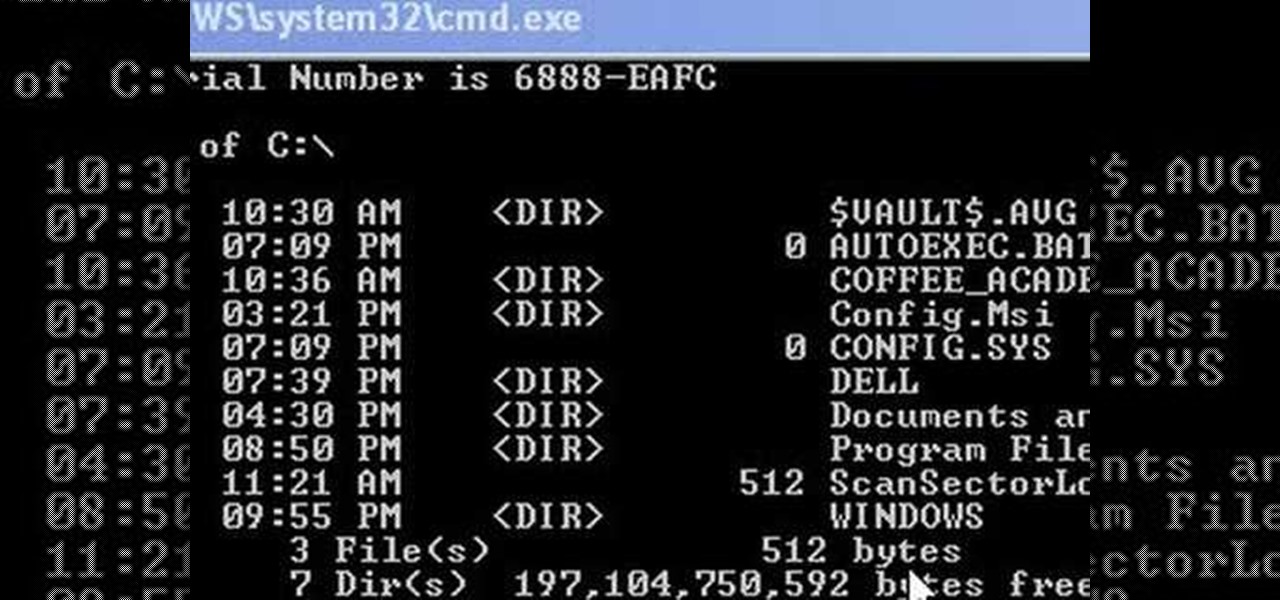
This video shows us how to change driving letters or directories in DOS command. Firstly go to start menu and then click on run. Then type cmd and press OK with which a DOS command cmd window will pop up. Now you need to change the directory and these is done by typing ‘cd..’ and after that press enter. Now you have changed the directory and now you need to see what’s in there and for that type ‘dir’ and press enter and this shows what’s in that directory. Now change to other directory by typ...
Nothing says you care like a hand-made card. Show that special someone what they mean to you or just have fun with this cute arts and crafts project. Get your markers and colored pencils. Get your glitter and glue. Get creative.
Learn how to make a papier mâché mask. Make a papier-mache mask for Halloween, a masquerade party, Carnival time, or anytime!
inDesign has some hidden special effects that will make your type on a path much more compelling. Granted Type on a Path is not a new concept and has been around in Illustrator for years. However, no other application out there can handle Type on a Path as well as InDesign CS2.
In this video series, let Denise Robinson show you some inexpensive ways to decorate your loft apartment. She shows you how to create a beautiful living room, dining room, office space, and bedroom. By adding simple things like window treatments, colorful rugs, and accent lights, you can completely change the look and feel of your loft apartment. Through her advice, you can save money and energy in decorating your loft. So, what are you waiting for? Learn how you can re-decorate loft apartmen...
In this video, we learn how to build a tipi. First, measure poles to make sure they are the same size, around 23 feet long. After this you will use a rope to tie the poles together so they are flat. To build the tipi, use the middle wooden pole to prop up in the very center. Make sure the rope is woven through the poles tightly and they are spaced apart. After these are secured together, you can bring them up into the air and set them against other poles to stand up. From here, decorate and u...
In this video, we learn how to make a cover for a tipi. First, put windows all around the bottom of the tipi. Then, take a tarp and cut out the top of it to make it into a circle shape. Then, cut out a hole from each side and put a rope in it for the top of the tipi. Wrap this around the sticks that you made the tipi with and then cover up the top of it with an additional tarp. This will protect you against water and other natural elements! Enjoy decorating and have fun making your tipi!
In this tutorial, we learn how to draw a vintage car. This car will take a lot of detail, so make sure you take your time with it. Start out by drawing the hood of the car, then work your way to the back of it. Once you have the basic outline of the car finished, add in the details! Don't forget the windshield, side mirrors, paint, wheels, tires, etc while drawing. To finish this up, start to shade with the pencil and then use the eraser to create a shined appearance as well. Add in colors if...
In this tutorial, we learn how to construct a mouse trap car. You will need: wood, string, wood glue, duct tape, scissors, markers, a mousetrap, wheels, and a drill to do this. To start, you will lift the mousetrap up and tape duct tape around it along with a long stick. Then, tape this to a piece of wood. From here, you will glue together two sticks and then put wheels on the top and bottom of it. Next, you will lay the mousetrap on top of this and then push it. Then it will roll away! You c...
In this tutorial, we learn how to mix and make paper mache. To do this, you will need: flour, water, and a large mixing bowl. Start off by pouring the flour into the mixing bowl, then adding in warm water in the same amount as the flour. After this, mix it together until you have a thick consistency. It should not be like water, more like a thick soup. Add more of the ingredients until you have this consistency. After this, dip your strips of paper into the mixture. Use them to place on your ...
In this video, we learn how to make a pi–ata, step-by-step. First, you need to soften up the balloon and then blow it up until it's the size that you want it to be. After this, set the balloon aside and then make the glue for the pi–ata. Take flour and put it in a bowl with warm water. Mix this together until it's well combined and is a thick liquid. Next, grab a newspaper and use strips of it to dip into the liquid and paste onto the balloon. After this has dried, decorate the paper by paint...
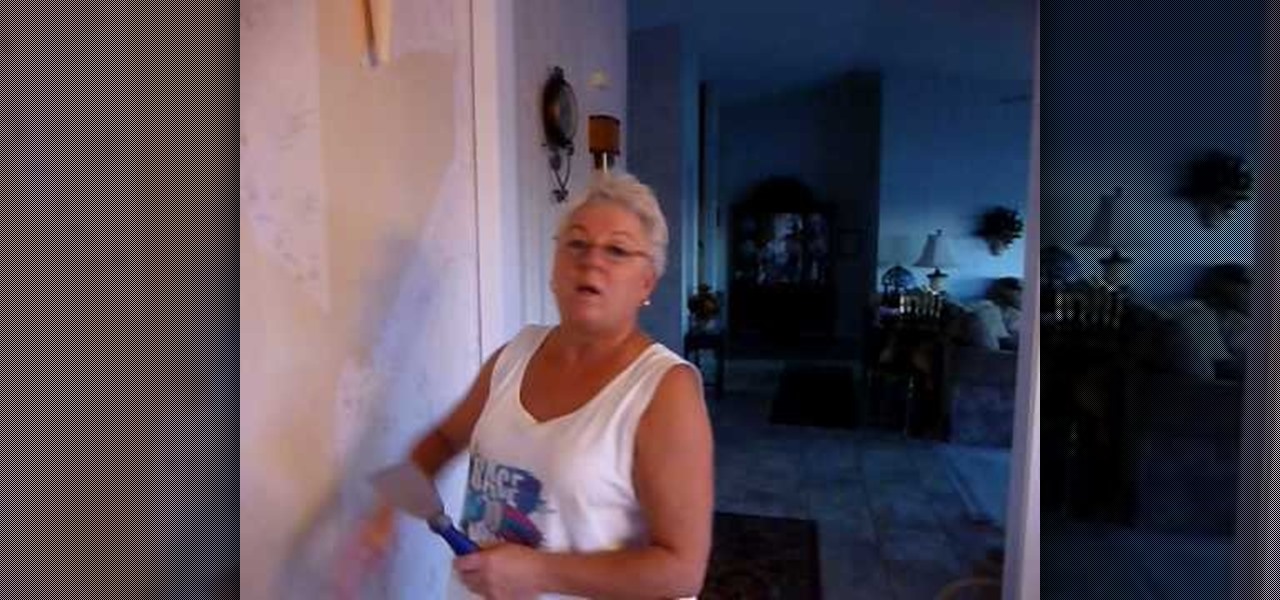
In this tutorial, we learn how to remove vinyl wallpaper. First, take your putty knife and slide it underneath the wallpaper. Once you do this, you will be able to see the paper and put water on the wall to help remove the paper. Tear the wallpaper down in large chunks until it's all completely gone from the wall. Make sure you wet the wallpaper as well, because this will help it come off more easily. Let the wall dry before you paint it or add on new wallpaper, then you can decorate how you ...
Cupcakes are really quite good as they are - we don't care if they're iced or have a cute little sugar daisy on top for decor. In the end, they're just yummy. But if you love dressing up your cupcakes to make the package look as appealing as the taste, then check out this fun cupcake decorating tutorial.
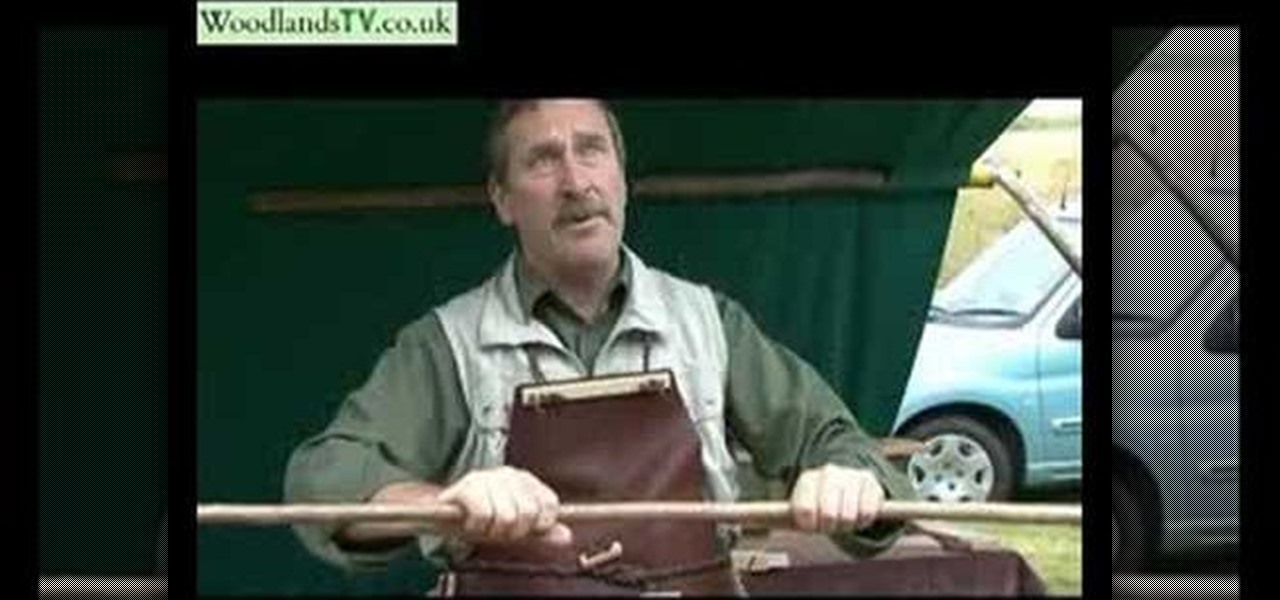
In this tutorial, we learn how to choose and use a walking stick. Find a large and firm stick that you find, then make sure it's dried out. Next, you will shave down the wood so that it doesn't give you blisters on the inside of your hand. After this, you will use hot air to bend the stick so that it is straight instead of crooked. Cut the stick to the size you need depending on how tall you are. The top of the stick will be jointed and have a cover over it so it's comfortable to grab. You ca...
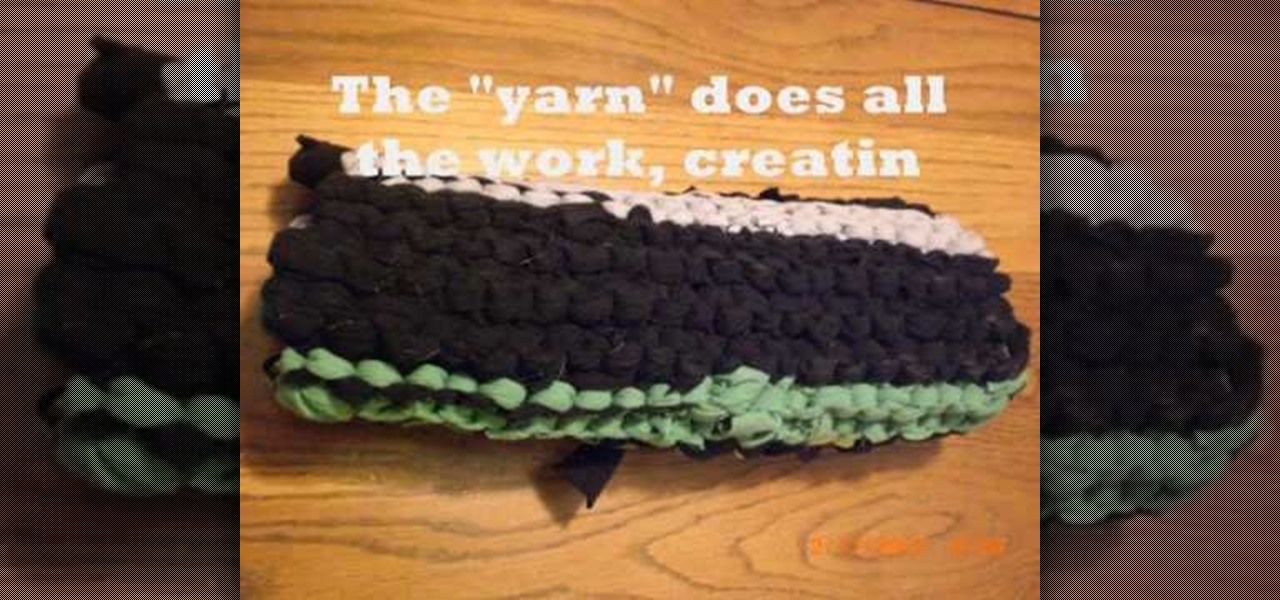
T-shirt rugs and placements exactly like the one presented in this tutorial sell for upwards of $150 at home decorating stores, so why not save money and reduce your consumption by simply repurposing old T-shirts yourself?
In this video tutorial, viewers learn how to make a 3D flower pop up card. The materials required for this are 5 pieces of paper, scissors and glue. Begin by folding the paper in half 3 times and then fold down the sides to a triangle. Now fold a bit of the triangle flap up to make a slimmer triangle. Then cut around the top with a half circle shape. When opened, it will be a flower shape. Cut one of the pedals off and decorate it. Make 7 more flowers and glue the points together. Now take a ...
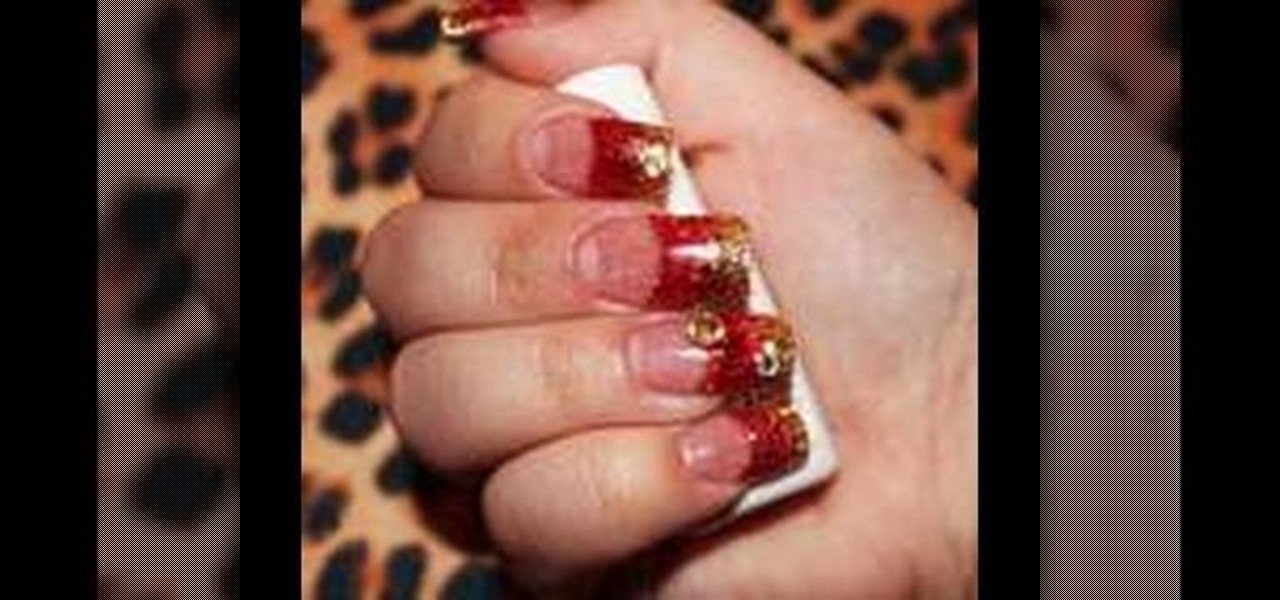
To create red and gold acrylic nails start by prepping a sanitizing your finger nails and applying the tips. after you have trimmed you nails to the desired length apply primer to you nail bed. With your brush gently apply the gold glitter to the tip of you nail and brush downwards toward your nail bed. Apply your red glitter the same way under your gold glitter. With your brush create what Jennisse calls a smile under the glitter to your liking. Cover your nail evenly with a thin layer of pi...