In this tutorial, we learn how to tie the Djinn bottle decorative knot. First, make a loop on the left side of the string, then bring the other side around it and pull the top up. After this, twist the two strings underneath the bottom of the knot and push the right string through the side of it. Then, push the left string into the left side of the knot through the back. Pull on the top, then twist it into a loop and push the left string through the back, making a loop, then pushing the right...
In this tutorial, we learn how to tie the rising sun decorative knot. First, loop your string on the left side, then pull the right side over the top. Now, bring the bottom of the right side over and place the end into the first loop going over the other string. Next, remove the string from the last loop it was in, then bring the right over to the right loop and push through to the bottom. Next, bring the right string over to the left side and thread through the left loop closest to it. Next,...
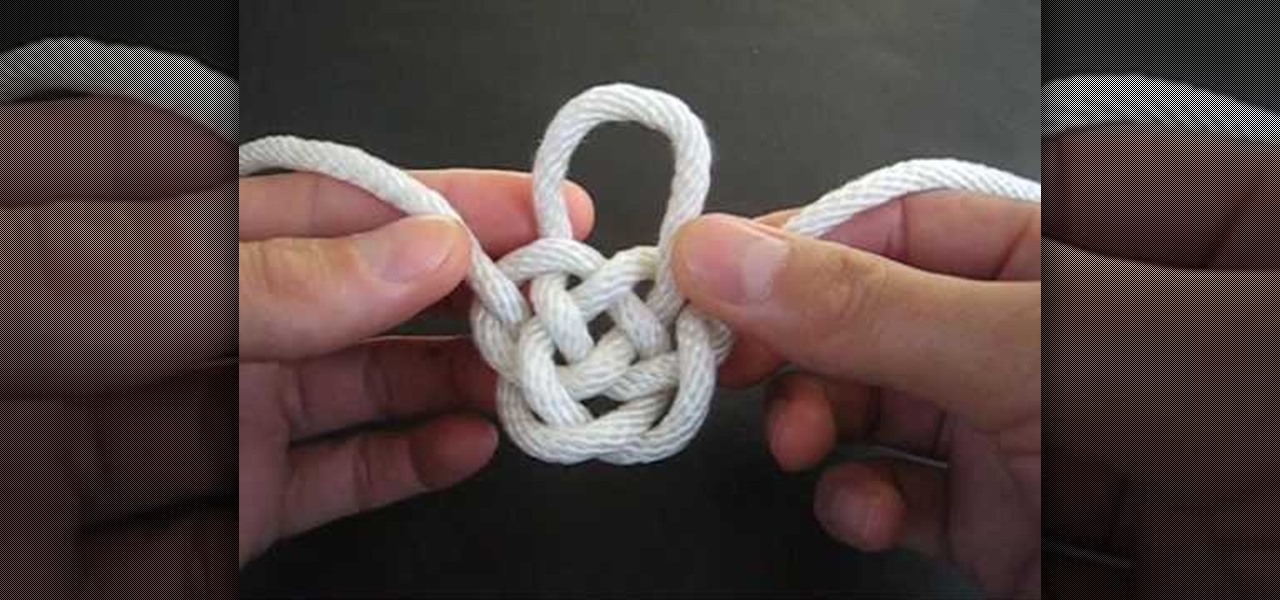
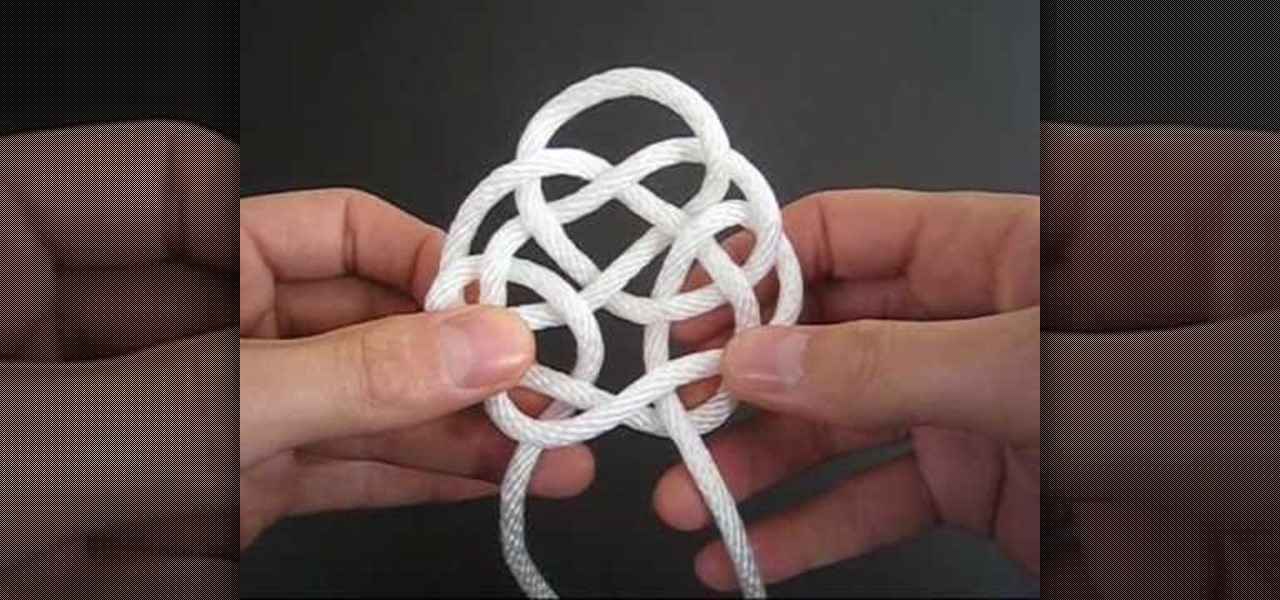
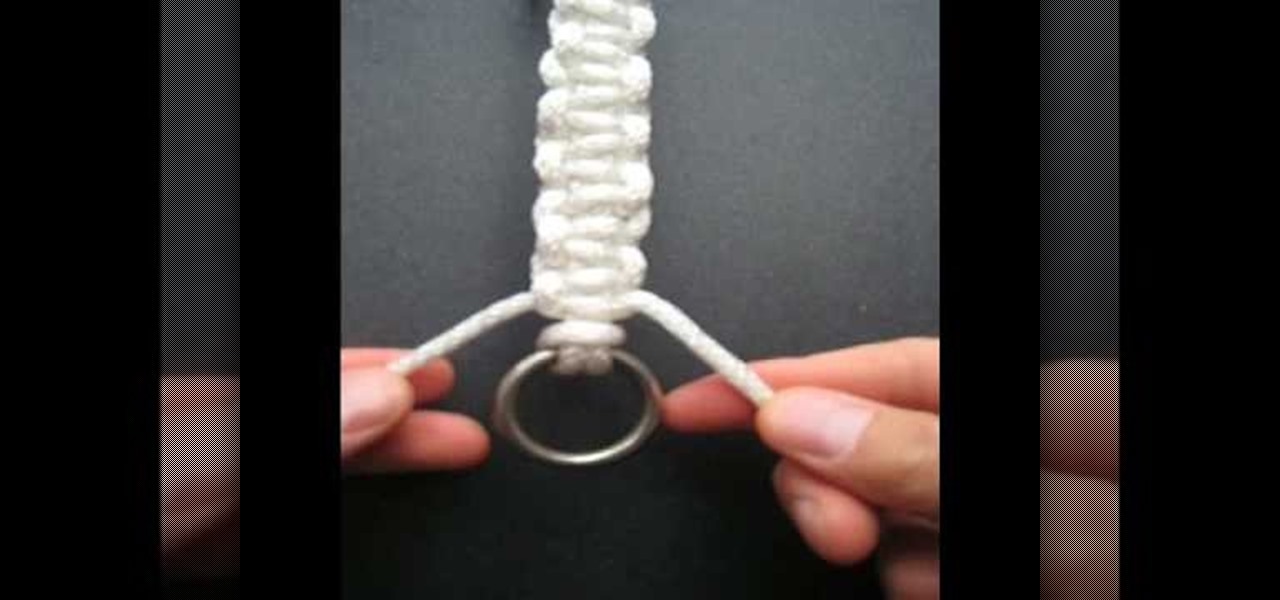
In this tutorial, we learn how to tie the Basket Weave decorative knot. First, hook your string to a hook, then tie a loop that is wide. After this, bring the strings to the top and make a heart shape. Now, twist the two loops on the side and twist them around each other. Now, bring the right string through the right loop and up through the left. Do this for the left string except using the opposite loops. When you are finished, pull on this tightly and release the string from the hook. Make ...
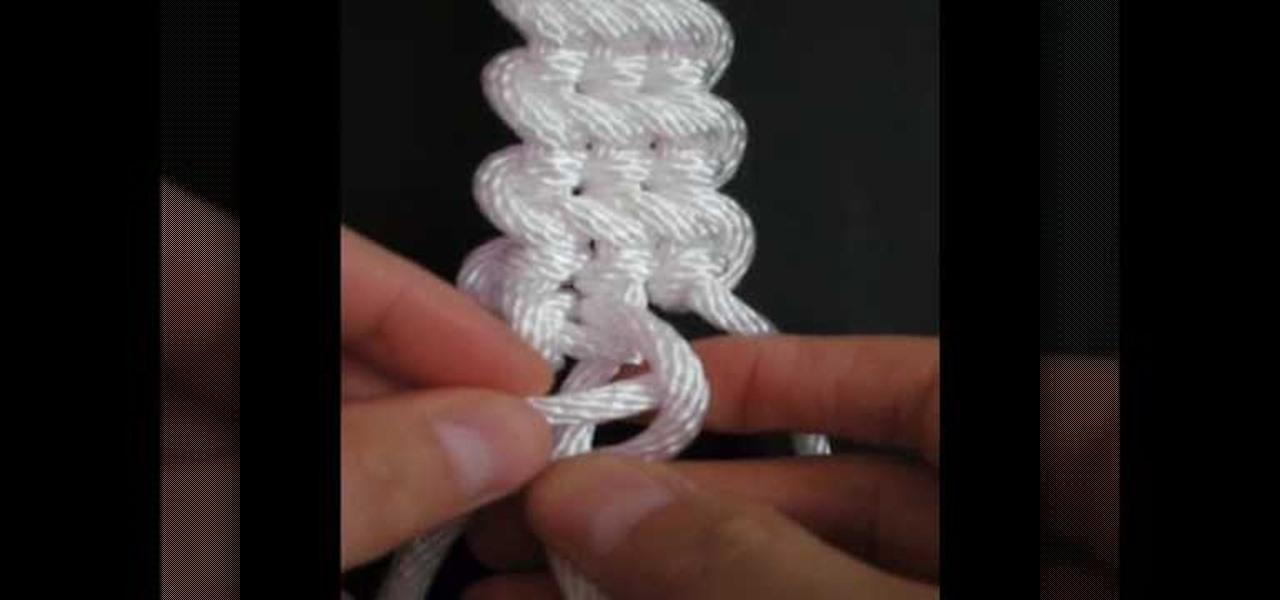
In this video, we learn how to make the guitar bar decorative knot. First, set up the bard then cow hitch two strips of rope side by side. Next, measure each bar to 12 inches long and make sure you have 12 feet of rope. After this, build the frets of the bar, and while you are doing this you will flip the bar over and start to half hitch. Continue to do this, tying all of the ropes together into the knot. Next, turn the knot over and continue on the other side. When you are near the end of yo...
In this tutorial, we learn how to make a Solomon bar decorative knot. You will start by grabbing the ring at the end of the string, then tie it to an opposite ring. Fold the left side of the string to the right and bring the right over to the left. Pull the left into the loop to create a knot. Now, you will have two string that are more up and two that are more down. Next, tie the top strings into a knot, then bring the right knot behind the bottom two, and thread the left knot into the right...

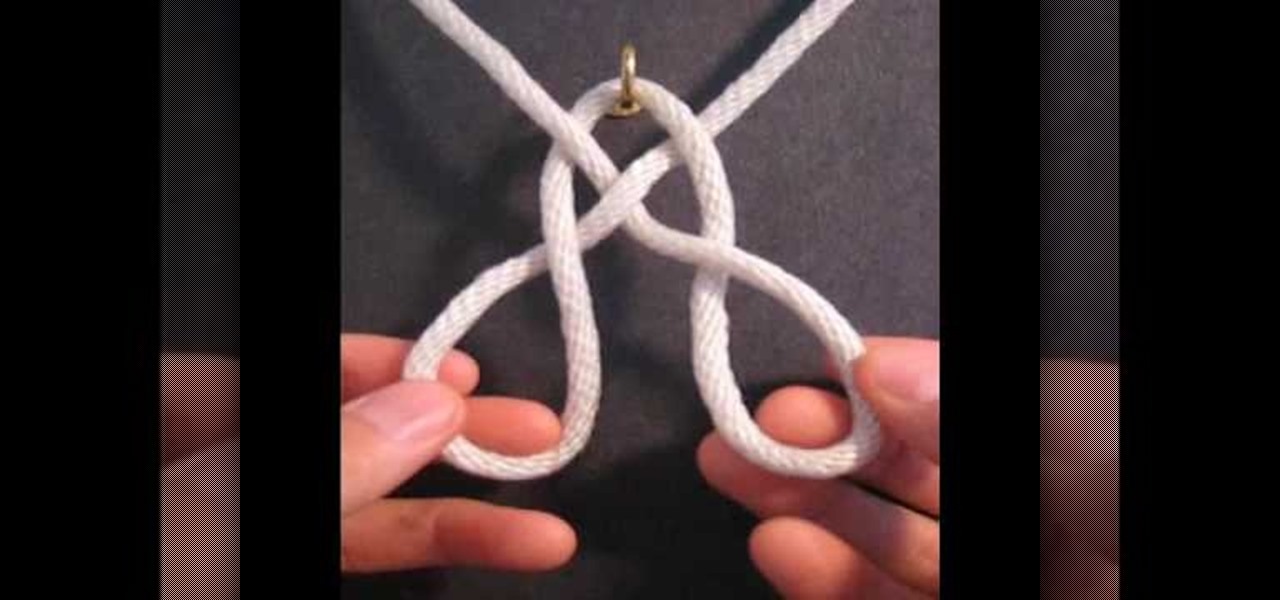
This video tutorial is in the Arts & Crafts category which will show you how to tie a decorative Door Knocker knot. Take a piece of rope and make a loop at the center with the left hand end of the rope over the right hand end. Now pass the right end above and through the loop to make a half knot. Twist the loop to make a figure of eight, pass the right hand end through the lower loop of the "8" and back through the upper loop. Repeat this once again. Now repeat these steps with the left hand ...

In this Arts & Crafts video tutorial you will learn how to tie a Padlock style decorative knot. Padlock knot is a clever way to achieve the look and function of a padlock without having to bother about the key. Take a piece of rope, bend it in the center and make two loops on either side of the rope. Ensure the working end is over the rope in the left side loop and under the rope in the right side loop. Now overlap both the loops so that the left side loop is over the other loop. Now pass the...
Candles make a lovely addition to any home decor, and they are also fabulous gifts. In this video learn how to make your very own decorative candles for cheap. All you will need to create this funky gift if a plain white candle from any grocery store, tissue paper and some wax paper.
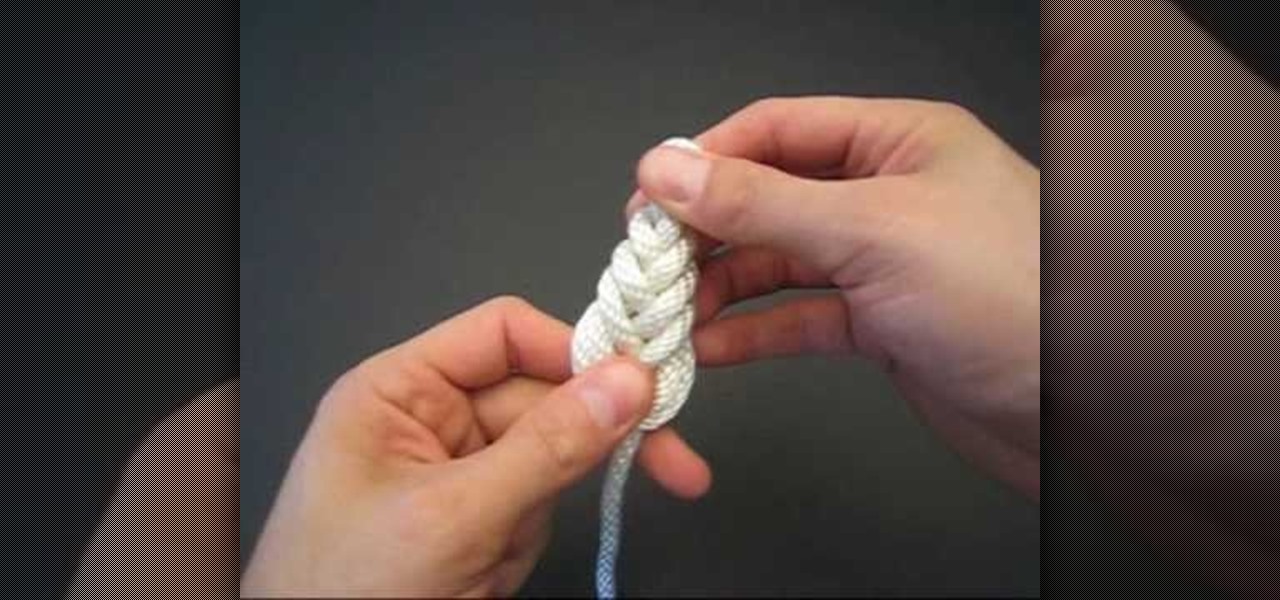
In this Tying It All Together video tutorial, you will learn how to tie a decorative pipa knot. To begin, take a piece of rope and fold so that you have two strands. Create a loop and take the left strand and loop it around the original loop. Continue doing this until you have layers of loop-like structures, gradually getting smaller and folding into one another. The effect is a woven-like structure. To actually secure the knot, fold the end strand into the last loop and then pull this end st...
If you're into arts and crafts then you know that there is more that you can do with a long piece of string than just tie your shoes. On this TyingitAllTogether video you have the opportunity to tie the teacup decorative knot using one long piece of string folded in half. The author of the video first shows you what the end product will look like then methodically begins to walk you through setting up the string in Y-configuration to "crossing each bights crook" which involves overlapping and...
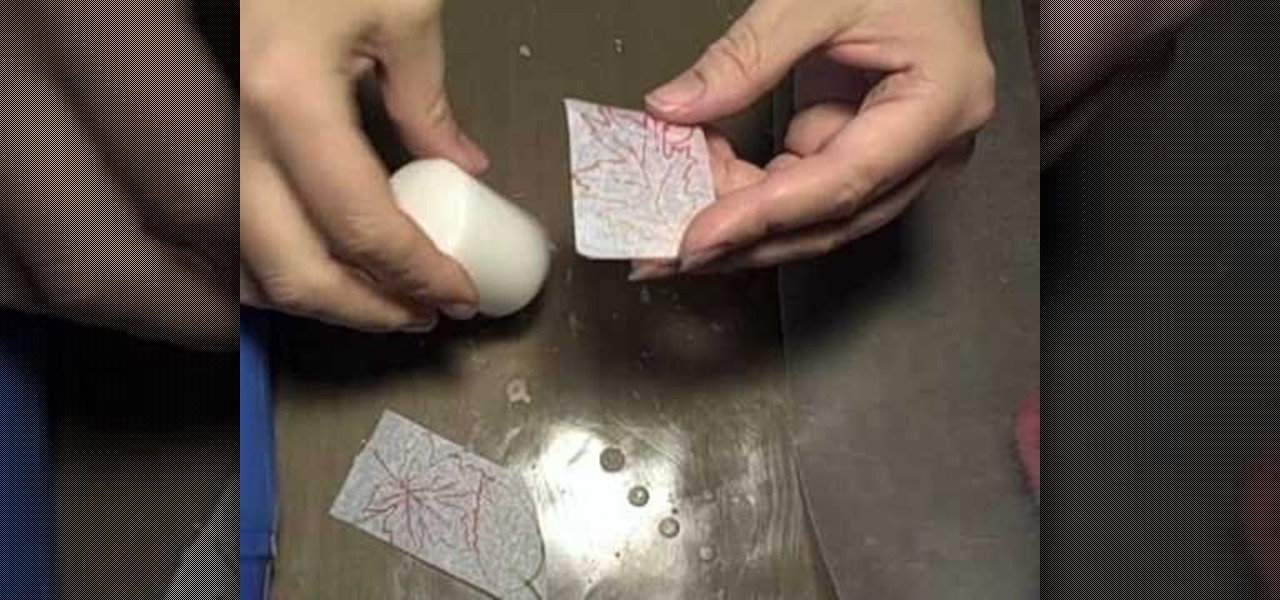
Feel and see just what duct tape is capable of! You can practically do anything with duct tape! This video tutorial will show you how to make decorative designs on your duct tape creations. There are two concepts to decorating your duct tape designs with more duct tape, and that's using stripes and squares, and using stenciling. Make all of your duct tape wallets and checkbooks and whatever more beautiful with colors.
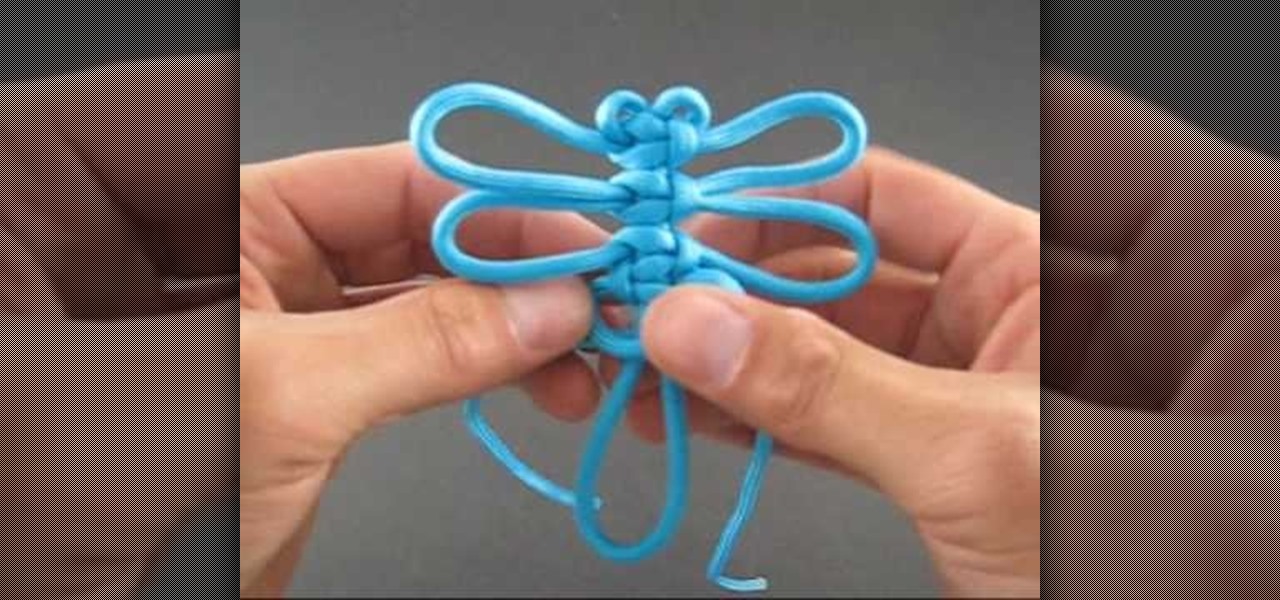
Tying knots can be fun and a great way to help pass the time. They can be used to decorate a variety of different things. For this video tutorial, you'll be finding out how to tie a dragonfly knot easily. It's a decorative Chinese knot and is one of the more popular ones searched for online. So check out the video above, pay attention, and enjoy!
Cat Morley and her adorable Scottish accent show you how to make a decorative square geisha flower that can be made into a pin or sewn onto clothes or accessories for extra embellishment. For this crafting project, you will need some felt, a square template of paper, a pencil, embroidery thread, normal thread, a needle, a yarn needle, sharp scissors, beads, and a button. Watch this video sewing tutorial and learn how to stitch a pretty felt geisha flower.
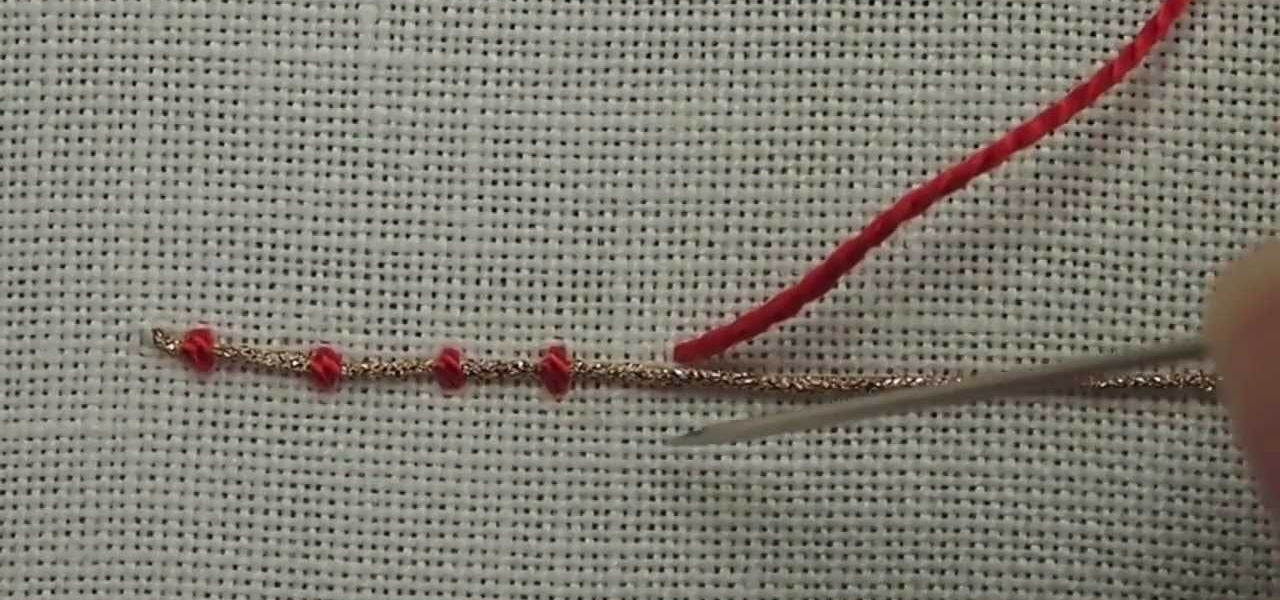
Couching is another easy embroidery stitch in hand embroidery, and a great way to create decorative line stitches that scroll and twirl about. It's also widely used for filling areas, and historically was used to great effect during the Middle Ages and Renaissance in a technique called Or Nue. Here's a video from Needle 'n Thread that demonstrates couching a single thread for an outline.
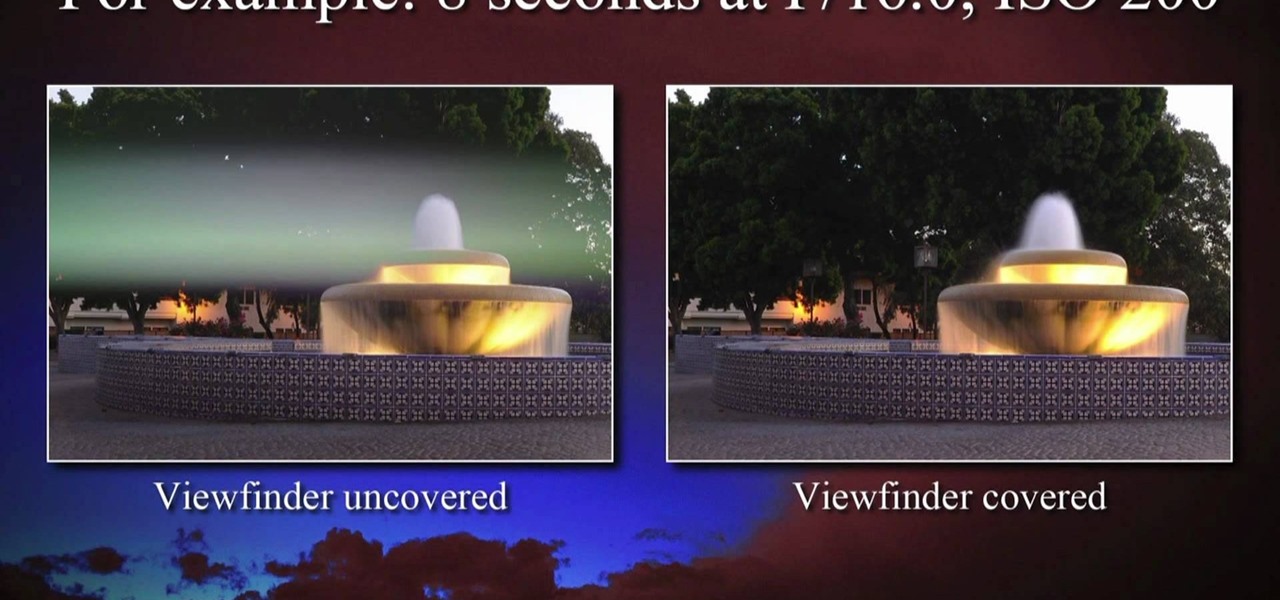
If you've ever been taking pictures and have suddenly noticed an odd white line in your pictures, it's called "Spray Light" and it happens when light enters into the viewfinder while the picture is developing. This video teaches you why it's important to use the viewfinder cover or curtain to avoid this serious problem!
Drapery panels add decorative touches to any bare window or room. Watch this Home & Garden how to video to learn how to use drapery end hooks with 4 prong hooks to hang your draperies. Keep watching the video and learn an easy way to hang flat panel curtains.
This video demonstrates how to hang a shower liner. Hanging a shower liner allows you to hang a decorative shower curtain and keep it dry.
Afraid of the dark? You're only afraid of things you can't see. Just like an owl, see through the darkness, light up your imagination, and use your own owl eyes to make your very own Halloween hoot. To make this owl, you'll need black foam board, an X-Acto knife, LED lights, battery-powered closet light, and curtain rod.
In this video, we learn how to transport & store your decorative cakes. First, you need to consider what icing you covered your cake in. If it's made with butter cream icing, you should store it in the fridge for a couple days before transporting. Also, if you're making a whipped cream icing, this needs to be refrigerated before you transport it as well. There's a whipped icing mix on the market today that you can buy, but don't have to refrigerate. If you've covered it with fondant, place th...
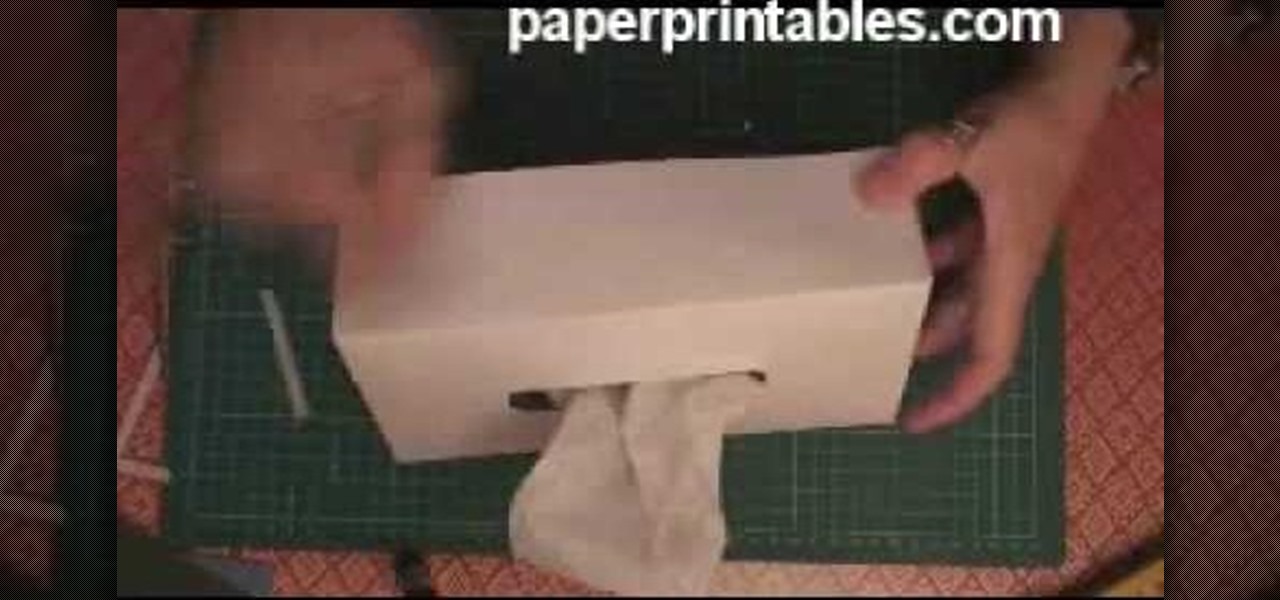
In this video, we learn how to make a decorative tissue box cover. First, you will need to get a piece of paper in your choice of color and set your tissue box on top of it. Use different colors of paper to trace out the edges of the box and then you will tape them all together. Make edges off the paper when you trace them so they fold over. When finished, you will put this onto the tissue box. You can also decorate this with any accessories that you would like to add a personal touch to the ...
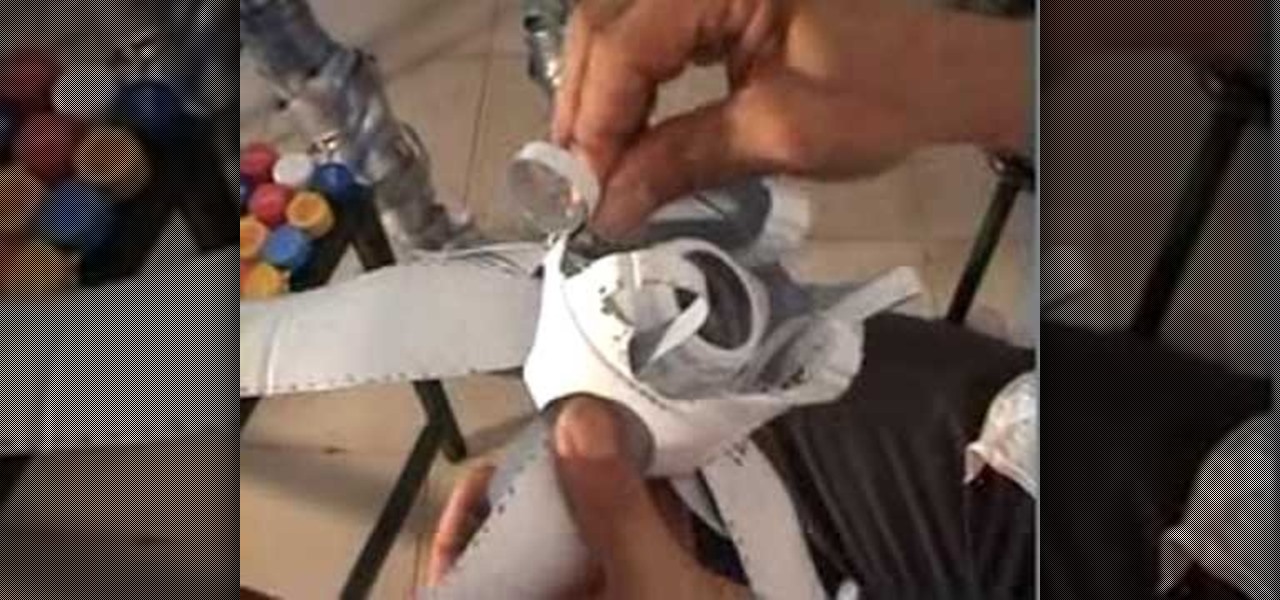
In this video we learn how to recycle plastic bottles and make a decorative mobile. Start off by cutting the strips off of the water bottle then pinning them down to a table. After this, you will start to cross each of these with another piece to make a checkered effect. Nail them down on the sides as well to make it stick to where you want it. When finished, you will remove the nails and then place in a needle with beads and shells attached to it on each of the holes. Once you are finished w...
With this video, we learn how to recycle milk bottles to make decorative flowers. First, mark eight coupled marks on four sides of the bottom of the bottom. Then, poke holes into them and cut into them with sharp scissors. From here, you will continue to do this all the way around the bottom of the bottle until you have created petals. Then, cut above these to make long oval types of shapes and then spread the petals out on the bottom and on the top. Pull the longer petals into the open areas...
In this video we learn how to make a decorative paper rose. First, take a piece of paper and cut several heart shapes out of it, making them different sizes. Once these are cut out, curl the edge over with a toothpick, pencil, or by hand. Set these aside, then use a grab a green sheet of paper. Roll the edge of the paper up and then cut the rest of the paper from it. Create a leaf in this and then tape it all around. Now, twist this tightly and place the curled ends of the heart shapes away f...
To make a mini milk carton, you will need the following a big shot, Mini Milk Carton Die # 117310 (Occasions Mini) card stock, a clip, and sticky strip.
In this tutorial, we learn how to use Fiskars Decorative Edge scrapbook layout. First, you will need to pick out the templates, pictures, and paper that you want to use for this project. Now, place the stencil over the card stock and cut out the stencil shapes you want, stars work best if you are doing a fun child theme. Now, apply these to your base card stock, and arrange a frame over the background. Now, apply the picture to the page and add on the stencils you just cut out. Add in quotes ...
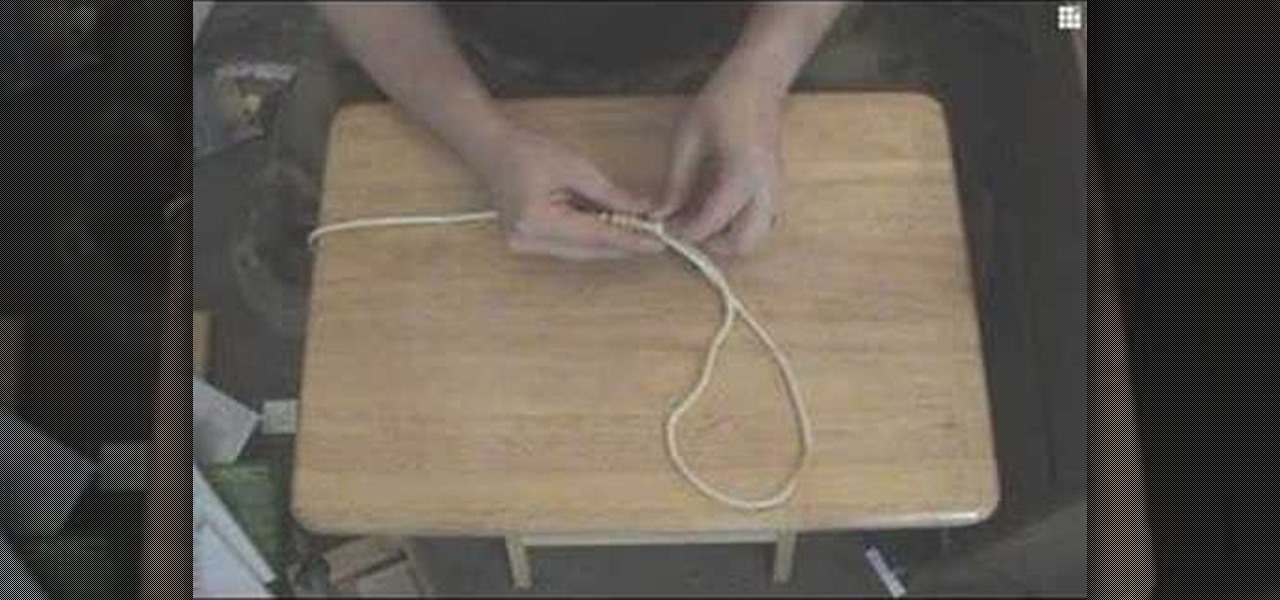
In this tutorial, we learn how to tie a decorative noose. First, form a loop and then and wrap the end around the loop thirteen times. Next, take the loose end and stick it into the coils you just made. Use a pencil and long scissors to help you do this. After you are done with this, tie a knot at the end and pull so the loop is tight. You can also clip off the loose end and pull the loop to make it larger if you prefer. When finished, use this as you wish but do not use it for violent activi...
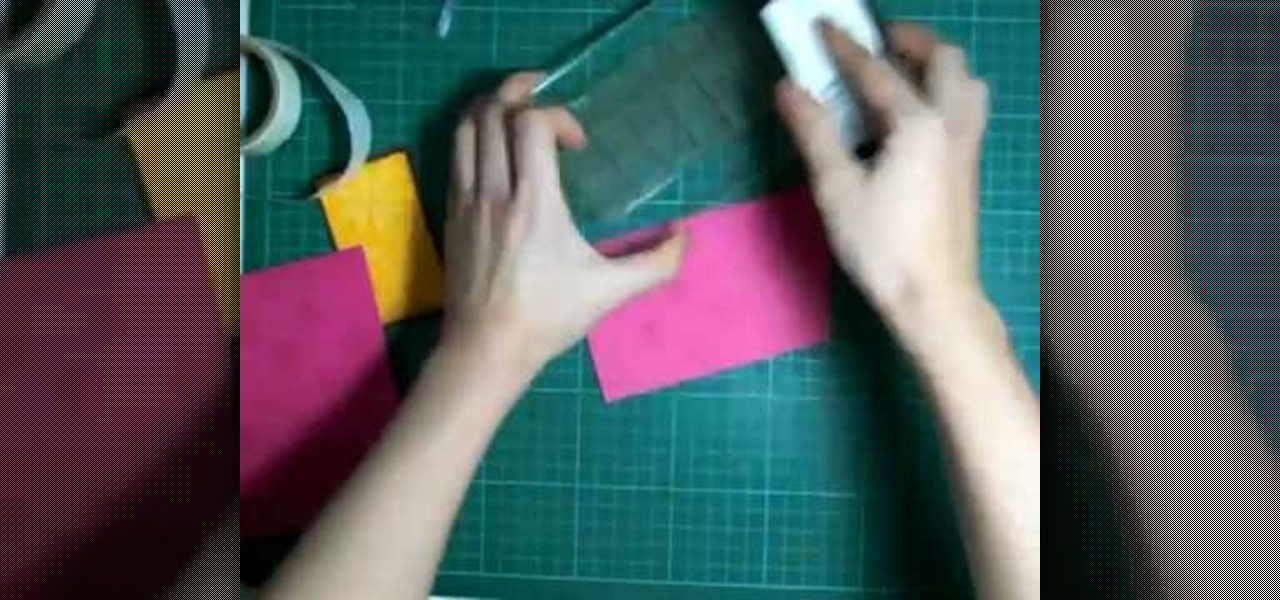
In order to make a Shaker card, you will need the following: a 2" square punch, scissors, card stock, clear plastic, paper, glitter, beads, decorative cutouts, and 2 sided tape.
Not sure what to get your sweetie on Valentine's Day? Everybody loves food! Although they may wait to eat their present AFTER the date in order to stay fitted into their dress or pant, an edible gift might be the way to go this year! In this video presented by the "Original Naked Chef", learn how to make a decorative edible rose for Valentine's Day. Give a gift your loved one's taste buds will enjoy!
In this video tutorial, viewers learn how to make decorative wreaths from garden plants. Users will need a wreath thorn. Users may choose to make the wreath or purchase it. Then add on some greenery such as bay leaf. Now place the greenery onto the thorn wreath and secure it by wrapping it 3 times around with wire. Continue doing this for the rest of the wreath. This video provides a visual demonstration for viewers to easily follow along. This video will benefit those viewers who are interes...
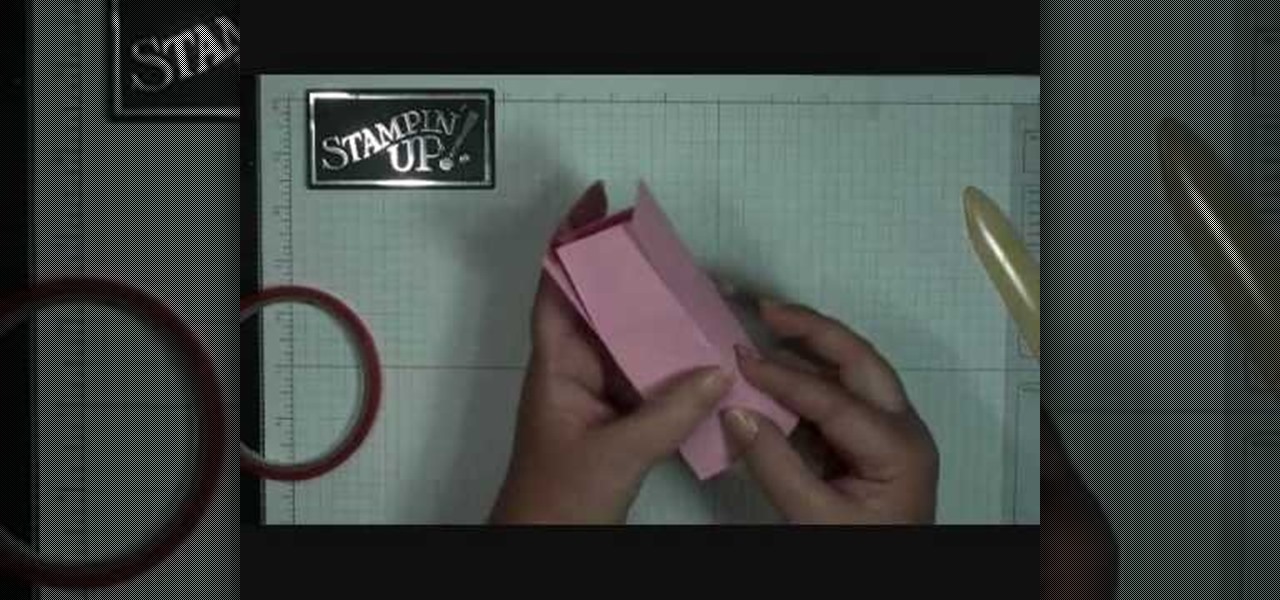
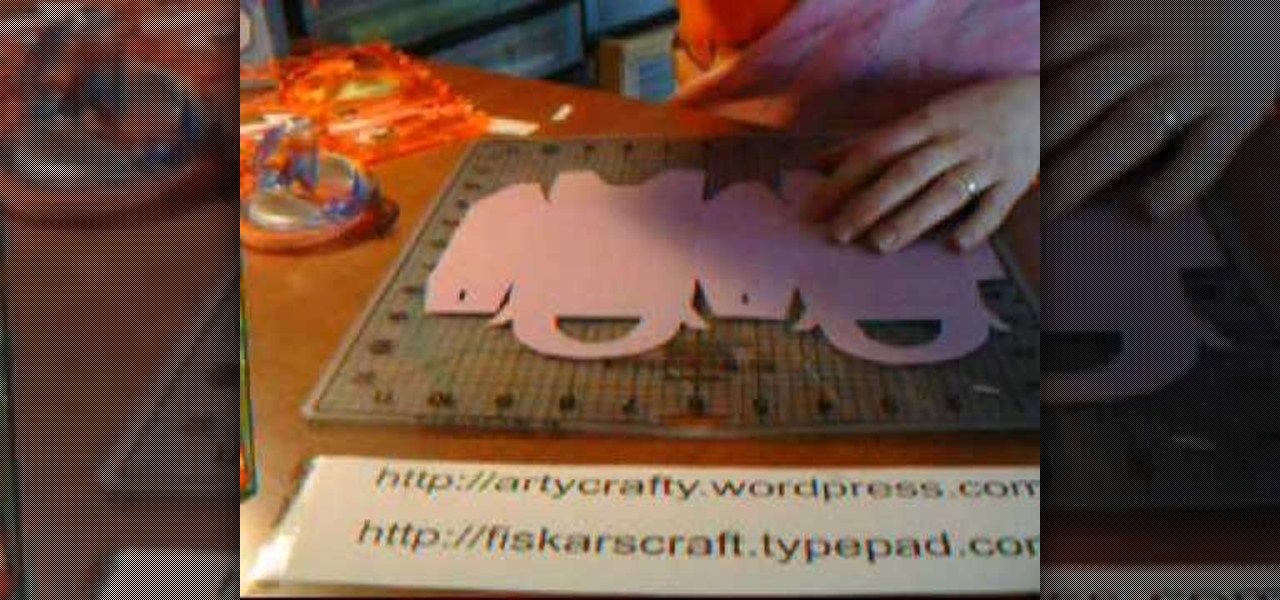
In this Arts & Crafts video tutorial you will learn how to make handmade treat boxes. Materials needed for this project are trimmer with scoring blade, PDF template, cardstock, scissors, Fiskars fingertip craft knife, Fiskars templates, Fiskars ultra shape Xpress, decorative scissors and embellishments. Download the PDF template from http://artycrafty.wordpress.com, print it out on a cardstock on the non-decorative side and cut out the shape along the thick line. Then score along the dotted l...
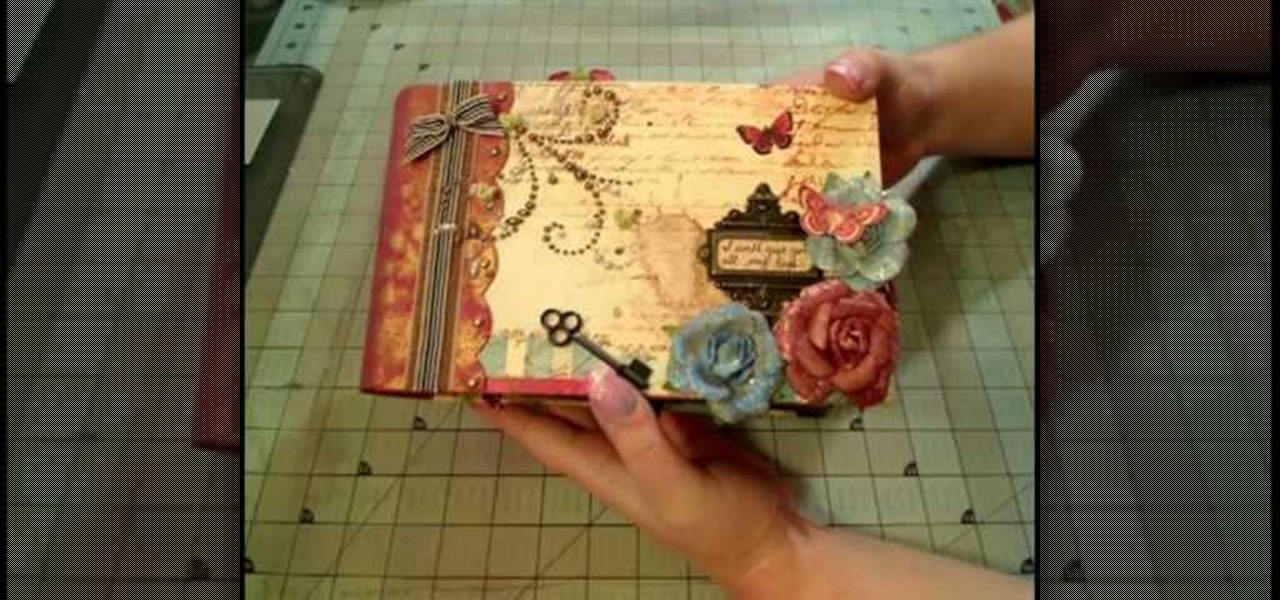
How to make a Prima "Pastiche" Paperbag Album. The demostrator shows us how to make a Prima "Pastiche" Paperbag album. Take a french paper, apply fix some pearls, old keys, artificial flowers, key mantle, all this for the back cover of the album.
In order to make a Cuttlebug Smoosh Card, you will need the following materials: card stock (at least 3 different prints or colors), a ruler, distress tool, double sided tape or glue, distress ink, watermark stamp pad, decorative accessories, and scissors.
This is a great instructional video on how to make a decorative paper star. The materials you need are color papers, ruler, stapler, scissors, adhesive tape, pencil and cutting pliers. Take a paper and make a square of 20 cm side. Now fold the paper twice and get a triangular shape. Now draw four lines on it. Then cut along the lines with the help of scissors. Take the middle square and staple it. Then go to the back side and staple the ends. Repeat this process and get a star. You can make t...
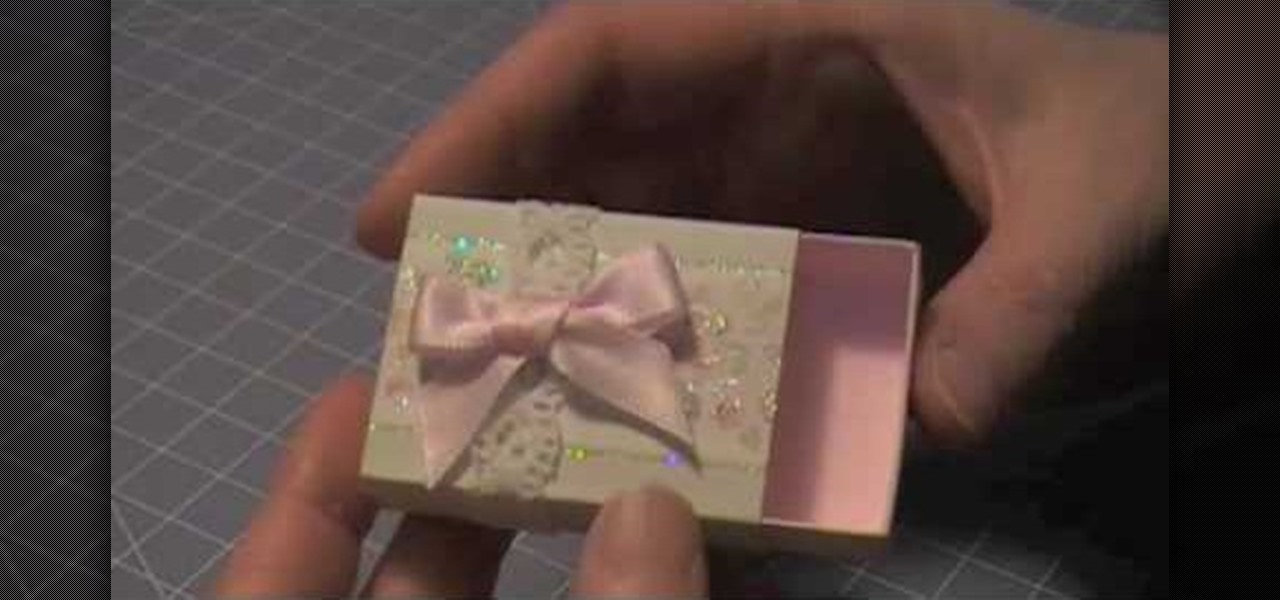
The Artful Paper Doll demonstrates how to make a Marie Antoinette inspired matchbox. Trace the matchbox template onto a piece of decorative paper. Score the template on the creases and then cut the template out of the decorative paper. Fold the creases up. Affix the creases into a square basket shape with dabs of glue to hold the flaps closed. Fold and glue the ends of the box sleeve together. Slide the basket into the sleeve to form the matchbox. Embellish the box as desired. The box can be ...
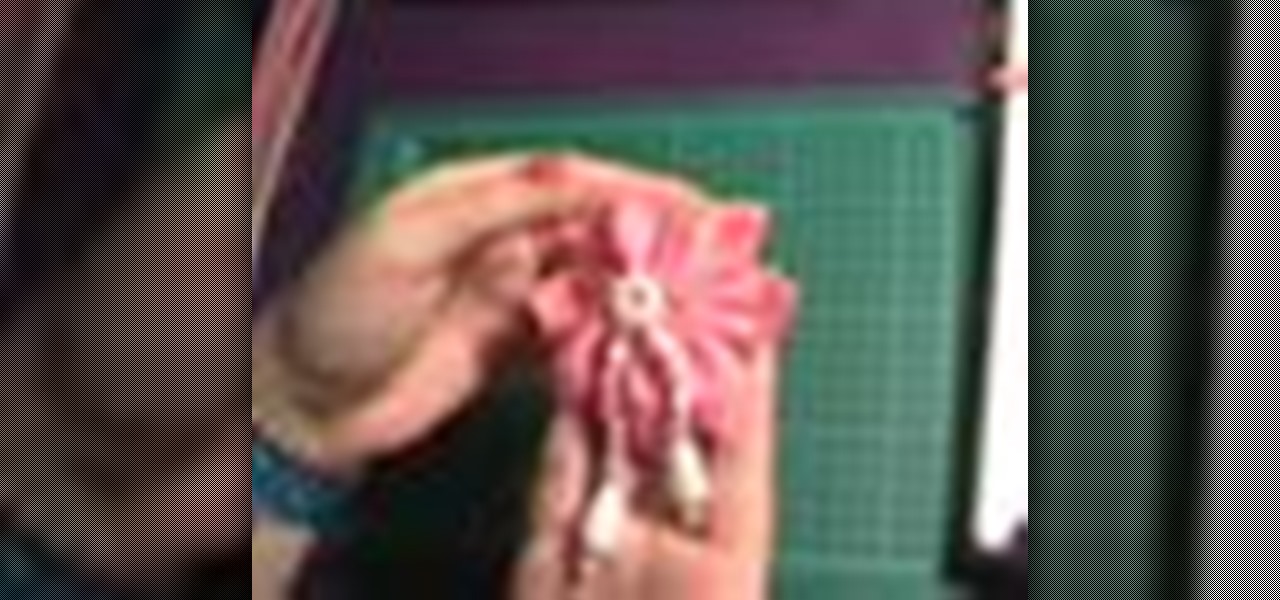
Ever been impressed by fancy gift wrap but didn't know how to create it on your own? This video will show you how to make that perfect decorative bow. In this tutorial you will go step by step about how to use normal ribbon to create a special bow. You'll take two separate lengths of ribbon, one thick and one thin and combine them for a fancier look. This tutorial will show you how to adjust the length of the loops and tie the look off for a final look.
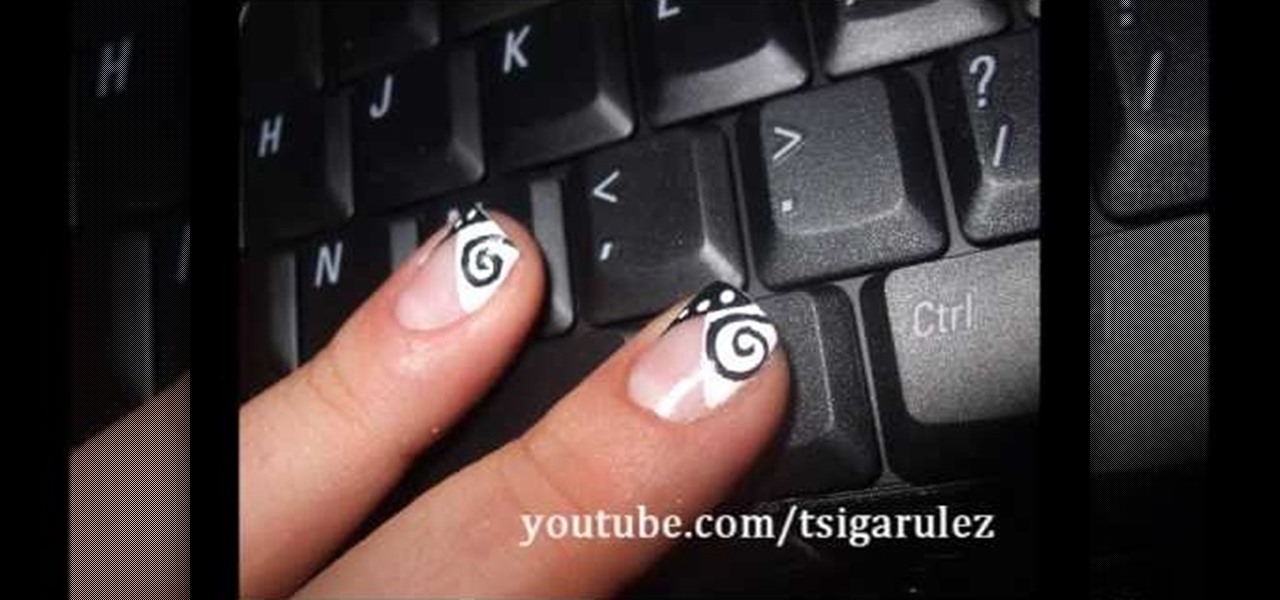
Make a fun decorative design with this video tutorial. To create black and white with decorative swirls and dots:
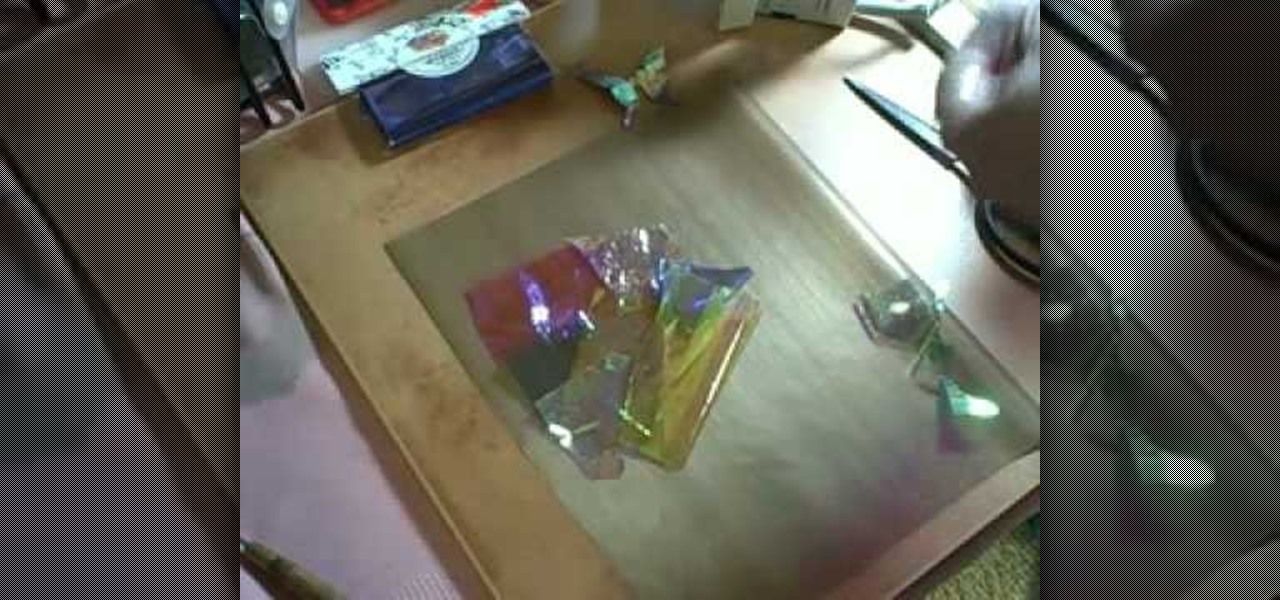
Make a cool drinking or water container, or simply a great decorative gourd ornament. But before you can decorate the gourd, you need to make the decorations. Learn how to make Opals and Fantasy Film glass paper for a gourd.
If you or anyone in your family suffers from allergies, there are some simple ways to make your home more hospitable.
Presented by Apartments.com When looking for a new apartment, it's hard not to notice the improvements (on large and small scale) needed prior to moving in. While your landlord may be taking care of new carpeting, cleaning the central air vents, and fresh paint on the walls, there may be some additional improvements on your list that you can take care of on your own. Here are five quick improvements you can check off your list before the big move.
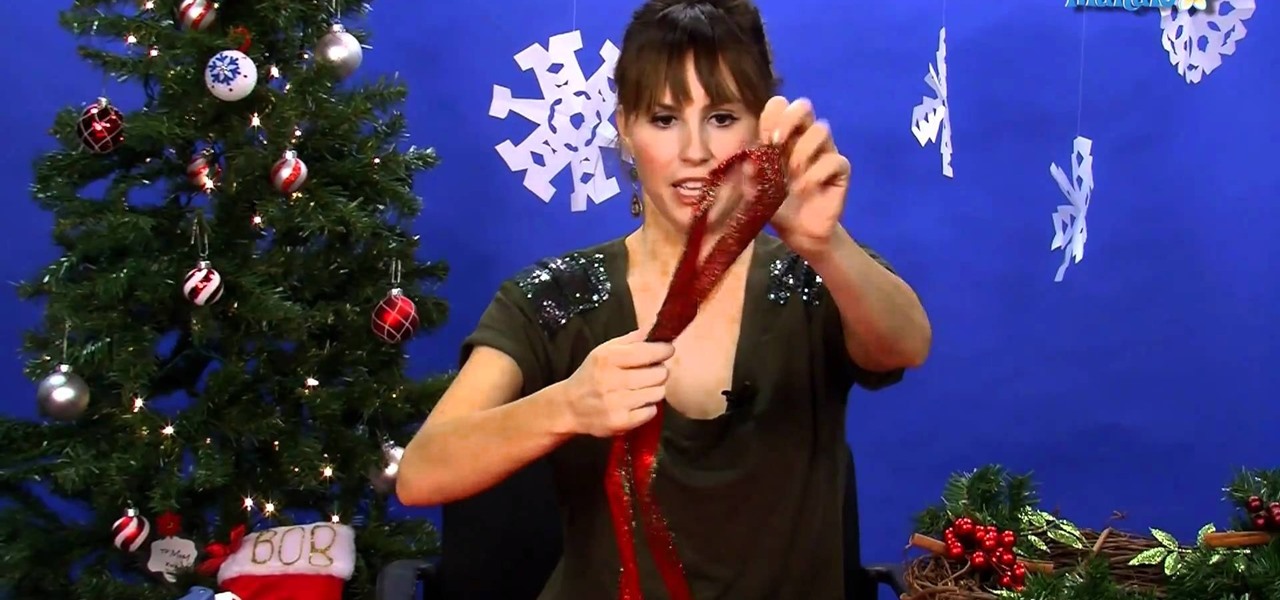
Make a fun and inviting Christmas wreath this holiday season and impress your friends and family with your creative skills! For this project, you will need a pre-made wreath, wire edged ribbon, glue gun, scissors, and additional accoutrements like decorative berries and cinammon sticks.Keltie Colleen from Mahalo gets in touch with her resourceful side and shows you how.