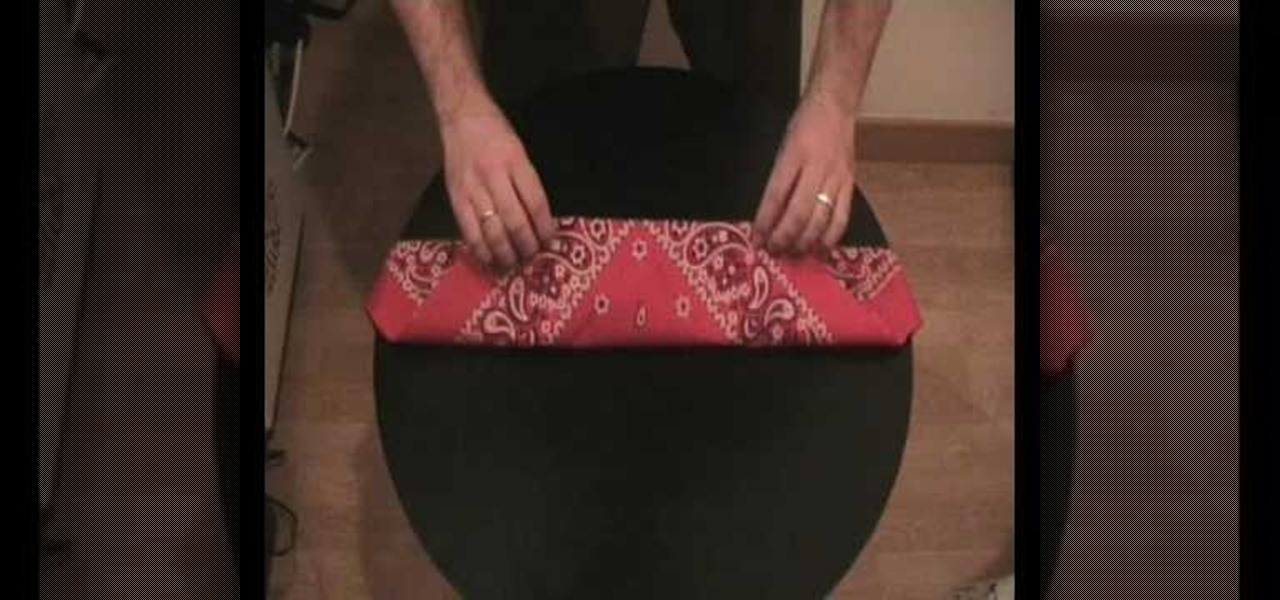
In this tutorial, we learn the proper way to fold a bandana. This is a traditional way, not a rapper or gangster style. First, lay the bandana flat and make sure there are no creases in it. Next, fold the bandana into one big triangle. After you've done this, fold the top point down and keep folding down until you've made a large and thin rectangle. Now, flip it over and you can tie the bandana around your head. Tie it in the back of your head and place it across your forehead, now you've got...
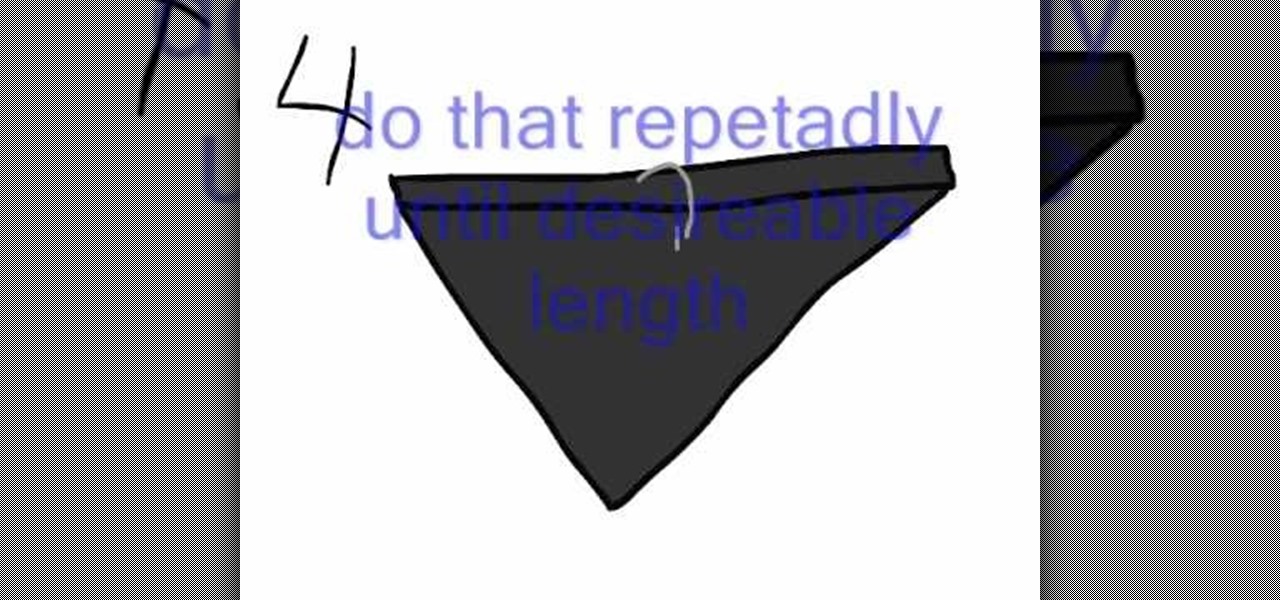
In this video, we learn how to fold a bandanna. First, place your bandanna flat, then fold it diagonally. Once you've done this, you will have an upside down triangle. Now, fold the top of the triangle down as many times as you desire, it can be as wide or as thin as you want. Now, you should have a rectangle with a triangle hanging out from under it. You can now tie the bandanna around your head, butting the triangle part around your mouth. Tie a knot behind your head tight enough to where i...
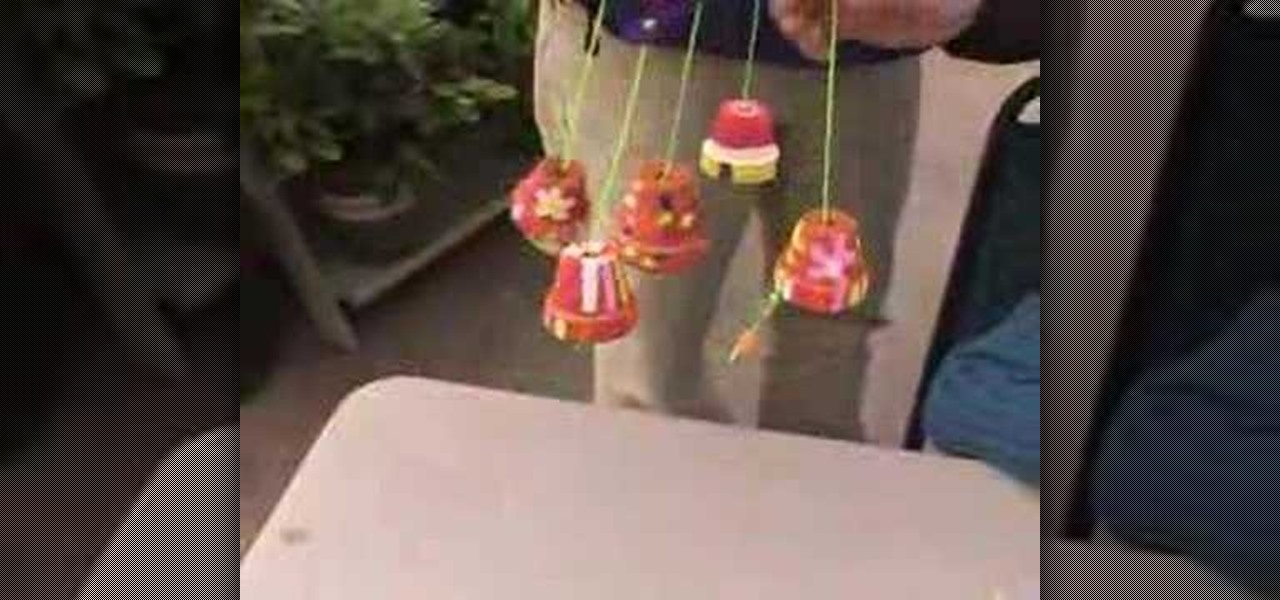
Lynn Snodgrass shows how to make chimes by using small clay pots and popsicle sticks. You can tie them together by using plastic string or regular garden string. The pots can be decorated with paint or you can apply stickers to the pots. 1. Use the sticks tied with the string as the base that holds the pots together. 2. Thread the string through the opening in the clay pots. The pots will have already been decorated with the stickers and the paint and will already be dry. The next step is to ...
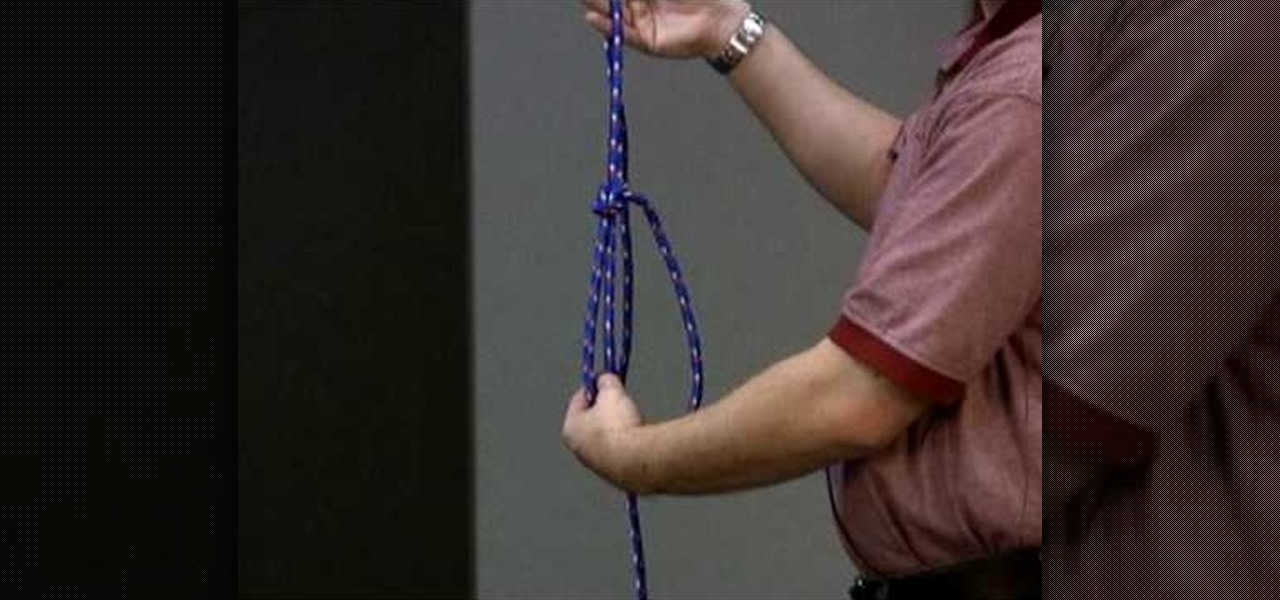
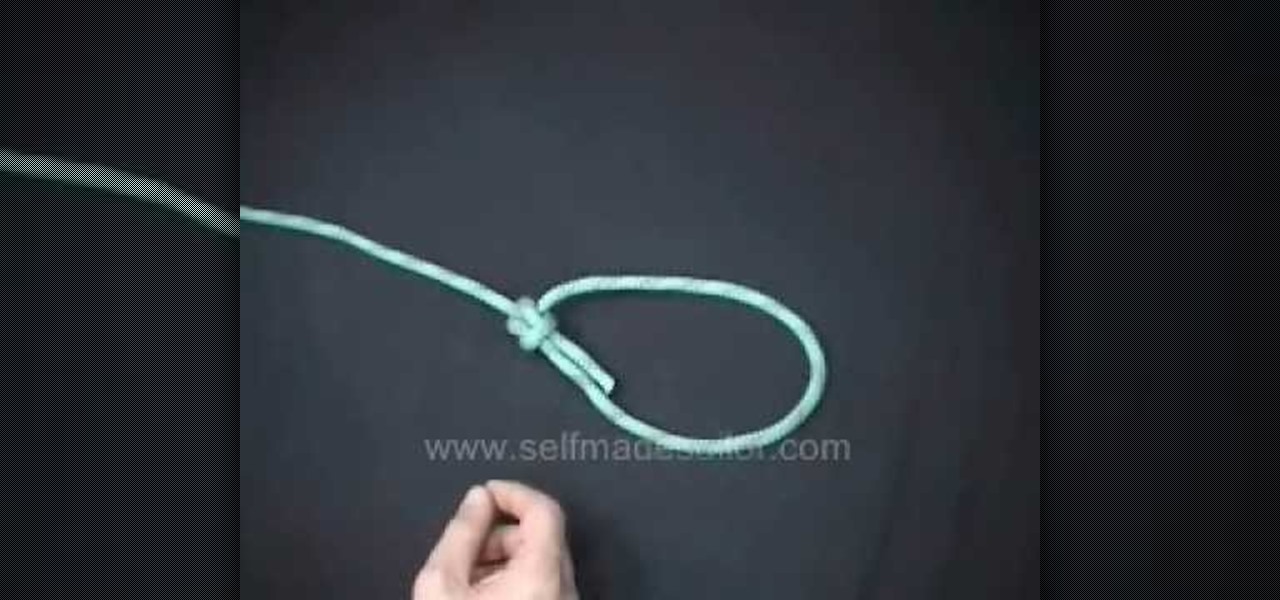
This video describes and shows you how to tie a loop in the end of a rope with a bowline knot. A bowline knot is used in rigging by the ground rigger to create a point for the up rigger to have a point to pull up. This is how you create a bowline knot. First you must create a loop in the middle of the knot. With the free end, come up through the loop, then you go around the standing end of the rope and then you move it back through the loop. You pull the knot tight. That is how you create a b...

Learn how to make a River Bar bracelet, which is also known as a Paracord bracelet, by following the steps outlined in this video tutorial. To start your bracelet, you will need to tie a reef knot. This is done by taking two loops (in two different color strings) and then placing one loop within the other, pulling this through the first loop to secure the two loops together. This knot creates the end of your bracelet. To actually make the River Bar design, bend the two colors of string so tha...
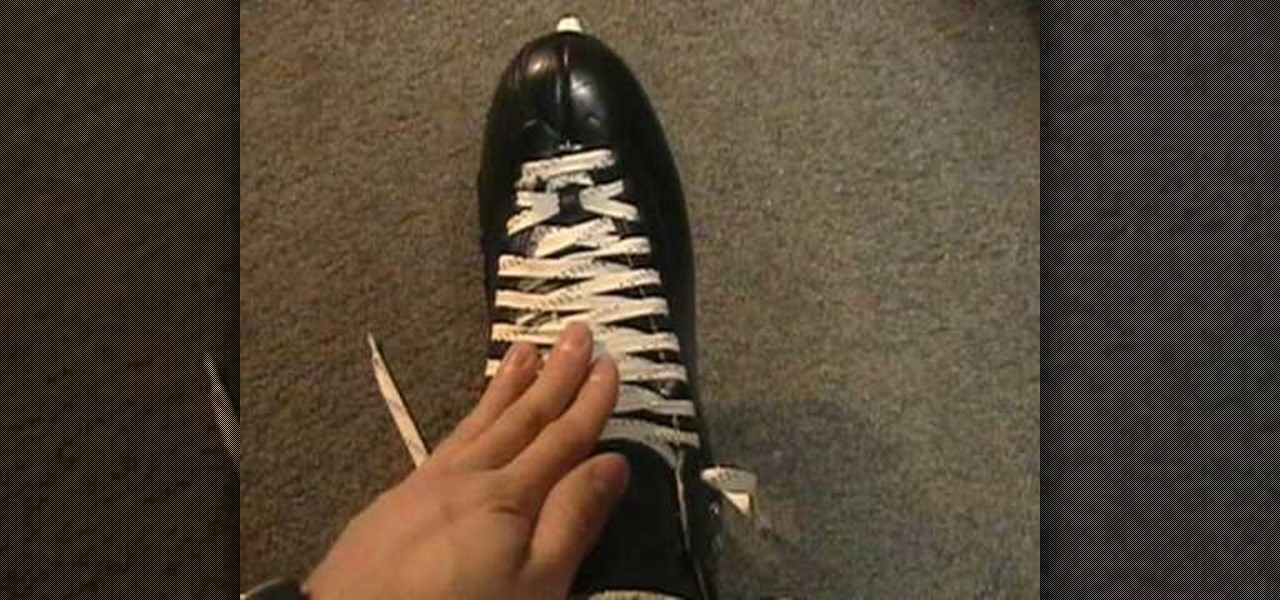
In this video from Prolite we learn the right way to tie your ice skates and keep the laces tight. First you need a lace hook. It's a metal piece that helps you lace the skates. With the skate on and the laces loose, pull tight on the laces just enough so it's a little tight. Now take the lace hook and start at the bottom. Put it underneath both laces and pull tight. Keep doing this as you go up the skate. As you pull tight with one hand, with the other you put one finger where the tension is...

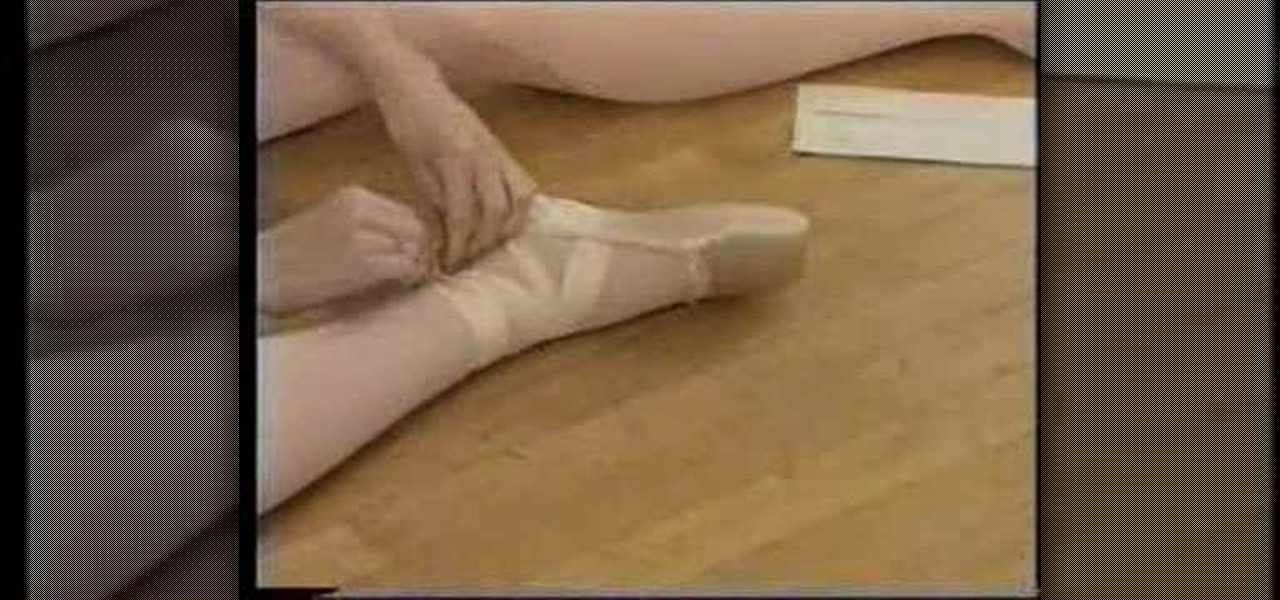
This video demonstrates how to properly tie ballet shoes before doing ballet. First, in addition to the ballet shoes, some paper towels will be needed for padding. Fold about three paper towels together until they form a rectangle approximately 3" by 4". This will be used to pad the toes. Now, pulling the show onto the foot, pull the strap over the top of the foot and place the folded paper towels around the toes and top of foot to pad. Pull the shoe snugly onto the foot. The side straps shou...
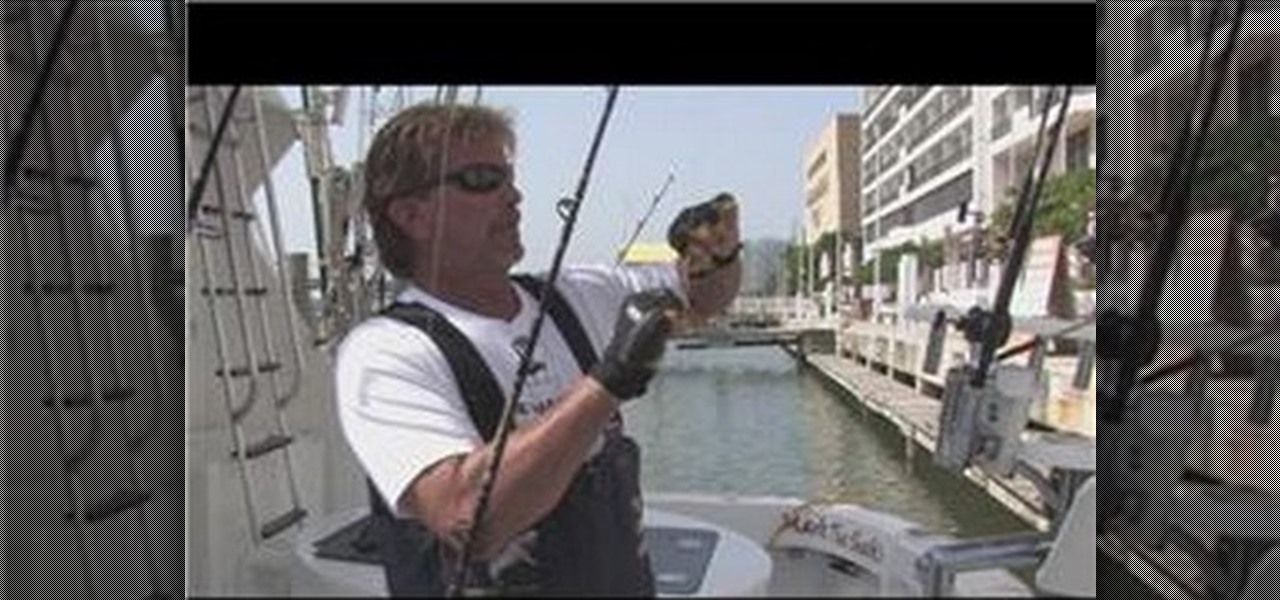
To begin with you have to pass the line all the way through the eye of the hook and do it crosswise seven or eight times. Run it through the loop once more and then pass it all the way through the main loop of the line. Make certain that your line is wet. Another special way is that you can tie a loop on the line and then craft another loop and then pass it all the way through the eye of the hook and then bind it and cut it off. One more way to create a knot for the live bait is first craft a...
This video is in the Arts and Crafts category and you will learn how to make a Victorian-inspired necklace using an old ribbon. This is a very simple and easy way of making a necklace. Take a ribbon of about an arm’s length, tie it around the neck and check that the length should be OK. Then you can take a bunch of beads or a flower or some such suitable item which is fixed on a wire to put on the ribbon. Tie a knot around the wire and then turn the wire around the ribbon and your necklace is...
The woman in the video want to show how to tie a toga for men and woman. Everything you need for both types of toga is a bed sheet, folded in half. First, men toga. You wrap the sheet around once and then roll it over your shoulder. For the woman toga, take the sheet, wrap is around you, and than roll it over your shoulder. You can even have clothes under it, because the most part of them won't be able to be seen. You can also put a crown on your head, made from leaves. Enjoy your toga!
This Spirituality video clip will show you how to wrap a Wiccan cinnamon stick bundle for protection. You need some cinnamon sticks, scissors and ribbon. Cut a very long piece of ribbon, lay it down on a table, place the cinnamon sticks on the ribbon, tie a basic knot flip it over and tie another knot. With one end of the ribbon, go over and in between the sticks and with the other end, go under and in between the sticks. Now put one more knot in between the sticks. One more time go under or ...
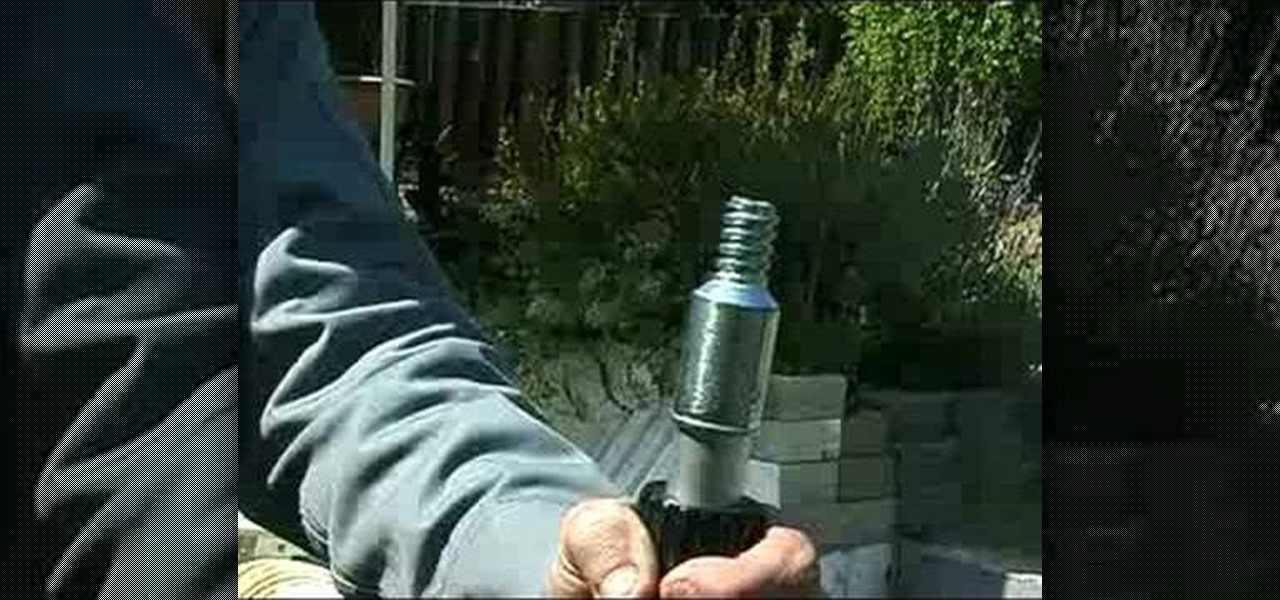
Joe Richardson, Five Sprockets consultant, demonstrates how to build your own functional boom microphone. First, if you don't already have one, get a microphone from your local electronics store. Then, pick up a mic holder. Next, you'll also need a telescoping pole like a painter's pole. You'll also need zip ties and metal bonding glue. A piece of fake fur from a fabric store will act as a wind sock to cut down on noise. Attach the mic head to the painter's pole with the metal bonding glue. N...
MRTV demonstrates how to make a scarf necklace. Making a scarf necklace is very easy and doesn't require cutting, sewing or altering. If you know how to tie a knot and you have a scarf then you can make a scarf necklace. Fold a square scarf into a triangle. Take the tip of the triangle and fold it in. Roll the scarf up and knot it loosely in the middle. Make knots in the loose ends of the scarf, using your desired length to determine how many knots to make. Tie the ends of the scarf together ...
We need a pen, thread or twine, small stick or wooden skewer, and scissors to make a mini bow and arrow.
This video helps in making a bow and arrow using pencil, pen and rubber band. You can get these from school, stores, house etc.
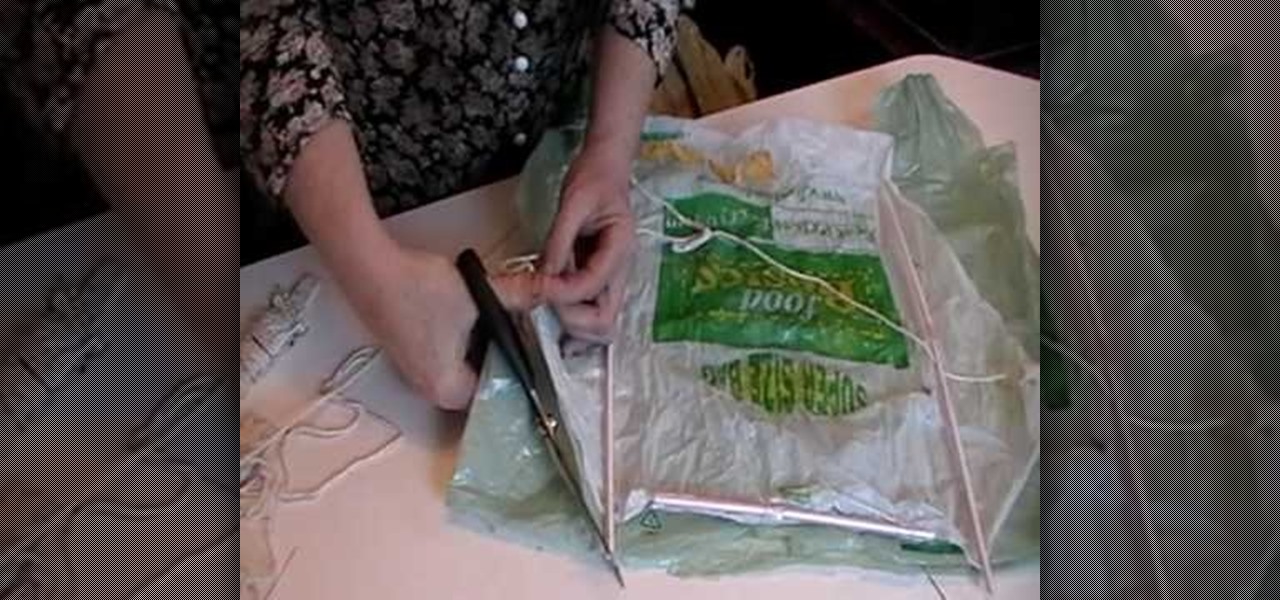
Learn how to make a homemade kite with this video. To do this you will need a regular plastic bag, some plastic straws, string and scissors. Begin by using the scissors to cut the bag in half, around the edges. Once you have this, make a rhombus shape out of it. You will need five straws and tape. Use one straw for the top and two straws on each side. Make sure that these two sides are the same side. Add clear or regular tape to stick the straws to the plastic bag. Lastly, tie the string at t...
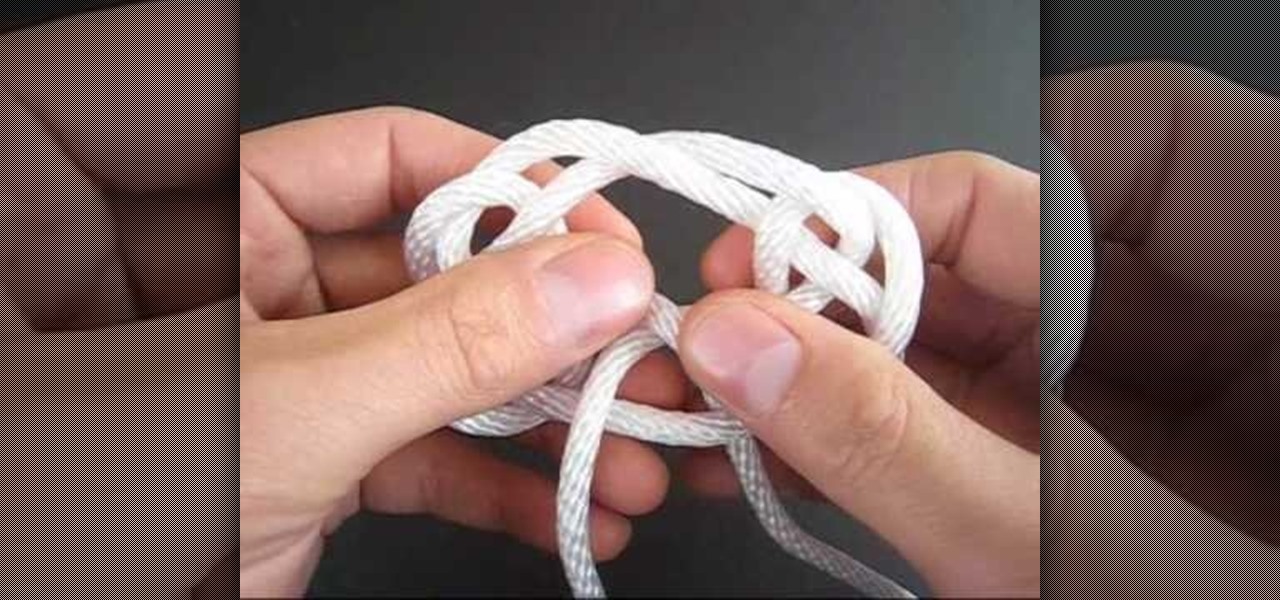
The Tying It All Together team, or TIAT, explains the origin of the Rorschach knot and demonstrates the techniques in order to make the decorative knot. The Rorschach knot, associated with psychological testing of a subject's perception of inkblots can become a decorative knot with just one string. TIAT shows how to make "bunny ear" loops consecutively around one another while repeatedly matting and firming the string to keep it in place. TIAT also pauses periodically for the viewer to keep t...
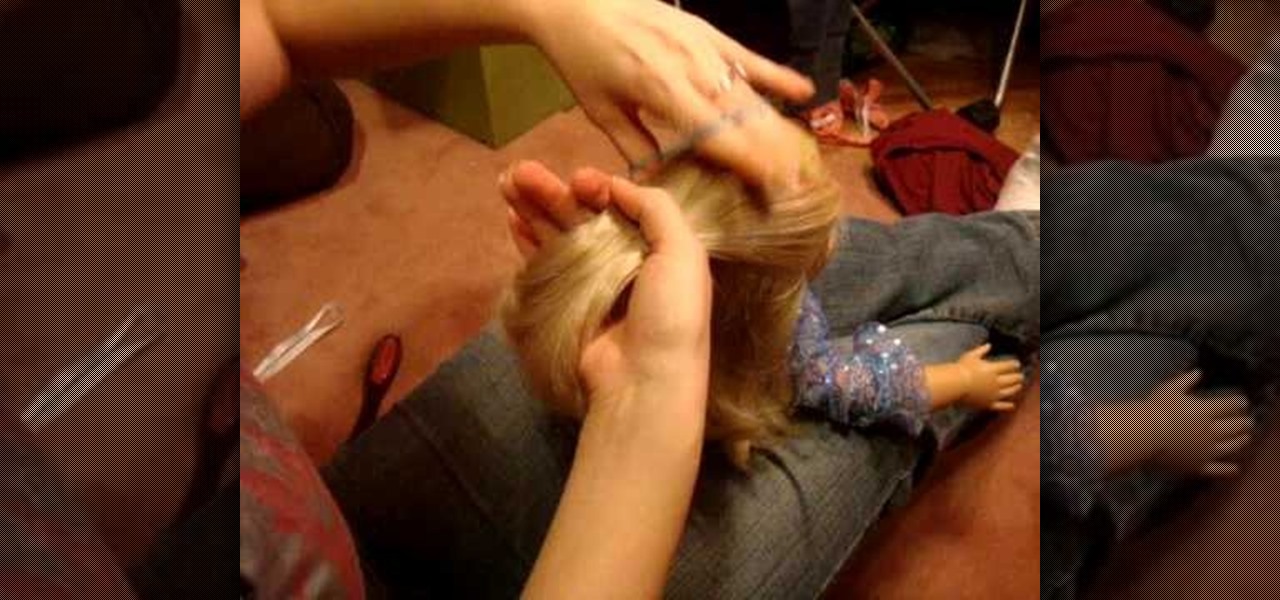
Follow this video to learn how to do an innovative and cute hairstyle to your American Girl doll. The first thing you have to do is to brush the doll's hair well. Then split the hair in two parts by parting it. Tie the upper part in a ponytail using a hair band. Afterwards tie the lower part into another ponytail using another hair band. Make sure to brush the hair well each time. Spread out the upper ponytail in a way that it almost hides beneath it the lower ponytail. You will have made a d...
The ability to tie a ribbon bow is a basic skill that can dress up any drab looking gift box.
Looking for a stylish, slightly menacing way to store your keys? The "rattlesnake tie" is in actuality Clifford W. Ashley's Over-And-Under Heaving Line Knot or ABOK #541. That said, the rattlesnake tie is a whole lot easier to say and remember, so that name is used here.
To make a Kinky Lover's knot, first hang or keep the tag on something. Then take the first end. Tie it by keeping a loop. Then take the second end and pass it through the loop by leaving a loop. Then take the second end, which was taken earlier , through the loop made by the first end. Then pass the second end through the loop, which was made by the second end. The knot is ready! All we have to do now is to tighten the knot by pulling the two ends. Make it beautiful by arranging the tag clearly.
The Hempdiaries believes that you too can create a bracelet using hemp and jewelry accessories. The narrator first begins by showing you what the two mandatory materials you will need which are hemp and a dowel rod. To begin he shows you how set the dowel rod between your knees to provide a foundation for the string and then an arms length of two pieces of string folded in half. Tying the string around the dowel rod he shows you how to begin the flat pattern for the hemp bracelet and that thi...
Watch this video to learn how to sew by hand! You need scissors, thread (or floss), a needle, and fabric. First, stick your threaded needle through the cloth and pull the thread through. To make a running stitch, push it back through to the opposite side. Your stitches should look like a dashed line. For a whip stitch, keep pushing the needle through the fabric from the same side each time, near the edge. It will wrap around the edge. To tie it off, push the needle back through the loop of a ...
Kristina tells us the key steps to making a cheerleader styled hair bow. All you need is one simple thin strip of material, of whatever color or pattern you might want, there being a huge variety to choose from, thread and a needle, and the hair tie that you will then be attaching the created bow to. You make a simple "breast cancer sign" with the material, then further twist it into a bow, then thread the center to hold it together. The last step, of course, being to glue the aforementioned ...
Want to stay warm while out in the cold without looking like a frump? This video is for you! Stylist Jackie O Dee shows you multiple ways to tie a scarf to keep looking stylish during the cold winter months. Some styles work well under outerwear while others can be pinned and worn indoors with your regular outfit. The great thing is that many of these techniques can be transferred to lighter spring scarves as well as this instruction can be used all year long.
Parisians often wear beautiful scarves. They look chic, and keep you warm. The first way to wear it is the European loop. Double the scarf in half and loop then loose end though the loops. Second, you can loop the scarf around your neck then loop the end though the wrap. Third idea is to wrap the scarf around the neck twice then pull the loose end through the loop. This creates a very warm bundle around the neck. With a large square scarf you can fold it into a triangle and tie it around the ...
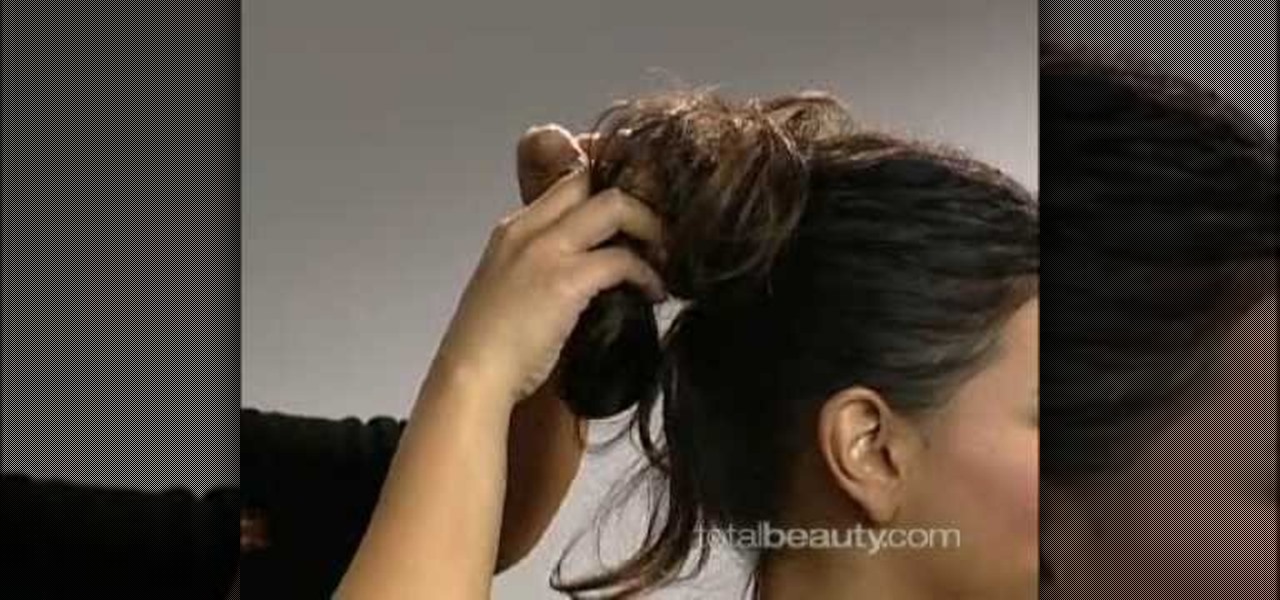
The pony tail is the quintessential up do. In this video, Jeanne San Diego shows her viewers how to make a messy pony tail. After taking your hair in a normal pony tail and tying it up, you then scrunch up your hair and tie a second hair band, creating a messy bun. Then, using a rat tail comb, you should use the end of it and place it under your hair, creating more volume. This technique is perfect for people who would like to have a classy yet simple up do.
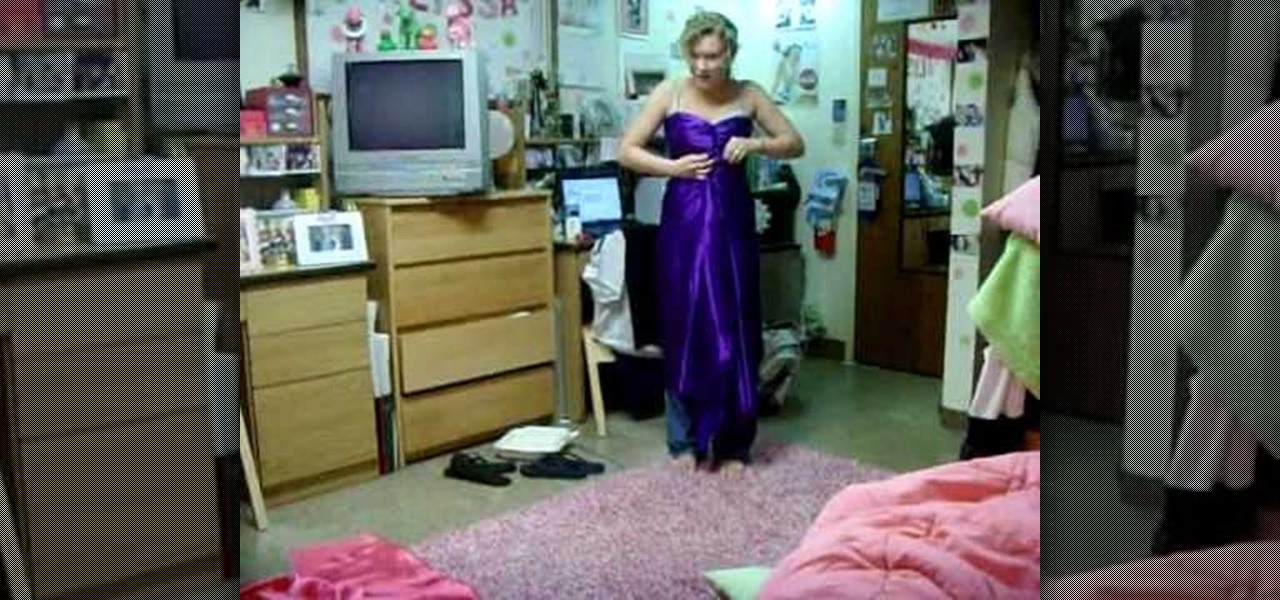
Watch this video to learn how to make a sexy toga for women! First, take a sheet and wrap it around from back to front, twisting it in the middle of your chest. (Wear a strapless bra.) Pin it there with safety pins. Take the bottom ends, tie them once in front and pin the tails to the sides. Take a rope and tie it tight under your breasts in a bow. Now you are ready for an epic toga party!
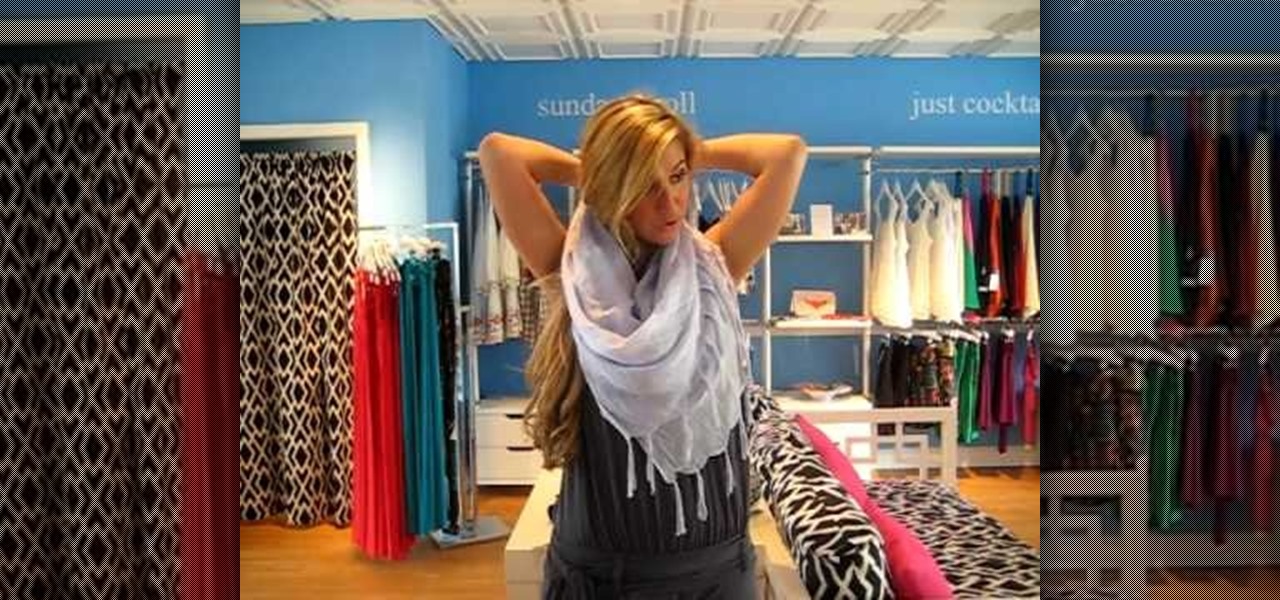
Brianna of First Date Boutique gives us several different ways to tie a summer scarf. This light and airy accessory can add an extra touch to any outfit, and Brianna runs down each style, and then, using herself as the model, shows us exactly how it's done. First up, we have a wide and loose style, where the scarf covers almost your entire front, looking almost like a poncho. Second, a style similar to how you wear a winter scarf, with the two distinct ends coming out and across your chest. T...
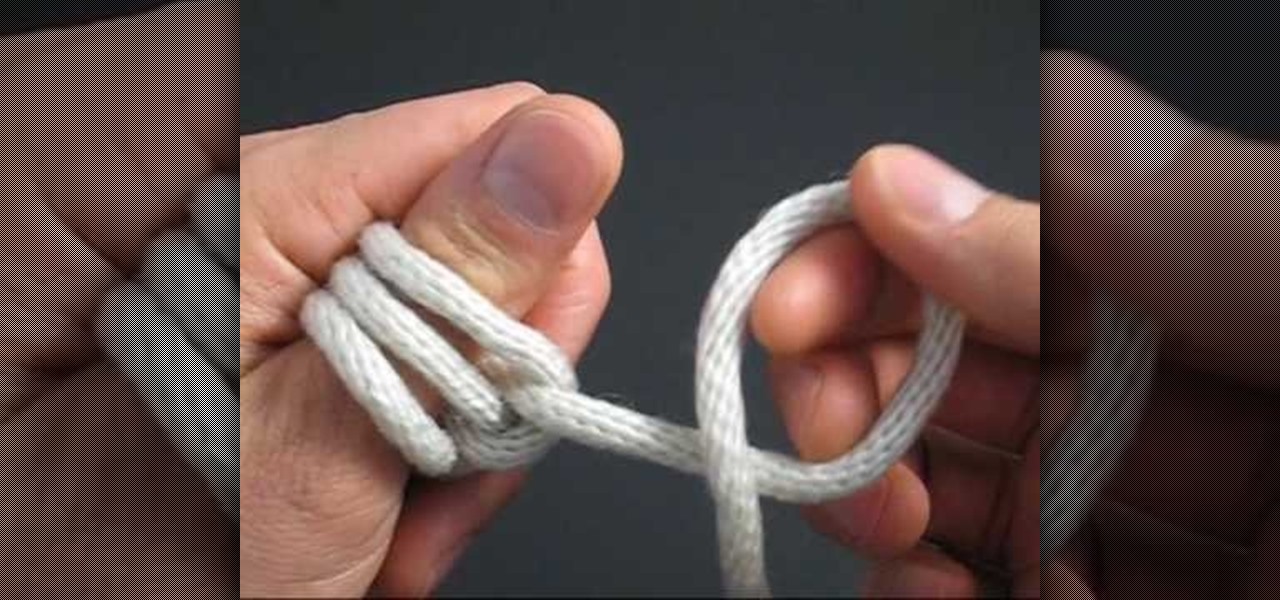
A bloody knuckle knot is the result of a row of half hitches fused with a blood knot--this video teaches you how to tie one. Make two loops with your rope then loop them over your thumb. Take the tail of the rope and keep making loops and adding them to the others on your thumb, to produce a row of loops. When you have five loops, slide them off your thumb, take the end of the rope and pass it through the loops. Pull out the slack but do not tighten, then take the other tail and pass it throu...
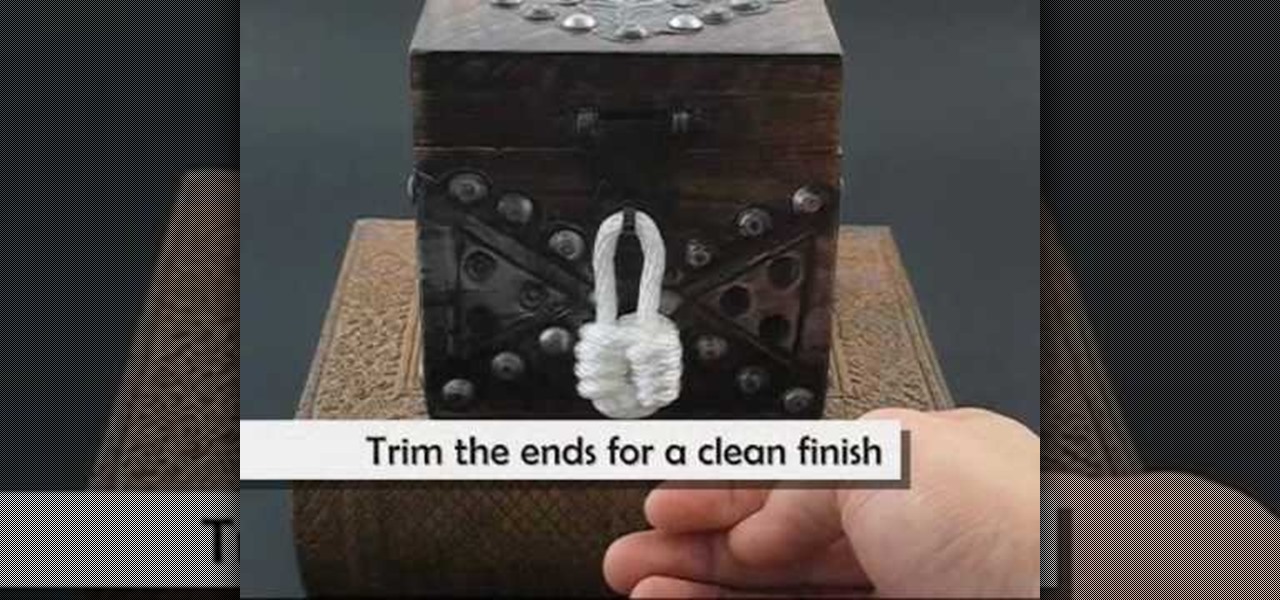
The padlock knot is designed to look like a padlock, but without the actual function of one. In order to tie this knot take your rope or string and fold it in half. After you have done that make a loop with both sides of the rope making sure you leave a loop at the top. Put the two loops together the one in the front turning clockwise and the one in the back counter-clockwise. Make sure to leave a hole in the center for the rope to pass through. Now wind each piece of rope through the hole in...
Learn the tricks to running a three-legged race – without ending up flat on your face! Step 1
Ok, shutterbug, you need to keep your camera from shaking, but there’s no tripod in sight. Relax--you can still get the perfect shot. Here a couple easy tricks to help you get a steady shot without a tripod.
Need to know how to tie a Bowline with a few ways of securing it? This way shows you how to secure it with a seizing so that it won't accidentally come undone. Included is a little variation of the bowline with a built-in seizing. If you don't have electrical tape to secure the bowline feed the bitter end back through the hole. It also makes it so you don't have a tail line dangling if you're towing something.
This instructional drum video shows you how to make a Guinean bolong bata drum. The Bolong Bata comes originally from Guinea. The base is made of two half calabashes. One half is covered with goat hide, tied with rope to the bottom of the other calabash. The hole in the upper half is made for acoustic purposes. And if you like the music, you may put some money in it. The Bolong has three or four strings, made of rope, tied to a wooden stick on one side and a wooden keg on the other. The strin...
When fishing you want to have a strong knot attaching your hook to your line. Learn how to tie a polymer knot from a fisherman in this video tutorial. Take action: put line through the jig, keep slack in the line loop, and run the jig through the loop. Ron, the instructor in this how-to video from Live Strong, is a professional bass fisher and has qualified for the Bass Master Classic and has won two B.A.S.S. Western Divisionals. He has also recorded multiple top ten finishes on F.L.W. tourna...
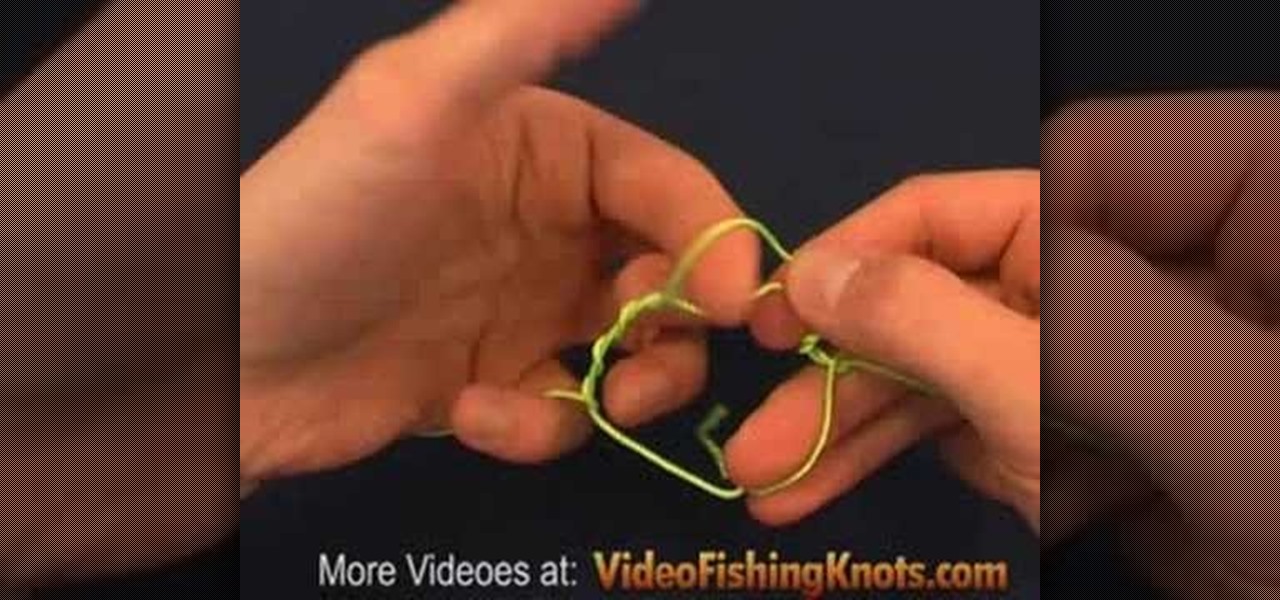
The Twisted Dropper Loop is a variation of the dropper loop. As the dropper loop the twisted dropper loop forms a loop which is off to the side of the line. In the this variation the line is twisted before the loop is created. This stiffens the line and make it stand nicely off to the side. The twisted dropper loop can be used anytime a loop is needed in the middle of your leader. Follow along with this fishing HowTo video to learn how to tie a twisted dropper loop for fishing.
The Dropper loop is a classic loop knot which is often used on multi-hook fishing lines and bait rigs. The dropper loop is also often used by fly fishermen to attach an extra fly to the leader. The dropper loop can be created in the middle of a the fishing line and forms a loop which is off to the side of the line. Follow along with this outdoor recreation how to video to learn how to tie a dropper loop.
John Campbell, from azbushman, demonstrates how to make a quick bow and arrow in the wilderness by collecting natural materials and constructing them with cord. He starts by finding seep willow (also called coyote willow) that grows in clumps near rivers. He cuts ten willow sticks and ranges their lengths from about five feet down to about one foot, each a couple of inches shorter than the next.
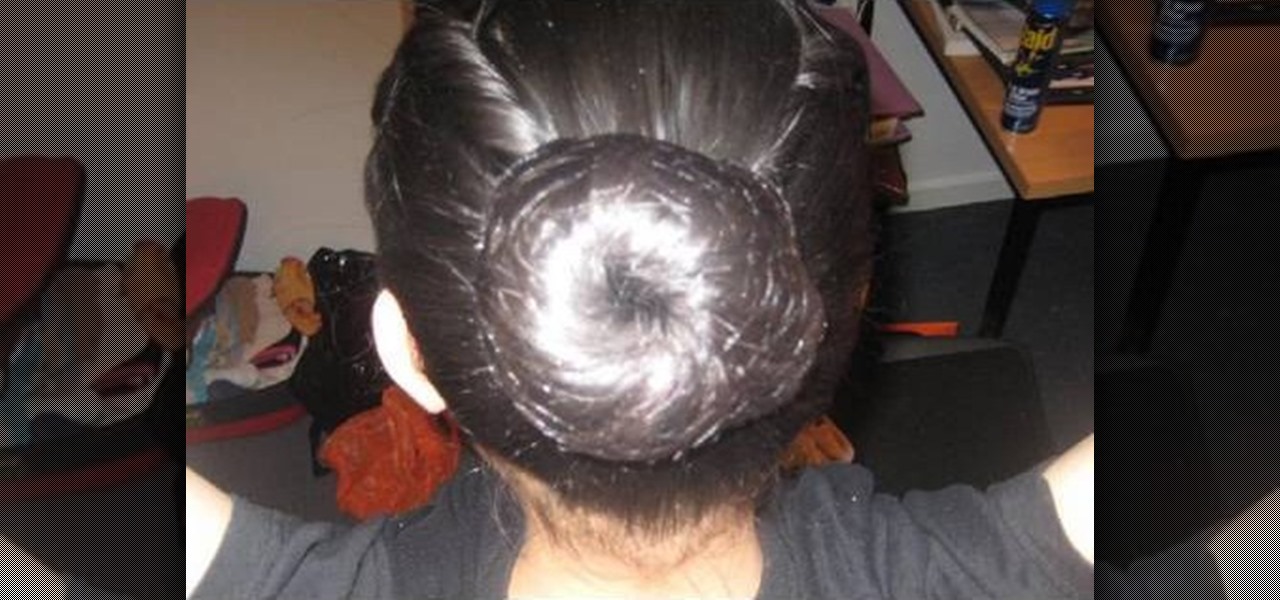
In order to begin, you will need the following: Three hair tiesBobby pinsHair spray or spray gelRat tail combHair net