
How To: Style a chic, simple hair bun
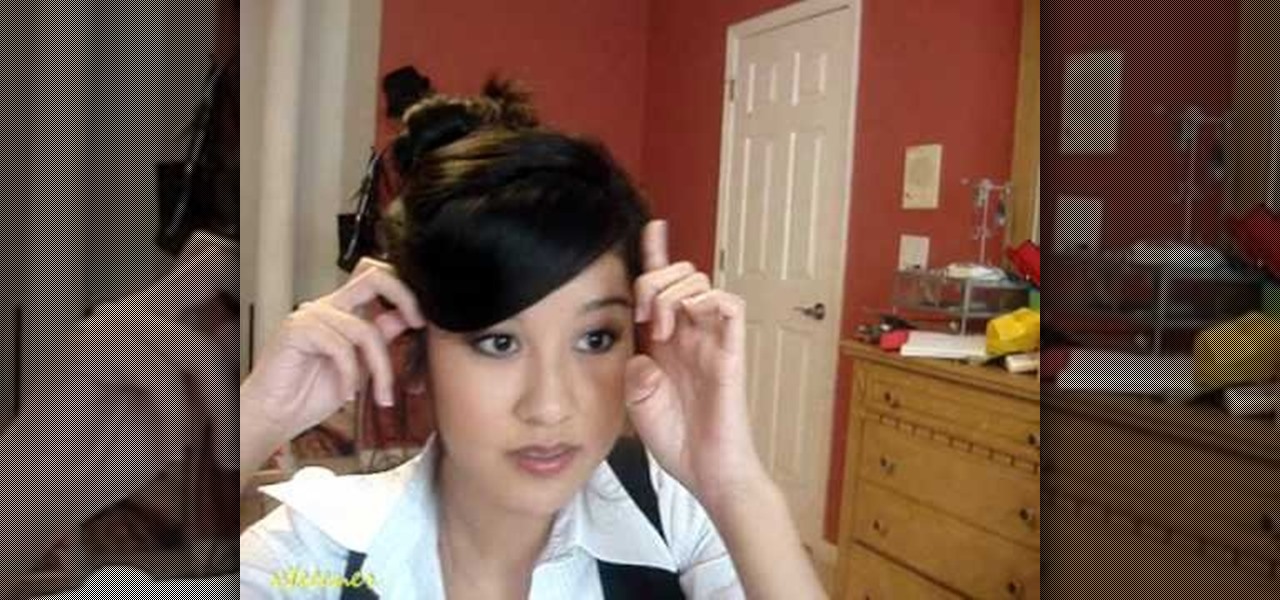
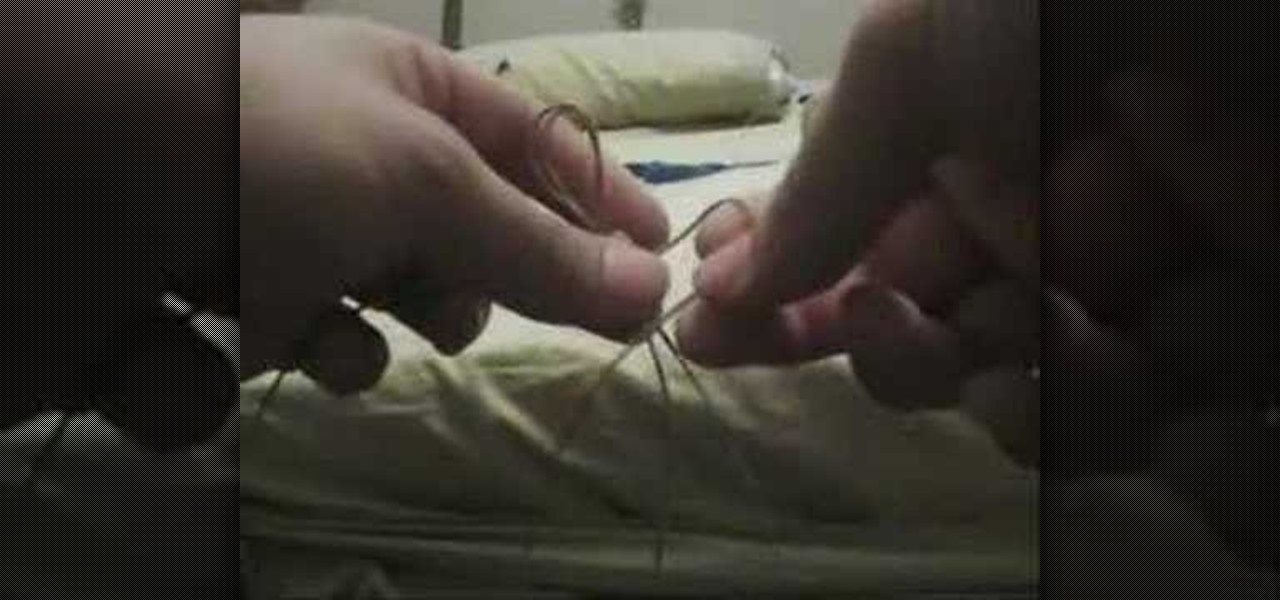
Xteeener wants to show you how to make the cool easy Updo Bun. Materials required:

Xteeener wants to show you how to make the cool easy Updo Bun. Materials required:
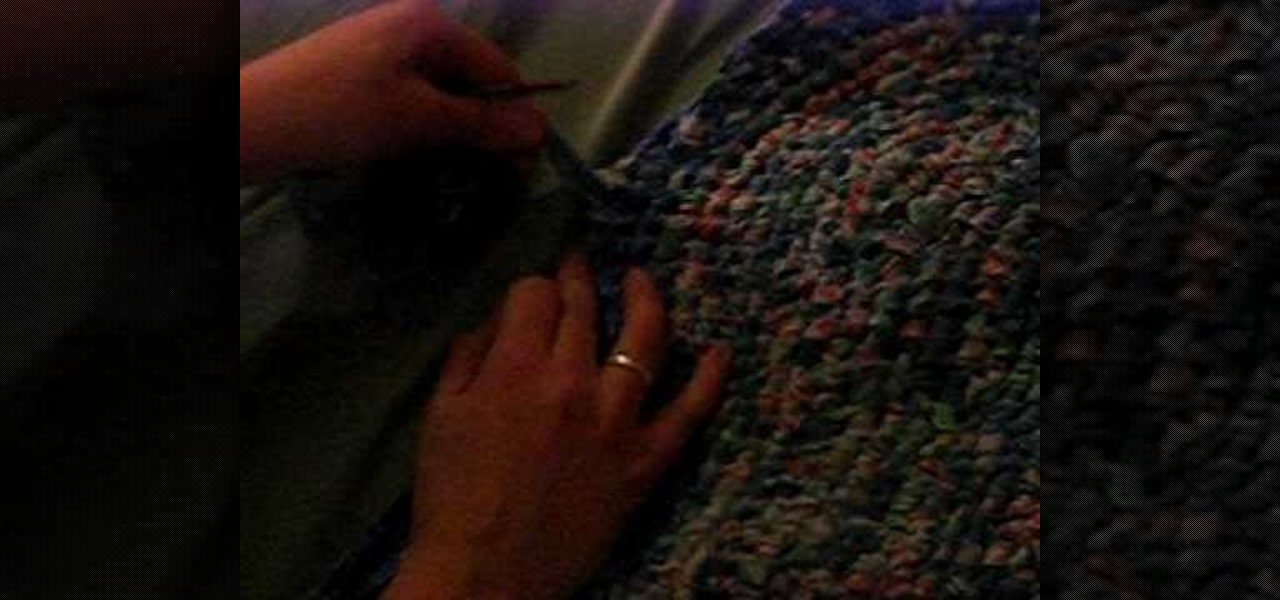
Rag rugs were commonly made in households up to the middle of the 20th century by using odd scraps of fabric on a background of old sacking. Begin making rag rug with two ribbons tied in a knot. Attach a rug tool to the left strand. You can use a traditional latch hook, needle punch, or substitute tool. For the first row, repeat a simple process of tying knots. Don't tie them too tight, as you must thread the latch hook through each knot again to link the strings of knots. This video provides...

Tie a clove hitch knot again, again, and again.

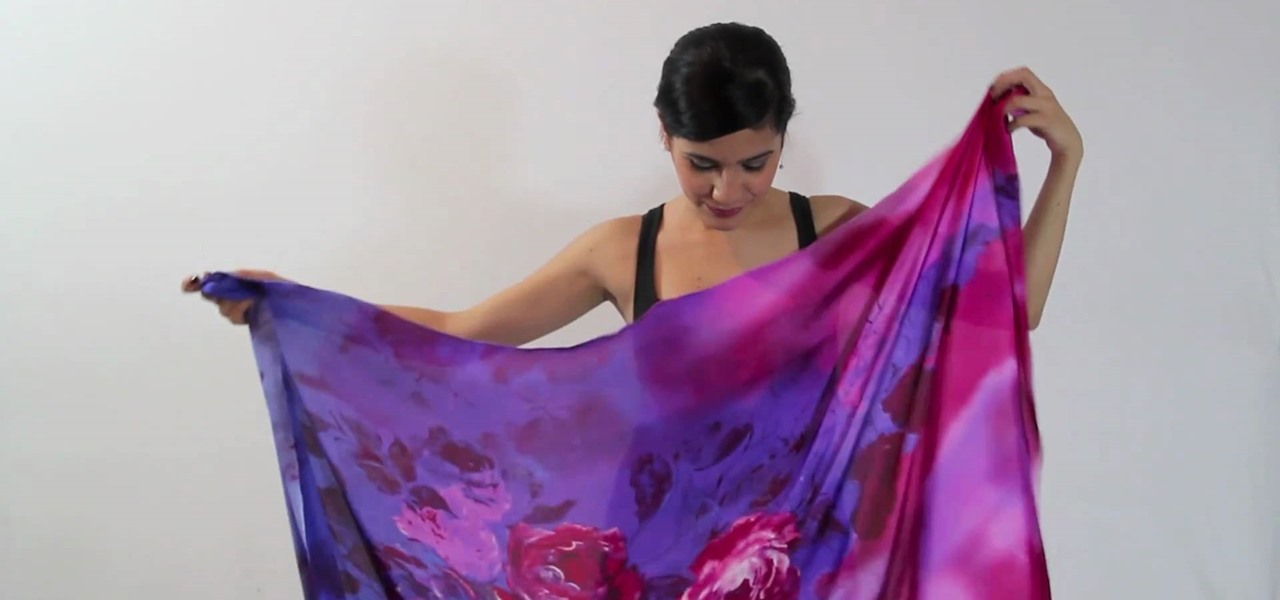
Give your sarong a polished look by hiding the knot.
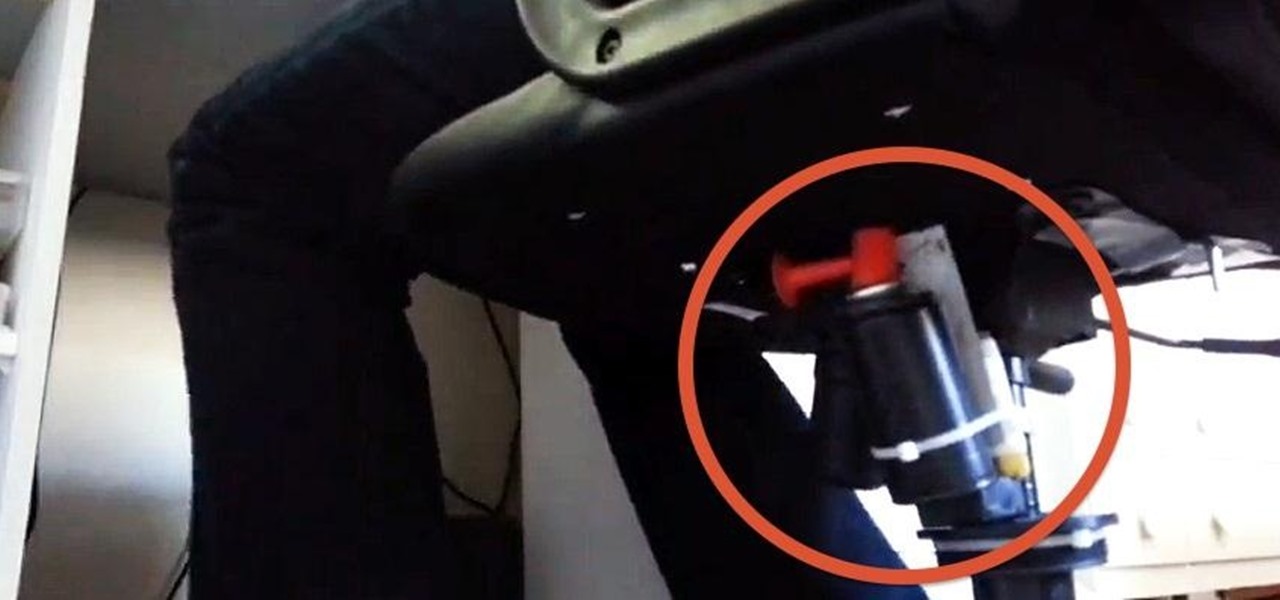
Remember when the whoopee cushion was the epitome of a good office prank? Seriously, when was the last time you've actually seen a whoopee cushion? It's a shame when a classic prank fades into the shadows like a fart in a dungeon. These days, office pranks need to be a little more involved—and way louder—like this amazing air-horn chair prank.
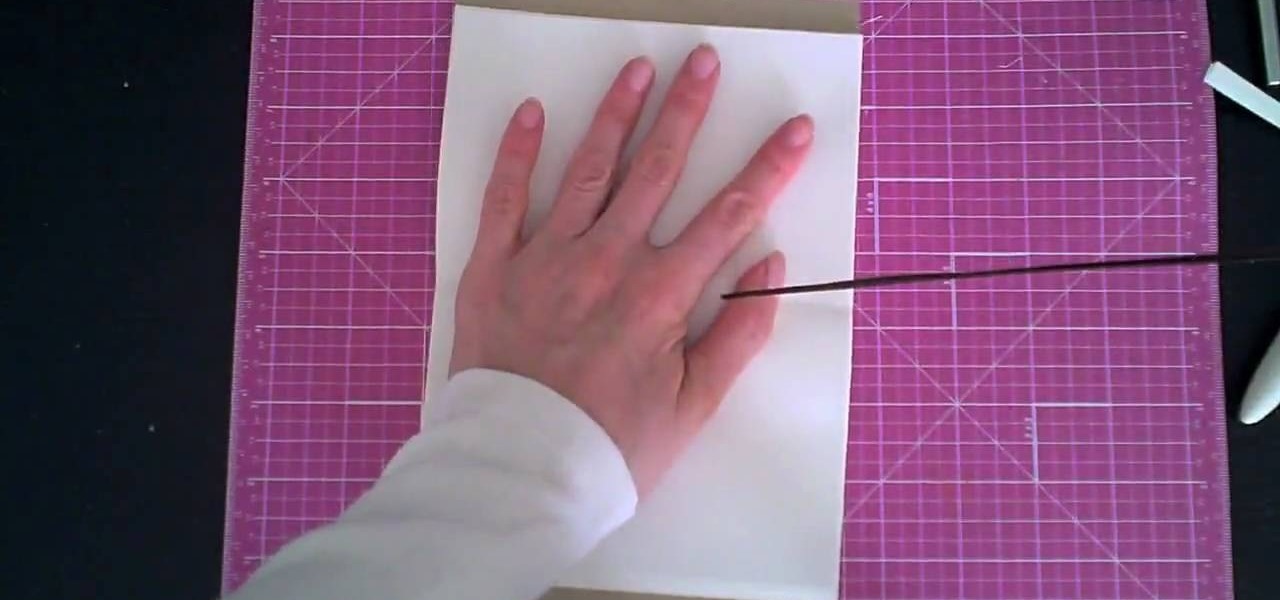
This video demonstrates how to make a notebook with ribbon binding. Take a stalk of plain white paper and it would be 5 1/2" long and 8" wide. Fold it in half. Trim off the excess with a ruler. Then align the edges of the white paper. Put this in a cardstock which is 8 1/2" wide and 5 1/2" long. Cover rapid around the white paper stalk to make sure that it the spine is bounded. Take the grid ruler and center it and mark the center and also 1" from the center at each side to the left and right...

DulceCandy87 will be showing you 11 different ways you can wear your scarf. You can start by just letting it hang from you neck so both ends are hanging in front of you. Then another way is to wrap it once with one side so that one end is hanging from the front and the other from the back. You can also wrap both ends around your neck so they hang from your back. Or you can have it go from behind your neck and under your arms and tied around your back. You can also have it around your with bot...
In this video tutorial, viewers learn how to make a tied fleece blankie. Select any colored fleece and a coordinated patterned fleece. Purchase one yard of each fleece. Cut the fleece so that you have two pieces of 36 x 30. You will need a pair of scissors and a ruler. Sandwich your fleece together and lay it on a flat surface. Make your first cut at the 4 inch mark. Continue to cut in on strips until you reach the end of the fabric. Then turn the corner and cut a 4 inch square out of the fab...
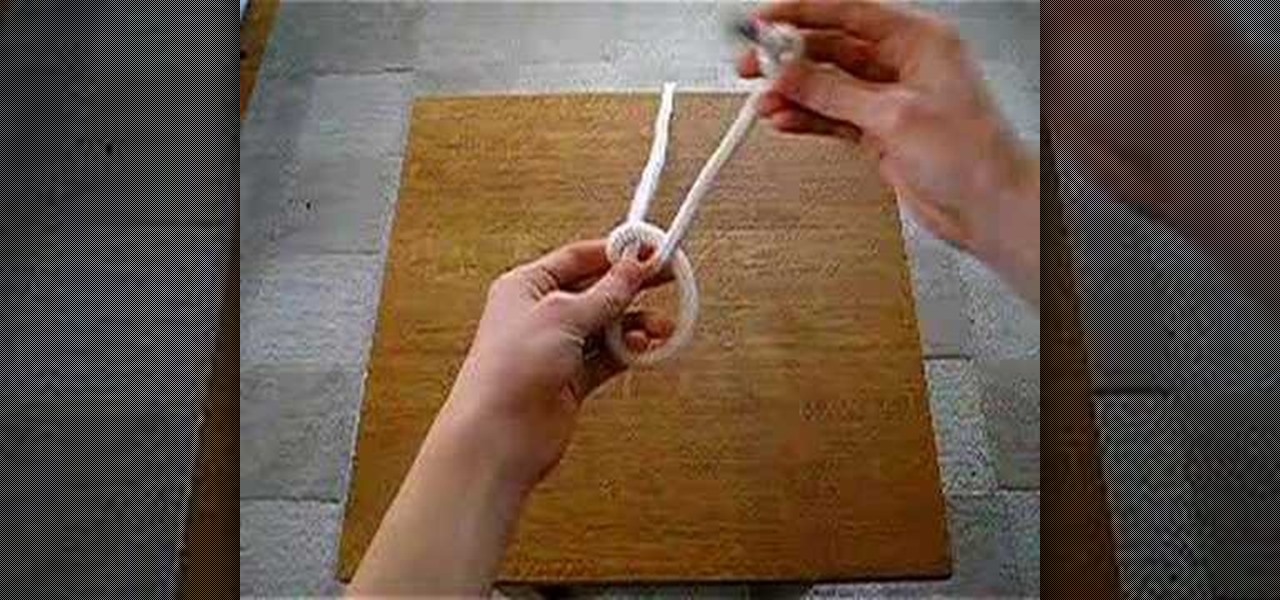
For anyone interested in hemp and learning how to make a bracelet, follow the steps outlined in this video tutorial. To be able to do this craft project, you will need scissors, a ruler, a bead, and some hemp. Hemp can be bought at any local craft supply store. After you have bought all of your supplies, you will need to cut the hemp that you will be working with. You will need two pieces cut. One piece should be 20 inches, the other should be 10 inches. Take the middle of both strands and ti...

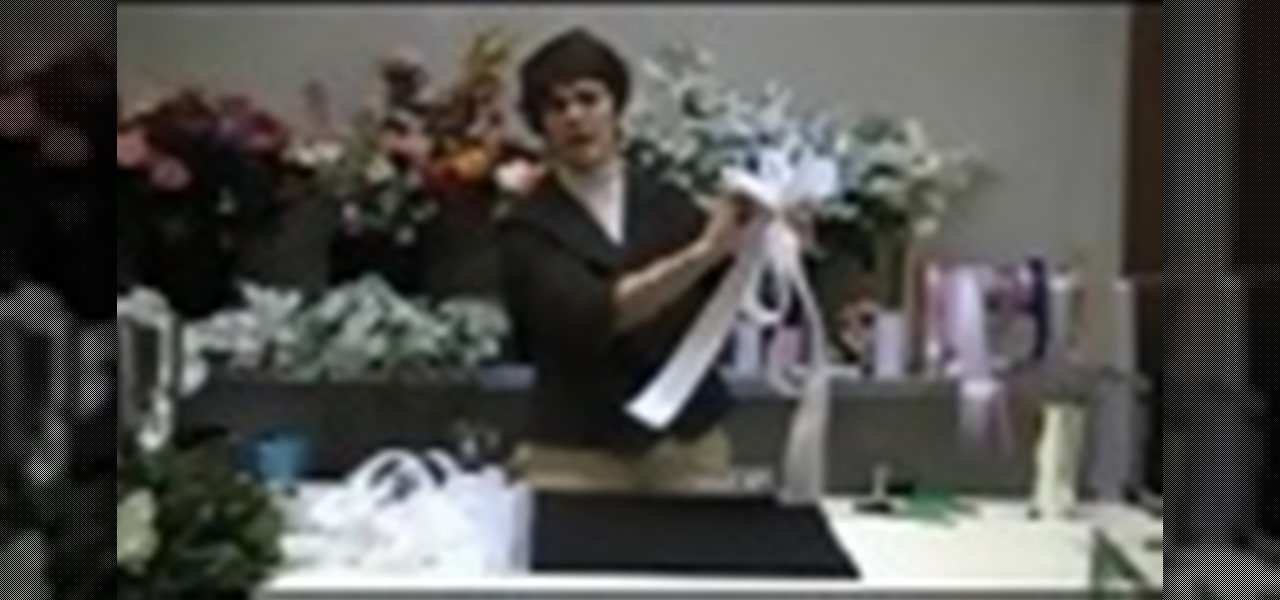
Butternutsage offers her technique for tying a perfect bow in a ribbon for use with cards or gift wrapping. You will need a length of ribbon four times the area you're going to cover. First, make a loop and pinch it with your fingers. You should "pucker" the ribbon as you pinch it, to achieve a smooth knot. Take the other end of the ribbon around your loop, as if you're tying your shoes. Push the tail end of the ribbon through your ribbon to create another loop, just like tying shoes. Pull on...
Cut your ribbon or lace into two evenly sized pieces. This can easily be done by folding the ribbon or lace in half and cutting it on the fold.
Professional truck driver, Yesterday Irmani, teaches us how to tie a time honored, weight sustaining knot, for transportation purposes.
Have you ever looked behind your desk and found a clutter of cords? Cords tend to find ways of tangling themselves up, so watch this video to learn how to reduce the clutter.
If you're drawstring fell out, it may seem like the end of the world, but take a deep breath -- it's possible to put back in!

Any long wrap can secure any size baby leaving your arms free with the basic front wrap demonstrated in this how-to video. Find the middle of your wrap. Place the middle marker in front of your chest. Wrap both lengths around your back and over your shoulder. Lift straps above the head to adjust. Grab your baby. Wrap lengths around the baby's bottom and under each of the legs. Depending on the type of wrap, tie off with a half or double knot. Watch this video infant care tutorial and learn ho...
This how to video tutorial demonstrates how to tie a Turk's knot for sailing. Follow along with the step by step process and the directions below to learn how to tie the Turk's knot.
Video: . Whether you are gardening, cooking, riding a motorcycle or just want to cover up on a bad hair day, doo rags are easy to make and fun to personalize to suit to your style. If you would rather just download the durag pattern click here.

Avril Lavigne has come a long way since her bratty "Sk8er Boy" days. The striped skull ties, baggy jeans, and skater shoes are now no more, instead replaced by lustrous, shiny strands, thick black eyeliner that's tough but feminine, and loads of shiny pink lip gloss.
You're in the wild, without rope or string and you need something to tie down your tent. What do you do? Well, if you have that ever handy roll of duct tape you're in luck. This survival tip shows how to turn a piece of duct tape into a handy length of cord to use however you please.

This dress can be wrapped, draped, or tied any way that suits you, depending on where you're going. Choose a lightweight fabric, like silk or satin, when you're sewing this dress. All you need is a few yards of fabric and your usual sewing notions.
You barely even need a sewing machine to make this dress! All you need is a length of your favorite fabric. Wrap it around yourself, tie one shoulder and then sew up the side seam. Now all you need is to pick which shoes you're going to wear with it!
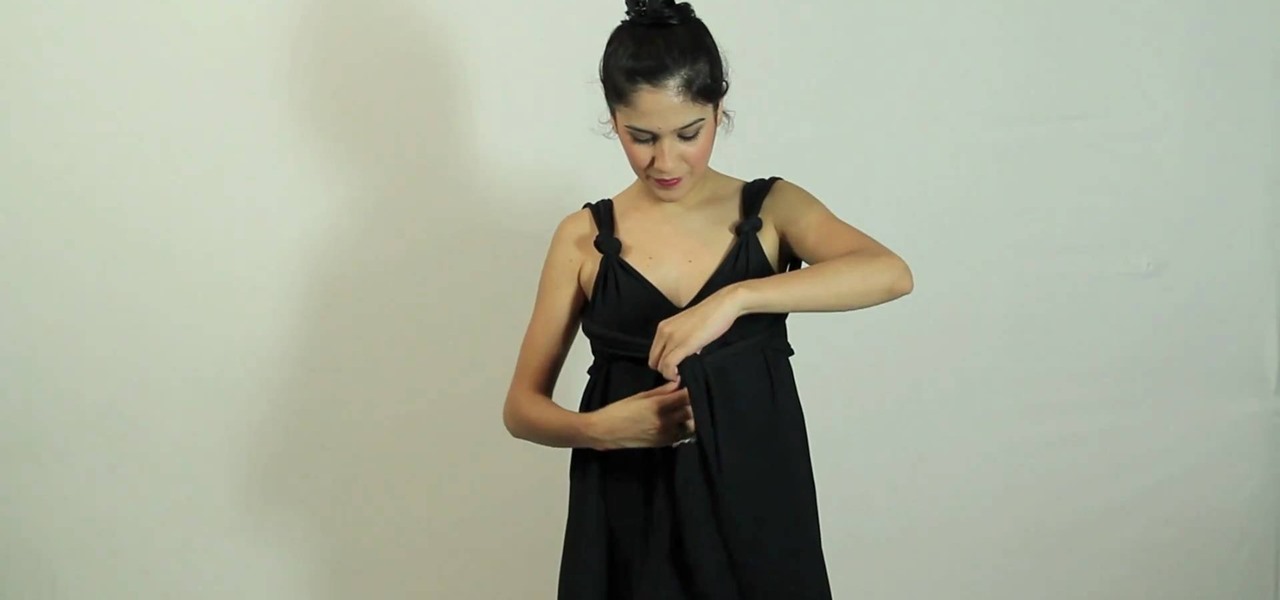
Convertible dresses are the best, especially when you like the color and general form of a dress but you'd like to give it new life by enhancing your waist rather than your bust line, for instance.

Greek goddesses are known for their bronzy, youthful skin that seems to glow from within, but according to artistic depictions they also have very beautiful hair, too. Check out this hairstyling tutorial to learn how to create not one, but two Greek goddess hairstyles:

Have a formal event on the horizon? Want to put your best fashion foot forward? Looking your best at a prom, wedding or black tie event means wearing a properly tailored tuxedo. Take the proper measurements to ensure perfectly fitted menswear.
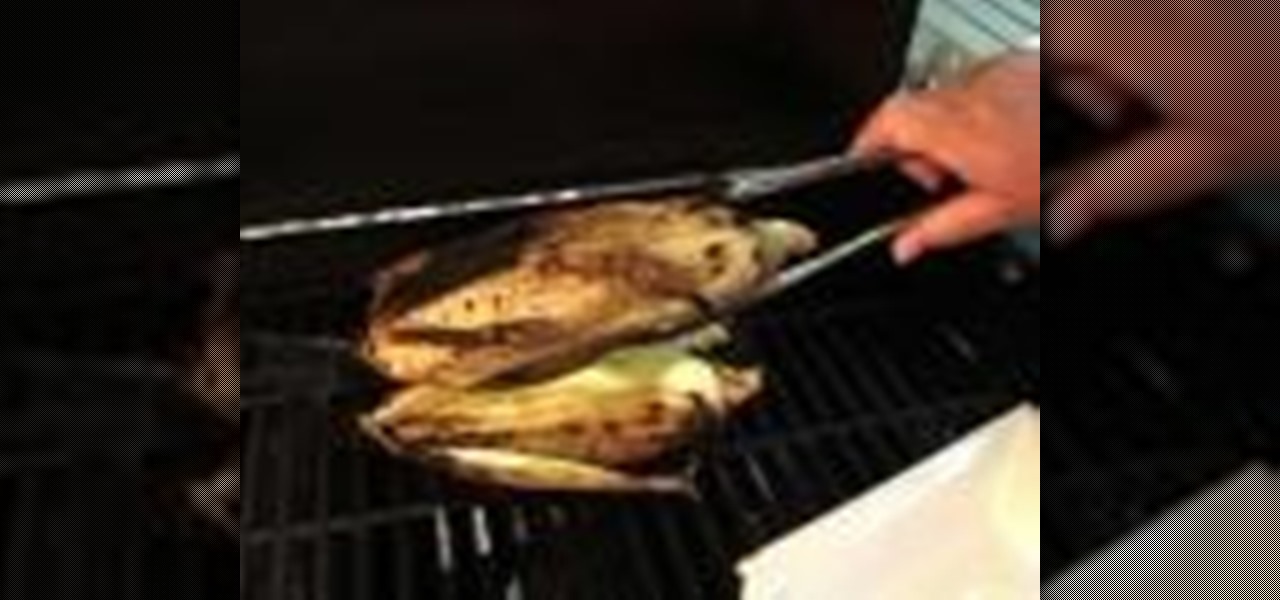
Try corn on the cob with a little outdoor flavor! This video will show you the steps to grilling corn on the cob. If you've never had, then you're missing out a crunchy corn cob delight! The trick is, when peeling the husks back, leave them attached and tie them together with some kitchen string, then soak them in water thirty minutes before you're ready to slap them on the grill.
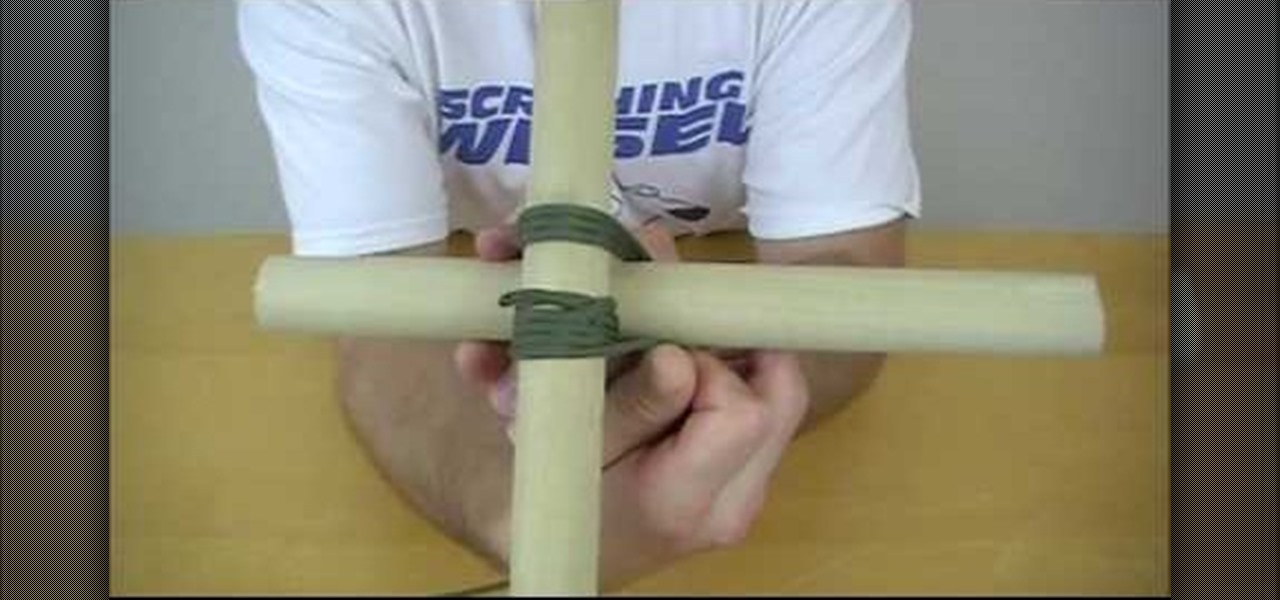
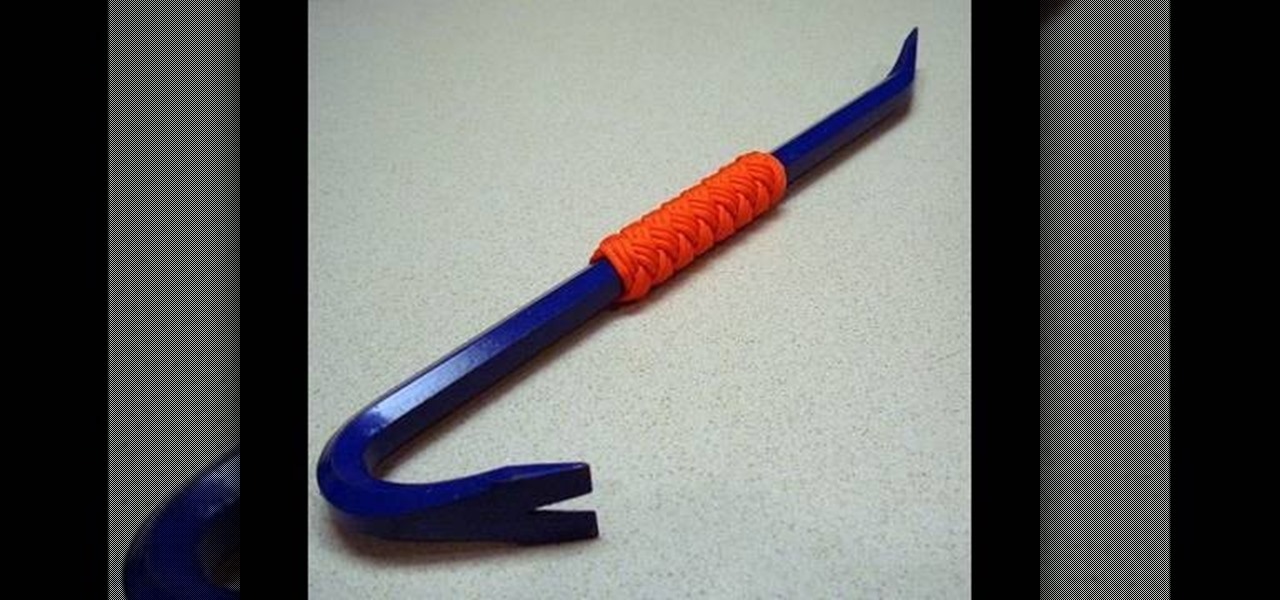
Square lashing is a knot-making technique that has been made famous by the Boy Scouts of America's massive pioneering projects, and is really integral to any structure made out of poles like the one you see in the thumbnail. This video will teach you how to use square lashing to bind two poles together perpendicular to one another. You will need to know how to tie a clove hitch to make this work.
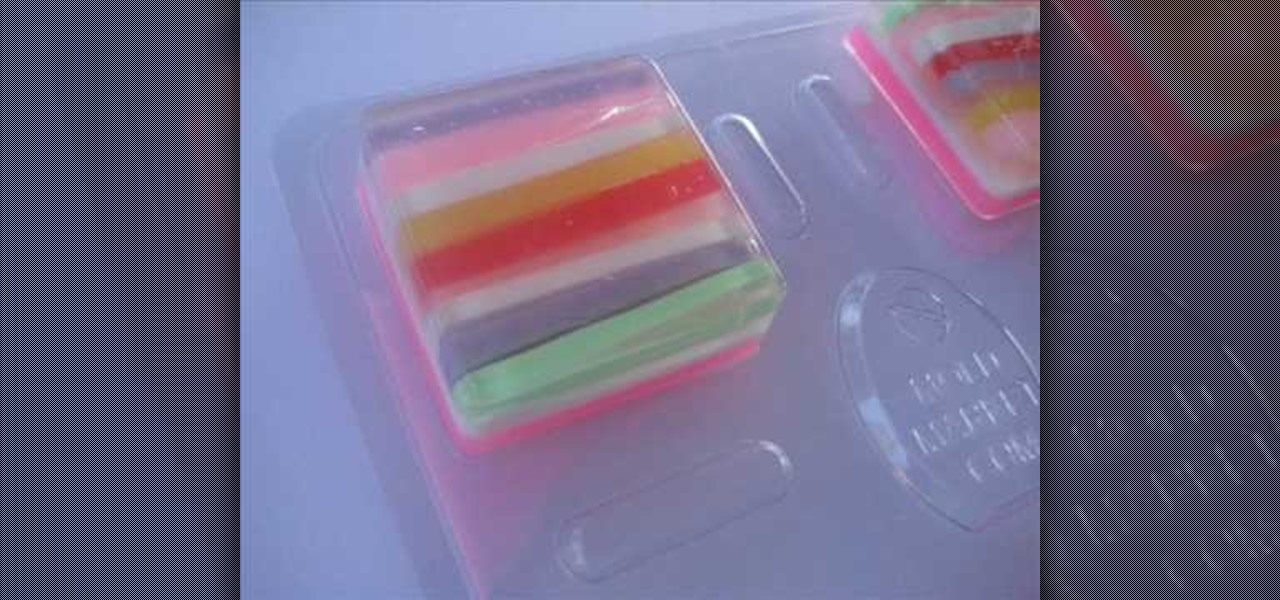
These multicolored heart and square shaped soaps are so cute and pretty you may end up grudgingly giving several to friends before you can try them out yourself!
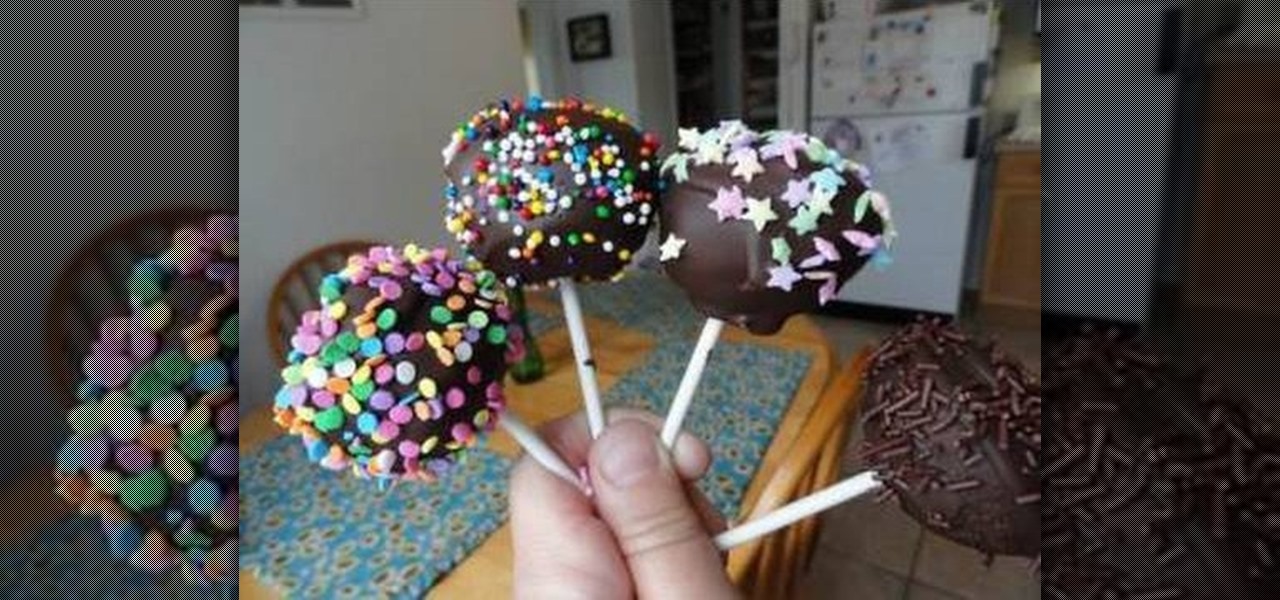
Unlike cupcakes, which magically disappear even before they are set down on the table, cake pops can be made in more abundance and are portion sized so everyone can try at least one before seconds are given out.

When the weather gets warmer you have two options: Tie your hair up into a super boring ponytail, or become more adventurous with your hairstyling and create a romantic updo that gets hair out of your face without compromising style.
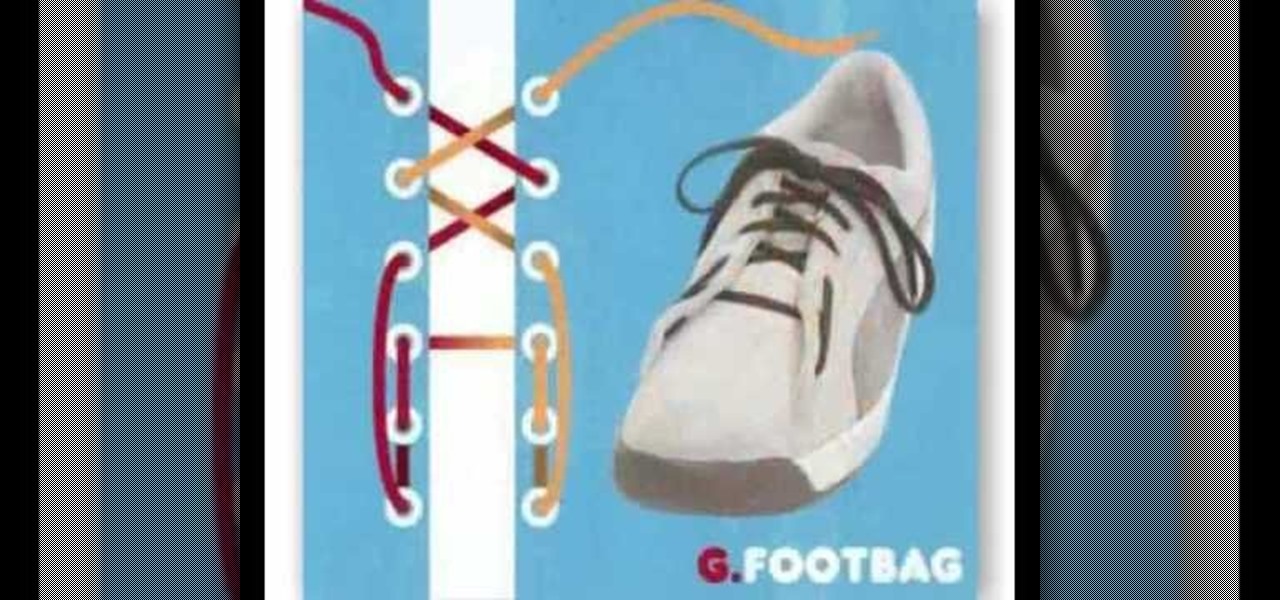
Looking to get super creative with your shoelaces? In this video, fifteen different shoelace styles are gone over with diagram as to how they were done. Such styles include the checkerboard, the double back, loop back, sawtooth, riding bow, twistie, lattice style, footbag, ladder, bushwalk, bi-color, display, hidden knot, and the zipper style. Use two different colored laces when doing these styles to jazz things up!
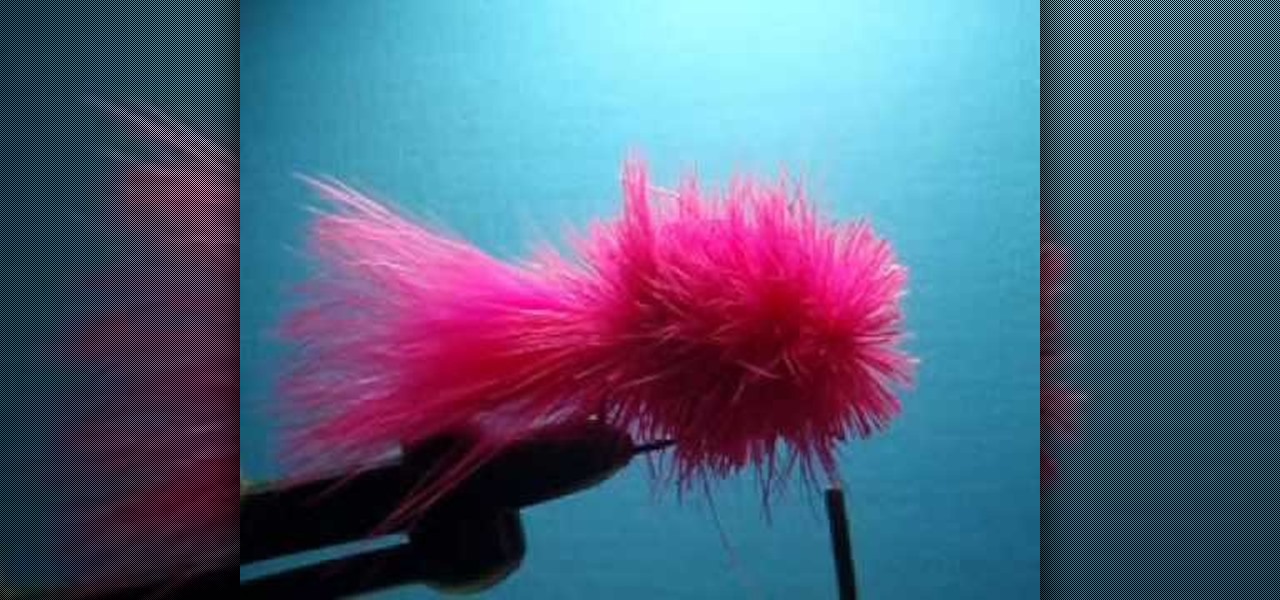
The pink wog (also known as the techno wog) is a silly-looking fly that gets the job done. Designed to float on the surface, it attracts silvers and other fish. The supplies are rather exotic: a marabou tail, deer hair dyed pink, and more. It's also a very messy fly to make, and you need to take extra care when putting it together.
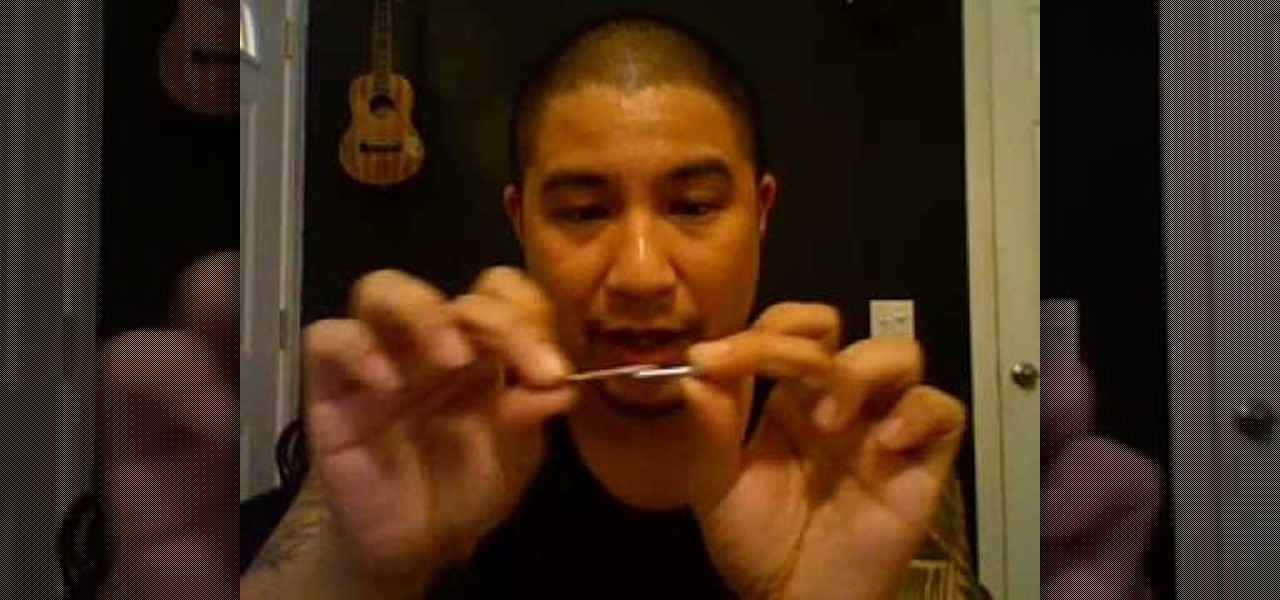
Had enough of tie-on uke straps? Learn how to install strap buttons onto your ukulele with this how-to. For detailed, step-by-step instructions on this handy ukulele mod watch this helpful video guide.

Are you new to crocheting? Watch this video tutorial to learn how to do a slip knot before beginning a crochet project. You will need some yarn and a crochet hook.
Watch this video to learn how to make a tulip twist. Tulip twists are some of the basic fundamentals of balloon tying and are used in may balloons. This is a great video for beginners.
This is the same knot used for lassos. You can go wrangle some cattle or horses now, or if you not on a farm you can practice on your dog or cat, or better yet - you're neighbor's dog or cat.
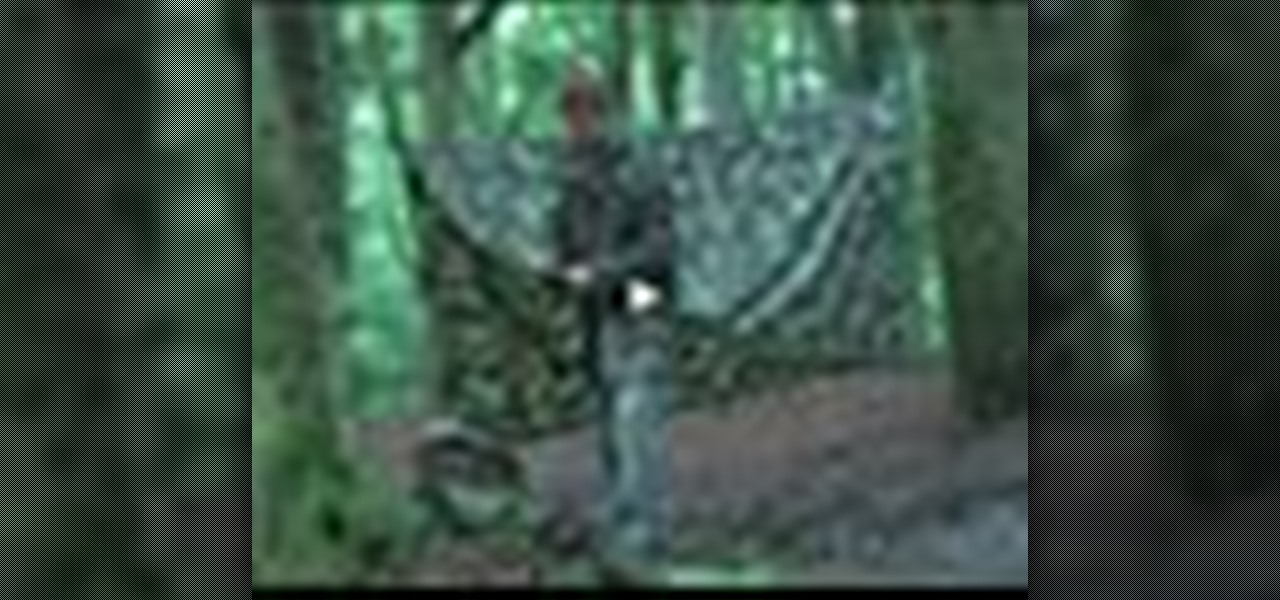
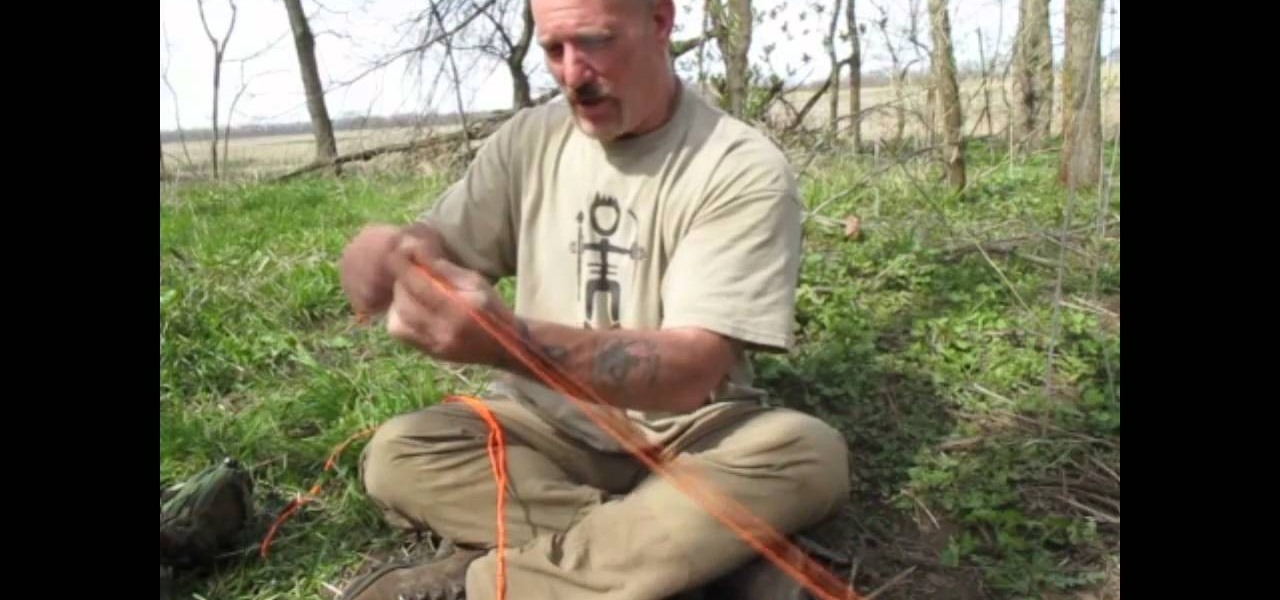
Learn how to construct a shelter in the woods from Andrew Price of Dyad Bushcraft. Where are the best places to build shelter? What should you look for? Andrew will teach you what a 'basha' is and how to tie the best knots to build hammocks and other wilderness shelters.
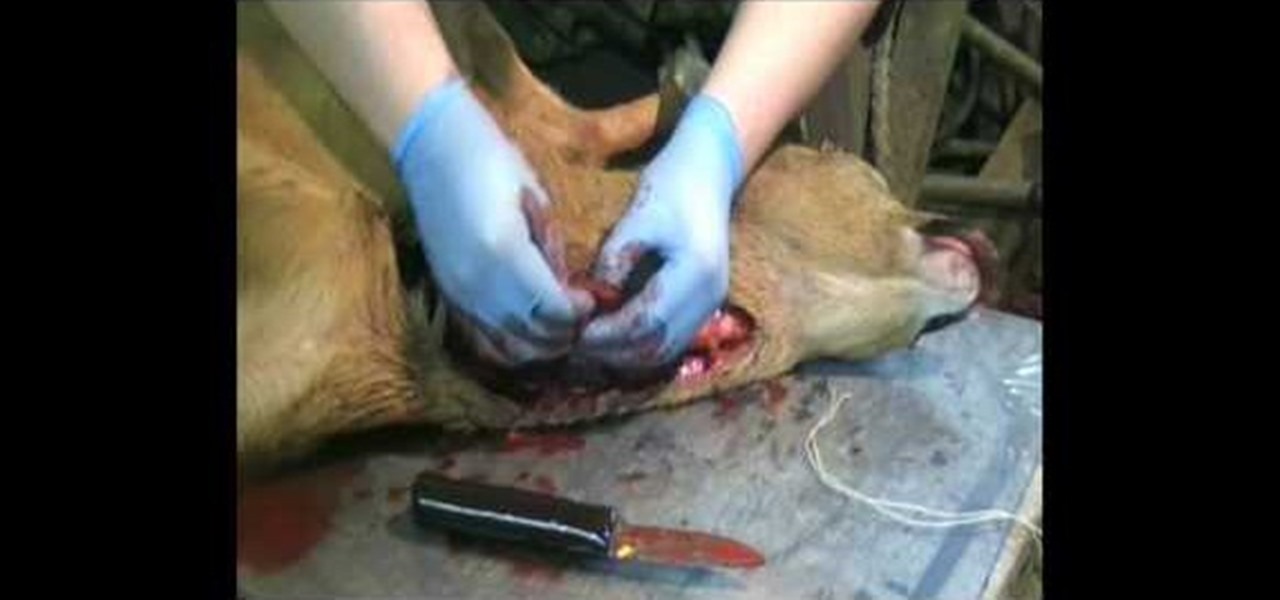
In this tutorial we learn how to field dress a deer. First, put some gloves on and grab a sharp knife. After this, puncture a hole in the lower half of the throat of the deer. Next, start to cut up until you reach the neck. There will be a lot of blood that comes out, just a warning. Then, you will see the inside of the deer start to come out from the fur. Cut the piece of the neck and then tie together at the end. To finish, go to the rear end of the deer and cut from the hole. Tie it with a...
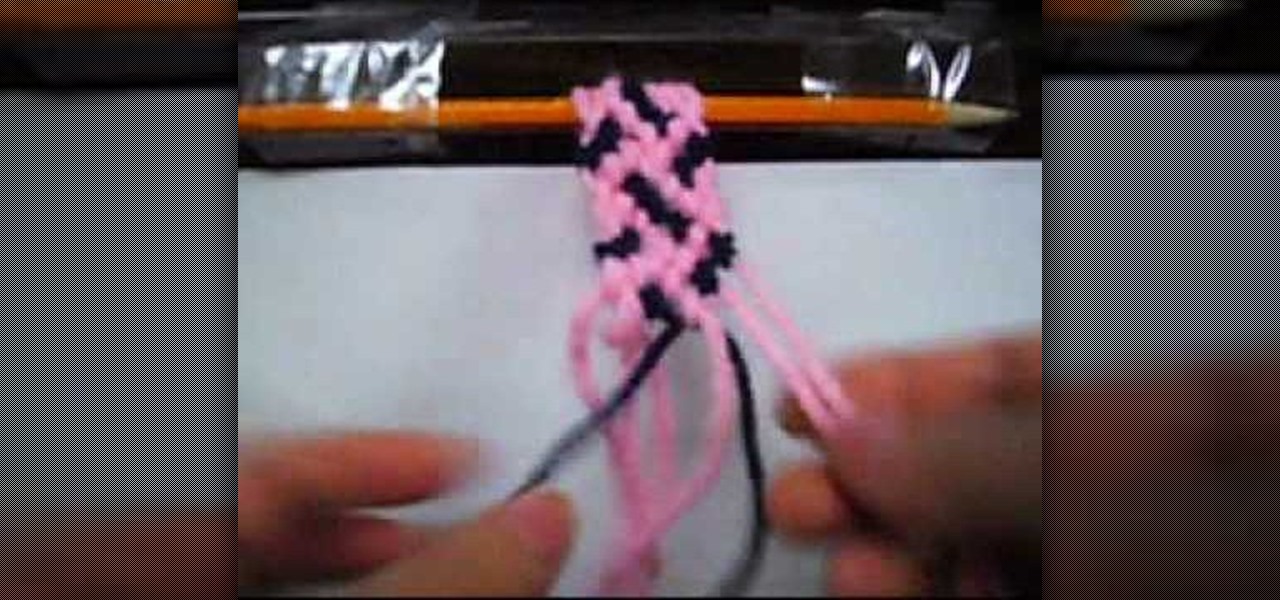
In this tutorial, we learn how to make a confused-style friendship bracelet. First, you will need to clip down your thread on the top and then start to braid the thread together. You will need to have two different colors, white and blue. Then, you will tie the right and left side together and start to braid the middle of it. Then, you will start to braid the bracelet together until you reach the bottom. When you are finished, you can tie this around your wrist and wear it whenever you would ...

In this video, we learn how to do a fancy and messy side bun. First, curl your hair however you would prefer, but it should be more wavy than curly. Now, part your hair on the side and then tie your hair on one side. Bring your bands out of the tie, then start to tease your pony tail in small sections. Make sure to use a lot of hair spray while doing this, then afterwards as well. Now, take the pony tail and connect it to the head. Use small sections and connect them with bobby pins. When fin...
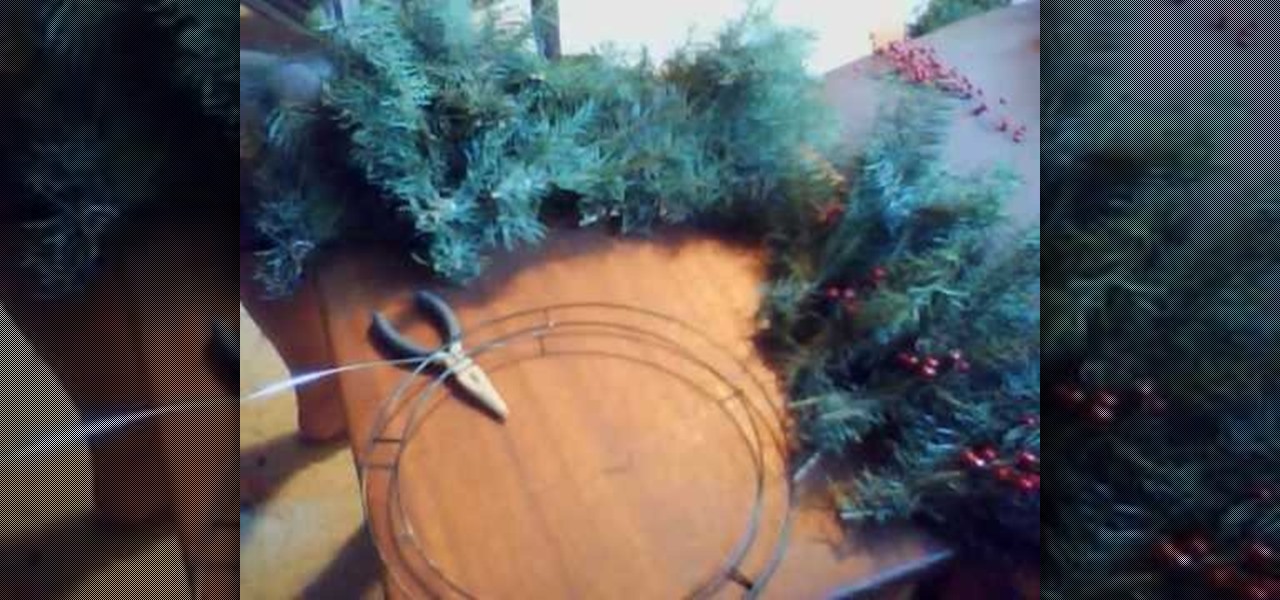
In this tutorial, we learn how to make a holiday wreath on a budget. You will need: branches, round wire frame, Next, buy some holiday flowers, and ribbon. First, start to arrange your branches with some wire and mix different types of branches together. After this, start to add in the flowers and some holly to the branches as well. Tie these tight in different bunches so that you have a more secure bundle. After this, start to wrap them around the round metal frame that you have, then situat...