The great thing about braids is that they're so incredibly versatile. Spin a single braid through the crown of your hair and let the rest of your locks loose and you've got a pretty Lauren Conrad, girl next door look going on. Or add a few curls using a curling iron and tie your hair up into an updo to create an elegant look befitting of a formal affair.

Kameron Kay teaches us how to make a floating flower crystal toe ring in this tutorial. You will need: stretch cord, large crimp bead, flat nosed pliers, flat backed crystal flower, glue, and small scissors to make this. First, cut out your chord to the exact size that you need. After this, use glue to attack the ring into the middle of the string. Place a crimp bead on the bottom to help the bead stay in place, then glue these together as well. Next, tie this together and attach an end to th...
In this tutorial, we learn how to do a side headband braid with ribbon intertwined. First, grab a ribbon that is around 32 inches and any color you want. Now, take a chunk of hair on the side of your head, and place the middle of the ribbon underneath it. Now, separate your hair into three sections, then start to braid by connecting the ribbon in with the strands. Once you finish this, tie off at the end. Now, make a messy bun in the back of your hair with the braid on the side still. After t...
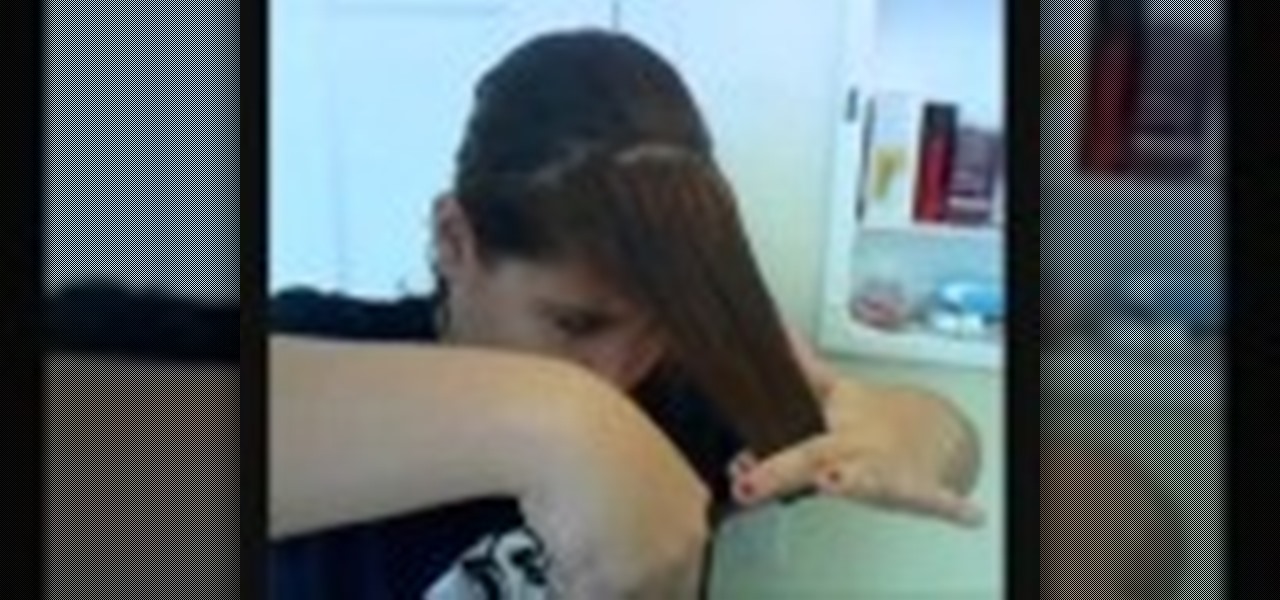
In this video, we learn how to easily cut your bangs. First, you will want to take a shower and have your hair went and brushed out. Next, part your hair so that your bangs are in the front and the rest of your hair is tied back behind you. After this, grab your scissors that are for hair cutting, and then level your hair out in front of you. Be sure to hold your head up straight and don't look too far down or up. Next, cut the bottom of your bangs where you want them to be at, then continue ...

In this video, we learn how to make a "puppy love" box for Valentine's Day. To key to creating this box is a thin strip of paper that has teeth (pointy spikes) at the end of this. Turn this into a heart shape, then tape it around the heart to make a perfect box. It will be easier to find your center and cold it in half, then place it on the box. Glue the heart onto a black card stock to situate it, then tie a cute ribbon along the edge of the heart. This is very cute and a great idea for Vale...
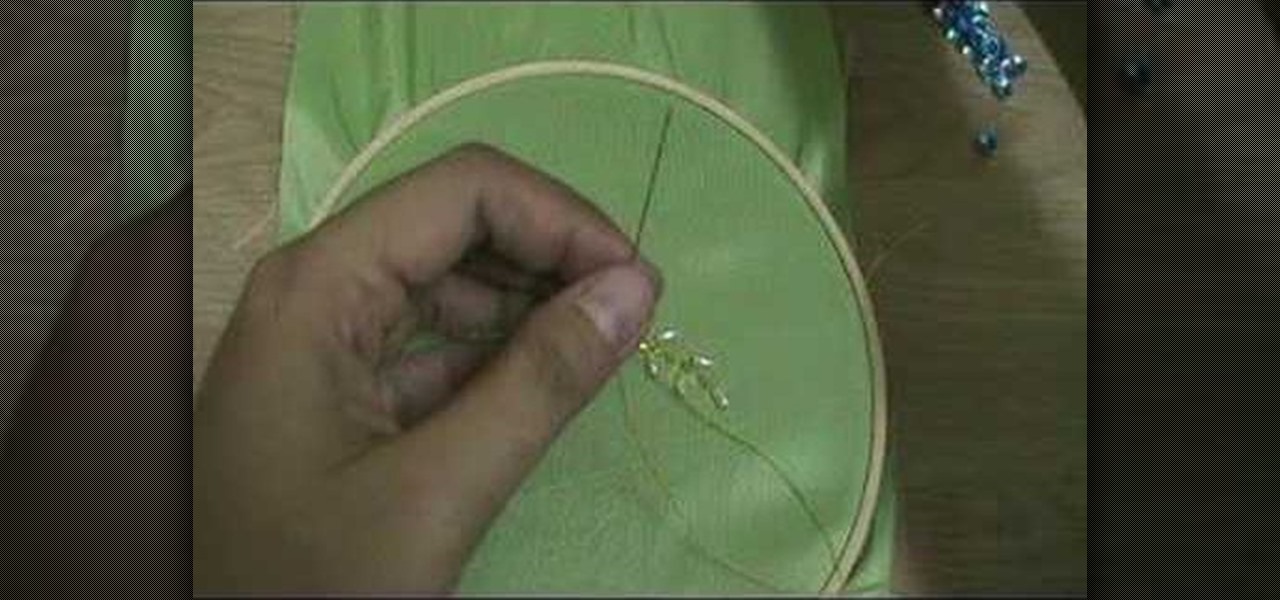
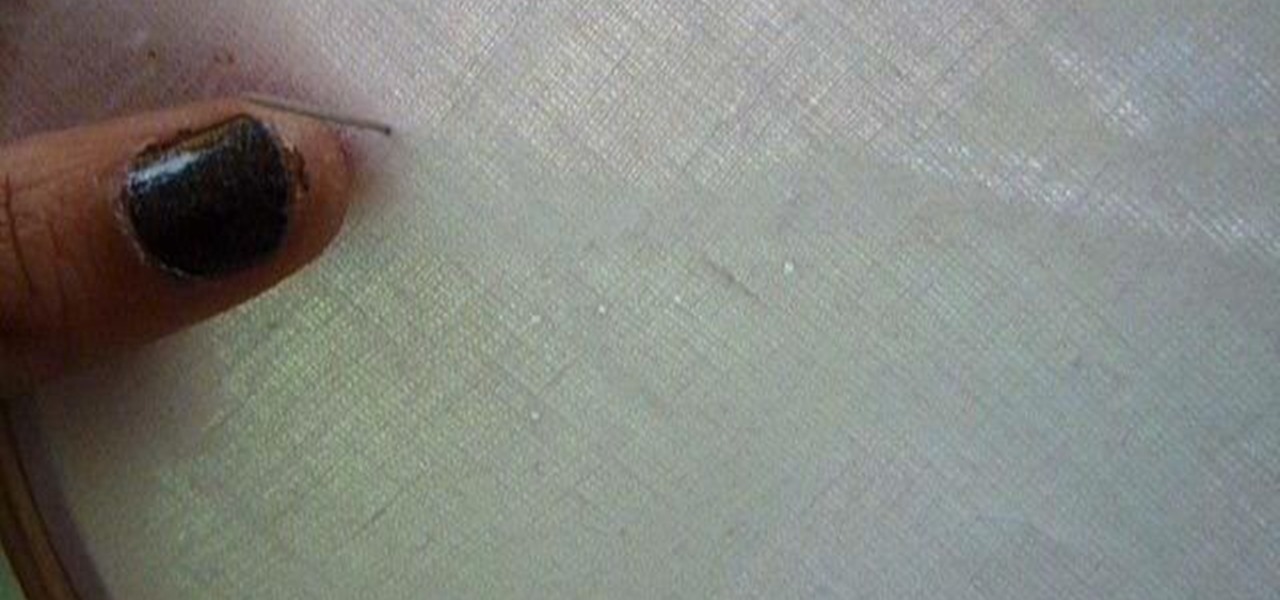
In this video, we learn how to embroider with beads and sequins. First, push the needle through the bottom of the cloth into the top where the sequin is at. After this, continue to thread in beads and more sequins. Make sure you are pulling through on the bottom so you attach the beads to the thread and they don't fall off. When you are done with this, you will push the needle through the top of the cloth, then tie it at the bottom and cut off the excess thread. When done, you will have a bea...

In this video, we learn how to make a gift Christmas jar with Stampin' Up! First, take any type of jar you want to collect money in. After this, rinse out the inside and remove the labels off of the bottle and measure them. Now, take a piece of card stock and cut it out to make the length of the label from the bottle. Now, decorate the bottle with different Christmas decorations and then tape it onto the jar or bottle. Next, add on different types of felt cut outs to the jar as well. To finis...
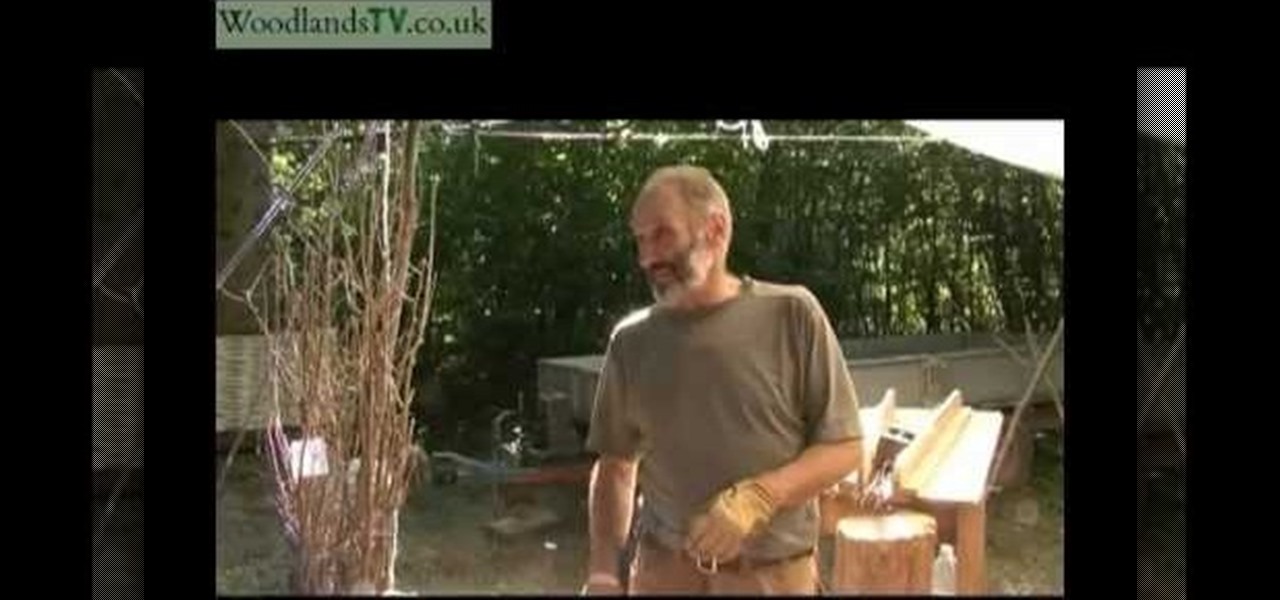
In this tutorial, we learn how to bundle kindling. First, gather up 25 pieces of kindling together and tie it together with a rope on two ends and in the middle. Before you do this, you will cut the tops off of the kindling so you are just left with the branches. The water will go through these and it will build the bank up, that is what these kindling bundles were created for. You can bundle kindling in larger groups or smaller groups, depending on what you need it for. These were once used ...
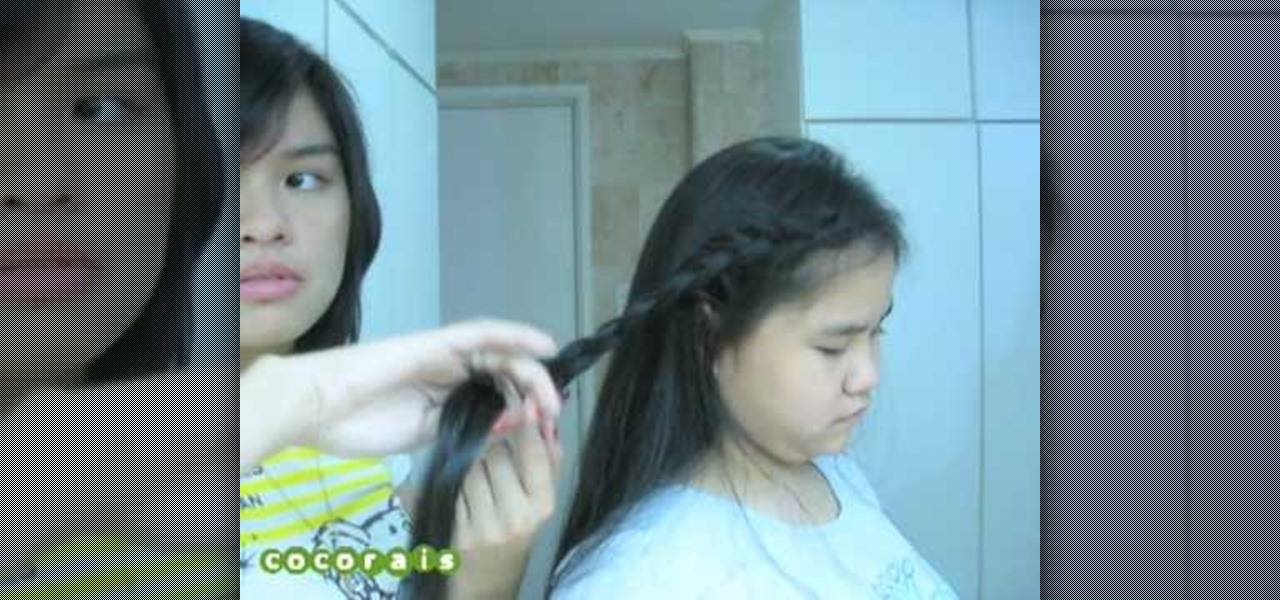
In this tutorial, we learn how to do an elegant french braid. Start off by grabbing the top section of your hair and splitting it up into three sections. After this, start to braid your hair by grabbing hair from each side and gathering it into the braid as you are going down. Once you reach the bottom of the hair, just do a normal braid and then tie it at the bottom. After you do this, you can hair spray your bangs back and tease them, or you can let them hang loose on the front of your face...
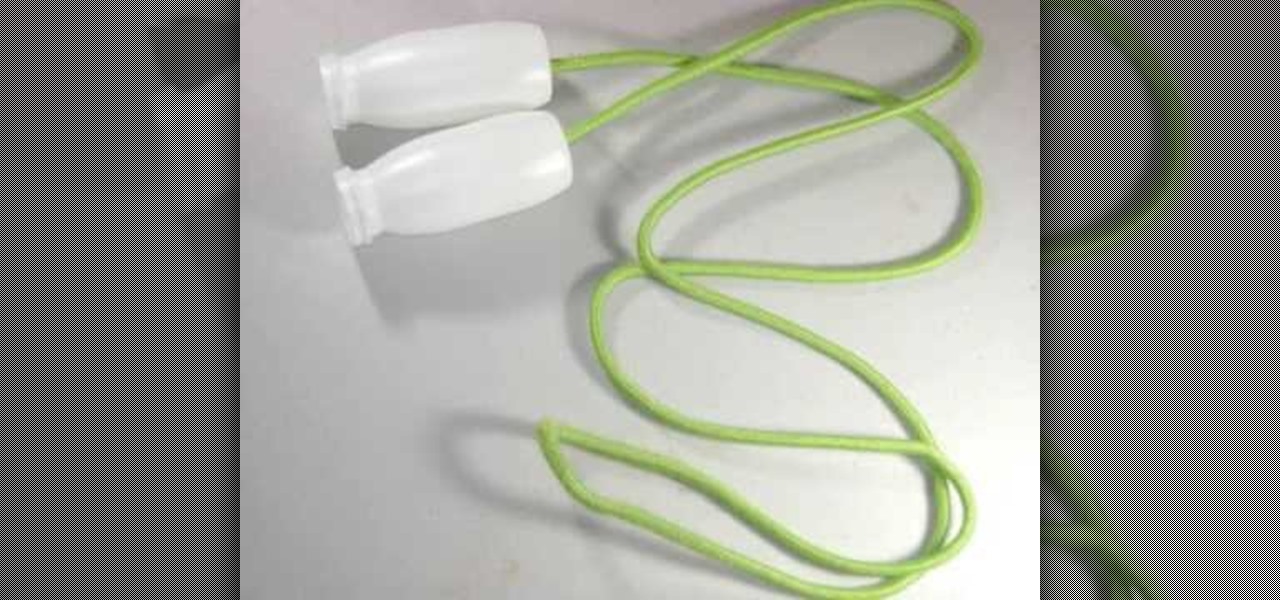
In this video, we learn how to craft a homemade jump rope with your kids. You will need: 2 think plastic containers, a heavy rope, and scissors. First, take your plastic containers and cut a hole in the bottom of each of them with the scissors. After this, place your rope through the inside of each one. Tie a knot at the end of each side of the rope so it's thick enough that it won't go through the hole you just made. After this pull the rope down and now you will be able to use it as a jump ...
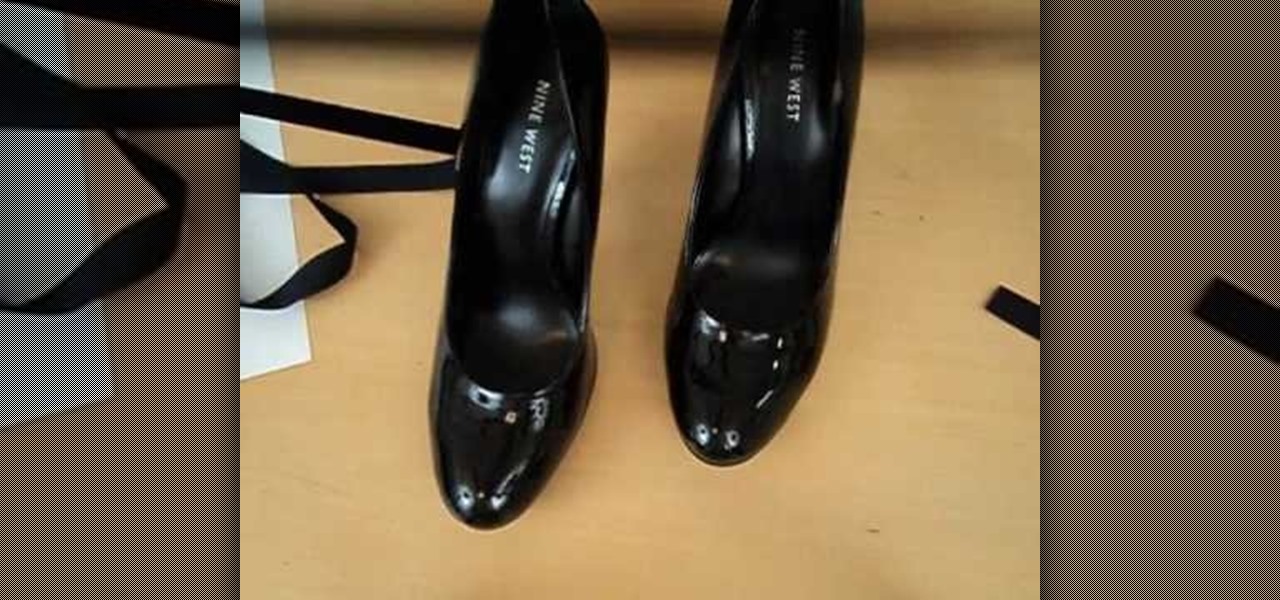
As kids, we had dreams of becoming a prima ballerina and dancing for the New York Ballet Company (while we loved dancing around our house in our skivies, we think it had more to do with the pretty tulle skirts and beribboned toe shoes). Dreams discarded, we are nevertheless still in love with any combination of ribbon and shoes.
In this tutorial, we learn how to do a messy fishtail braid. First separate your hair so the bottom layer is exposed, then place on volumizing mousse and hair spray to this layer. Now, expose the rest of the hair and add the mousse and hair spray to this layer. Next, curl your hair with a 3/4" to curl the hair away from your face. When finished, section your hair so the upper half is in the back of your head, then clip this securely. Next, start doing a fishtail braid by braiding the outer si...
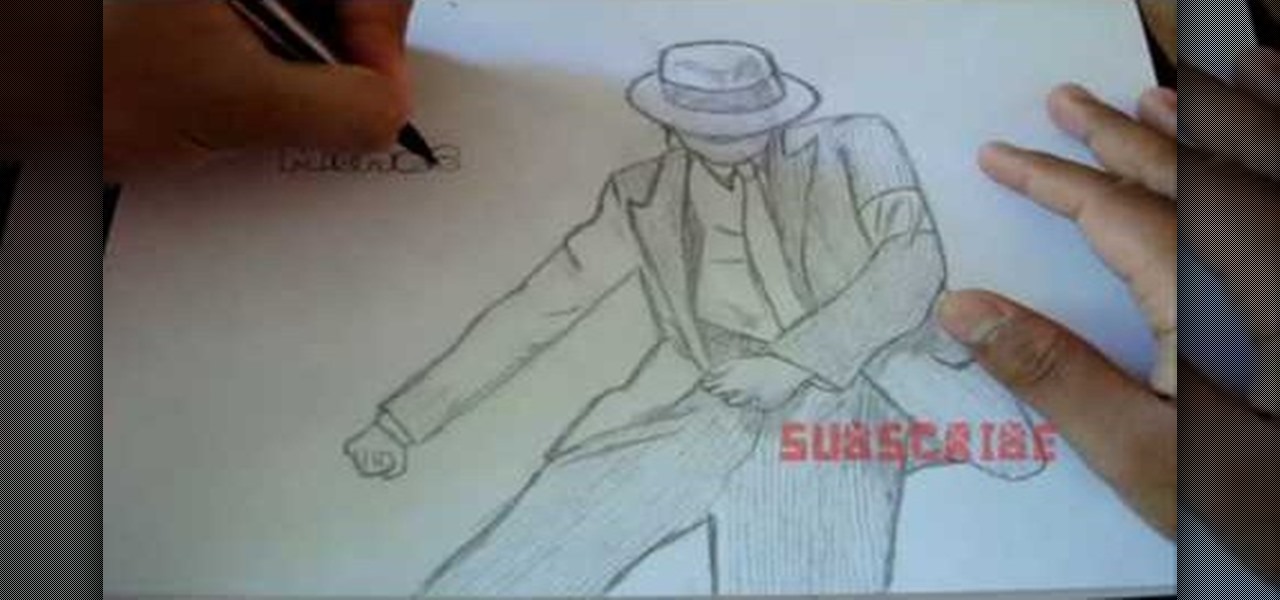
In this video, we learn how to draw Michael Jackson. Start out by drawing the body shape, outlining the clothes first. Draw details on the pants and shirt, then add a hat on top, shading the face. Now, draw hands onto the drawing, along with shoes on the bottom. Next, add details to the hat and a tie to the shirt with a collar. After this, draw on a belt and shading and lines to the jacket and pants. Add shading underneath the hat to make it look as though the face is underneath, then when fi...
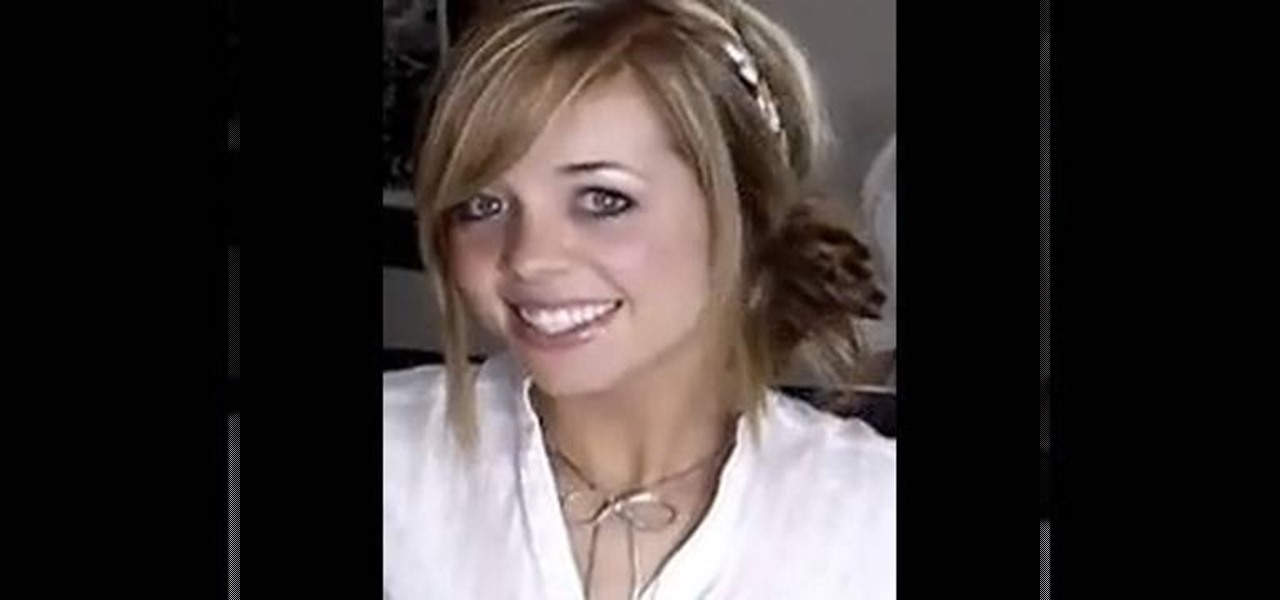
In this video, we learn how to do a yukata inspired hairstyle. First, brush out the hair, then bring the top section of the hair and start to braid it. Continue to braid it until you read the end of the hair, then tie it at the end. Now, set the braid aside and put the rest of the hair up in a pony tail. Push the hair together in a bun, then pin it together with bobby pins. After this, take the braid and wrap it around the bun, then secure it with more bobby pins. To finish the look, add in a...
In this tutorial, we learn how to do an arrowhead stitch when embroidering. Start off by pushing the thread through, then pulling it under, then back through at a diagonal angle. After this, thread it back through, making the same angle on the opposite end. As you continue to do this, you will start to see arrows forming after two stitches. Place the arrows one in front of the last to make the stitch complete. When you are done, you will thread the needle through the bottom and tie it. After ...
In this tutorial, we learn how to thread a cord lock. First, tilt the cord lock up and find the two different wheels on the inside of it. Now, push your lift cord up through the two wheels that are on the inside of the lock. After this, pull the thread up through the top and then slide the thread through the smaller hole on the lock. Now, you will repeat this again for another piece of string, but thread it through the larger hole once you reach the top. After this, thread another cord throug...
In this tutorial, we learn how to make a double bow with Sandy. First, take two satin ribbons of different colors and place one on top of the other. Leave a long tail, then make a large loop and scrunch it in. Make a loop on the top and a loop on the bottom. Each should get a half a twist and be opposite of the one you made before it. Practice with a single ribbon before you do this one. After you have six loops, create four more to make a bigger bow. When finished, you will have six large lo...
In this tutorial, we learn how to scrunch hair for the summer. First, wash your hair in the shower, then use a comb to separate the hair in the middle of the head. Now, take some hair mousse and run it into the hair from the top to the bottom until all the white is gone. Scrunch your hair while you are putting the mousse in, don't comb through it after this. Now, take hair gel and scrunch separate pieces of hair with your hair. After this, make several messy buns in your hair throughout the e...
In this tutorial, we learn how to do the veil style for your hair. First, you will section the front of your hair and bangs into three separate and equal sections tied with small rubber bangs. Next, section the layer of hair behind the front row and make four separate sections. Keep doing this until you reach the back of the hair, adding one section each time. After this, braid the hair as far back as it goes to combine with the next box. When you are finished braiding, you will have a veil s...
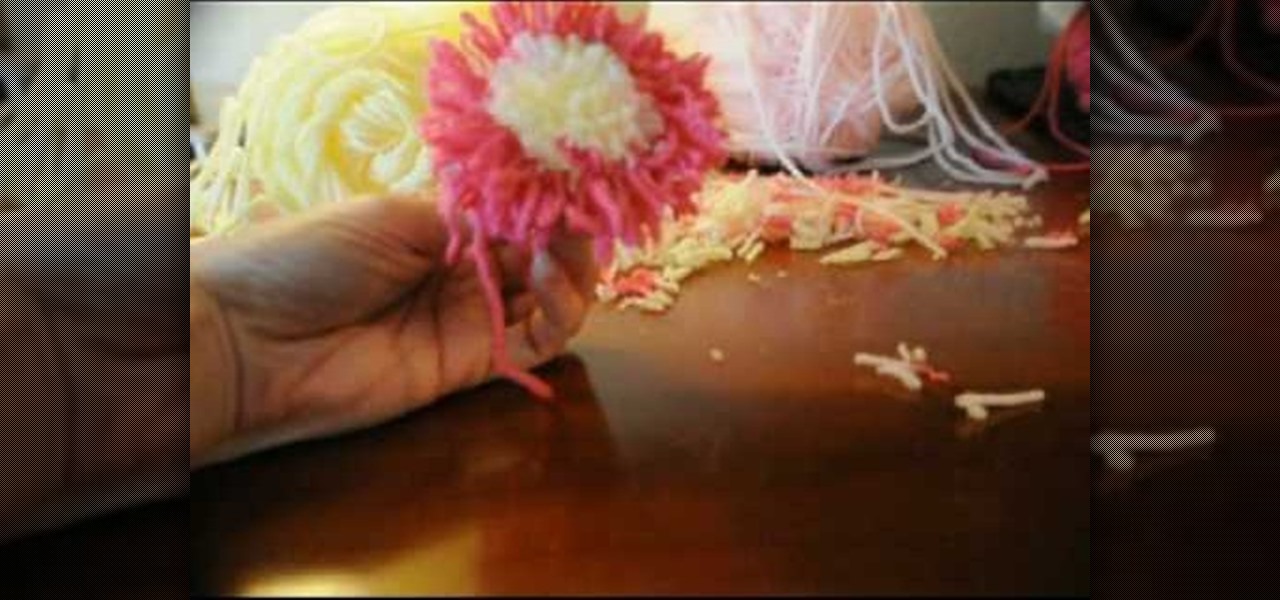
Tracey shows us how to crochet an easy pom pom flower in this tutorial. First, wrap your yarn around four fingers several times, and then wrap another color around as well. Last, wrap one last color on top of the middle color still wrapping around your fingers. Now pull the yarn off your fingers and tie a piece of yarn down the center of the wrapped yarn. Pull this as tight as you can and make as many knots as possible with this piece of yarn. Now cut your loops open with scissors through the...
In this tutorial, we learn how to do a feather stitch while embroidering. To begin, you want to place your finger right next to where you are sewing so you are making a loop shape and helping guide your needle as you are doing this. You will want to chain the loops together, making the thread look like feathers as you continue. There should be no lines that are straight, all should be looped by placing the needle in between each circle and pulling it into the loop shape. When you are finished...
This video shows us how to make a DIY long vest out of a scarf in no time! You will need: a wide scarf, matching thread, other colored thread, safety pins, needles, and scissors. First, measure yourself shoulder to shoulder and add 15cm to that number. Next, measure 30cm on each side from the very middle of the scarf. Now, mark that spot with a safety pin and measure out another 30 cm on both sides, marking those spots as well. Now, bind the last two safety pins and sew from the bottom up to ...
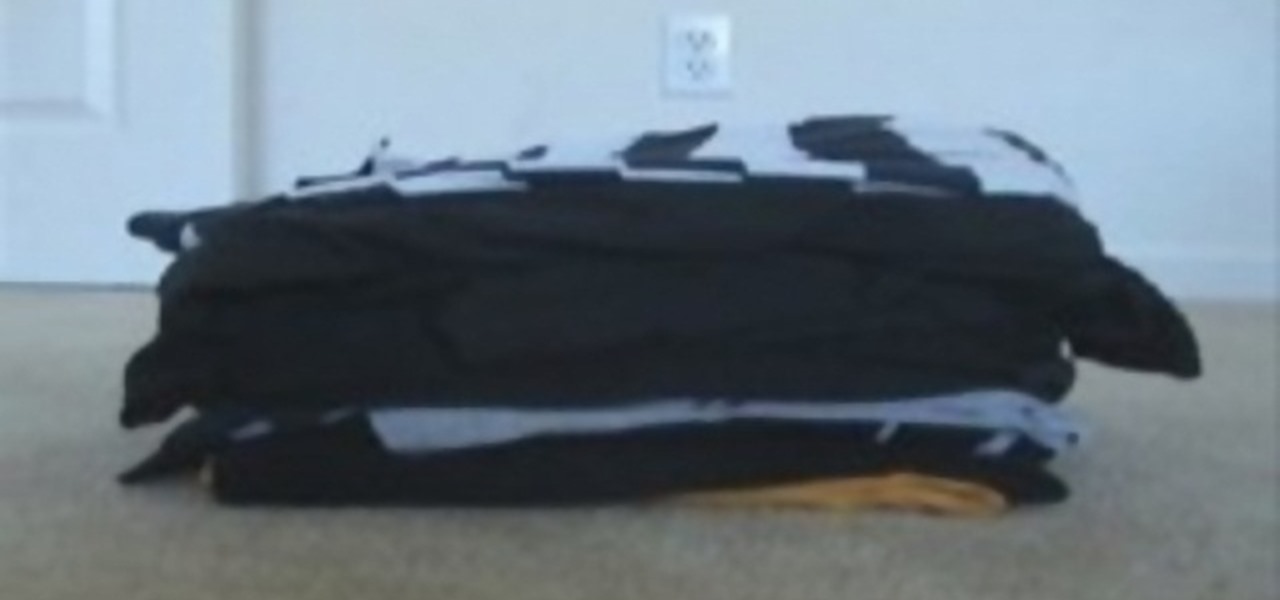
In this video, we learn how to save space while packing using 3 household items. You will need the following items: garbage bag, vacuum, and rubber band. First, fold your clothes and stack them on top of each other in a pile, then place a garbage bag around them. Now, take your rubber band and tie it around the bag, then stick the hose of the vacuum into the hole. Now, turn your vacuum on and let it suck the air out of the bag, and you will see the bag shrink within just a few minutes. Keep s...
In this tutorial, we learn how to make a tissue paper flower. You will need: pipe cleaners, scissors, and tissue paper (three different colors). First, twist three pipe cleaners together to make a stem. Next, cut your tissue papers all into the same size, mix colors to get a prettier flower. Now, layer the sheet and fold the papers as many times as possible. Cut the ends in a triangle shape, then spread the papers again and fold up again in the alternate direction. Now using your papers and p...
In this tutorial, we learn how to make stacked hair bows. Start off with three separate bows: red, white, and blue. Make sure there is a string still hanging from the red one, but the strings on the white and blue are cut off. Now, put glue from a hot glue gun and place it on the middle/side of the blue ribbon, the glue the white one where the glue is and hold together. Next, take the red bow and glue it to the center of the blue and white bow. Hold the red bow in place until it's completely ...
In order to make a bow headband without doing any glue or sewing, you will need the following: a headband, a hair tie or rubber band, and a piece of ribbon or a belt.
In this tutorial, we learn how to craft a pom-pom ladybug with your kids! The materials you will need are: 1 large red pom pom, 1 medium black pom pom, 1 pipe cleaner, 2 googly eyes, and one piece of lace. Start off by gluing the black and red pom pom's together with a hot glue gun. Next, use a hot glue gun to glue the googly eyes onto the black pom pom. Now glue black pipe cleaner around the red pom pom to make a stripe on the back of the ladybug. cut the pipe cleaner into little round shape...
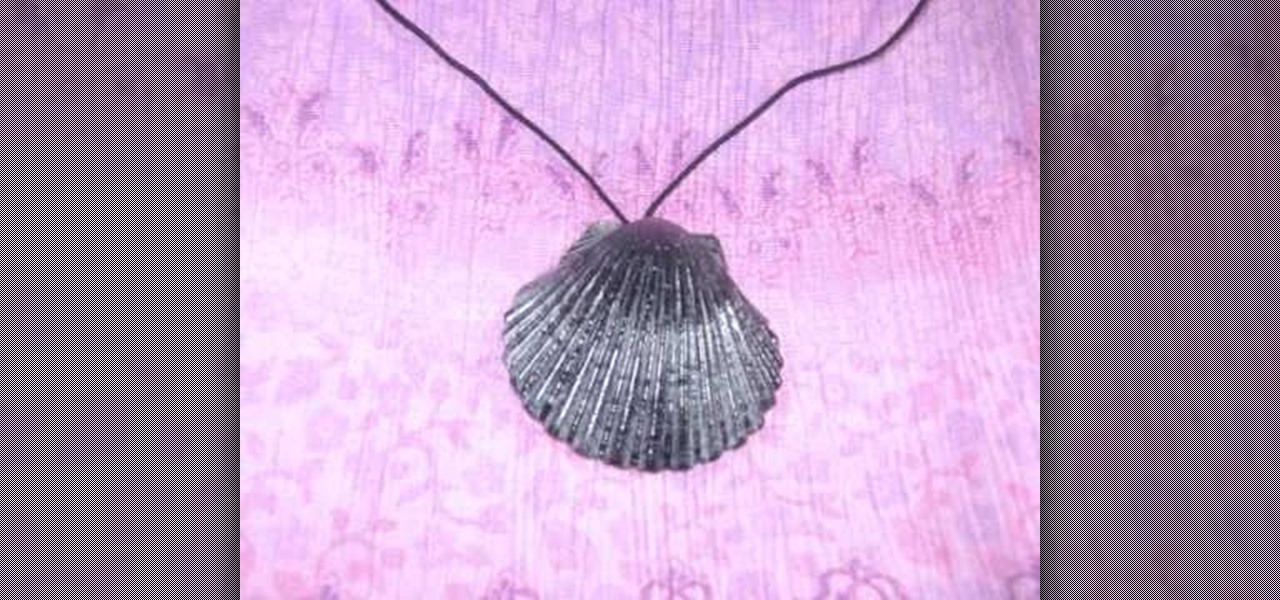
In this tutorial, we learn how to make a simple shell necklace with your kids. To make this, you will need: a sea shell, a hot glue gun, and a necklace string. First, tie your string into a knot at the end of it. Next, grab your shell and apply glue with the hot glue gun to the inside base of it. Now, press the knot that you just made onto the glue in the shell. Let this set up until the glue is completely dried, and you're finished! You can apply more glue to the top if you want a more secur...
In this video, Betty Jean shows us how to make a Christmas bow and wreath. You will need a wreath the size you want, then open it and fluff it so everything is out and the green branches are facing outward. Next, choose a ribbon of your choice and poinsettias. Now, take your ribbon and make it even and tie the ends together. Now, make a bow with your ribbon and place it onto your wreath. Now, add on the poinsettias to your wreath and add on ornaments or anything shiny that you like. You can a...
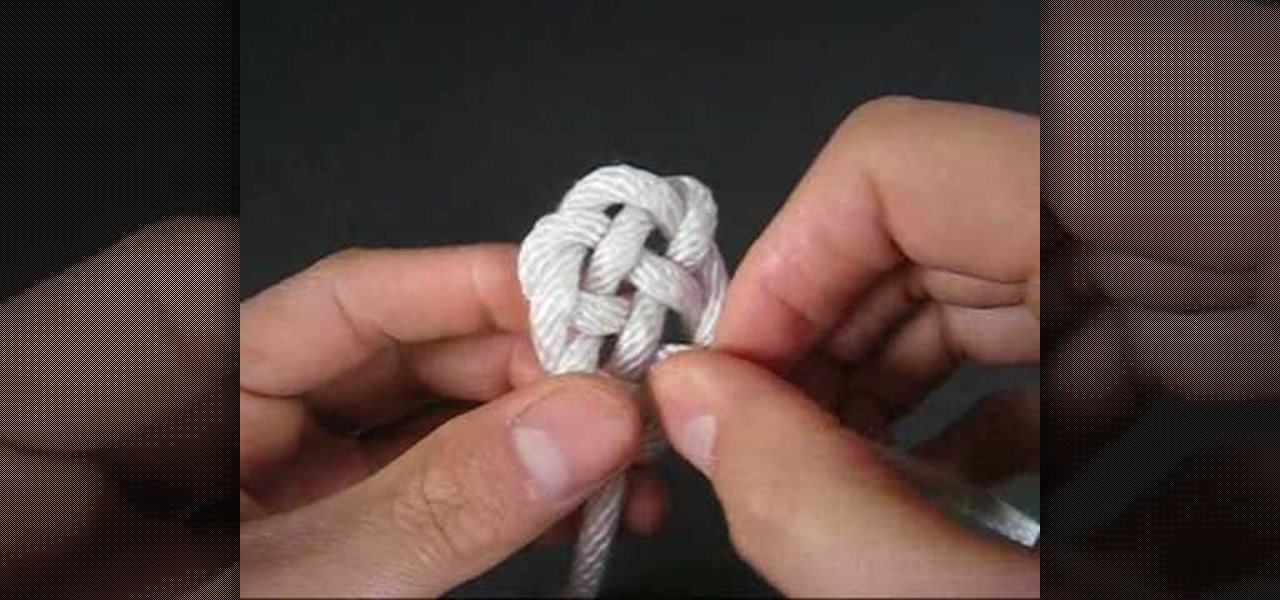
In order to create a Key Hole Weave Knot, you will need: rope or twine. Begin by making a loop. Then, make a second loop next to it. Cross the loops, placing one on top of the other. Weave a free end through the loops. Next, weave the other free end through the loop. Pull them both through carefully. Next, you'll need to shape your knot, by making sure that the spacing is even.
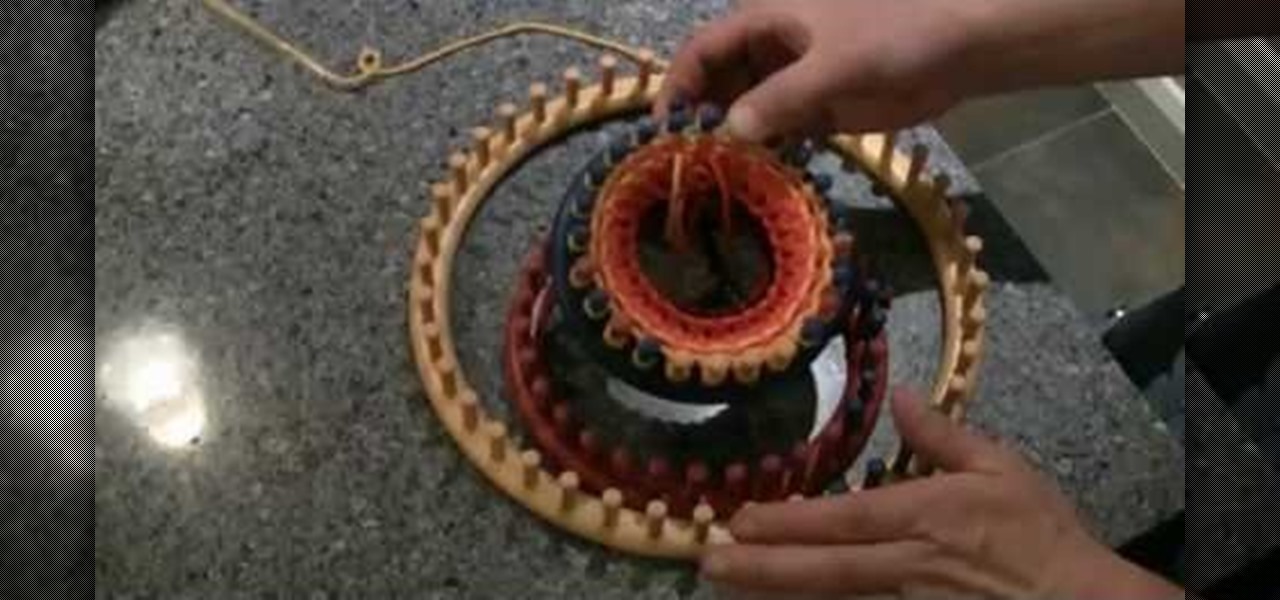
We all know that color coding is important because it helps us to quickly organize things based on visual cues. As students in high school, we used differently colored page tabs to denote different subject matters, and some of us color code file cabinets for easier and faster access. The same principle goes for this tutorial, which teaches you how to color code a knitting loom.
Is your roommate's food always in the fridge longer than it should be? Is their meat rotting, forcing you to take care of it? Living with other people can be a pain, especially when it comes to the one place that you all share— the refrigerator. Keep your sanity and senses by transforming your funky smelling fridge into a pleasant aroma of charcoal...
In this tutorial, we learn how to make a high pony tail for curly hair with Liz Muller. First, wet both sides of the hair and put gel into it. Now, push the front of the hair back with a brush, avoiding brushing a lot so you don't have frizz. Make sure it's straight, then push the back of the hair up. Combine all of your hair together until you have it high on your head. If your hair starts to get curly in the front again, just release your hair and try again. You can always add more gel if y...
In this video tutorial, viewers learn how to make a beaded watch band with a non-loop watch face. Begin by cutting 2 pieces of the stringing materials to approximately 10 inches. Then put one end of the string through the hole of the watch face and pull it to about halfway. Now users will have 2 strands to work with. Users may choose to making a double strand watch band by putting beads on both strings, or a single strand watch band by running both strands of string through a single bead. Fin...
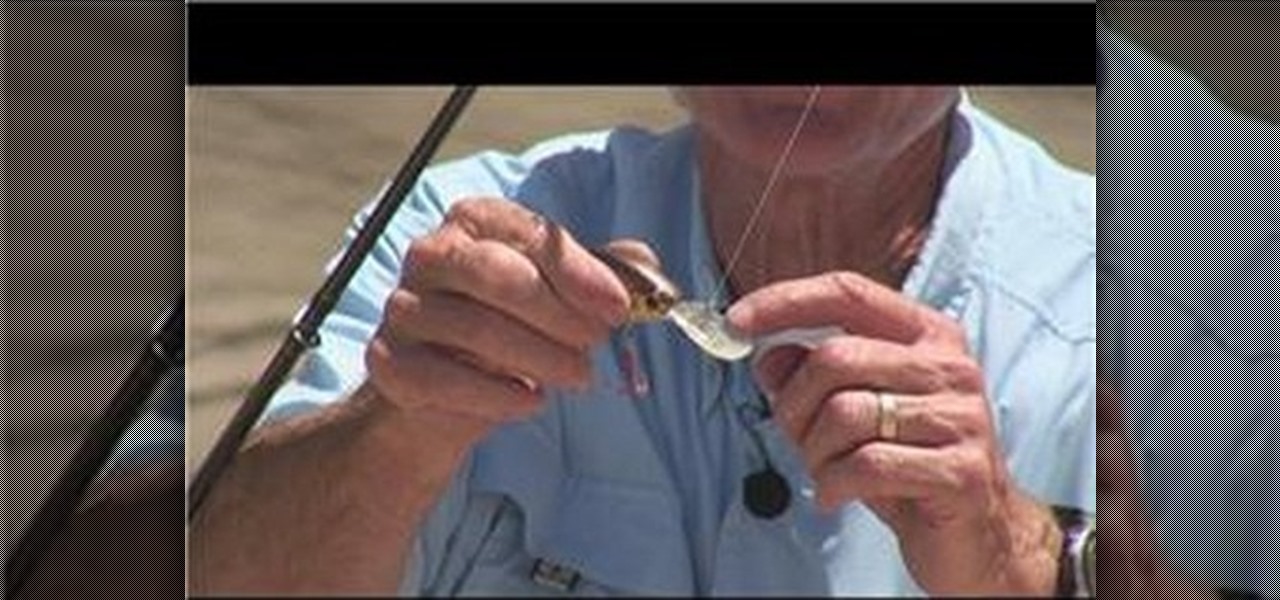
In this Outdoor Recreation video tutorial you will learn how to rig a crankbait. It is so named because it floats on the water and does nothing until the crank is turned. The turning of the crank provides the action to the bait and attracts fish to it. To rig it, there is an attachment point on the diving lip of the crankbait; it can be a small hole for the line to be passed through or a split ring to attach the line. Tie the line to the lip with a clinch knot and you are in business. In case...
In this tutorial, we learn tips from roadies. If you experience a nosebleed and don't know how to handle it, there is a very simple way to cure it. First, take a long string and tie it around the middle of your hand a few times until it's tight. Then, make a fist with your hand and squeeze for two minutes. By the time the two minutes is up, your nosebleed should have subsided. Another tip, is for when you have hiccups. First, take a pen and press it on the inside of the ear. After a few secon...
In this Outdoor Recreation video tutorial Dave from 'journey the outdoors' explains how to make a bench shooting bag. This is used by bench or week-end shooters for recreation purposes. For this you will need an old sock. Take one that you don't use anymore and preferably a tight knit sock. Then fill it with rice and tie the open end of the sock. You can also fill it with beans or some other such substance. Rice and beans being bigger than sand, there will be more air in the bag and it will a...
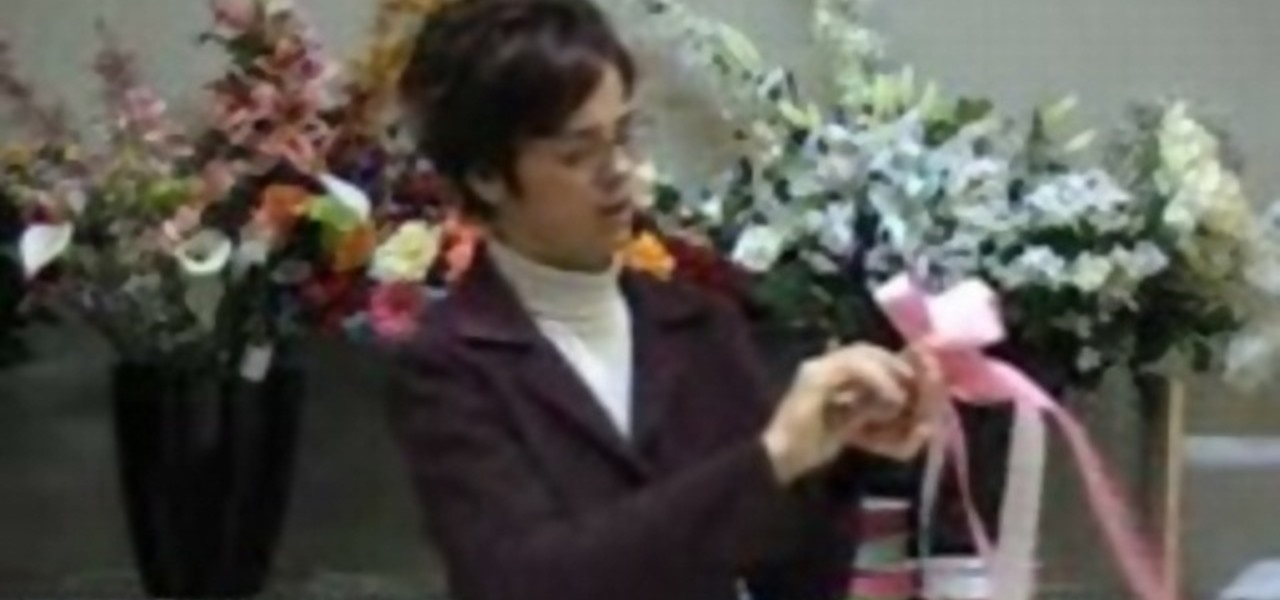
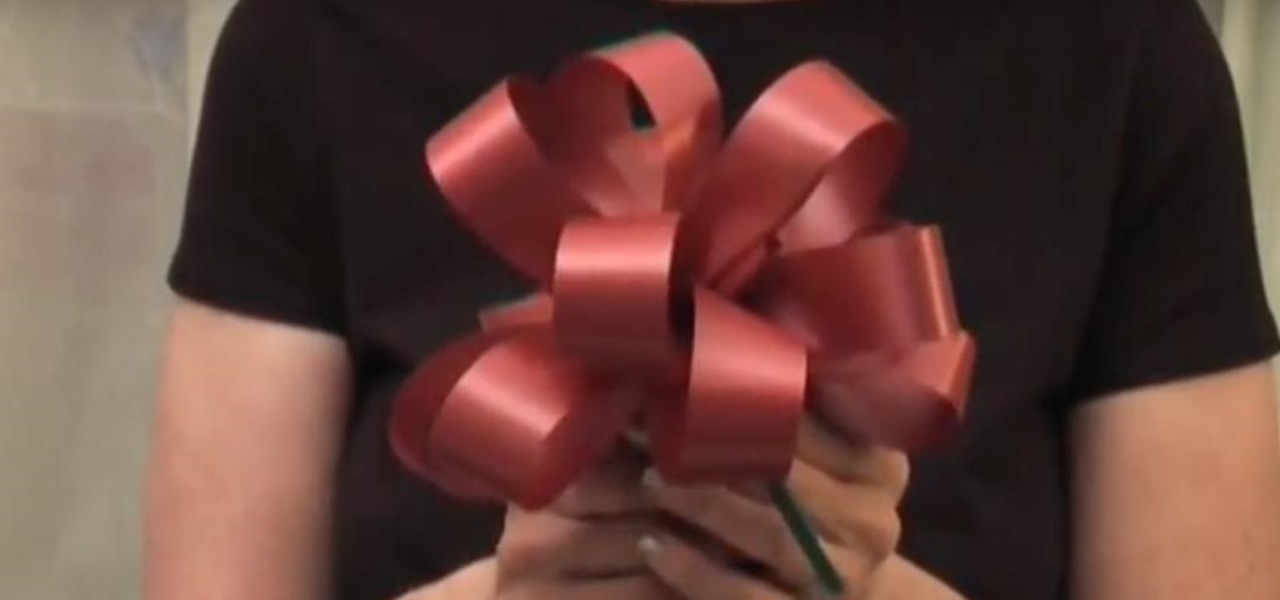
Looking to give your party a more decorative atmosphere? In this video, Judy of A-BnC Parties and More, Inc. shows how easy it is to make a decorative bow with ribbon, a sharp pair of scissors, some curling ribbon or a twist tie, and the knowledge held in this how-to. One can use these bows to decorate your wedding, place them on chairs, canopies, or even add them as an accent to gift baskets. Take your party decor to the next level with help from this free tutorial.
In this free ballooning tutorial, learn how to make your very own multi-colored balloons (agates) by using a very simple (but difficult at first) technique called "the blend". The blend actually rips apart the balloon while melting other parts together. Tip from Mr. Fudge: "Do NOT use the whole balloon. It makes it too difficult and you end up with large lumps in your final product."
In this how to video, you will learn how to load a kayak on a vehicle. Doing this properly will mean both the kayak and vehicle are safe. A simple upright system is fine for your kayak. You want to look for J and V bars with padding to transport your kayak. To lift the kayak on to the roof, first check to make sure the straps are working. Hold the kayak with both hands and a straight back with your knees. Lay the kayak in a strong position on its side. Secure the kayak with the straps. Thread...