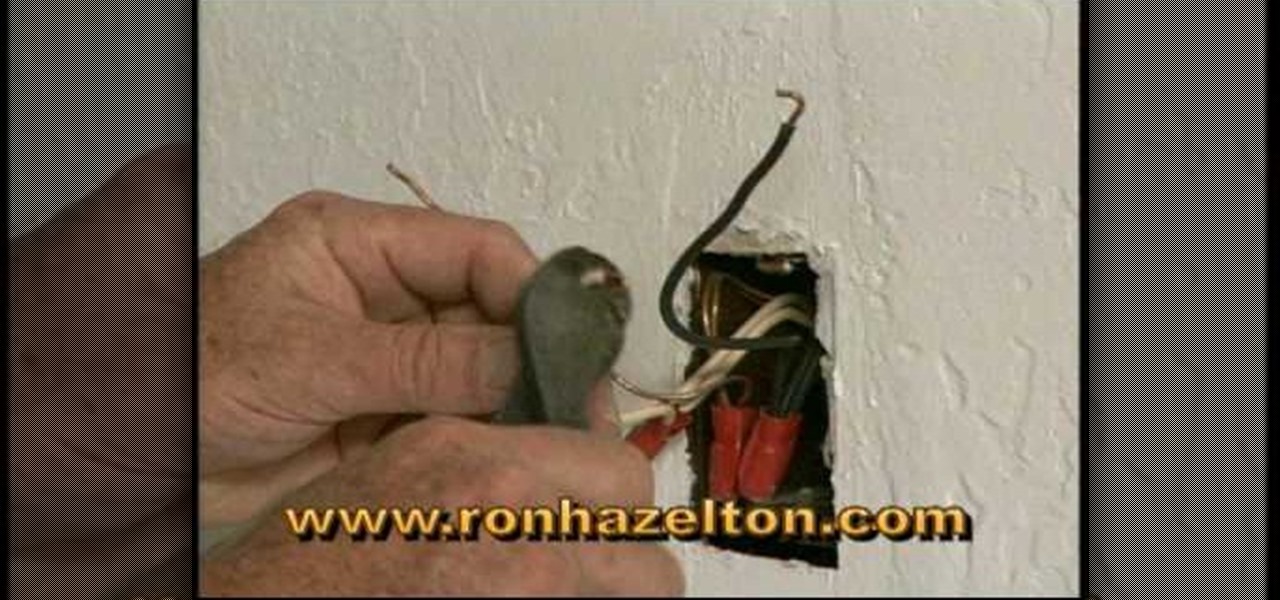
Ron Hazelton shows how to install a ground fault circuit interrupter (GFCI). First turn off the power to the electrical outlet at the circuit breaker or fuse box (check to make sure there's no power in the outlet!). Then remove the electric cover plate. Then gently remove the old outlet receptacle. Detach the wires from the old receptacle. Trim and re-strip the wires if necessary. Attach the wires to the GFCI receptacle per the instructions. Gently reassemble the receptacle and plate. Restore...
Ron Hazelton shows the most secure way to hang heavy mirrors or art on plaster walls using toggle bolts. Attach a sturdy hanging wire to the piece if necessary. Draw a level line on the wall where the top of the piece will go. Stretch the hanging wire taut and measure the distance between the wire and the top of the frame. A two-bolt system will keep the piece level. Drill two holes this distance below the wall line. Using masking tape prevents the plaster from chipping. Fold the toggle wings...
Mark Donovan of HomeAdditionsPlus shows us how to install a towel ring in the bathroom. - Line the ring up on a wall stud.

This tutorial shows you how to attach legs, arms, ears, etc to your amigurumi. I also show you my method for binding off (BO) your yarn when you are done crocheting. Amigurumi is the Japanese craft of knitting or crocheting little animals (or any kind of cartoon/ creature) out of yarn. Most important principle of amigurumi: your creation must be cute! Watch this amigurumi tutorial and get started on your own creation.
F for FAKE. This video has been labeled a "Faux-To". Commonly contested as bogus science, we believe this video to be a hoax. What's your opinion? Comment below.
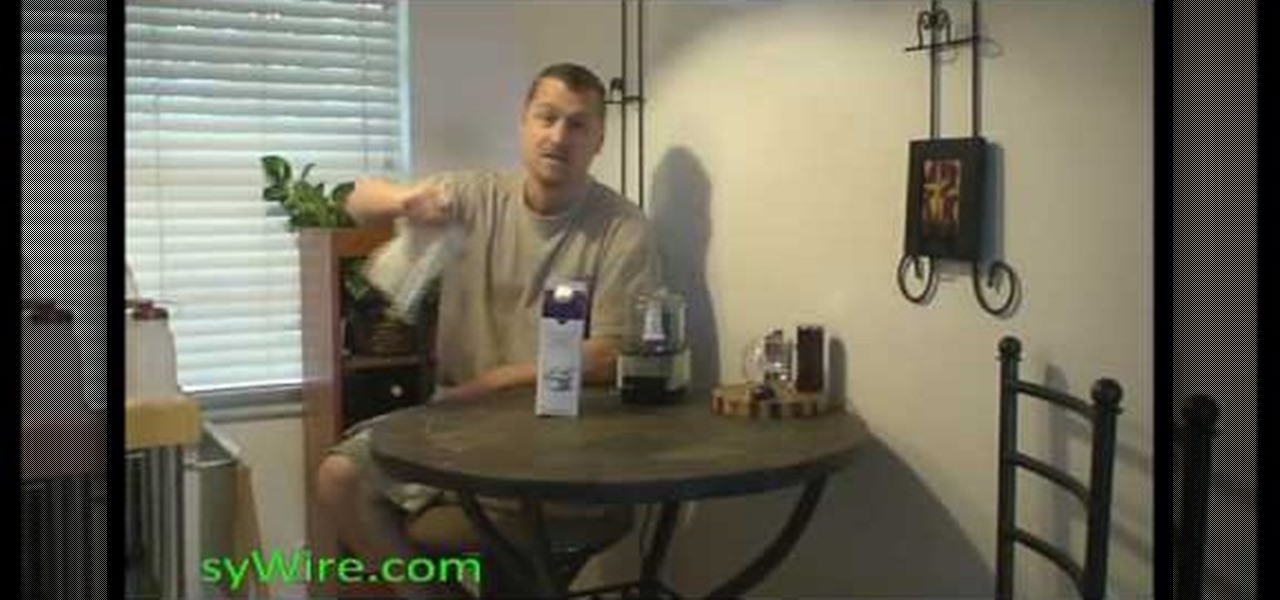
Are you tired of crying and having puffy eyes after cutting a large onion for dinner? Learn how to spice up any dish with a nice mild shallot, without the tears. Shallots are similar to onions and just as flavorful.

Necklace chains can easily get tangled and can take what seems like forever to put right. Don't waste any more time untangling your necklaces and simply grab a straw.
Normally a remote control car only comes with four body clips. Body clips tend to get misplaced, or they fall off of the remote control car quite easily. For quick maneuvering, attach extra body clips directly to the body of the car.
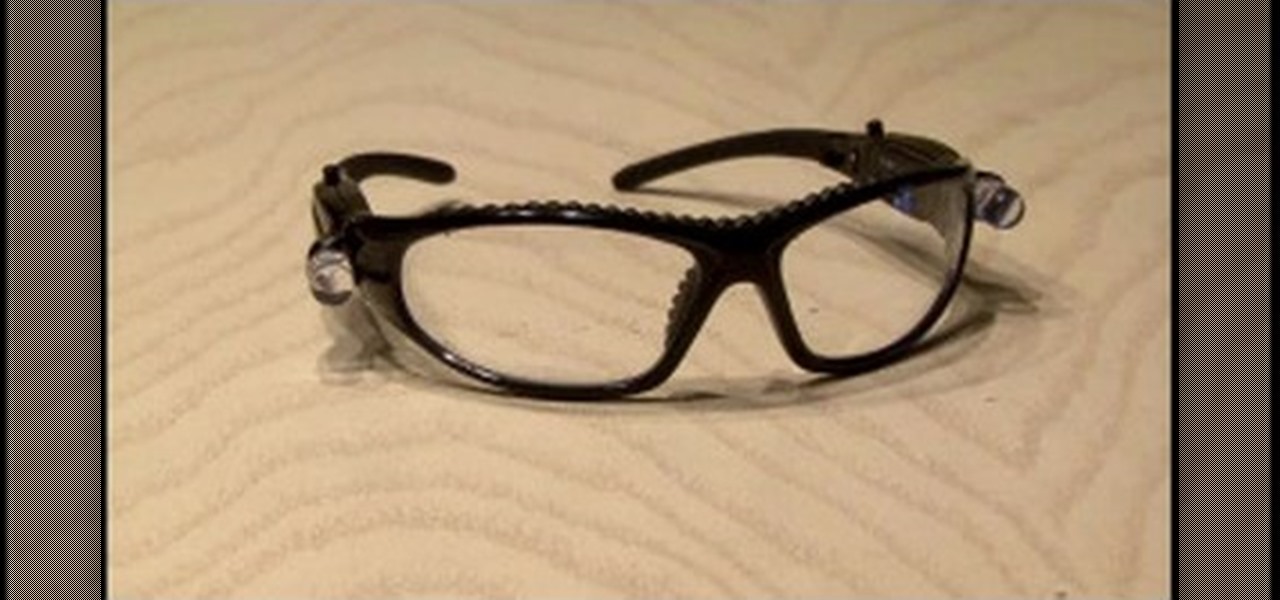
This video teaches us how to prevent those pesky paparazzi from invading our privacy. It suggests buying a pair of safety glasses that have lights attached at the sides. Then, remove the lights, and replace the existing resistors with higher-powered ones, and the lights with infrared LEDs. When the press tries to film you while you're wearing these at night, the cameras will see bright, menacing lights where your face should be. This how-to is presented as a joke, but it would be hilarious to...
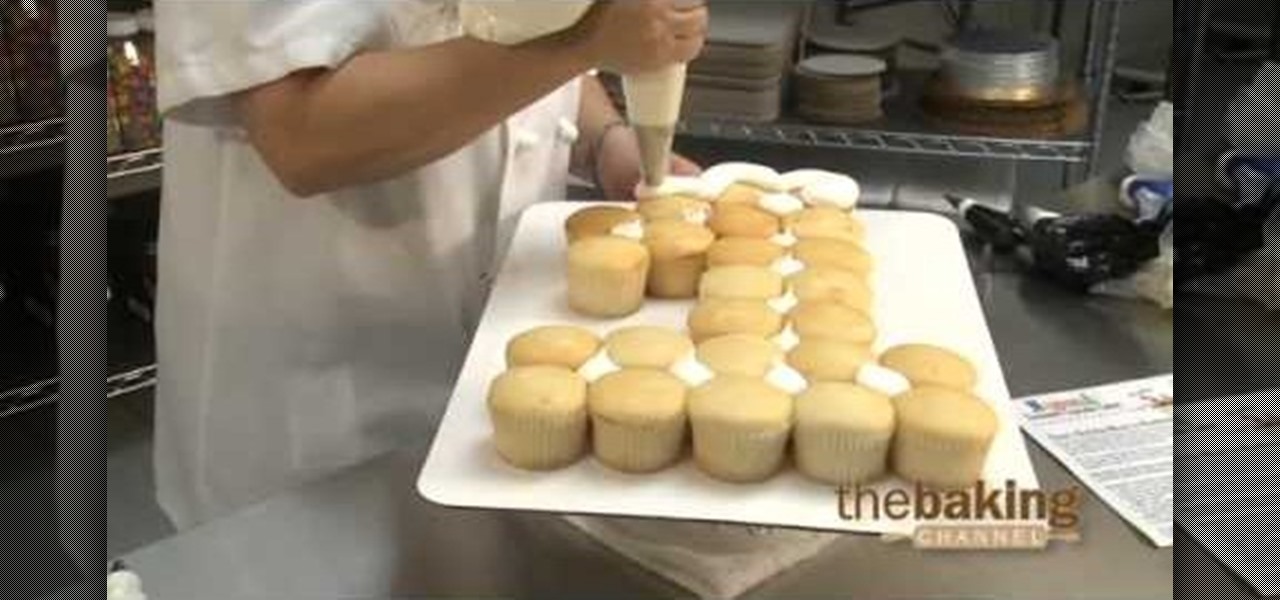
Cupcakes are considered tiny cakes, so it only makes sense that assembling a bunch of cupcakes together creates a cake. If you have a ton of starving guests to serve and a few measly cupcakes just won't do, why not make this cupcake cake?
We understand why companies affix sticky labels to their products. We just don't understand why they manufacture these labels with unyielding, Godzilla strength glue. Who wants to open up a new microwave only to end up with partially peeled labels and glue stains?
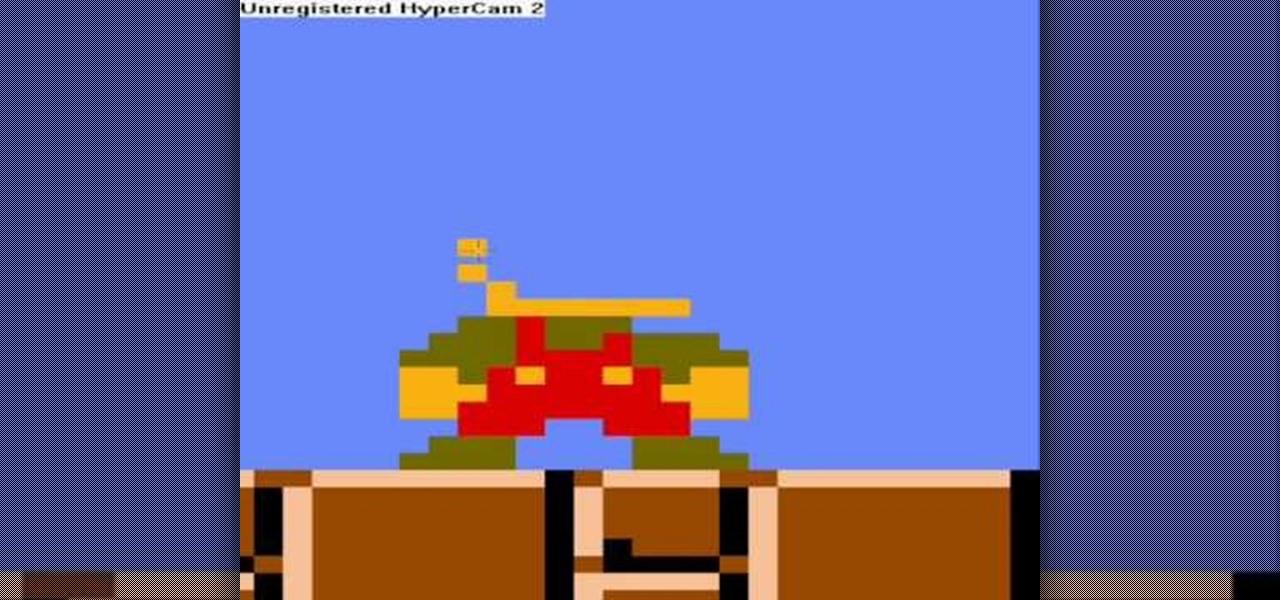
This video shows how to make the original 8-bit Mario using only pixels. The first step is to use three dark brown pixels to create a stair like shape for Mario's feet. The next step is to create his pants by making a 6x6 red square which is attached to the characters feet. The body and arms are created making the same sized red square out of pixels. The arms are made as various straight lines which are made up of about four pixels each. the last step is to make a 4x4 tan colored square for t...
This video will show how to use the note tool using the program Photoshop. Using notes makes pulling up previous projects or leaving brief bits of information easy to obtain. Notes in Photoshop can be pulled up by using the keyboard short cut button N button on your keyboard. After opening up an image you can access the note panel by right-clicking and selecting attach note. to pull previous notes up you must right click the image and select the show note option. Using the add note setting wi...
In this tutorial, we learn how to make sure your game is really dead. One of the best things is to stay away from the feet, then touch the eyes with the end of your rifle. If there is no reaction at all, then the animal is dead for sure. After this, you will need to attach a validated elk tag to the animal, making sure it's secured. Glue it to the ear using your hands and pressing it down for several seconds. In different states, there are rules and regulations as to where you have to apply t...
In this tutorial, we learn how to make an array of paper roses. Use any colors of paper you want with this to add a special touch to them! Now, you will take the pattern or color of your choice and fold it up into a square. after this, fold it into a triangle and then cut the edges of this off. After this, cut the bottom off and open it up, it should be a flower shape with a hole in the center. After this, repeat with several other papers and then cut the flowers up into halves. From here, yo...
In this tutorial, we learn how to recycle plastic bottles and make decorative flower art. Start out by cutting around the cap of the bottle until the body is cut off. Then, cut small slits in the bottle until it's completely cut up. From here, you will spread these out so they are opened up like petals. Take different colored plastic bottles and repeat this process. When you're finished, you will then attach these together using heat and use them as decorative art for your wall! This is great...
In this tutorial, we learn how to tease your hair easily. First, brush your hair back and then grab the hair in the back of the crown of your head. Hair spray all of the hair and then comb it back against the growth, towards the root. After this you need to check to make sure it's enough volume. Your hair will stick up, but that's what you want it to do! After this, grab the hair behind this and do the same process. Continue to do this until you have achieved the look you want. To finish, sim...
In this video we learn how to knit a scalloped edge. This forms a shell along one edge! First, attach your needle to the yarn on the right edge. Then, make a slip stitch and yarn over. Then, stick then needle through the fabric and yarn over again so you have three on the hook. Then, yarn over and pull through the first two loops in the hook. Then yarn over and go into the fabric and over again. Pull through a loop and then yarn over through all the loops on the hook. Now, do another one foll...
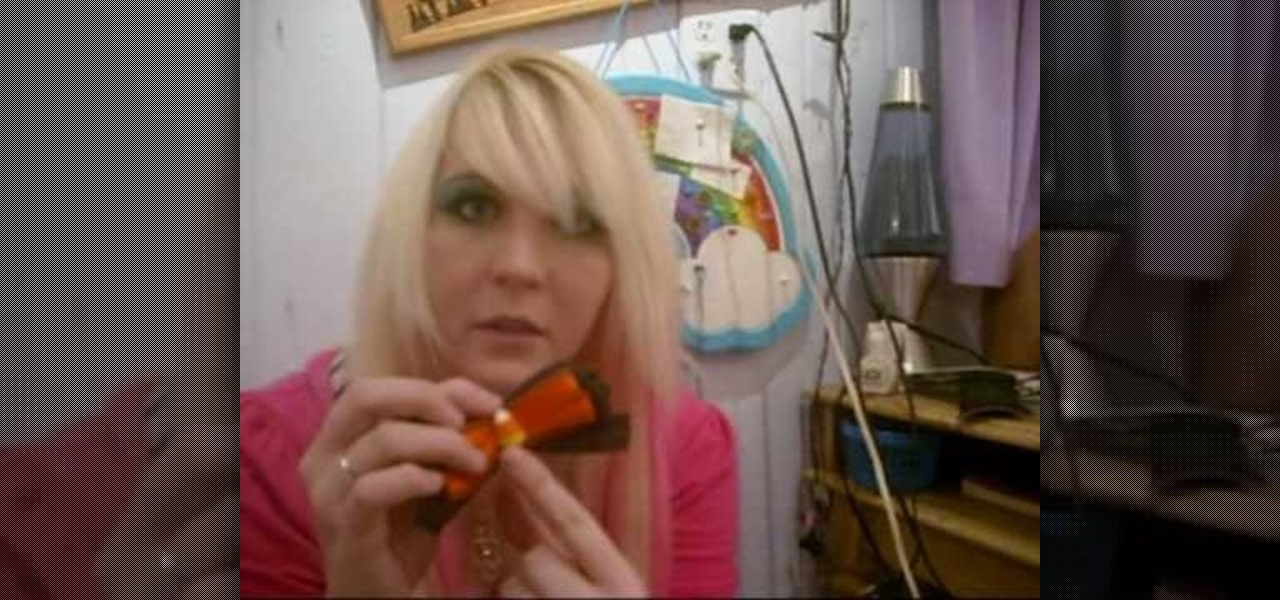
In this tutorial, we learn how to make cute little hair clips. These will add a fashion statement to any hair style and they are easy to create! To start, you will take some thin ribbon and bend it all together until it creates a large ribbon. After this, you will wrap it together in the center until it's a bow shape. From here, add in more colors or accessories. Then, use a hot glue gun to attach a clip to the base of it. Let this dry and then you can clip it into your hair! Make a lot of th...
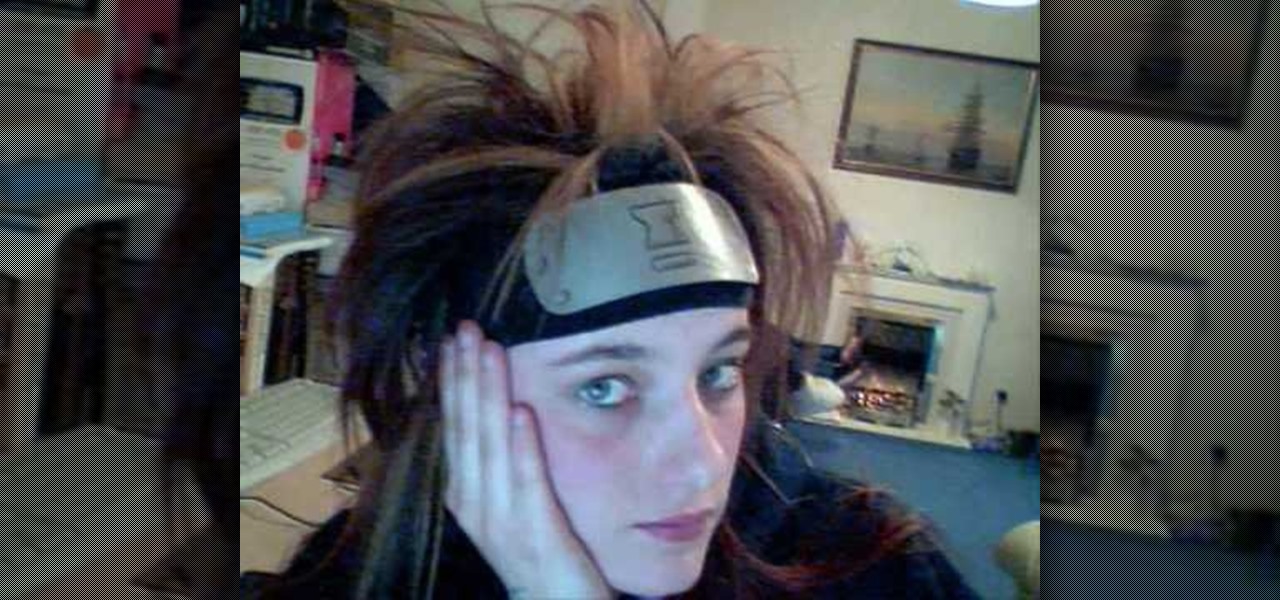
In this video, we learn how to make a decent Naruto headband. First, get a paper plate and figure out how big you want it, draw on the template so you can see it through the paint. Then, apply metallic paint with a paint brush using the template you drew as a guide. Next, you will wait for it to dry and then cut it out. Round the edges like it's a real headband, then draw on the hair band the village insignia. Once finished, glue this to an old sock and wait for it to dry. Then, you can attac...
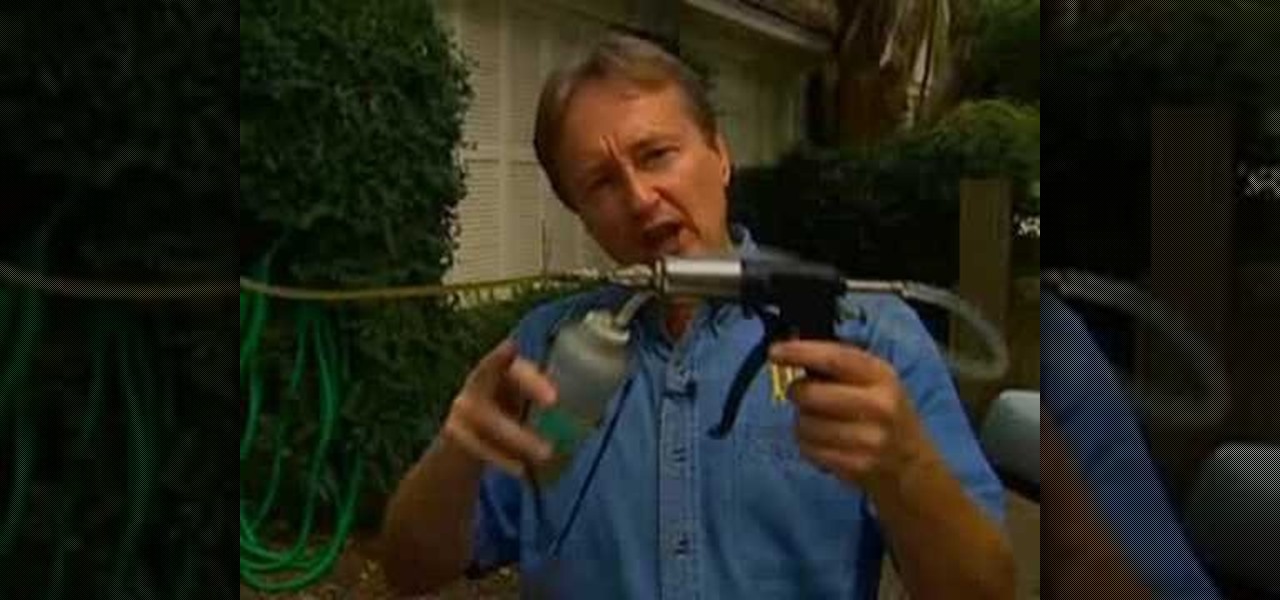
In this video, we learn how to bleed air out of your car's brake system. To do this, you will first need to hike your car up on a jack. After this, remove the wheel from the car and then find the bleeder screw on the car. This is down at the bottom but the air will want to go up. To help this, you will use a magnet on the wheel that has a canister attached to it. Then, connect this to the brake and pump the fluid into the system. Now the air will come up into the air and out of your car! Do t...
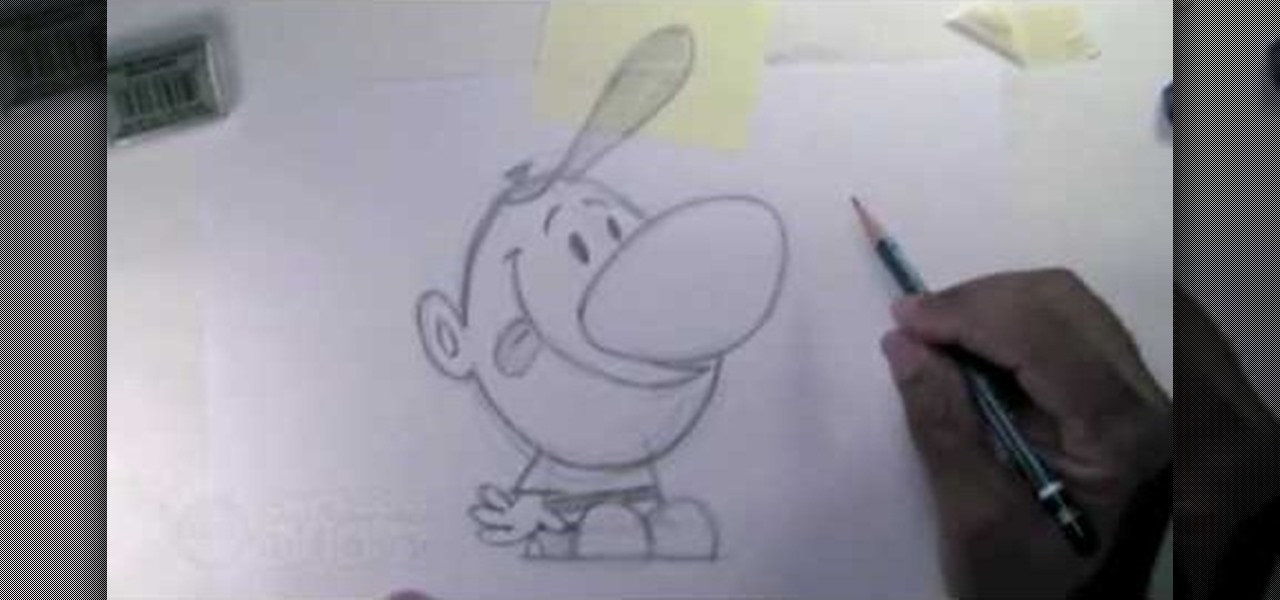
In this video, we learn how to draw Billy from The Grim Adventures of Billy & Mandy. Start out by drawing the egg shaped head with a pencil. From here, sketch on the body by using a block shape then draw the shoes as simple half circles. The arms and hands will be hanging to the sides. Now, draw on the huge nose in the middle of the circle. Attach the mouth to this and draw it all the way up near the eyes, which are simple dots. The brows are simple slashes. After this, add in the minor detai...
In this tutorial, we learn how to easily install a toilet. When you pull it out of place, there will be black residue on the toilet, scrape this off with a knife. From here, you will need a wax ring and plumber's putty to apply to the toilet. Once this is on the bottom of the toilet, it will help it stay in place and save you a lot of anguish. Now, take the plumber's putty and put it around the edge of the toilet. Now, when you install the toilet it will be sealed to the floor and stay in pla...
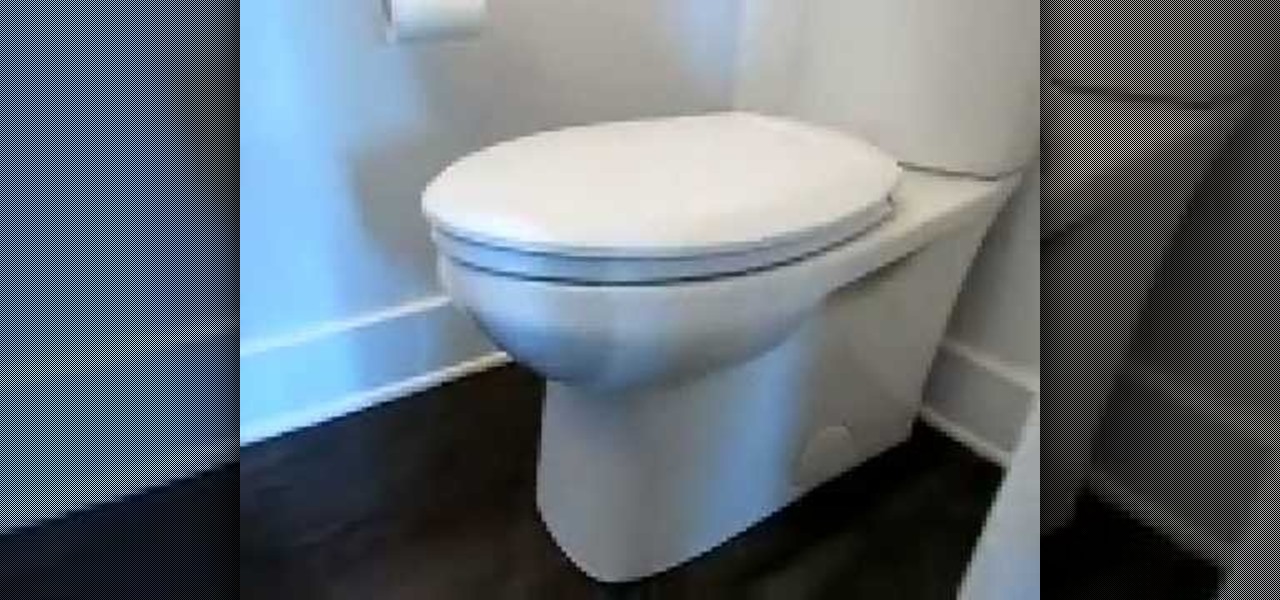
In this tutorial, we learn how to easily install a toilet seat. First, unscrew and remove your previous toilet seat. Next, take the two plastic bolts and remove the nuts and washers. Then, install these into the proper spots in the seat. Then, flip the seat back over and slide the nuts into the appropriate hole on the toilet. Then, take the rubber fittings and slip them on the underside of the bolt. The tip of the rubber cone should point up. When finished, you will take the plastic nuts and ...
In this tutorial, we learn how to recycle a plastic bottle to make a toy bottle rocket. First, take a large plastic bottle and a sharp knife, then cut it in half. After this, take the side with the cap on it and then paint on the inside of the bottle. You can paint whatever you want on the inside, feel free to use different colors and get as creative as you want! From here, take some bottle caps and poke holes in the center of them. Then, string these together by pushing a string in the middl...
In this video we learn how to recycle plastic bottles and make a decorative mobile. Start off by cutting the strips off of the water bottle then pinning them down to a table. After this, you will start to cross each of these with another piece to make a checkered effect. Nail them down on the sides as well to make it stick to where you want it. When finished, you will remove the nails and then place in a needle with beads and shells attached to it on each of the holes. Once you are finished w...
In this tutorial, we learn how to recycle cans to make garden decor. First, use small scissors to poke a hole in the top of the can, then cur around the top of it until you have removed the mouth. After this, cut a rigid design in the top of the can and then cut five slits going down on all the sides. Push these down, then cut the sides of them so they are slightly rounded. From here, you will attach these to another can that has been spread out with tons of different slits. Place this on a r...
In this tutorial, we learn how to make a pair of great looking earrings. To start, you will take the base of your earring that has the hook on it and then take the wire for your beads. Pick out any beads that you want to attach to the wire, then string them onto it. You can add different colors and any type of bead you want to make these unique. From here, use wire cutters to bend and cut the excess wire from the bead. From here, you will bend the extra piece into a loop that you will hook to...
In this tutorial, we learn how to assemble a computer from parts. First, you will need to take the motherboard, video card, RAM, hard drive, power supply, CD-rom drive, and the case and make sure you have them all laying out. From here, you will take out the motherboard and plug the RAM in to the appropriate spot for it. This will be located next to the fan on the upper right hand corner of the motherboard. After this, place the motherboard inside of the computer case and then insert in the v...
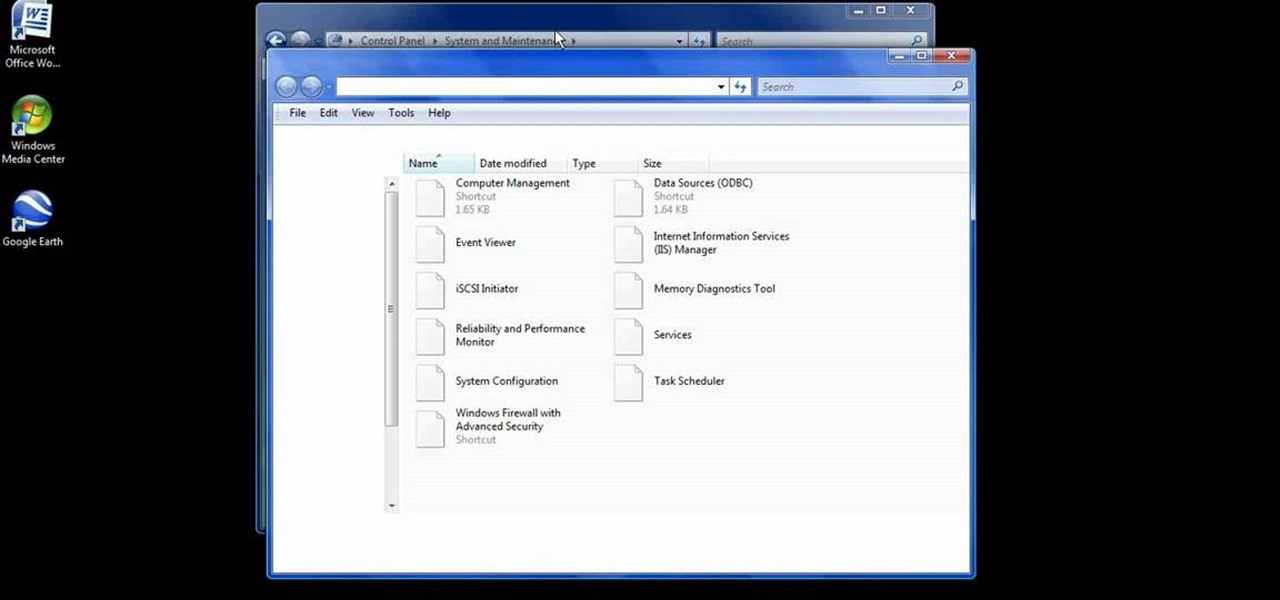
In this video, we learn how to easily defrag your computer's hard drive. First, go to the start menu on your desktop. Then, click on the control panel and then click on "system and maintenance". On the new page, click on administrative tools and then open up computer management. Then, click on disk management and then defragment for your computer. Let this defragmenter run on your computer until it is no longer loading on your screen. When it's finished you can view the results from the test ...
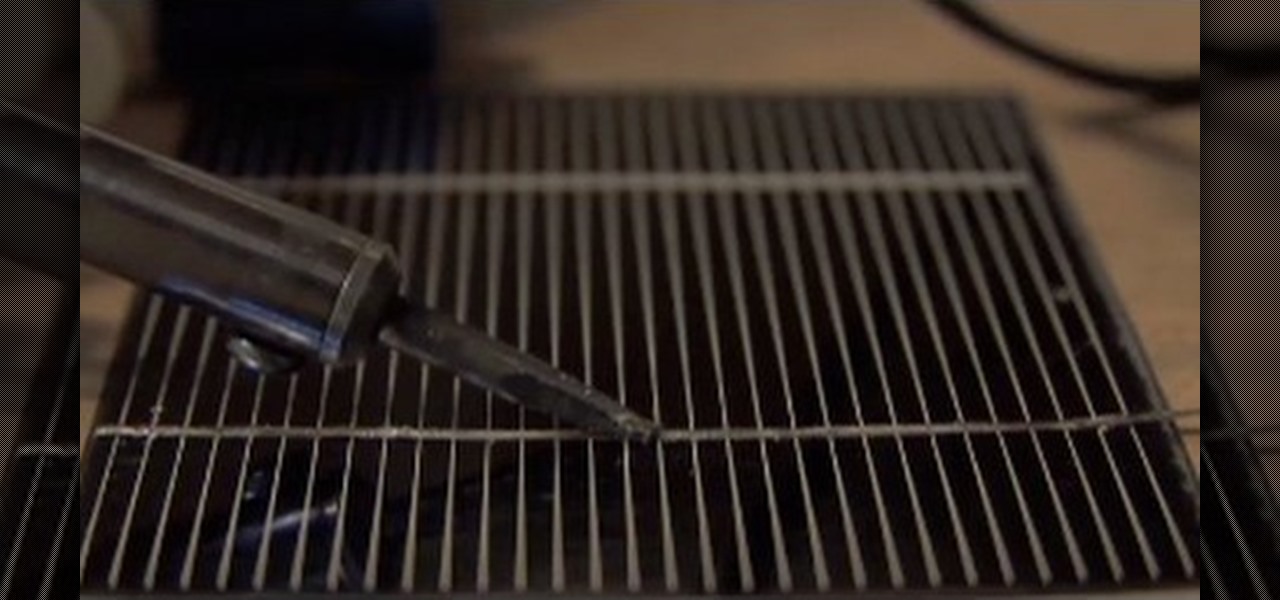
In this video, we learn how to make your own solar panel.The amorphous solar glass is the cheapest but it's also the least efficient. You can do anything you want with these and they are durable. The hexagon cells are the most efficient and most expensive as well. The poly crystalline is almost 2 watts a piece and can be purchase in lots of any size. You have to tab these cells together and they are extremely fragile. Be careful when you work with these. To make these, you will solder tabbing...
In this tutorial, we learn how to make your own summer dress. First, take a tank to and measure it out on your chest. Then, mark the shirt and cut it. Then, take another color tank top and cut off the opposite area that you just cut on the other tank. Take another piece of fabric now and measure it out to fit your body. Then, attach this to the bottom of the dress and sew all of the pieces together with a sewing machine. Try it on when you are done and then enjoy wearing your new homemade sum...
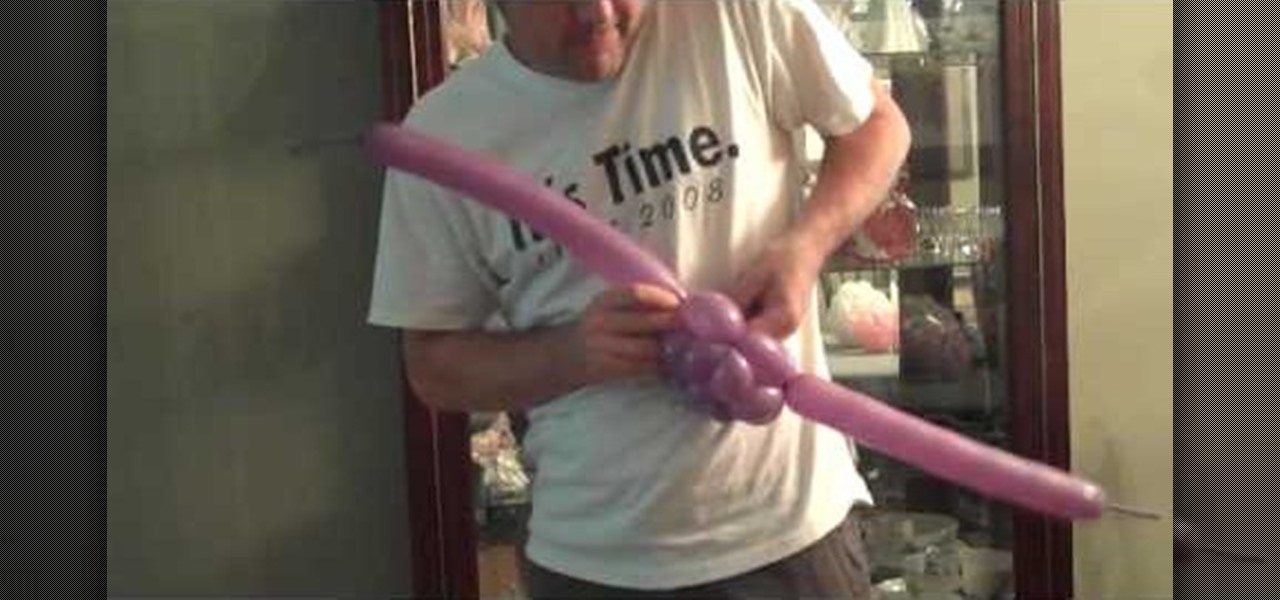
In this video, we learn how to make a balloon basket. This will be a square anti-prism made of white balloons and pink balloons. But, you can change the color if you would like. Start out by creating large and small bubbles inside the first balloon. Then, tie this with the other balloon and connect them both together. After this, you will have the bottom of the basket. Create a bunch of bubbles connecting both of these and attach it to other bubbled balloons to create a large top above the ba...
In this tutorial, we learn how to make Styrofoam and fabric Christmas ornaments. First, shape the Styrofoam into a ball and then grab the fabric you want to place around it. Place the ball into the fabric, then tie it at the top with a ribbon and some string. After this, you will be able to decorate the fabric with bows and glitter, whatever you want to use. You can attach a hook to the string in the middle if you would like to hang this on a string. Be as creative as you would like, just mak...
In this tutorial, we learn how to easily make butter. All you need is a food processor or jug and some heavy cream. To do this with the processor, you will pour the cream into the food processor and continue keeping this going until you see chunks of butter start to appear. After this, you will drain the butter from the milk and then add salt to make it taste better. If you do this in a jug, you will add the cream into the jug and just shake it continuously until it's turned into butter. Stra...
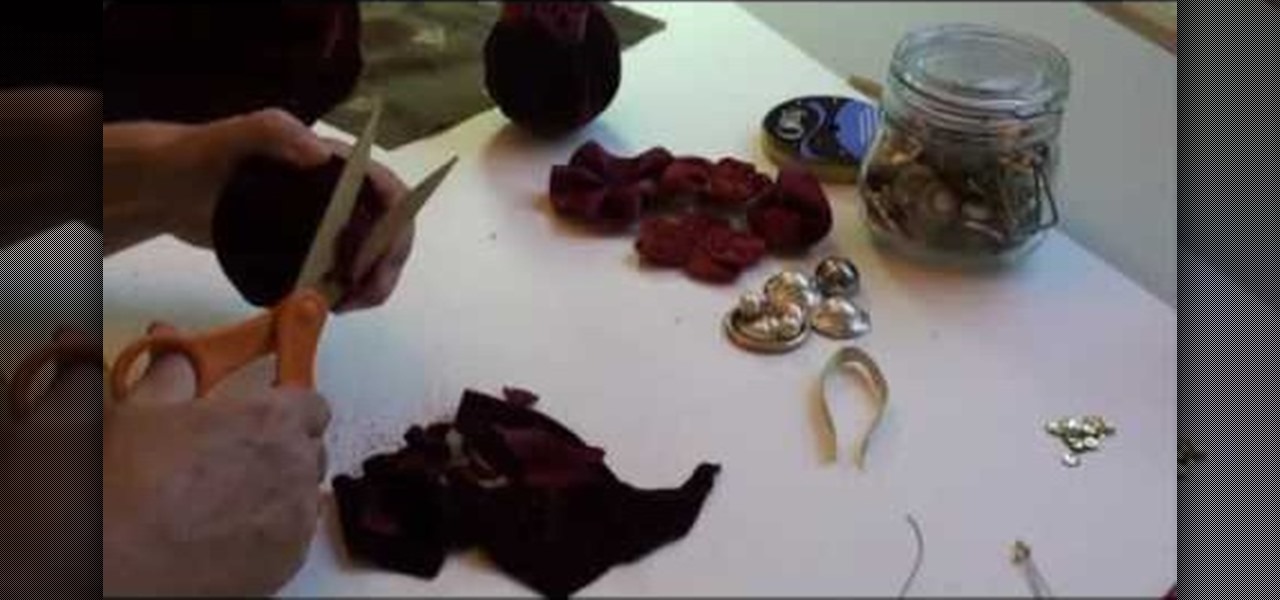
In this video, we learn how to craft orange-and-clove Christmas decorations. First, you will need to grab some oranges from a local supermarket, along with ribbon, and cloves. Now, grab the close and pierce it into the skin of the orange. This will release the smell of the orange and give you the scent of the clove as well. You can now make any design on the orange that you would like to! When you are finished decorating these, you can attach a ribbon to any part of them that you would like. ...
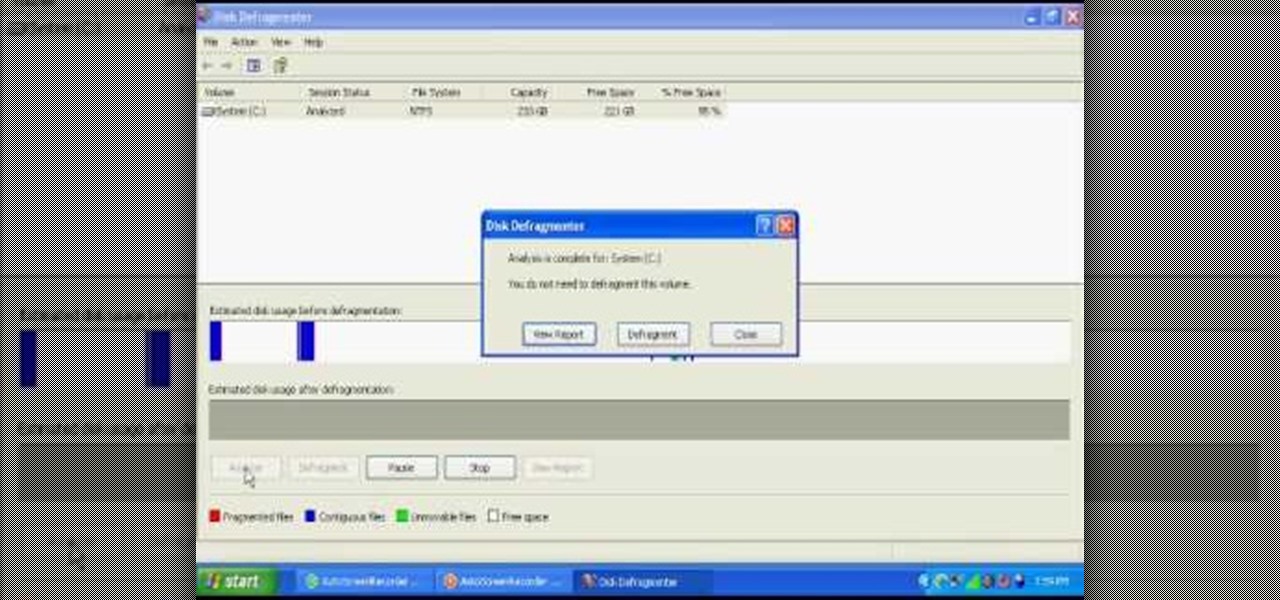
In this tutorial, we learn how to easily defragment your computer. Files that you use aren't always put in the right place, which will slow down your computer and file searches. Defragmenting your computer can help speed up your computer and make everything go a lot quicker. First, go to the start menu and then run "dfrg.msc" and click "ok". Once you have done this, a disk defragmenter will appear on your screen. Run this on your screen, then when it is finished you will be able to review the...
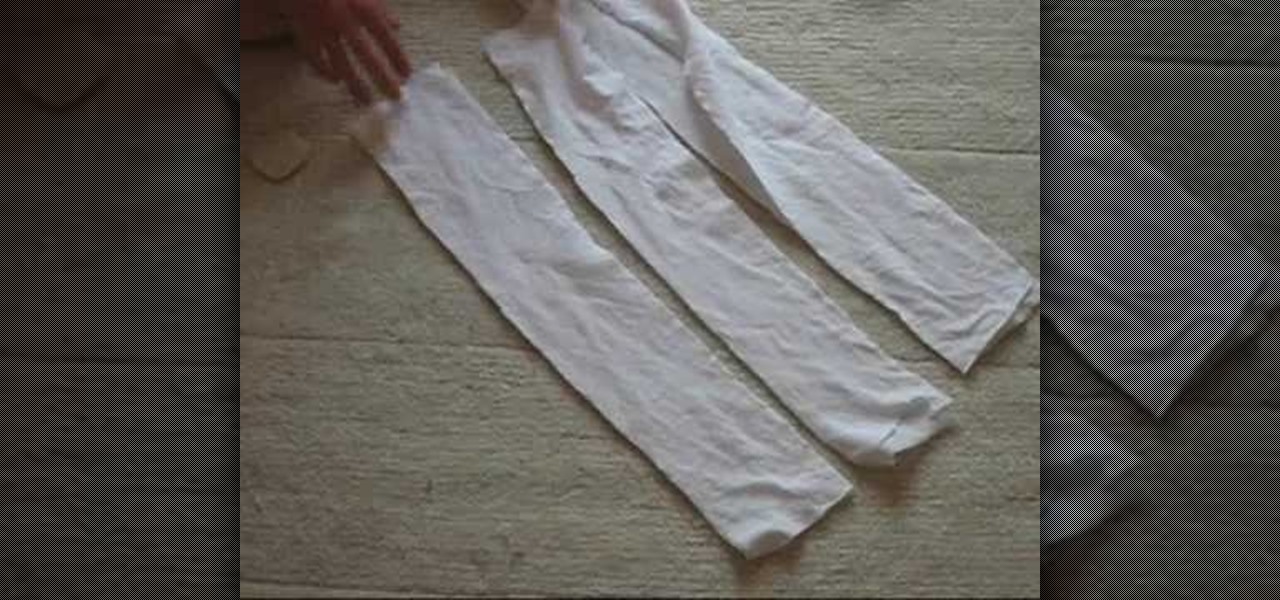
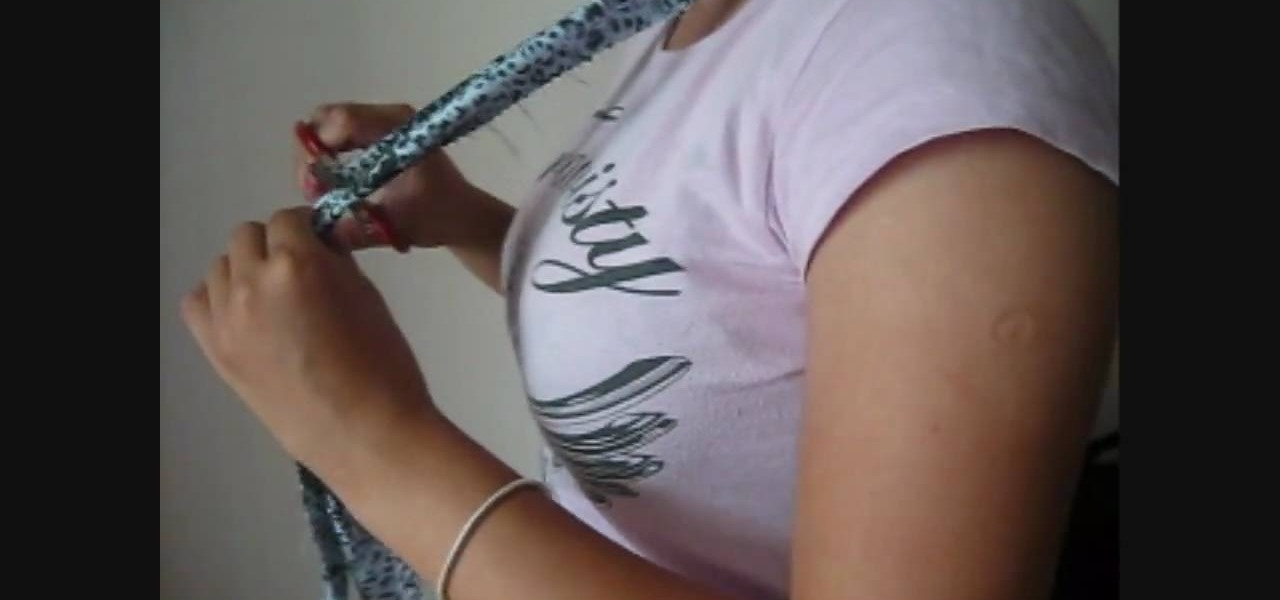
In this tutorial, we learn how to make a DIY halter style bra strap. First, you will need to cut a long piece of fabric and you will also need some bra hooks. Now, you will take the fabric and fold it in half twice so it's the correct size for a bra strap. Then, you will sew it on all of the sides to create a secure strap. From here, you will place the bra hook onto the strap at the base where you sewed the end. Now, sew this onto the strap and then attach to your bra to wear as a halter!
In this video we learn how to make an elegant paper hat. First, place the paper over the head and lay it down. Then, have the person hold the hat while you find their nose and attach tape from this and around the entire head. Once you are finished going around twice, then you can wrap up the excess parts of the paper towards the top. Use a stapler to staple down the sections of paper that you have rolled up. Do this all the way around the hat and then add on different items and accessories to...
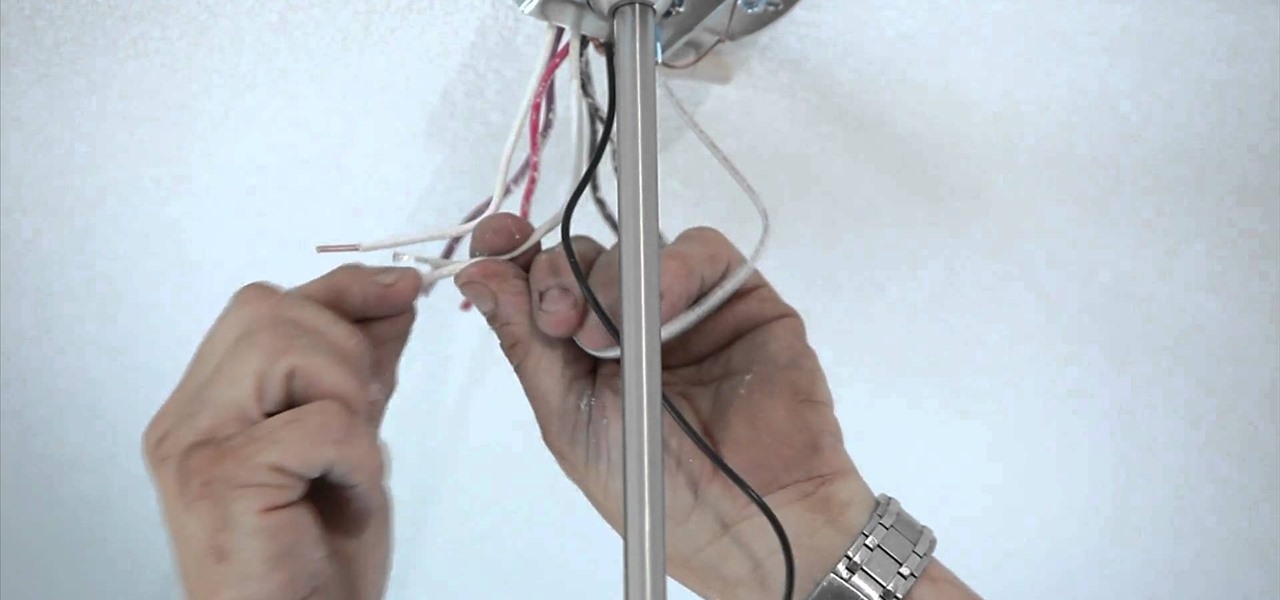
Gary Clark shows you what it takes to hang a beautiful new chandelier in your home, and believe it or not, the installation is simple! No matter what kind of hanging light fixture you're installing in your ceiling, the process is generally the same, where you first need to cut a hole in the drywall and run some wire to the panel. Then make sure you have a junction box that can support the weight of the fixture.