Learn how to make a unique rose from clay that can be given as a gift to your special someone. 1. Make about 20 tear-drop shapes out of the clay. 2. Flatten each of these to form petals. 3. Roll one of the petals up to form the center. 4. Curl each of the other petals around this center. 5. Stretch the base of the flower downward to form the stem. Add clay as needed to make the stem the desired length. 6. Form leaves with the remaining "petals" by creasing them and attaching them to the stem.
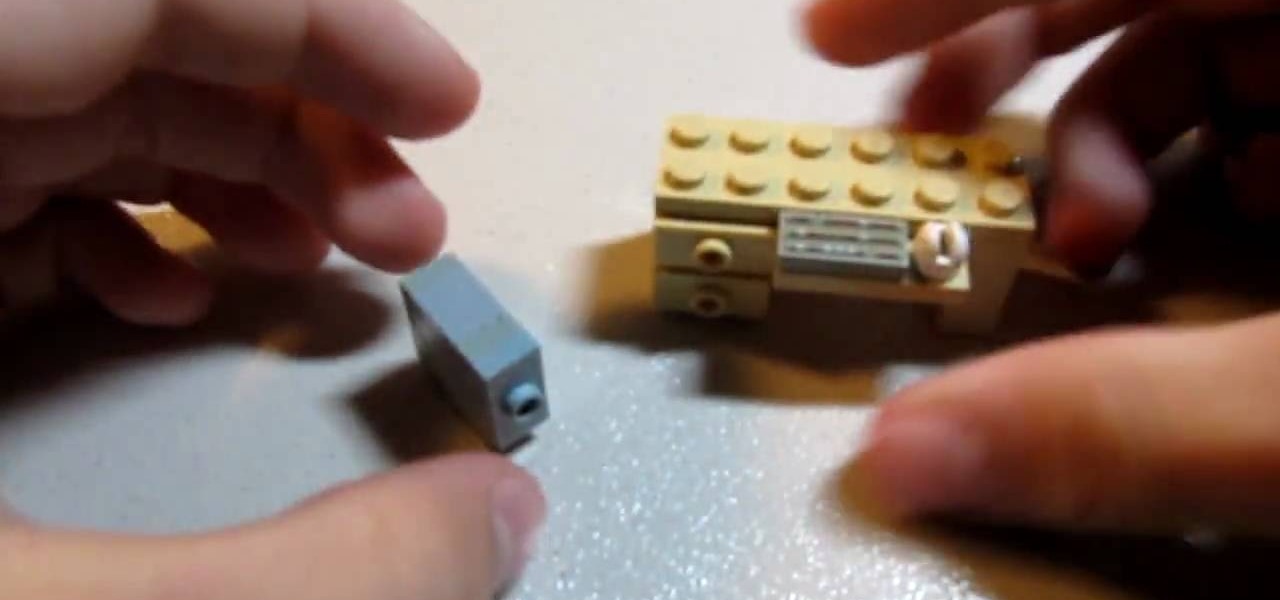
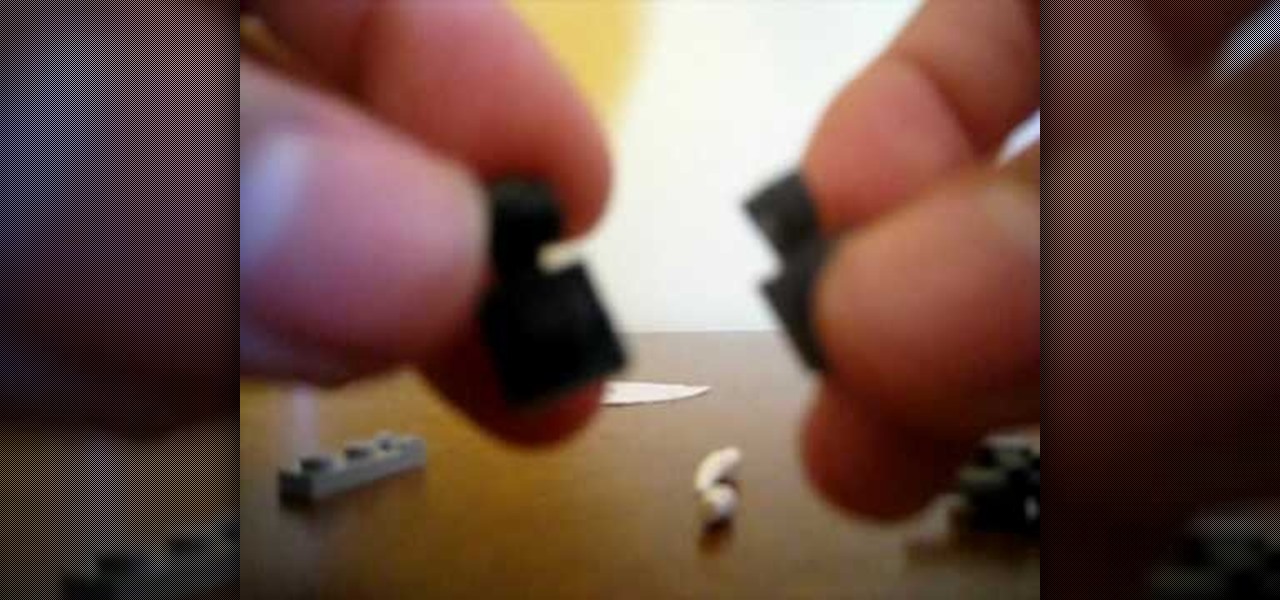
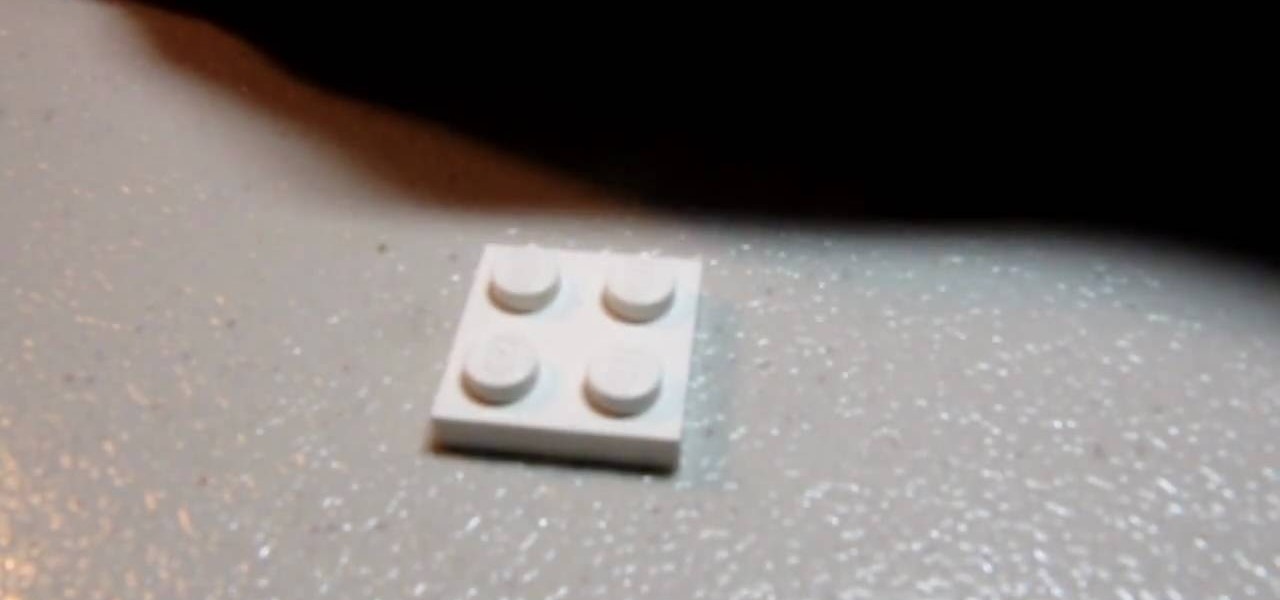
In order to construct a LEGO computer tower case, you will need 6 bricks: 2 1x2 smooths with the dot in the center, 2 1x2 thins, 1 1x1 chunky, and 1 1x1 with a hole in the middle. First, take both of your 1x2s and stick them on top of the 1x1s. You'll want the hole facing outwards on the side. Next take your other 1x1 and snap that on top. Now take the 1x2 with the dot in the center and attach that to the front. Then take your remaining 1x2 with the dot in the middle and connect it into the h...

You will be using a picture of a Nintendo character and perler beads to make the necklace. Start by making an outline of the character using black perler beads. Then begin using colored beads to fill in the character. The color beads allow you to fill in the character and they also allow you to create all the detail on the character. You can shade and use multiple colors in making the characters. After you have put all the beads on the card put a sheet of waxy paper over the character and iro...

In this tutorial from brickboy518, viewers are shown how to construct a table out of fourteen LEGO bricks. The following bricks are required: 4 1x1 spokes, two 4x1 strips, a 4x6 thin, a 2x4 thin, two 4x1 thins from the LEGO Racing Legacy sets, and 4 1x1 spokes. First, the builder must apply the 2x4 thin to the center of the of the 4x6 then. Next, they must attach one of the spokes on each corner of the 4x6. Then, the car strips must be applied face-inwards to the sides of the 4x6. Thus, this ...
Learn how to make a simple Ghillie suit in easy steps. 1. First find out some burlap bags and cut them up. 2. Now dye your burlap by choosing the proper colors that are suitable to the environment you are going to be in. 3. After selecting the dye color, soak them in it, let it dry and string it. 4. Now attach a netting to your selected base and then tie on the dyed burlap strings to the net. 5. Finally make any changes if needed and then test it out to finish.
This video explains how to make a polymer clay "rainbow cane," which, amongst other things, can be used to make jewelry or pendants. First, you must run a conditioned piece of each color of clay through a pasta machine. Then, cut each color into a square, and from there cut each square diagonally, creating triangles. Arrange the triangles side by side and attach them together, so that you create a large rectangle of the colors. Run this rectangle through the pasta machine several times, until...

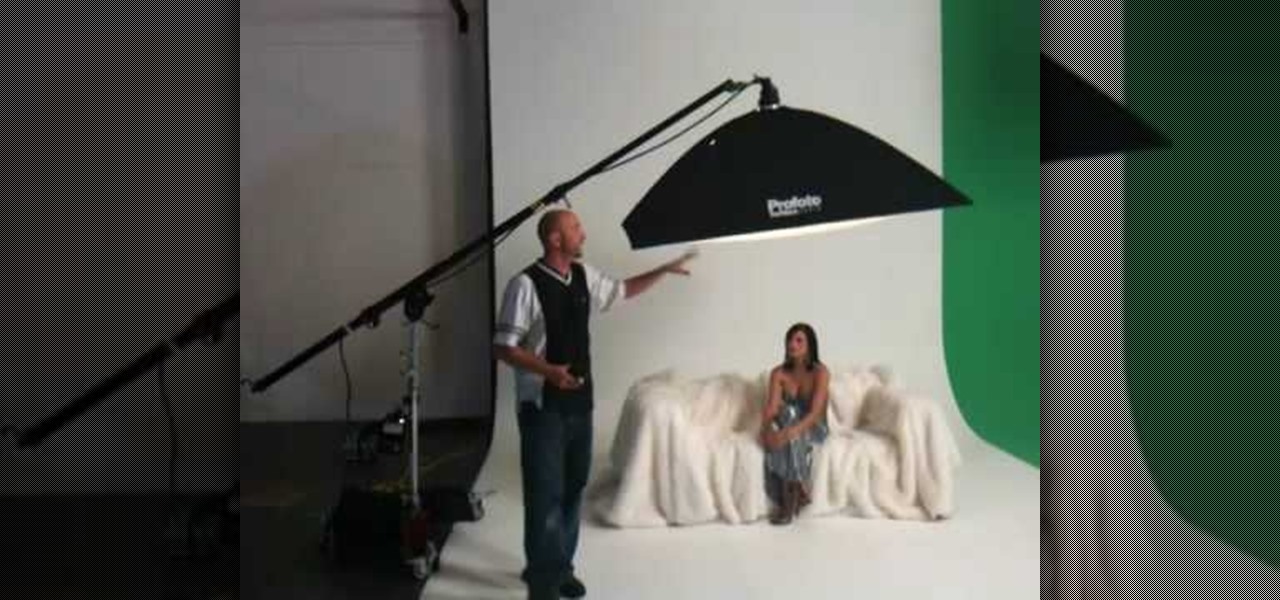
Mike Wallace is going to show you how to set up a softbox in order for a photo shoot. First, you are going to need an 1200 watt generation and with the Profoto one it comes with a pocket wizard built into it so it allows the photographer to meter and trigger with a pocket wizard TT1 on the mini camera. Also, you want to use a Manfrotto Megaboom softbox, and this is much easier then using a ladder because on the ladder you'd need to climb it whenever you wanted to reposition it. With the Megab...
This video shows you how to make your own home made Christmas reindeer decorations. You need some floral fabric, scissors, a few feathers, and some artificial eyes. Draw a reindeer template on some cardboard, using a cookie cutter if you wish, and cut it out. Paint some glue thinly on the reindeer shape. Lay the fabric on the glue and spread it out with your hands. You can use anything for this, even wrapping paper. This crafty look is very fashionable at the moment. Attach the plastic eyes a...
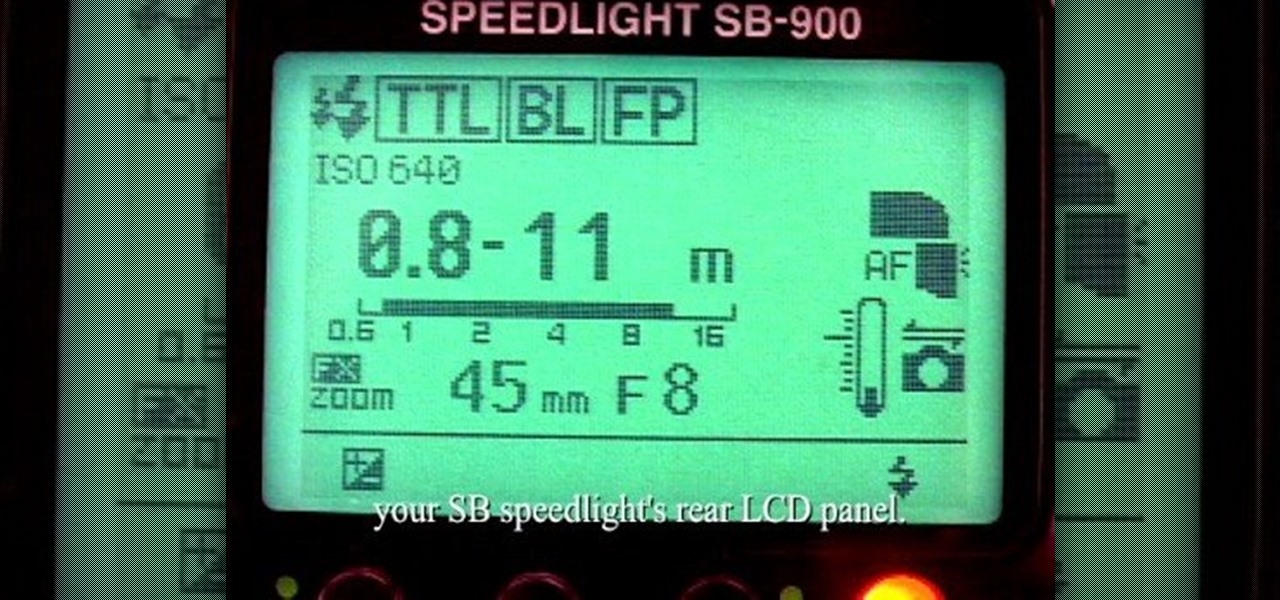
In this video tutorial, viewers learn how to use Auto-FP high speed flash on the Nikon SB camera. Begin by attaching the SB speed light onto the camera and turn on the speed light. This video will be setting up vie the camera menu. In he menu, set it at 1/250s and exit out the menu. The "FP" icon will now appear on the LCD panel. Increase it to 1/8000s or stop up to F/2. 8. This video will benefit those viewers who are interested in photography and would like to learn how to use Auto-FP on a ...
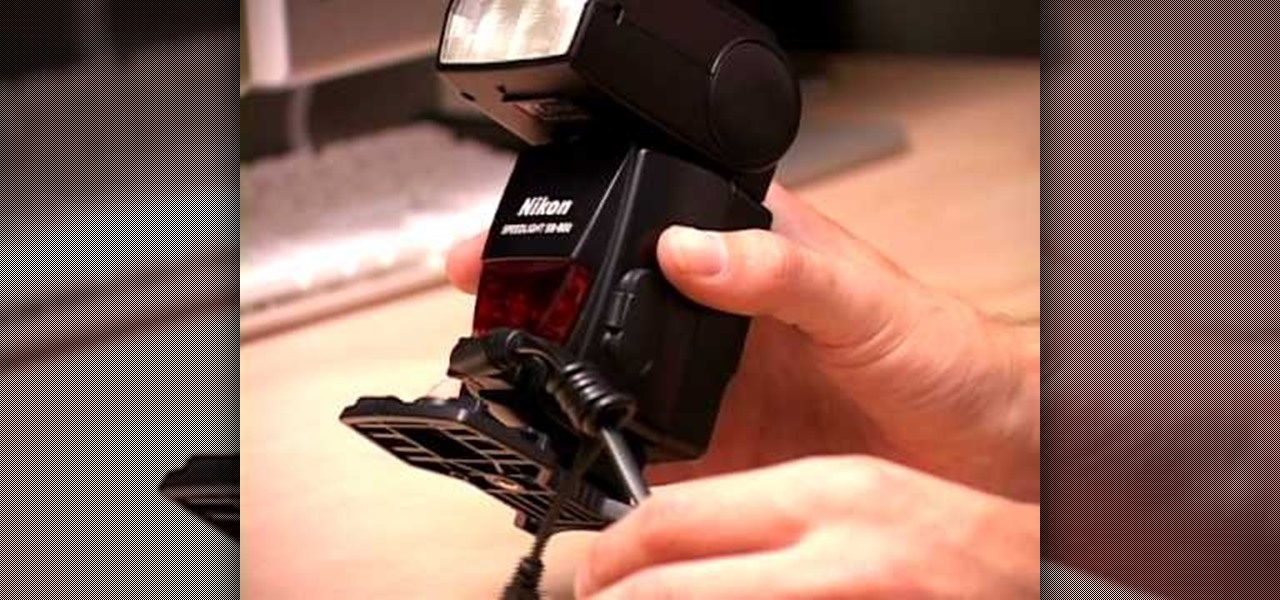
This video demonstrates how to use a Nikon SD-80 Battery Pack with a Nikon SB-800 Speedlight. The first step is to identify the different power adaptors on the ends of the cable leading to the battery pack. This pack is powered with AA batteries. Remove the outlet plate on the SD-80 and insert the power cable into the SB-800 Speedlight. Then attach the communication cord to the Speedlight. Now place the Speedlight in the hotshoe of the Nikon camera and let the battery pack dangle or attach it...
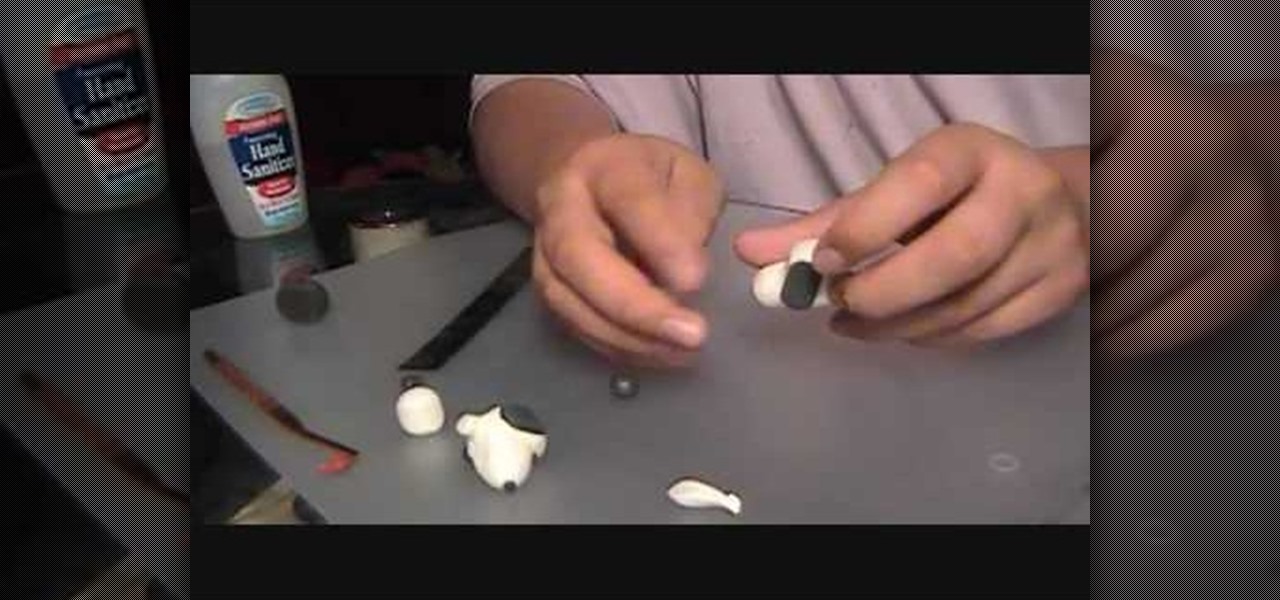
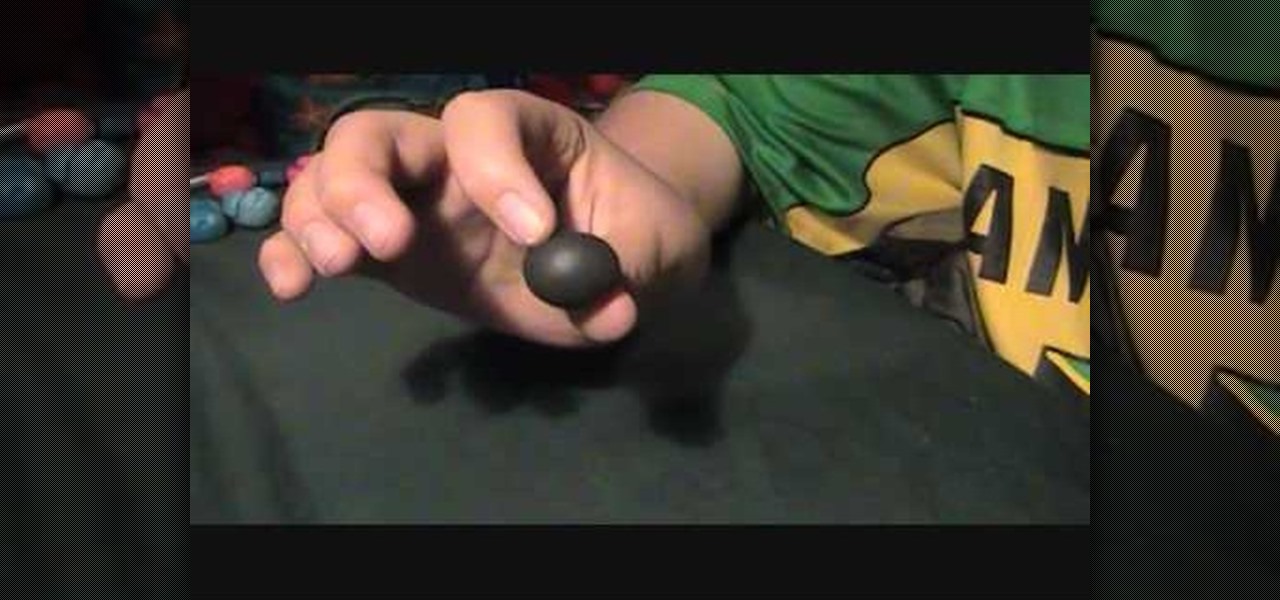
This video describes how to make a snoopy head from a type of polymer clay. You will need both black and white polymer clay, a blending tool and a ruler. It begins with the main part of the head and moves onto creating the correct structure using a blending tool. It advises using your thumbs to smooth away the creases and cracks from the surface of the snoopy head. After the main part of the face is made, it describes how to create the eyes and ears using the black clay. The eyes and ears are...
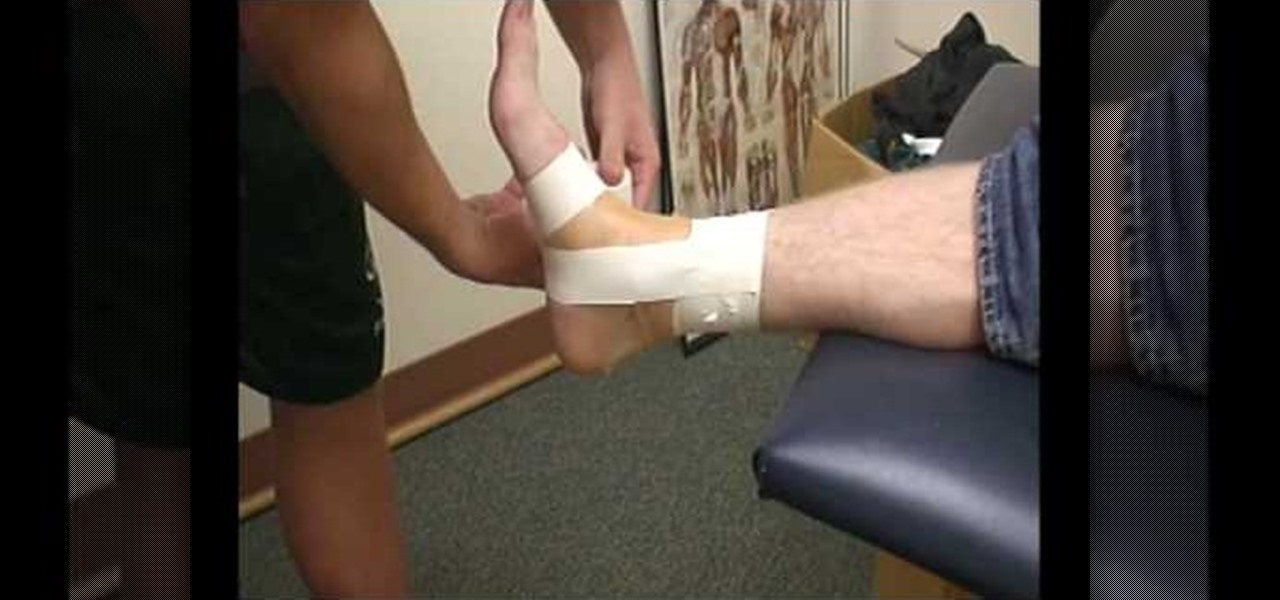
In this Diet & Health video tutorial you will learn how to easily tape an ankle to prevent an injury. Place the injured foot on a soft furniture with the ankle protruding out. Toes should be pointing upward. Place two pads one on top and the other below the ankle. Start wrapping the tape around the leg starting about 3 inches from above the ankle. Cover up to the ankle and then go below the foot and take three turns, then cover the heel and come over the ankle. Now put three anchors on the to...
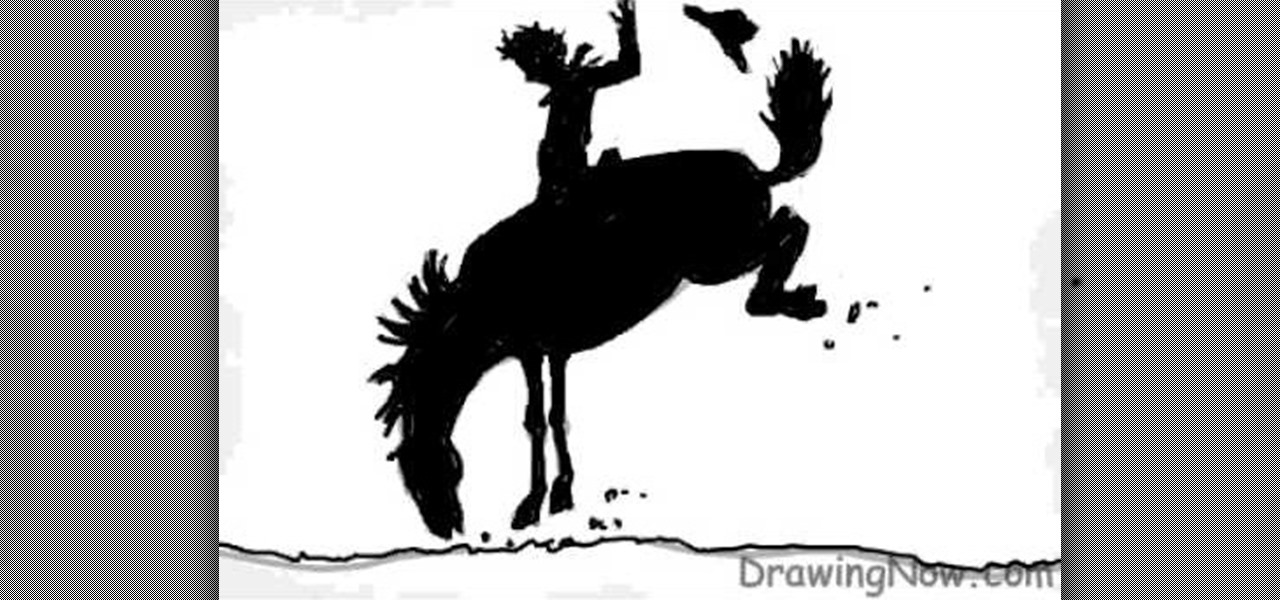
In this video user DrawingNow teaches you how to draw a rodeo cowboy and horse. You draw a large oval which will be the horse's body. Then attach another one as the horse's head. Next, draw the legs and the ground using simple lines.
In this video you will see how to remove the plunger rod when unclogging a sink. To unclog a sink drain, remove the bent portion the drain and clear it out. Normally something or the other gets stuck inside it causing the clog. Also check out both ends of the other pipes. The plunger to your sink is attached by a little rod. Slide the little catch off the rod; remember which hole it is on so that you put it back correctly later on. Then take pliers and loosen the plastic nut gently and pull t...
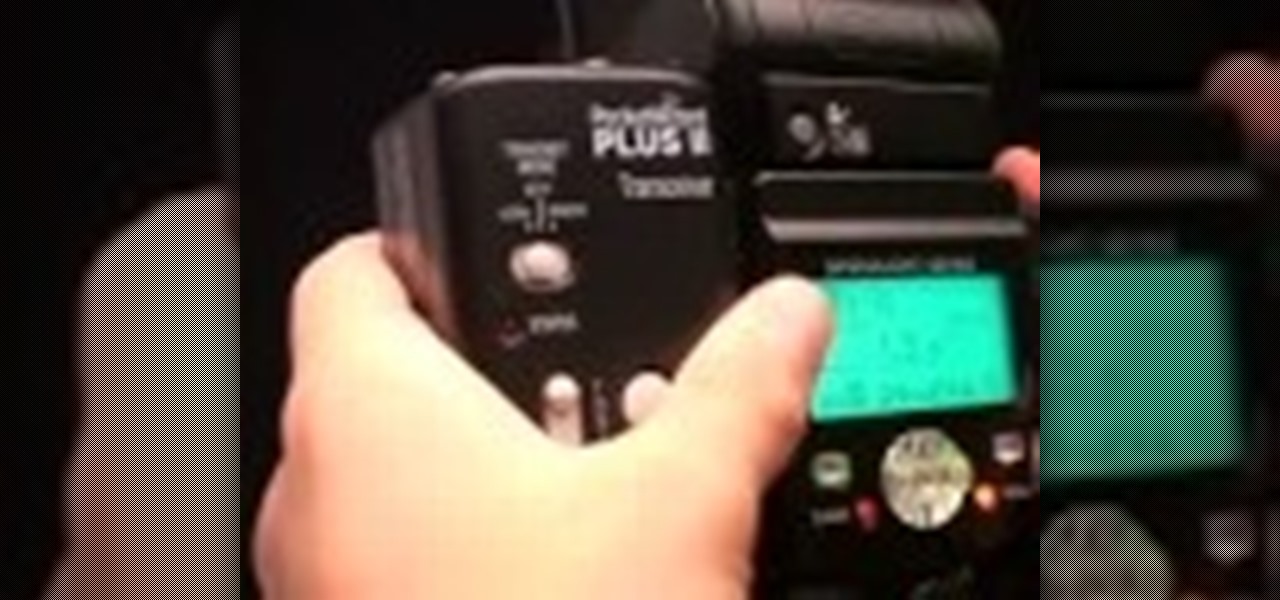
In this Electronics video you will see how to set up the Pocketwizard with a Nikon SB-800 and SB-900. When you use Pocketwizard as a master to trigger the flash, the remote flashes for a working distance of 1600 feet as against 33 feet. First attach a Pocketwizard unit to the flash by using the Velcro stickers. Plug in the cable supplied with the Pocketwizard in the ‘Flash’ slot. Open the rubber door on SB-800 and plug in the other end of the cord into ‘sync’. Turn it ON. When the connection ...
Those interested in learning how to make their own jewelry, can learn how to make a floating illusion necklace by following the steps in this video tutorial. You will need a beading board, beading wire, crimp beads, beads of your choice, a barrel clasp, wire cutters, and crimping/flat-nosed pliers. First measure out how much wire you will need. The tutorial is making a 16-inch necklace. Make sure to cut extra wire. For a 16-inch necklace, this means you should cut approximately 20 inches of w...
The hosts, Robin Burke and David Musial, show how to install weather stripping to keep the heat in your home and the cold out. David demonstrates how to remove old, worn weather stripping. He shows the new weather stripping and makes a cut, demonstrating what to do if a new piece of stripping doesn't fit your door. Robin then shows us how to install weather stripping on windows, demonstrating how easy it is to attach the material. Using these techniques, you can further insulate your home fro...
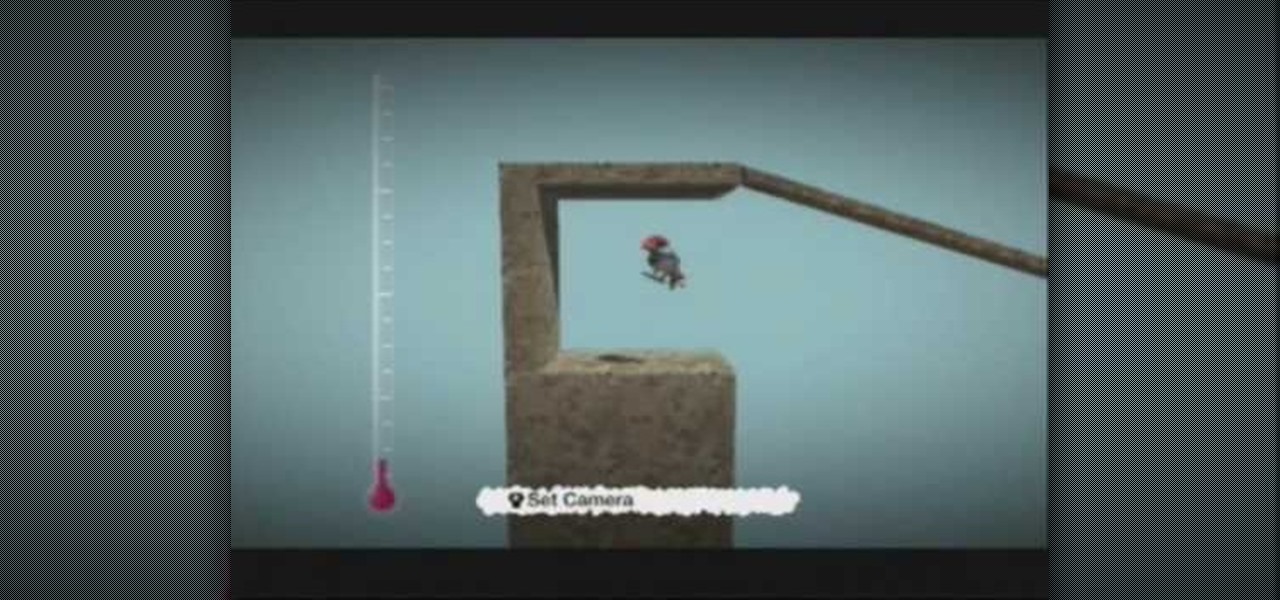
In this video, gamer Chilled Chaos shows you how to construct a zip line to use in the video game Little Big Planet. He starts off by building a large block, going up into the air, with an area cut out. This will be where you are standing when you start. He then goes on to construct a declining plane, which is where your zip line will hang from. After just a few more short and very easy steps, he has attached ropes and other small objects and created the zip line. Using this brief but detaile...
The girl in this video demonstrates the way of making a LEGO crossbow at home. She first shows you what all pieces that you require for the process. Then she asks you pick up the rod-shaped piece and stick it to the back of the spark piece. Then you have to put the two tiny pieces together as shown by her. Then she asks you to attach this piece to the stick and push it all the way to the end touching the spark piece. Then you have to stick the two horn-shaped pieces to the sides of another pi...
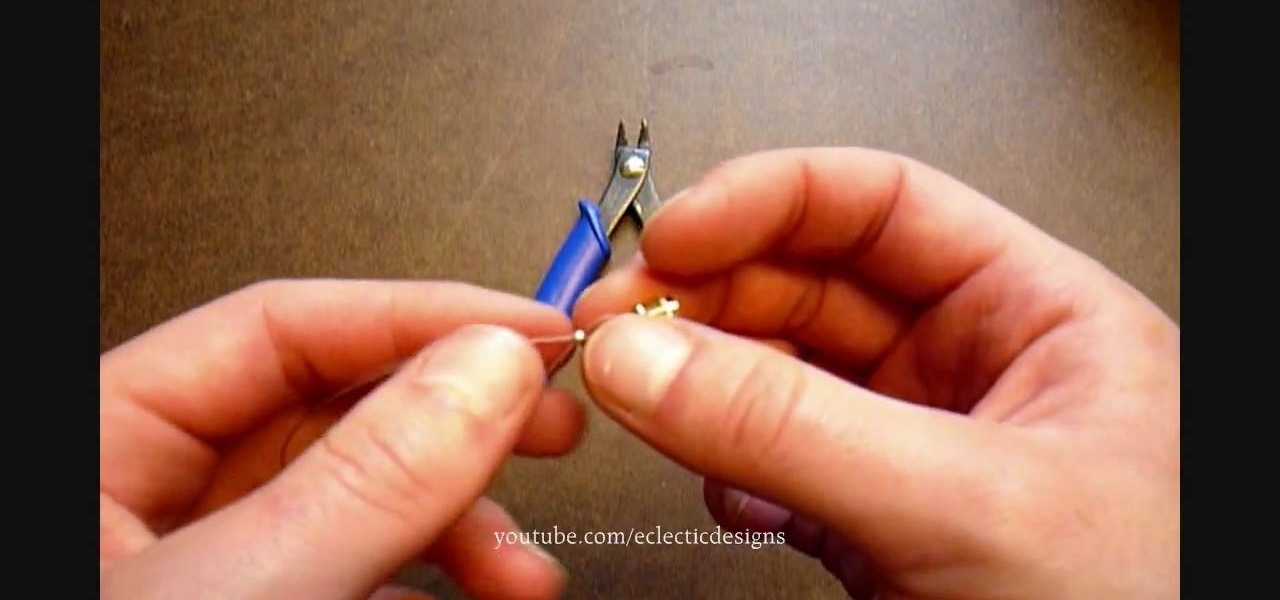
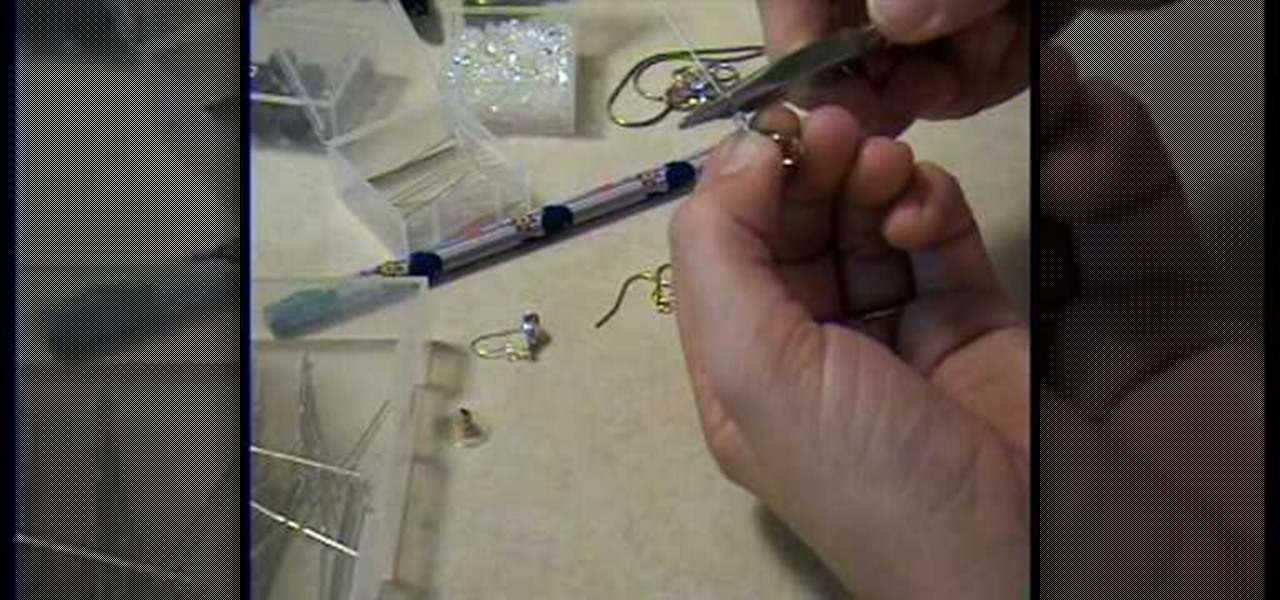
In order to make a simple hair pin you need a couple things first, a small and big bead (although you can use other items), an ear wire and a head pin. Tools that you will need are a pair of round nose pliers and a pair of cutlets. Now take the head pin and loop the beads through it. Take the nose pliers and bend it, about half way up the head pin and gently bend it with your fingers, making a 90 degree angle. Twist the pliers up and bring the head pin over the nose pliers. Then twist it cloc...
Learn how to make a fly fishing leader by following this tutorial. First, the easiest way is to purchase a tapered leader, obviously. However, sometimes as you are fishing this will break and you may not have a backup leader. Your only option in that scenario is to make a new one from your broken leader. Take approximately 18 to 24 inches of the 3X wire and double knot it to the but section that is broken. Then use another wire material to attach for the fly section. To decide what type of ma...
Brittany helps guide you throw the steps of making your very own homemade earrings with beads and the right tools. She shows you everything you need with a subtitle description to help you understand just what you are looking at. Brittany demonstrates how to make the earrings with using the heaviest bead on the bottom so they are weighted down and by sliding them up the head pin and cutting the end of the pin off with a pair of wire cutters. Next she bends the end of the pin with needle nose ...
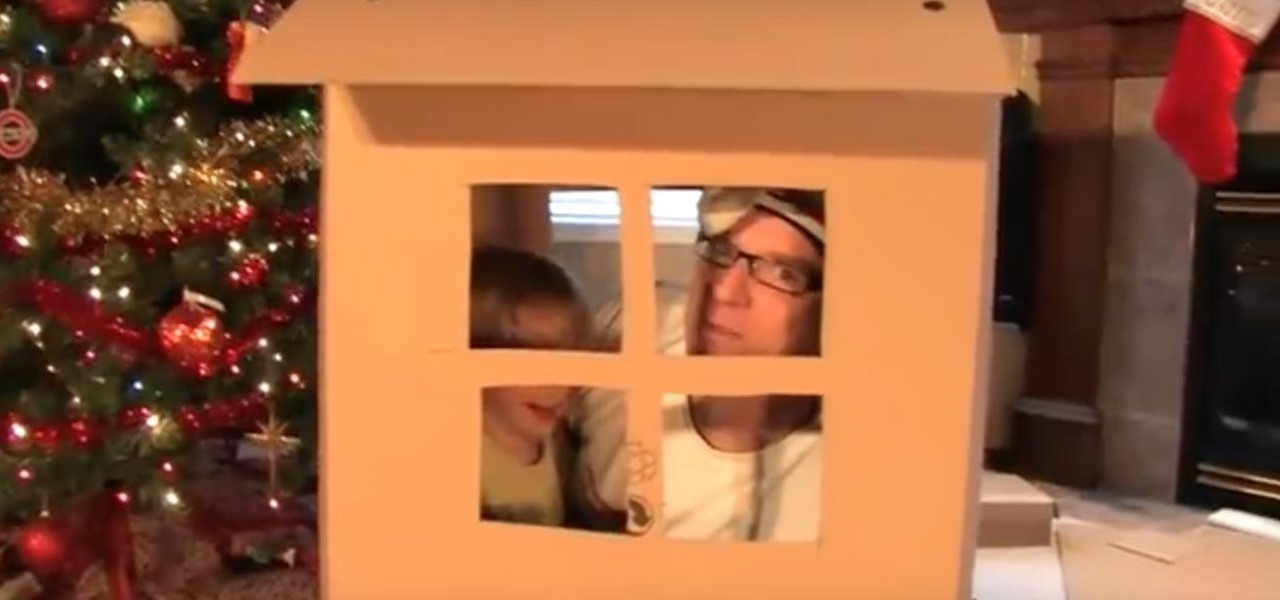
In this video tutorial, learn how to make a cardboard house with leftover cardboard that you may have sitting around from the holidays. You will need cardboard and plastic box rivets.
In this tutorial from Mark the Shark, viewers are shown how to apply a hook to a fishing pole. One such method is using a Fishermen's knot, and wrapping the hook around the line eight times, and then wetting it with saliva, before it is tightened. Then, the user must make sure than the knot comes all the way down to the hook, to make sure it does not rotate. Next, pliers must be used to eliminate excessive line, and then the line must be searched for crinks, or any imperfections. Mark the Sha...
She teaches us how to make a beautiful jewelry pendant for a necklace out of polymer clay. She starts with kneading a black base. She then sends it through a pasta machine. After she has a black flat sheet she rolls it into a ball again. Then, she takes the other five colors and starts rolling tiny little ball. She attaches them to the base black ball. Next, she creates a snake with the colors swirling around. She sends it back through the pasta machine to create a perfectly flat surface. To ...
This video shows how to make an earring holder. You will need a canvas and some acrylic paint. Paint the entire canvas including the sides. You can paint it a solid color, or paint any design you like. Use glue to attach some glitter, or use puffy paint or glitter glue to decorate the earring holder. When the paint is dry it is ready to use. Simply push your earrings through the canvas. If you have earrings that are delicate, you may want to use a nail to form a hole in the canvas before plac...
Jewelry-making Techniques demonstrates how to finish your jewelry with crimps and covers. To use crimps and covers to finish your jewelry you will need 2mm crimps, 3mm crimp covers, crimping pliers, a clasp and beading wire. First, attach the clasp by stringing the crimp bead and one part of the clasp onto the wire. Take the end of the wire and string it back through the crimp bead to make a loop. Adjust the crimp bead up to the clasp and use the crimping pliers to crimp the bead. Repeat on t...
In this video you learn to make earrings out of guitar picks. You will need round nose and regular pliers, wire cutters, 2 regular picks, bead reamer, earring hooks, jump rings, and long silver strands. Use the bead reamer to make a nice clean hole on the top edge of the guitar pick. Use the jump ring through the hole you just made to attach the silver strand. This makes the earrings dangle. On the other end of the silver strand connect the earring hook with another jump ring. This completes ...
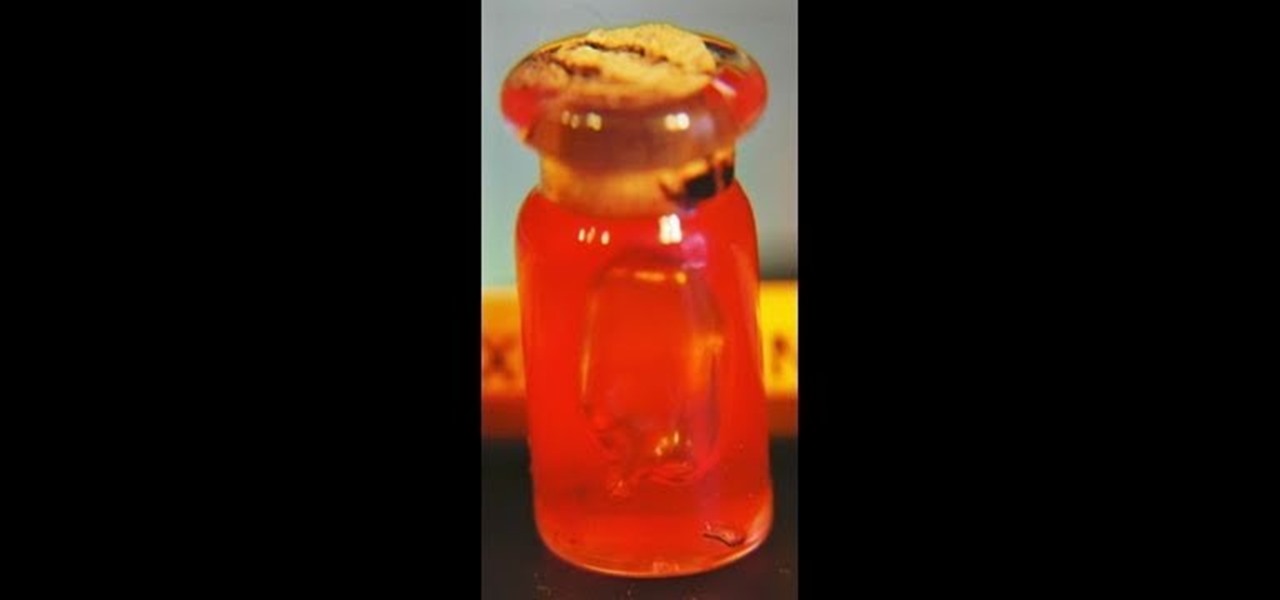
Decorating a dollhouse with tiny details is easy with this informative clip. You'll learn how to make a miniature jar of jelly for your dollhouse. Learn step by step how to use clear liquid nail, coloring gel, a syringe and Q-tip to fill a tiny jar that looks more than realistic. Using a jar from a necklace, the presenter fills it with the colored glue then takes a small amount of cotton cloth, attached with a small wire, to make it look like a jar of jelly from your pantry. This easy to foll...
Building a LEGO sink is not difficult at all. You will need only 6 simple parts: 2 1x2 thins, 1 2x2 thin, one sink element (this is kind of rare so if you're not able to find it, you may have some trouble making the sink), and 2 1x1 right-angle elevated bricks. Starting with the 2x4 thin, stack the 2x1s on top of each other and place them on the end of the 2x4. Now take the elevated bricks and snap them on the other end. Finally, attach the sink element so it is facing the elevated bricks. Th...
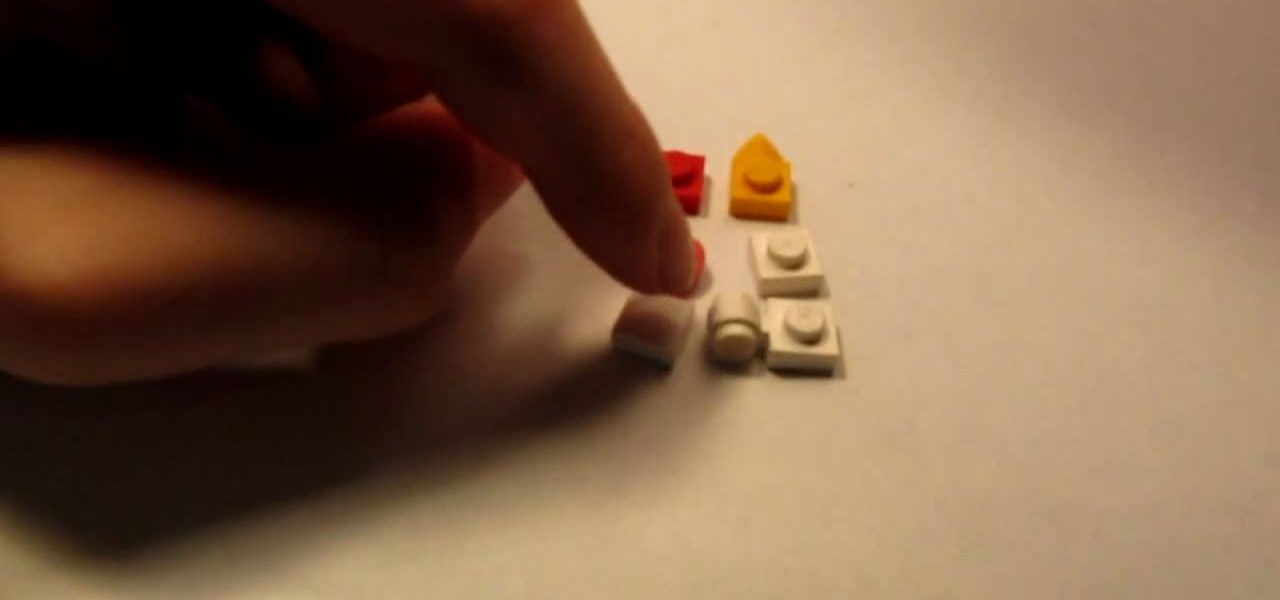
If you've ever wanted to learn how to build a LEGO chicken, today is your lucky day. First you'll need a 1x1 red LEGO stud, flat square with claw, smooth white, orange with a tooth, flat square, and a flat square with a circle coming out of the side. Starting with the claw, but the stud on top. Now take the piece with the claw and attach that to the opposite side of the claw. Put your flat square on top of that, then the flat with the tooth and another flat square goes on top. Now you're done...
Learn how to make a Swarovski crystal pendants that can be used to make your own necklaces by following the tips in this tutorial. You will need a pair of needlenose pliers, a chain, Swarovski beads, and bails (a pinch bail). You can get the beads from ArtBeads or FusionBeads, which offer shipping promotions and low prices. Once you have these items it is simple to put the pendant together. Simply take the bail and open it with the pliers. Slip the bail through the hole of whatever bead you b...
Joe Richardson, Five Sprockets consultant, demonstrates how to build your own functional boom microphone. First, if you don't already have one, get a microphone from your local electronics store. Then, pick up a mic holder. Next, you'll also need a telescoping pole like a painter's pole. You'll also need zip ties and metal bonding glue. A piece of fake fur from a fabric store will act as a wind sock to cut down on noise. Attach the mic head to the painter's pole with the metal bonding glue. N...
This video lesson will show you how to easily make frames and borders in Photoshop. Yanik from Yanik’s photo school presents this video. It’s really easy and fun. Go to select -> all or ctrl+A. Then Go to select -> modify ->contract. Put in the amount of pixels you want your border to be and click OK. 75 may be suitable for most pictures. Then Go to select -> inverse. Now you go into quick mask, ctrl+Q or click the appropriate icon. Click filters -> filter gallery and select the type of effec...
Take an inexpensive earring and use hot pliers to ease it away from the cheap metal fastening. Take a more expensive silver or gold earwire and pull it through the loop at the top of the pendant part. Squeeze the wire closed with the pliers. Using an inexpensive earring part as a model, bend your own wire to the same shape. You then take a 4mm Swarovski crystal and attach it. Bend your earwire round a smooth pencil and make sure the bead cannot slide off from the wire. You can use the same pr...
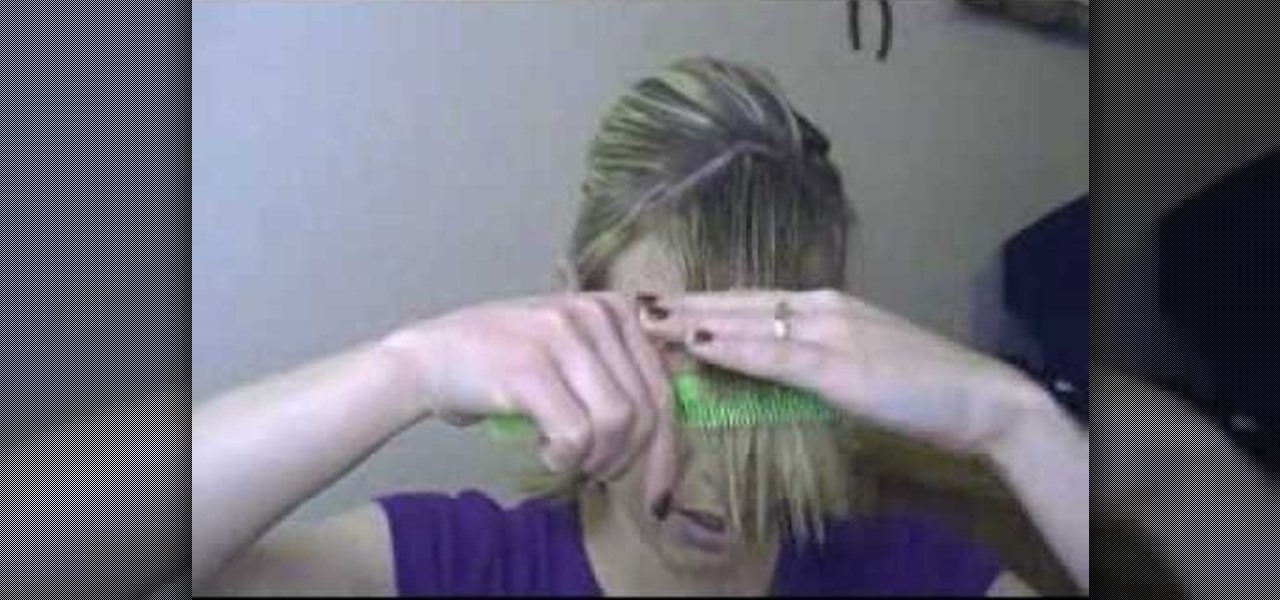
This video is about how to easily trim side swept bangs at home. You will need a plastic grocery bag, a spray bottle, a clip or ponytail holder, a comb and some sharp scissors. First put your hair behind your ears so you can see where your bangs start and comb your bands straight down and comb the rest of your hair back and clip the back of your hair back. Get the bangs wet with your water bottle. Decide what length you want. Make sure to cut them a little longer than you want them to be beca...
iPhoneElite8 teaches viewers how to easily SSH into their iPhone or iPod Touch using Cyberduck! First, open Safari, Google 'Cyberduck Space Mac". Click the very first link you get and download Cyberduck on the right. Now open Cyberduck on your computer. Get your iPhone of iPod Touch and open up settings. Under settings, connect to Wi-Fi, and copy down your IP address that shows. Go back to Cyberduck, go to open connection and click on 'protocol'. Open up SFTP and copy the IOP address you got ...
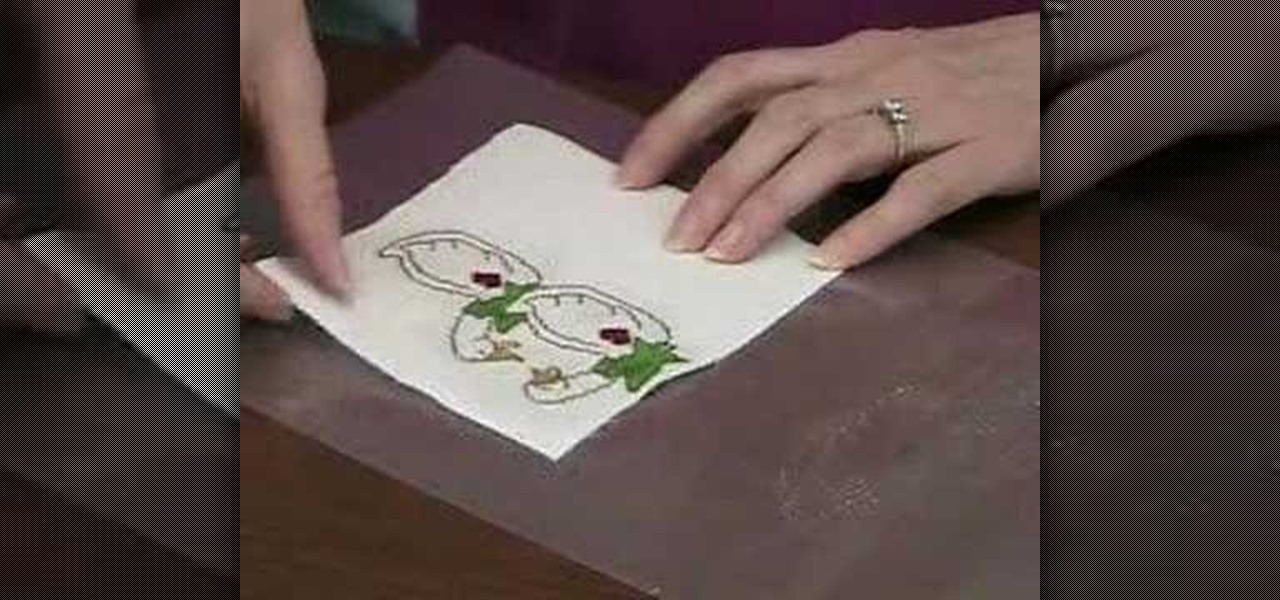
Beth Johnson explains how to use Needlework Finisher to turn cross stitched pieces into ornaments. Needlework Finisher comes out of the bottle as a thick, white liquid, but turns into a clear plastic coating when dry. No special equipment is required, and Beth demonstrates how to daub the Needlework Finisher onto the cross stitched items with a finger tip. She allows one side to dry before coating the other side. The "wrong" side of the cross stitch can be covered with plain fabric, by using ...
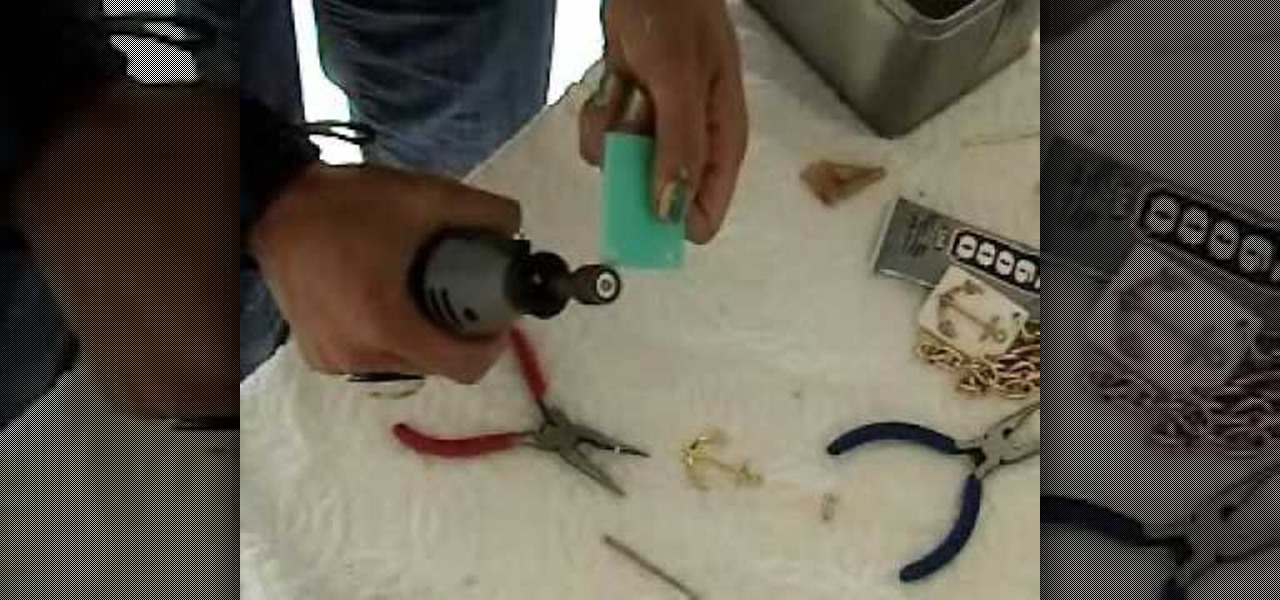
Learn how to make your own jewelry starting with a gold anchor and plastic gold chain necklace by following the steps Kandee outlines in her tutorial. You will need a drill, some attachments for it, a gold pendant, gold chain, and clasps to connect your necklace. To begin, create your pendant by gluing an anchor charm to a plastic square pendant. Once you have created the pendant, drill holes in the upper portions of the pendant. Then connect the gold chains on each side of the pendant using ...
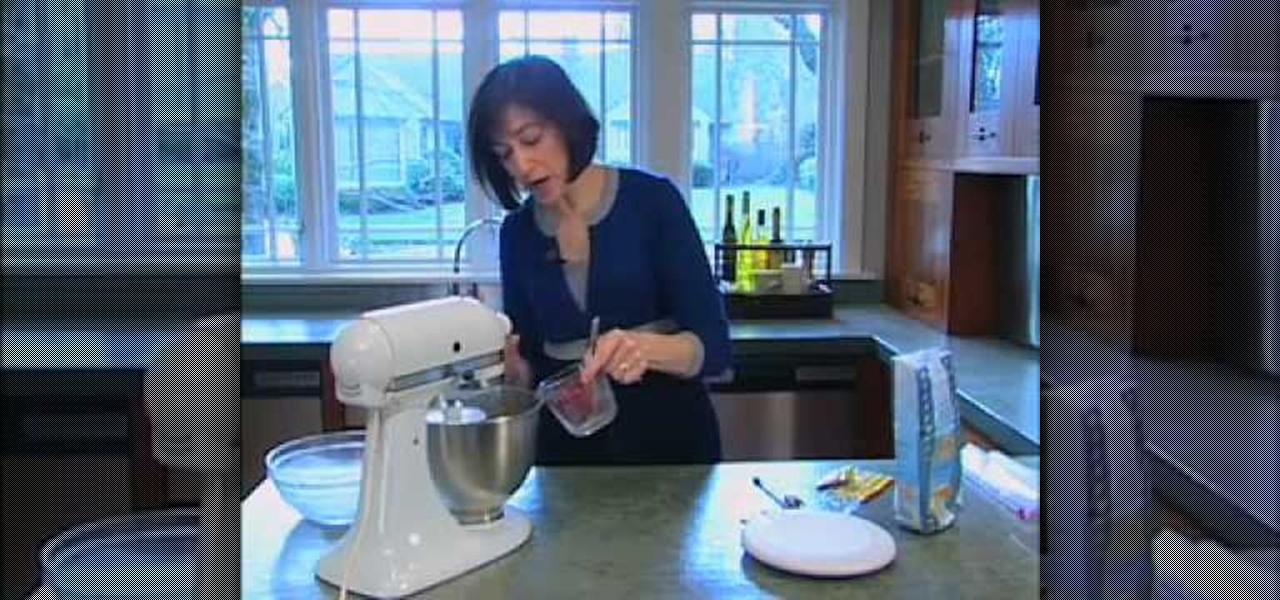
This is the first part of a two-part video by Diane Morgan, in which she demonstrates how to make pizza dough. This part describes the actual making of the dough. First, she shows how to proof the yeast in warm water to make sure it is active. The flour goes into the mixer bowl with the dough hook attached. Next she adds he yeast, along with sea salt dissolved in water. This is kneaded together until the dough has formed a nice soft ball. Then she gives it some final kneading by hand and cuts...