Artbeads demonstrates how to make a simple loop using eye pins. Simple loops on head pins or eye pins are great ways to attach charms to your jewelry. To make a simple loop use chain nose pliers to make a 90 degree bend in the pin above the bead. Then, cut the wire so that there is a 3/4 inch tail on the wire. With round nose pliers, create a loop on the end of the wire. Use chain nose pliers to open and close the loop to attach it to a chain or clasp. You can also make a loop by using the ro...
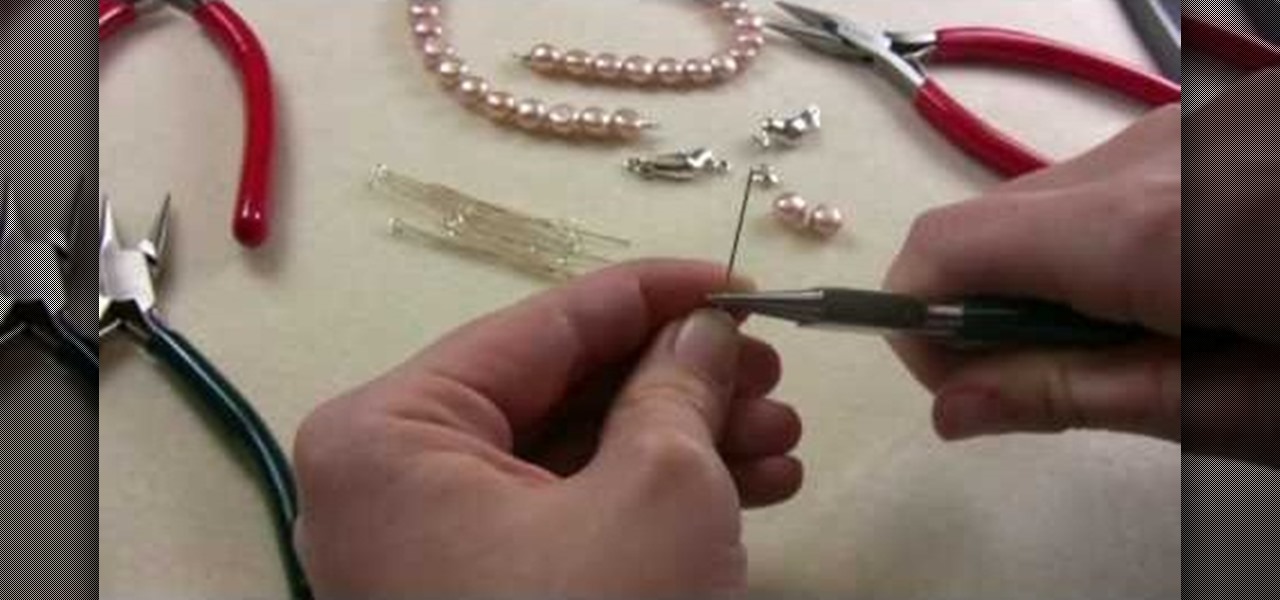
Artbeads demonstrates how to make a wrapped beading loop. First, take a head pin or an eye pin and add the beads that you would like to use. Use chain nose pliers to make a 90 degree bend about 1/8 inch above the bead. Hold the bead so the tail of the wire is facing towards you. Use round nose pliers to position the wire into a loop. Use your fingers to complete the loop. Next, attach chain link or a clasp to the loop. Use another pair of chain nose pliers to wrap the rest of the wire around ...
In this Arts & Crafts video tutorial you will learn how to attach an eye pin to a French hook. The video is from Jewelry Making Fun. For this you will need nose pliers, an eye pin and a French hook. One way of doing this is to hold the French hook in one hand. With the pliers twist one end of the loop on the French hook to open it slightly. Then put the loop of the eye pin into the loop of the French hook and close the loop with the pliers. The other way is to open the loop of the eye pin, pu...

In this short video tutorial you'll be shown how to build or create a LEGO fire extinguisher/spray paint can. The process only requires two LEGO pieces to complete the item. The first piece required is a 1x1 studded can LEGO brick. The second piece is a 1x1 nozzle LEGO brick. Each piece is clearly shown and described in the video to make the process easier. Simply attach the two LEGO pieces together, forming an item which resembles either a fire extinguisher or a spray paint can. The last ste...
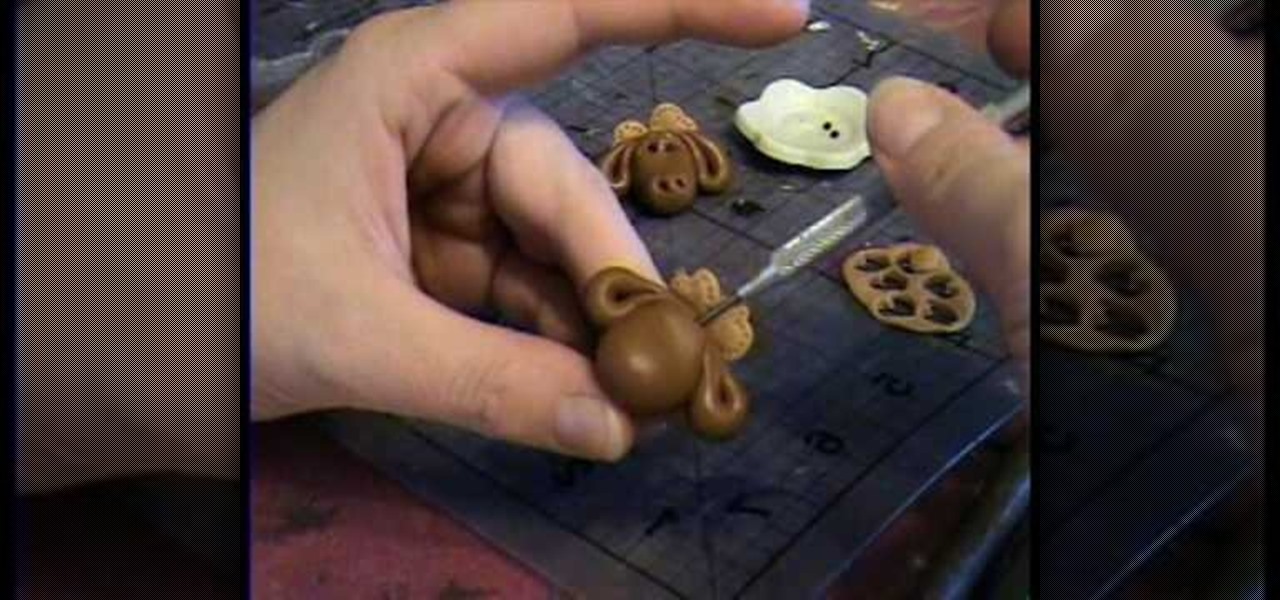
This video tutorial is going to show you how to make a Moose Bead from Polymer Clay by Garden of Imagination. You begin with clay and make a shape it like the head of the moose as shown in the video. Then take more clay and make the ears and attach them to the head. Now take lighter color clay, cut it out into heart shapes, poke around the edge with a pin, and attach them behind the head. Take a pin and make a hole at the top end of the head to make it a bead. Watch the video to finish the pr...

To make a paper flower mistletoe kissing ball, cut leaf petal shapes out of green paper. Apply glue to white wire berries and attach them in between four paper petals. Wrap the ends of the petals with wire to secure the bouquet. Adjust the leaves as desired. Snip the excess wire with wire cutters. Insert the mistletoe bouquet into a Styrofoam ball. Repeat until the ball is completely covered in mistletoe bouquets. Attach a red bow to the top of the mistletoe ball. Finally, add string to hang ...

This is a guide that will show you how to make a bow out of everyday items. First, you want to find a curved branch outside that's nice and thick so it won't snap. Also, if it's connected to other branches just saw them off, and then remove any smaller twigs or leaves from the branch. Then take a small knife and whittle down any nubs or small leftover pieces, then if the branch isn't bent to your requirements just bend it or use a vice to bend it to our liking and your bow staff has been crea...
Simple Kids Crafts demonstrates how to make a flower out of a toilet paper tube. For this project you will need one toilet paper tube, paint, a paintbrush, glue and scissors. First, paint the toilet paper tube and let it dry. Then cut the toilet paper tubes into rings. Scrunch up a ball of tissue and glue it closed. Bend the painted rings into flower shapes. Attach the flower shapes to the tissue ball. Paint the tissue ball. Next, paint the inside of the flower shapes. Let it dry. Add decorat...
First, apply wax to the toilet hole so it doesn't leak. Next install the supply line. Set the bolts on the flange and attach a wax ring onto the bottom of the toilet. Set the toilet over the bolts. Next, stick the gasket to the bottom of the tank and put the tank on the toilet. Tighten the bolts on either side of the tank. Then, hook the supply line up to the toilet. Attach the toilet seat to the toilet by screwing it into place. Finally, turn on the water supply. Your low flow toilet is now ...
This is a tutorial that will show you how to create a powerful bow and for under $5. The material you'll need is 1 curved pipe, poly poli string, tape, scissors, and a knife. First you want to cut a slit and a hole on each end of the pipe and then add some tape underneath it to prevent it from splitting. Next, you want to line up the string with the pipe and cut it at that length. Also, you want to tie a knot at both ends of the strings and attach it by using the slits you made in the pipe. T...
Watch this video to learn how to draw Thomas the Train. 1) First start out with a circle, followed with a rectangle attached, to make a cyclinder
Street artist wackojacko54321 teaches you how to draw "wild style" graffiti. There is no definite technique or way of drawing wild style. Wackojacko54321's interpretation involves starting with a simple piece with connecting letters (of which he provides an example) and possibly arrows. Add more basic arrows and connections to unify the piece more. Connection points of the arrows are important. Attach them to the ends/corners of letters or other letters/connections. Spice it up with more adva...
Christina of Bright ling Beads explains how to use a fold over crimp to finish an organza ribbon necklace. First, fold down the ribbon approximately an eighth of an inch. Then, fold it down over once again. Make perpendicular folds bringing each fold towards the middle and making the end of the ribbon as wide as the crimp bed. Lay the folded ribbon inside the crimp, leaving a small piece of the ribbon sticking out of the top. Use flat nose pliers to hold the tab of the crimp and hold the ribb...
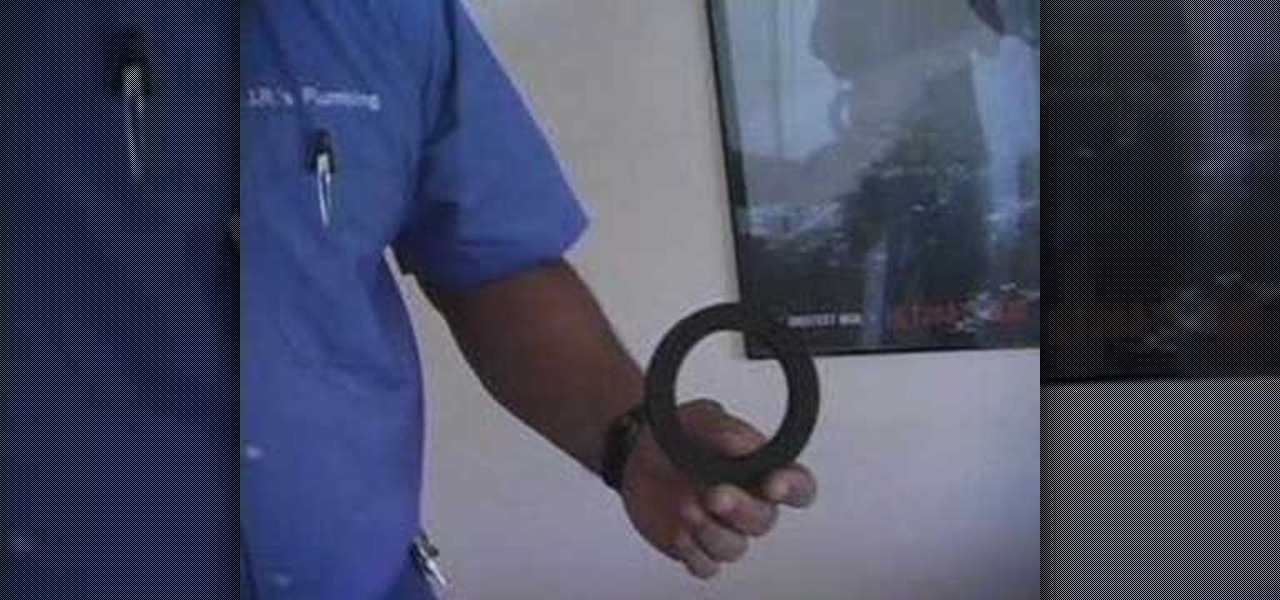
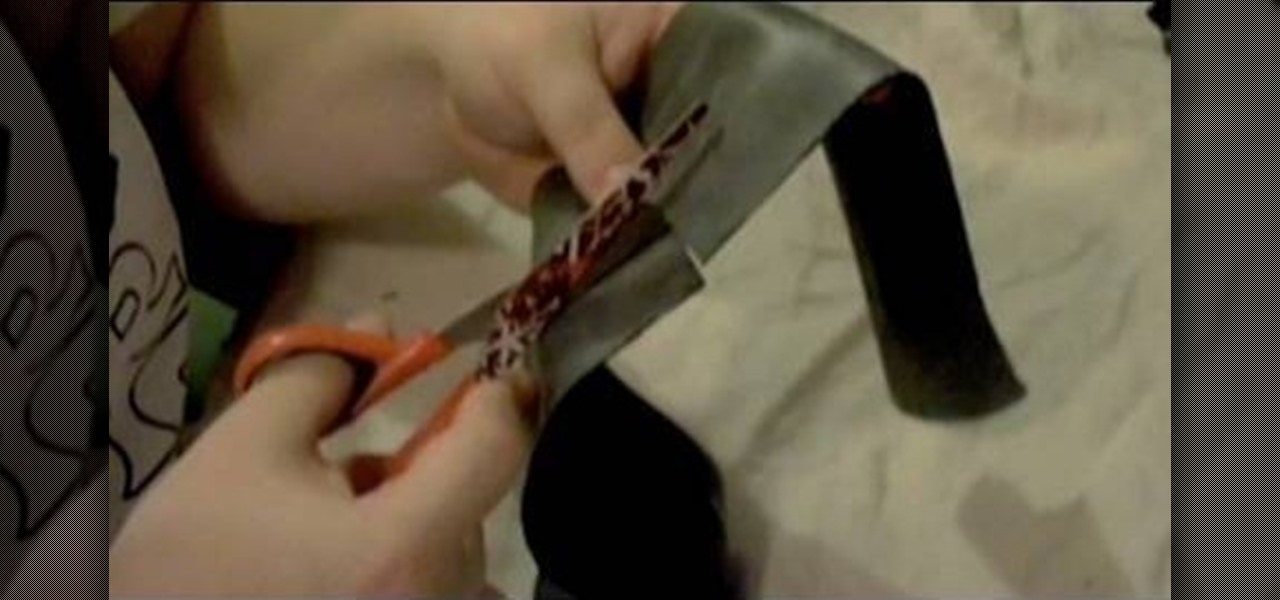
In this video hostess Charlotte instructs us, on how to make "Inner Tube" Bracelets, a rock style associated accessory. Employing either Black Plastic, Leather, or even Tape. Creating these alt accessories requires only scissors and a needle and thread of some type of adhesive to attach the clasp or fastener that will allow you to attach it to your wrist. With a few simple Scissor cuts along the material's length to create a design. Charlotte shows us exactly how it is done with helpful tips ...
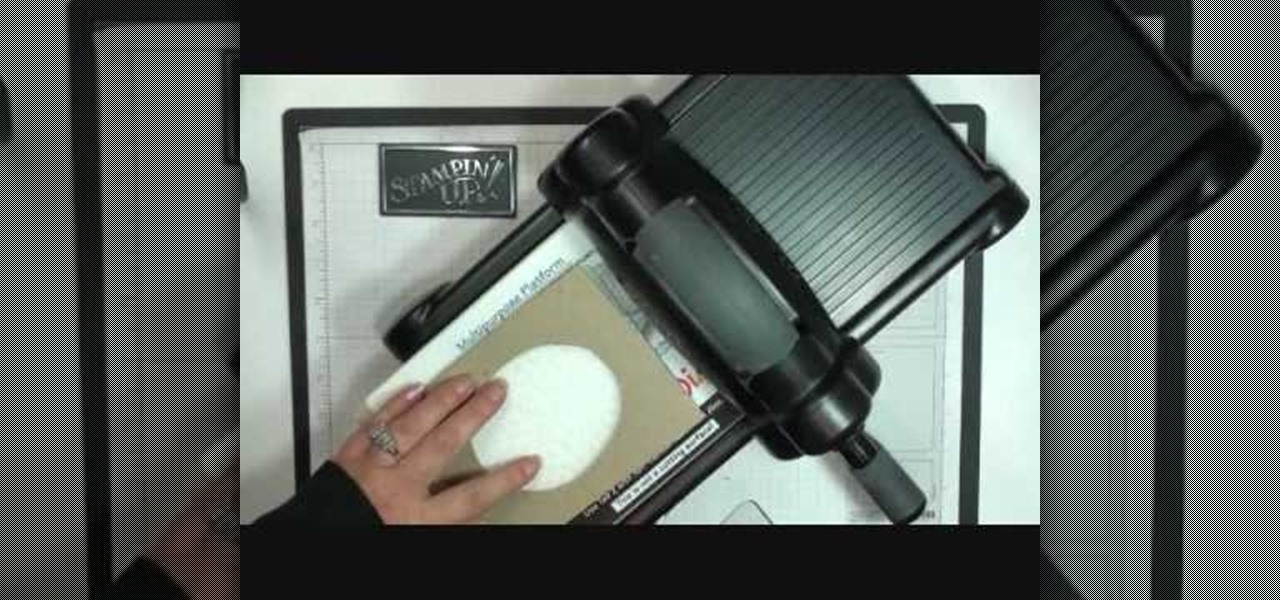
This video is about using an embossing folder. The video begins off by showing how to create a perfect oval for the main emblem in the picture. First you take your whisper white card stalk and attach it to a piece of cardboard. after this process you run it the embossing machine to make the adhesive attaches correctly. The video contains video and audio instructions as well as multiple techniques to complete the task at hand. this video is very informative and help you indefinitely to complet...
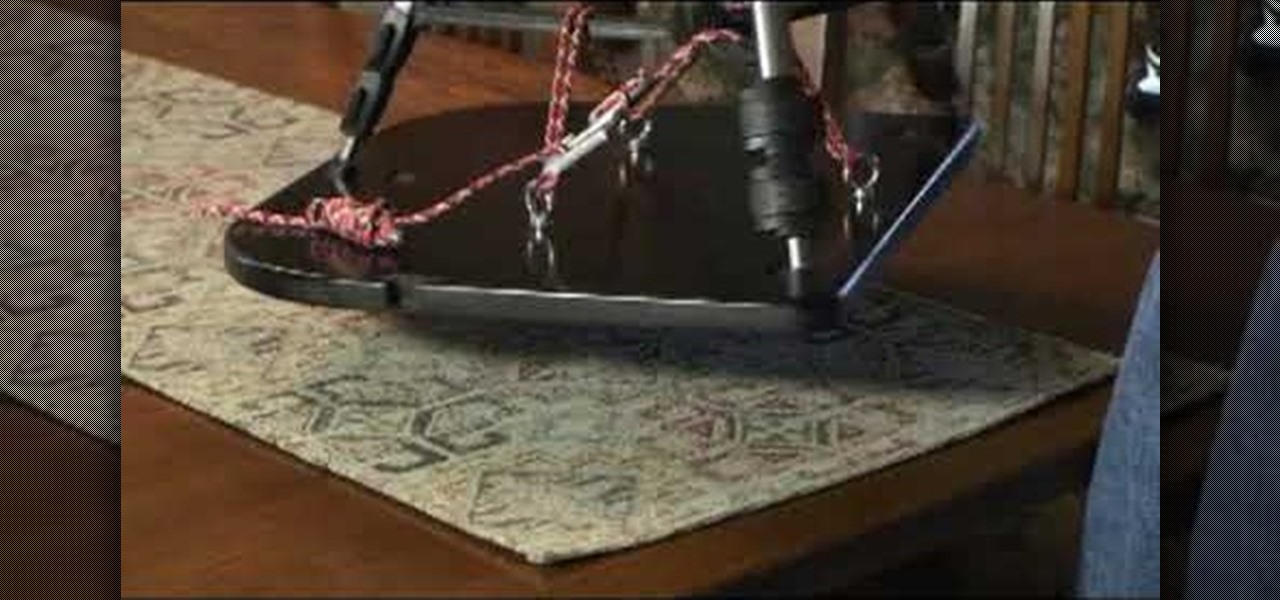
If you've ever wanted to do in-car filming, you know how difficult the set up is. The Tripshot mount can help you master your next taxicab confession, or your next car chase scene. This video explains proper setup and installation for maximum flexibility and diversity of camera angles.
Let's face it: Most people, even our friends and family, find it pretty boring to open emails with huge photo files attached to them. They're bulky and take forever to load.
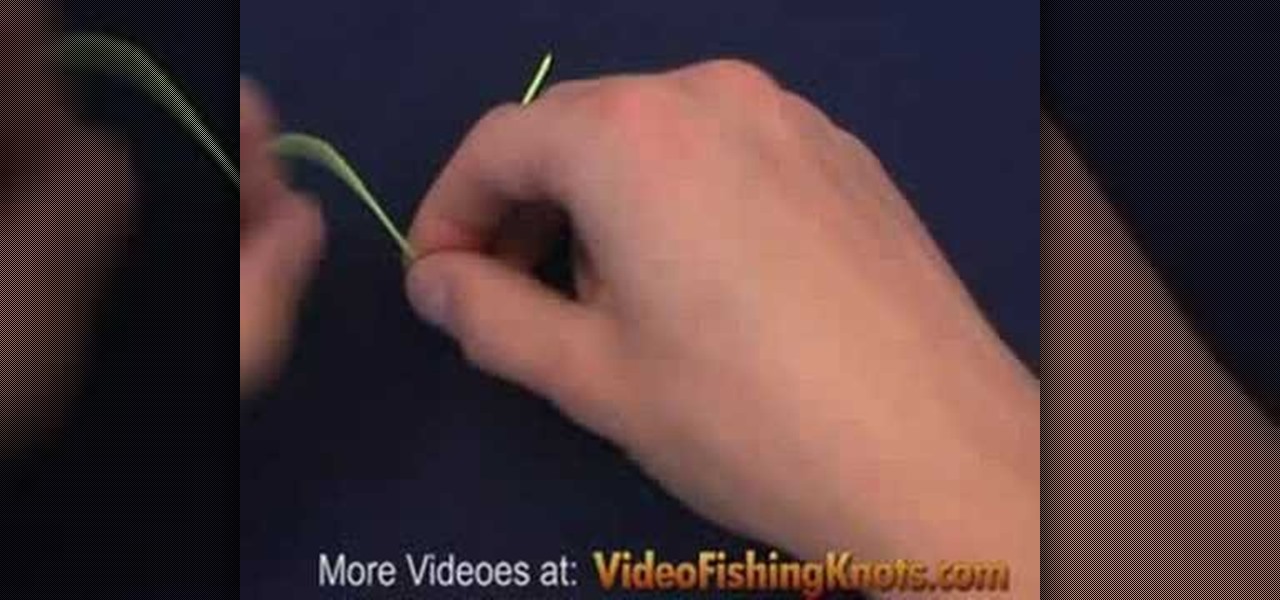
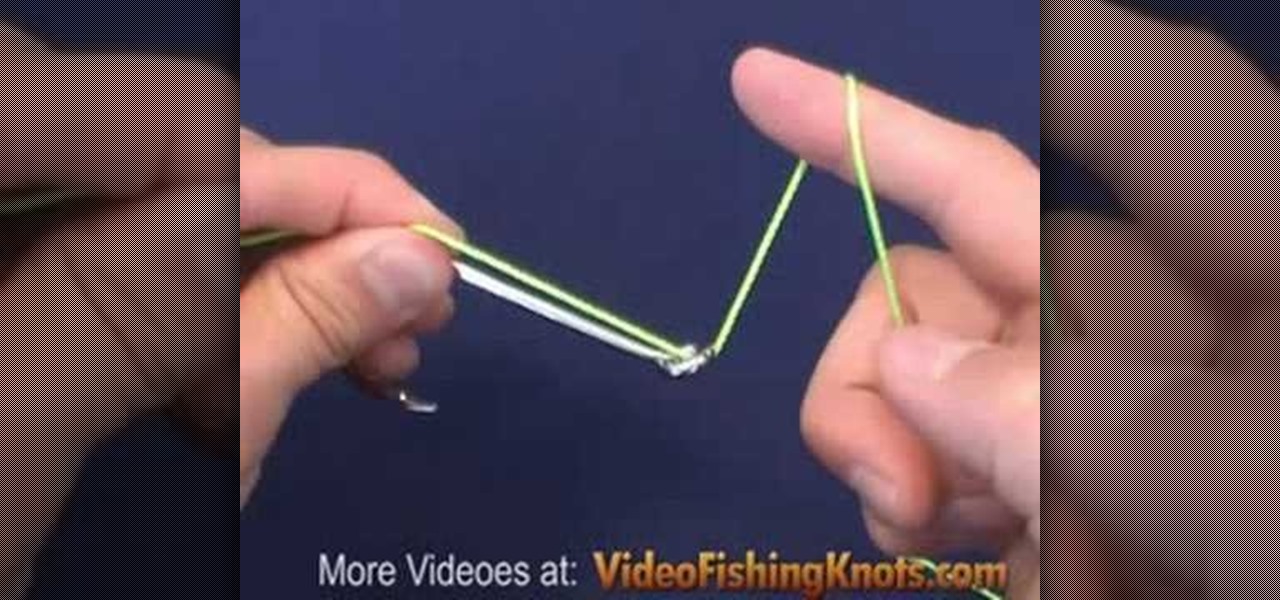
The Rapala Knot is the knot that the Rapala brothers recommend to use with Rapala lures. The Rapala Knot attaches the lure with a loop at the end of the line. The loop will allow the lure to move freely and naturally. The Rapala brother also emphasize that the line is attached directly to the eye of the lure without the use of a snap or swirvel. Again this is to insure a natural movement. Follow along with this HowTo video tutorial to learn how to tie a rapala loop the next time you go fishing.
The Penny Knot is a very popular knot with fly-fishermen for attaching a fly to the leader. The Penny Knot works just as well for attaching a hook or lure. When mastered it is easy to tie and can be tied in the dark. The Penny Knot retains around 75 percent of the lines original breaking strength. Follow along with this fishing how-to video and learn how to tie the penny knot.
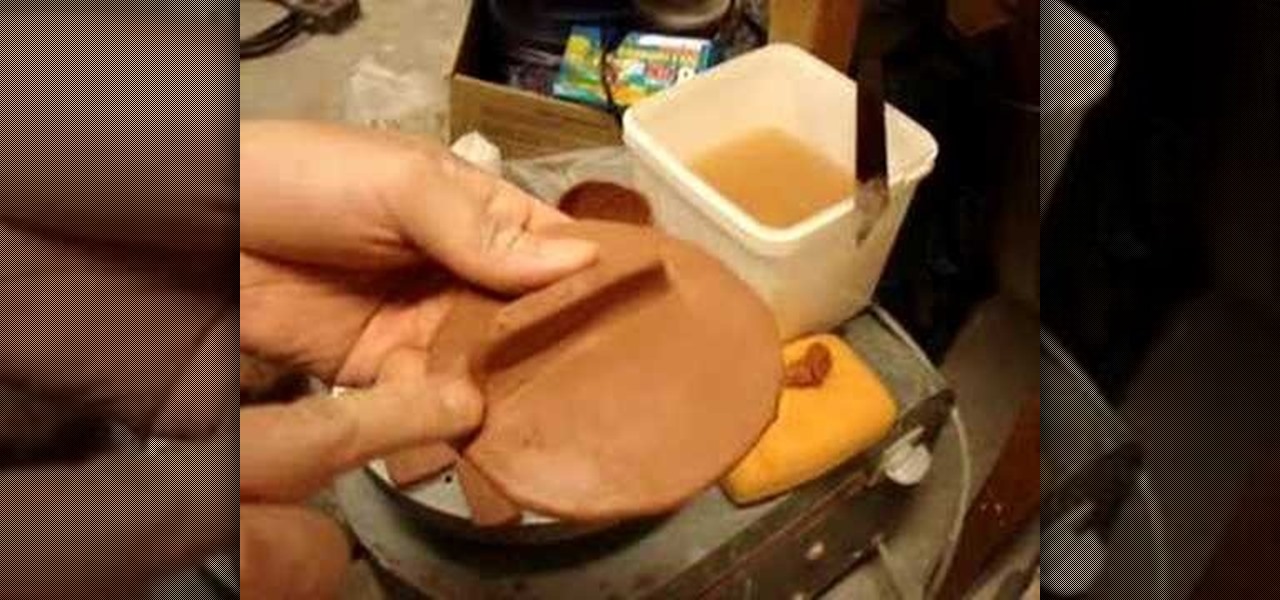
Check out this video to learn a technique for attaching soft clay to soft clay. No scoring or slip is needed. By just applying firm pressure to get a good strong joint. The small clay coil is used to reinforce the joints, and the blending is to make sure both parts are joint securely. Finally give a little pull to the new piece of clay that was attached, to test how good the joints are. If it comes loose than you are not applying enough pressure in joining the two pieces together. Finally, if...
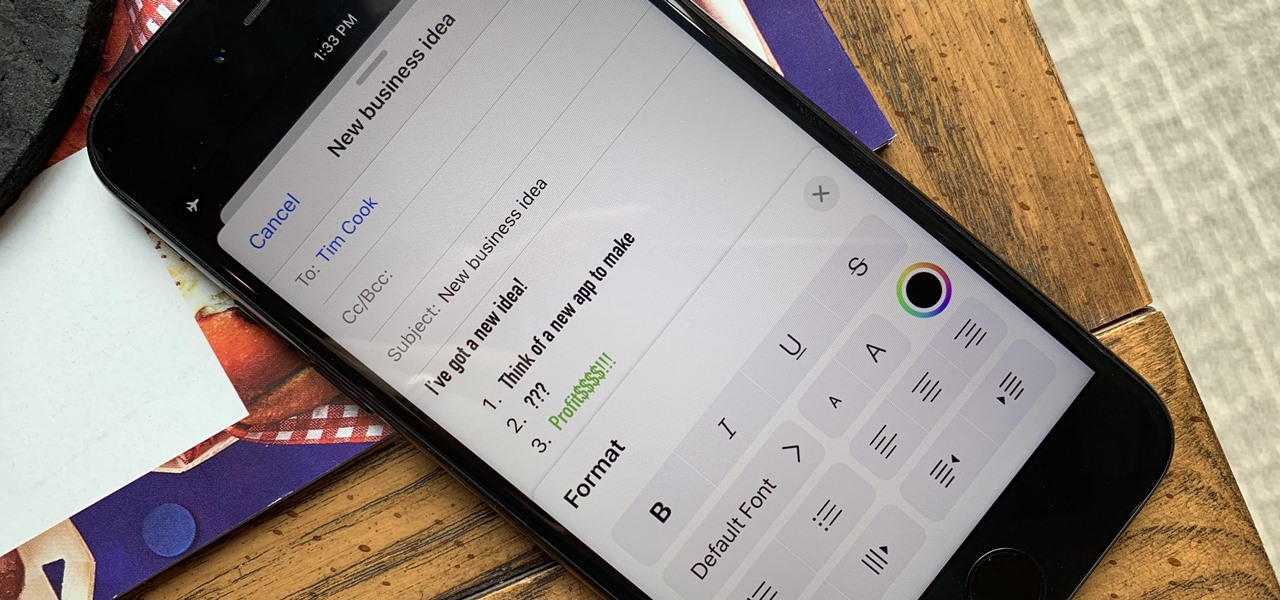
Although Mail didn't get a massive update in iOS 13, the new formatting and attachments toolbar makes it easier to stylize your messages and get quick access to files you'd like to send. It even includes the excellent document scanner built into iOS, so you can use your iPhone to turn a physical document into a PDF and attach it to your message — all from within the Mail app directly.
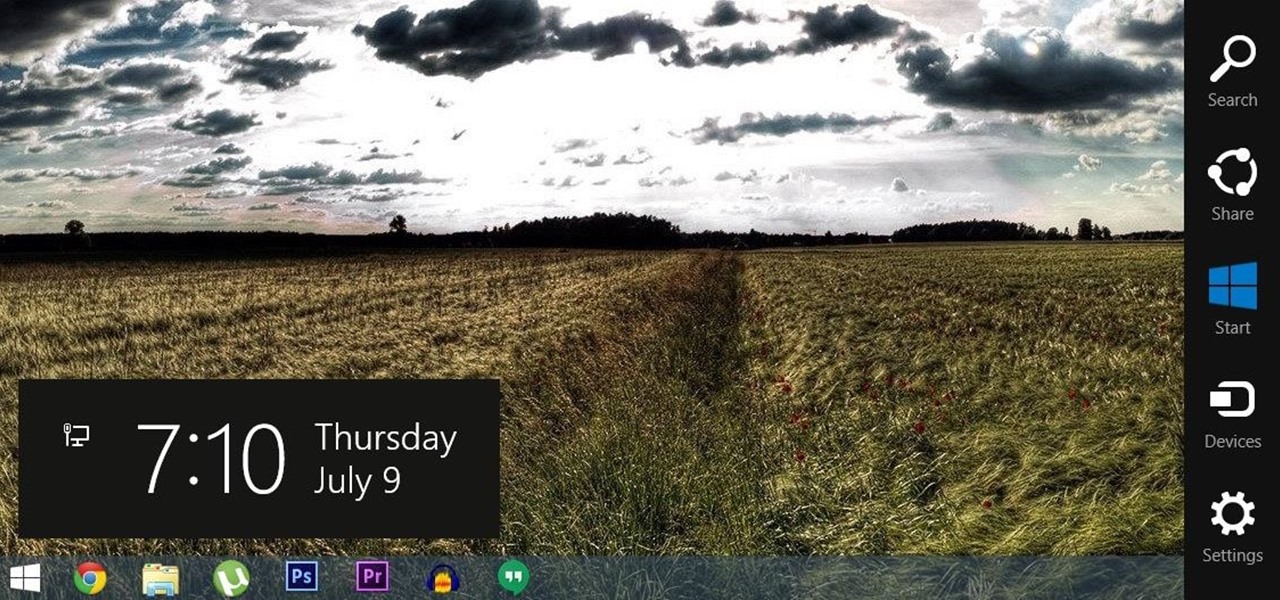
For all of the flak that Windows 8 received from desktop users, it certainly had some interesting and unique features. For instance, the "Charms" bar allowed you to easily access several key menus by simply hovering your mouse pointer in the top- or bottom-right corner of the screen.
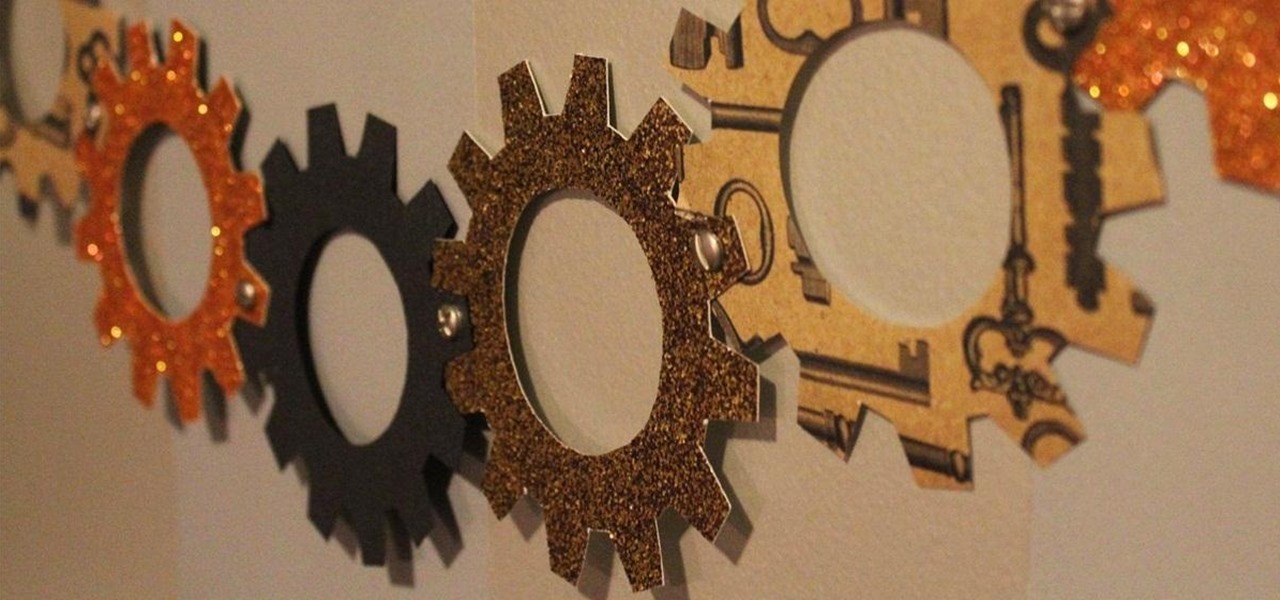
You may or may not care about this, but sometimes it physically upsets me when I see gears stuck together haphazardly, with no concern for whether their teeth interlock. I mean, what do you do with non-interlocking gears?
This is a video tutorial showing its audience how to make a New York City Skyline punctured paper lamp shade with ThreadBanger. The first step is to gather your supplies. You will need paper, puncturing tools, two wire rings, ribbon, tape, bull nose clips, tape, foam, and scissors. Then you will take your graphic paper and lay it on top of your plain sheet of paper and on top of your foam. Next with your puncturing tools punch holes all around each graphic so that you get your design. Then ma...
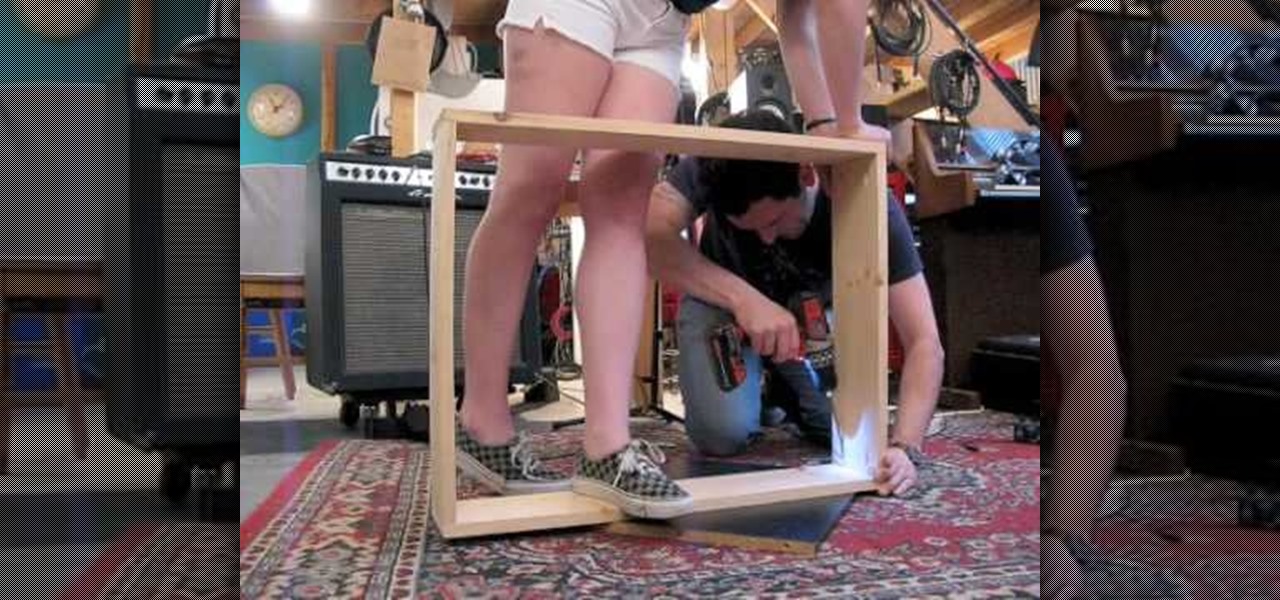
Josh Copp and Madeline Donahue show us how to build a light table from pine wood and plywood utilizing two fluorescent light fixtures as the light source inside the box. The frame of the box is fashioned out of two 1X8 planks cut into four pieces so that two sides are 30 inches and two sides are 22 3/8 inches. The base of the box is made of plywood or OSB and is 30X22 3/8. Once the pieces are cut and assembled using a pocket hole jig and wood screws, the inside of the box is painted with whit...
Before working on any circuit in your house, make sure you turn the light off at the circuit breaker and then test it at the switch. Use 14-2 wire which has two insulated wires, a white and a black, and a bare copper wire which is used for grounding. First you run a 14-2 wire from the main circuit panel into the switch box. Then run a 14-2 wire from the switch to the light bulb. The black wire from the main circuit panel gets attached to one of the poles on the switch. The black from the 14-2...
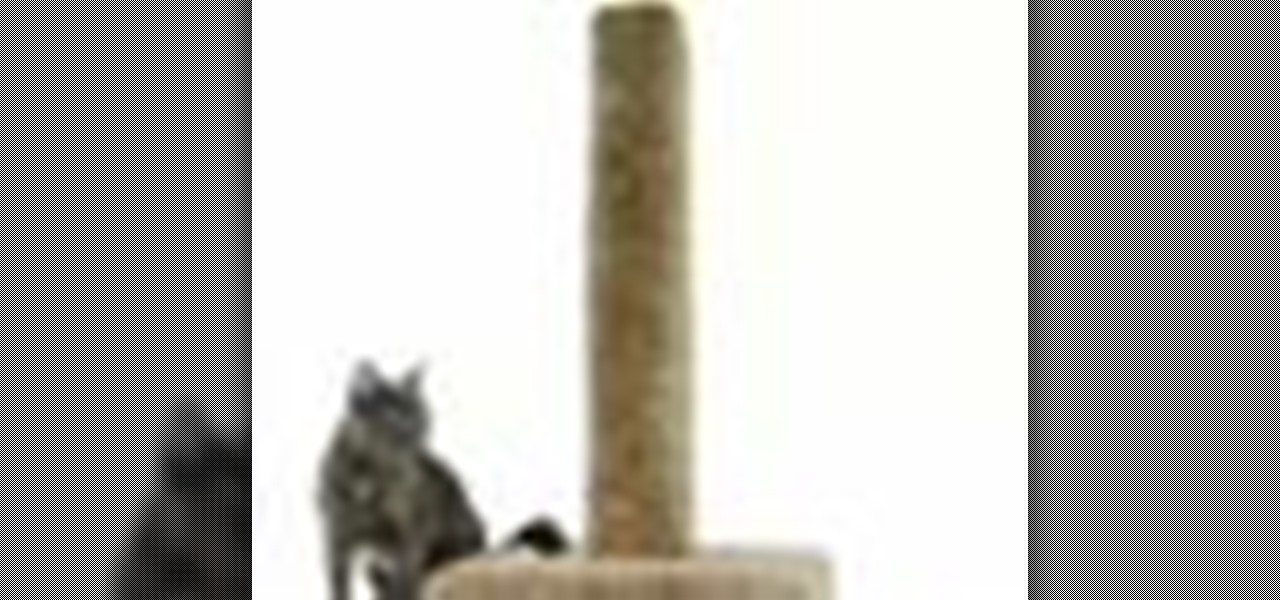
Make your cat happy by giving them a sturdy scratching post. They'll sharpen their claws – without tearing up your furniture.
Clip Art from Microsoft Office allows you to insert stock photos into you PowerPoint, Word, Excel and Entourage documents easily. You can gain access to the Office Clip Art site easily in any of the mentioned applications. The Microsoft Office for Mac team shows you just how to download and use clipart from Office Online in this how-to video. You can get free stock images of low-priced professional quality photos.
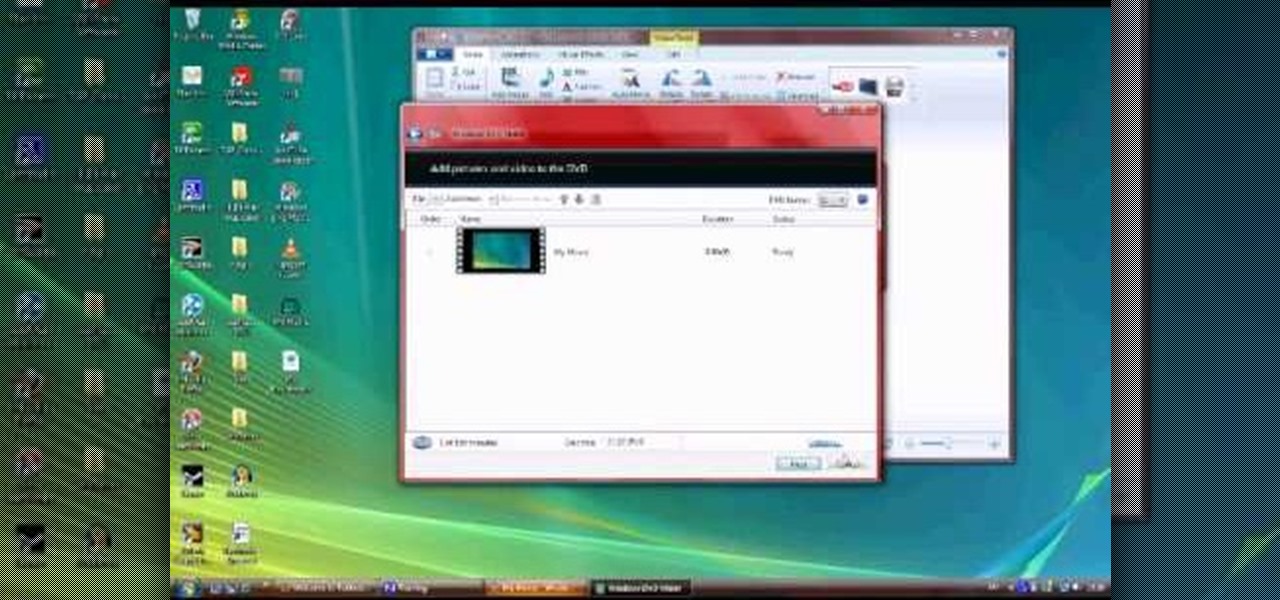
Converting file formats seems to stump a lot of people, so if you're coming here clueless as to how to convert an AVI to DVD, don't feel alone. In this video, learn how to turn an .AVI file to DVD using Windows Live Movie Maker easily and for free.
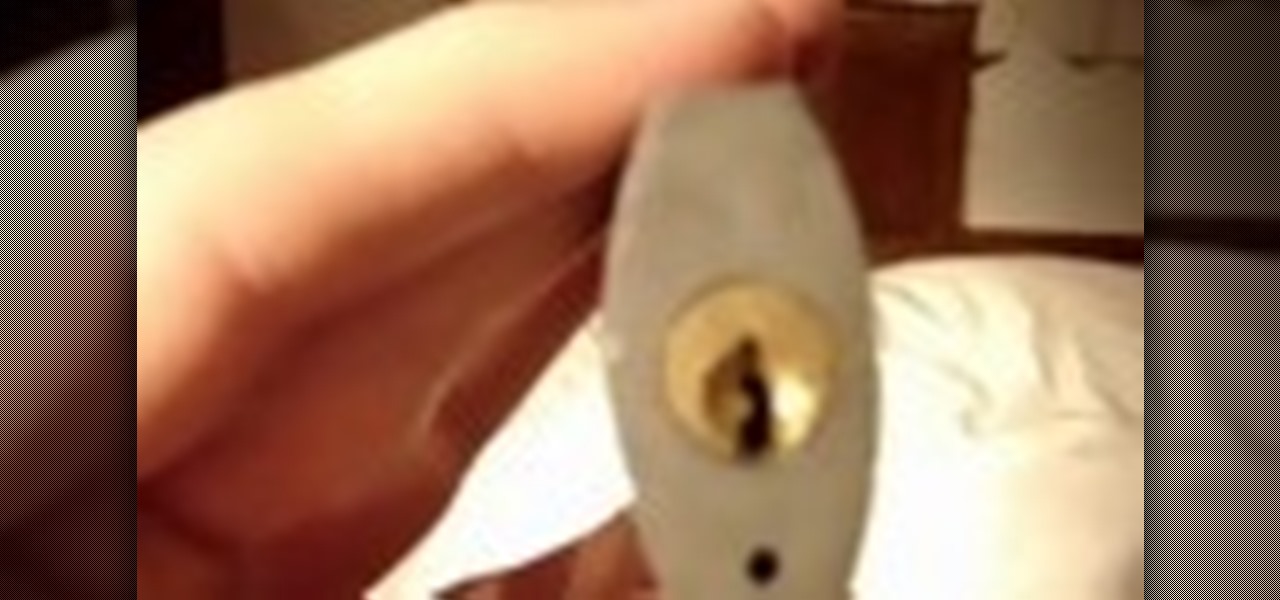
This video tutorial is for educational purposes only. See how to pick a normal lock with a tension allen wrench and a small screwdriver.
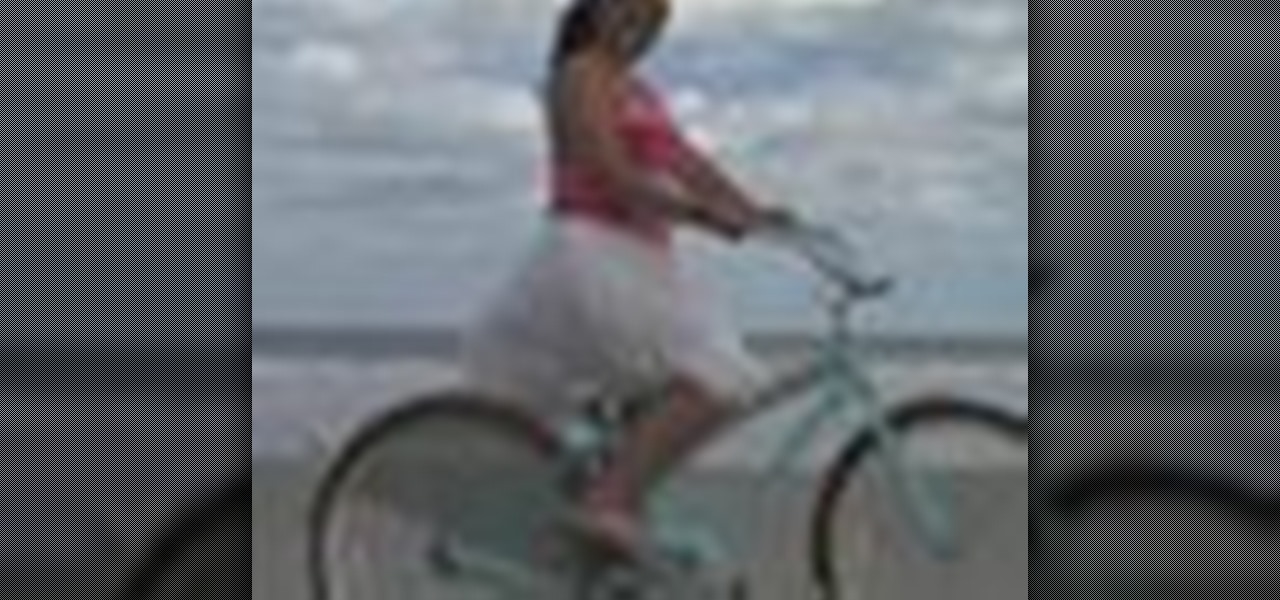
Your bike is your prized possession - it is your mode of transportation, your exercise and definitely your fashion statement. But, just because you love your bike, doesn't mean you want to destroy your outfit by riding it. Follow this tutorial and add a pretty mesh barrier to your back wheel and stop ripping and soiling your skirts.
Riding a bike is a great way to get exercise and as means to getting around but incorrect bike assemble will make for a bad time. Double check all your work and make sure everything is lubed up and fastened before taking your bike out for a spin.
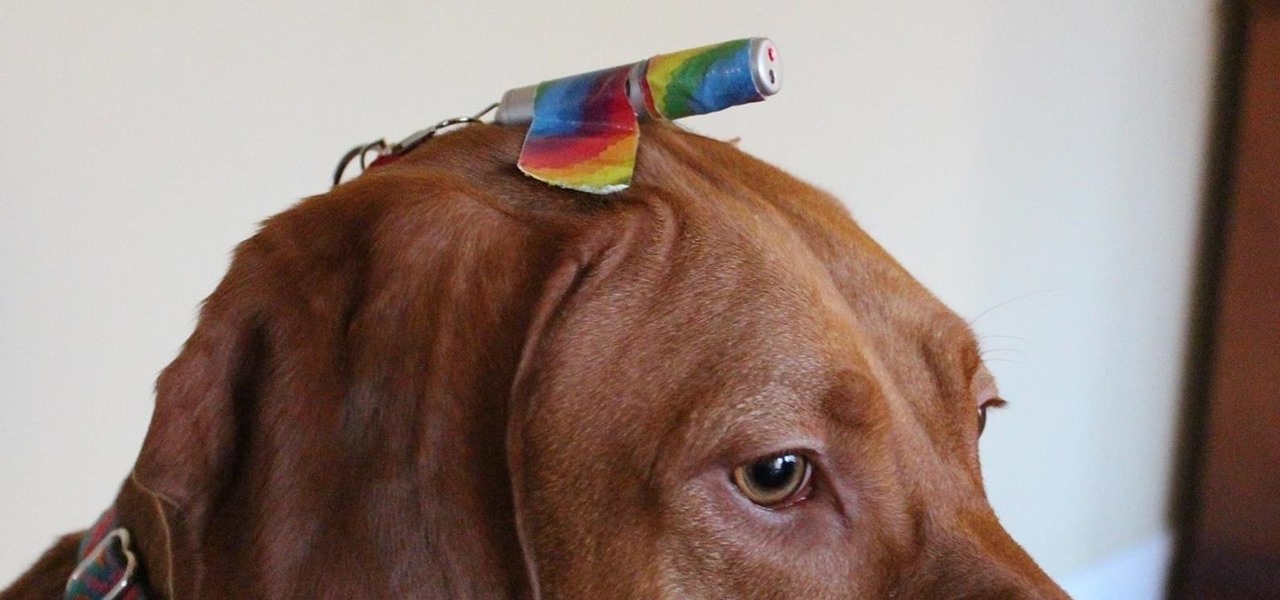
Our dog has tons of energy and always wants to play. However, play time can be exhausting to the humans of the house. We found out a few months ago that the dog loves to play ‘chase the red dot.' Boredom leads to creativity, so we attached a laser pointer to her head with a bandana and small piece of tape. This kept her continuously occupied until we removed it after 20 minutes. I assume you could try this with a cat if you were daring enough – good luck with that. Caution: Laser pointers (ev...
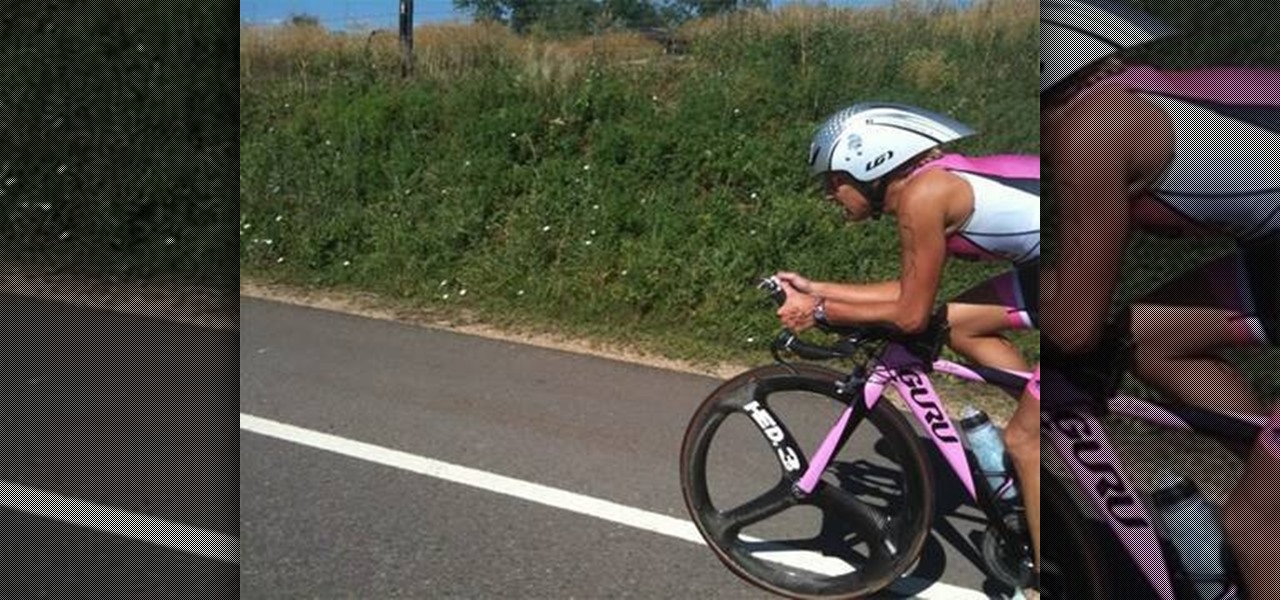
There's nothing like taking a bice bike trip during the summer time. Not only do you manage to stay cool, but you can easily burn some calories away. But your mood can easily change when you get a flat tire.
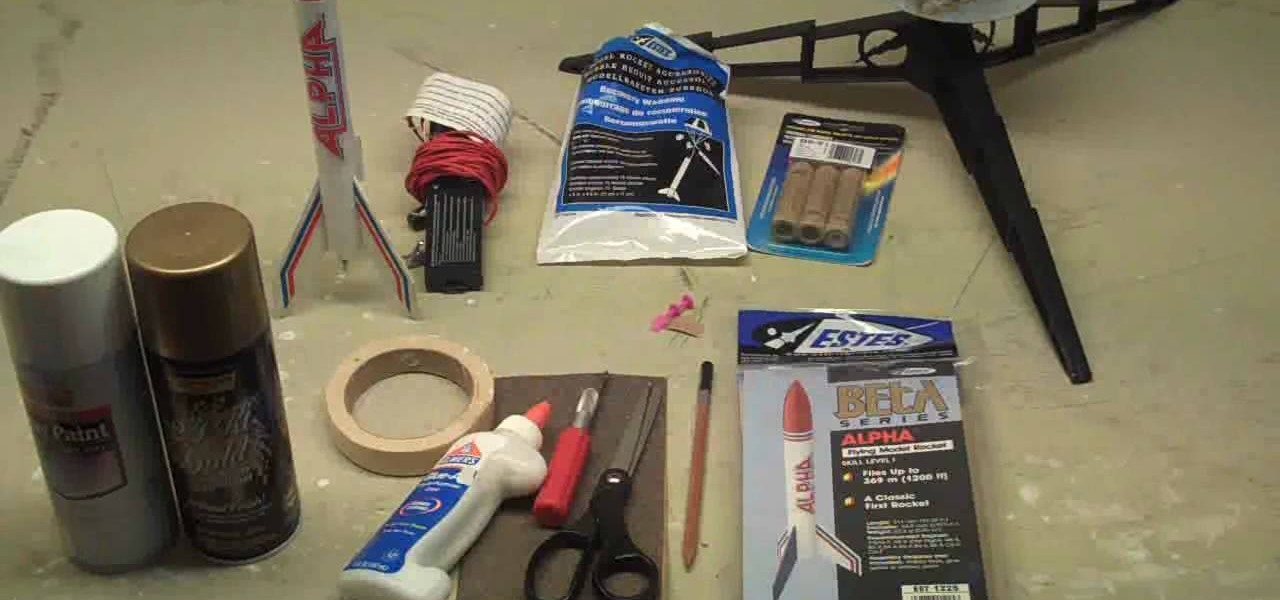
In this Hobbies & Toys video tutorial you will learn how to assemble a model rocket for launching. This video will show you how to do this using the Estes Alpha model rocket. For this project you will need the rocket kit, masking tape, glue, sand paper, a knife, scissors and a pencil. First you sample the engine mount, glue it up and set it aside to dry. Next you cut out the fins and sandpaper them together. Then you apply glue on the inside of the tube up to 1 1/2" and push the engine mount ...
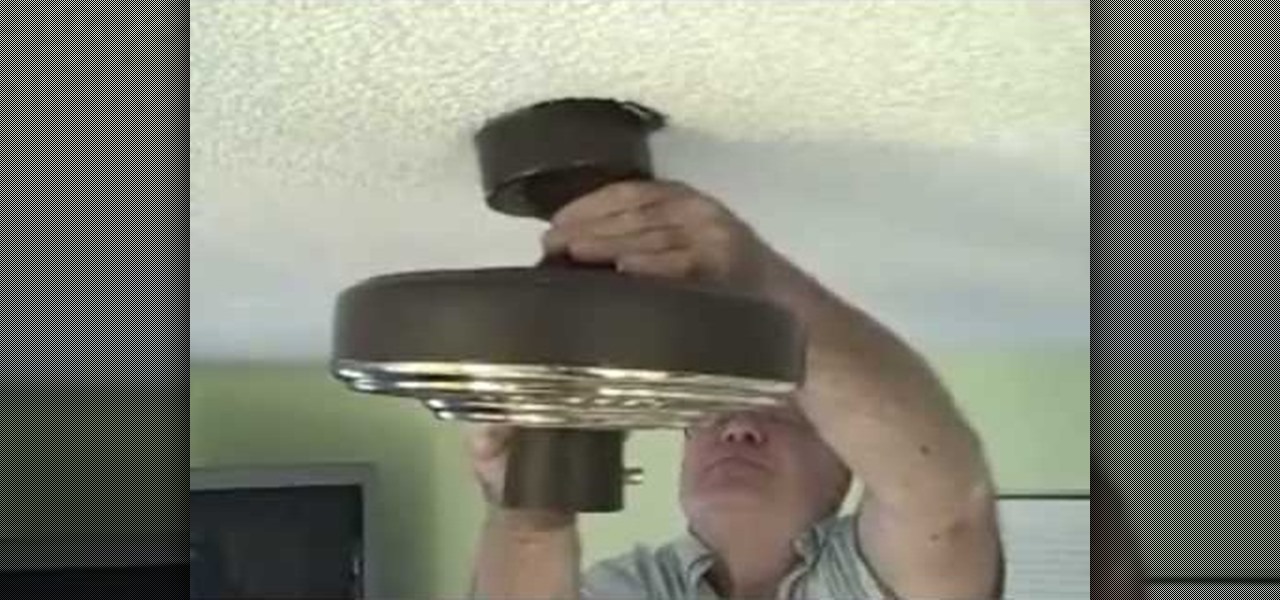
A ceiling fan is a cheap, economical way to add some nice air into your home during the hot summer months. They're easy to install and can actually save some money. So in these videos, you'll find out how to easily install a ceiling fan in your home today. Remember, you will be messing with electrical wires so be safe and wear the right equipment. Good luck and enjoy!
By watching this video, you will learn how to create your own art journal. Begin by cutting pieces of heavy weight cardstock 5" by 8". After you have cut all your sheets, fold them in half. If you want a defined crease, you can use a bone folder. Next, poke small holes in the crease of each sheet. Start at the center and then poke one every inch above and below the center hole. Then using a regular running stitch, sew through each hole of a single sheet. Once you reach the bottom hole, bring ...
First of all create a website. Go to 'file' and then click 'new'. Choose it as ‘general’ and then as 'empty'. Name this as 'practice site'. Click 'ok'. Now create your first webpage. Click on 'general', 'html' and then 'ok'. Now click on the 'file ' and then choose 'ccs' to create an external style website. This is basically a text file given a '.css' extension. Now click 'ok'. Now go back to your 'html' page and then 'save' it. Now you have to type in 'index' to replace 'default', and th...
This video teaches us how to make shaker cards. These are cards that have a sort of window where you can see glitter or confetti moving about when you shake the card. You start off with your card base. A good size is 6" by 8". You take your front image, either a picture you have or stamp one yourself. Attach this image to the front of your card base. Line your image with thick double sided tape. Don't leave any gaps or your glitter will leak out. Next you cut your window. This will be the ver...
This video is about how to make a puppet dragon out of household items. First, a piece of card stock paper is cut in half the long way. Next, you must take an empty 18-pack egg carton and cut off a strip of egg slots. Using a stapler, the two pieces of paper are connected long ways, with the egg strip stapled on top of it. This forms the body. To make the head, a small cardboard box is stapled to one end. A smaller cardboard box (about half the size of the one already used) is glued on top. F...