In this video, we learn how to change hair color in Photoshop CS3 and CS4. First, open up your image and zoom in on the hair. From here, you will click on the selection tool with a circle to select your image. Now, make sure this is the perfect size for the entire image. Right click and make sure it's sized out right. Now, select the hair and a red marker will appear. Select the whole surface of the hair, and as you get to the short hair use a smaller circle tool, don't worry about the smalle...
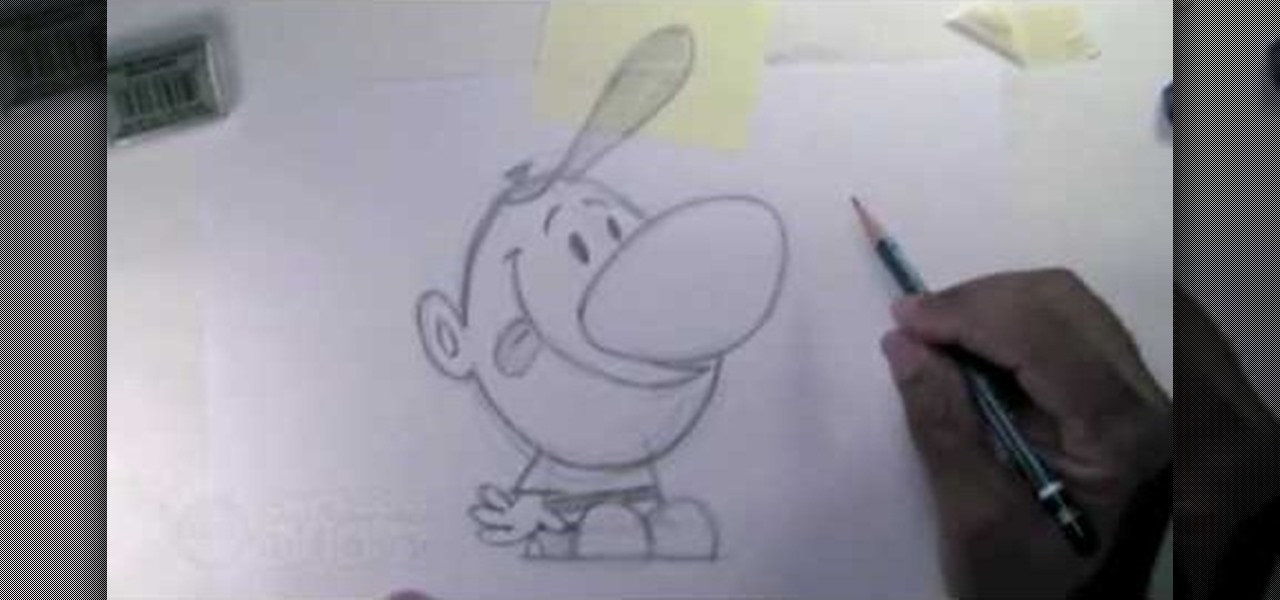
In this video, we learn how to draw Billy from The Grim Adventures of Billy & Mandy. Start out by drawing the egg shaped head with a pencil. From here, sketch on the body by using a block shape then draw the shoes as simple half circles. The arms and hands will be hanging to the sides. Now, draw on the huge nose in the middle of the circle. Attach the mouth to this and draw it all the way up near the eyes, which are simple dots. The brows are simple slashes. After this, add in the minor detai...
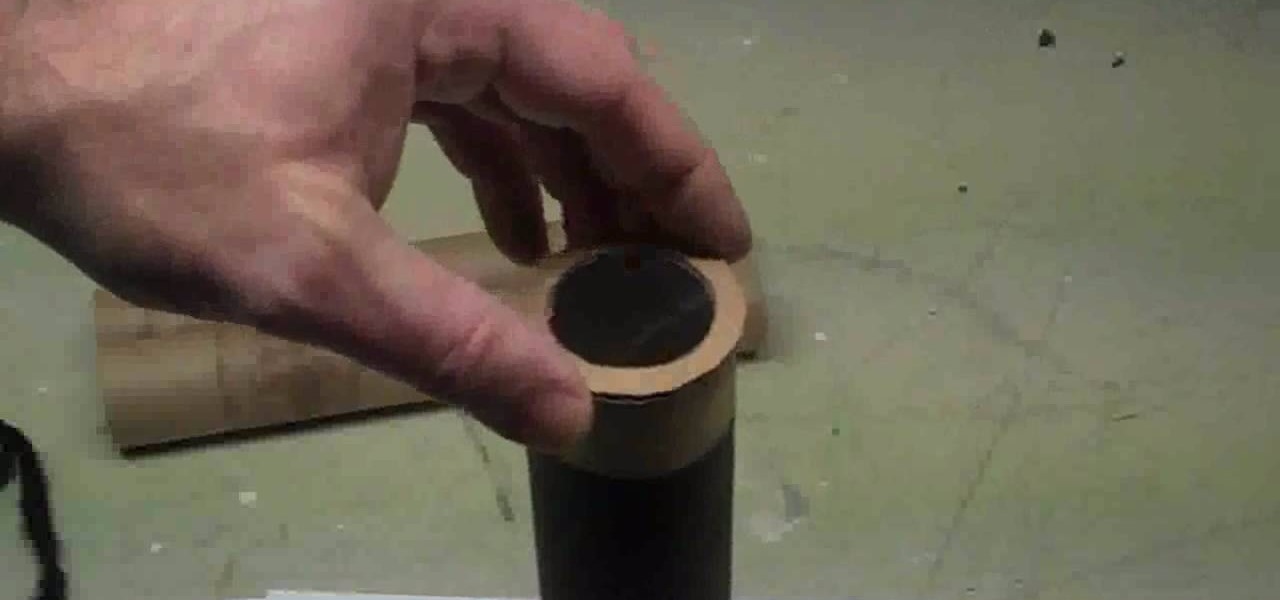
In this tutorial, we learn how to make a small, easy, functional telescope. First, glue a lens in place with glue underneath a piece of cardboard with a circle cut in it. Then, cut this into a circle and tape it to a paper towel holder. Then, you can wrap this in some paper mache around the cardboard. Then, wait for this to dry and spray paint it with gold and black paint. When finished, you will have a functional telescope ready to go and use! This is cheap and a fun project to make with chi...
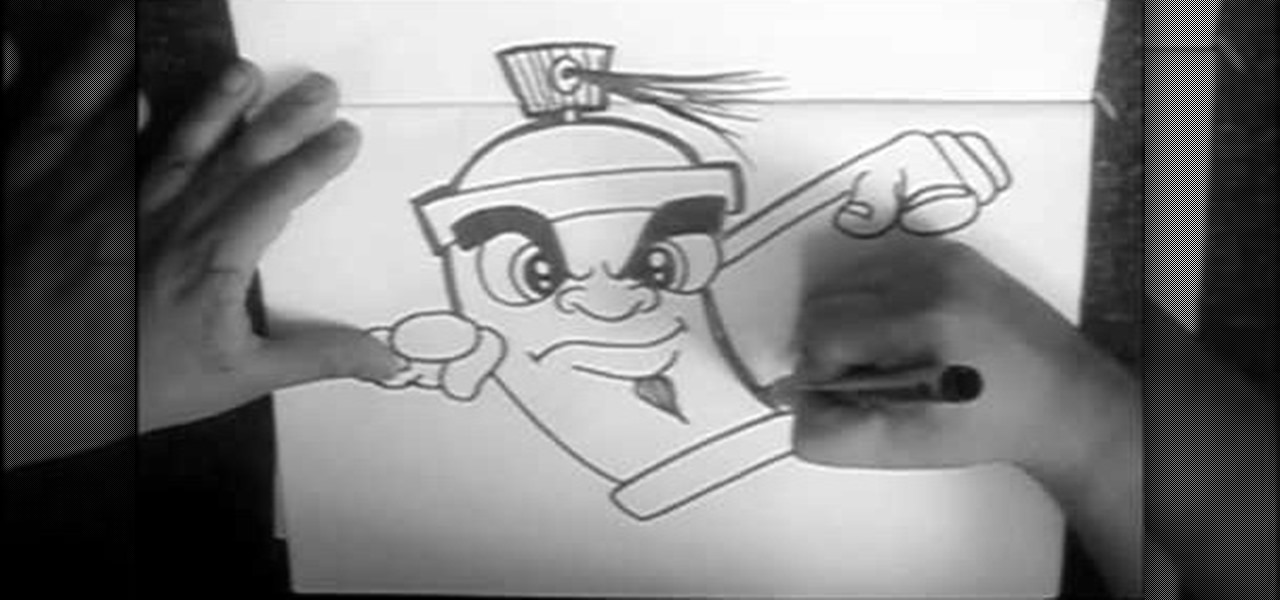
In this tutorial, we learn how to draw a cartoon spray can. Start off by drawing a round circle for the eyes, then fill in the pupil and draw the eyebrow above it. After this, draw in the nose and then draw the other eye opposite to the first. From here, draw in the mouth and the goatee on the face. Then, draw in the top, which will be a rectangle with a half circle on top of it. From here, draw a hand on the right side pointing straight out, then draw a top to the spray can showing the spray...
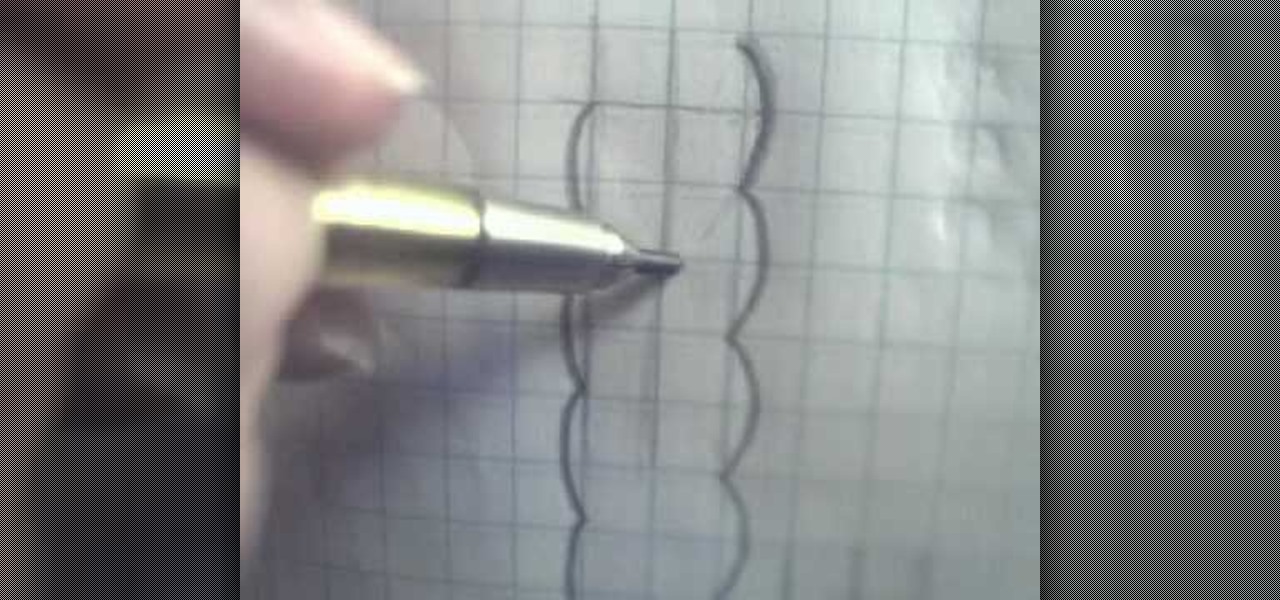
In this tutorial, we learn how to draw braided hair. Start off using grid paper and a pencil to practice. Then, draw two lines parallel together and draw a line in between each of those. From here, draw on a circle around these and continue the pattern all the way down until you reach the end of the lines. Then, draw a line in the center where the circles meet and start to shade in the area to the right, creating a line coming out of it from the left. Practice doing this to get a better idea ...

In this video, we learn how to draw an eye step by step. First, draw the curve of the eye on the top and on the bottom. Then, draw in the pupil of the eye and the inner corner of the eye. Use a light touch with the pencil to make the circle in the middle of the eye. Then, draw around it with a bolder line. After this, draw the crease above the eye, then draw shading to show where the crease line is. Next, fill in the pupil and add in a circle to make the eye appear glossy or that light is hit...

In this video, we learn how to draw a graffiti spray can. Start out by drawing the top of the can with the nozzle on the very top. Use a half circle with a thick line under it to make the top. Next, draw the rest of the can creating a face on the side of the can with a mouth, nose, ears, and eyes. Then, draw in the bottom of the can using a circle shape and filling it on black so it looks sealed. Add in some lines to show the can spraying, then write in graffiti letters underneath to finish!
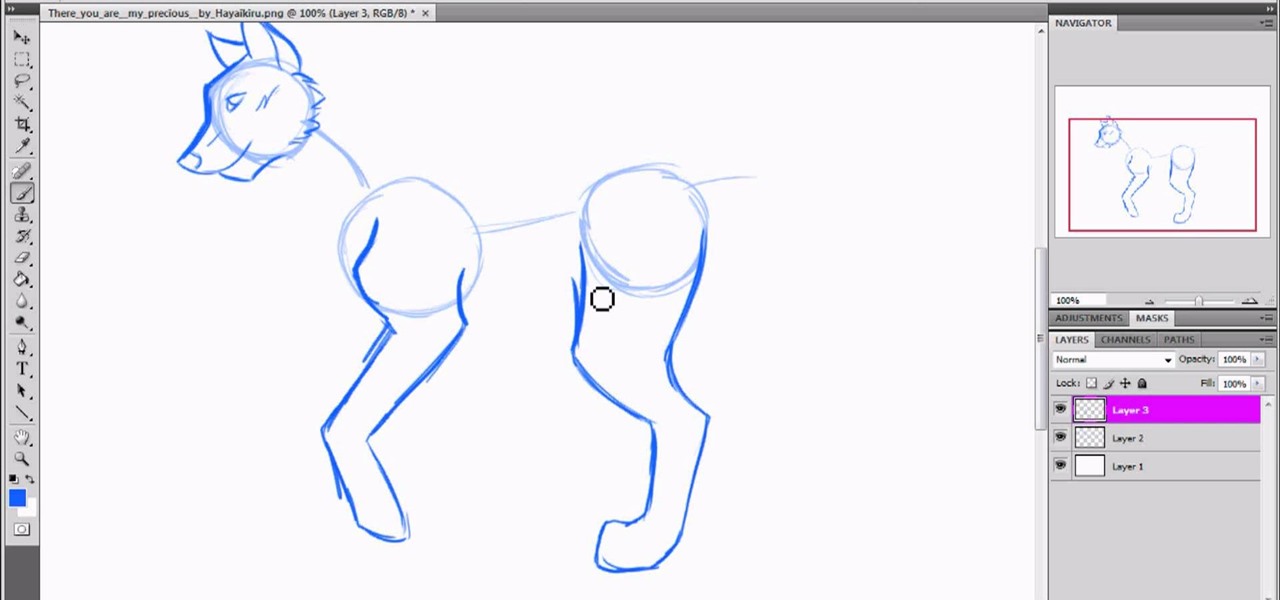
In this tutorial, we learn how to draw a wolf with basic guidelines. First, draw in circles from where the main sections of the wolf is. Now, draw a line connecting all of these and draw in the details of the face. Now, draw the back legs starting with the front leg and then the back leg. After this, draw in the stomach and the main part of the body. Erase the circles and background lines, then draw in the hair of the wolf and the stomach. Create a tail on the back, then add in the ears and t...
In this video, we learn how to draw anime eyes in MS Paint. First, draw the round circle for the head and draw a line in the middle for reference of where the eyes will go. To draw large eyes, draw two round circles and then a small pupil at the top. Color the pupils in black and color the rest any color you'd like. For female eyes, make the pupils much larger and add in eyelashes on the eyelids. Shade in underneath the lids and add white to show they are glossy. These are both great looks fo...
In this tutorial, we learn how to draw Orochimaru. Start with drawing a circle for the head, then draw lines crossing the circle to use as a measurement of where the features of the face will be. After this, draw in the eyes, nose, nostrils, mouth, and eyebrows. Next, draw in the neck and the shoulders for the body. Once finished with this, draw in the hair surrounding the face, then erase the back lines from the drawing because you won't need them any longer. To finish, add in details to the...
In this tutorial, we learn how to draw manga bodies. Start out by drawing circles for the body. These circles will start at the head, then go to the shoulders, arms, stomach, hips, knees, and ankles. After you do this, draw lines to connect them all together and make out the basic shape of the body. Now star to use a bolder line to create the realistic outline of the body. When you're finished with this, you will be able to do the fun part. You can fill in these spaces with color and lines to...
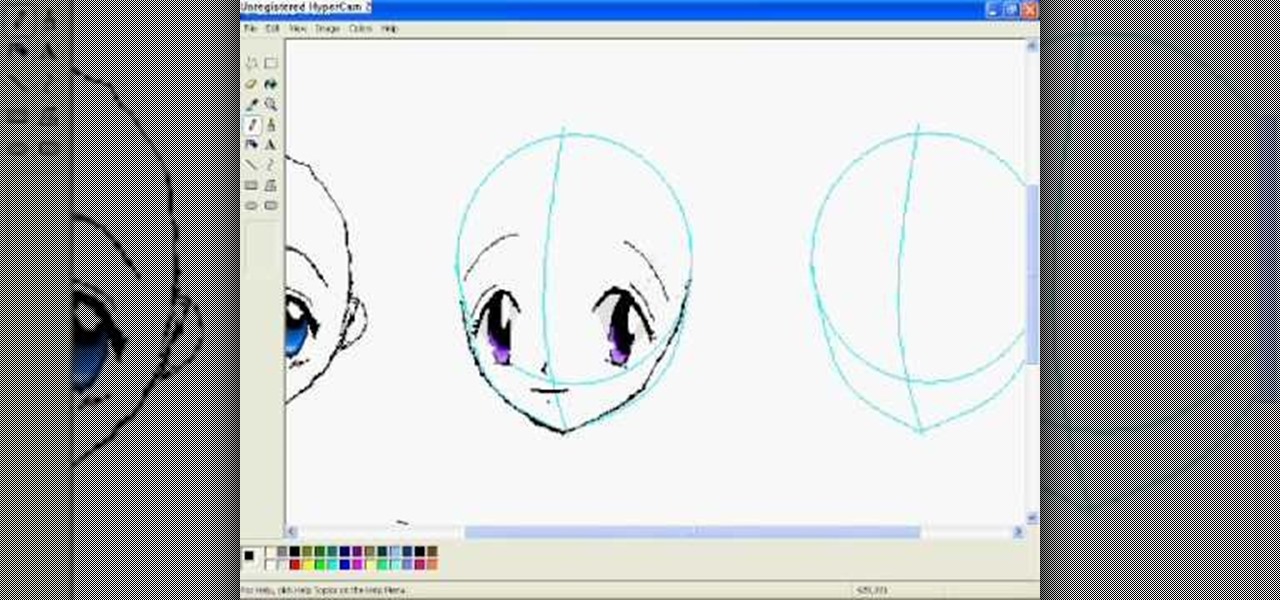
In this tutorial, we learn how to draw manga faces 3/4 view tilted down. You will start with a circle for the head, but you will make the chin go off to the side slightly. Next, you will draw a horizontal and vertical intersecting line off to the side of the face where the chin is. Next, draw in the circles for the eyes, then draw in the brow line. The brow line should be lower than normal. Once you have all the guidelines set up, add in the ear and start to draw in the details of the face. W...
In this tutorial, we learn how to draw Karin 2. Start out with a circle for the head, then draw in your reference line so you can align the different features of the face. After this, draw in circles where the joints of the body would be for the upper body, then draw around this using bold lines. Once you are finished with this, draw in the rest of the arms and create clothing on the body as well. Next, you will need to draw in the features of the eyes as you would like, then add in the detai...
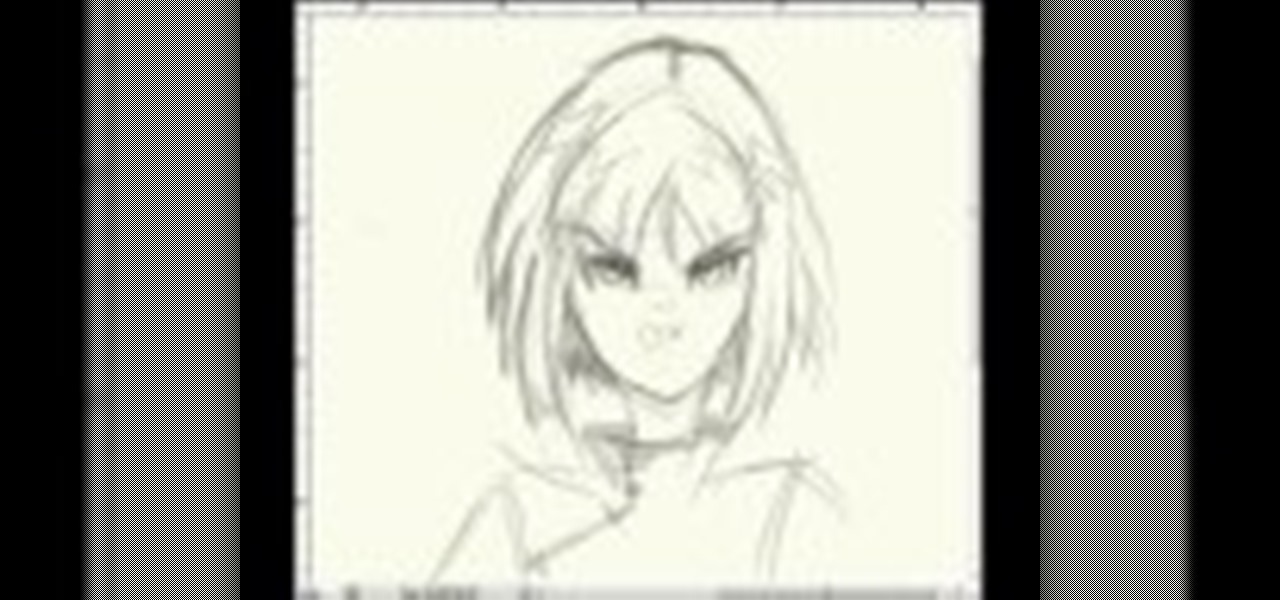
In this tutorial, we learn how to draw manga facial expressions. To draw an angry face, you will draw a circle for the head with a point for the chin. Then, you will draw in a slight frown for the mouth and half circles for the eyes. Then, draw in slanted eyebrows above the eyes to make the character look angry. Add in highlights around the face to make the expression larger. Then, add in lines around the face to show it being crunched up and the person being angry. You can also make the mout...
In this tutorial, we learn how to draw Rock Lee. First draw a circle for the head, making a chin underneath and using lines to reference where the facial features will go. After this, draw eyes that are slightly aligned to the left hand side of the face. The right eye should be larger than the left, both off center. Then, draw two dots for the nose and a "u" shape for the mouth. After this, draw a larger circle around the head and then draw in angry eyebrows above the eyes. Start to erase the...
In this tutorial, we learn how to draw Train Heartnet. Start off by drawing a circle for his head, then lines in the head for reference of where the features will go. Next, draw a stick for the body and draw circles where the shoulders and wrists would be. After this, draw in the neck and the upper body. Draw in the clothes after this, adding in as much detail as you would like. Make sure to add in shading and lines to make the clothes look more realistic. Next, you will need to draw in the f...
In this tutorial, we learn how to draw Tohru Honda. Start out by drawing a circle for the head, then lines on the face to reference where the facial features go. After this, draw a stick for the body alone with a neck. Draw in circles where the shoulders go, then start drawing around that to create the body. Draw on the school uniform for her, then draw on the ear and additional details for the uniform. After this, draw on the bangs and the hair, then add on the bows to the hair. Then, draw o...
In this tutorial, we learn how to draw Misty from PokŽmon. Start by drawing the basic shape of the head, a circle with lines inside of it to use as reference lines. After this, draw on ears to the side of the face and then draw in the cheeks. Now, draw a stick figure for the body and then draw in circles to create the other lines for the body. Then, draw the back of the neck and start to fill in details. Erase any background lines as you continue to draw. Make sure to add in details and facia...
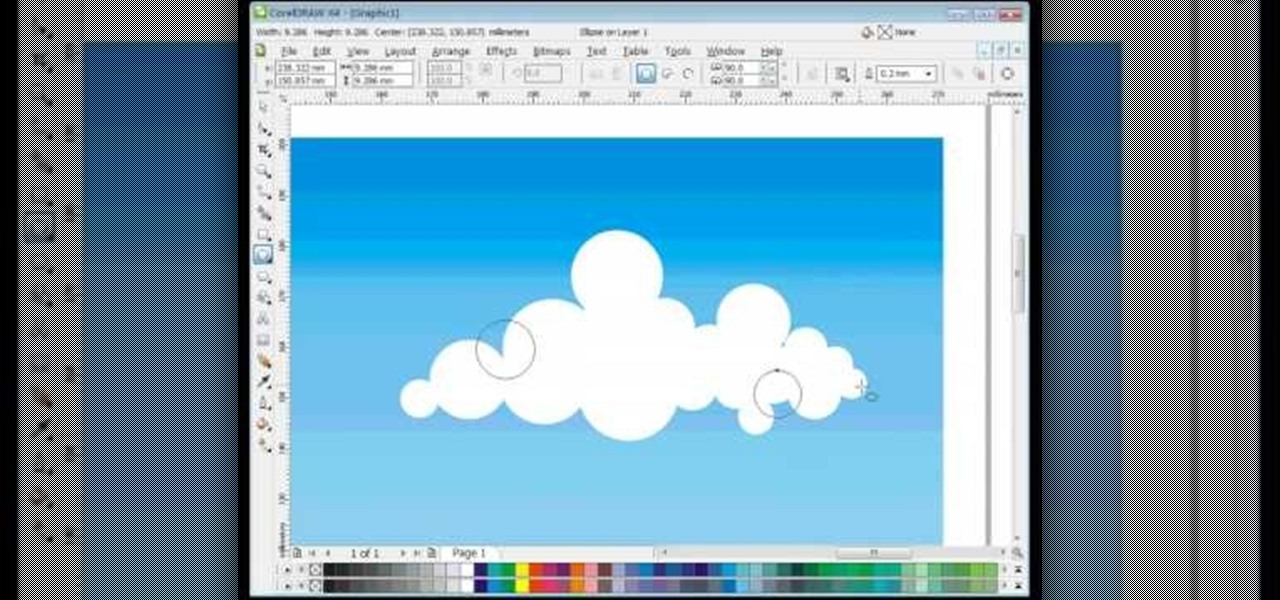
In this video, we learn how to draw vector clouds in CorelDraw X4. First, open the program and make a circle using "ctrl+shift". Make these circles touching and overlapping each other on the top of the page. After this, select all and then weld it. Next, press "ctrl+k" to break the curves apart, then erase the parts inside of the clouds. When this is done, select all, then copy and paste for additional clouds. Trim the bottom to make the clouds sit on a mountain or straight edge, then you are...
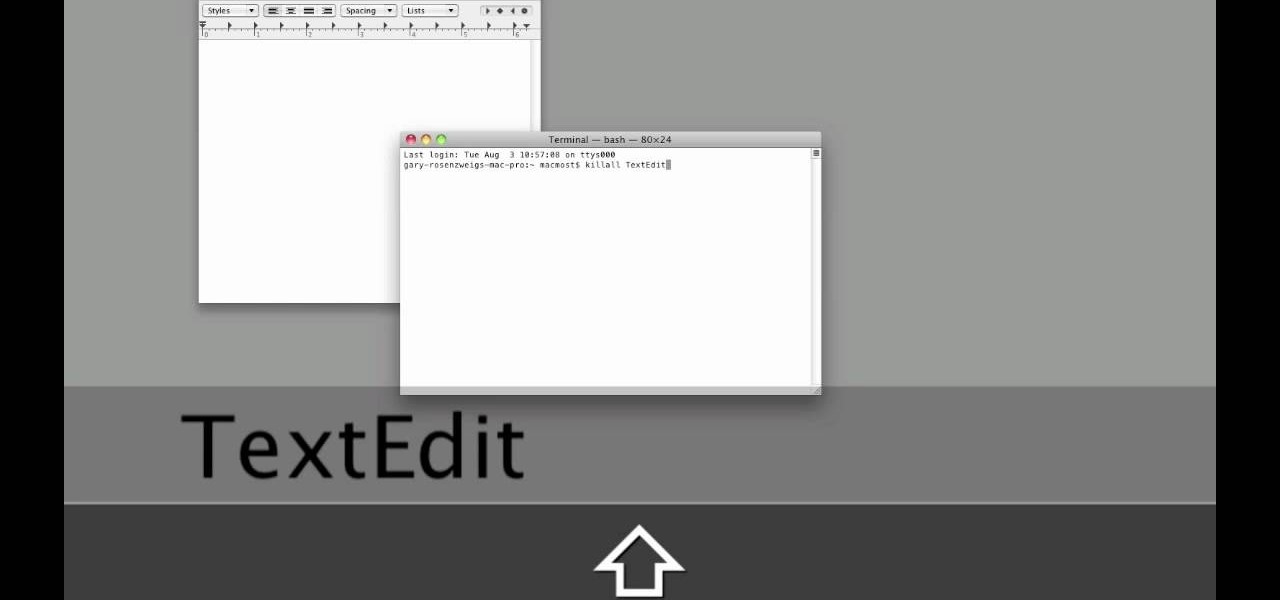
When it comes to closing applications in Mac OS X, there are more options available than just clicking the little red circle in the left-hand corner of an application window. There are, in fact, 10 different ways in which a person can quit an app. And this handy home-computing how-to demonstrates each and every one of them.
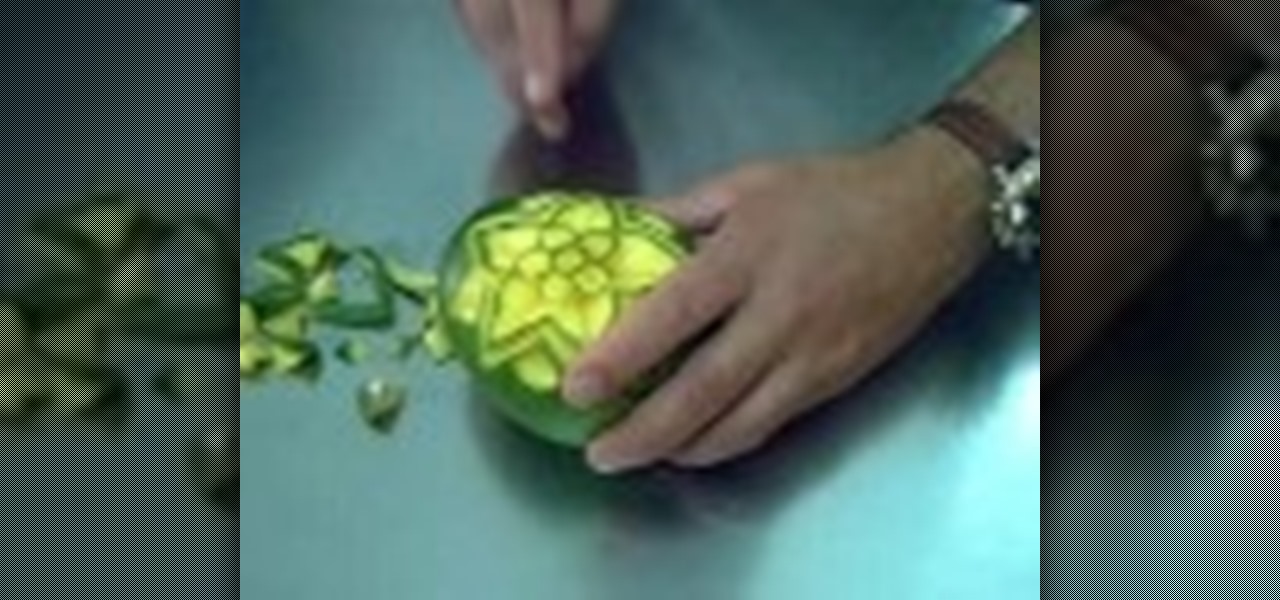
In this video, we learn how to carve a mango creatively. First, cut small circle in the middle of the side on the mango. Next, cut out circles around the middle to make a cute flower shape! Make sure you take the middle peel out so you can see the yellow of the mango show through. Carve in leaves on the side where the petals are. Continue to carve a smaller line to make the image look shadowed. Use your own talents to make this all your own and be as creative as you'd like to be. When finishe...
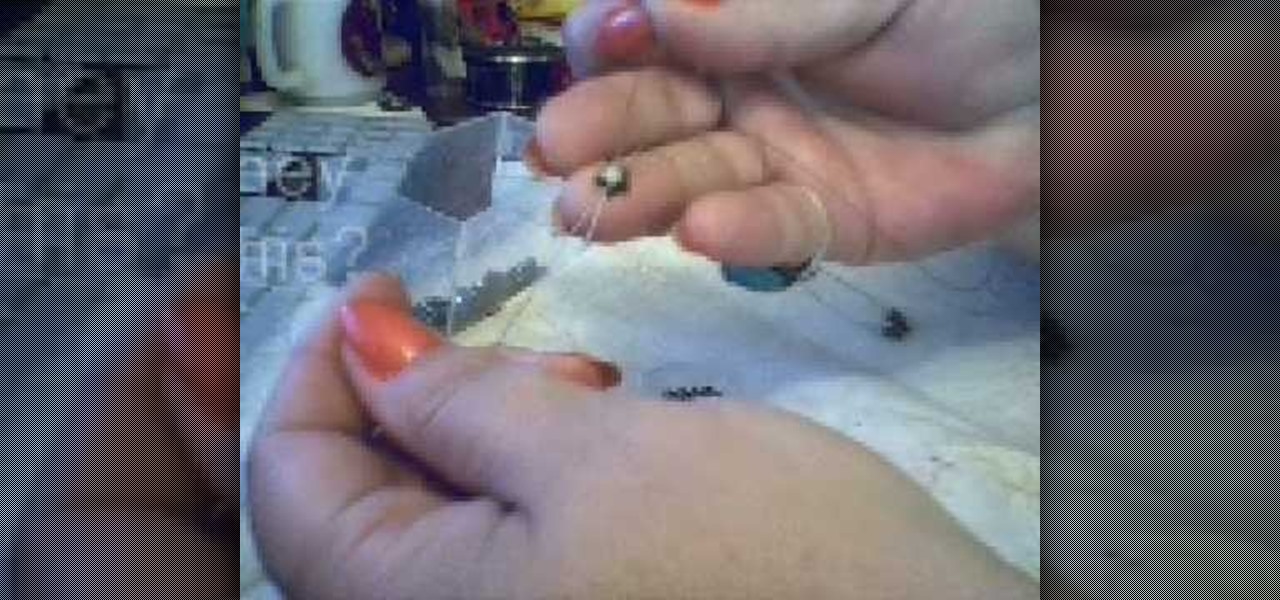
Make a hematite bead ring
Google is the biggest and best search engine on Earth, and if you are a webmaster and want your website to be a big success it would really behoove you to know as much about how it works as possible. The Google Webmasters series of videos and website were created to teach webmasters, SEO professionals, and others how Google works by answering their questions and giving them insights into how they can best integrate and utilize Google's functionality to improve their business. This video will ...
In this video, we learn how to draw a cartoon brontosaurus. First, draw a large hump that is a half circle, then draw a line on the other end of this. After this, draw a tail on the other end of the hump and then go down and draw the feet on the bottom. Continue going and draw up the neck and make a circle for the head. Draw in a large eye on the head and make a smile on it. Next, draw soft spikes on the back of the dinosaur and color it in if you prefer, then enjoy your cute drawing!
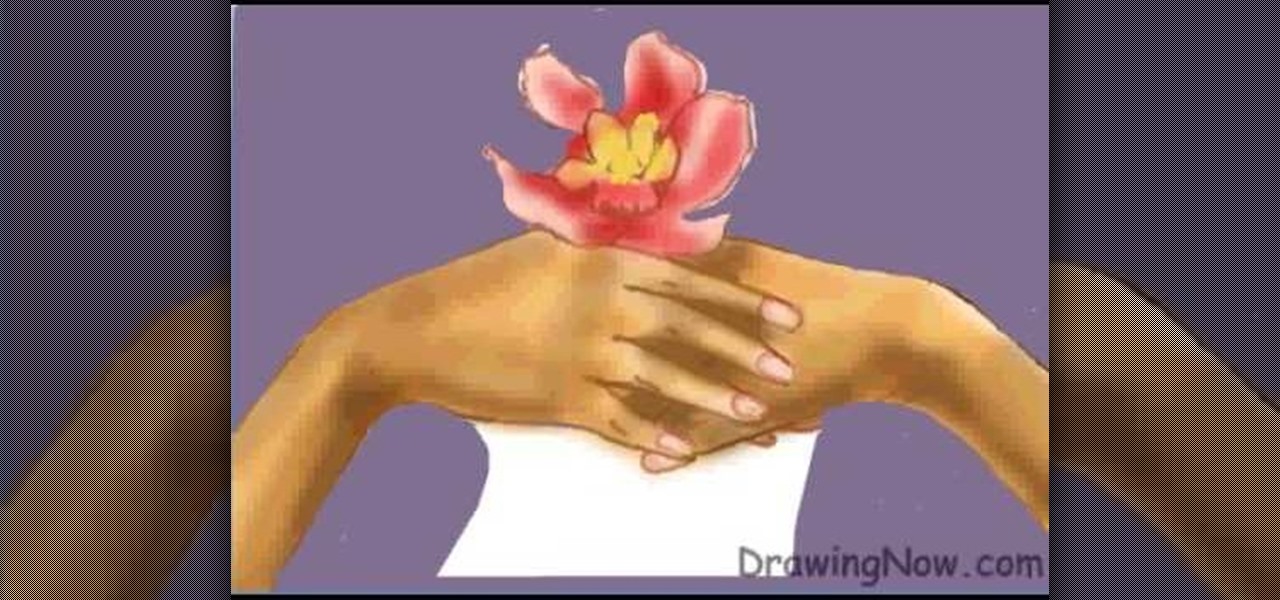
In this video, we learn how to draw two clasping hands. Start off by drawing the two hands holding each others hand. Next, draw a circle above the hands like they are holding something. After this, draw a large flower on the circle and then start to erase the base lines from the drawing. Draw in the fingernails on the picture, then color in the skin color on the nail. Color the flower any color that you would like, then draw in the background to any color you prefer. Shade the wrist of the ar...
In this tutorial, we learn how to draw an eye in GIMP. First, open up the GIMP software and set up a circle, then color it dark blue. Next, add in light to the middle of the eye, so it looks like a light is shining onto it. After this, make a small circle in the middle of the eye, coloring it black. When done with this, create a new layer and then add brightness to the pupil of the eye. Continue to play around with the contrast and colors of the eye, so it looks more realistic and life like. ...
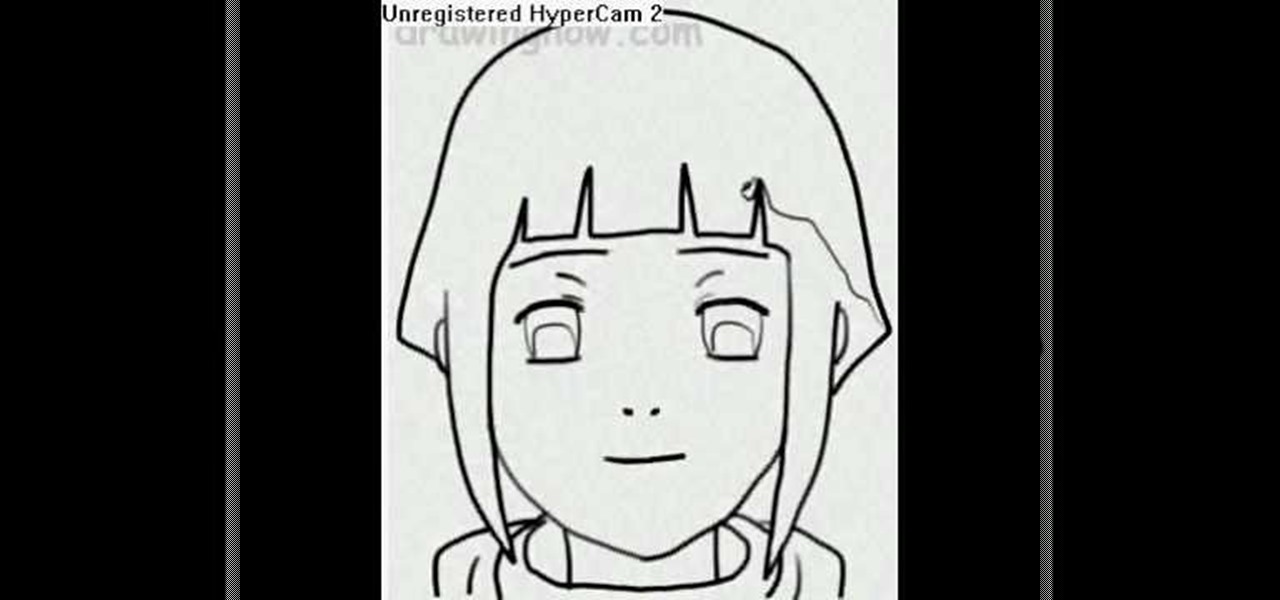
In this video, we learn how to draw Hinata. First draw a circle, then draw crossing lines through the circle. Draw in eyes where the lines intersect, then draw in the nose and mouth. Make the eyebrows after this, then remove the lines inside of the face. Next, draw in the hair and make the bangs lie flat on the face with long bangs on the front of the face. Draw on the top of the shirt and then start adding in further detail. Add lines to the face, then add in color if you prefer. To finish, ...
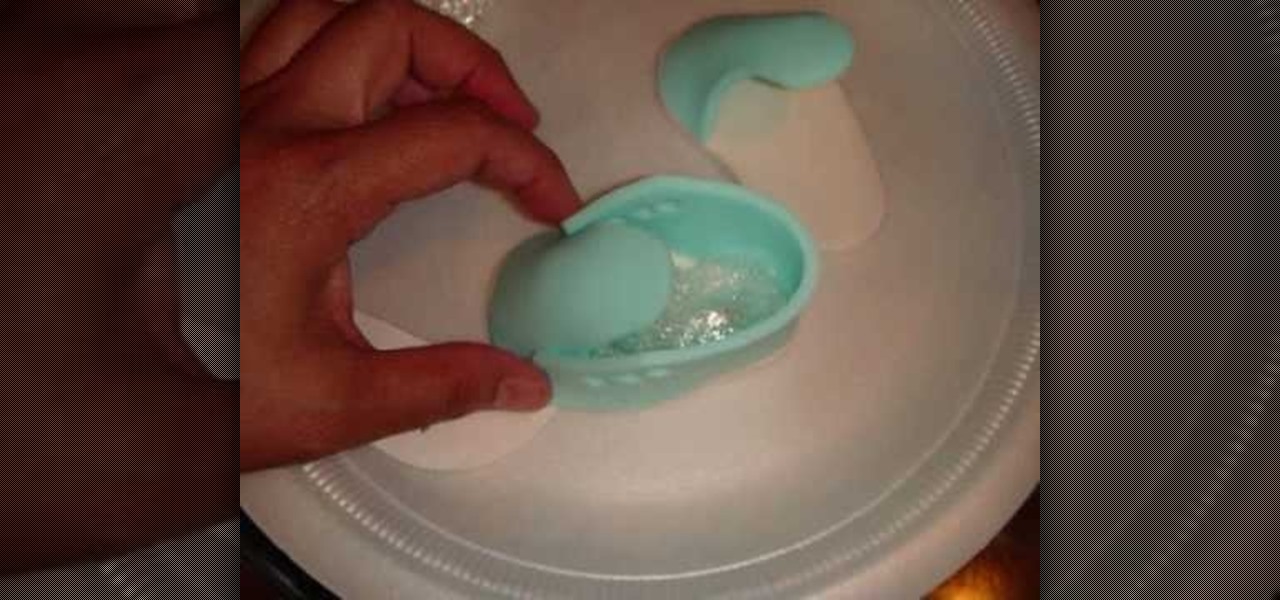
In order to make baby converse sneakers out of gumpaste, you will need the following: fondant cutter or a pizza cutter, a paint brush, an X-acto knife, edible glue, a small circle cutter, and templates.
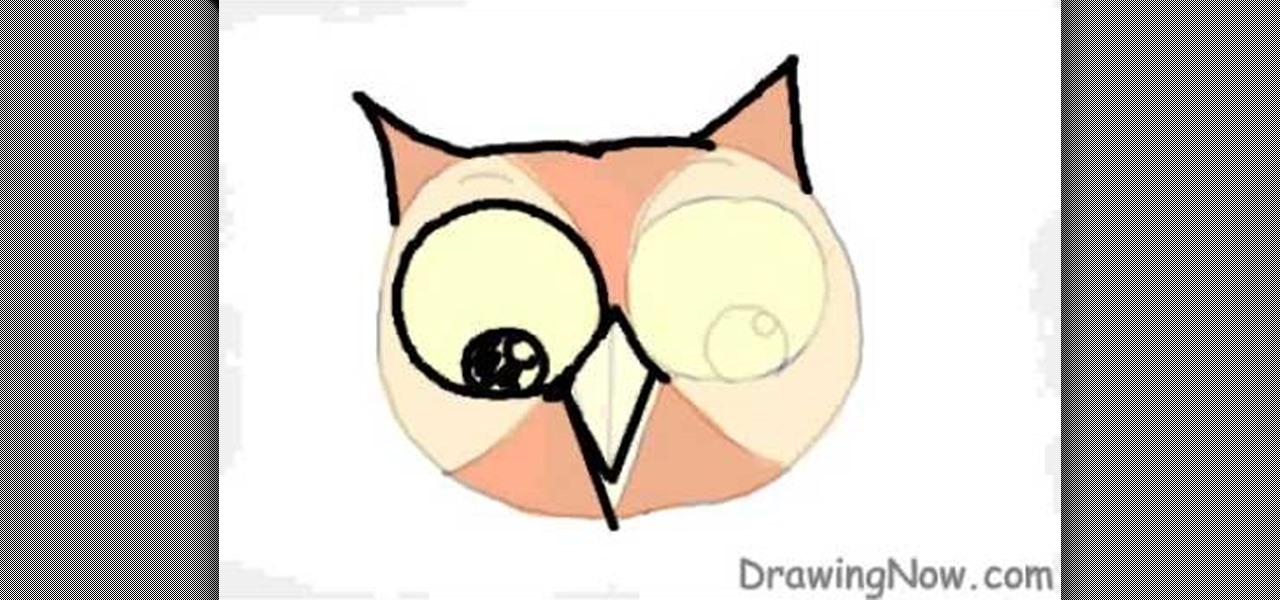
In this video, we learn how to draw an owl on a computer. First, draw a circle, then two small triangles on both sides of the top of the head. Next, draw two very large circles in the middle of the face, separated by an upside down triangle and two large triangles on either side of that. Next, add pupils to the eyes, and add a line in the beak. Outline the eyes, beak, and eyebrows after this. Color in the owl brown and light brown, then add small black lines to the sides to make it appear lik...
In this tutorial, we learn how to make a left-hand crochet Valentine's puffy heart. You will need: a size G crochet hook and yarn. Start by working a chain of three then forming a loop and doing a chain one. After this, work 9 single crochets through the center of the ring. Next, do 18 single crochets making the first stitch on a single crochet. Keep doing 18 single crochets around the circle you have created. After this, make one single crochet for a total of 18. The edges will start to curl...
In this video tutorial, viewers learn how to draw Obi-Wan from Star Wars. Begin by drawing a circle for the head and rectangular shape for the jaw. Then draw a line 1/3 way across the circle. Draw the eyes on the line and the nose just underneath the line. Now draw 2 lines from the ends of the eyes to the rectangular shape. Use those lines as a guide to draw the length of the mouth. Then add the ears, eyebrows and beard. Now lightly draw the hair. Finish by coloring and shading the image. Thi...
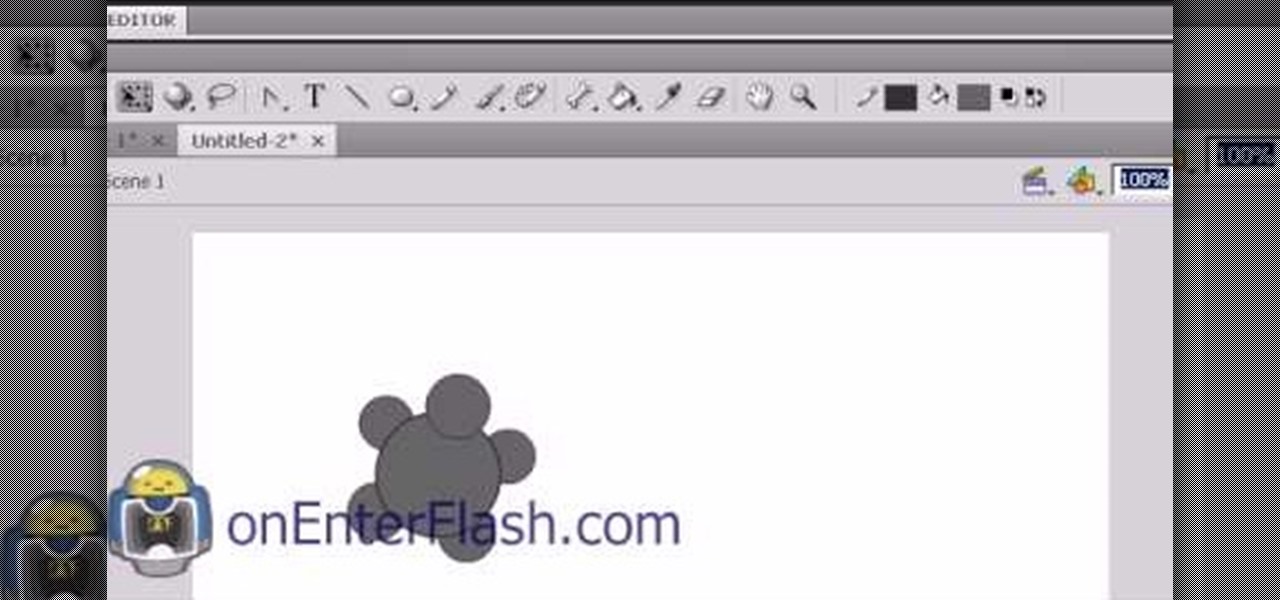
Creating cool animations is the bread and butter of Flash. This video will help you get started making them yourself for your website, video game, or movie. It explains how to animate objects, making them move around however you wish and form the basis of your animation. No source files needed, just make some circles and get started!
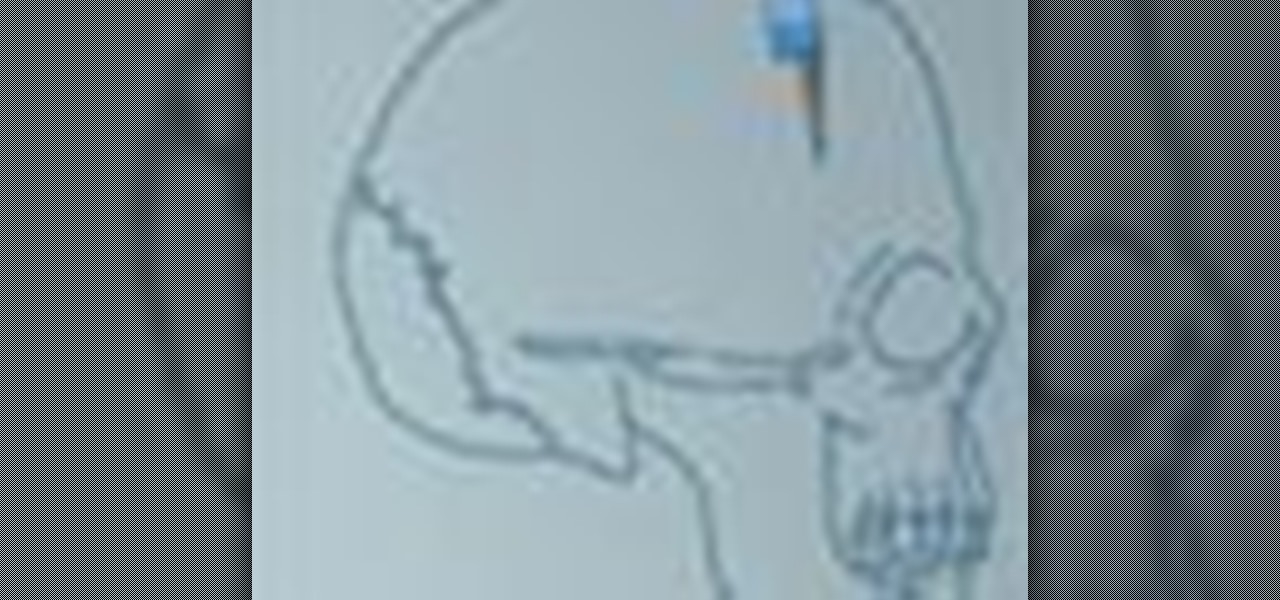
First, make the chin of the skull by drawing out a slight sharp curve facing downwards. Then, make the forehead and the upper part of the skull by drawing huge slight curves. Draw a circle on the spot where the eye socket should be. Draw a curve at the side of the circle to give it an illusion of popping out. Draw the cheekbone lines as well as the jaw lines to give the skull more definition. Draw several rectangles standing vertically to create the skull's teeth. Finish the head with a sligh...
Michael Weisner shows aspiring artists how to draw a snowman's face on a piece of paper using any writing utensil. In order to save time, Michael has drawn a rough outline sketch in pencil to give an idea of what the finished product should look like. However, it is not necessary to do this and by following the directions, one should be able to sufficiently draw a the snowman. First, begin by drawing a circle for the head and then two large circles for the coal eyes, adding detail to show tha...
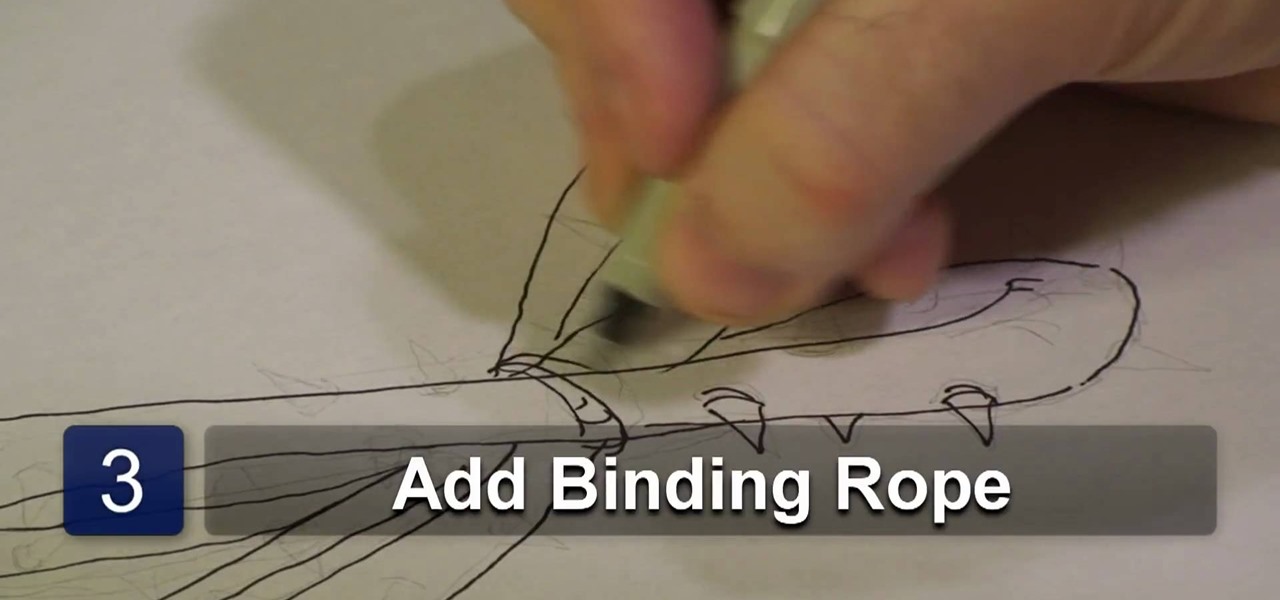
In this video tutorial, viewers learn how to draw a crown of thorns. Users will need a sheet of paper and a drawing utensil. Begin by drawing 4 semi circles. Then link the 4 circles together to form 2 vein-like thorn weeds. Now add detail by adding a rope to bind the thorns together. Then add barbs along the thorns and some more detail to give it realistic look. This video will benefit those viewers who enjoy drawing and art, and would like to learn how to draw a corn of thorns to utilize in ...
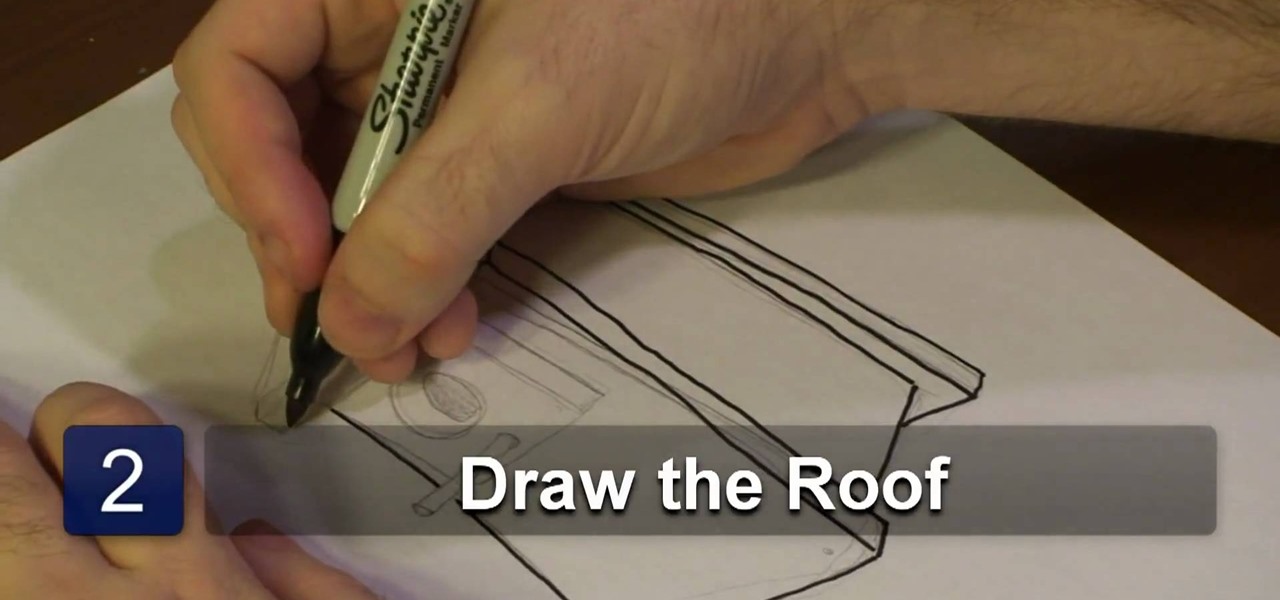
In this video tutorial, viewers learn how to draw an animated birdhouse. The materials required are paper and a drawing utensil. Begin by drawing a rectangular base. A bird house is usually geometric, show the base should only contain rectangle and square shapes. It is recommended to use a ruler, instead of drawing the lines free handed. Add a rectangular roof on top and an entrance in the front. Draw a circle to represent the entry way and add a post. Draw another circle inside the entry hol...
A sweet yet tart accompaniment for early morning tea, blueberry pancakes are a lovely alternative to your standard dough and maple syrup pancakes. Served up with your favorite syrup, a fresh bowl of strawberries, and some Earl Grey, these pancakes will pique your appetite and set a wonderful tone for the rest of the day.
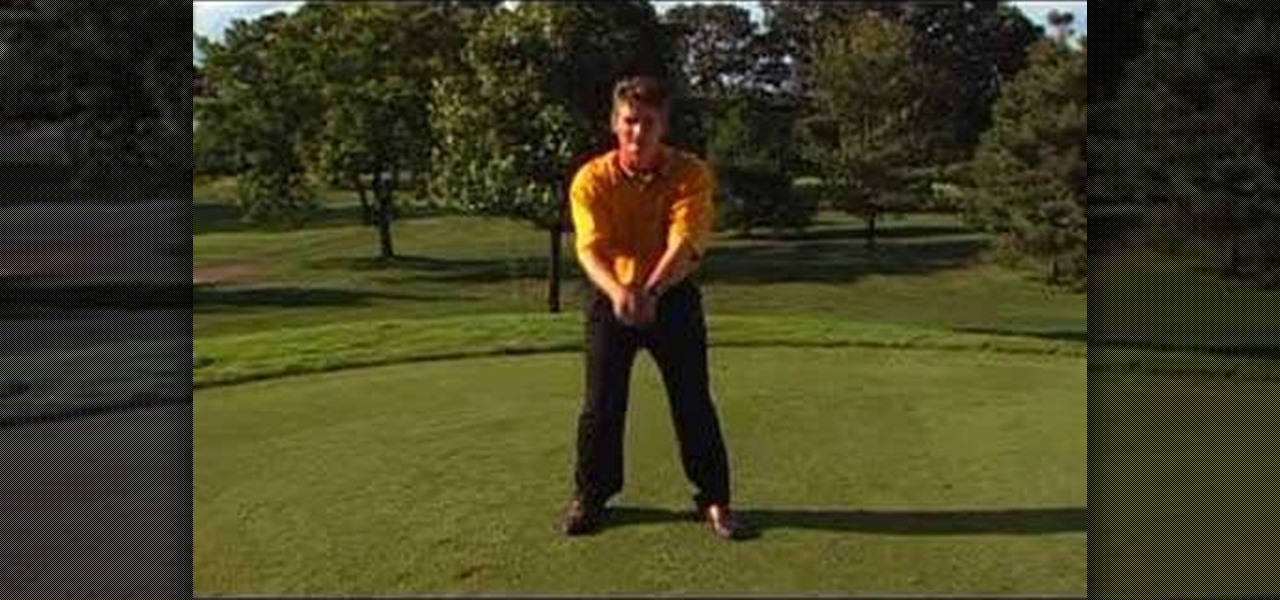
You ready to give your backswing some practice? Thanks to this video by expert golf site Golf Link, learn how to improve that backswing on the green! When doing the backswing, the arms do not move back but rather hinge upwards according to golf expert, Steven Bann.
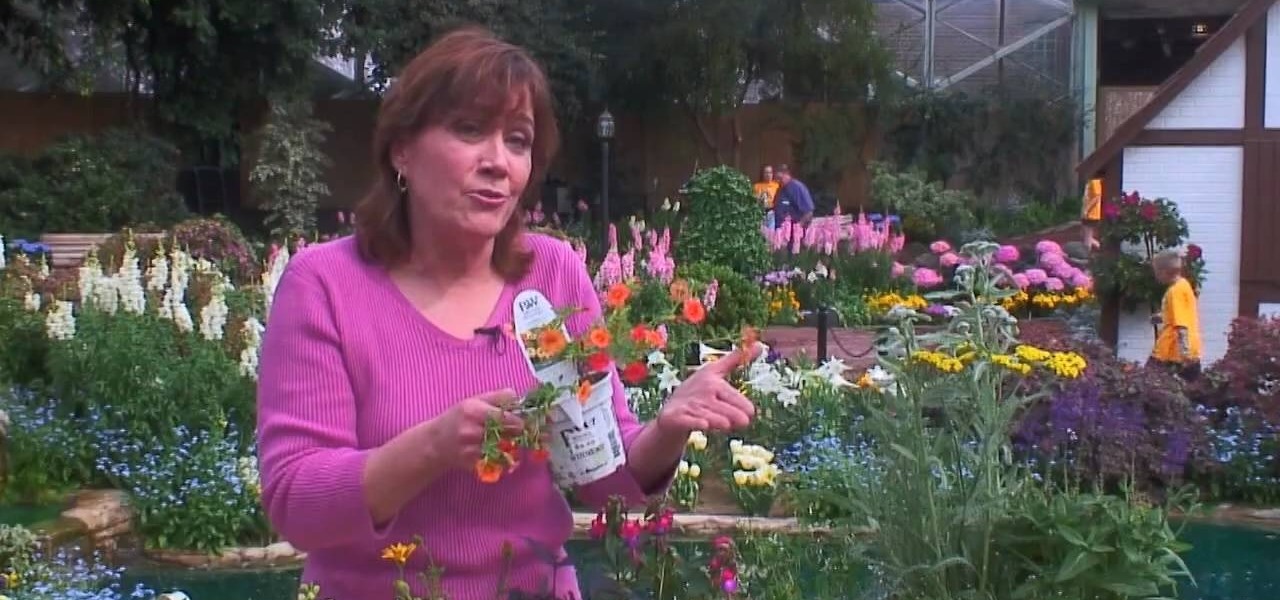
Get your garden started by brainstorming and plannng out the lay-out. The trick to designing a great flower garden that will bloom all season is matching the plant to its preferred growing condition. Learn how to do this with help from expert, Melinda Myers, a world-renowned expert gardener with a critically acclaimed TV show, Melinda's Garden Moment, and a popular radio program, "The Plant Doctor".
This video illustrates how to draw the cartoon character,Betty Boop. Here are the following steps: Step 1: Take a sheet of paper and pencil and start drawing a circle and below it draw a outline of human body.