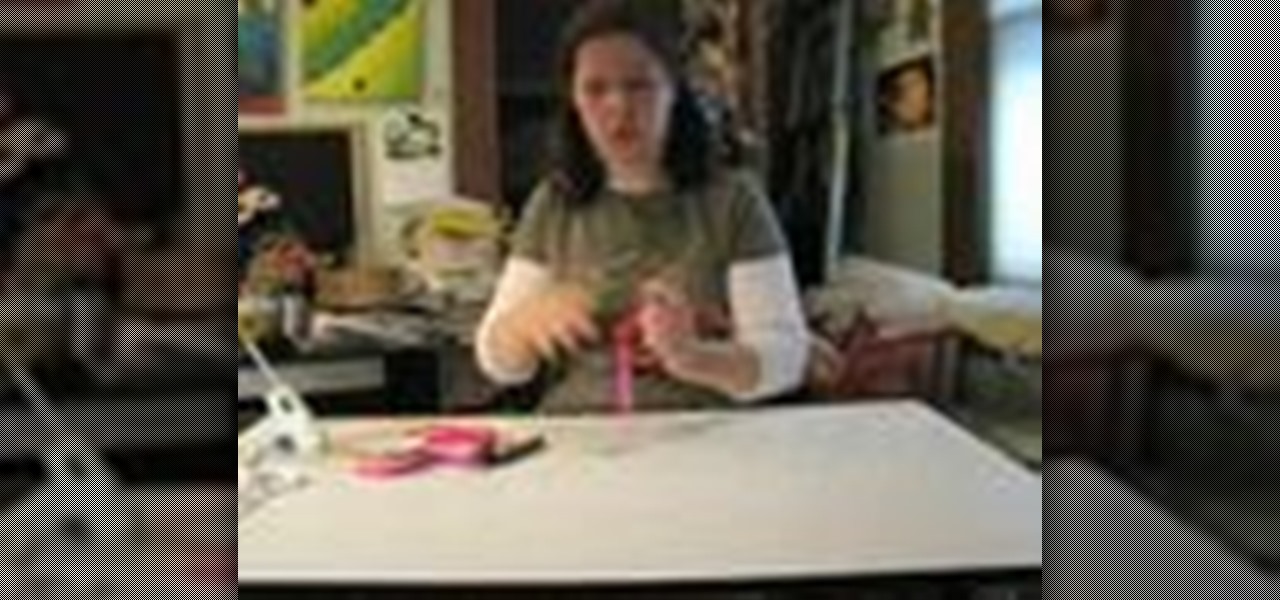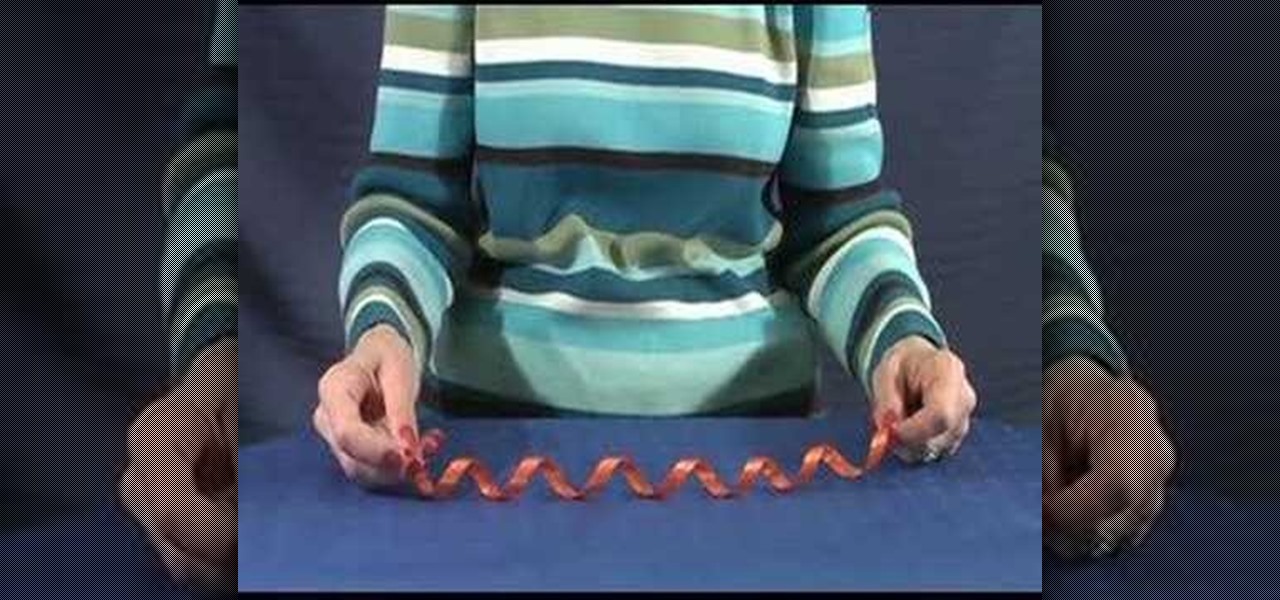
Judy of A-BnC Parties and More, Inc. demonstrates two methods to show you how to curl ribbons. For the first she uses a pair of scissors, on the second, her fingernails. This is helpful in making decorations, finishing off balloons tails, putting final touches on wrapped presents, etc.

Okay, want to know all of the tips out there for the Rubik's Cube. Well, let me tell you, you'll learn great tips here, like never putting your Cube in your pocket, and always keep your fingernails clipped.
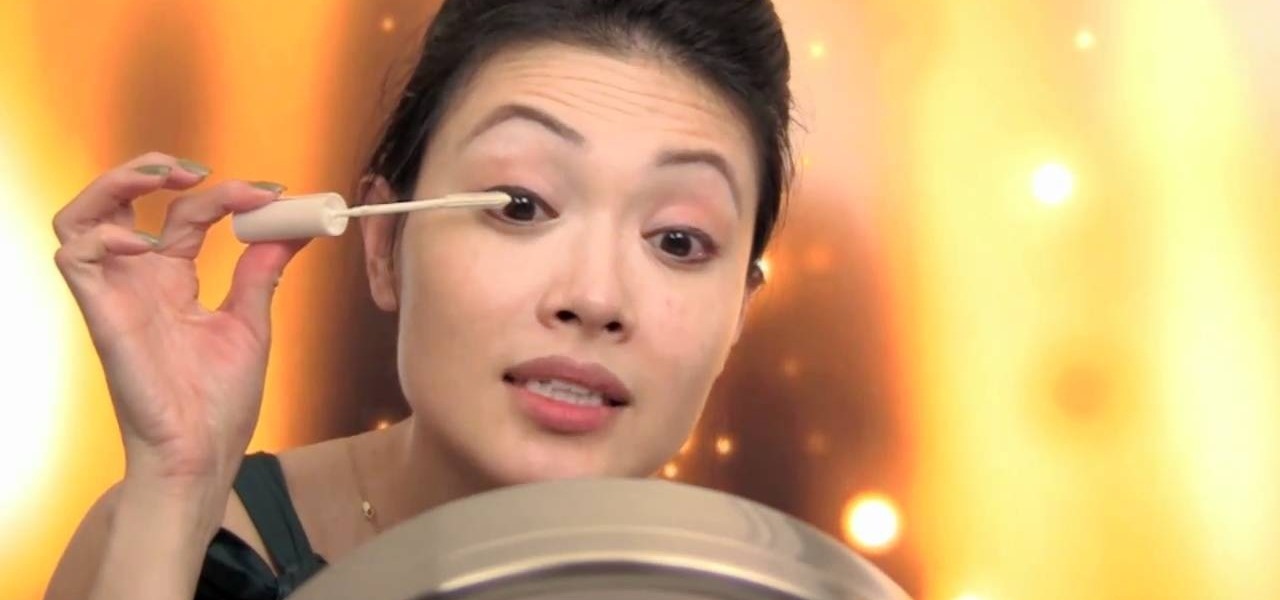
Mila Kunis rocked a makeup look that was equal parts elegant modern and Audrey Hepburn at the recent 2011 Golden Globes. The "Black Swan" stunner opted for simple yet oh-so-flattering neutral eyes, blushing rosy cheeks, and warm pink lips.
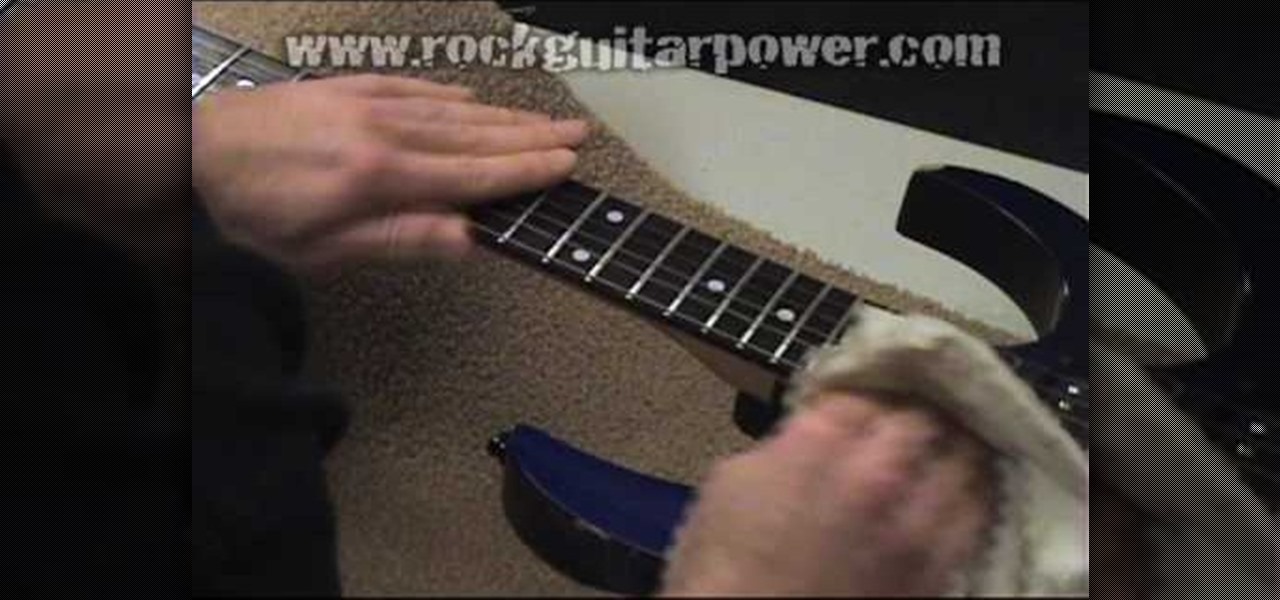
In this four part video tutorial, instructions on how to change the strings on a guitar with a Floyd Rose bridge are given. You will need the replacement strings, tuner, clippers, an allen wrench, string cleaner, guitar honey, & guitar polish.

Learn how to repair broken fingernails! You will need to purchase an instant nail repair kit. It should come with polish remover, nail tape, nail glue, and clear polish. First place a little bit of glue right where the slit is. Press the nail together so that it seals. Once it has dried a little, place the clear tape over the break. Next you will place a clear polish on top of the nail tape. Clean up the polish around the sides. Now your nails are ready to be polished in any color that you like.
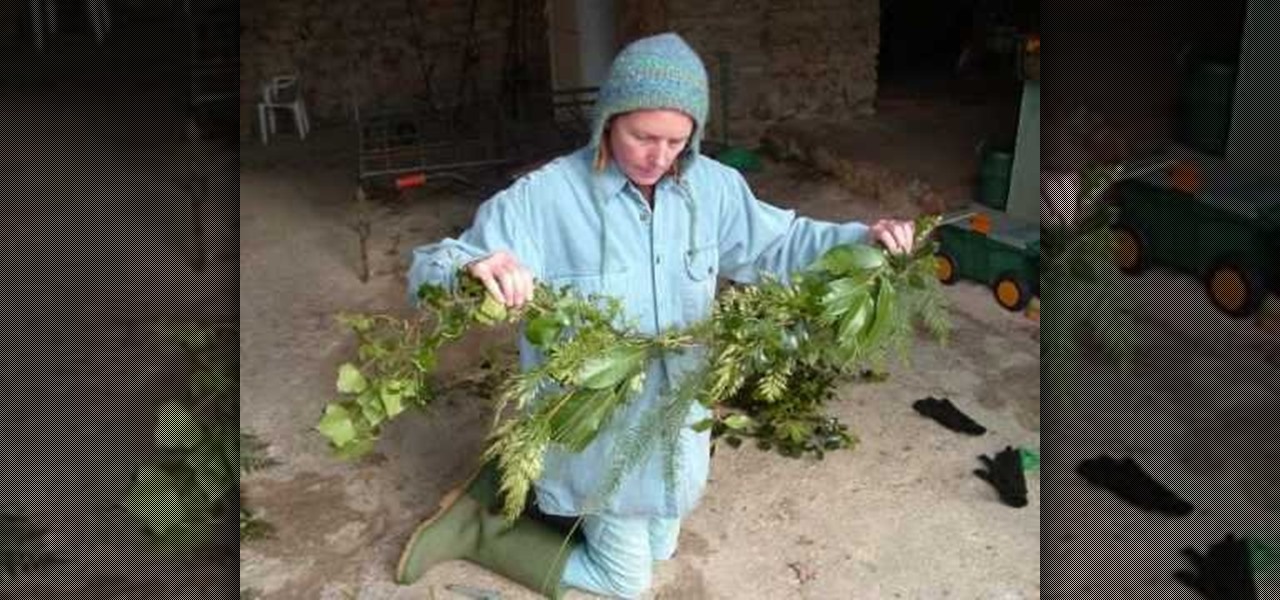
In this tutorial, we learn how to make a festive Christmas garland from fresh greenery. You will need: fresh greenery, wire cutters, floral wire, pruning clippers, and gloves to do this. The base should be made of holly, and then you can use different firs that you can find. You can arrange this garland however you wish, placing them onto the wire and then cutting the wire when everything is hooked together. The great thing about this is that you can be creative and use whatever kind of green...

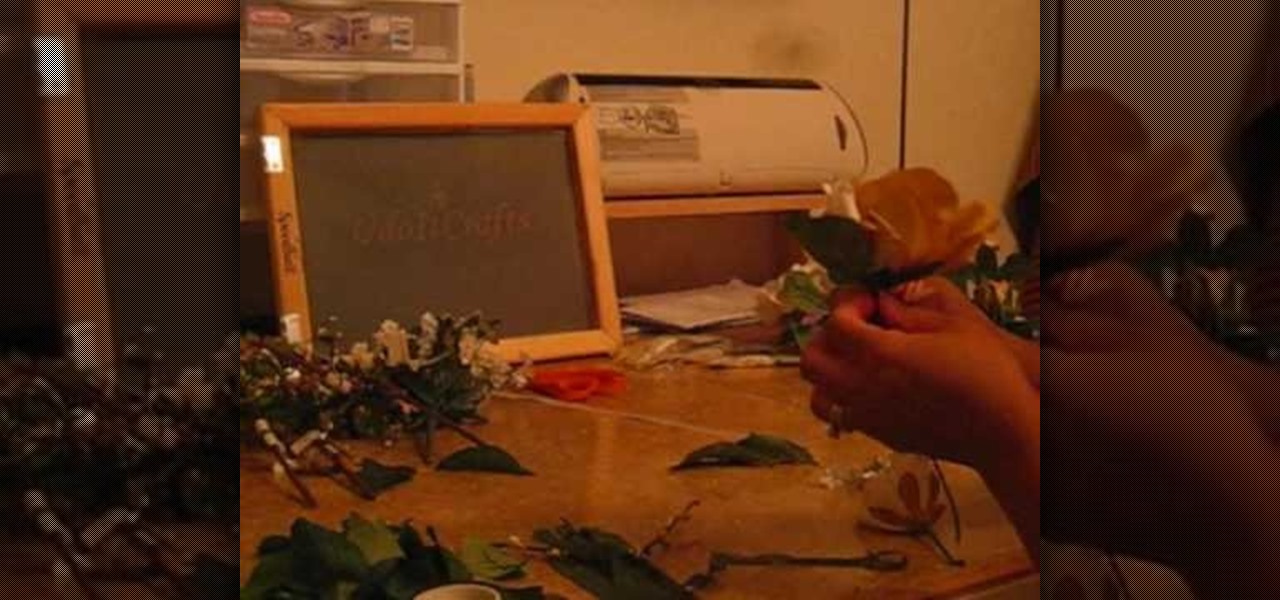
In order to make a floral ribbon corsage, you will need the following: floral tape, leaves, springs, flowers, wristband, and clippers
In this video tutorial, viewers learn how to do a hair transplant them self. Users will first need to let their beard grow 2 months or more, depending how fast their facial hair grows. The beard should be long and thick. The materials needed for this are glue and hair clippers. Begin by shaving off all the facial hair. Now evenly apply some glue on the bald spots and place on the pieces of facial hair. This video will benefit those viewers who are balding and would like to learn how to do a h...
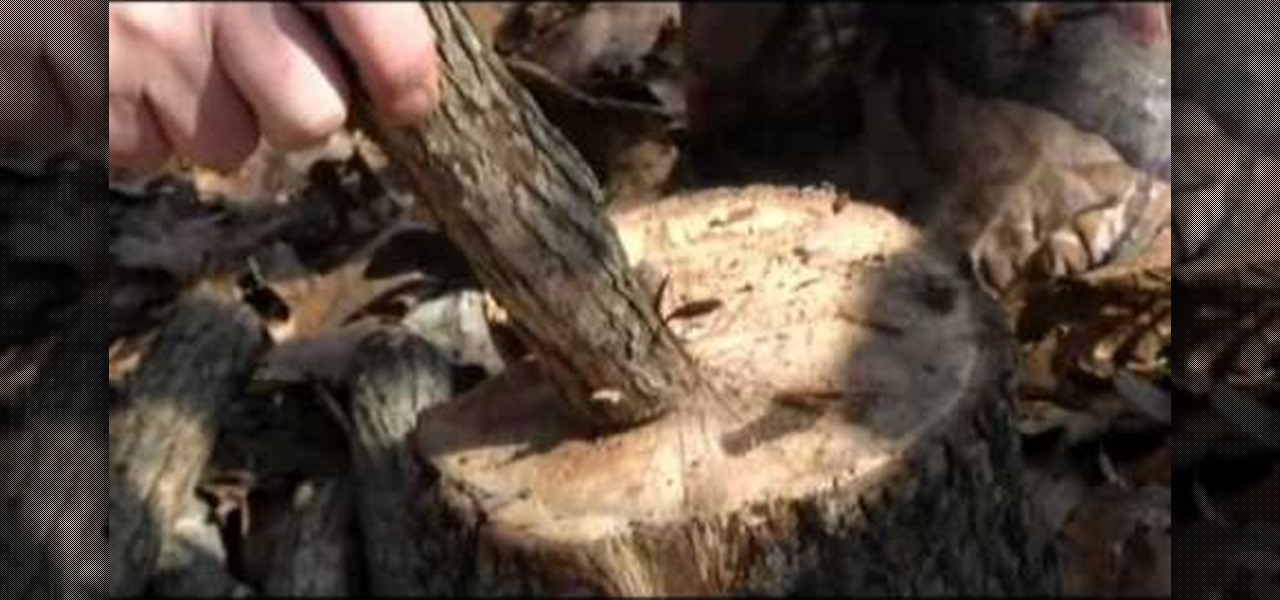
There's nothing greater than being in the outdoors and away from all the hustle and bustle of the city. Of course that doesn't mean you should be without basic necesseities. In this two part tutorial find out how to make a sitting stool used for camping. Enjoy!
Harvesting garlic scapes is a simple and very easy task. Grab some small clippers and then head out into the garden. Make sure you have harvested it before it has sprung its flower. Also make sure you cut it before the scape has curled around (at the top of the scape and where the flower will form), it tastes better and is nice and tender. Locate the scape and make a small mental note on where your going to cut it. The best location to do that is, as far down as the last set of leaves (near t...
Catherine demonstrates how to create an eclectic, sunset-inspired necklace in this video. To create the necklace you must gather 40 yellow bugle beads, 18 orange chip beads, 3 mm red round beads, a barrel clasp, 2 crimp beads, 2 bead covers, about 20 inches of beading wire, clippers and pliers. The design is to start by threading a clap and a crimp bead onto the wire, leaving a 2 inch tail. Then thread on 15 yellow beads, remembering to cover the tail you left with the beads, 3 orange beads, ...
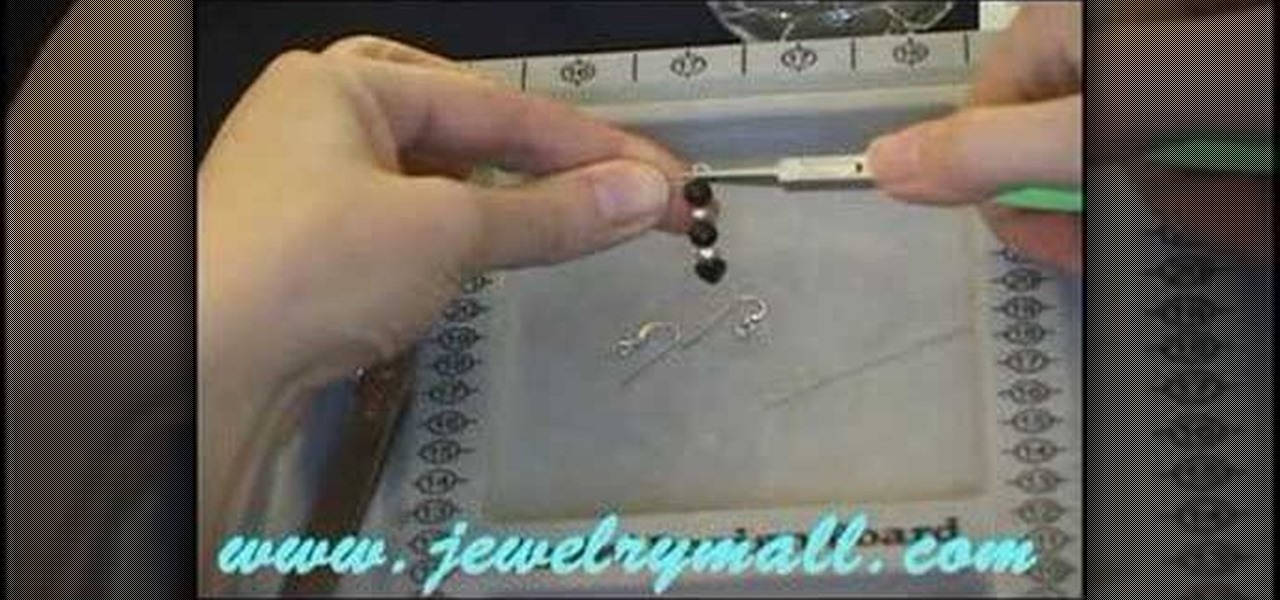
Learn how to make beautiful beaded earrings with this instructional video! The tools you will need are two head pins, ear wires, a pair of pliers, tweezers, and a nail clipper. First start off by choosing your favorite combinations of beads. Begin by stringing the beads in any order on the head pins. Next you will need to close the head pin off. The easiest way to do this is wrap it around with the pliers. You do this by easy twisting around the earring. You make sure to make a round loop whe...
First, prep the nails. Apply the white tips to the end of your nail. Use a nail clipper to clip the edges and a nail file to round the edges so they are not pointy. Next, apply primer to the bed of the nail. Then apply white acrylic with a brush to the tips that you put on earlier. Use the brush to make sure it fits the shape you want. Next, apply nail polish on the nail bed until it is the same height as the acrylic. File the edges down again if needed. Coat with transparent pink mix (a mixt...
This video demonstrates the proper technique to shave your head without getting cuts. First the presenter starts by shaving his head a pair of clippers. After the hair is trimmed he fills the sink with water to clean the razor off. The presenter suggests you take a shower before shaving your head to open the pores and loosen the hair. Then you apply the shaving cream to your head and massage it into the scalp. The presenter begins shaving the sides of his head, washing the razor after ever on...
This video shows how to clip your Chihuahua’s nails. Since the dog doesn’t weigh that much you may need to clip the nails more often then a heavier dog. If you can hear the dog’s nails clicking on the floor, then it is time for a clipping. Use cat nail clippers because they are smaller. If your dog has white nails, then just clip of the edge that is clear. If you look farther into the nail you will see there is a pink part. The pink part is a nerve. If the dog has black nails then just be car...
The beauty of home crafting projects is in transforming old junk into something you can use. Host Heather's how-to video shows how to make quick and easy napkin rings to add a little bit of flair to the table. You will need plastic shower curtain rings, clippers, ribbon, rhinestones or any other embellishments, and a hot glue gun. Find out how to make quick and easy napkin rings from old plastic shower curtain rings by watching this video tutorial.
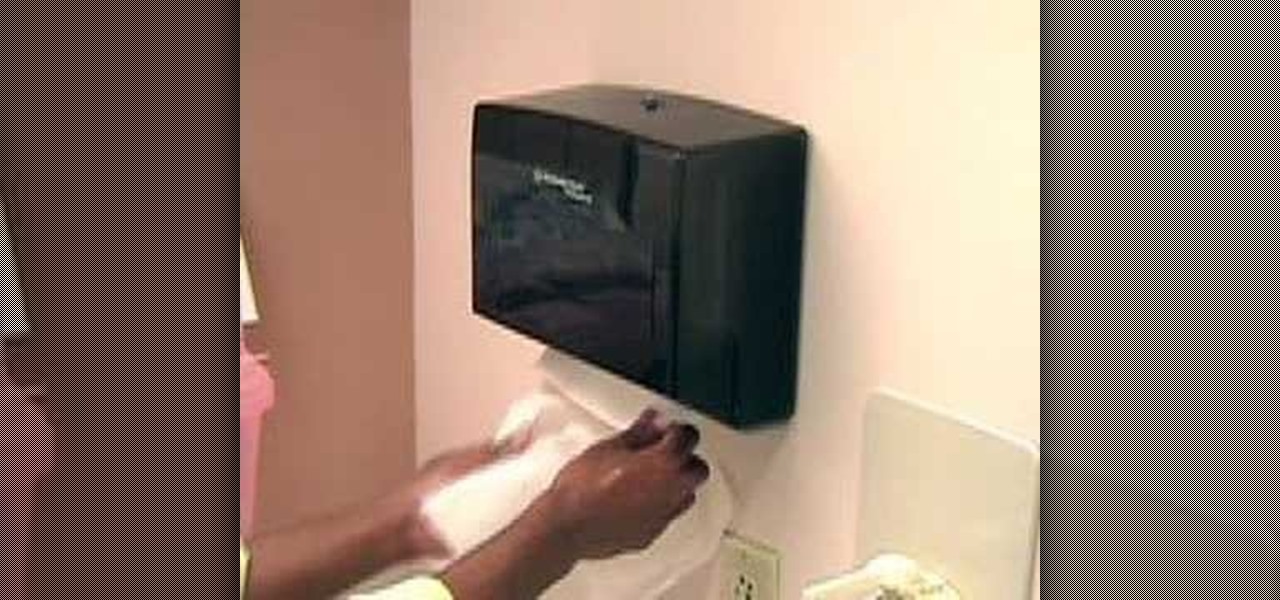
In this tutorial, we learn how to wash your hands the correct way. First, let the water run for a few seconds until it gets hot or warm. After it's done warming up, run your hands through the water, make sure to get your wrists wet as well. Next, apply a quarter sized amount to your hands and scrub through your fingers as well as underneath your fingernails and around your wrists. When you are finished scrubbing, rinse your hands with the warm water and then pat dry with a towel. If you are i...
Saturated blues plucked from the sultry night sky, warm jewel-toned aureolins that pick up the hues of the desert, and sparkling fuchsias like the colorful wraps and semiprecious jewelry worn by the exotic women of Morocco.
The odds are that you'll never find yourself being held prisoner with your hands bound together with zip ties. But if you ever are, you'll be very grateful for the info you learned from this video. In this tutorial from the folks at ITS Tactical, you'll learn how to escape from zip ties using shims. You can use all sorts of things for shimming, from professional equipment to your own fingernails.
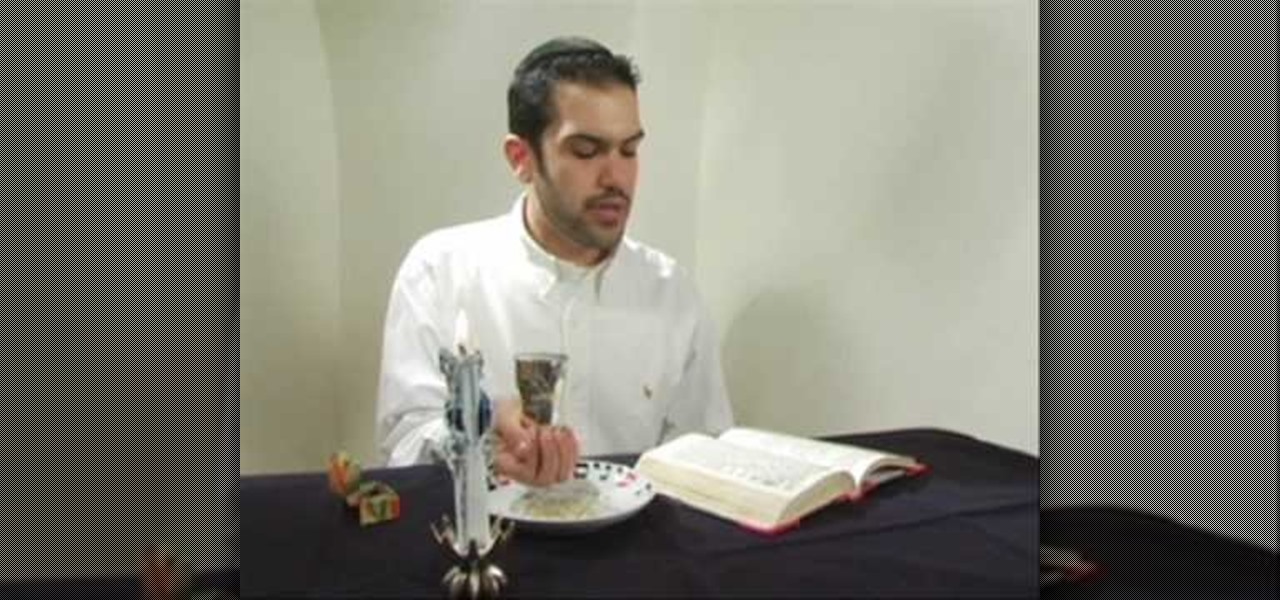
This instructional video, produced by Jewish Pathways, demonstrates how to perform Havdallah after Shabbat ends. Hadvallah is a Jewish religious ceremony that marks the symbolic end of Shabbat and holidays, ushering in the new week.
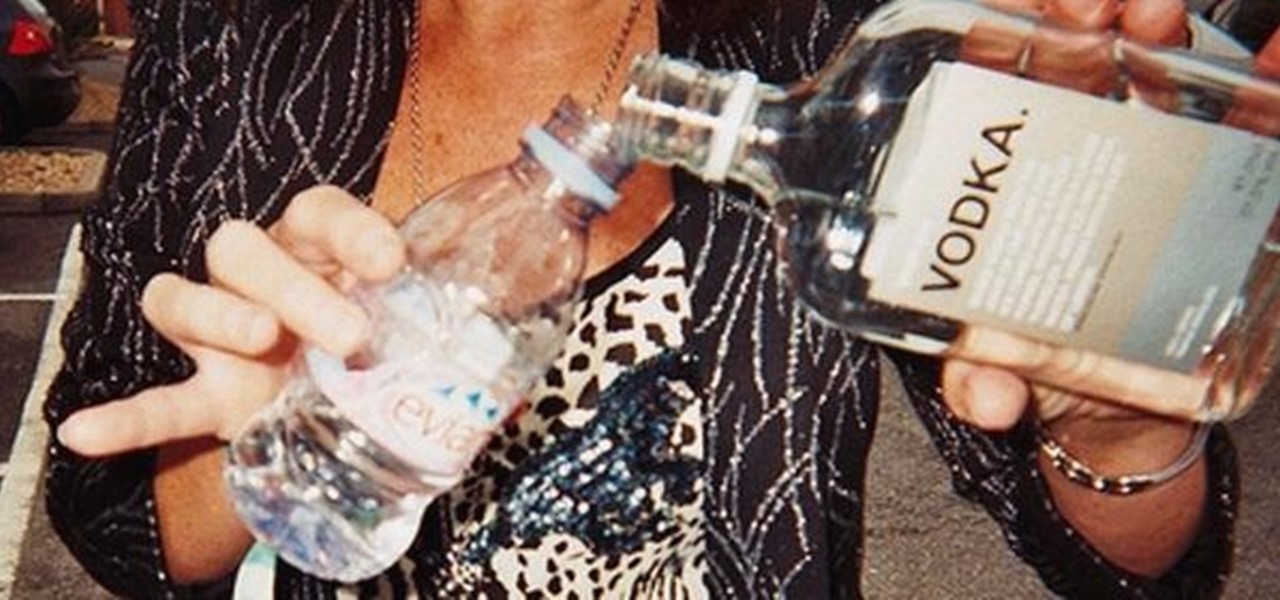
If you go to a lot of concerts and shows, you know that it can be easy to spend more on drinks than you spent on the ticket for the event itself. With this "vodka stash water bottle" you'll never have to pay for alcohol at a show again—assuming you like clear liquor, that is.
Simon Leach teaches us how to put handles on your ceramics in this tutorial. The key thing is to never let the handle fall as you are adding it to a cup, always keep it supported. Look at the handle as you are placing it on and think about proportion and size. If it's sticking out too far it's going to get knocked off. You need to have an elliptical shaped handle when you are shaping them so they can be gripped properly. Don't score the bottom part when you are joining the handle to the botto...
This video shows a demonstration of how to machine sew the binding of the quilt, especially the tricky corners. She starts with the binding already sewn onto the front of the quilt and points out how she made the corner like a little pocket. As she sews along the side and approaches the corner, she folds up the binding on the edge that's past the corner and pins it, so it keeps the corner in shape. Then she folds that entire edge up all the way to the corner, holds the corner down tightly wit...
In this video, we learn how to paint your American Girl dolls' nails. First, stand your doll up and then dip a tiny paintbrush into nail polish remover. After this, put some nail polish onto another tiny brush. Then start to paint the toes using the tiny paintbrush. If you make a mistake, just use the other brush to remove the nail polish. Don't put too much polish on the brush, or it will get messy and turn out badly. Repeat this process on the fingernails when you are done with the toes. Fr...
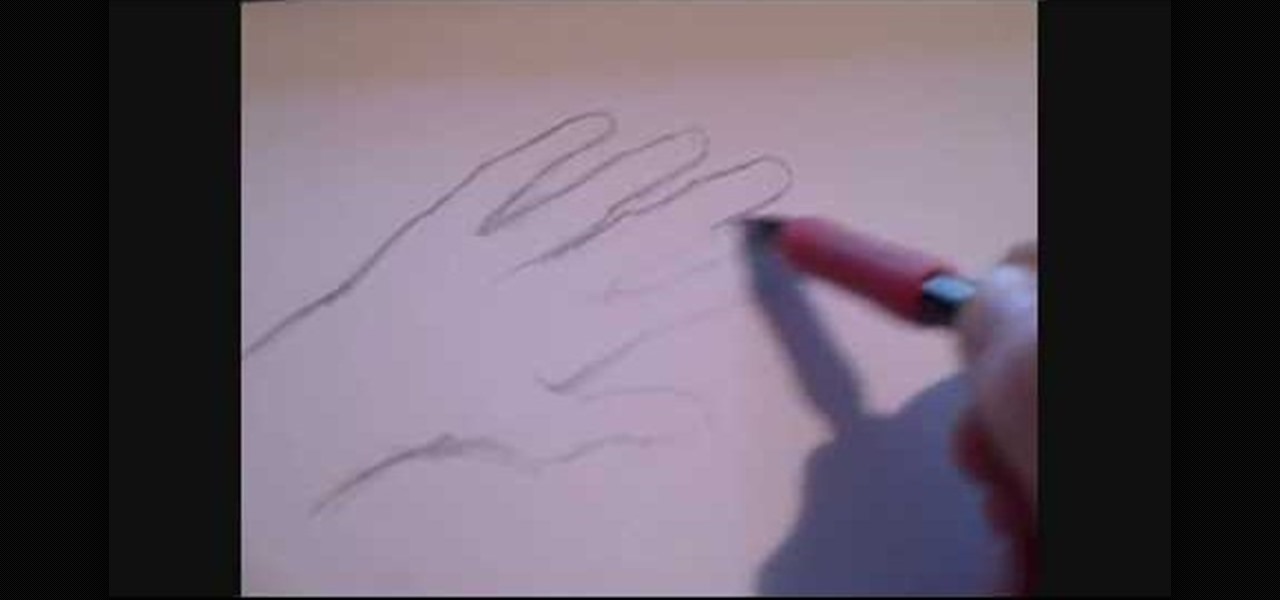
In this video we learn how to draw hands without references. First, draw the basic structure of the hand using a photo to make sure it's true to size. After this, draw on boxes and circles to create the wrist, hand, and the knuckles. Then, you will draw on straight lines for the bones in the thumb. After this, start to add details of the fingers and make out their basic shape. As you continue with details, erase any background lines and start to add lines in for wrinkles on the skin. Finish t...
In this video, we learn how to practice fingerpicking with basic fingerstyle exercises. First, position your fingers so the third is picking the thinnest, the second is picking the second, and the third is picking the third. The thumb should be picking the thickest string on the guitar. Now, start to pick going from your thumb down to the bottom finger. You may have to look at your fingers as you go down, but once you have practiced this, you will get a feel of how to play. When you fingerpic...
In this next video tutorial, you'll find out how to remove the rotors on a motorcycle. If you need to find out whether or not it's bad using your fingernail is a good way to test it. Switching the rotor is important for ensuring that your bike will last for a long time and that you'll be safe of any kind of injury. It's easy to follow and doesn't require a ton of work. So check out the video, pay attention, and enjoy!
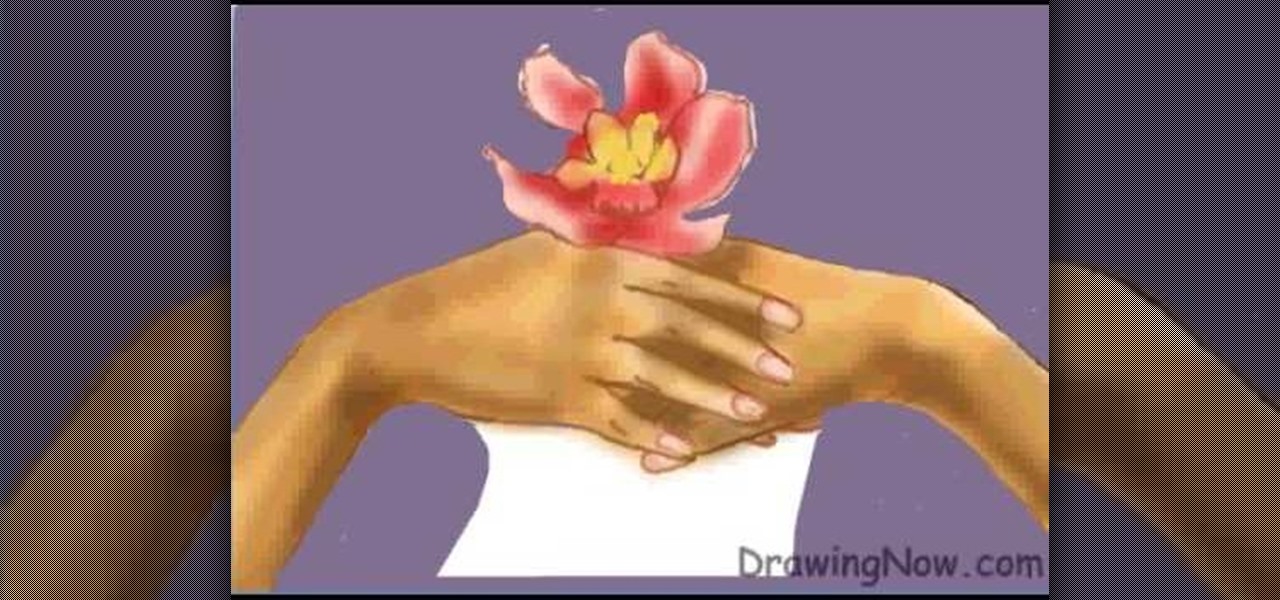
In this video, we learn how to draw two clasping hands. Start off by drawing the two hands holding each others hand. Next, draw a circle above the hands like they are holding something. After this, draw a large flower on the circle and then start to erase the base lines from the drawing. Draw in the fingernails on the picture, then color in the skin color on the nail. Color the flower any color that you would like, then draw in the background to any color you prefer. Shade the wrist of the ar...
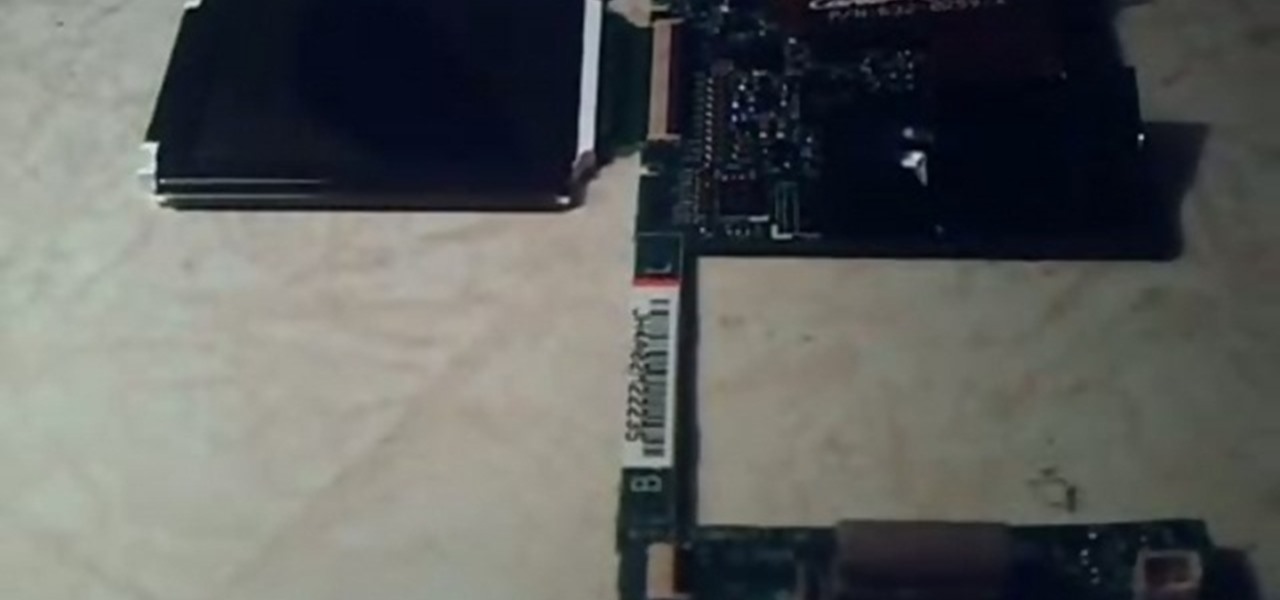
This video will help you repair your iPod classic first to fourth or fifth generation that has been damaged. Overall goal is to remove the broken, smashed, destroyed screen by removing the broken screen from the main board and replacing it with another screen. You start first by removing the screen which is connected by a short ribbon cable. To detach the ribbon cable from the main board, you have to lift up the clip away by pushing your fingernail into the pin hole. This will push the black ...
WayneTully1 teaches you how to draw a severed hand. Use a white piece of A4 paper and a mechanical pencil. Start with the wrist and work your way up to the index finger. Go down and draw the other fingers, paying more attention to the thumb. It needs to be in a right position to look realistic. When you're happy with your sketch you can use the pencil again, applying more pressure this time. Once you're done, you need to add details like curves, hair and fingernails. Also, because this is a s...
Garden of Imagination presents a video that teaches how to create a miniature pretzel for a dollhouse. First, she rolls polymer clay into a tiny snake-like roll. Then, she wraps the clay to form a pretzel shape. After she gets the shape she wants, she cuts the clay to make it even. Next, she retrieves chalk. She breaks up a little to dust the pretzel. She uses a dark yellow and brown to achieve a baked look. Then, she adds sea salt from her kitchen. Last, she instructs to bake the pretzel in ...
Disconnect all wires from XBox. Hold power button for 2 minutes to clear electric charges from XBox. Remove hard drives by pulling hard drive button and just straight up. Remove faceplate in XBox by gripping on the sides. Remove the bottom and top panels. Separate them. You'll hear a pop when they release. Complete separation by unhooking the tabs with your fingernail. Use a Tore T10 star screwdriver to remove the 6 screws in the video. You don't need to remove any other screws. Set them asid...
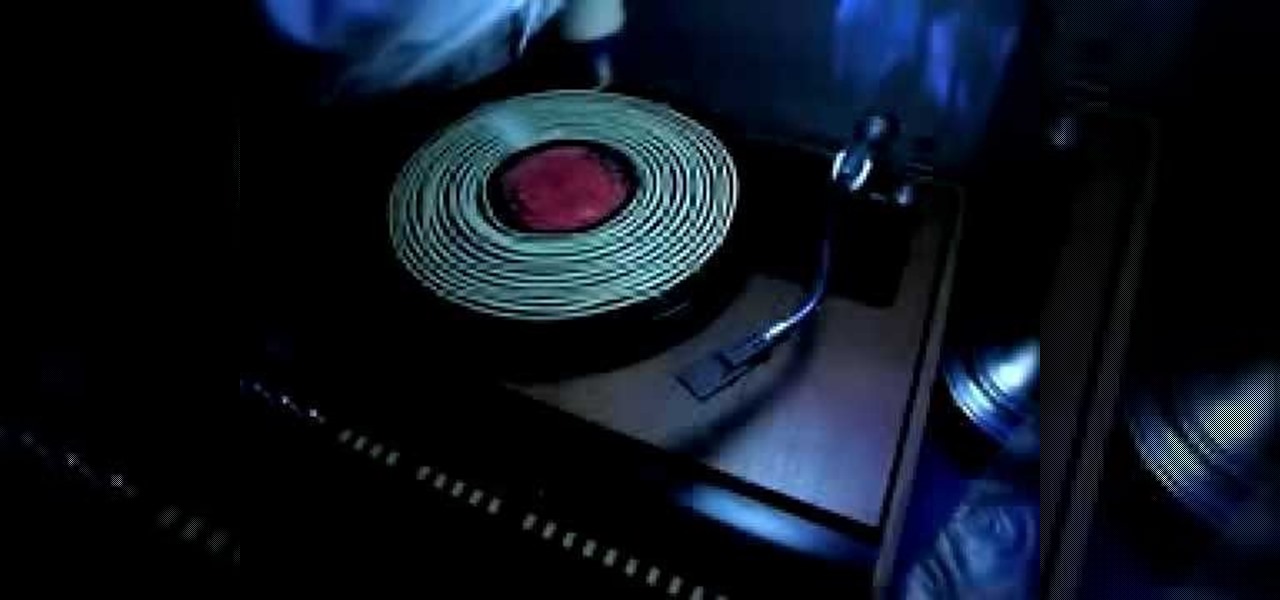
This video shows how to clean old records using Titebond II wood glue. He has the record turning slowly on the turntable, and while it's turning, slowly squeezes a line of glue around and around onto the surface of the record, starting from the middle. He explains that it takes between four and twelve hours for the glue to dry completely. After the glue is applied to the entire record, he takes an old credit card and spreads the glue evenly onto the record, all the way out to the edge. When t...
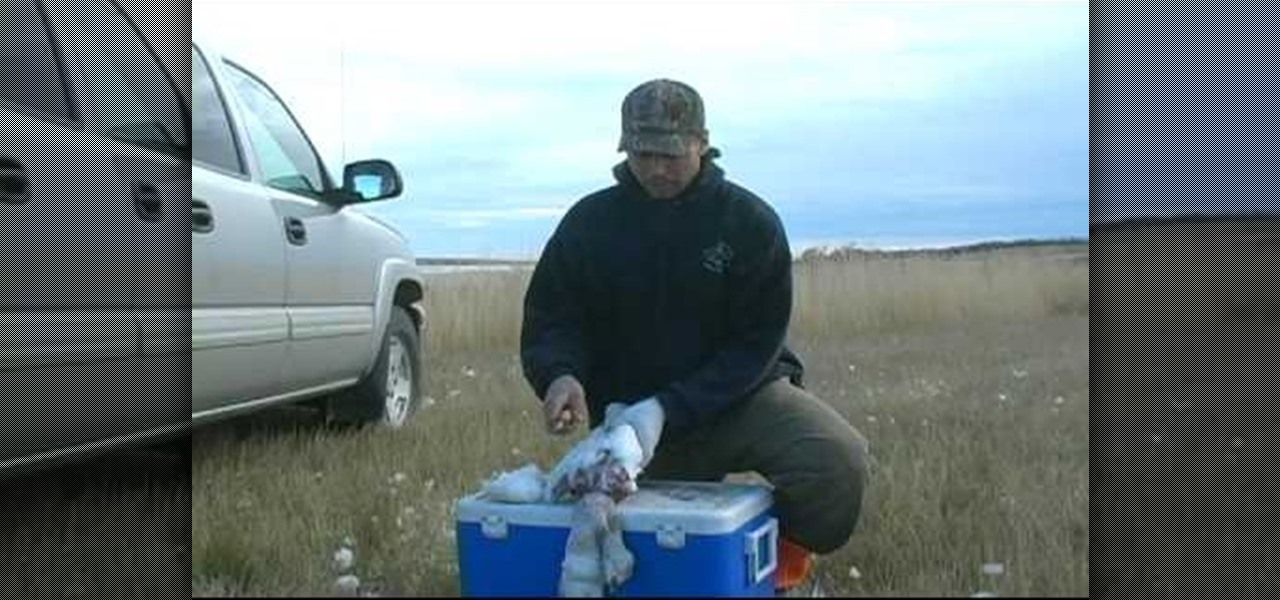
To clean fowl (ducks, geese, pheasant, etc) in the field, begin by turning it on its back. Lay it down on a flat surface. Grab a handful of flesh, underneath the head and neck and rip it away. Continue ripping the skin and feathers off around the torso. You will need to retain one wing for identification. Cut one wing off with clippers.
It's pretty much common knowledge that a successful sewing kit requires several different sizes of needles as well as differently colored thread. And if you're solely focused on patching up those favorite JBrand jeans of yours or a hole in a T-shirt, then that may be all you need.
In order to create a black, white, and purple nail design, you will need the following: black acrylic paint, a paint brush, purple glitter nail polish, white nail polish, and a shaping tool.
In this tutorial, we learn how to draw a hand. First, start drawing on a blank canvas and start with the middle finger and knuckle. Shade in the knuckle area, and make the lines that are around the nail of the finger. Then, start drawing the other fingers out, adding lines to make it look more realistic. After this, shade the sides of the fingers to make the hand look like it's bent in some areas, then make sure you have fingernails drawn into the picture. After this, shade the entire hand an...
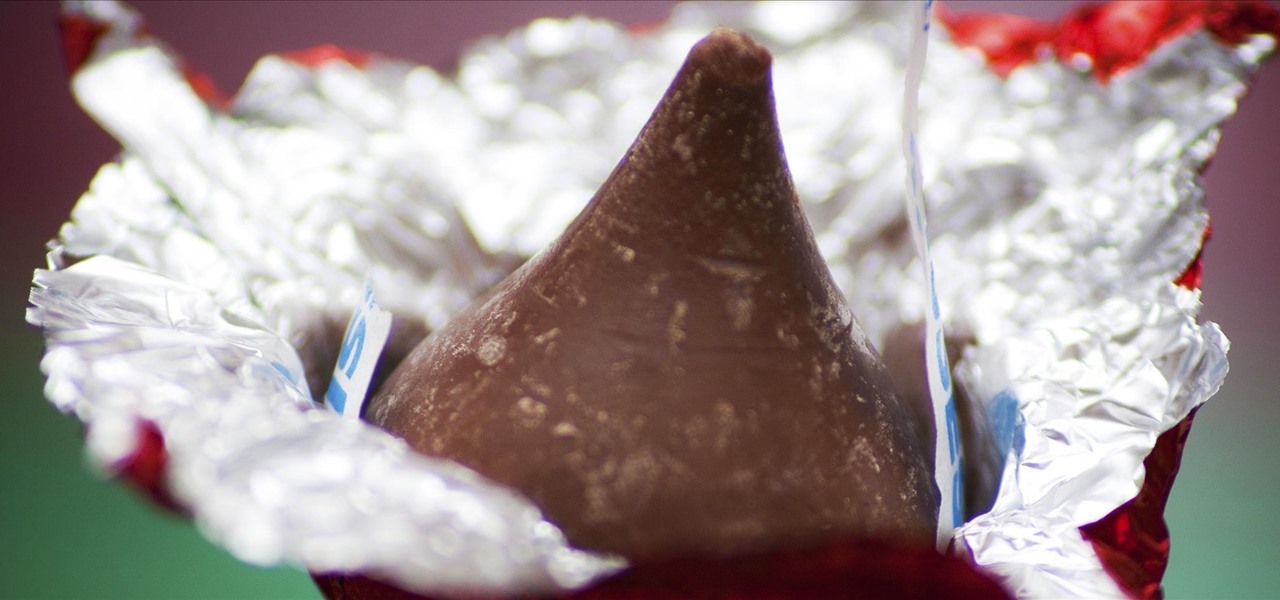
Removing the thin aluminum foil wrapping from a Hershey Kiss isn't necessarily a difficult thing, but even the easiest of things can be annoying sometimes. For instance, getting chocolate under your fingernail when you're trying to peel the wrapper off, or making a wrapper mess. To make this first-world problem go away, simply grab a Hershey Kiss in-between your index finger and thumb, then pull on the paper plume to yank the chocolate straight out of the wrapper. The plume was originally des...
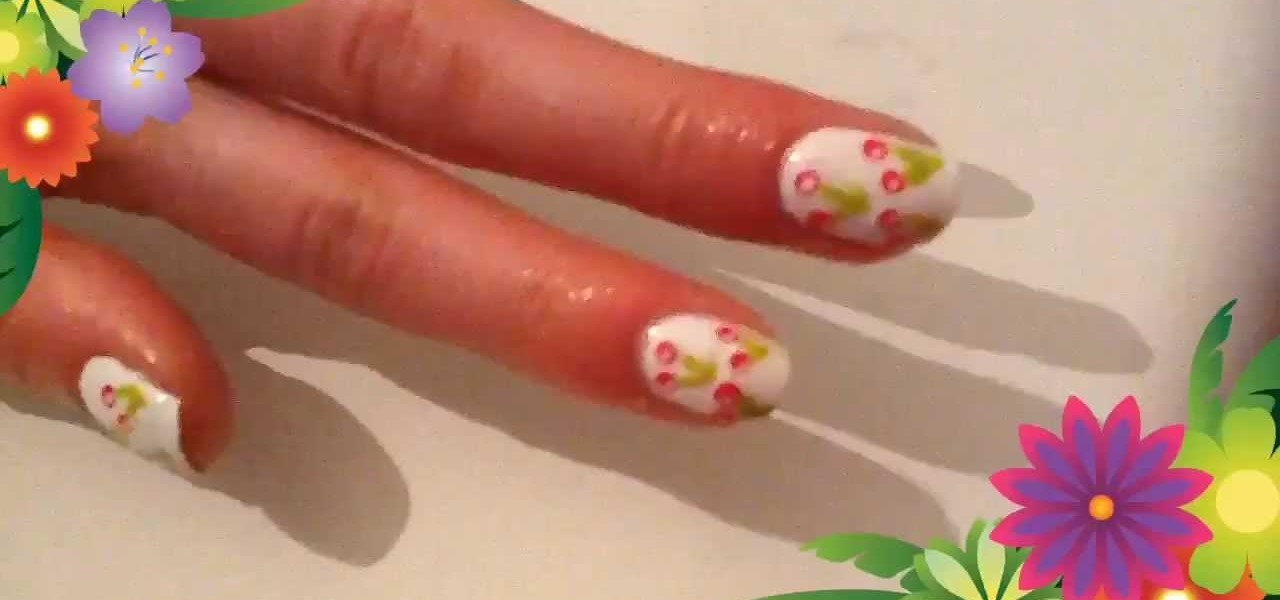
Video: . A nail art design for beginners. You will need a dotting tool, if you don't have one a toothpick or bobby pin will also work.
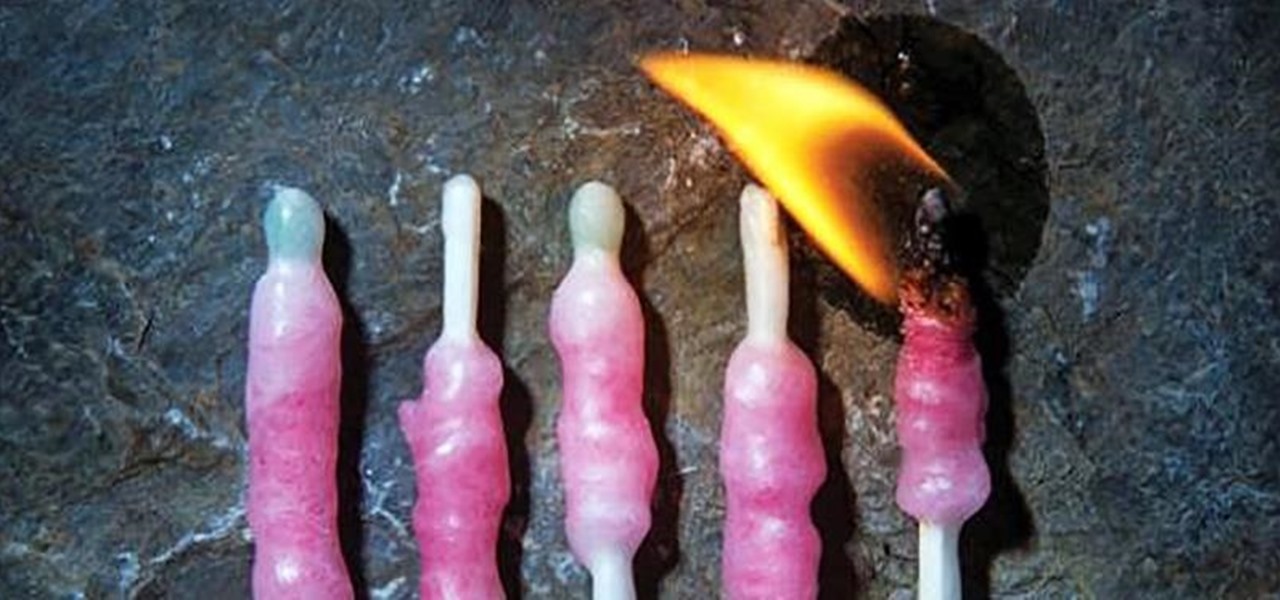
Camping in the rain sucks. It's not enough to deal with your clothes and tent being soaked—it makes starting a fire nearly impossible if you're not carrying waterproof matches. You can buy them pretty much anywhere that sells camping gear, but if you've got regular matches and a candle at home, they're just as easy to make yourself..