Tom Skowronski teaches the secrets of using an outdoor green screen. An excellent summary is given below. First check the advantages of using green screen outdoor like a lot of space, sufficient light. In the same way check some disadvantages like noises from birds, children. For the screen materials you can use paper which is cheaper but it cannot be controlled if wind blow. You can also use a board or even paint a wall green which will be better. Now to set up the screen use the screen rods...

This video shows the secret of applying makeup for large eyes. An excellent summary is given below. First apply a dark plumy color paste using a stiff dome brush all over your eyelid. Now with a flat stiff brush use the plumb color and apply it over your eyelids. Use coral color in a soft dome brush and blend it over the crease. Now use carbon color in the stiff dome brush and blend it on the outer end of your eyelids. Use vanilla color in the fluffy dome brush and highlight above the coral c...
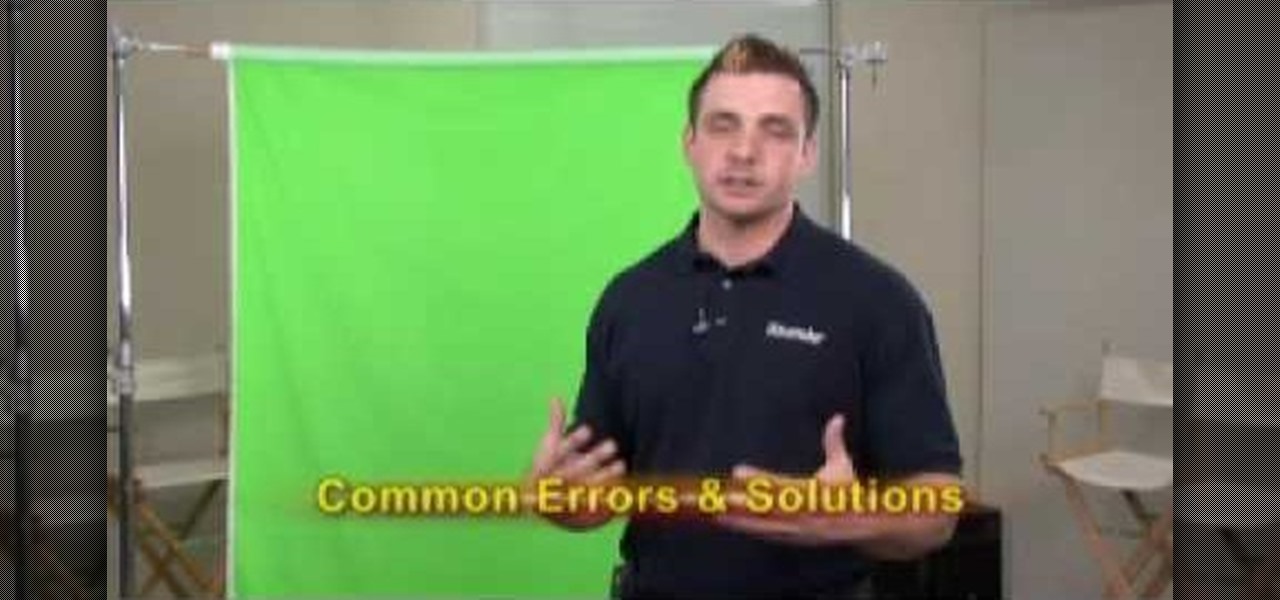
This video shows how to properly set up a green screen, to set up the screen we are taking into account this four factors:
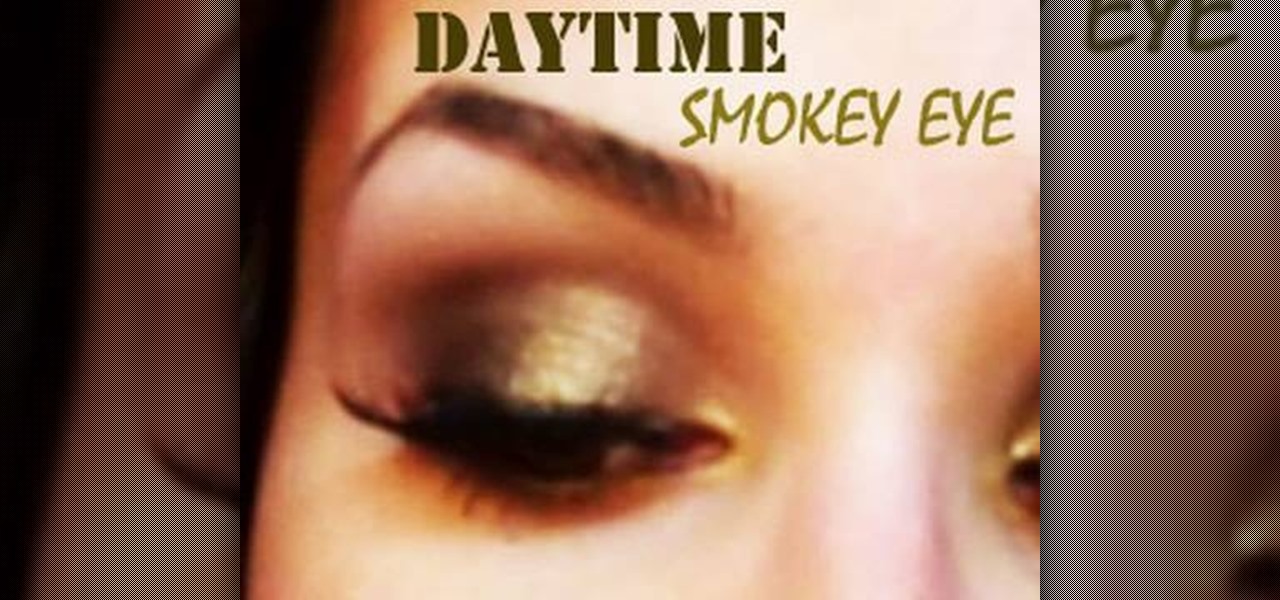
This is about how to do a daytime smoky eye look for everyday. Below are the steps: 1. Pat eye primer onto your eyelids with your fingers.

Get instructions on recreating Kim Kardashian's makeup look with cheaper products. First, use a short angled brush to fill in the brow with a shadow that is slightly lighter than the brow.

Have an old bike combination lock that you can't remember the code for? If it's a simply four-digit cable lock, you can easily figure out the combination with a quick peck-and-go method. Best of all, this technique doesn't require any tools or special know-how, and let's you reuse the cable lock again versus just damaging it with bolt cutters. All you need is a bit of patience and you'll have your figure out your combo in no time.

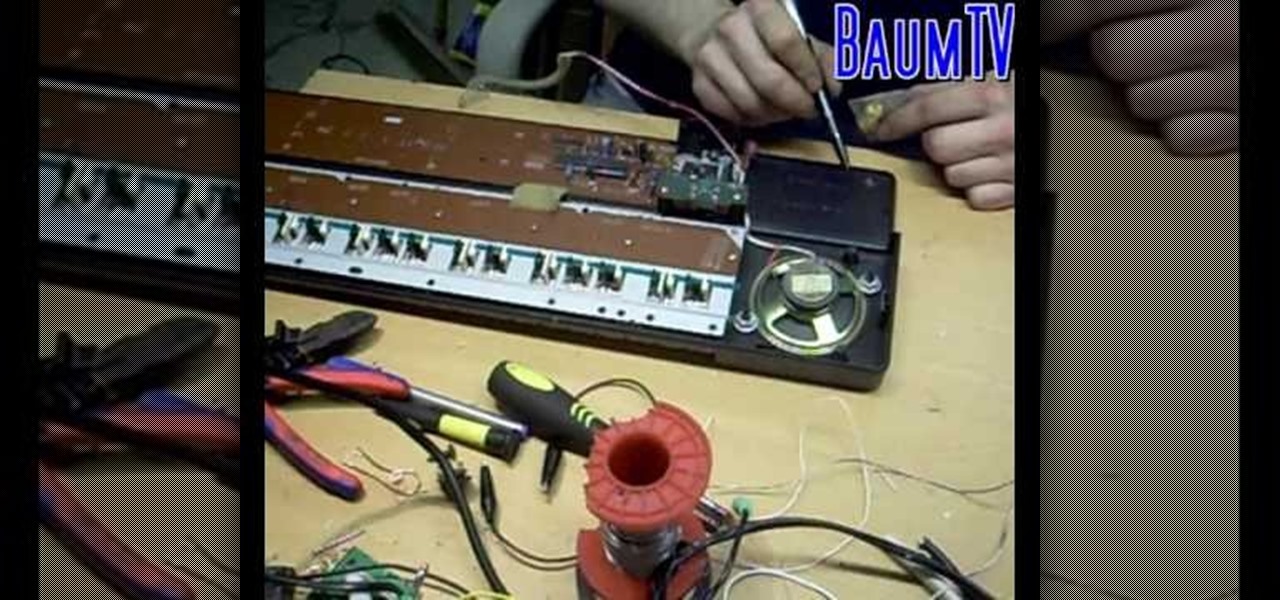
In this video the man describes of the circuit bending of Yamaha pss 140 synthesizer. This is a good model it's a FM synthesizers. It got many songs , many cool rhythms,nice trumpets and it is working real nice.Here he states that it is important for power supply or else we don't need batteries.First thing we have to do is open the case and we can see the wires related to battery supply but he doesn't need batteries. Keep the case aside so that you can get free space. Remove the screws so tha...
This video answers the question, how do you safely clean an LCD? Remember that LCD’s do not have glass so you have to be careful how much pressure you apply, as well as the kind of cloth you are using, or you can damage or scratch the screen.
Special effects are so cool and so..expensive! In this tutorial, learn how to make a portable green screen for very cool effects for less than 30 bucks. This green screen can move with you so you are ready to shoot no matter where you are! Follow these step by step instructions and you will be practicing your Oscar speech in no time.
You don't want to get stuck on the side of the road when your car's battery dies. Learn how to charge your car's battery off of someone else's using jumper cables. Don't let a dead battery leave you stranded! Every driver should know how to jump start a car.
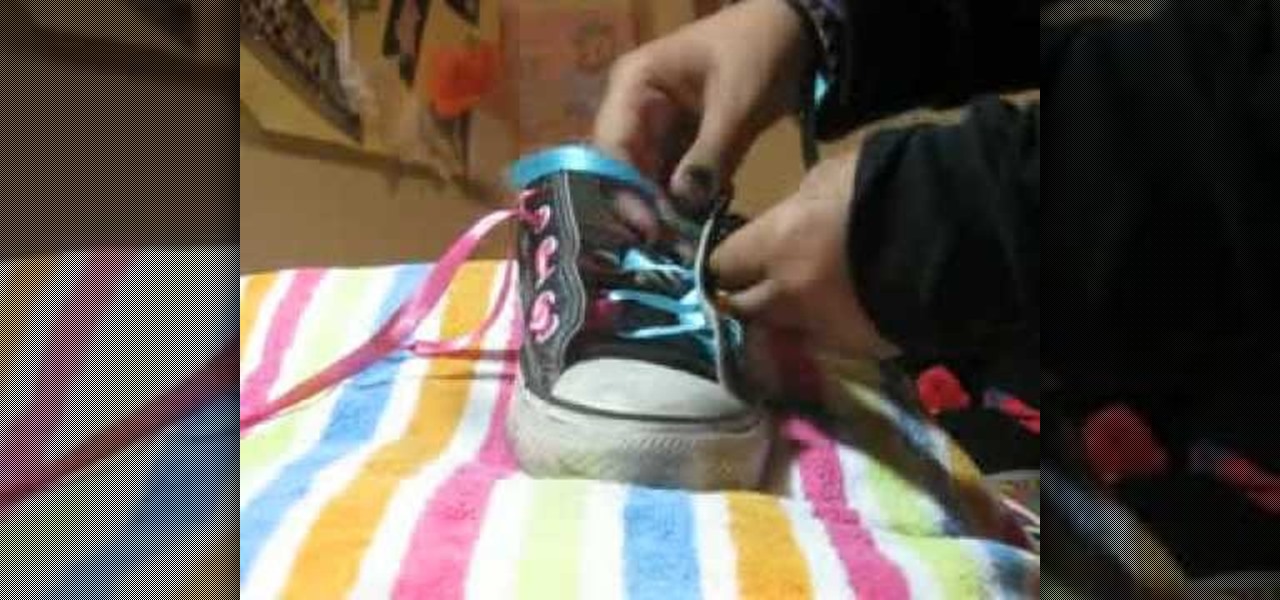
Converse sneakers are like the LBDs of our shoe wardrobe. And that's why we don't feel too original strolling down our college campus with the same black and white Chucks that every other girl has also got on. But you shouldn't sacrifice your Chucks for far more uncomfortable - and pinching! - flats or kitten heels just so you can stand out.
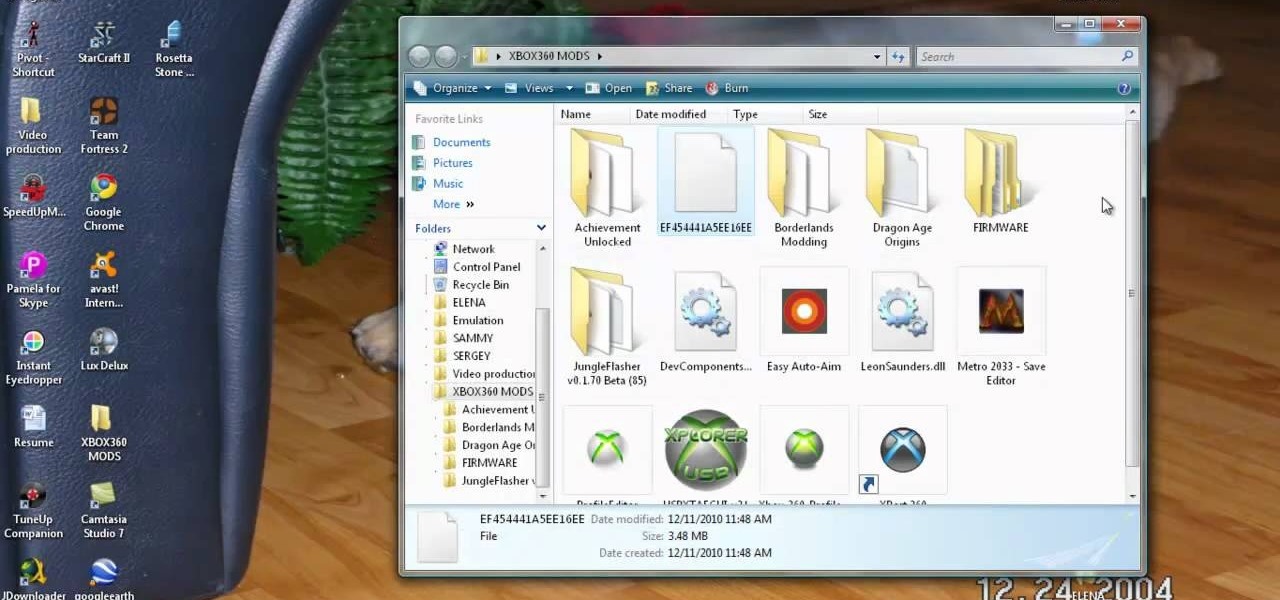
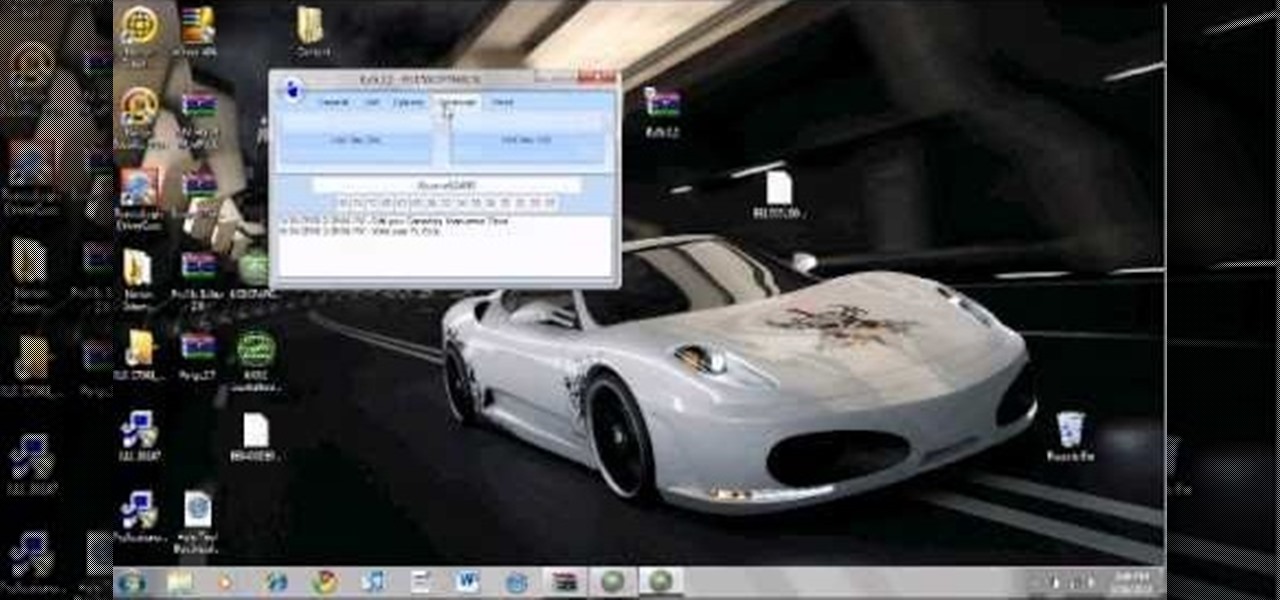
You will need the latest version of Eclipse for this tutorial to work. You will also, of course, need an Xbox and a data transfer cable. Extract your profile to your computer hard drive, and then mod it however you would like!
You can change your gamerscore, get unrestricted access and do much more with this hack! All you will need is an Xbox hard drive and a data transfer cable. Then just follow along with the video to hack your own Xbox 360!
You will need a transfer cable to execute this mod successfully. When you manage to hook up your Xbox 360 to your PC, you can get into the innards of the machine and edit or mod your Gamertag on your profile.
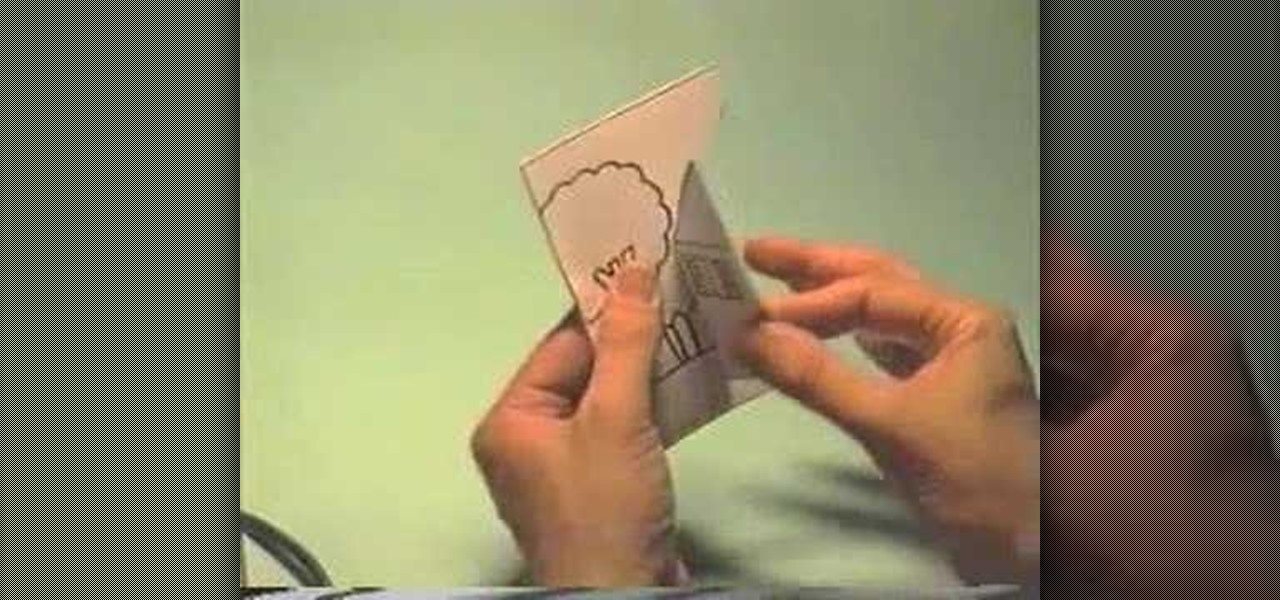
In this tutorial, we learn how to make a little house pop-up card. First, draw a cute little house on a flat plain with trees around it, then decorate the house! After this, fold it in half so the house shows on the outside and cut the paper along the roof and on the bottom, not on the sides. After this, bend that flap on both sides and then open up the card. Now, fold the card in so the little house pops out when you open it up! From here, put into your card and then color the entire thing t...
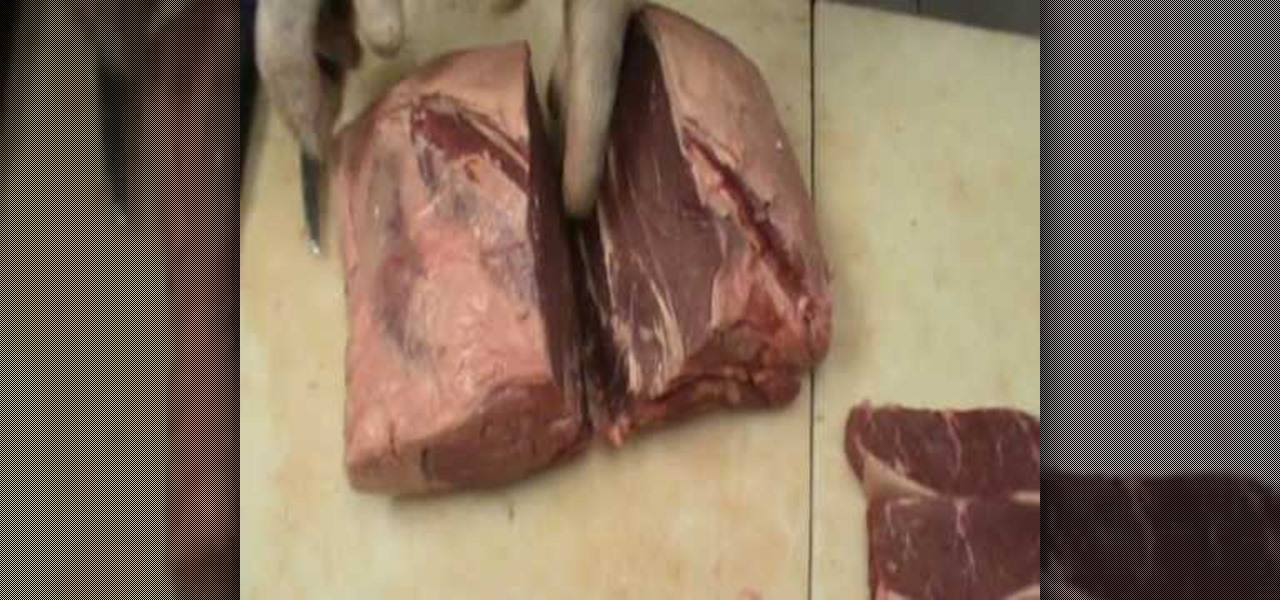
In this video, we learn how to cut a sirloin into steaks. Find the two ends to the sirloin and these are the sides you will cut into. The top is the New York cut, which tends to be more tender. Cut off the bone skin with a sharp knife from the very top of the meat. After this is out of the way, flip it to the other end and find the piece that is the flat part of the rump roast. Start by taking this off of the meat by going into the seam that opens up. After this, you will have cut pieces of s...
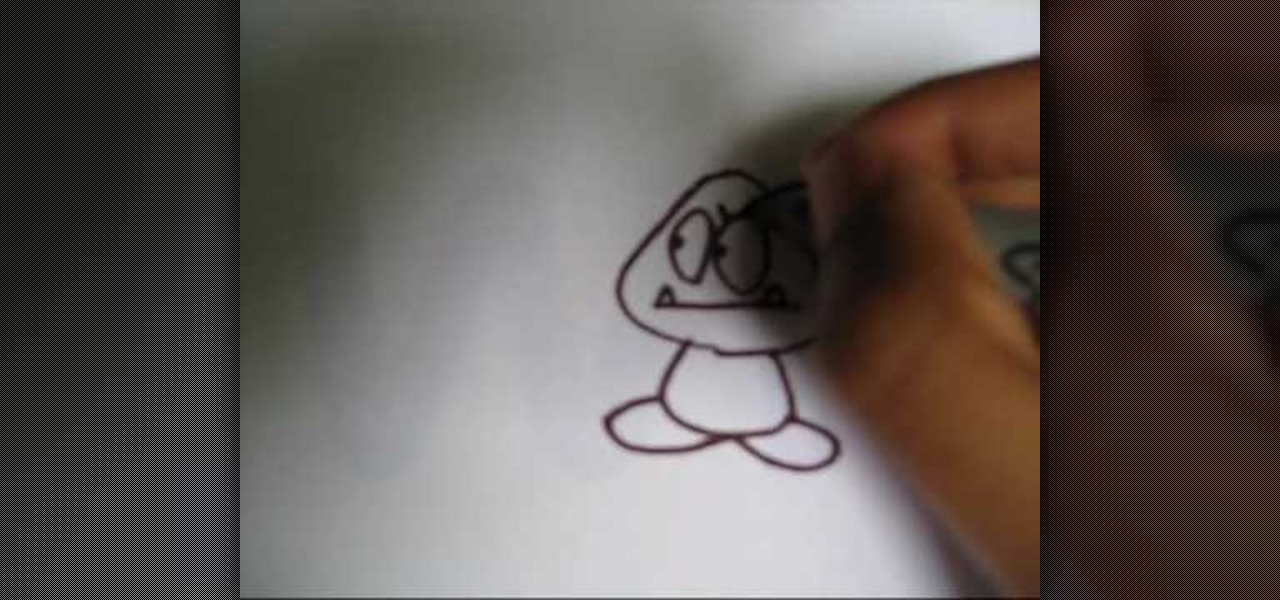
In this tutorial, we learn how to draw a Goomba from Super Mario. First, draw the softened triangle shape of the top of the head, then draw the body and the oval feet at the bottom. After this, draw on the oval eyes and then a flat mouth with two triangle teeth on both sides. From here, draw on the eyebrows to Goomba in thick lines. To draw another type of Goomba, draw the same basic shape, but then make the eyes squished into small lines and then draw the mouth with crunched teeth on the ins...
How you work out your abs determines how they'll appear in the long run. Not only are the type of ab exercises you do important, but also the frequency with which you do them.
In this video we learn how to cheat on any test by wearing a fake bandage. To do this, you will need a dark belt and a pen. First, you will lay your belt down on a flat surface and then use your pen to write out the information you need onto it. Write the notes out small and use phrases that you will remember when writing down the information. Once finished, wear this with your outfit, just put a big shirt over it. When you are taking your test, you will simply just need to look at your belt ...
In this tutorial, we learn how to do a big anime inspired hairstyle for cute pictures. First, part your hair slightly to the side of your choice. Next, tease your hair in the back and then straighten your bangs with a flat iron. After this, comb your hair so it flares out on the bottom and hair spray it. Then, tease it more on the higher side so you have a very messy and volumized side. Then, slick the other side of the hair back. When finished, you will have a big anime hair style ready to g...
In this tutorial, we learn how to make a kazoo out of a clothespin. This musical instrument can be made at home with just a few minutes. You will need: 2 rubber bands, a clothes pin, and tape. First, take the clothes pin apart and then take one side and wrap both ends with tape. Throw the metal part away, you won't need this anymore. Next, you will take this side and wrap a rubber band across it. Then, put the two flat sides together on top of the pin. Wrap a rubber band around the entire thi...
In this tutorial, we learn how to recycle an old t-shirt into a no-sew head scarf. First, lay your shirt out flat on a table and download the paper pattern from the video. From here, measure sixteen inches from side to side on the t-shirt that you are using. After this, follow the paper pattern on the shirt and cut out the pattern with scissors. Once you have finished this, use a fabric bonding agent to make the edges less frayed and fold them into each other. This is great for the environmen...
In this video, we learn how to create a marbleized water look with icing. This is a colorful and eye catching way to put icing on a cake to make a memorable piece! First, spoon your icing into a small bowl and then make a rice cereal treat and shape it into a circle. To start to decorate this, you will pipe on green icing to the sides and front of the ball to make it look like a fish. Then, pipe some of the icing onto a flat surface with red confectioner's sugar. Once this is covered and hard...
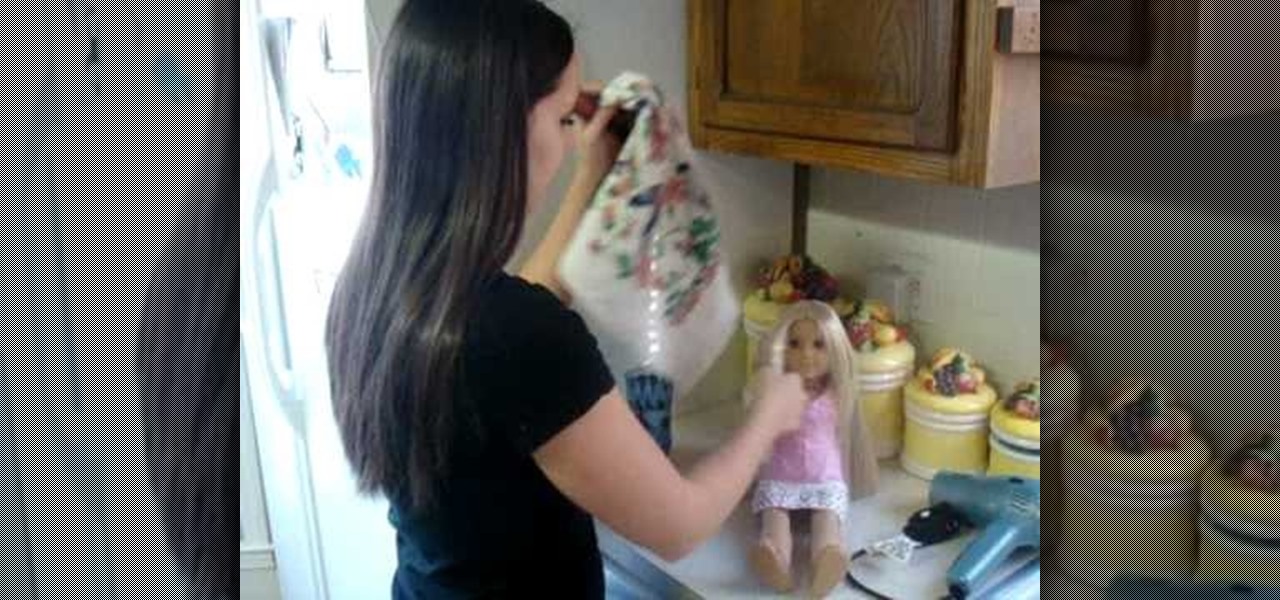
In this video, we learn how to straighten American Girl Doll Julie's braid. First, you will need to take the hair out of the braid and then separate that area. From here, cover the doll with a towel and brush her hair out. Wet down the area by dipping the comb into the water and brushing it in the hair. From here, you will bring the doll over to a flat surface. Then, lay some really heavy books down on top of the strand that needs to be straightened. Do this four nights in a row, then the hai...
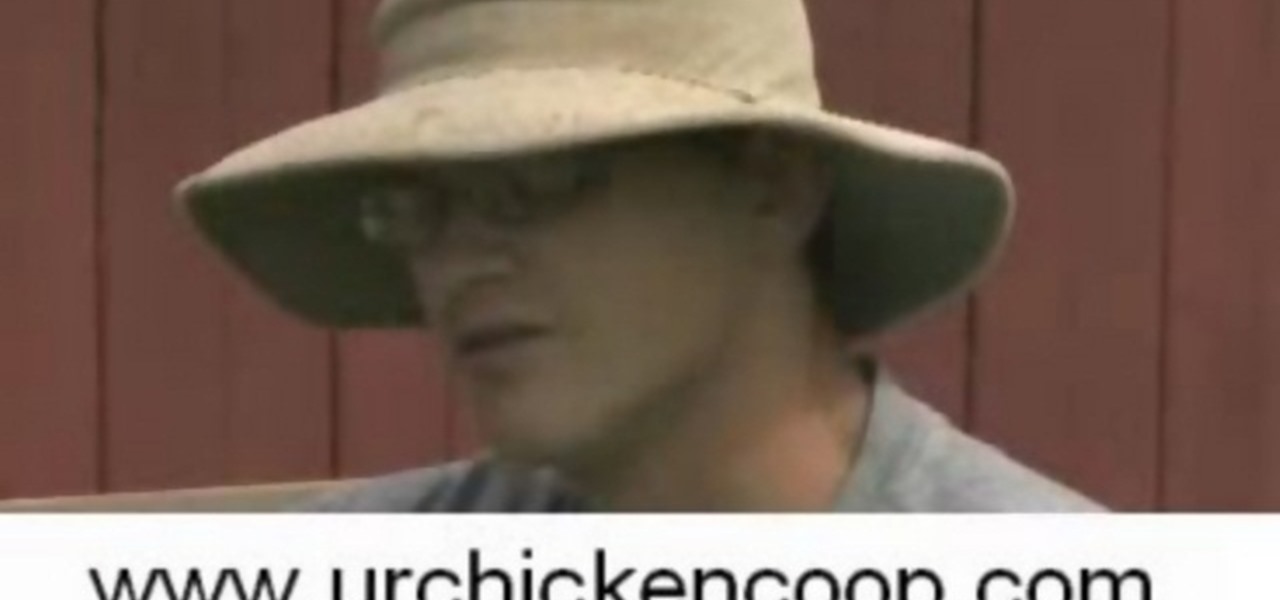
In this video, we learn how to build a nest box and ladder for a chicken coop. Start off by creating the box with several pieces of 2x4's. Measure each piece individually, then screw them into place. Make sure it's the size that you want it and that it's secure and lays flat on the ground. Once finished, you will bend some metal and place it on the sides of the coup and then fasten the hinges so they are free swinging. Then, pull in a few more piece and you will have created the nest box insi...
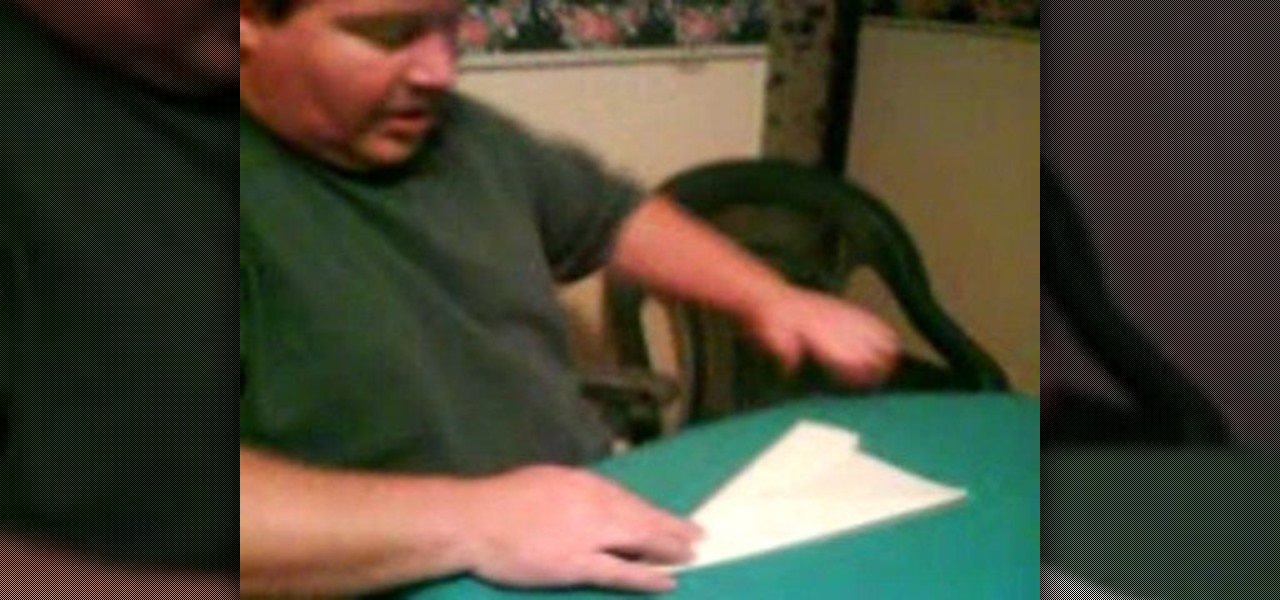
In this video, we learn how to make the farthest flying paper airplane. First, you will lay the paper flat and fold in two sides on the top. Then, fold it in half and keep folding the plane in. After this, you will see the wings become smaller and smaller. Once you fold this up until you cannot fold it in anymore, you will be able to throw this and make it fly! This will be really thin so it will go further and further. This will fly across the room easily and make everyone jealous they don't...
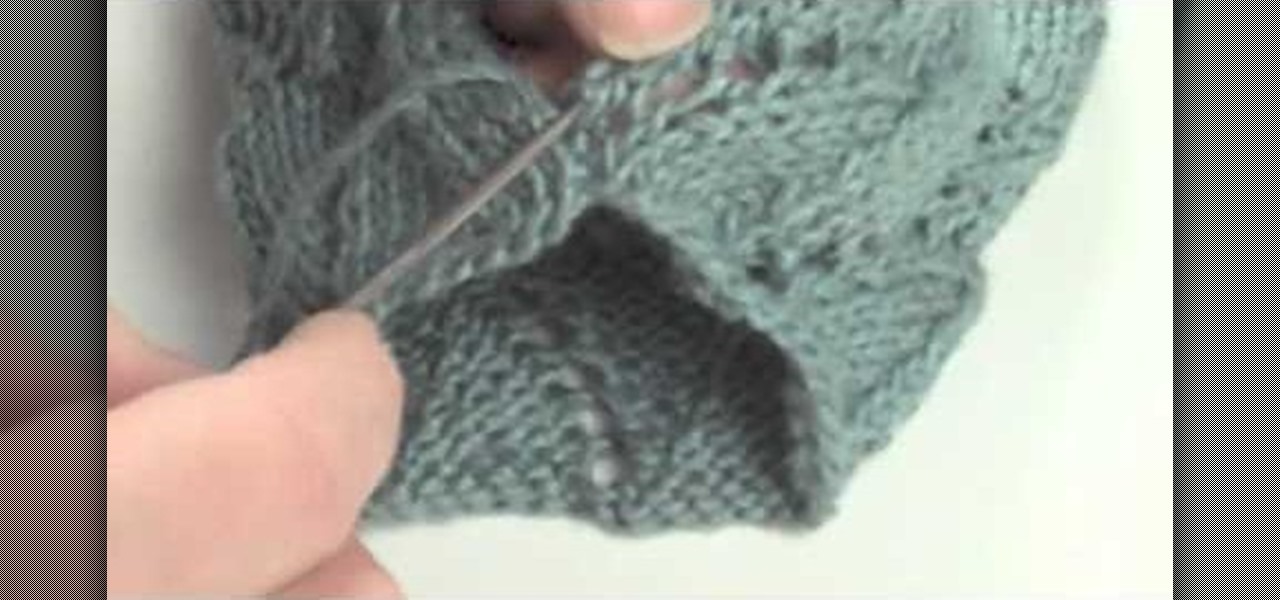
In this tutorial, we learn how to do the mattress stitch. First, lay the pieces flat and thread yarn tail onto the needle. Next, you will anchor the yarn to the bottom edge of the opposite piece. Then, go back through the side and find the tunnel of horizontal bars, one stitch in from the edge. Continue to do this around the stitches to combine them together. Keep alternating sides and just do one bar at a time to get the best results. You can do two bars at a time if you are comfortable with...
Do you have a beanie and just can't figure out how to wear it? Then this video is the right one for you! With this, we learn how to wear a beanie 18 different ways! The first way is to wear it flat on your head. Or you can wear it as a fedora. A girl can wear it with her bangs hanging out, then you can wear it with the cap sticking out for a "robin hood" look. You can pull up the sides of it to create a half hat or you can wear it to the side. Any way you choose to wear the hat, just let it w...
Don't waste your money on a normal nightlight when you can build your own multifunctional nightlight that doubles as a pen holder. With a few junk CDs or DVDs, some LED lights, super glue and a dowel rod, you can make a nifty pencil and pen holder that masquerades as a night light, powered by a USB cable plugged directly into your computer.
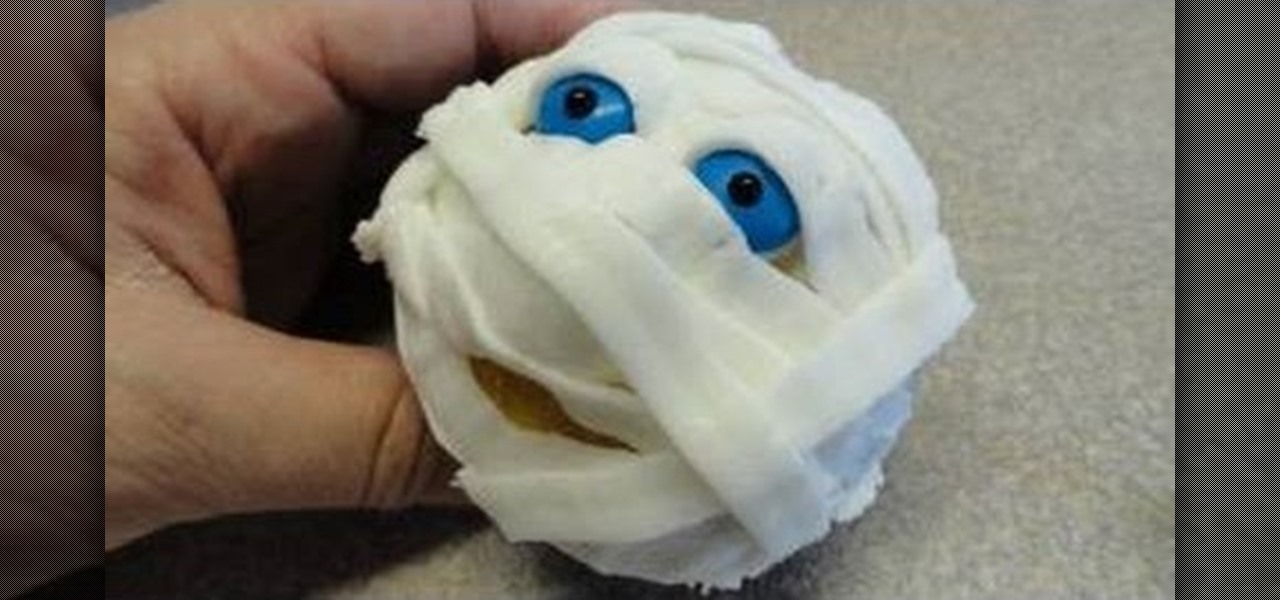
This mummy-shaped cupcake will be a ka-razy big hit on your Halloween buffet table. Flat, noodle-like layers of icing create a bandaged mummy effect, while an assortment of blue and red candies mimic the mummy's creepy eyes and mouth.
In this tutorial, we learn how to make and arrange a painting palette. First, you will need to buy a large palette that can handle a lot of different colors on it. Now, use the sides to add in the different colors that you are going to use. Use the middle of the palette to mix up colors while you are painting or doing different crafts. You can also use a large paper plate to make a paint palette if you don't have a palette nearby. Anything that is flat with a lot of room on it will work, so g...
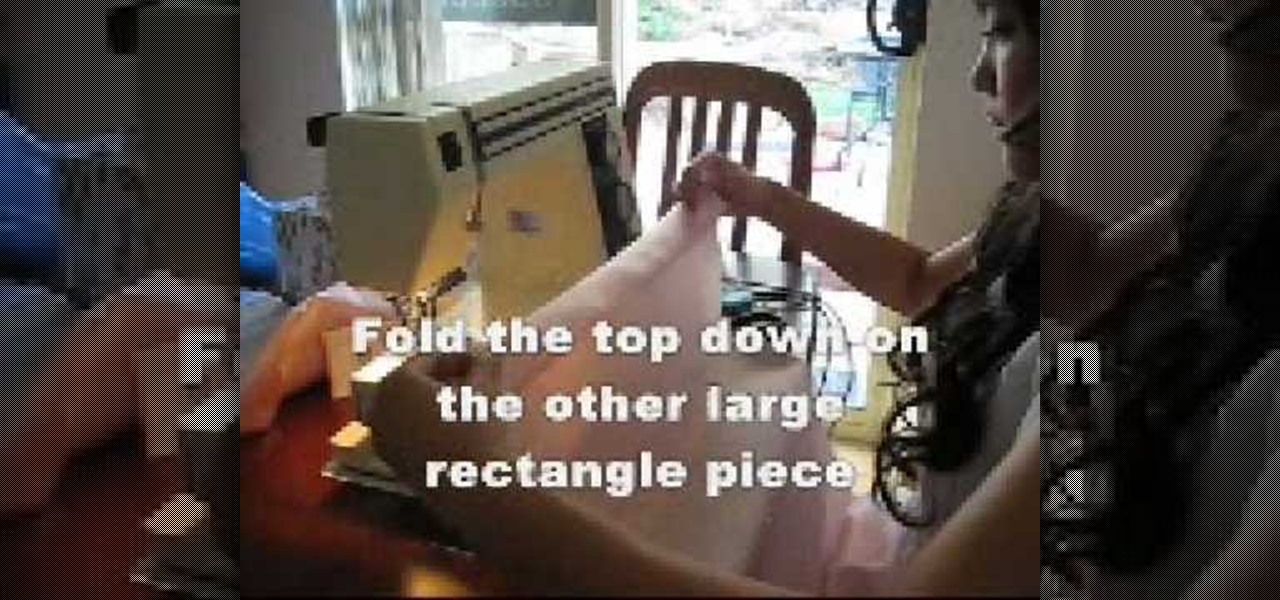
In this tutorial, we learn how to make a basic princess pillow case. First, you will need to have a large piece of pink silk fabric. Lay this out flat, then cut out a 45x75 cm rectangle. Once finished, separate the two pieces of the fabric, then cut a new piece 45x20 cm. Then, lay the fabric facing up and lay some lace on top with the frills facing inward. Sew together the fabric and lace all the way around the entire pillow case. Fold the top down on the other large rectangle piece, then rep...
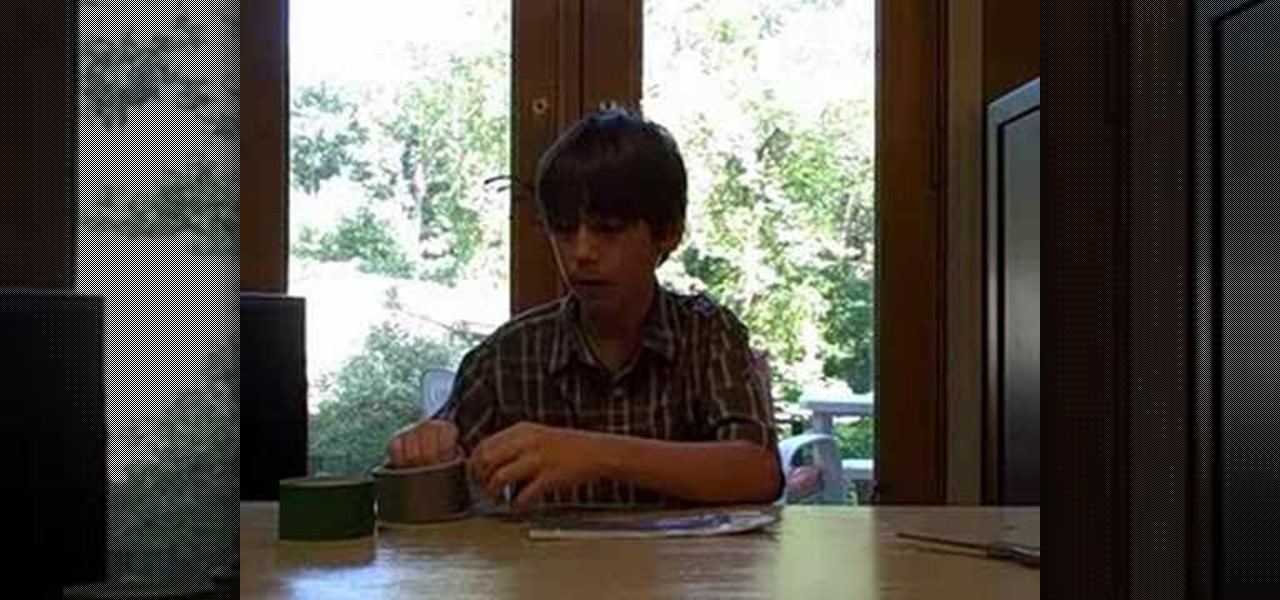
In this video, we learn how to make a duct tape wallet with a change pocket. First, grab your favorite color of duct tape and then place some down on a flat surface with the sticky side up. Overlap these until you have the desire size you want, then fold the edges over. After this, apply the sticky side down to this and you will have a nice little wallet that is made between them connecting to each other. Make the change pocket by doing the same process, just use a smaller piece and connect w...
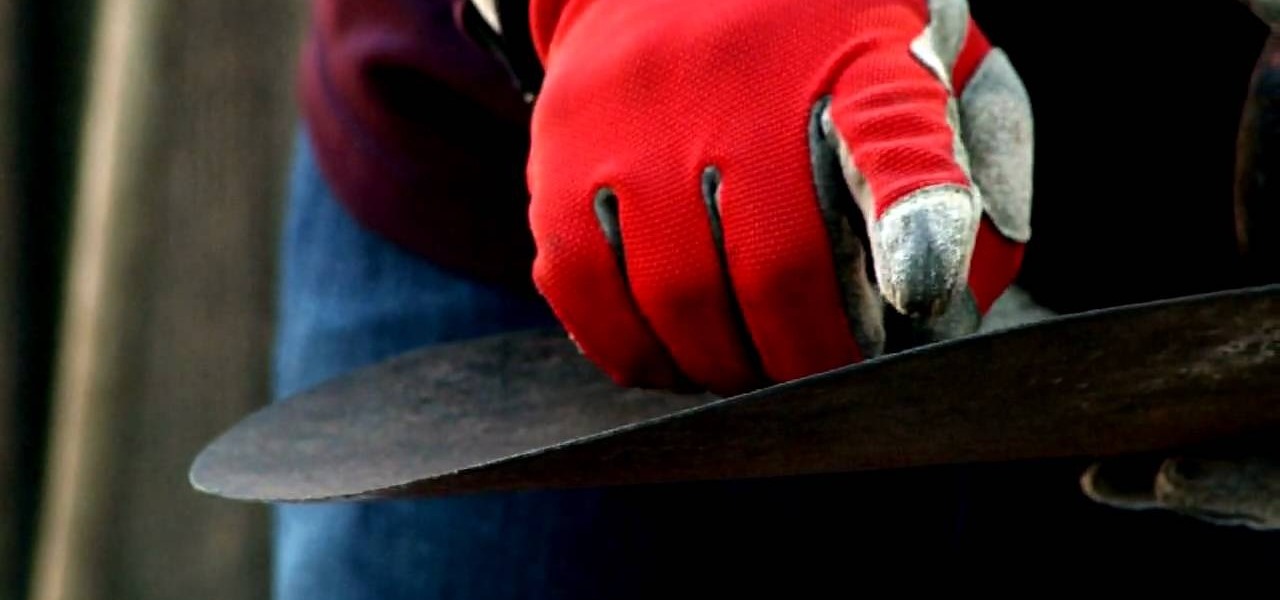
In this tutorial, we learn how to maintain your tools for extended usage. First, get a good sturdy brush to clean off all the crusted on dirt from your tool. The dirt will promote rust and deteriorate your tools. Once it's cleaned, also make sure it's dried off from anything that is wet. Also set the tool on a flat surface or table to remove rust off of the tool. You can also sharpen the sides of the tools or shovels so you are pulling out any kinks and making it sharp and more useful. Once f...
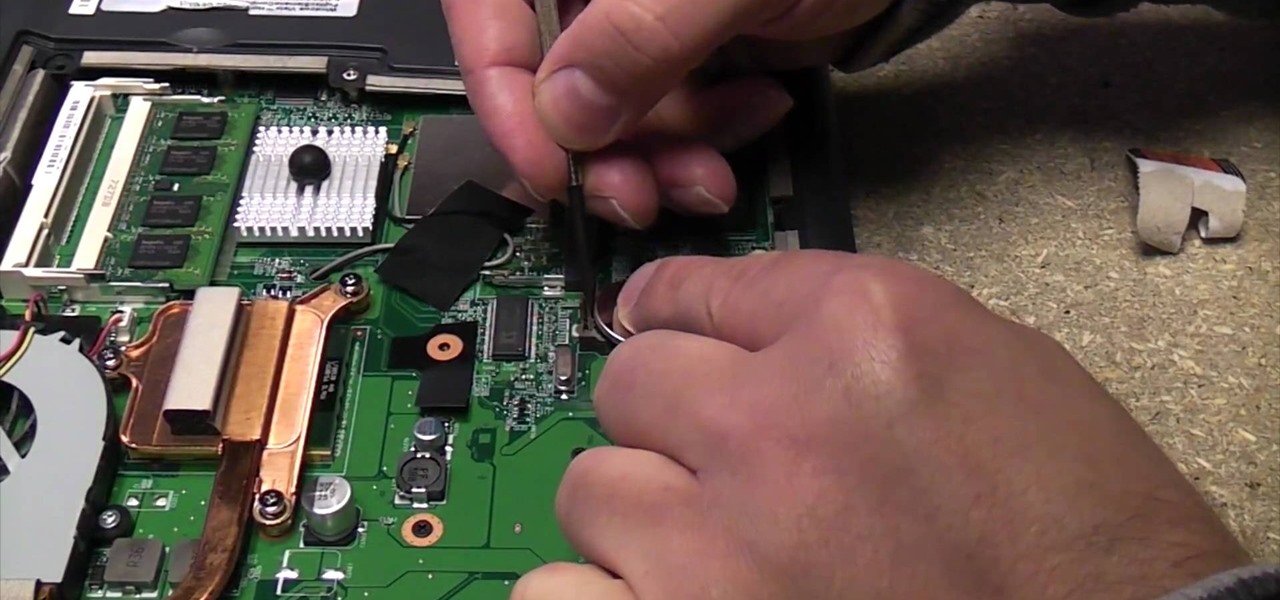
In this video, we learn how to replace a laptop CMOS battery. First, turn the laptop upside down and remove the screws around the panel you need inside. Set these aside and then pry the top up with a flat screwdriver. Now you will see the CMOS battery, remove this with the tab that is on top of it. Remove the battery from the area it's at and then replace it with the new one. Make sure you place it in just how it was before. After this, replace the panel on the top and screw the screws back i...
Charge your iPhone or iPod while you're killing zombies! You can actually charge many types of Apple products from an Xbox. Your Xbox certainly has enough USB ports to support plugging in your Apple sync cable into your Xbox or Xbox 360 and start charging.
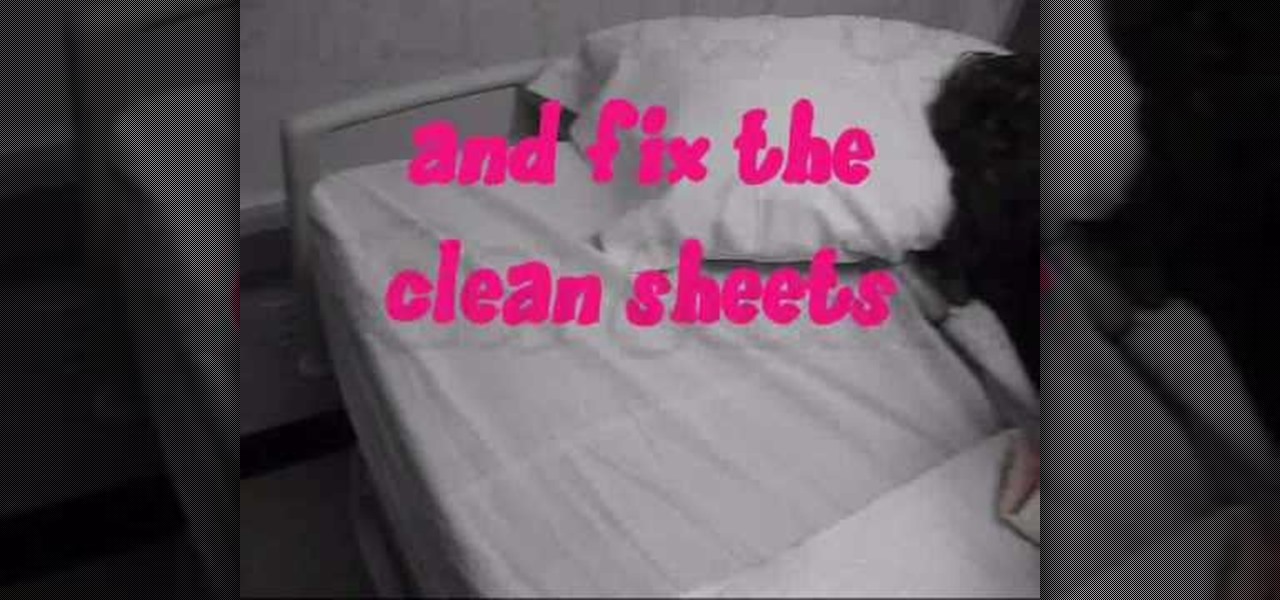
In this tutorial, we learn how to make an occupied bed. First, gather the supplies from the linen closet. After you have all the sheets and blankets, put gloves on and walk into the room. Now, cover the patient with a bath blanket. After this, remove the top sheets, then roll the patient to the side of the bed. Next, tuck dirty linens close to the patient and then roll clean linens under the dirty ones. Then, fix the clean sheets up and roll the patient towards you and repeat the same as you ...
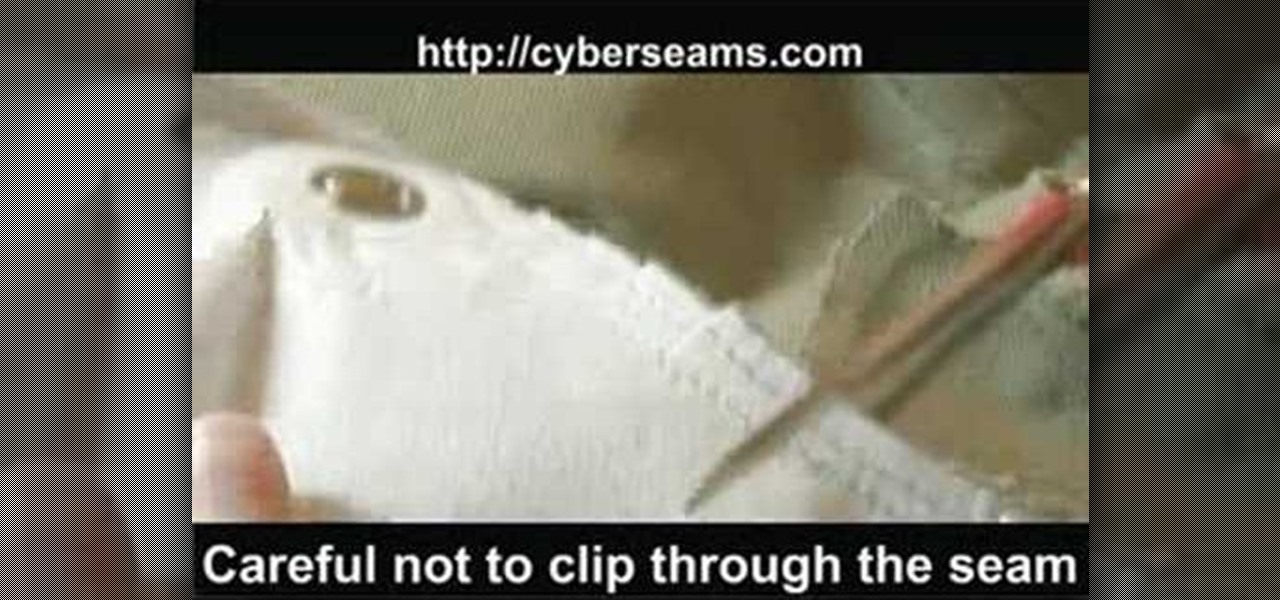
In this tutorial, we learn how to clip curves when sewing with rounded seams or edges. First, you will take your piece of clothing, then grab your scissors. Put the edge of the clothing (with the seam) and lay it flat. Then, put the scissors onto the seams with the very back of the scissors over the fabric. Clip close to the seam, but do not clip through the seam as you are cutting. Once you are finished, you will be able to sew in curves and will be able to easily get around the seams withou...
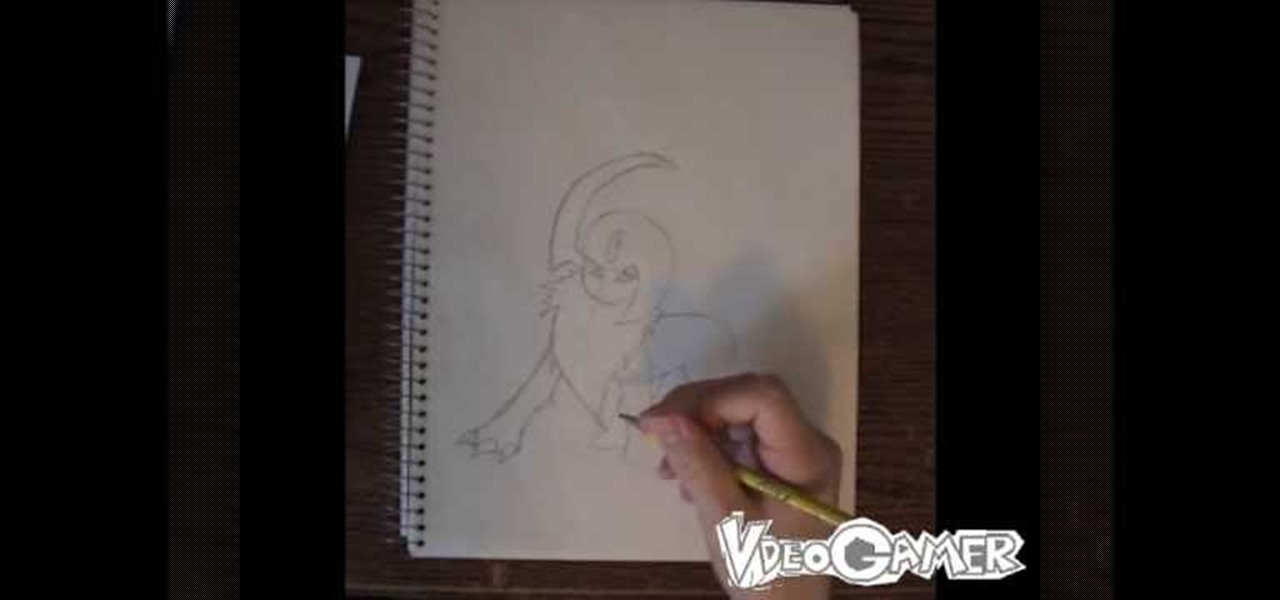
In this tutorial, we learn how to draw Absol. Start out by drawling the outline of the character, starting with the head. After this, draw on the details of the body, including the claws that are on the feet. Next, you will draw on lines for the fur that are on the main part of the upper body. Draw on the tail towards the read, then draw a large wing on the upper and lower body. You will also want to draw on a flat background to show that Absol is standing up. Add in details and shading to th...
In this video, we learn how to make a tutu for Halloween. First, take your pink fabric and lay it out flat. Next, use your scissors to cut down a folded edge on the top of the fabric. Now you will have two pieces. Next you will roll the fabric down until you reach the end, then you will cut strips out of the fabric. Now, take your elastic piece and tie the strips of fabric onto it. You can use any colors you would like to make this. You can use pinks, oranges, blacks, whites, and any other co...