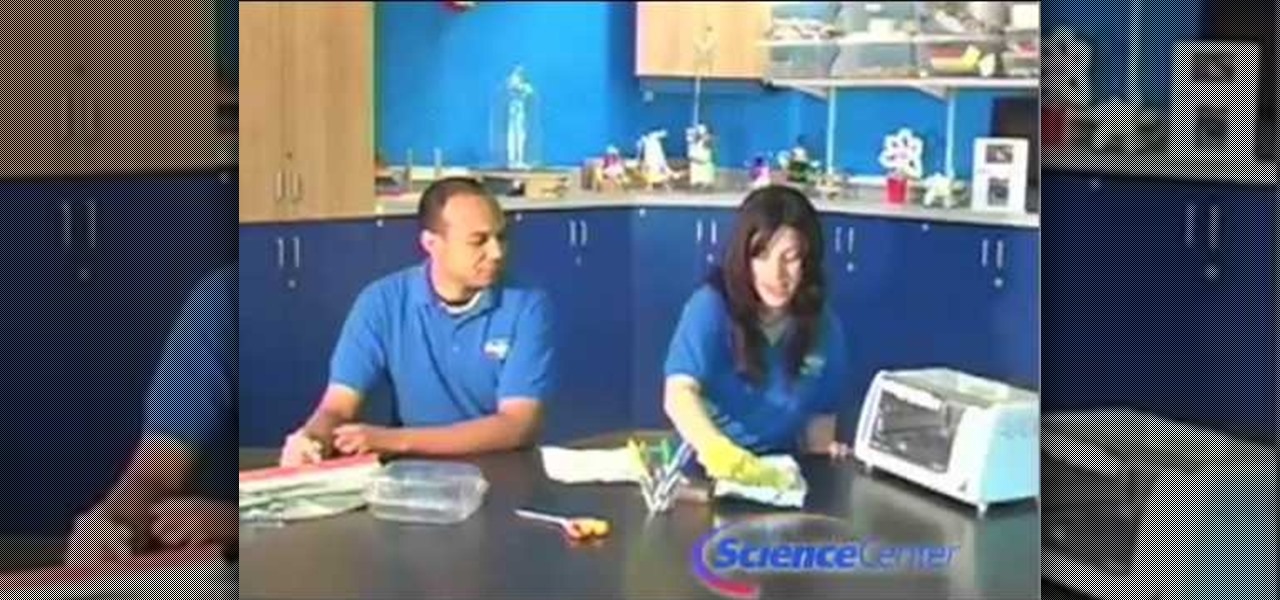
In this video, Steven Marin shows us an interesting method to recycle old CDs to make beautiful flower arrangements along with other recycled materials. In order to make the flowers, you need to take your old CDs and heat them up in a toaster oven. As demonstrated in the video, the CDs are very hot when they are taken out and should be handled with care. They are easily molded into the interesting flower shape by pressing them down over the neck of a bottle or by holding them in a cloth and s...

Learn how to install a Berry Floor laminate flooring by watching this video. Part 1 of 2 - How to Install Berry Floor laminate flooring.
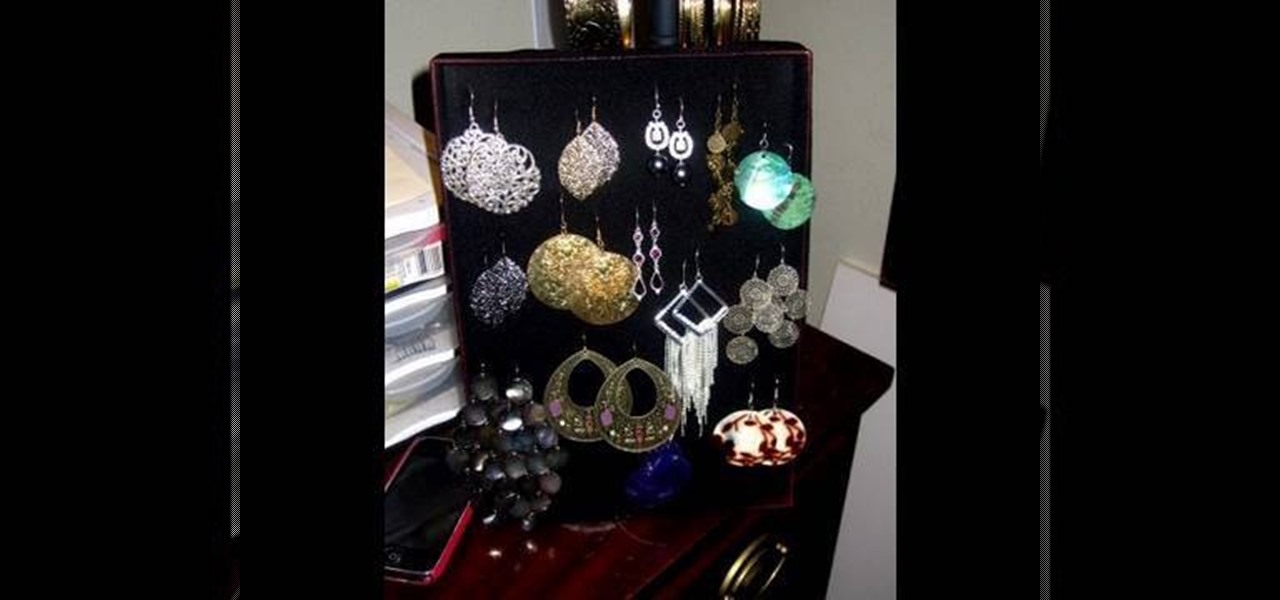
In this tutorial, we learn how to make an earring holder with everyday materials. first, you will need a box lid from a shoe box or a scrapbooking box. After you have this, slide a black piece of nylon over the top of the box and then tie the feet and top together on the back of the board. Cut off any excess nylon that is left over. After this, you can stick your earrings into the nylon and they will hang there securely! This will only work for hook on earrings because there's no back to it, ...
In this video, we learn how to shrink plastic with household materials. You will need: tin foil, plastic container, scissors, glove, and colored markers. To start, you will preheat the oven to 325 degrees. Then, cut a piece of the plastic out in a square shape. Next, draw whatever you want onto your piece of plastic. Make it as colorful as you would like to! When finished, put this in the oven using a glove. Make sure it's on the foil when you put it in. Then, leave it in for less than a minu...
It is a well known fact that due to the rotation of the Earth about its own axis has a bulging effect on the equator and a slight flattening effect at the poles. This experiment tries the reproduce the same effect using simple materials.
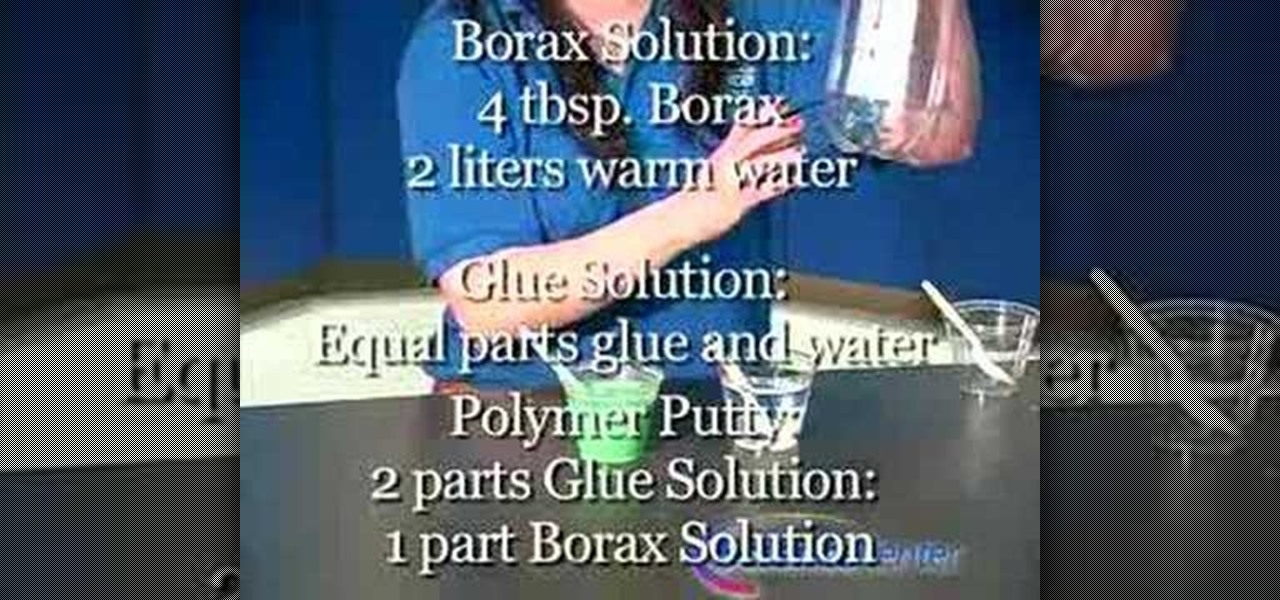
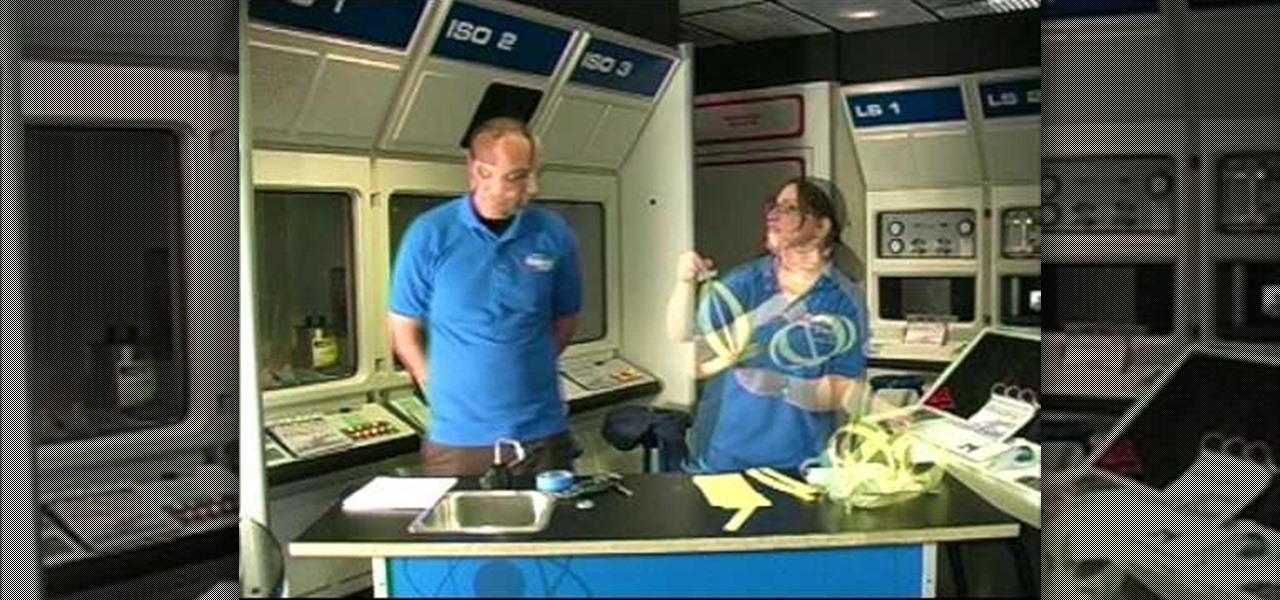
In this tutorial, we learn how to make polymer putty with household materials. You will need: borax, white glue, water, 3 plastic cups and spoons, and food coloring to color your putty. Now, dissolve 4 tbsp of Borax in 2 liters of warm water. Then, prepare equal parts of glue and water together. To make this, you will need 2 parts of the glue solution to 1 part of the Borax solution. Once you mix these together, you can add in some food coloring to it. Pour this into different cups to make di...

In this video, we learn how to make green fire from household materials. You will need: antifreeze, boric acid, and a glass jar. First, pour the antifreeze into the jar until it's 1/3 of the way filled. After this, drop a spoonful of the boric acid into the mixture and mix it up thoroughly. Now, let it sit for 30 seconds and then go into a dark room. Light this up, then watch it burn! You can also put it into a spray bottle and spray it over a flame to see the green fire right in front of you!
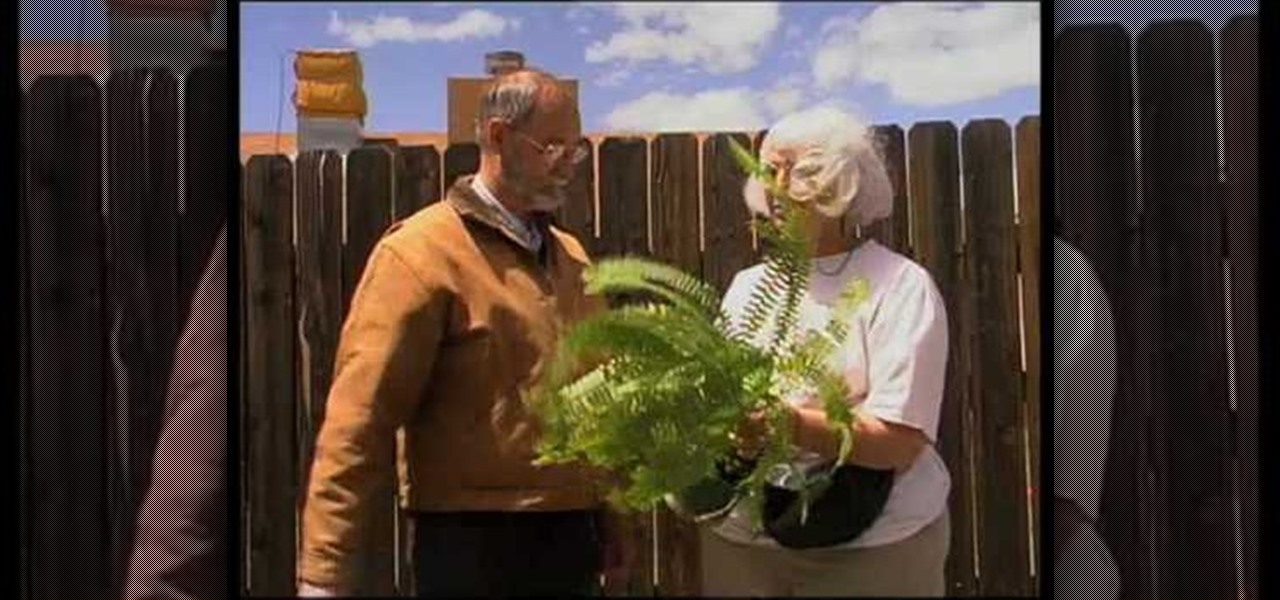
This video explains how to solve several problems associated with gardening in arid environments. Rhubarb is a plant that is commonly grown in colder environments. In arid environments, its very important to not over water it, so keep it in a sandy soil with lots of organic compost material. Plants such as the peace lily also need well irrigated soil, so it is important to pot it in an organic potting soil in a location that allows the water to drain away from the pot instead of soaking back ...
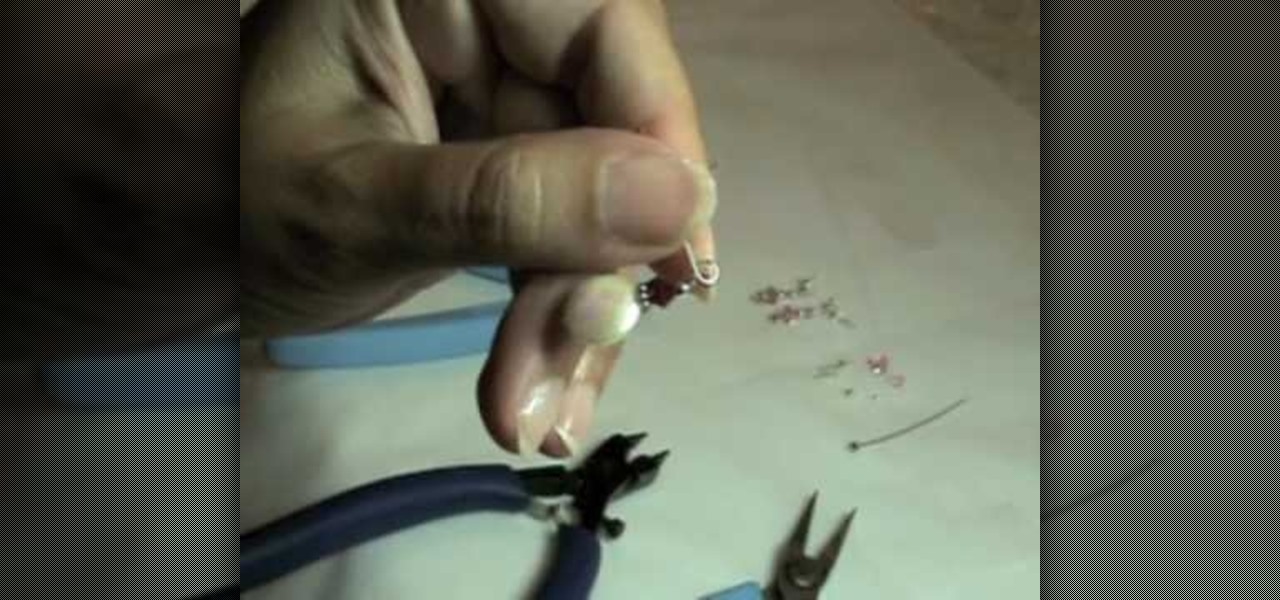
In this video tutorial, viewers will learn how to make two pairs of simple earrings. The video provides all the materials required to make the earrings. The materials required include: freshwater pearl disk, 4 mm Swarovski crystal, bally bead accent, 2 mm silver bead, head pin, flat nose pliers, round nose pliers and wire cutter pliers. This video provides step-by-step instructions and a visual demonstration for viewers to easily understand and follow along. This video will benefit those view...
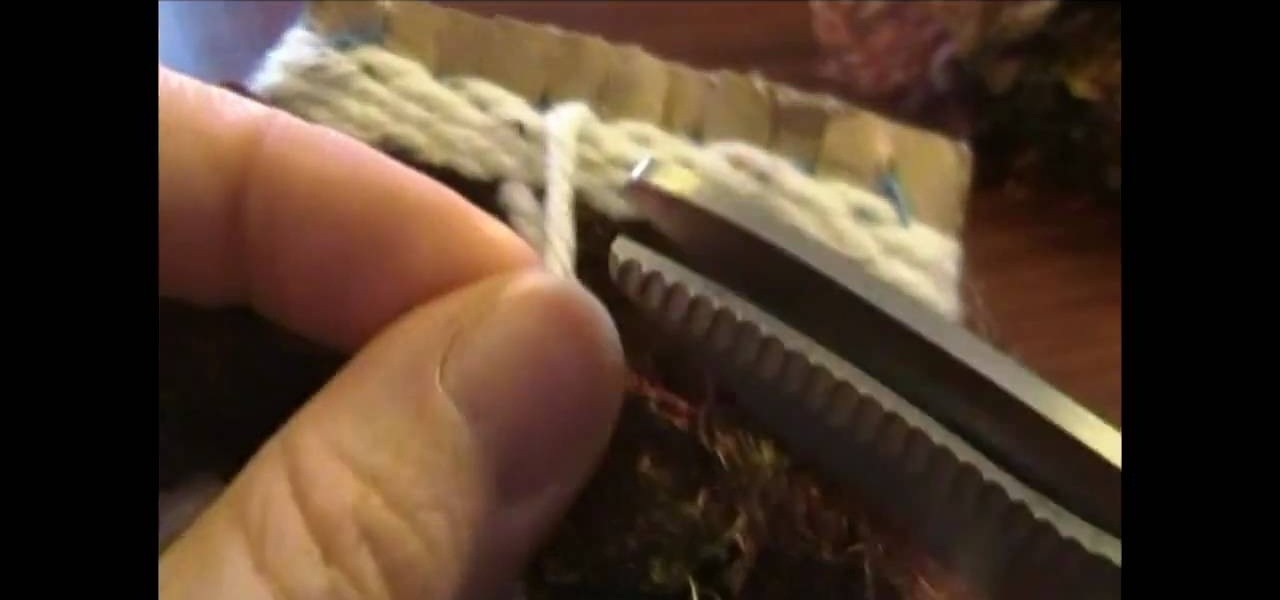
In this video tutorial, viewers learn how to weave a pouch for an MP3 player. The video lists all the materials required to make the pouch. The required materials include: cardboard, a ruler, scissors, yarn needle or bodkin, scraps of yarn or 10 crochet yarn and a marker or pencil. This video provides voice narration and a visual demonstration for viewers to easily understand and follow along. This video will benefit those viewers who enjoy homemade accessories. This is for those who enjoy we...
This is Part 1 in a series from FollowThePaperTrail. In this arts and crafts how to video the host will lead you through the process of preparing the materials necessary to create paper roses, from punched or die cut flower patterns. She teaches you how to soak the materials, once they've been cut, and spray them with starch so that they retain their shape. Following up on that she demonstrates the techniques she uses to form the flower patterns into a more three dimensional shape.
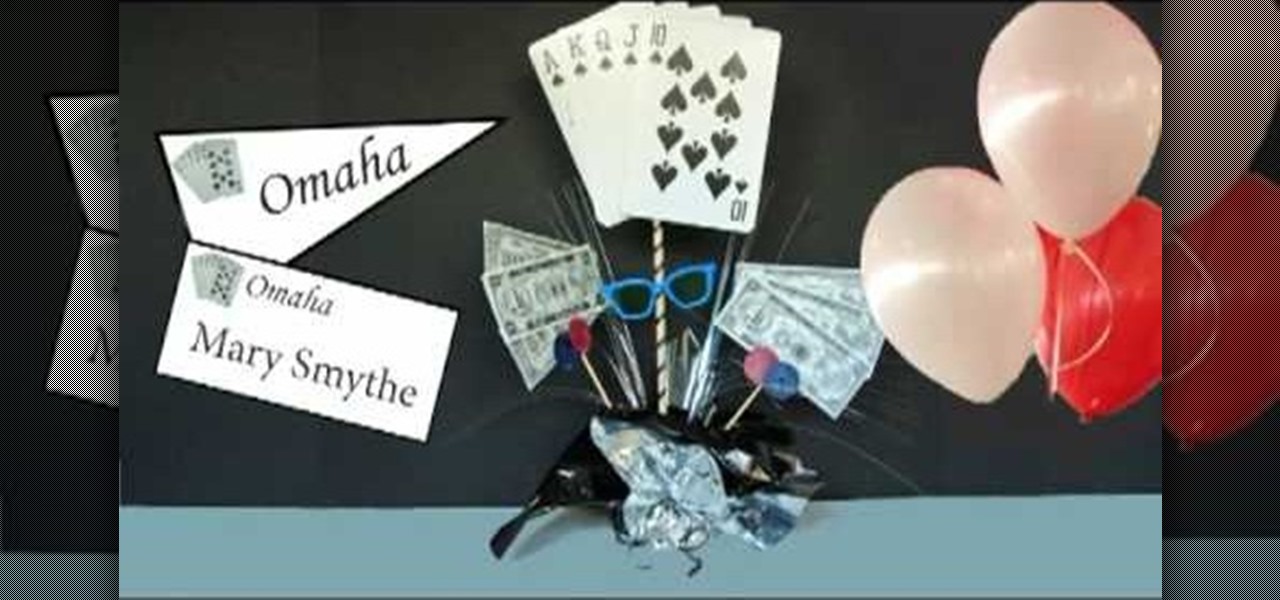
This video is a demonstration by A-BnC parties on the making DIY poker theme centerpiece. This is a rather simple do-it yourself video. The start of video lists a couple of materials needed to make the centerpiece like over sized playing cards, play paper money, power chips, card stock, shish kabob sticks, optional sun glasses and a just add sand centerpiece. The optional things required are glue and scissors to make changes to the materials and to stick them together. Following this video on...
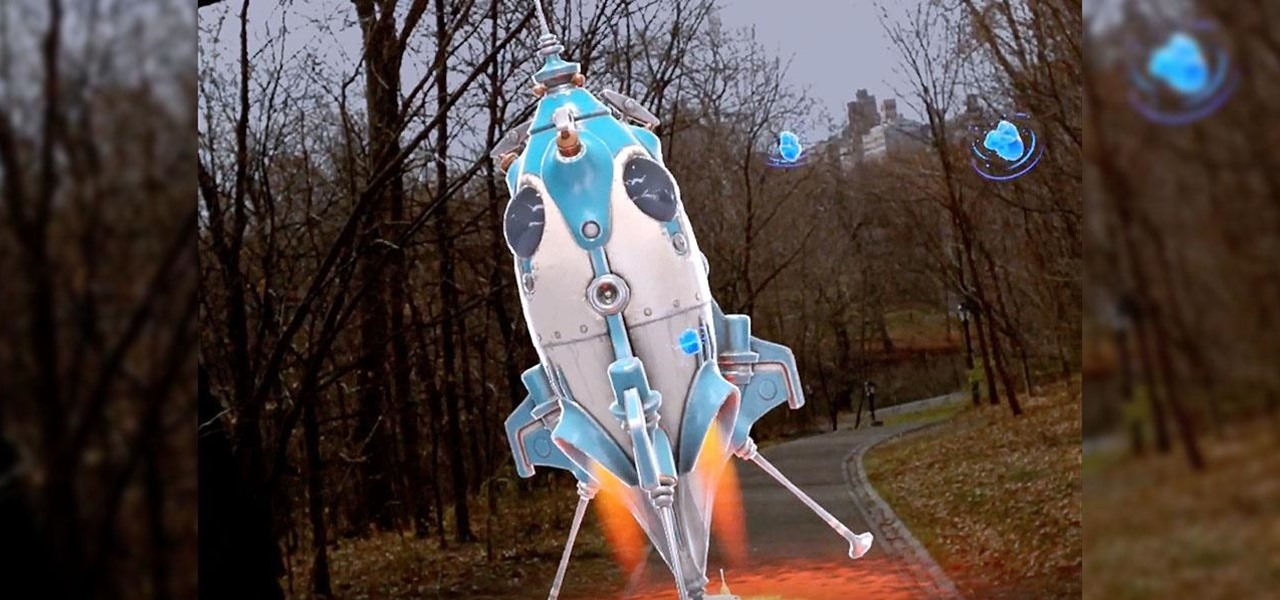
We're a few weeks away from the fireworks associated with New Year's celebrations, but that doesn't mean you can't start a little early — in augmented reality.
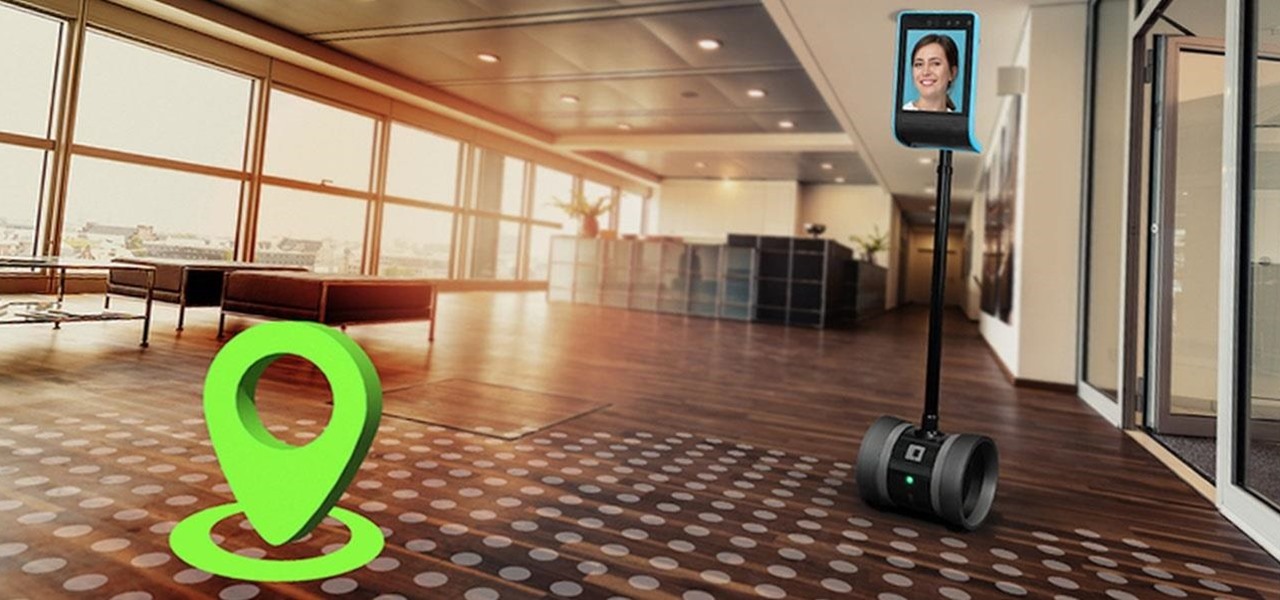
Until Star Wars-style 3D hologram projection technology becomes commonplace, the near future of certain kinds of remote work is in robotics. Now, a new dynamic is using augmented reality to give this kind of telepresence a kind of superpower.
Last week at Mobile World Congress 2019, Google put an augmented reality twist on its annual Android Partner Walk via its ARCore toolkit.
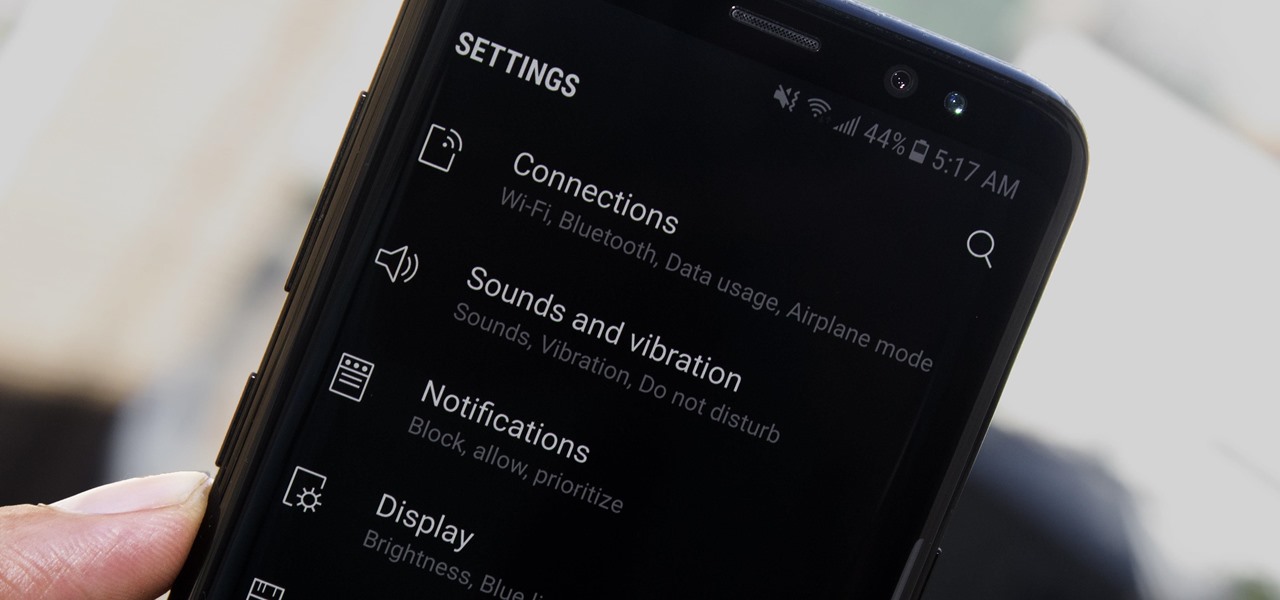
Samsung's recent TouchWiz rebranding didn't really change much — the skin is still as bloated as ever, and the UI still uses tacky accent colors. But while you can't fully remove TouchWiz without rooting, there are ways to make it look a lot better.
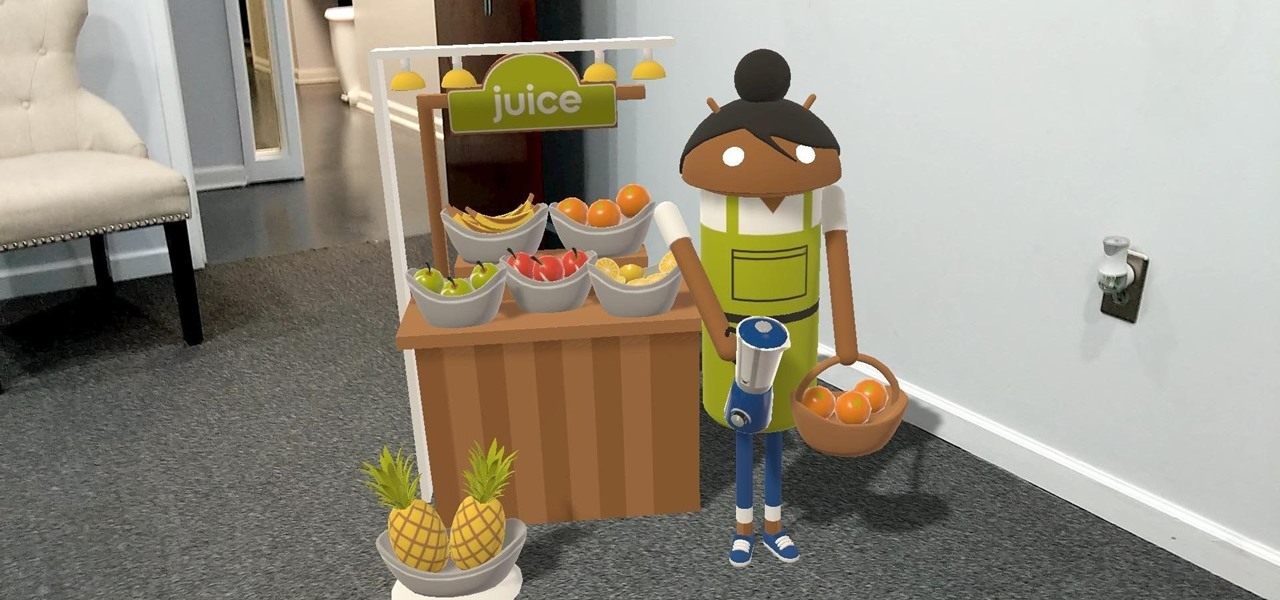
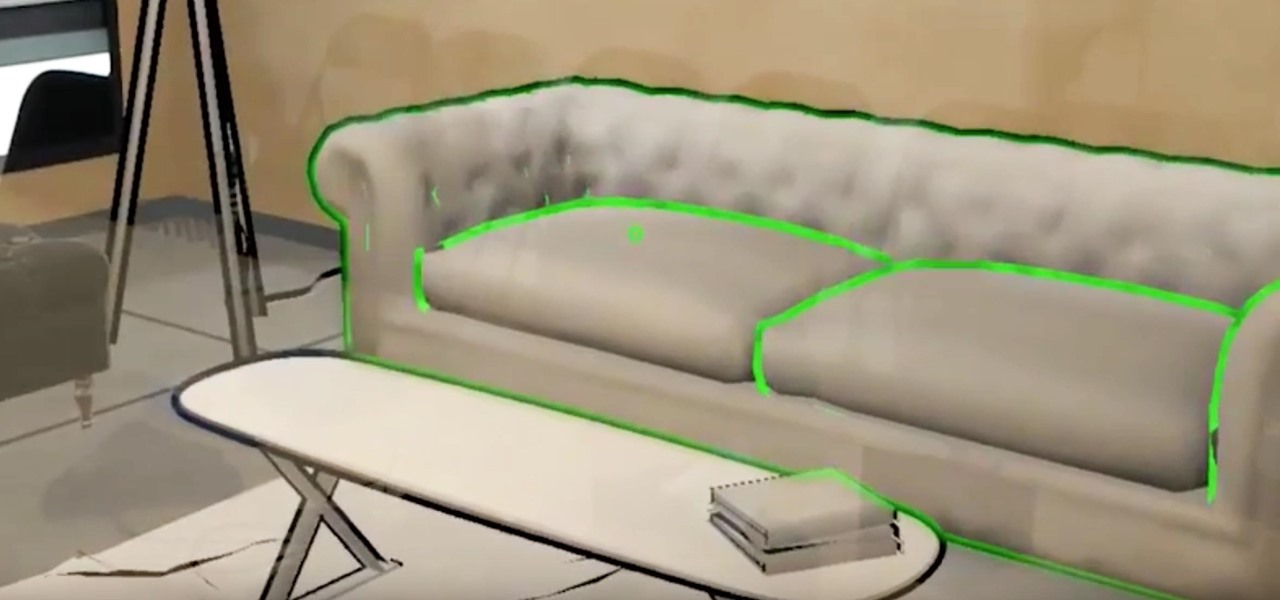
What does our future hold when augmented and mixed reality finally enter the mainstream? As developers, we are always looking for the ultimate solutions to the problems our users see. Welcome the innovative minds of DataMesh Consulting and their impressive HoloLens interior design solution called HoloDesign (previously "Decoration").
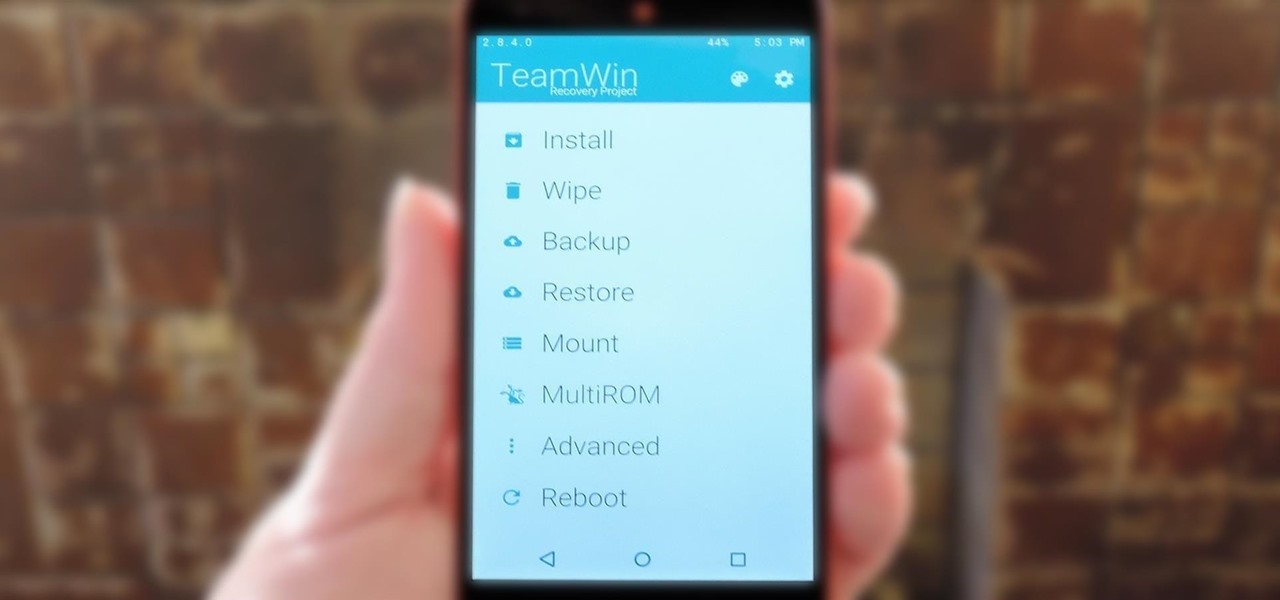
TWRP is hands-down the best custom recovery out there. Its interface, on the other hand, is... well, let's just call it utilitarian. The guys over at Team Win made sure that their product was robust, functional, and easy-to-use, but they didn't put a tremendous amount of effort into polishing the looks.
These last few months have been a Lollipop lovefest, and I'm not talking about the candy. Android's latest OS has been exalted for its embrace of Material Design, and we've certainly given Lollipop its fair share of coverage as well; check out all its new features and ways to make older devices get some of the new look and feel of Android 5.0.
With Google's latest version of their mobile OS, Android L, the most notable aesthetic difference is the newly introduced Material Design concept that will soon be ever-present through the interface. The objective of this bold design is to create "hierarchy, meaning, and focus," as described by Google, and the deliberate choices of color and white space "to create immersion and clarity."
If you're like me, you've already spent a ton of money on your costumes, your badge, and your hotel room, and now you're looking for ways to cut costs. There are all kinds of ways to save money at DragonCon, but many of them involve violating the rules in some way, such as not buying a badge, sleeping on the floor in a hallway somewhere, etc. However, the one thing you can do that is totally not against the rules is eat for free. It requires a little self-discipline and a willingness to eat w...
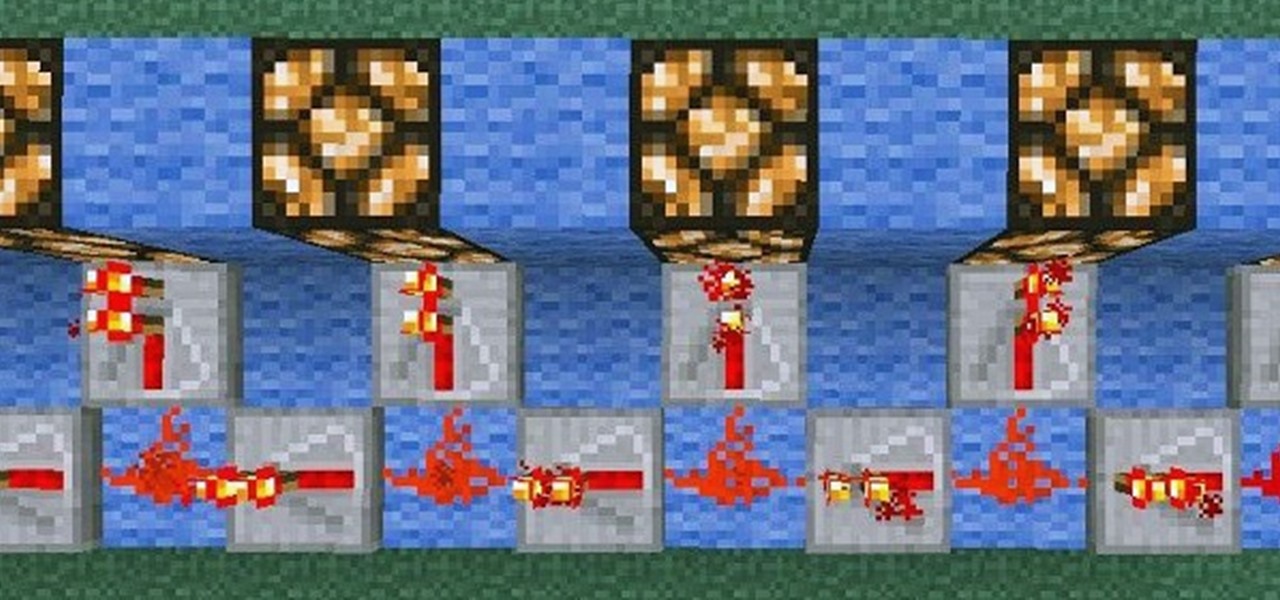
Builds in Minecraft aren't usually for your own personal enjoyment; most people want to show them off to others. So to some extent, builds need to be user-friendly. That is, they should automatically guide people to areas of interest or importance. One particularly stylish way to do that is by using guide lights. I have two different designs included here, which you can either use or adapt to your own purposes.
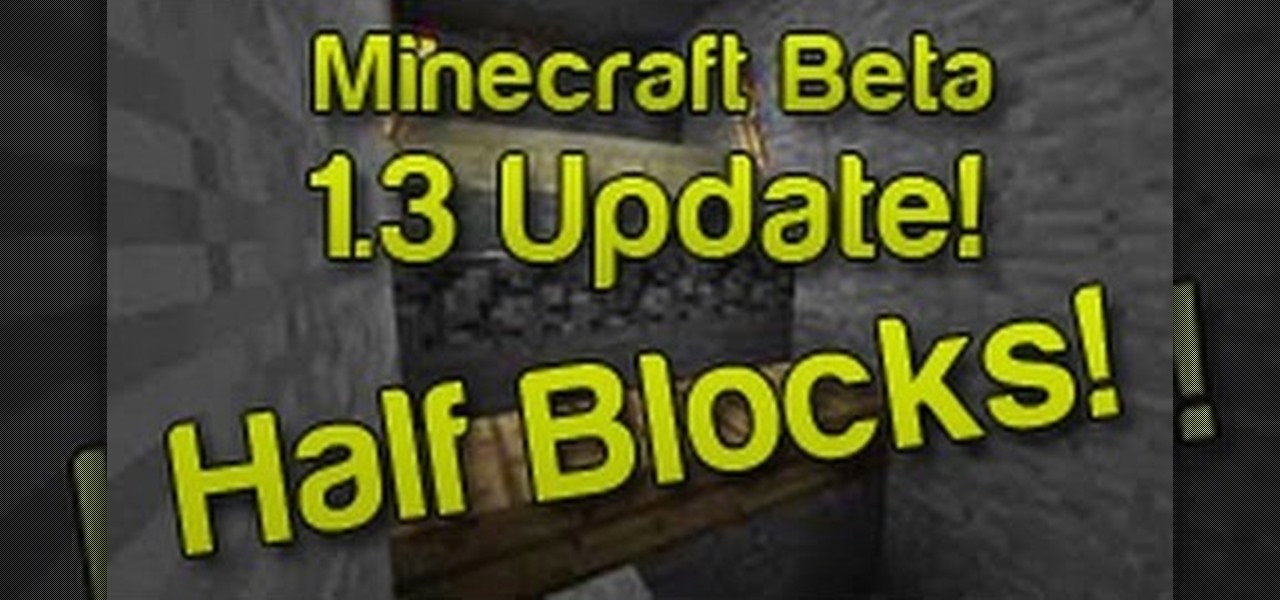
One of the many significant changes in Minecraft Beta 1.3 is the way half-blocks or slabs work. Before you could make stone slabs out of three pieces of stone and use them to builds stairs, but it took a lot of material and was limiting as far as choices. Now you can make slabs out of wood, cobblestone, sandstone, or normal stone, and this video will show you how it works.
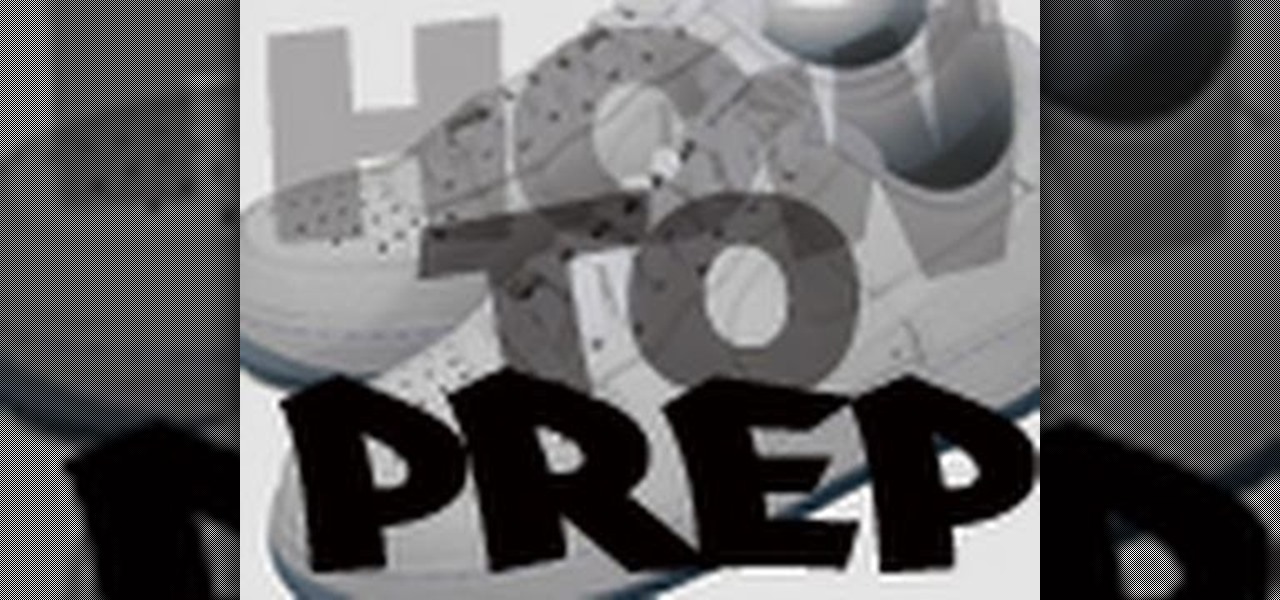
When fancy kicks started making their way into the indie scene, the art of custom leather shoe painting exploded. If you want to custom paint some kicks to show you creativity in this high-visibility area, watch this video for an in-depth guide to prepping any leather (not patent leather) shoes for painting by using Acetone, cotton balls, and other basic materials.
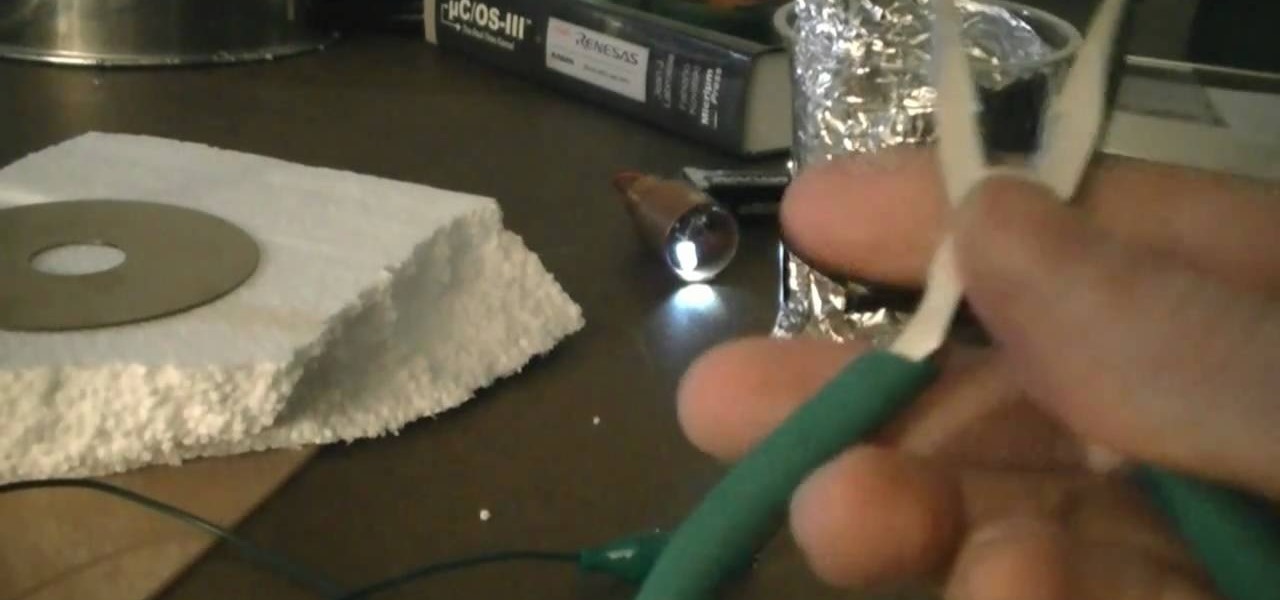
An electrophorus is a type of capacitor that generates electrostatic energy. Most of you probably know this force as static electricity, the domain of door handles and polyester shirts. It can be used for all sorts of other fun science experiments though, and this video will show you how an old hard drive, some plastic, Styrofoam, foil, a cat, and other simple materials can be used to make a a simple functioning electrophorus.
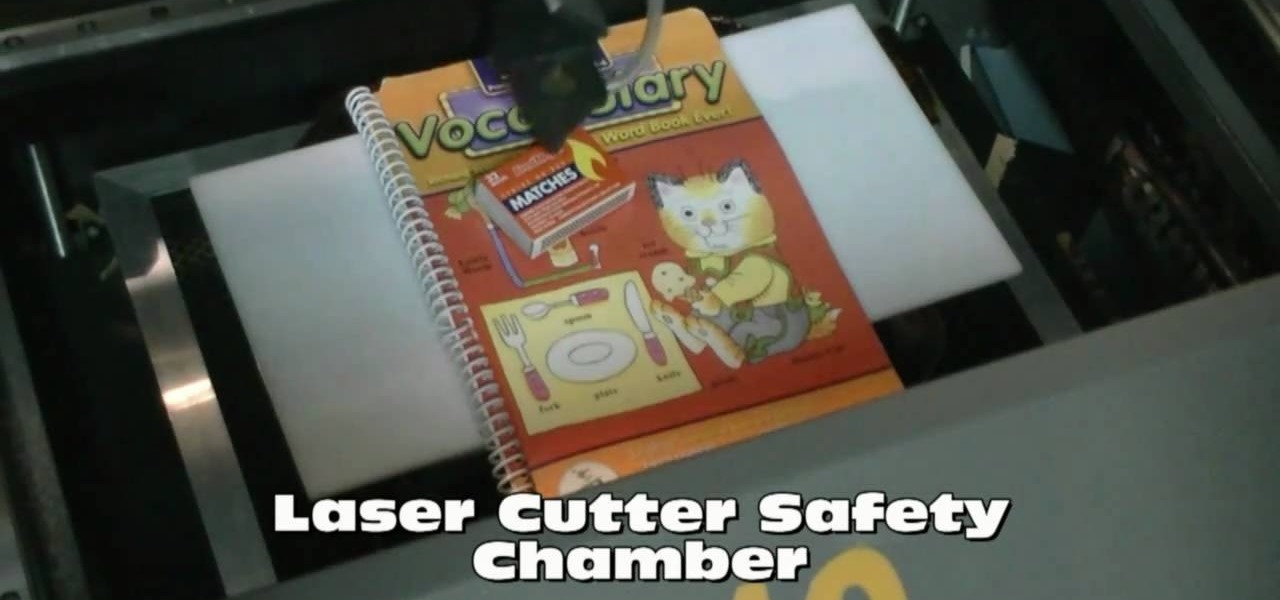
If you are the proud owner of a laser cutter, you had better be careful with your expensive new toy. Some materials can damage the optics in your laser or produce poisonous gas when you cut them, so you need to make a gas containment chamber to work in. Watch this video to find out how to do that out of silicon wafer, silicone sealant, and a metal cookie tin lid.
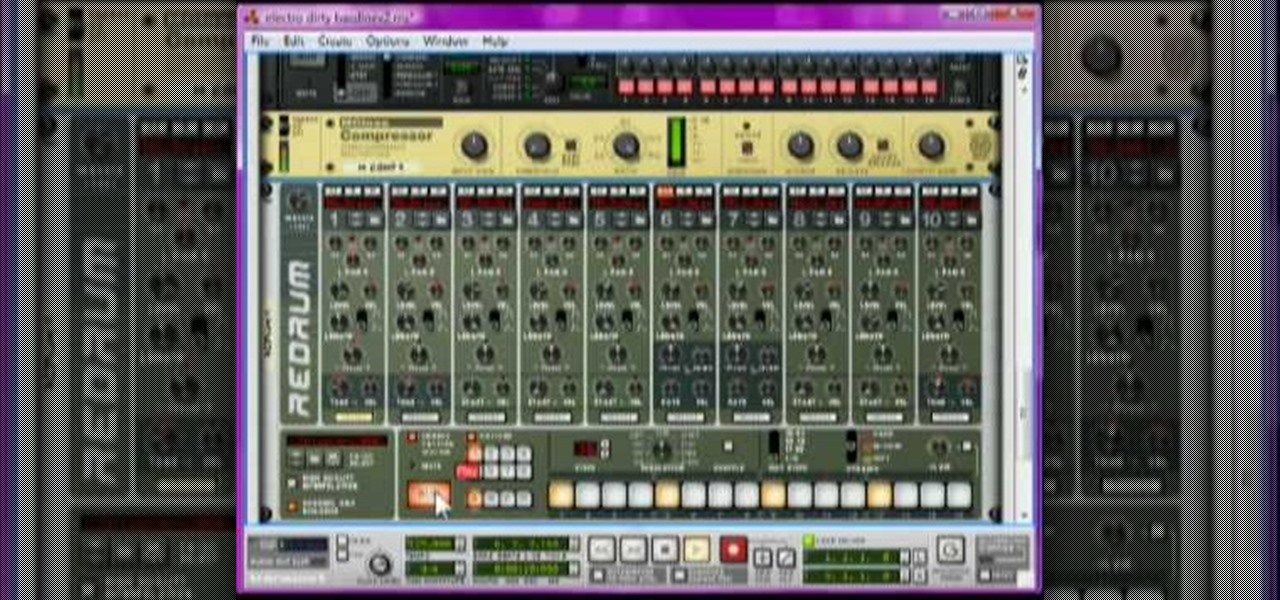
Justice might not have produced any new material in a while, but their place in electronic music history is already secured due to their filthy electro-house beats that have become ubiquitous in the years since they first broke out. Watch this video to learn how to make a dirty electro bass synth line like theirs in Reason 4.
Perspex is a durable and fashionable material, so getting tables like this made of it at the stores is expensive. If you've got some tools and wide DIY streak though, you can make one yourself with about 8 hours of time and this video, which will teach you just how to do it.
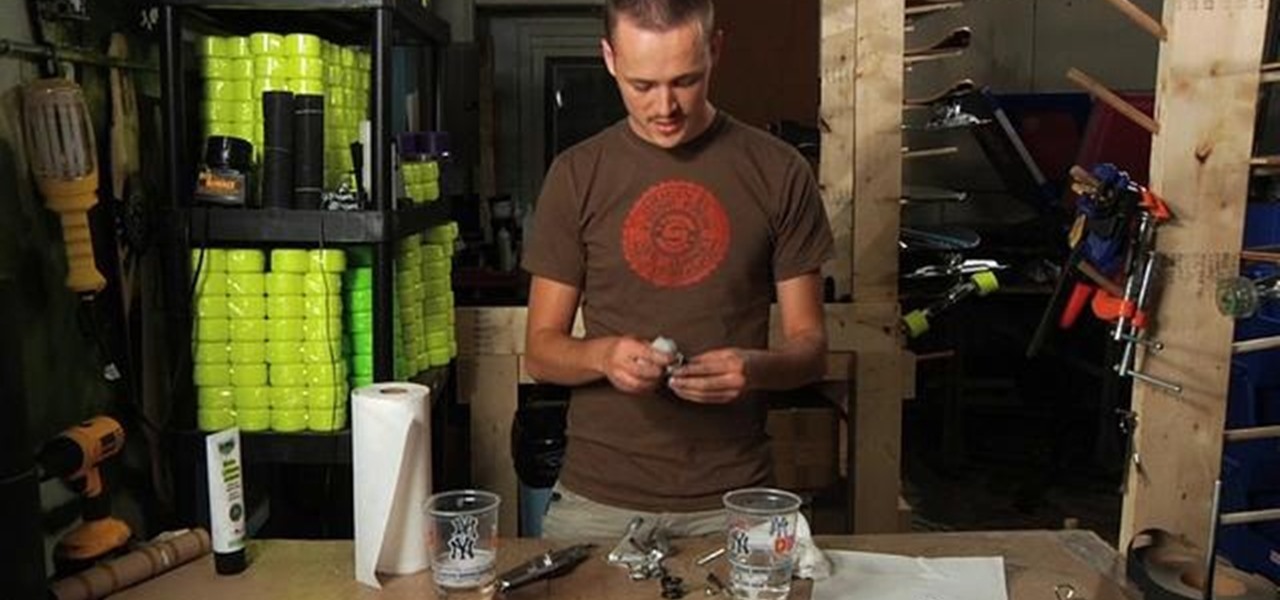
The trucks on your skateboard are it's only piece of connective material, and keeping them clean and lubricated is absolutely crucial to having good rides. Watch this video to learn how to take apart, lubricate, and the put back together your trucks.
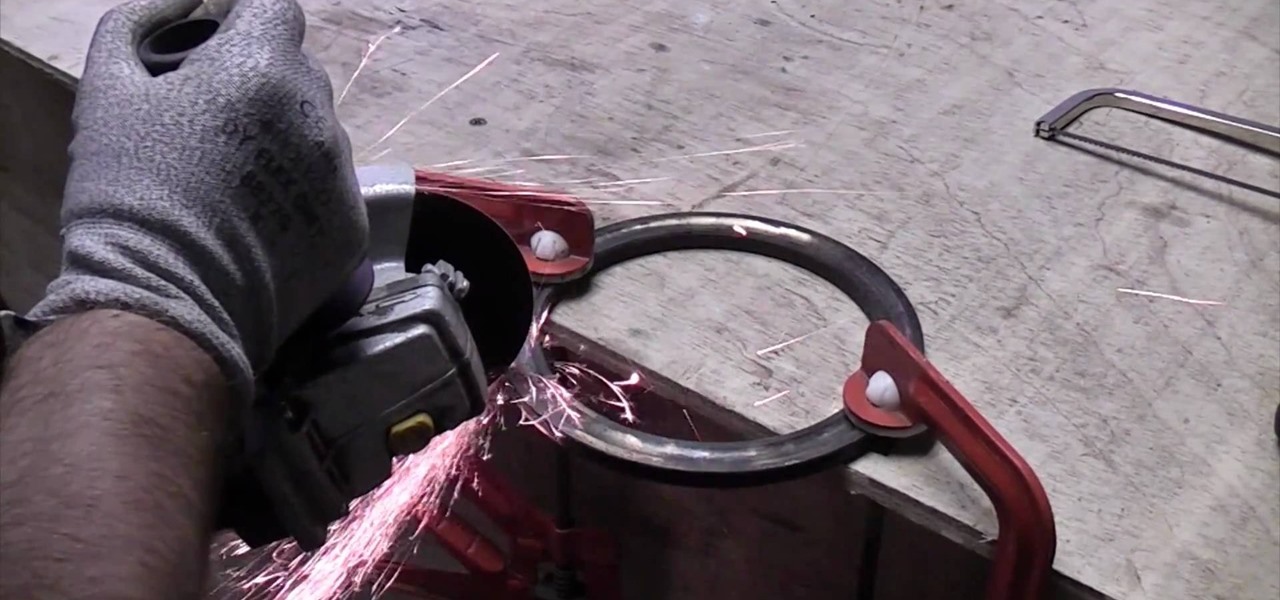
Hardened steel is a very useful material, but working with it is tough because it is nearly impossible to cut with simple tools. What you really need is an angle grinder, and this video will show you how to use one of the powerful power tools to cut a hardened steel ring.
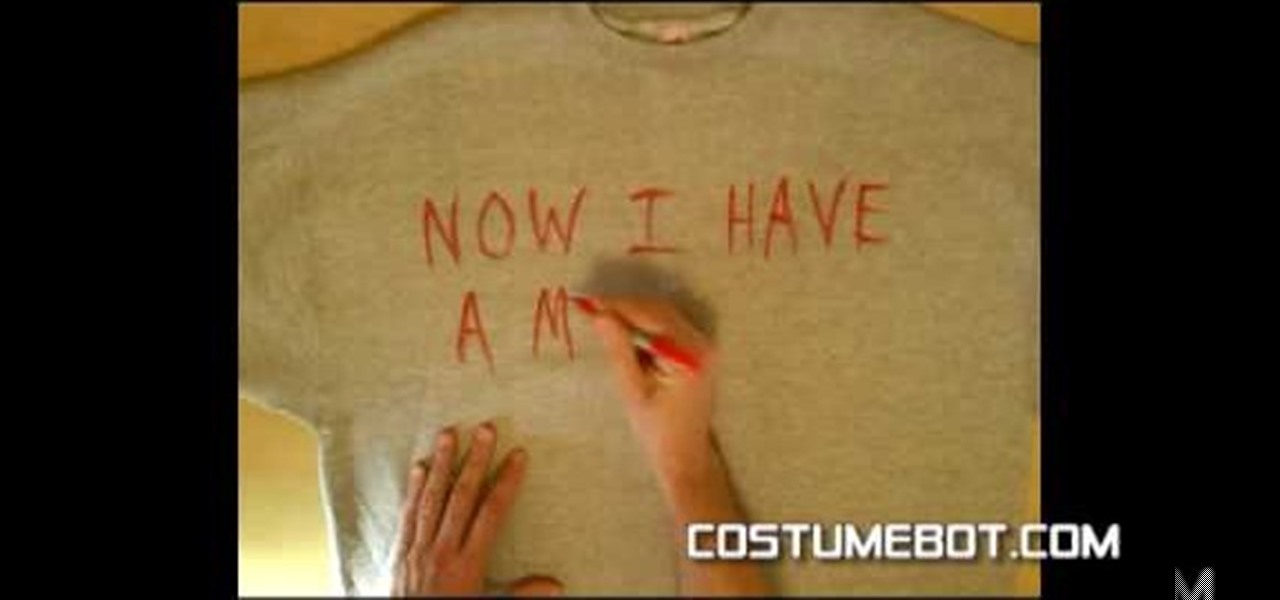
Tony is not the most well-known of Die Hard characters. He's the guy who McClane writes, "Now I have a machine gun ho-ho-ho" across the sweater of and leaves for Hans Gruber to find. He makes a good, quick, conversation-starting Halloween costume, and this video will show you how to make a Tony costume yourself out of a sweatshirt and other basic materials.
If you like the idea of building rockets that will soar through the air like angels but don't want to bother with operating high explosive, it's possible to build pretty darn powerful rockets out of water. This video will show you how to do so very easily out of junk that you probably already have.
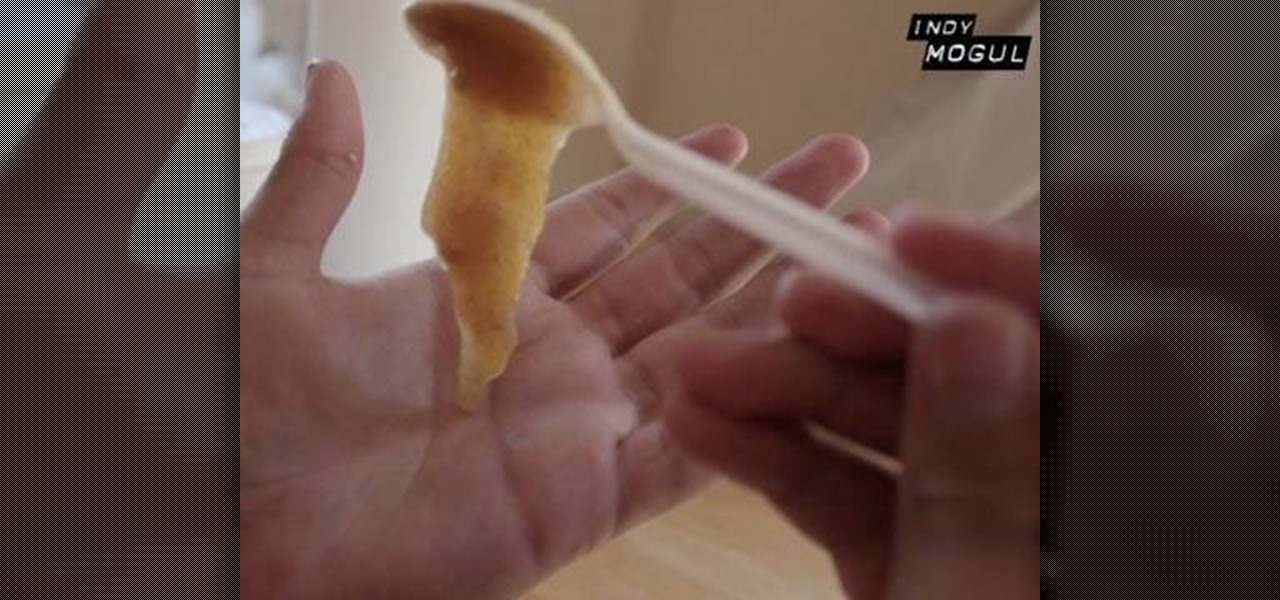
The human body is full of different kinds of fluids, most of which are either gross or dangerous to remove from a person for use in one of your films. Fortunately, most of them are pretty easy to replicate using household materials. This video will show you how to make edible prop fake blood, feces, vomit, and snot. They all look great, are safe, and will make you movie much more realistic.
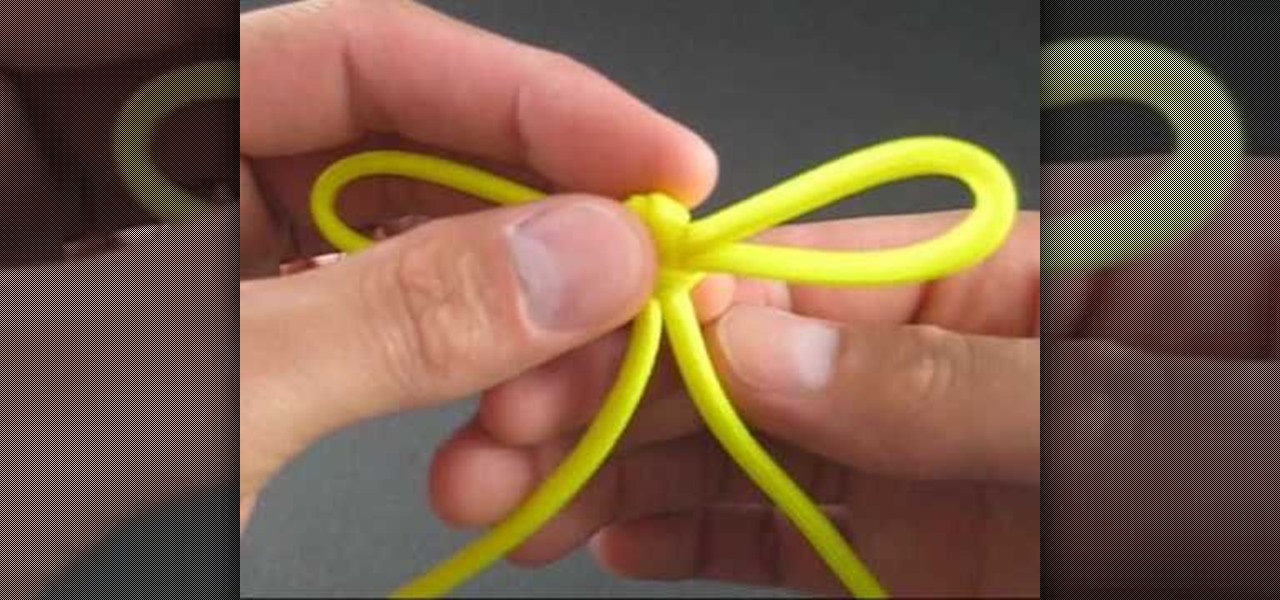
If you're looking to tie something that is elegant and beautiful, then this next tutorial has something for you. This video is going to show you step-by-step on how to tie a Japanese bow knot.
This video is a 2-for-1 special. It will teach you how to make not one, but TWO cool props for a film or costume. They are, in no particular order, a gas mask / ventilator and a laser pistol. Both look very cool, require some materials and carpentry skills, and are sure to make your next sci-fi film much more realistic and enjoyable to watch.
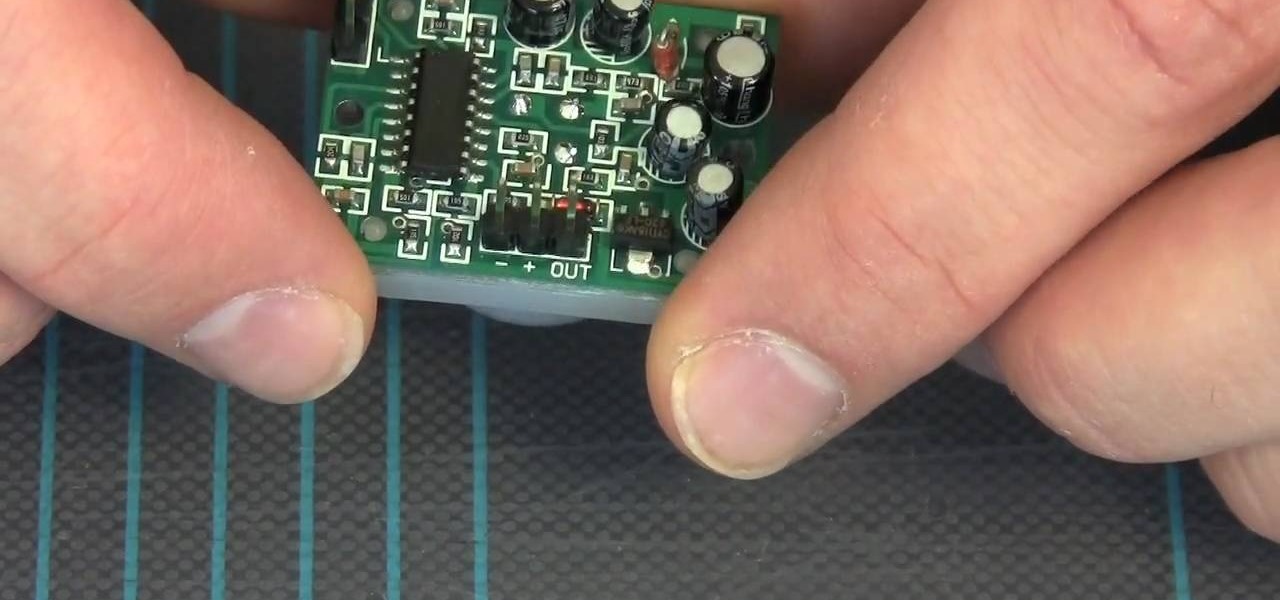
Want to build your own infrared motion detector? It's easier than you think! So easy, in fact, that this video tutorial from MAKE can present a complete overview of the build in under five minutes! For more information, including a full list of materials and detailed, step-by-step instructions, and to get started building your own passive infrared motion alarm, take a look.
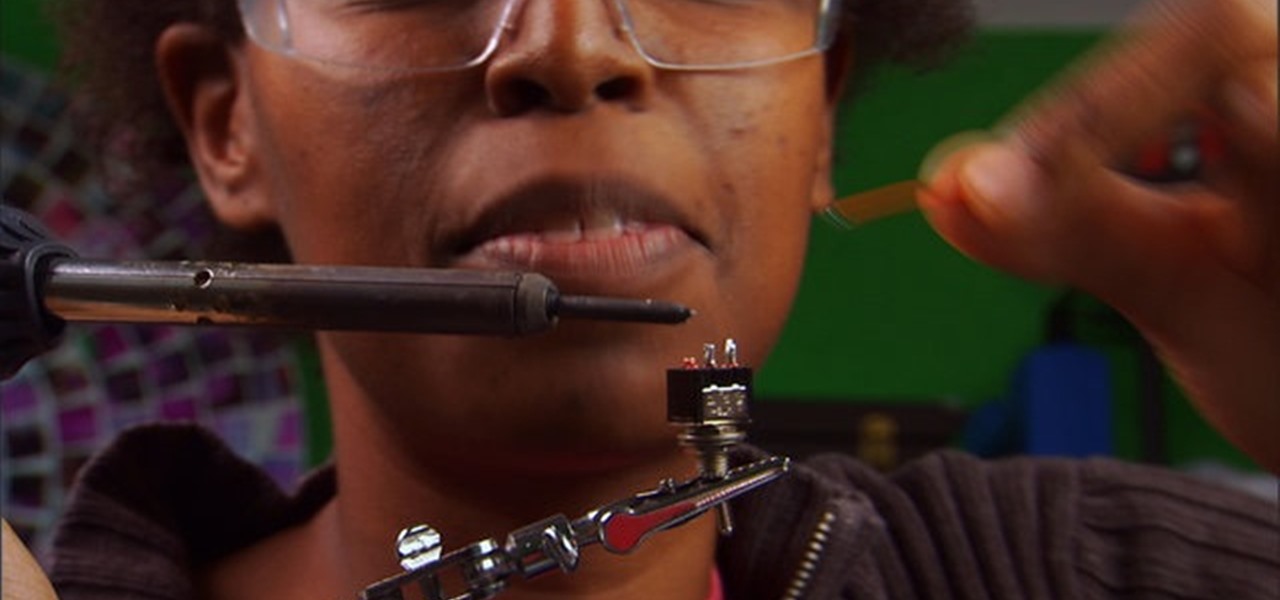
In a time of ubiquitous electronics, soldering is an essential skill. Fortunately, if you don't already know how it's done, it's an easy skill to pick up and the tools and associated materials can be had for cheap. This video tutorial from MAKE will get you started. For more information, and to get started using a soldering iron yourself, take a look.
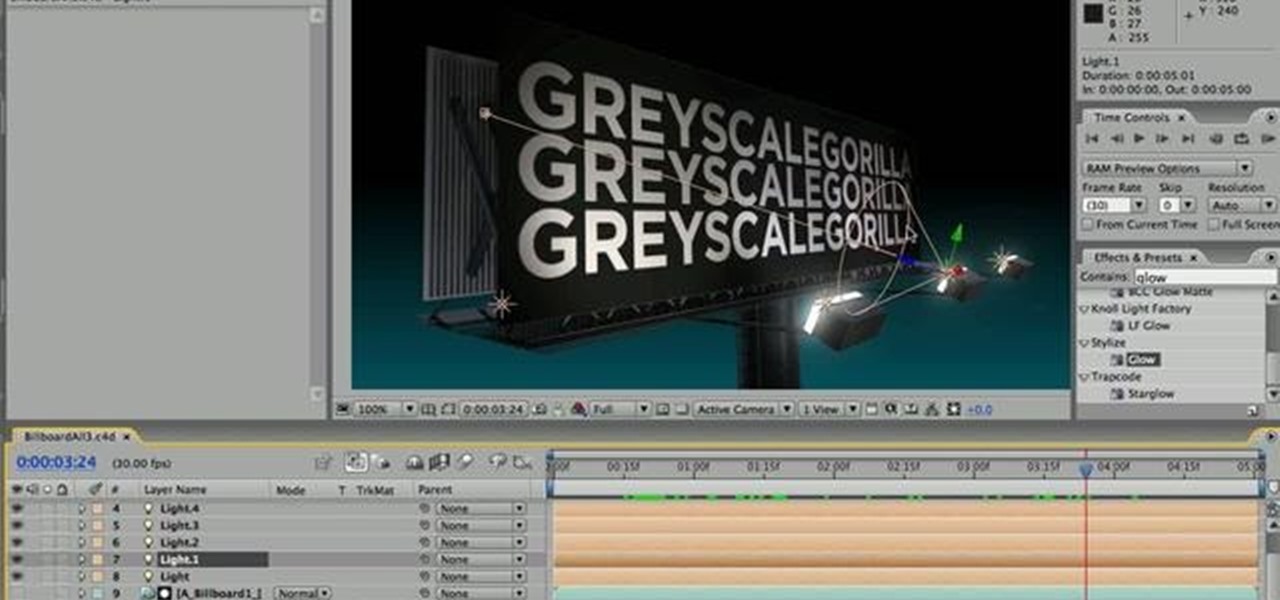
See how to prepare your renders in Cinema 4D for export into After Effects. This tutorial also delves into the process of importing your render into After Effects and adding materials to your 3D scene. For more (and better) information, including step-by-step instructions, and to get started transfering your own work from Cinema 4D to After Effects, watch this free video software lesson.
Real rockets require top ingenuity from physics and engineering experts, but you can construct a smaller replica that costs almost nothing can can be made from materials you already have at home or can find at a hardware store.
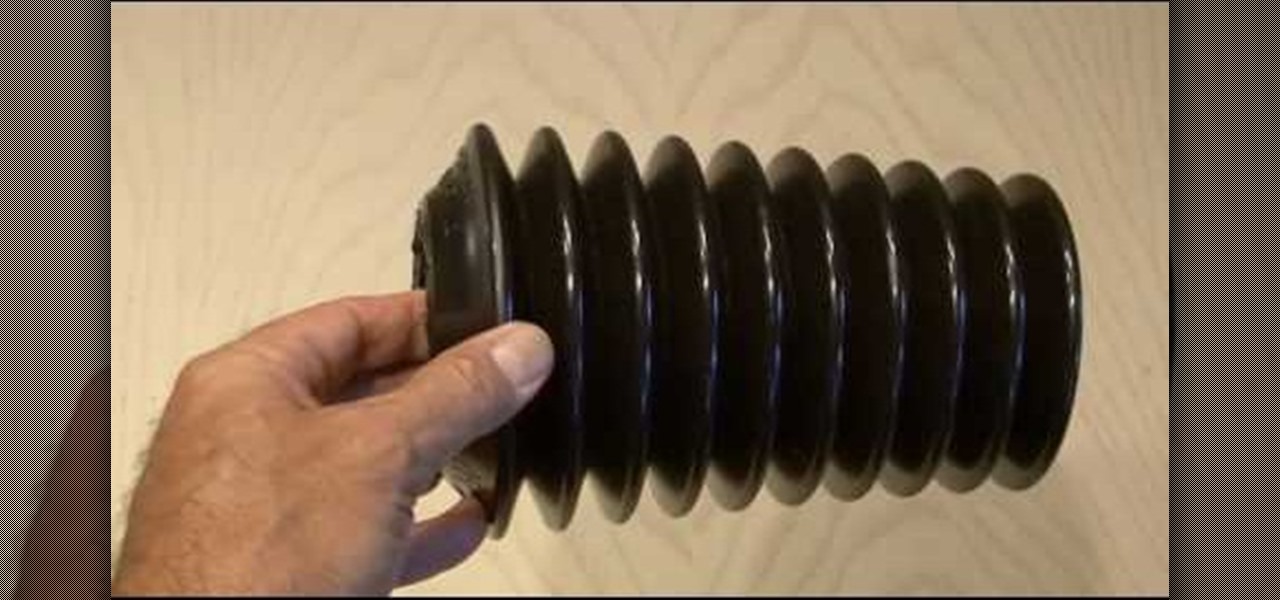
Kipkay from Make Magazine shows us how to create a photographic illusion, making things look smaller than they really are with tilt-shift photography. Materials needed include rubber plunger, an oversized lens, a plastic body cap, a single lens (or digital single lens) camera, a hot glue gun, a sanding file, and a disposable object for a plastic backing, such as a VHS tape case. With this great tutorial and a little work, create the illusion of a miniaturized world with this photographic tech...