Check out this mission on The Saboteur for the Xbox 360. The third mission in Act 2: A Whisper or a Roar is where Santos is looking for help again. When you get to the convoy, Sean points out that there are two very different ways to complete this mission. You can get a disguise, sneak up close to the convoy, and plant some dynamite, which would be the conventional route.

You may have to eventually abandon your stealthy approach in this mission on The Saboteur for the Xbox 360. The second mission in Act 2: Better Dying Through Chemistry is when you reach the entrance, there's a gunner behind sandbags by himself. If you take him out quickly and disguise yourself you can actually play this level pretty quietly. There are two basic kinds of targets, the smaller, thinner tanks, and the bigger, darker tanks. The big tanks you can blow with dynamite and as long as y...

Think Indian Jones when you play this mission on The Saboteur for the Xbox 360. The sixteenth mission in Act 1: Viva Le Vengeance is when you need to head into the church to drop off the chest, which seems to contain the suitcase from Pulp Fiction. Time for the dramatic climax of Act 1.

At the end of this mission on The Saboteur for the Xbox 360, you need to make your escape. The fourteenth mission in Act 1: Buried Secrets is when Skylar is waiting way in the southeast, so you have a long drive from the last one. The mausoleum is right nearby. The easiest way in is the blunt approach. Grab some wheels, smash through the front gate and ride back to the mausoleum. For more info, watch the whole gameplay.
There will be blood at this wedding on The Saboteur for the Xbox 360. On the twelfth mission in Act 1: Red Wedding, pick off all the Nazis at the ceremony. Time to finish Father Denis' story. The wedding is way in the east. You'll have to park the car on the far side of the bridge and hoof it from there. Get into position at any of the hiding places. For more info, watch the whole gameplay.

Now, not everyone can bend the spoon in their first try. Though some people do it in the first time , others take a few trials before they do it. But everybody , surely can bend it. This is how...

Homer starts with explanation-on what the art of surprise is all about. He explains that the art of surprise is to create some good and bad surprises for the partner which involves many ways and following the steps can leave your partner really surprised.
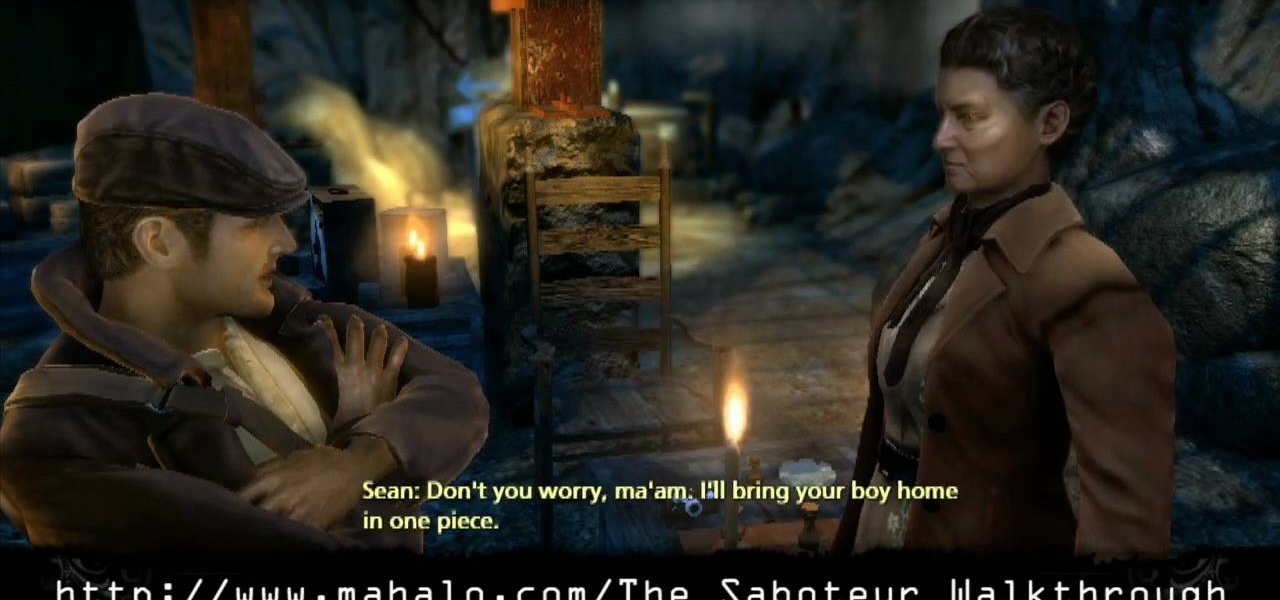
This is a great playthrough of The Saboteur for the Xbox 360. In the fourth mission in Act 2: Jailbreak, you will need to do the obvious… jailbreak. Once you acquire the papers to enter Area 2, you'll be able to start this mission by visiting the resistance in the Western District. They will charge you with freeing a man named Bryman from a Nazi prison. Grab a car and follow the GPS to the destination. Here you'll find a heavily occupied Nazi area. Bryman's cell is within the courtyard surrou...
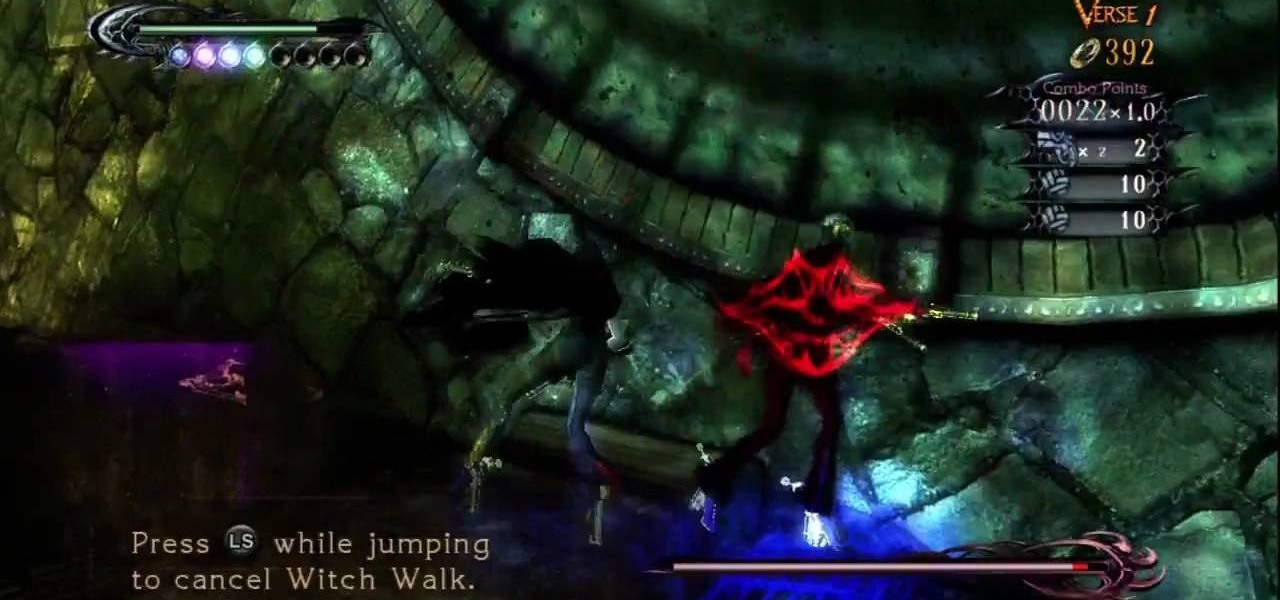
Fight Enchant Angels, Trash Mobs, and Fortitudo in the Xbox 360 game Bayonetta. In Chapter 2 - Vigrid, City of Deja Vu, it's time to shine as one mean mama-san. In the first battle you can walk on walls. To get back to the floor quickly press down on the left stick while jumping. Because this fight takes place on six different surfaces it can sometimes be hard to locate Jeanne (your opponent). If you don't know where she is, just shoot her. Your guns don't do any damage, but you will see wher...
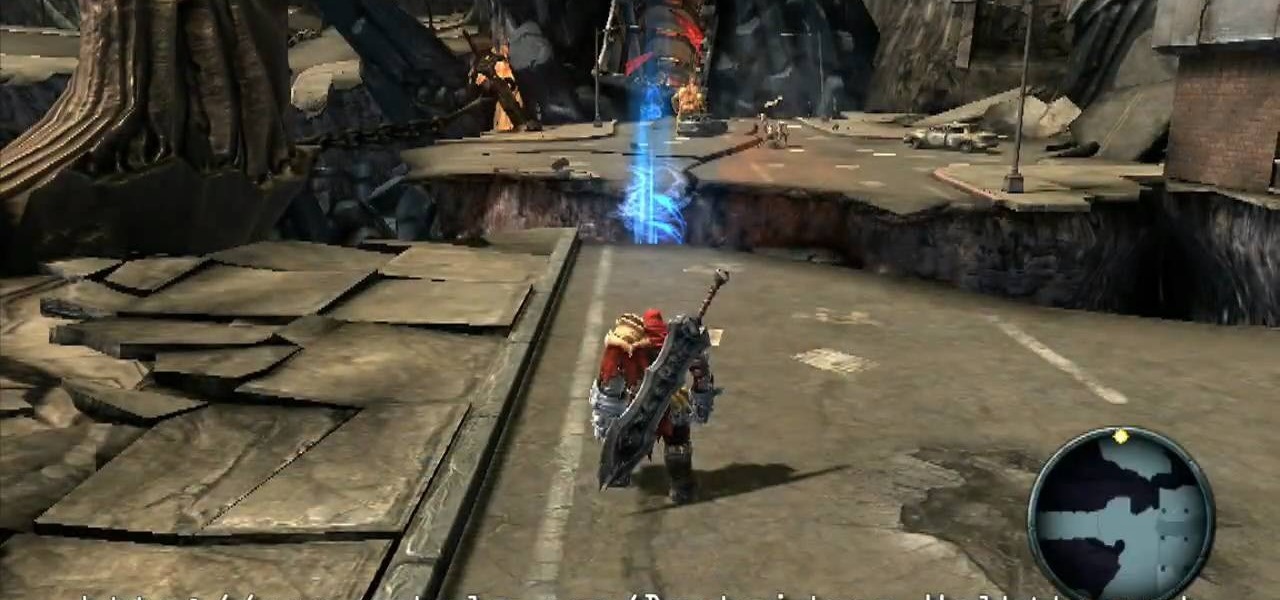
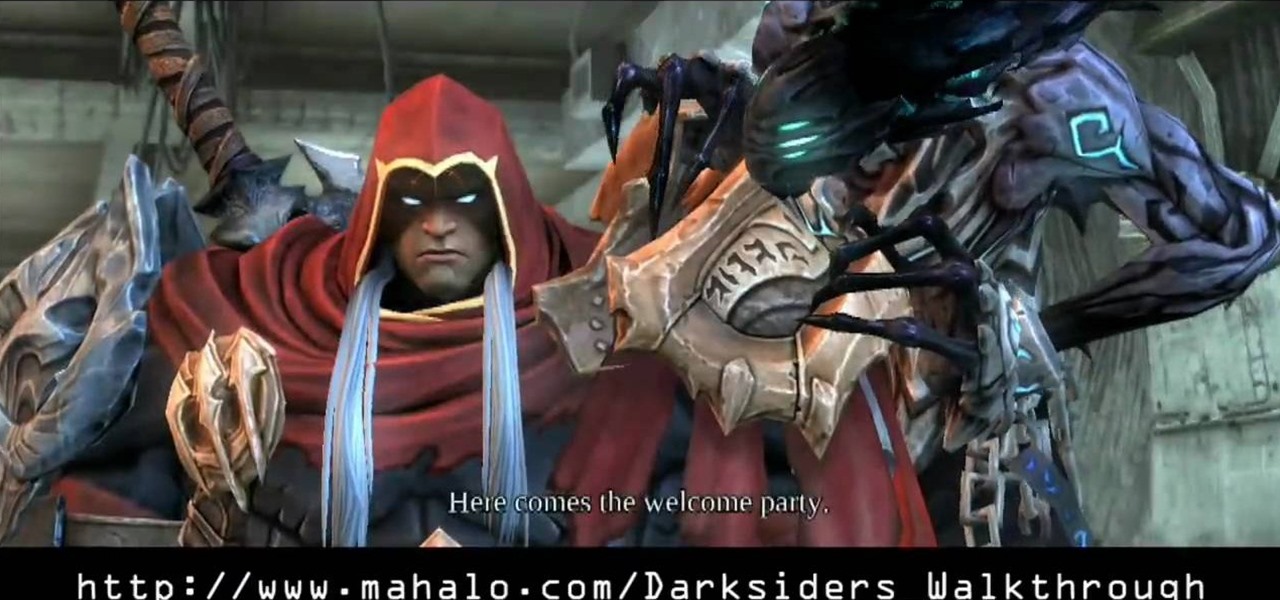
See the steps that lead up to the Phantom General in the Xbox 360 game Darksiders. See each and every step involved for the Scalding Gallow level. Once you enter this new area, make your way up the steps to the left to find a Soul Chest on the half demolished second floor. Now step out of this building and into the middle section of this map. In front of you is a long sharp tooth lined walkway. Before venturing to the circular portion in the middle, make your way around to the left. Back here...
This lengthy walkthrough covers a lot of ground in the Xbox 360 game Darksiders. Learn all you need to know about the Crossroads, including the Seraphim Hotel, the Crossroads, and the Library. War and the Watcher land in the parking garage of a hotel. Smashing cars and other objects can earn you a few extra souls. When you are ready, climb the Demonic Growth to the second floor and explore the far corner to discover a Soul Chest. These blue souls are worth collecting as you will be able to ex...
Souls have their value in the Xbox 360 game Darksiders. Learn all you need to know about the Crossroads level Charred Council. War finds himself before the Charred Council who accuse him or disobeying the laws of the Seven Seals. War feels that he was in the right to intervene and pleads to be sent back to earth to discover how the Destroyer invaded earth without breaking the Seven Seals. Being that War has been stripped of all his powers, the council sees it as a death sentence which is a wo...
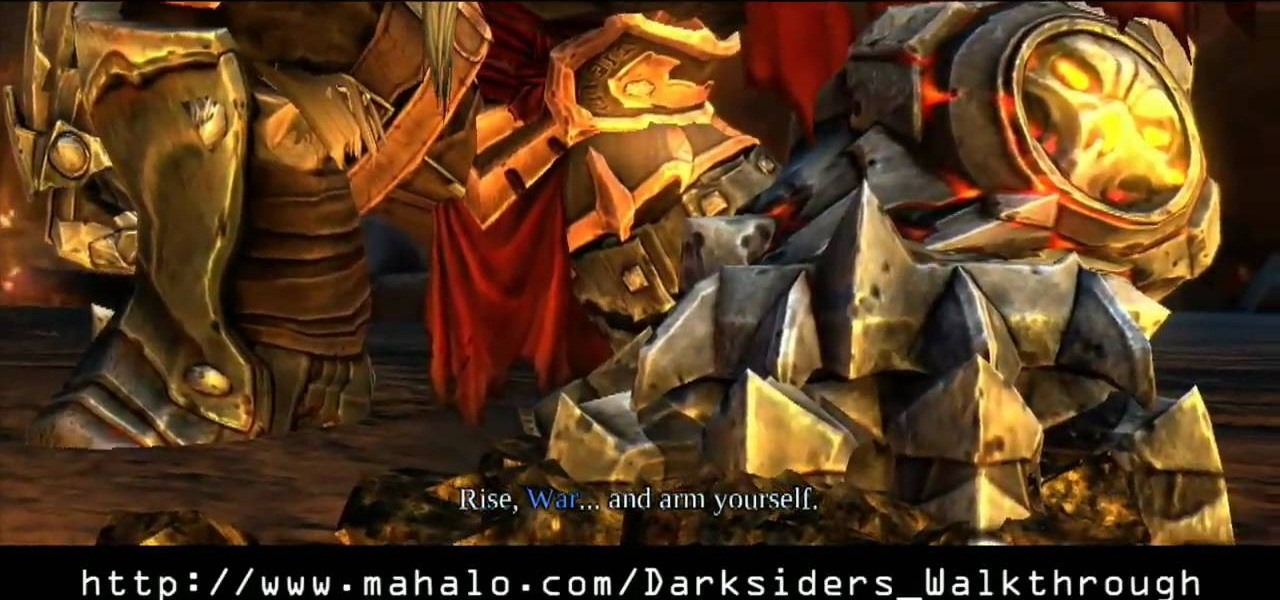
Begin hacking your way through the hordes of minions in the Xbox 360 game Darksiders. The Prologue is where you really start to develop your creature killing skills. The apocalypse has begun on earth. Angels and Demons reign chaos upon the planet in a battle for the souls of humans. This is when War steps in. One of the four horsemen, War is here to restore balance. You begin the game with a powered up War. Note that he has 7 Lifestones (the little green skulls above the health meter). Each o...
Make your way through The Saboteur for the Xbox 360. In the eighth mission in Act 1: Doppelganger, the ambassador will rendezvous with a German official near the Place des Vosges. Security will be tight around the ground level, but you should be able to find a vantage point among the rooftops. For more info, watch the whole gameplay.
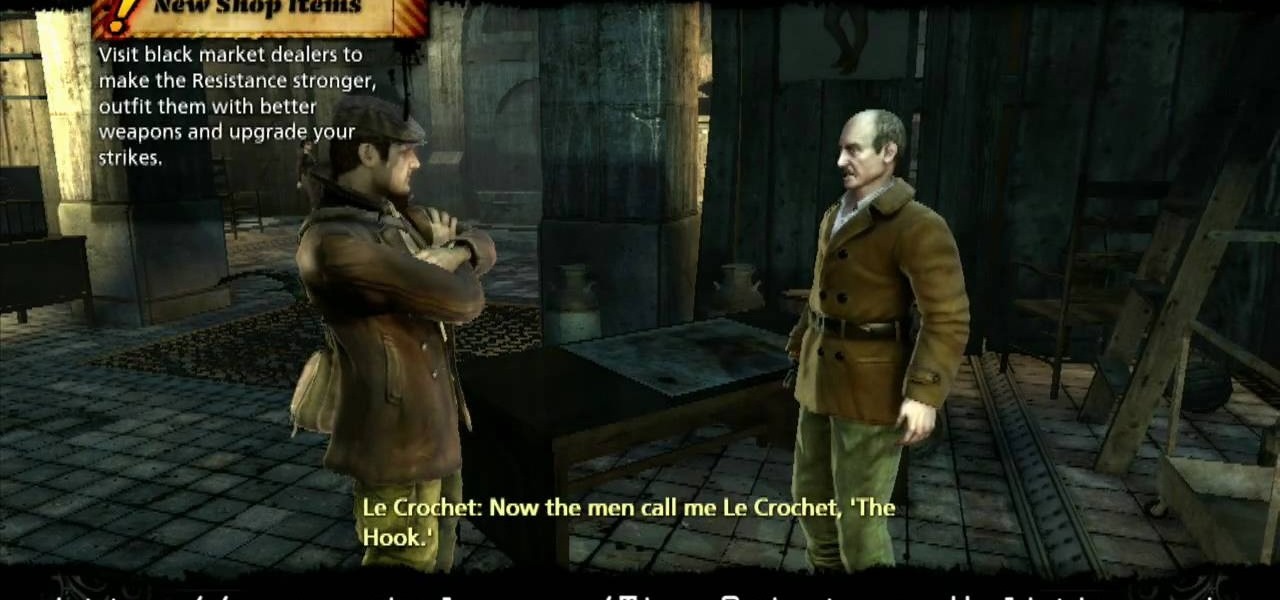
Here, you'll meet Luc and Crochet in The Saboteur for the Xbox 360. In the seventh mission in Act 1: Belly of the Beast, after speaking with Crochet, you'll need to go to the red light district. For more info, watch the whole gameplay.
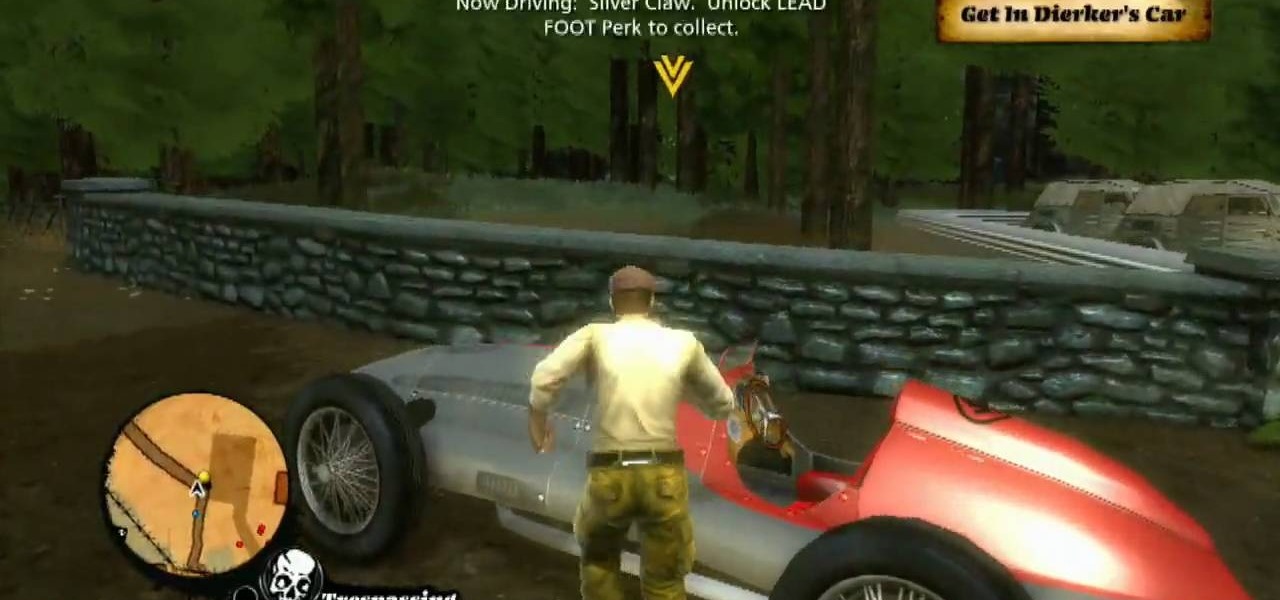
Drive your way to success on The Saboteur for the Xbox 360. You need to floor the pedal in order to follow Dierker in the sixth mission in the Prologue: A Sunday Drive. It's payback time. Hop into the car with Jules and follow Dierker. Don't get too close to him or his paranoia meter will rise. If it fills up you will be caught and fail the mission. Likewise, if you loose sight of Dierker for too long you will fail the mission. Follow Dierker, just don't follow him too closely. He will lead y...
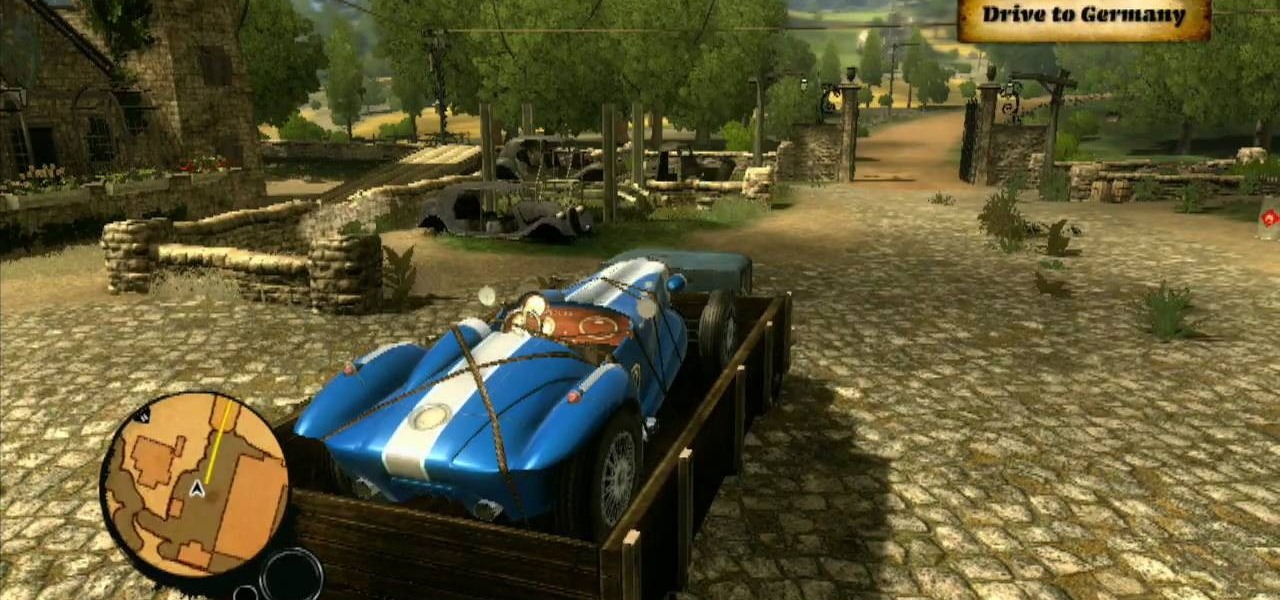
Prepare yourself for more info than you need for winning The Saboteur for the Xbox 360. See everything involving the second mission in the Prologue: Better Days. Sean will flashback to 3 months prior to the opening mission. After the cutscene introduces some new characters, hop into the truck with Jules. Follow the GPS through the country side while avoiding running into other cars on the road. You'll eventually reach the German border. Pull up to the gate and a Nazi will inspect your papers ...
Mission 10 on the Sony PSP takes you through finding the ship for Kyrenia to deliver Alexander's message to the crewmen without being discovered. The path to the Crewman is relatively free of guards if you stick to rooftops as much as possible. Then, leap down to the docks below. The manifest is located on the big ship docked at the Port. Take the ladder down to the deck below and follow your nose to the manifest. With it now in your possession, take it to Alexander. For more info, watch the ...
In Mission 9 on the Sony PSP, you just need to recapture Maria. Chase after Maria and her captors. You will end up fighting off these soldiers. Once they've fallen to your sharp blade, Maria rejoins you, and you receive a new objective. For more info, watch the whole gameplay.
Defeat the Templars in Mission 8 on the Sony PSP and stop the attacks on the safe house. Altair doesn't really catch a break, although the Safe House assault squad comprises only six Templars. Slay them all. For more info, watch the whole gameplay.
In order to escape the Limassol Castle, you simply need to return to the castle entrance in Mission 7 on the Sony PSP. Ignore all the pursuers and just keep running back toward the Castle Courtyard. From there, mosey on over to the Marketplace.
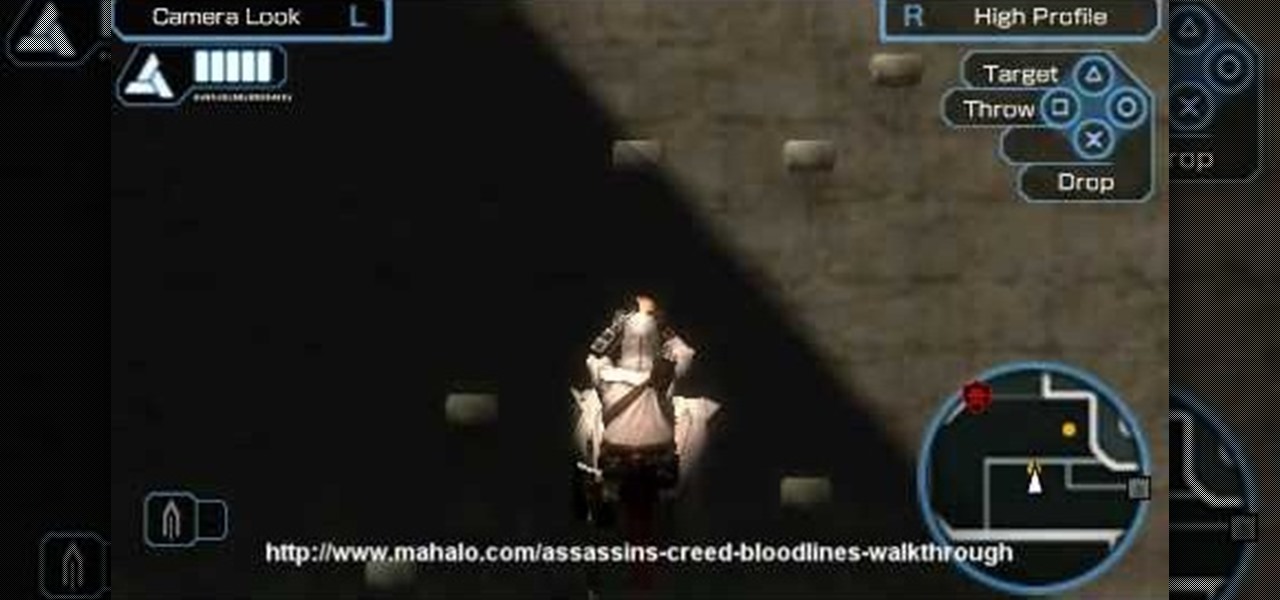
See how to infiltrate the Limassol Castle and kill Frederick "The Red" in Mission 6 on the Sony PSP. Guards patrol almost every corner of the Limassol Castle Courtyard, and soldiers armed with sturdy-looking shields block the normal route into the castle. Looks like you will have to find an alternate way. That path reveals itself quickly enough in the form of protruding pieces of bricks along the wall, allowing Altair to gain suitable height above the ground. Jump on the merchant stand roof f...
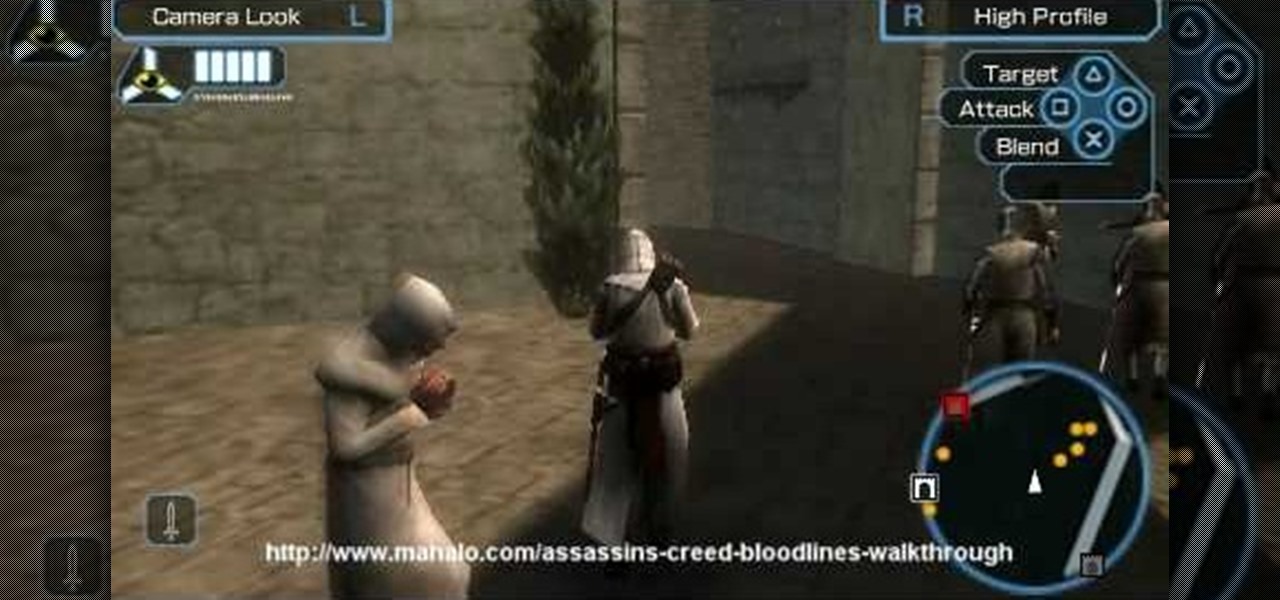
Find Osman in the Cathedral Square to deliver Alexander's message to him in Mission 5 on the Sony PSP. Make your way to the Cathedral area, at which point the red delivery icon pops up and denotes Osman's rendezvous point. The only problem is that the area is swarming with guards and that Altair must make successful contact without being detected. Climb up the first buildings in front of you and hop across toward the icon. Silently dispatch the archer on the roof and then head around to the o...
Learn how to locate the assassinate the Templar Captain of the Guard. Locate him in the Limassol Marketplace in Mission 4 on the Sony PSP. The Templar Captain is as good as dead with his location so boldly announced on the map. A word of caution: if you make a ruckus approaching him, he will be backed up by annoying archers on the rooftops. Once you've found him and carried out the deed in any way you see fit, return to the Safe House for the next objective. For more info, watch the whole gam...
Successfully complete the introduction to gameplay with Mission 1 on the Sony PSP. This is the brief episode of playing the game. See the introduction of the tale and learn the controls of the game. If you don't properly complete this mission, you won't know how to complete the rest. For more info, watch the whole gameplay.
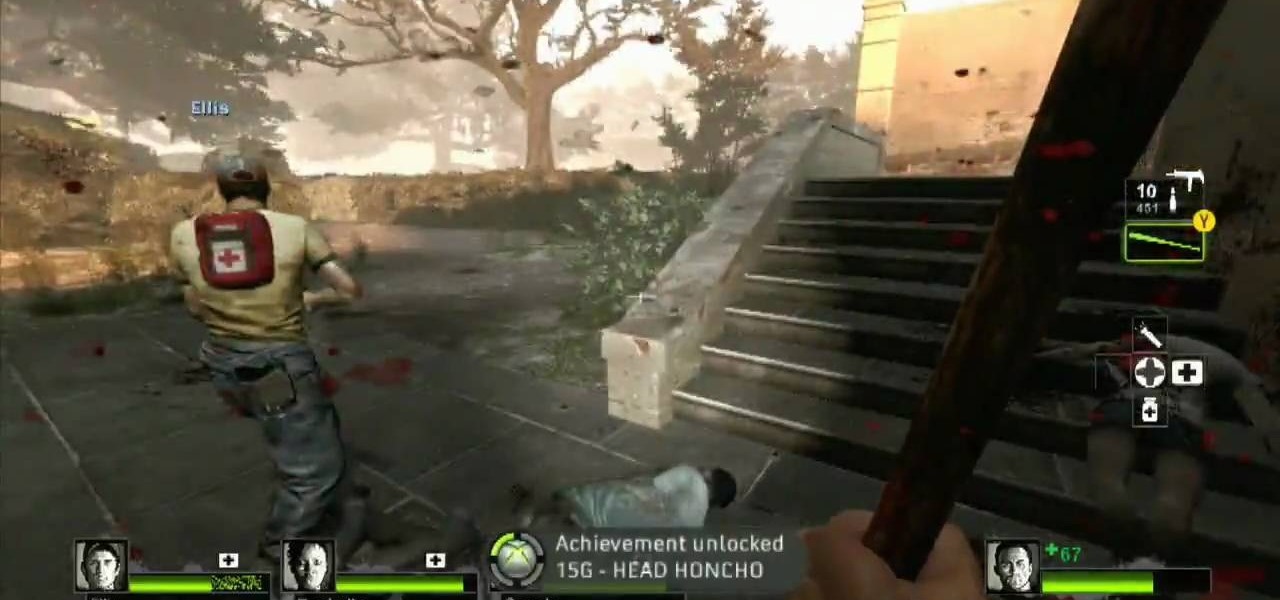
Check out this L4D2 walkthrough for some tips on Campaign 5: The Parish - Park. Stock up on items and exit via the door right next to the one you entered. Clear out any zombies and work your way up the large staircase into the park. Be prepared to deal with a likely Crescendo event in the plaza here. Pick a one of the staircases to climb up and enter the park. The restrooms near the entrance of the park usually contain a throwable item or two. For more info, watch the whole gameplay.
This last campaign is the hardest one. In the first part of campaign five, try not to drown and watch this L4D2 walkthrough for some tips on Campaign 5: The Parish - Waterfront. You are dropped off on the waterfront and told to make your way to the bridge. Pick up weapons and medpacks and head up the staircase. Go through the gate and clear a path to the Waterfront Market directly in front of you. There should be an open door for you to walk into. You may encounter a SWAT zombie at this point...
And just when you thought it was safe in town, you come back and find out it's like you were never there. Zombies everywhere. Watch this L4D2 walkthrough to play Campaign 4: Hard Rain - Return to Town. Gather any equipment and head out of the safehouse. The suburban neighborhood you travelled through last time is now flooded. You will want to spend as little time as possible wading through water. Try to look for rooftops or makeshift walkways to maximize your maneuverability. After dropping d...
Learn your way around the saccharine and bloody land of the sugar mill in L4D2. See the whole gameplay for Campaign 4: Hard Rain - Sugarmill. Stock up on weapons and head down the stairs to open the door of the safehouse. Clear out any zombies on the street and go across through the open window into the sugar mill. Once in the building, head to the left. There should be an open door leading back outside. For more info, watch the whole gameplay.
Make your way through the deadly plantation in L4D2. See the gameplay for Campaign 3: Swamp Fever - Plantation. Gear up and go outside of the safehouse. It will be light out. Mop up any zombies here and head straight ahead, bearing to the left. You will climb a small hill and see an opening in the fence. Check the sundries building on your left for items. Make your way through the rows of houses here towards the red two-story house at the end. Don't go inside the house, turn left right before...
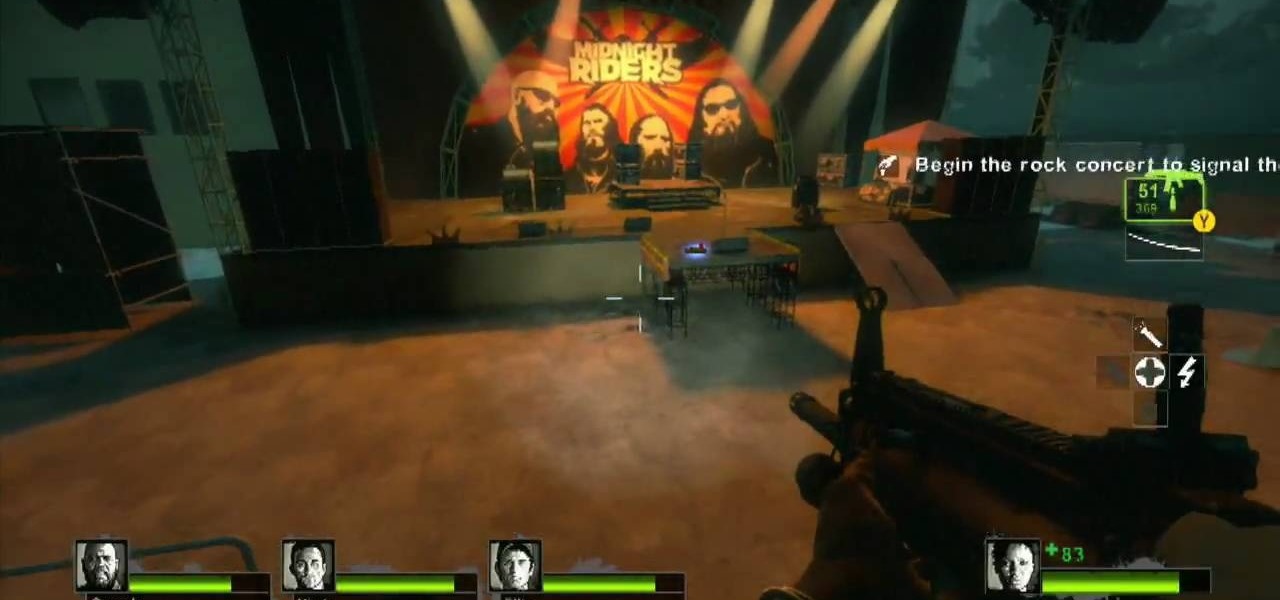
Don't let L4D2 get the best of you. Take control by checking out this video on Campaign 2: Dark Carnival - Concert. Grab your guns and go out the door. There is really only one path to follow, so move right around the venue until you reach the stage. Feel free to use up your ammo as there will be a refill when you reach the end. There are bathrooms to your right and left, but it isn't worth your time to search them. Clear out any zombies in the stage area. You must then flip the switch on the...
Having some trouble beating L4D2? No problem, watch this which shows you around and gives tips on Campaign 2: Dark Carnival - Coaster. Restock your gear and head out the door. If you have any pipe bombs or pick up any throughout the level, try and save them for the roller coaster chase sequence at the end. Climb up the stairs and continue forward until you reach the swans at the start of the ride. Turn right, and follow the water pathway forward. You can safely ignore most of the tiny backdro...
Prepare to delve into the world of L4D2 and check out the gameplay for Campaign 1: Dead Center - Streets. Stock up and open the safe house door. You should see a bunch of infected milling about here. Kill them and make your way straight up the hill past the port-o-potties. Turn right at the fence and take the street down. Watch out for zombie attacks from the walls to the left and right of you. They will drop down from above. Duck into the building on the right when you reach the fence at the...
L4D2: One of the best horror video games of all time. Check out the tips and gameplay for Campaign 1: Dead Center - Mall. Restock on supplies and head out of the safehouse. Feel free to kill any zombies trying to reach in the door before you unlock it. Hang right and make your way up the giant escalator in the middle of the floor. Loop around and exit Kappel's department store. Go down the first escalator you see. Watch out for zombie attacks from the floor above. They will jump down and catc...
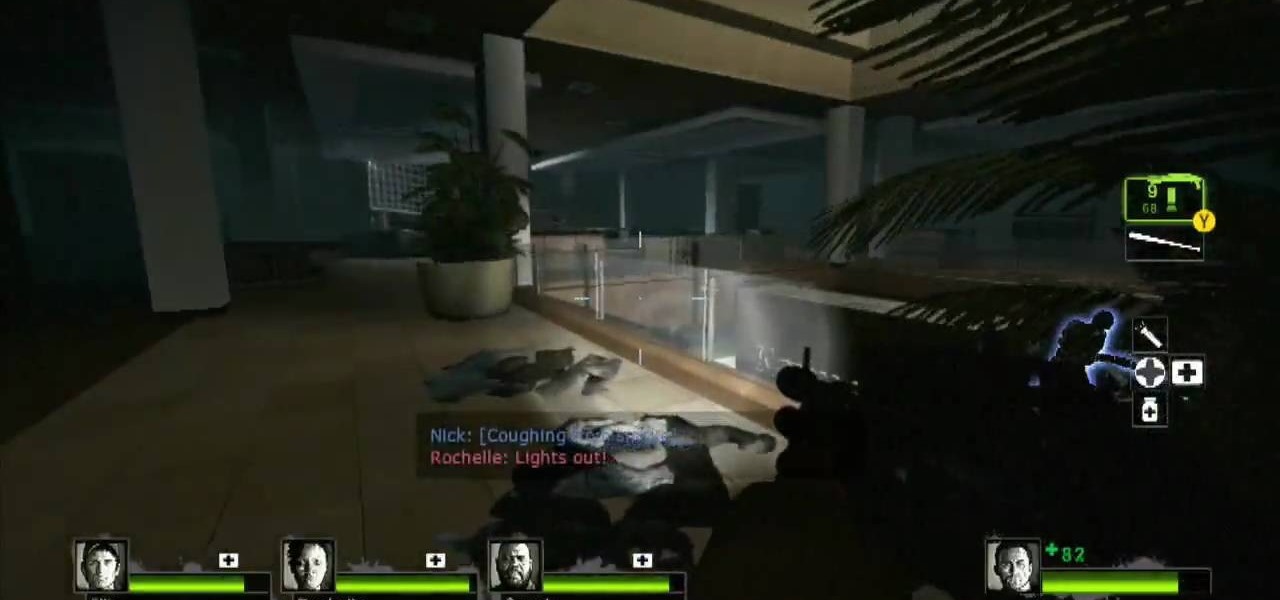
Learn about the L4D2 gameplay for Campaign 1: Dead Center - Atrium. Get the goodies and walk out of the safe house. Turn right and go down the hallway, making another right through the door at the end. You will find yourself back in the mall. Continue on the makeshift walkway, bearing left at the end until you reach an elevator. The blue door across from you is a dead end. For more info, watch the whole gameplay.
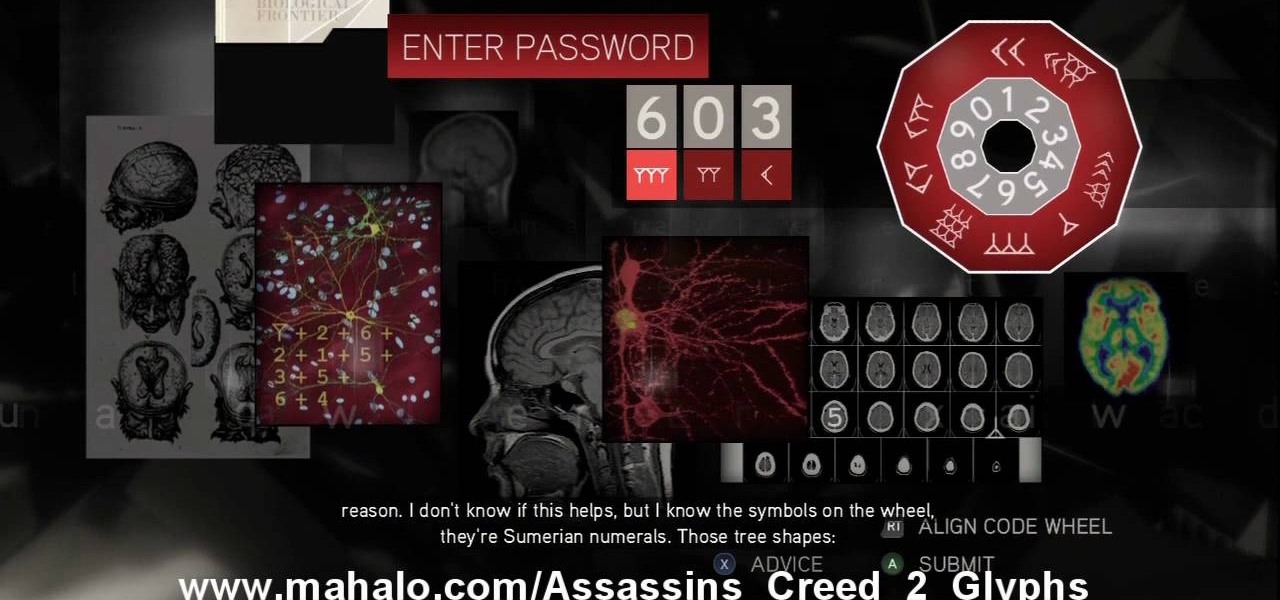
The 18th puzzle is called "Synapses". See how to solve it in Assassin's Creed 2. Code wheel puzzle: Your first clue is to line up 5 with a single tree-looking symbol. The key here is the weird-looking equation on the left, which offers a hint as to the progression of the symbols.
Figure out the 17th puzzle, entitled "The Bunker", in Assassin's Creed 2. Code wheel puzzle: Here’s a tricky one; your clues are “<” and “2,” and the only advice you’ll get from your handlers is that maybe there’s “something we can count” on the strange symbols. In this case that “something” is the number of times each symbol bends sharply. Don’t expect consistency across the wheel on this one; just take a look at what symbols flank the blank spaces and pick a shape with the number of bends t...
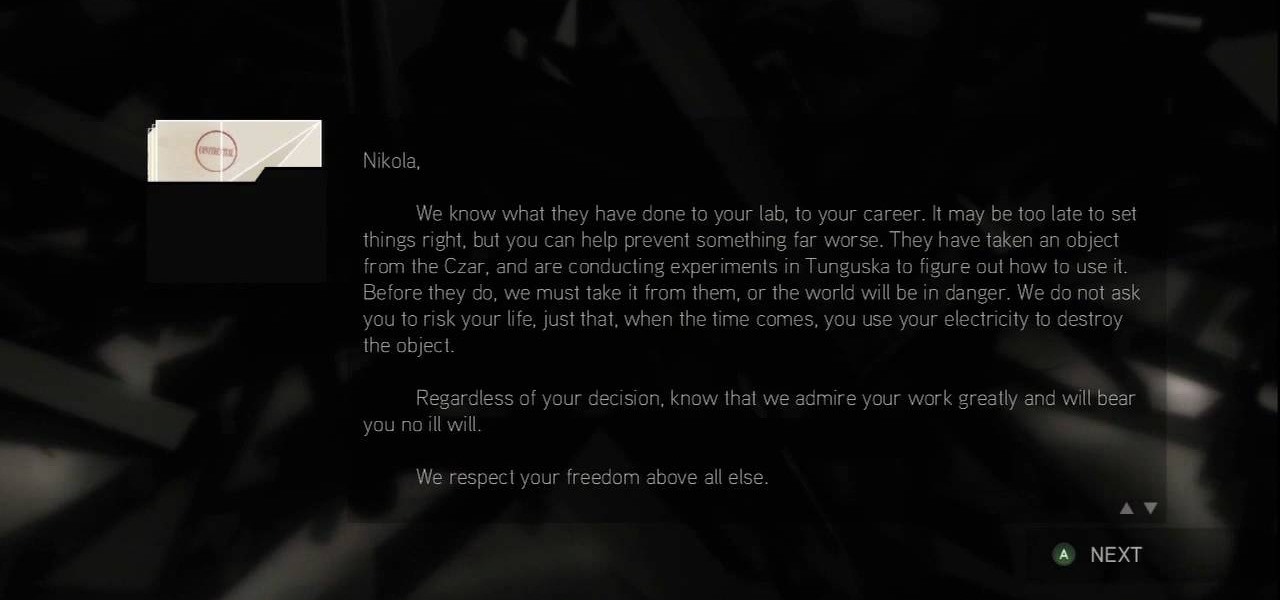
This one's pretty easy. Here's the solution to the 16th puzzle, entitled "The Cavalry", in Assassin's Creed 2. Image 1: Just move the cursor to the word “Tunguska.” Image 2: Move the cursor onto the staff and drag it onto Tesla’s photo. For more info, watch the whole gameplay.
Get all of the info on the 15th puzzle, entitled "Guardians", in Assassin's Creed 2. Puzzle wheel: Seemingly every other ring is linked here, so we’ll cut straight to the chase: Turn the third (and fourth) rings right twice, the fifth (and first) right four times, the fourth (and first) right five times, the fifth (and first) left five times and the second left five times. Finally, move the fifth (and second) rings right five times. Image: Another gimme – just move the Assassin logo over the ...
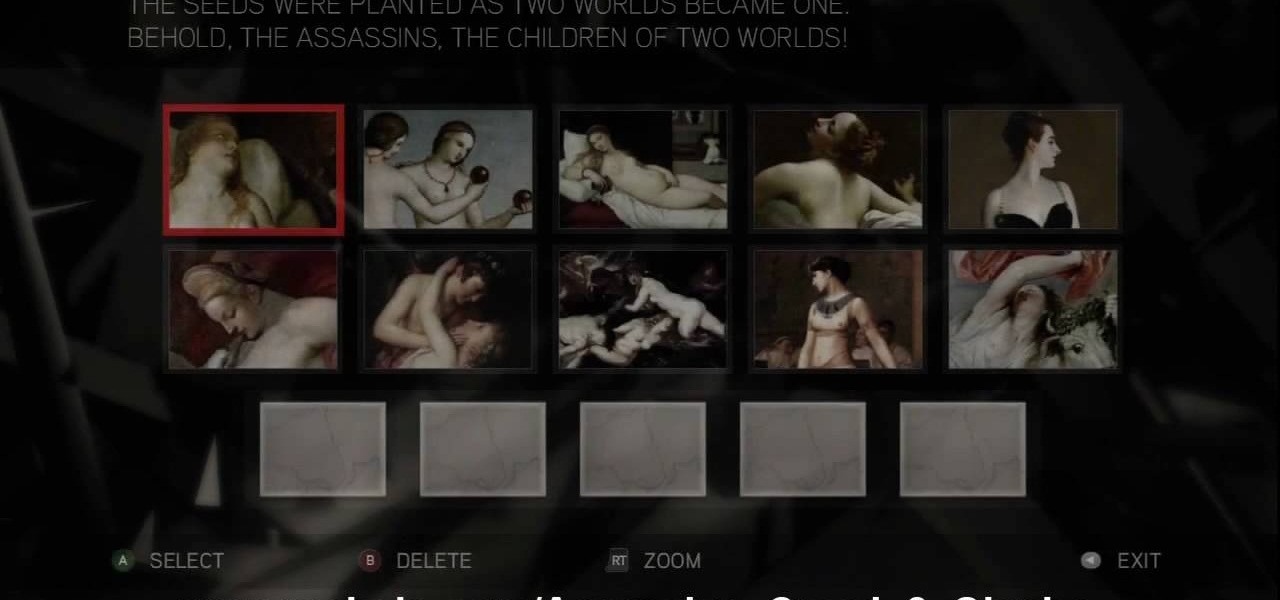
The 14th puzzle, entitled "Bloodlines", isn't really that hard in Assassin's Creed 2. Set 1: Highlight the images that depict women and gods in amorous entanglements (especially if those gods are disguised as animals). For more info, watch the whole gameplay.