Use Final Cut Pro? Want to expose just one color while leaving the rest black and white? See how it's done with this free video software tutorial from CNET TV. Whether you're new to Apple's Final Cut Pro non-linear video editor or just want to better acquaint yourself with some of the more esoteric features of the program, you're sure to benefit from this free video tutorial. For specifics, including a step-by-step overview of this trick, watch this Final Cut Pro lesson.
When making your film, you want to make sure that the cameras that you're using, and the pictures and footage that you're taking, have the right exposure. Exposure can make or break your film as far as quality of the footage being presented! In this video you will get a tutorial on how to get the perfect exposure for your footage!
The first CS4 beta Red Plug-in is finally available! With this plug-in, you can use Premiere Pro CS4 and After Effects CS4 to import Native RED R3D files as easily as any of our other native tapeless formats.
Shoot digital footage to rival film by incorporating a 35mm DoF adapter into your camcorder rig! For detailed, step-by-step instructions, and to get started shooting footage to rival anything shot on a video-capable DSLR, watch this video guide.
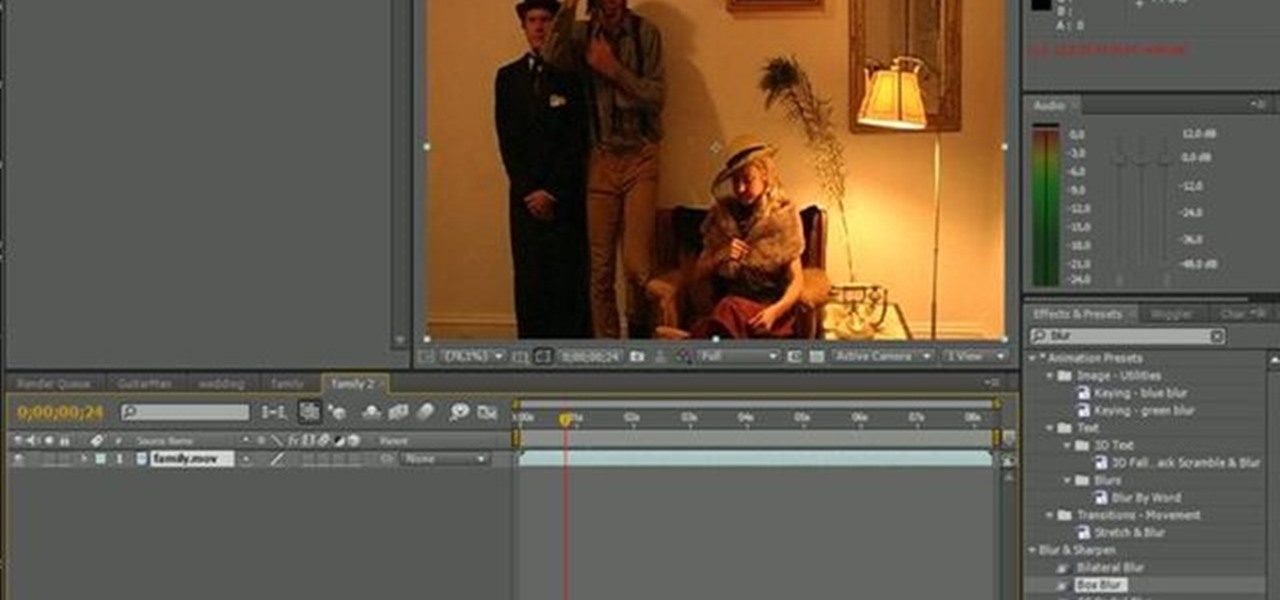
For various reasons — ranging from lens type to the frame rate to the storage medium —, footage shot with a camcorder doesn't really look anything like what one would see in a Hollywood film. However, with a little bit of work and a touch of post-production, you can make your consumera camera footage look a lot more like a commerically shot project.
If you read a lot of video game press on the internet, you've probably salivated at the high-quality HD video footage of console games that reviewers are able to record and use to illustrate their points about games. If you too want to be able to record HD footage of XBox 360 and Playstation 3 games and put them on your computer for editing and distribution, this video will show you how to do it. All you need is a $200 device called an HD PVR, which is an external device that records your gam...

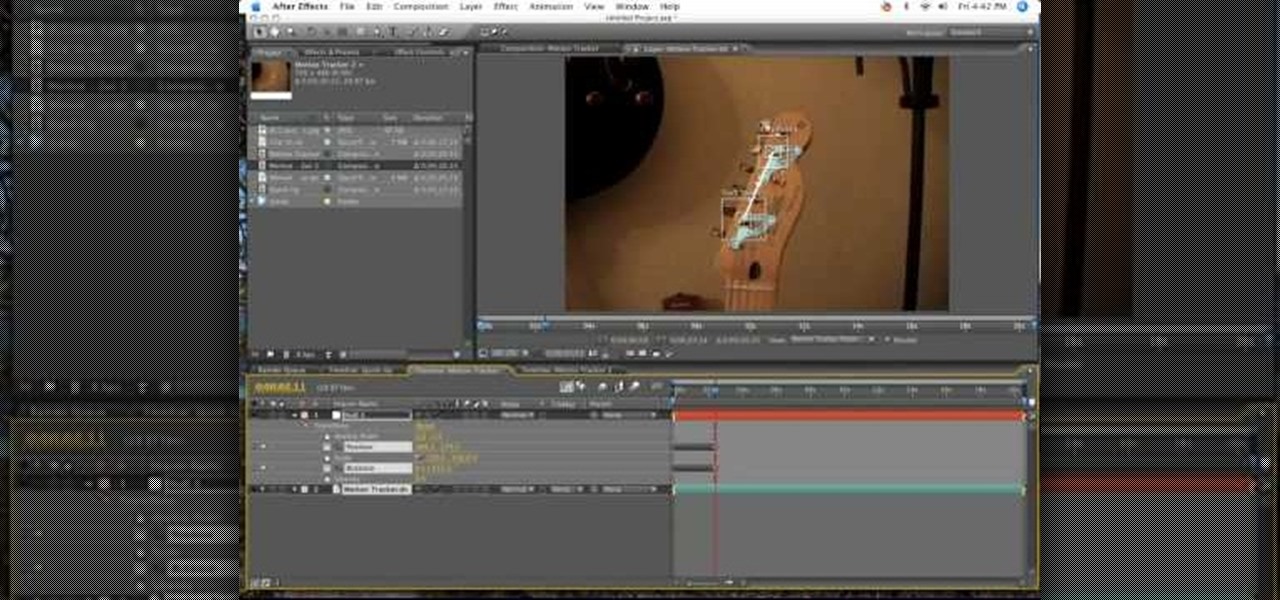
Shooting good footage with handheld cameras that wiggle, bounce, and fall onto rocks on a regular basis is tough. Sometimes, though, you may want to make it appear as if film that you've shot with tripods and such was actually shot with a handheld, like in some horror films. This video will show you how to create a fake camera movement effect in After Effects, giving your professionally-shot film just enough of that vérité quality.
Decided after you filmed it that your footage shot in 60p would actually look better as a slow motion shot? Fortunately, you don't have to shoot anything over again - you can just use Adobe After Effects to slow it all down.
This how-to video offers some pointers on how to take footage from a low angle. This technique captures a unique perspective neglected by traditional methods of film-making. The principle is simple, flip the camera and go. Check out this video lesson and learn how to shoot low angle footage.
It's easy when Jamie-B from Total Recall Films takes an in-depth look at filming and editing techniques you can easily use to make your next film look and feel professional using a well know technique called "tricking the camera" -- and the viewer. Watch to see how to make a one-camera shoot look like multi-cams.
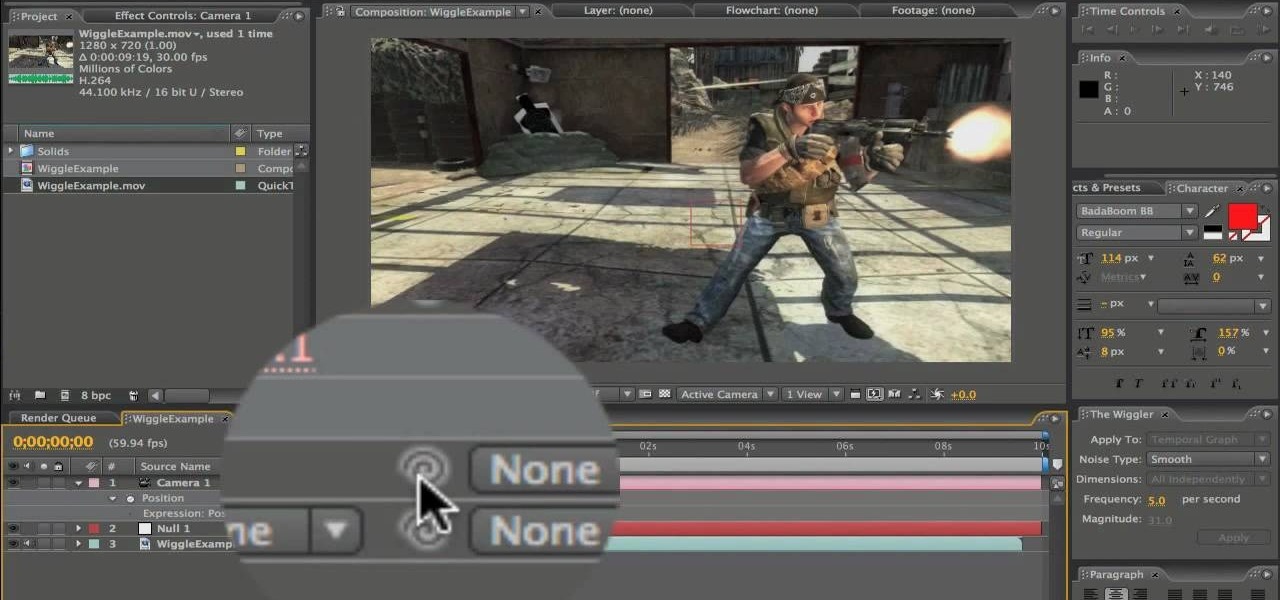
Increase the realism of your video footage with camera movement and color correction. In this video tutorial, Adobe After Effects is used to add realistic camera wiggle and shake to video footage from Call of Duty: Black Ops, simulating a handheld camera. In addition, the video tutorial also goes over some basic curve adjustment for color correction to give the video footage a unique look.
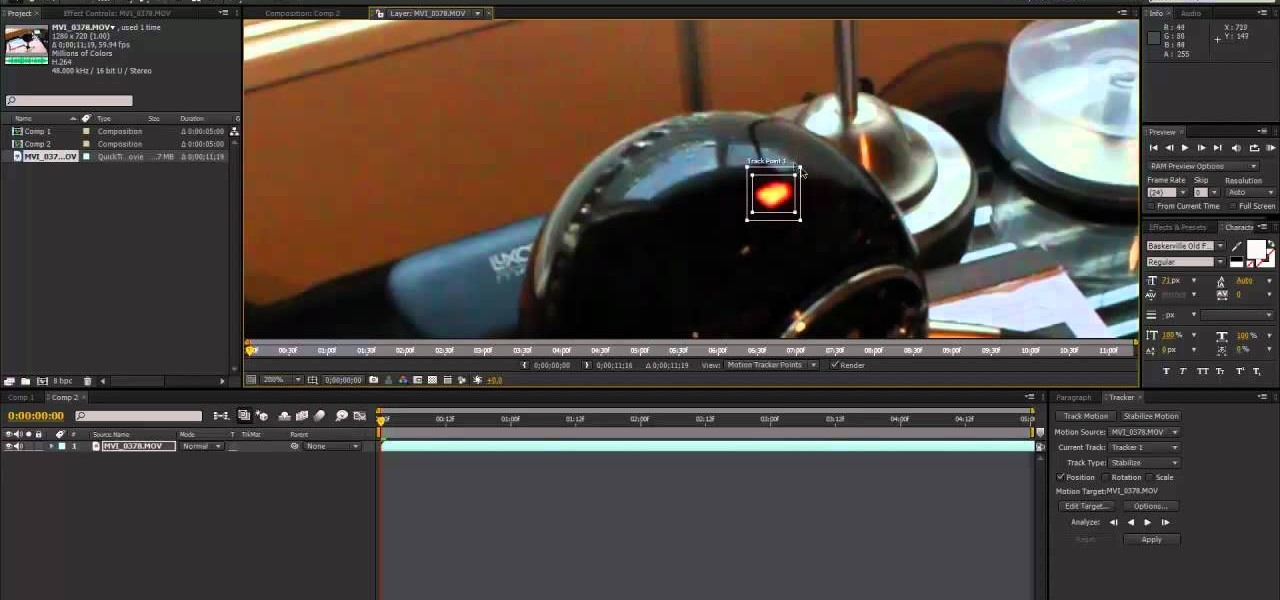
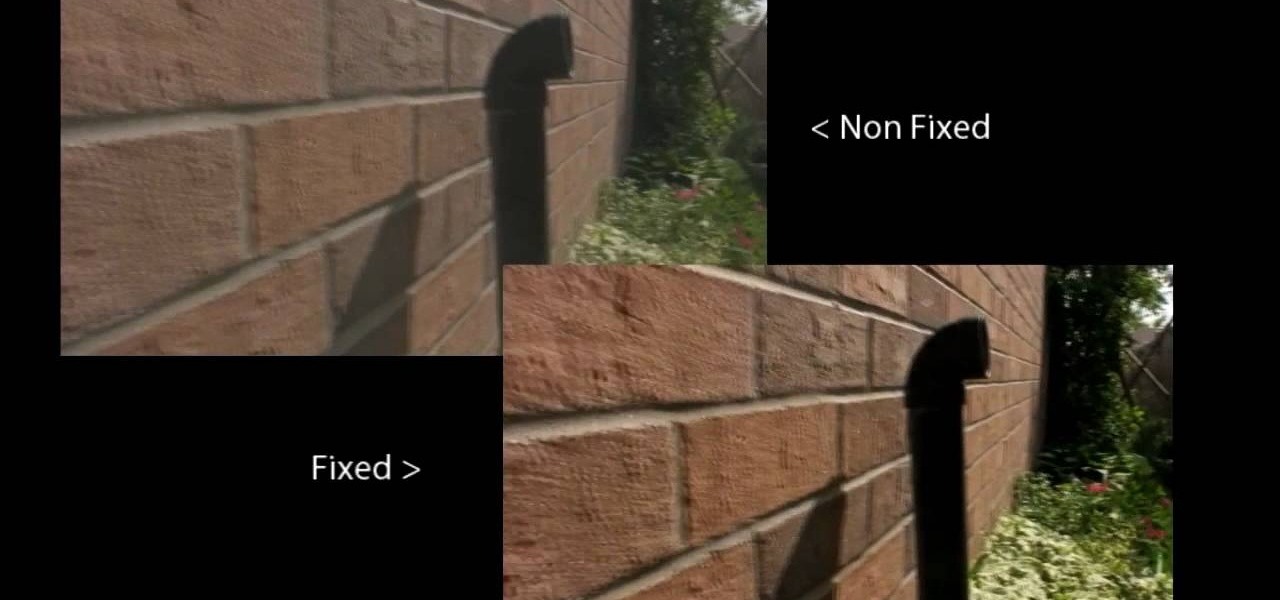
We don't always have a tripod handy when we need to grab some footage for our latest video project, but shaky footage can ruin an otherwise great video. Thankfully, After Effects has a 'stabilize motion' tool that you can apply to your recording to prevent headaches brought on by a shaky camera.
Learn the basics of video editing in this funny and informative clip from Vimeo's excellent Video 101 series of tutorials. This video provides a handy overview of the steps involved in editing video, including transferrring footage, organizing clips into video bins, editing using the timeline, trimming the footage & using transitions, saving frequently, and exporting videos to be viewed on various sites with various compression settings.
Now that you've imported your footage into Windows Live Movie Maker, you're ready to edit it. A good first step is to trim the beginning and end points of the individual clips that will go on to make up your movie. This clip from Vimeo's excellent Video 101 series of video tutorials will teach you how to do precisely that.
This half-hour episode of Hak5 covers several topics: Using a DSLR camera to create HD footage, building your own Google TV, unlocking & copying locked files with Lock Hunter, using PicPick for screen capture, using WinDirStat for analyzing & cleaning your hard drive, setting up a secure FTP server with Ubuntu Server, and secretly copying data from USB drives with USB Dumper.
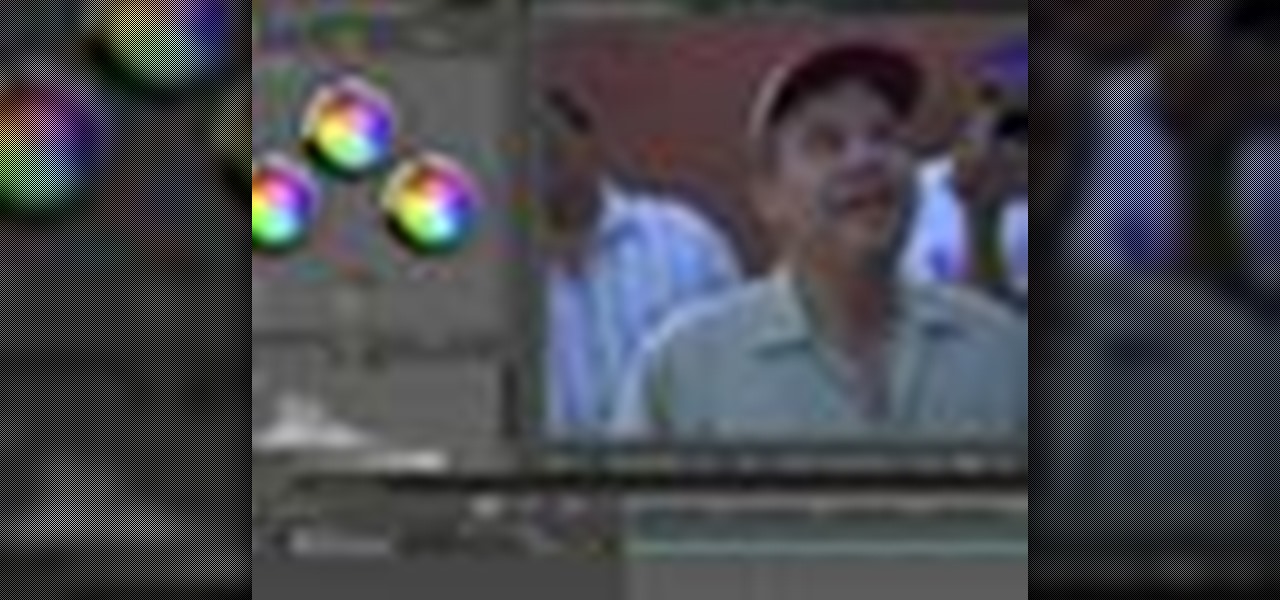
With this thorough guide, you'll learn how to color correct footage in After Effects of Photoshop using the Curves tool. Whether you're new to Adobe's popular motion graphics and compositing software or a seasoned video professional just looking to better acquaint yourself with the program and its various features and filters, you're sure to be well served by this video tutorial. For more information, including detailed, step-by-step instructions, watch this free video guide.
In this two-part video tutorial, you'll learn how to use Magic Bullet Colorista to color grade and color correct your digital video when using Final Cut Pro Studio. Whether you're new to Adobe's popular motion graphics and compositing software or a seasoned video professional just looking to better acquaint yourself with the program and its various features and filters, you're sure to be well served by this video tutorial. For more information, including detailed, step-by-step instructions, w...
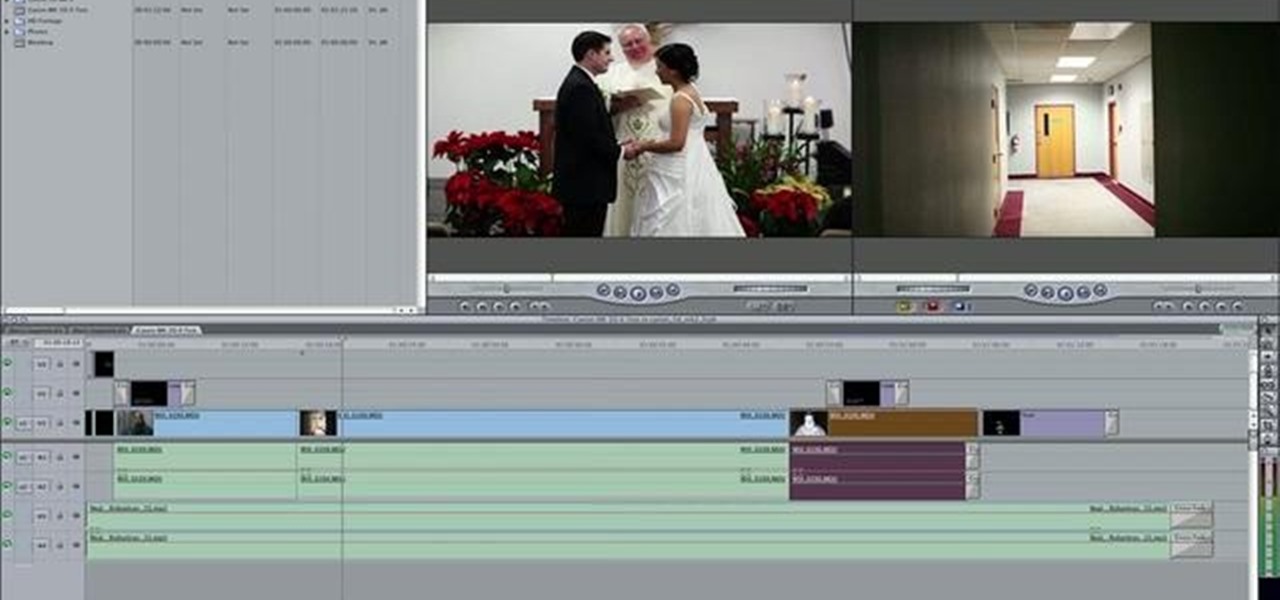
This video tutorial details how to set up Canon 5D MK II footage on Final Cut Pro. After watching this, you'll be able to create an easy setup for your project. It covers using the Audio/Video Settings option and using the Sequence Preset Editor to maximize your project workflow. See how to create the Easy Setup!
Check out this quick tip for Apple's Final Cut Pro. See how to use the "add" composite mode in Final Cut Pro. Footage Firm has given DV Professionals access to free footage of a numbers graphic.
Watch this professional cinematography video to learn how to make linear tracks on the P+S Technik SKATER Mini dolly to better utilize and maximize its performance. It's actually extremely fast to get the Skater ready to shoot. Learn how to make straight tracks inward as well as a typical linear tracking shot. View final footage of the Skater used on professional film sets.
Watch this professional cinematography video to learn how to pan and lock to enhance and maximize the performance of the P+S Technik SKATER Mini dolly. This allows you to either lock the wheels for fixed camera angles, or execute basic panning shots. View final footage of the Skater used on professional film sets.
Watch this professional cinematography video to learn how to use the Steadybag to enhance and maximize the performance of the P+S Technik SKATER Mini dolly. The Steadybag allows you to work with angled shots. Just place the bracket into the frame of the skater and then place the camera on top of it. View final footage of the Skater used on professional film sets.
Watch this instructional video to learn how to use periscopes and borescopes to maximize the performance of the P+S Technik SKATER Mini dolly. Working with periscopes and borescopes can add interesting perspective to the shots you do with the SKATER. View final footage of the Skater used on actual professional film sets.
This tutorial covers how to use layers to composite footage together and then how to keyframe footage layers. The tutorial gives a clear and easy step-by-step breakdown of using compositing and keyframing in Final Cut Pro 6.
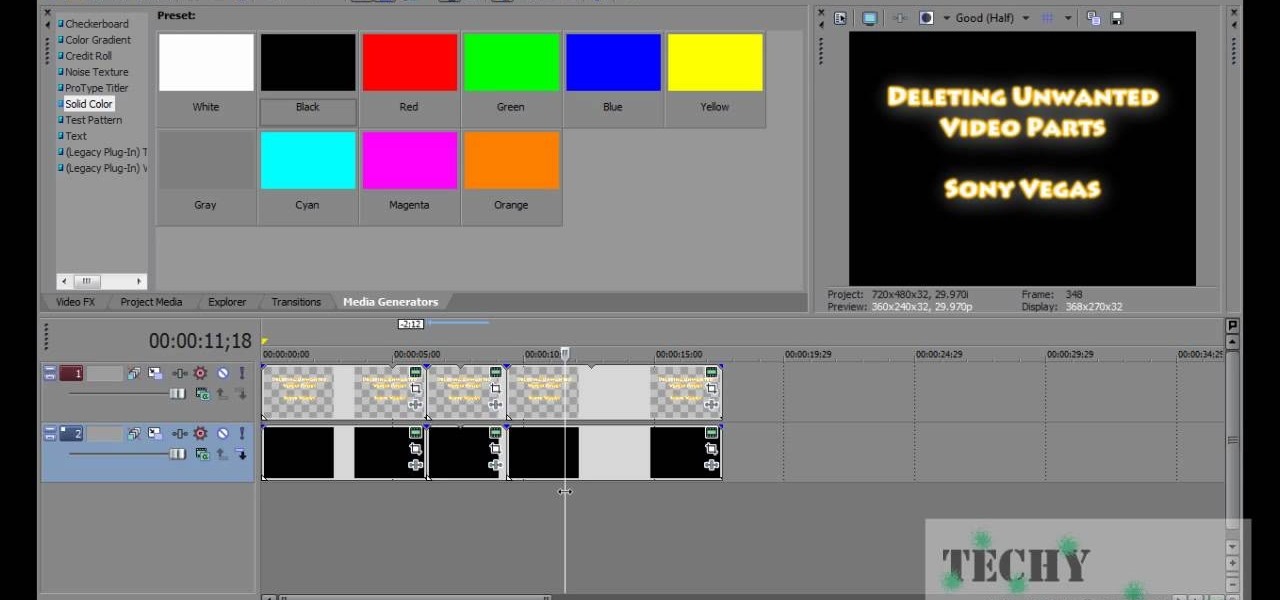
You have a huge video file, and want to make it smaller by cutting out the footage you don't need. This shows you how to use Sony Vegas Pro to edit out all your unwanted footage, no matter how large your file is!
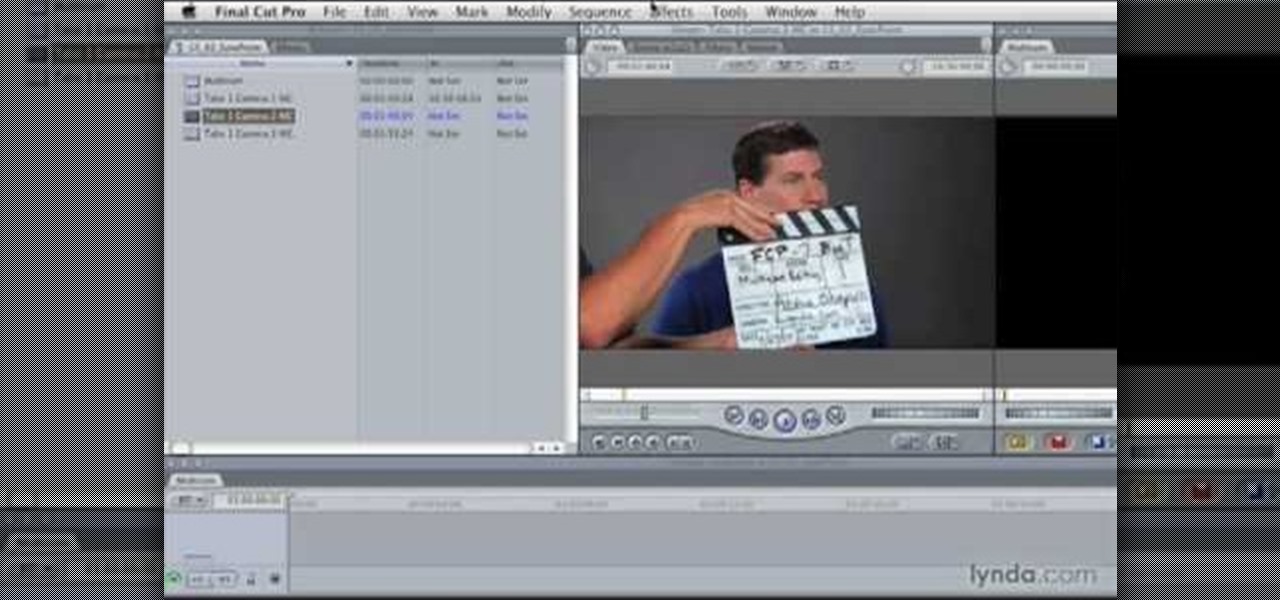
Looking for an easy way to work with footage from a two-camera setup within Final Cut Pro? Whether you're new to Apple's Final Cut Pro non-linear video editor or just want to learn how to take advantage of Final Cut Pro 7's new features, you're sure to benefit from this free video tutorial from the folks at Lynda. Specifically, this software tutorial provides a complete overview of how to sync multi-cam footage.
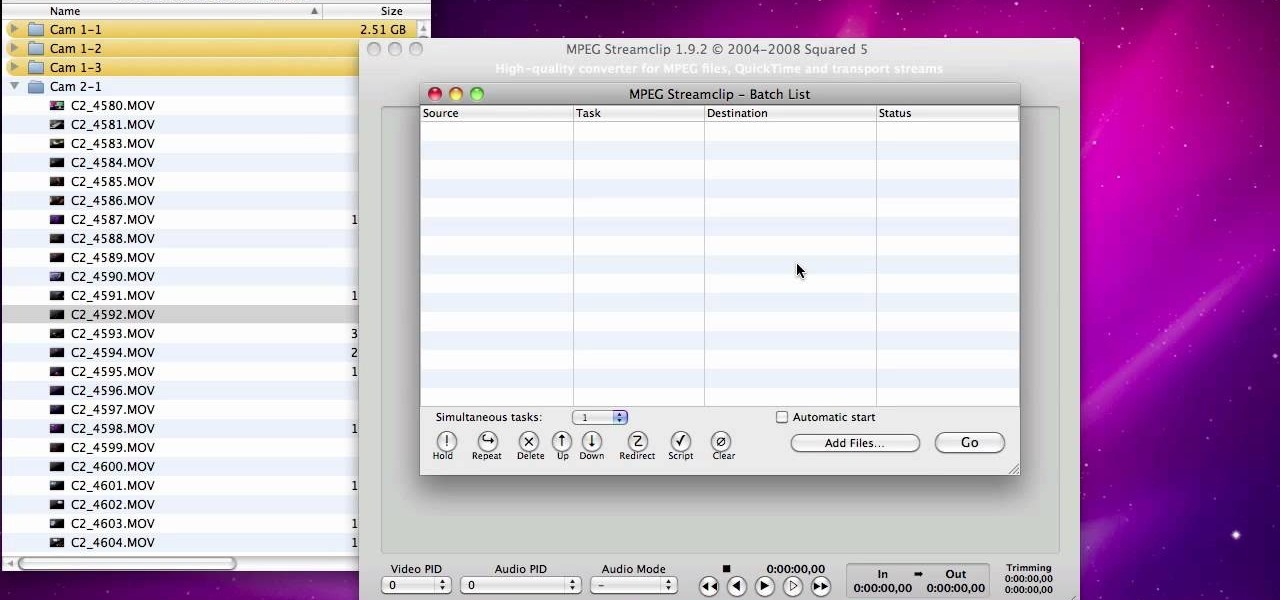
In order to be able to work with Canon DSLR footage (as from a 5D Mark II or 7D), you need to convert the h.264 into a more edit friendly format such as Apple ProRes 422. This tutorial shows you in detail how to ingest and convert this footage.
Looking to convert your 30p footage to 24p footage? In this video, learn a quick and cheap way to do so with the Canon 5D MK2.
Using the Digi Effects plugin "Aged Film" in After Effects, learn how to take your digital footage and turn it into a Super 8mm looking reel. Author Oliver Mellan, shows step-by-step how to create that faux grainy look to make your 21st century film look as deep & rich as any 8mm or 16mm film.
Once you have your footage imported, you're ready for editing! This tutorial goes over how you can edit footage in Final Cut Pro 6 and even goes over real-time editing abilities. The tutorial is well paced and easy to follow. You'll be an expert in no time!
It doesn't matter what type of weather it is outside when you shoot your film footage. Why not? Because you have After Effects! In this After Effects tutorial you will learn how to add precipitation and raindrop effects to your footage. Make it snow, rain and more with this After Effects CS3 tutorial.
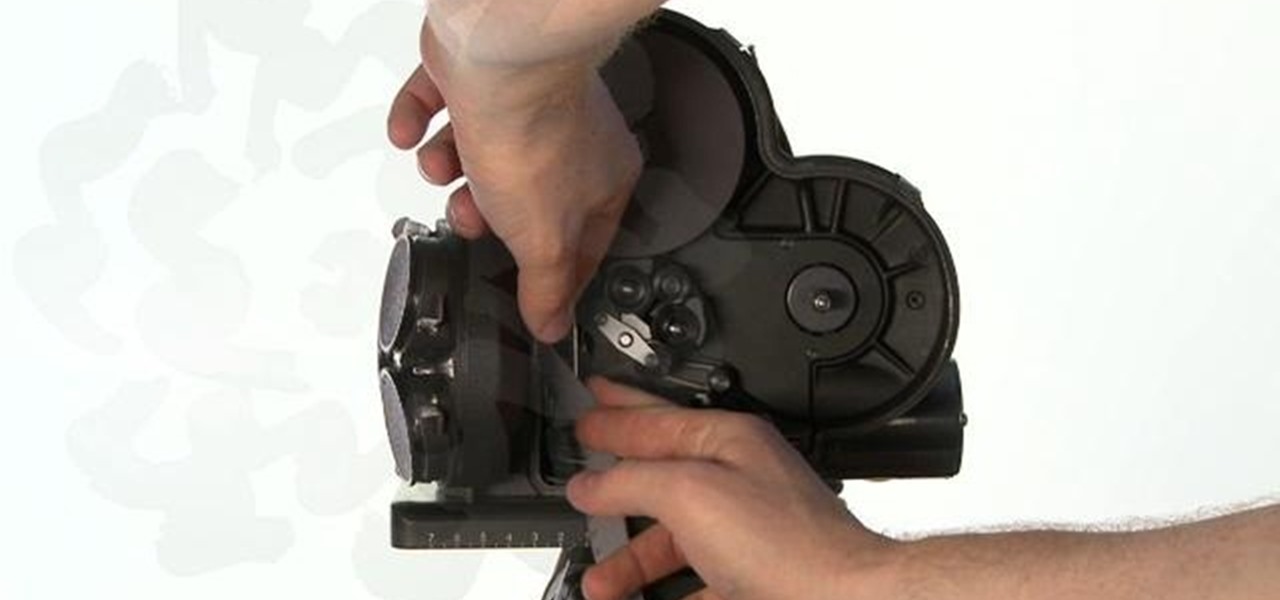
The Arriflex S is a high grade, professional quality 16mm camera. It can shoot steady, consistent film footage. This tutorial shows you how to properly load your film into the camera and a few other tips for getting the most out of your equipment.
In this two-part video tutorial, you'll see what it takes to color grade and correct footage with Magic Bullet Colorista in After Effects. Whether you're new to Adobe's compositing software or a seasoned video professional just looking to better acquaint yourself with the program and its various features and filters, you're sure to be well served by this video tutorial. For more information, including detailed, step-by-step instructions, watch this free video guide.
In this video tutorial, viewers learn how to import, manage and export 16:9 footage in Adobe Final Cut Pro. Begin by opening the Log and Capture.Then configure the Logging, Clip Settings and Control Settings. For the Control Settings, set the Device Control as Fire Wire NTSC and the Capture/Input as DV NTSC 48 kHz Anamorphic. Then scroll through the sequence setting of the footage and check Anamorphic. To export, click on File and select Export. Click in Options set the the size to Compressor...
In this video, learn how cine film was transferred in the days before modern telecine machines. This demonstration shows a vintage Sony VC-20 multiplexer transferring home movie footage.
Turn your digital footage into something that looks more like film! Set your frame rate to 24 and shoot with a low depth of field to mimic the look of a film camera. Also make sure you pick the right aspect ratio, resolution and use a tripod!
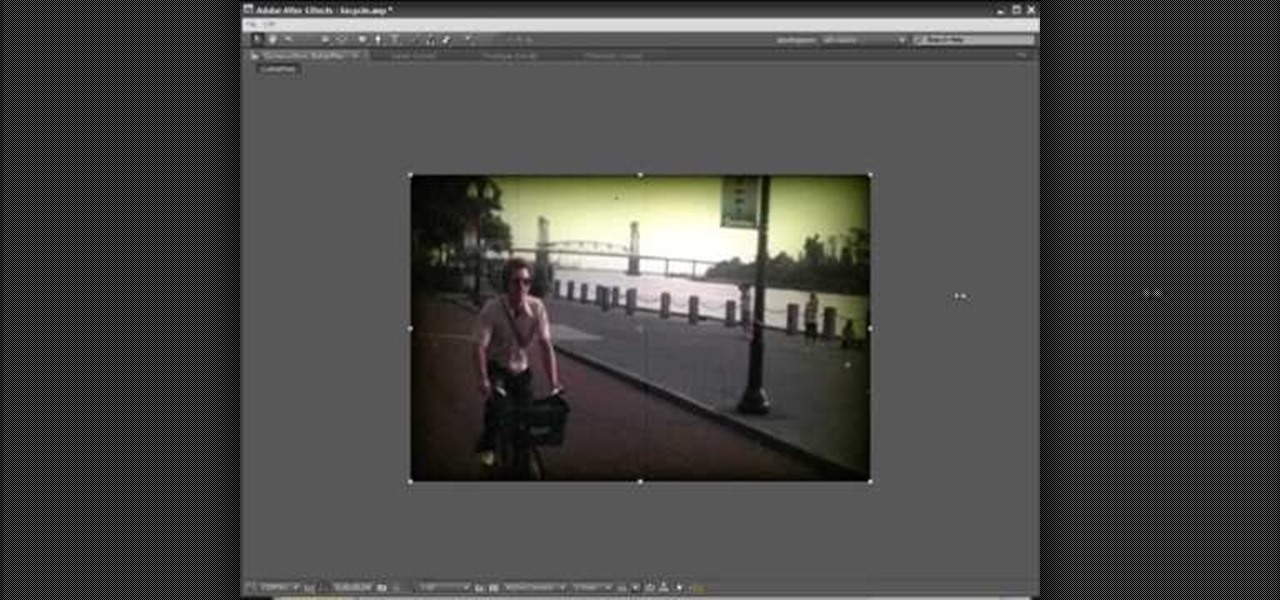
You can take a piece of completely modern digital footage and give it an aged, antique feel! You will need the Aged Film plugin for Adobe After Effects, which lets you create the sepia tone and flickering, variable speed look of antique film clips.
Learn After Effects: the best digital motion graphics software programs out there.
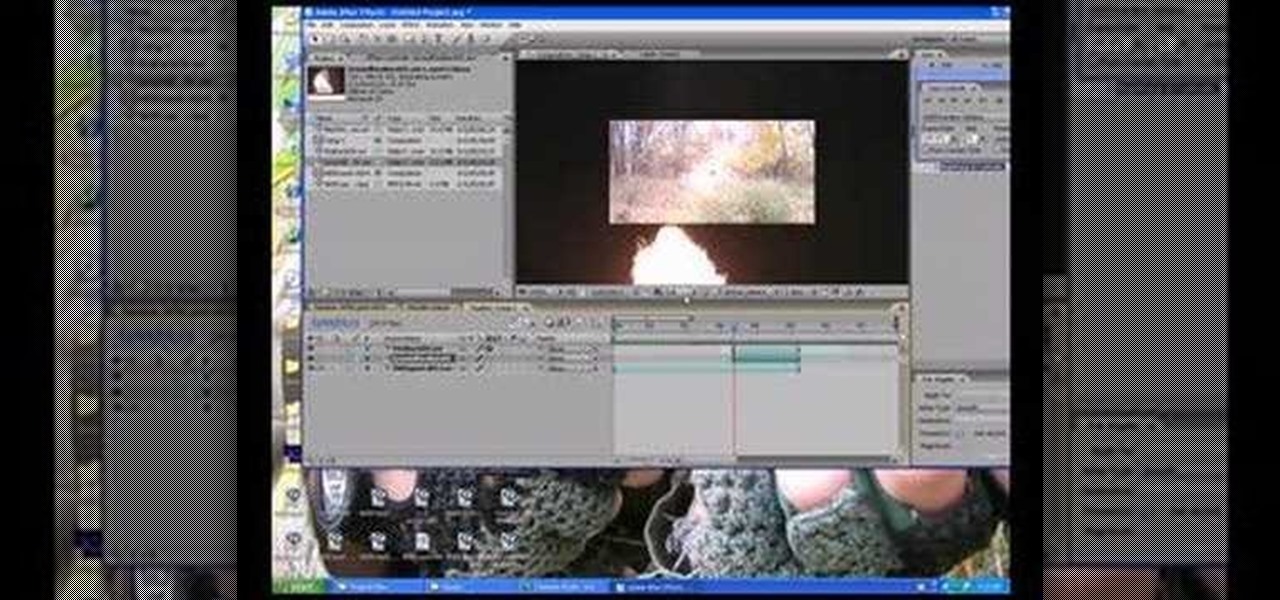
This software tutorial shows you how to add an explosion to your footage in After Effects. You will need to find footage of an explosion first, then in After Effects you composite the explosion footage over your movie or video to create the desired effect. Learn how to tweak and edit the layers so your explosion looks real and not like it was comped in After Effects.
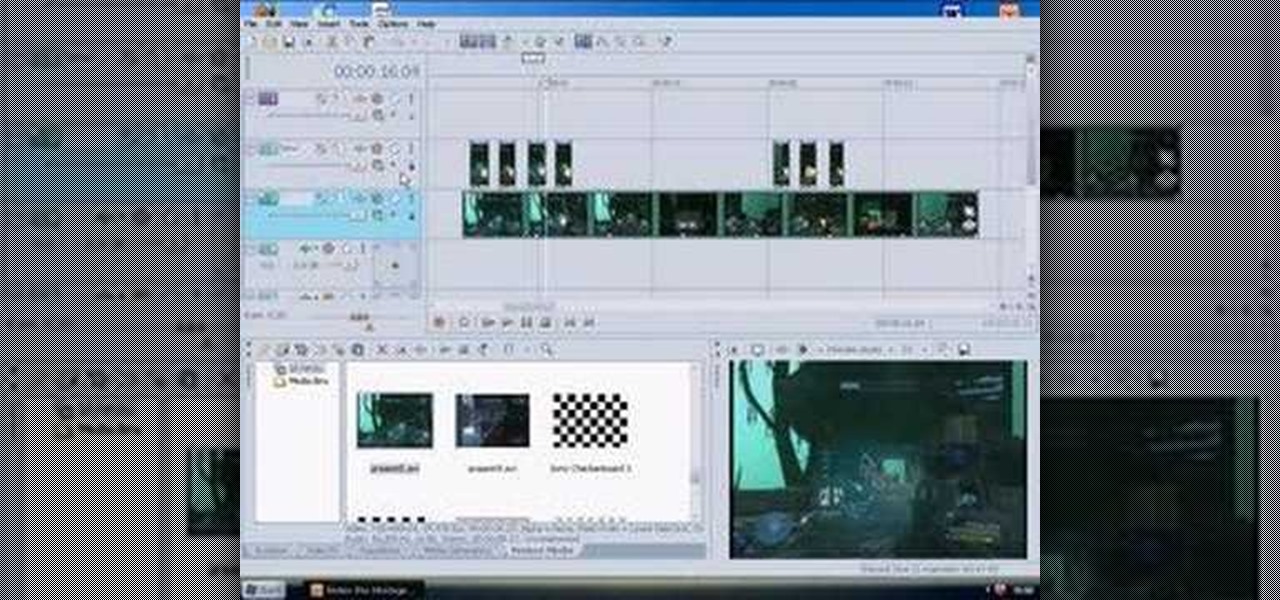
This tutorial shows you how to create a cool red fire effect on footage in Sony Vegas. This particular footage is from Halo 3, but you could use any video game gun firing footage or whatever.