
How To: Capture movie footage in Apple iMovie
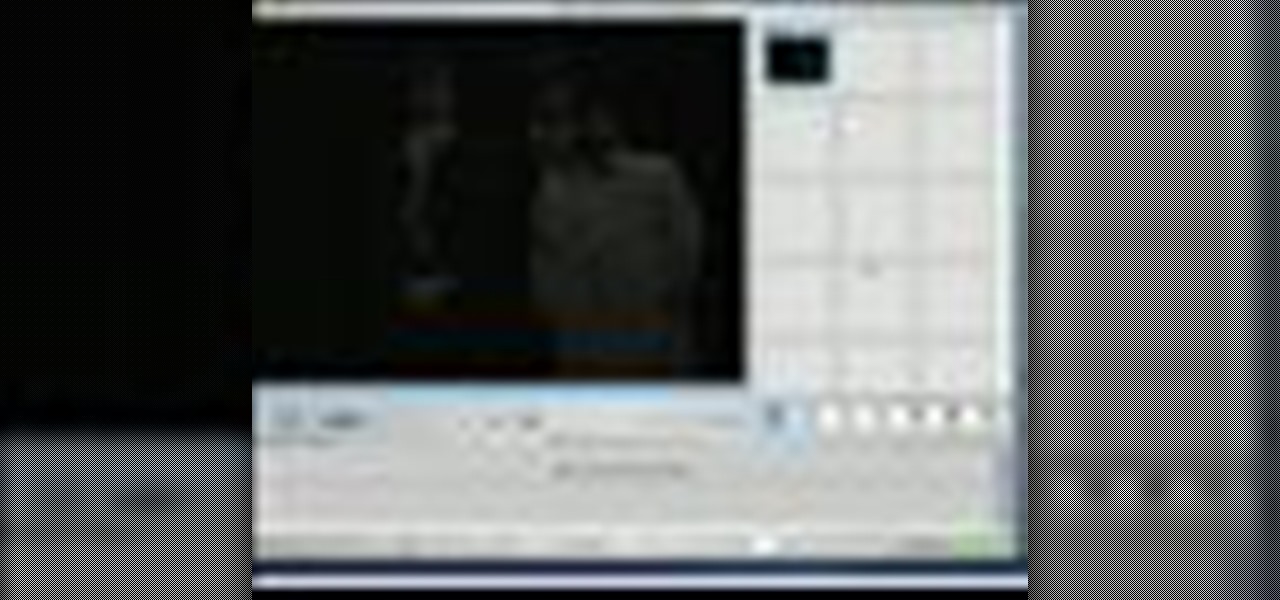
Learn how to log and capture movie footage in Apple iMovie so you can begin to transform your raw footage into a completed movie.

Learn how to log and capture movie footage in Apple iMovie so you can begin to transform your raw footage into a completed movie.
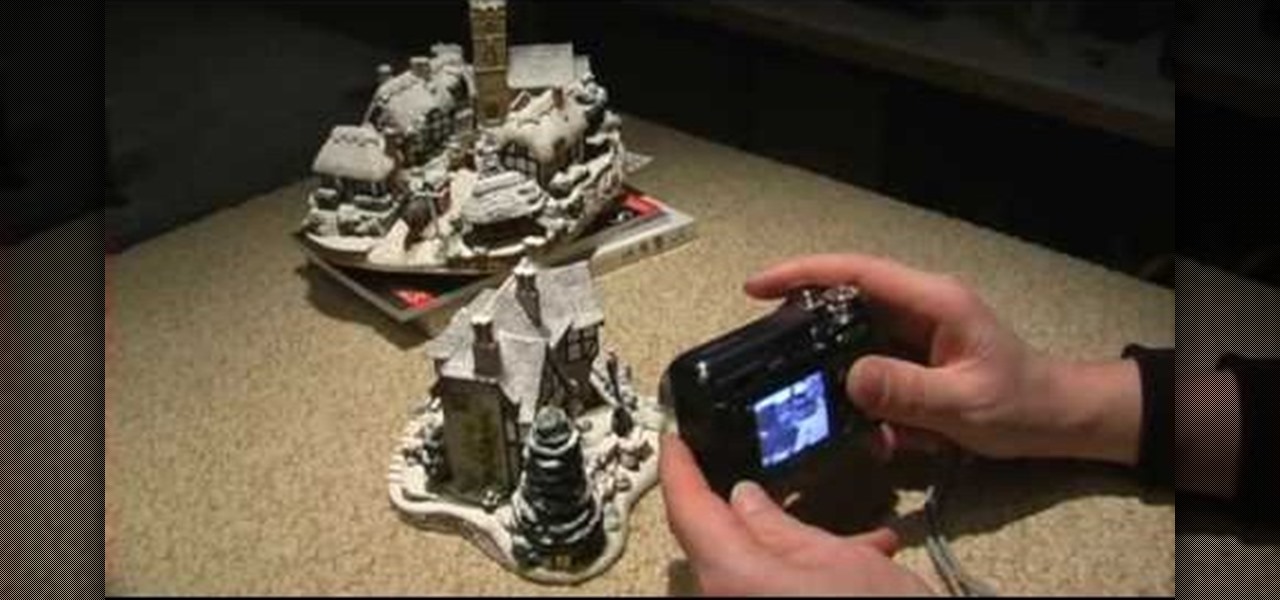
Rick Vanman reveals the secrets to professional video effects using your own computer software. Position your model houses into a setup of your liking. Take a picture of the houses with a digital camera using the macro setting. Edit your picture in Photoshop. Disguise any unwanted objects with the cloning tool. Separate the foreground and the background of the picture into 2 different layers. Film yourself in front of a green screen. Key out the green with your video editing software. Using y...
Having a clip filmed at 25p can sometimes make the footage look jerky, which can distract the viewer from the content of your film. This tutorial shows you how to convert a 25p clip to 50p or 25i using Adobe After Effects.
This is for the semi-pro or professional filmographer who wants to get the best picture quality out of their digital cameras possible. Get broadcast or film studio quality for your footage without needing a film studio budget by following these easy steps.
Take film footage of the ocean! This tutorial shows you how to attach a special mount for the GoPro Surf Hero to your bodyboard. All you really need is a drill and a little hardware to firmly attach the mount. Then attach your camera, and you're ready to film!
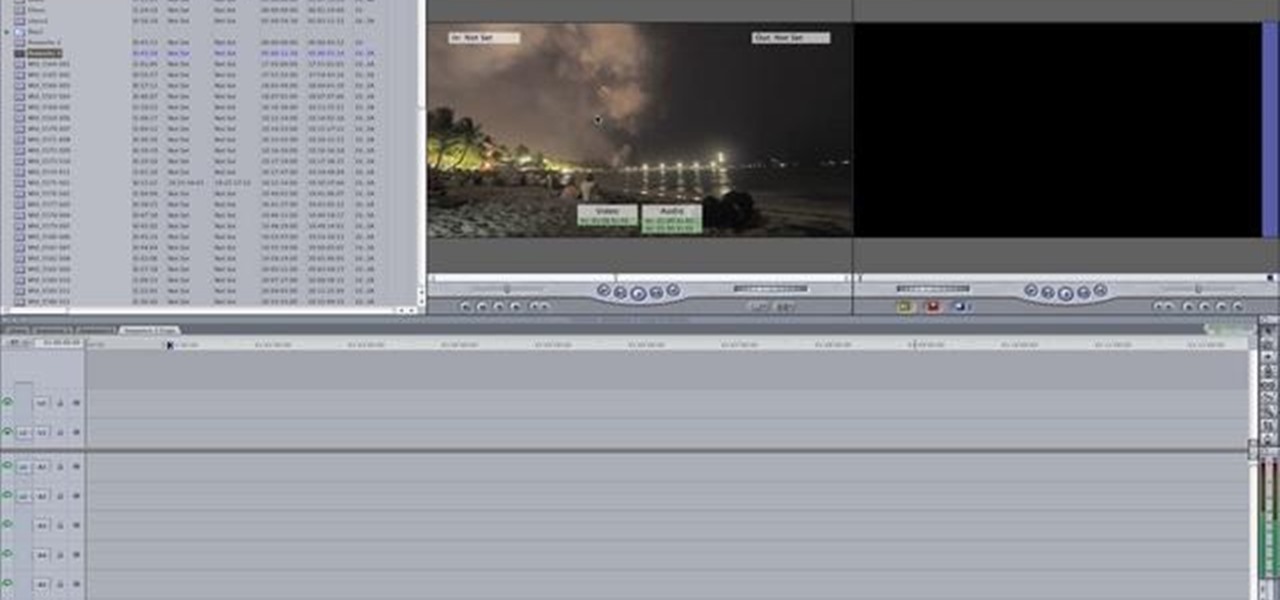
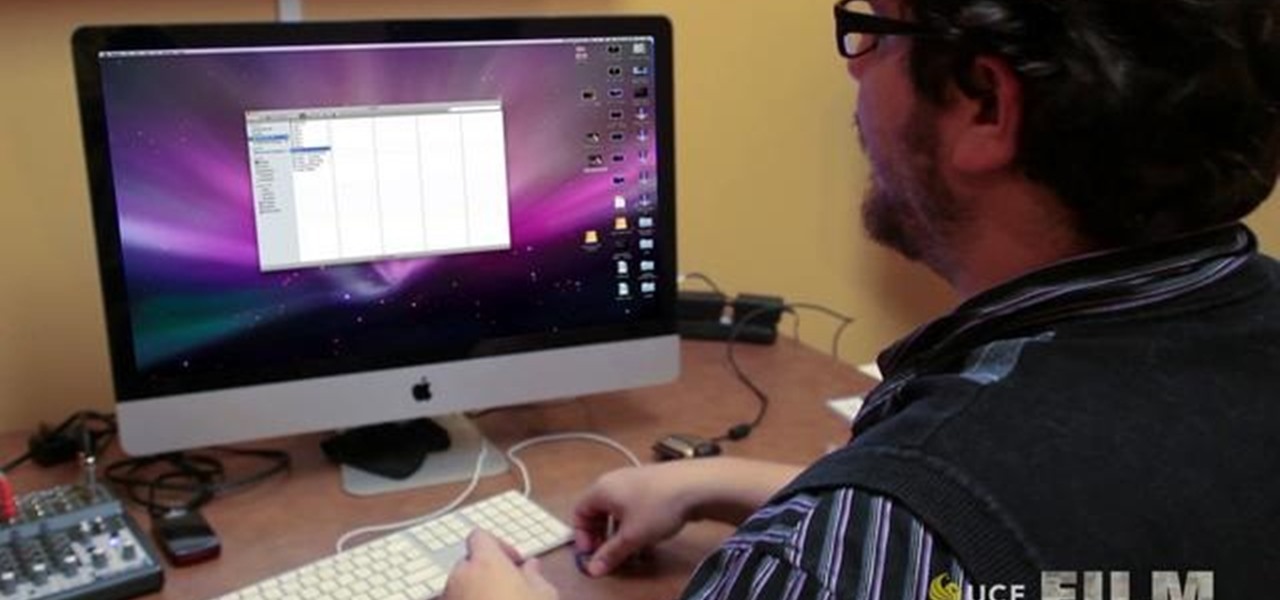
Trim and cut video footage with iMovie. This video tutorial provides an overview of the steps involved, including selecting video resources to be used in the project, placing video resources in the timeline, highlighting the actual clips to be used from the resources, and rearranging the chronological order of the clips in the timeline.
You will need to create some time lapse footage first. Then, you can use the Magic Bullet software to edit in a fake tilt shift look for your time lapse film. This technique will work on most other video editing programs as well.

This tutorial shows you an easy technique you can use to make your footage look like you've shot it using a Steadicam... even if you don't actually own one! All you'll need is a steady tripod and some open space.
Evoke a dramatic effect in your 720p60 video by upsampling and converting to 24p and 24p slow motion, and adding a little bit of color grading with Adobe After Effects. This informative video shows the footage before, during and after treatment, showing the difference that this editing process can make in ordinary footage.
Replicate the Predator-style video camouflage in After Effects by using displacement maps. This uniquely stunning and groundbreaking visual effect has been seen countless times in film and television to show video camouflage, invisibility, heat distortion, holograms, and static interference, among others. This video shows how to replicate this effect by using green screen footage, Fractal Noise and Displacement Maps, all within Adobe After Effects.

In this quick clip, you'll learn how to export 1080p HD footage from a widescreen aspect ratio (16:9) to Cinemascope (2.35:1) using Adobe Premiere Pro CS5. Whether you're new to Adobe's popular NLE (or non-linear editor) or are merely looking to pick up a few new tips and tricks, you're sure to find something to take away. For more informationn, including detailed, step-by-step instructions, take a look.

Steady cam rigs allow you to film really great smooth footage, but they cost about $300. If you're too lazy to make one yourself that is! This video will show you how to make a cheap substitute called a fig rig using $30 dollars worth of materials. Now you can finally push beyond handheld to the world of professional-looking video.
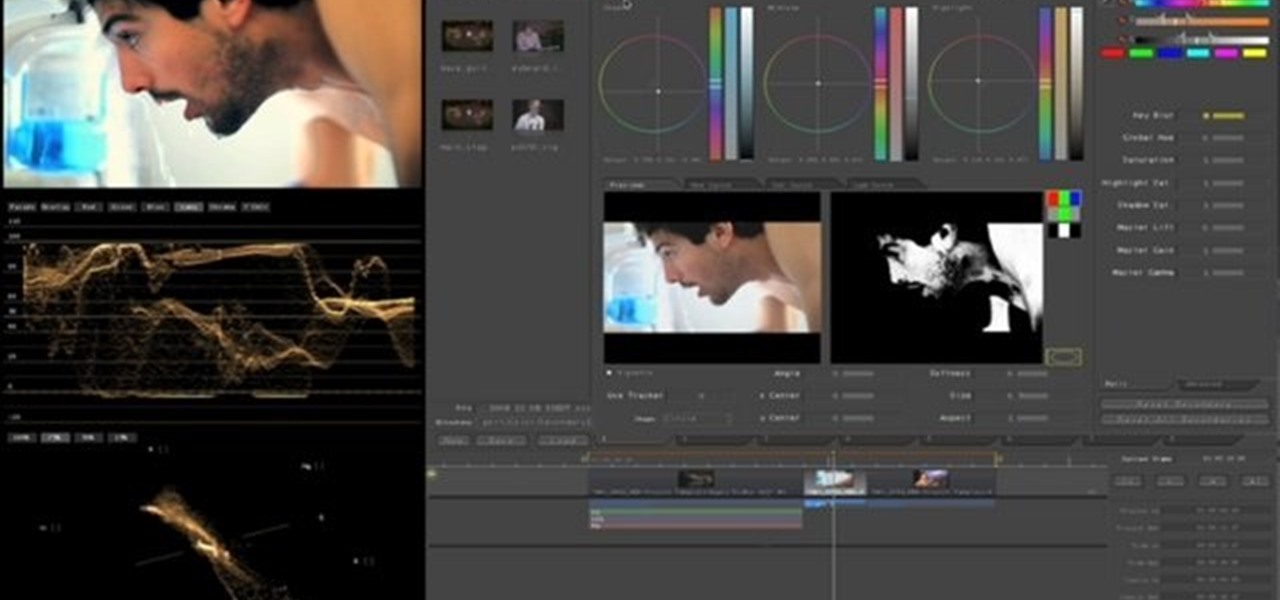
This clip presents an overview of color grading footage shot with the new Canon EOS 5D Mark II Digital SLR (DSLR) in Apple Color. Whether you're new to Apple's Final Cut Pro non-linear video editor or just want to better acquaint yourself with the Final Cut Pro workflow, you're sure to benefit from this free video tutorial. For specifics, watch this Final Cut Pro lesson.
This tutorial from LoadedNewsletter's Jonathan Jelkin gives a simple process on how to prepare H.264 video footage for quick editing. H.264 video footage is shot by popular cameras such as the Canon 5d/7d, Flip cam, GoProHD. This is a great format for straight upload to YouTube, but if you want to edit you need to transcode it to something else. The first step is to download and install a free program called MPEGSTREAMCLIP. Once it is installed you can process all of your files by loading the...
Many video camera companies are beginning to manufacture tapeless camcorders, which record footage as files on hard disks, solid state drives, or optical disks. It's easy to transfer file-based footage to your Mac using Final Cut Express. Just connect your camcorder to the USB port.
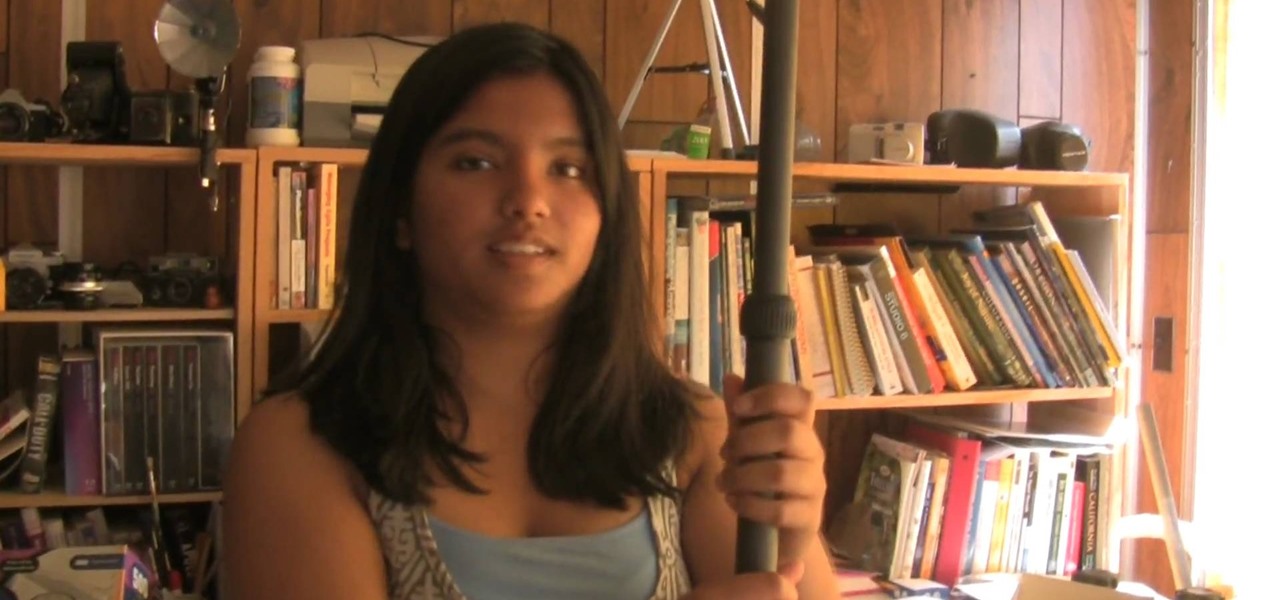
Low angle shots are a great way to evoke a sense of panic in movies, but if you're trying to get good quality shots from ground level with just your hands, then it's not going to work. The video footage will be all shaky, unless that's another look you're wanting to achieve in your film. If you want steady, fast-tracking low angle footage, then Ritwika has a great trick on taking those ground level moving camera shots. You'll need a monopod, water bottle (with water), 2 rubber bands and your ...

The video shows us how to edit footage from Canon 7D at 1080/24p using Avid Media Composer. Canon 7D is first of the video DSLR which is actually an easily editable of an Avid media composer. If you are shooting a project at 1080 24P, then Canon 7D records the footage at 23.98 which is perfectly compatible and tested with Avid. Firstly create a new 1080/24P project. Now import footage from a CF card in DNxHD codec. Then edit the time line in real-time apply the real-time effects but here the ...

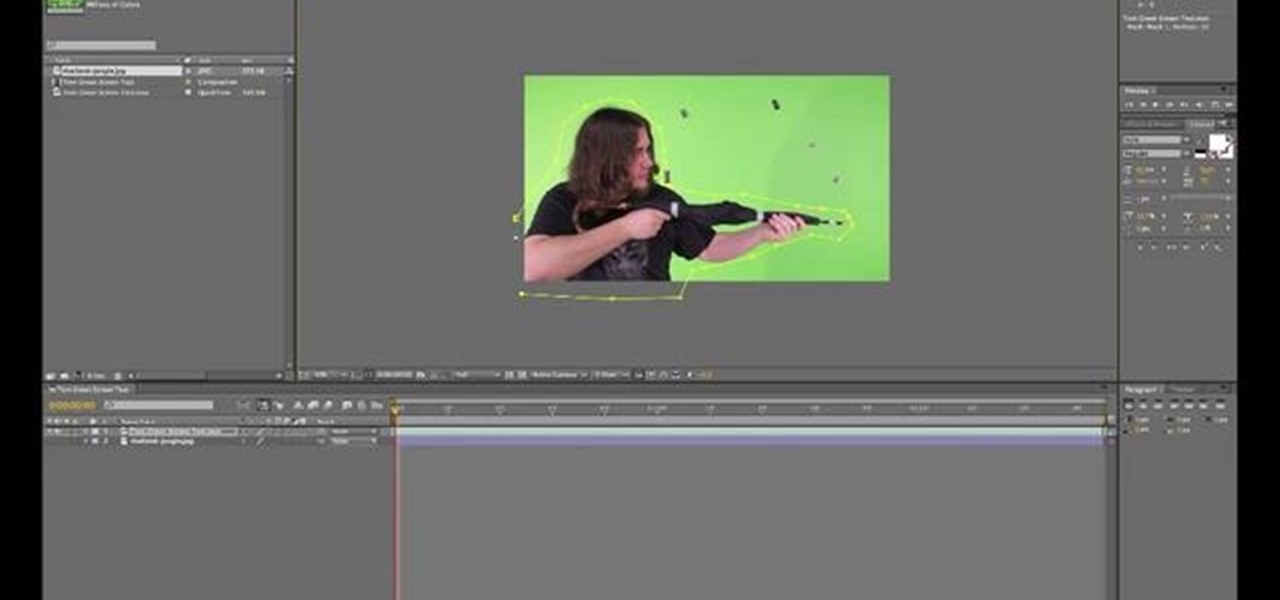
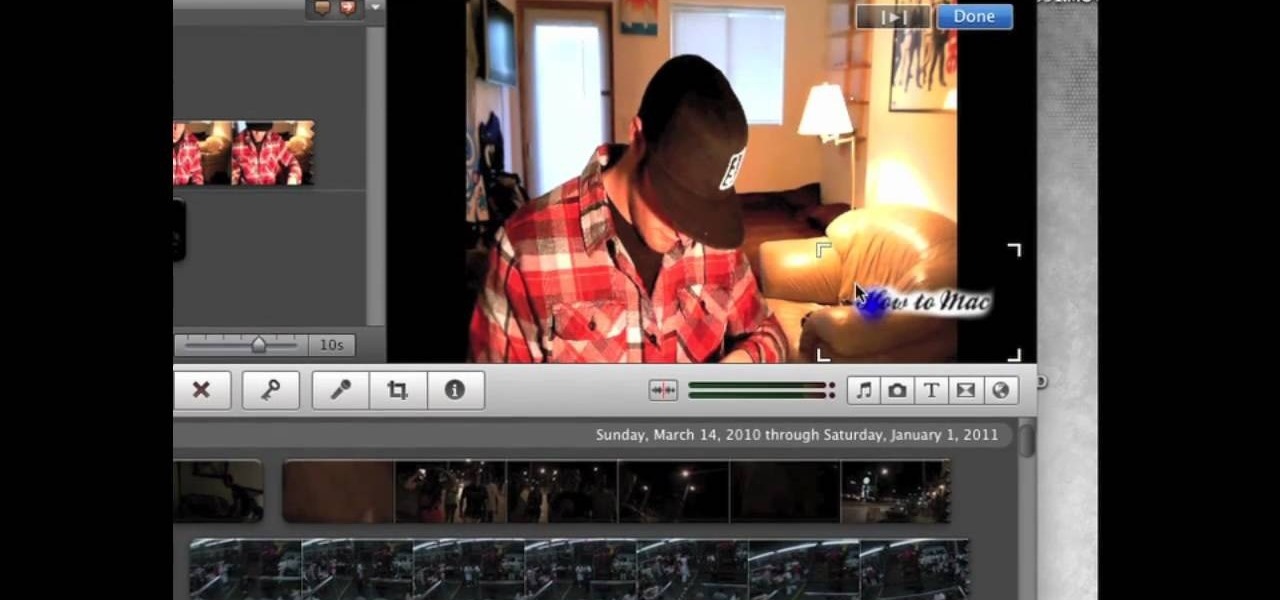
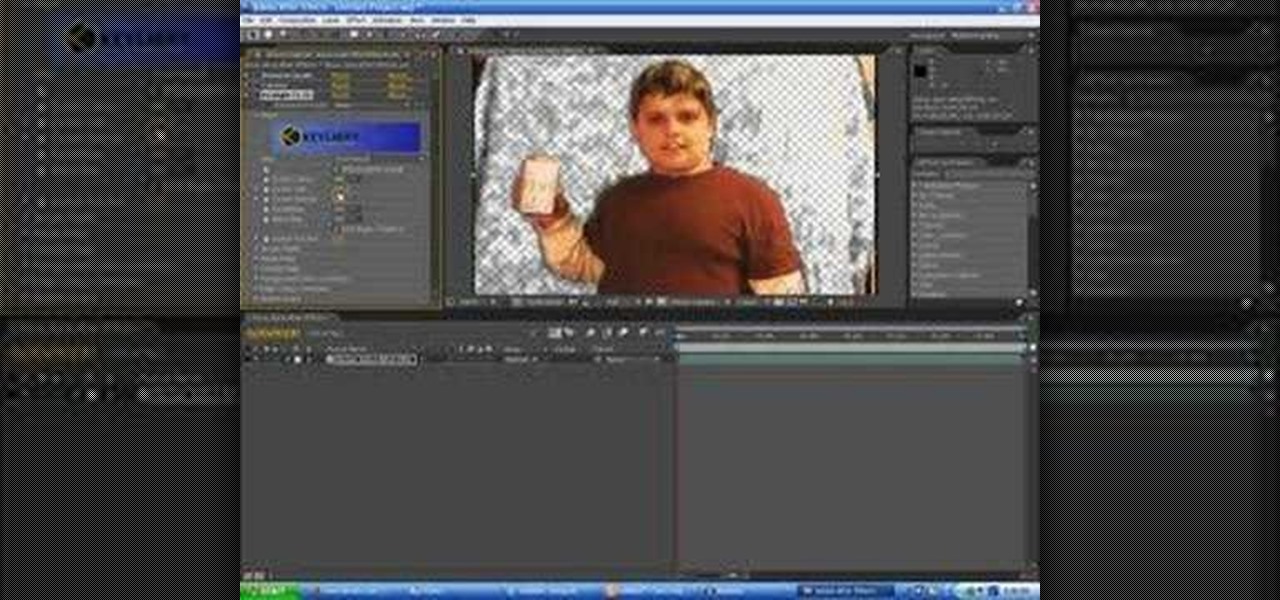
This video describes the "green screen" process in iMovie. The shirtless presenter has setup a green screen in his home along with several lights to provide realistic lighting. The presenter then places the object, in this case a porcelain troll, in front of the green screen. The background scene in this instance is a busy downtown area. By watching the background video while filming the green screen footage, the presenter is able to position the troll so it appears to be interacting with the...
If you’re selling your home, you’ll need to know its square footage. Why pay a professional when you can measure it yourself?

In this clip, you'll learn how to stabilize and remove objects from your digital footage with After Effects CS5. Whether you're new to Adobe's popular motion graphics and compositing software or a seasoned video professional just looking to better acquaint yourself with the program and its various features and filters, you're sure to be well served by this video tutorial. For more information, including detailed, step-by-step instructions, watch this free video guide.

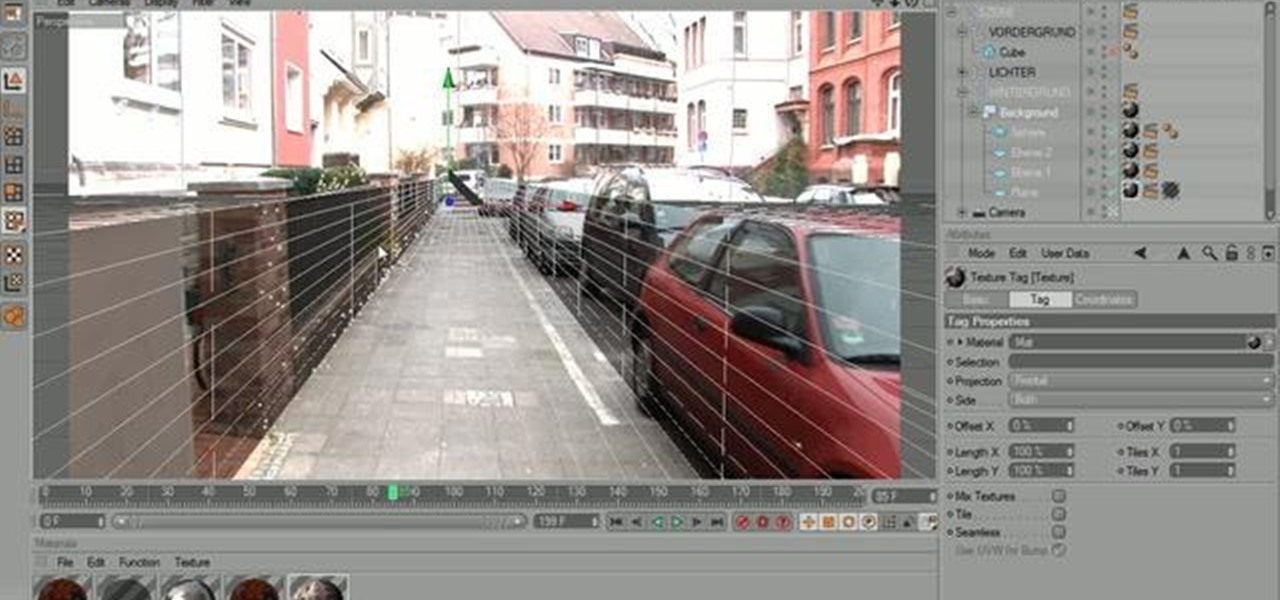
In this tutorial, you'll see how easy it is to bring your footage into PFTrack and then quickly take that data into Cinema 4D to begin to add your elements. Whether you're new to MAXON's popular 3D modeling application or are just looking to get better acquainted with Cinema 4D and its various features and functions, you're sure to enjoy this free video software tutorial. For more information, including complete instructions, watch this 3D modeler's guide.
In this clip, you'll learn how to use the Xplode C4D plugin with real-life camera footage. Whether you're new to Adobe's popular motion graphics and compositing software or a seasoned video professional just looking to better acquaint yourself with the program and its various features and filters, you're sure to be well served by this video tutorial. For more information, including detailed, step-by-step instructions, watch this free video guide.
Boris Continuum Complete 5's UpRez filter is a fantastic new filter that lets you upscale SD video to HD. In this podcast, Dave DiPinto demonstrates a possible production scenario in Apple Final Cut Pro where you have D1 resolution stock footage that you want to use in a 1080 HD project. He shows you how to use the BCC plug-in filter UpRez to upscale the footage to HD for use in the Final Cut Pro project.

This video shows you how to use Apple iMovie HD to edit and upload your video footage to Vimeo. If you're new to Apple's iMovie and your new to the Vimeo video website, then this is the best tutorial for you.

Zombies. That's the first thing that comes to mind when I see footage of a once heavily populated area turned completely desolate. Either that or you stumbled across a Ke$ha concert...BURN.
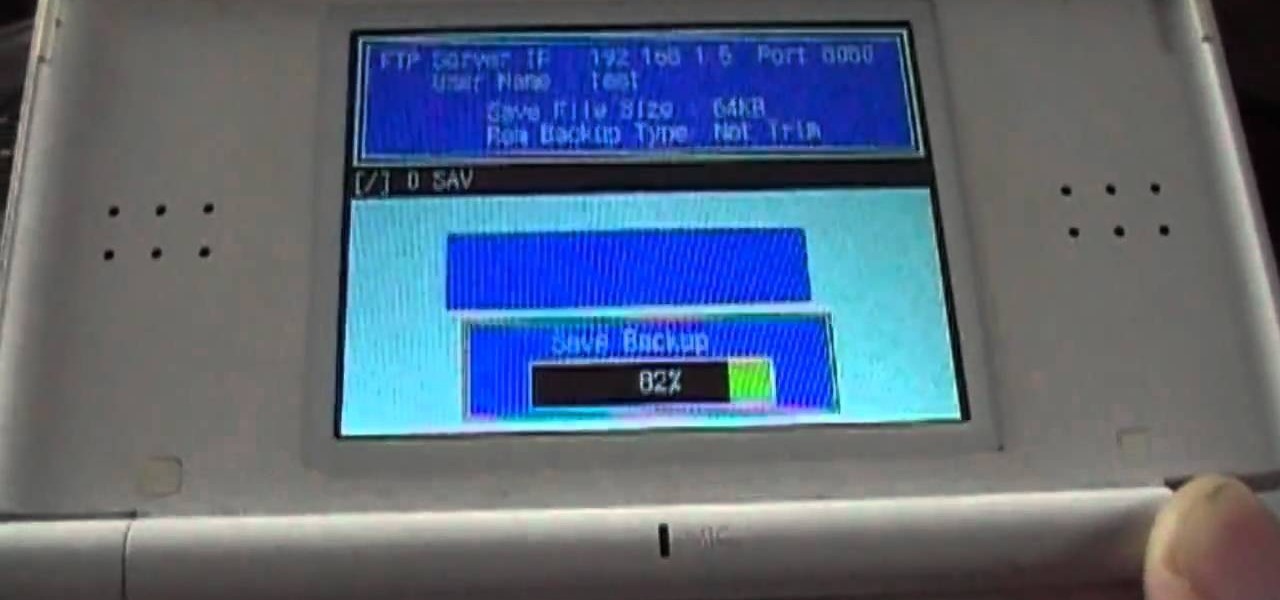
If you'd like to capture footage from your Nintendo DS, either to share online or make walkthroughs or playthroughs with commentaries, download all of the necessary files from Lifehacker, then watch this video for step-by-step instructions on how to get capturing. For recording gameplay this way, you'll need a DS or DS Lite, microSD card, NDS flash cartridge, Wi-Fi connection, SD card reader and a computer (along with all of those files you need to download).
Edit your video footage like a pro with Windows Live Movie Maker. This informative video from Vimeo's excellent Video 101 series of tutorials reviews the steps involved in using the software to create a basic 5x5—that is, a video composed of five clips of five seconds each. The different steps highlighted include importing your video clips, trimming the footage, editing audio, adding transitions, adding text & titles, and uploading to video sharing sites.

Handbrake is a free application that will read DVDs and convert the video footage for usable formats that you can open on your Macintosh, your iPhone, your iPod or Apple TV. The imported video footage can also be edited in iMovie.
This tutorial shows you how to improve your digital asset management. Once you have recorded your digital audio and video footage, you'll want to import it and edit it as efficiently and quickly as possible. This video shows you the most efficient workflow set up to use.
One of the problems with car mounts for film cameras is avoiding harmonic vibration and keeping your shot steady. This tutorial shows you how to make your own camera mount that will shoot stable, clear footage as the car drives.
This tutorial shows you how to add some more functionality to the clips on your iMovie films. Create custom title screens by adding logos, transparent images and watermarks to your videos using this versatile and powerful movie editing software for Mac.
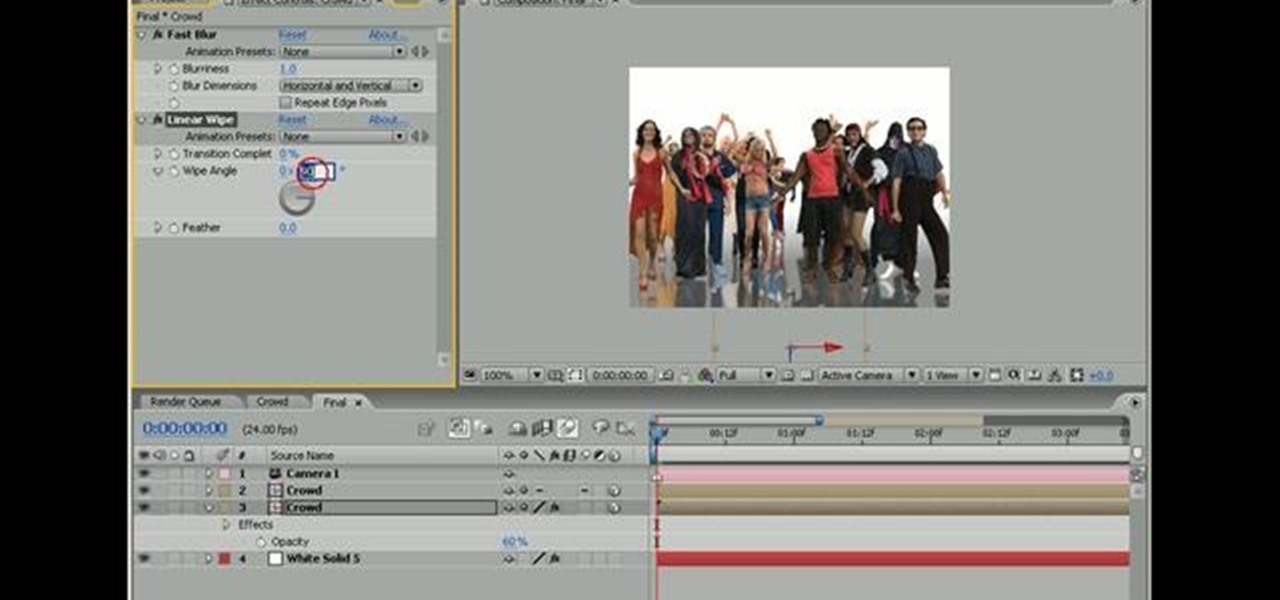
Create simple reflections in Adobe After Effects with keyed footage. In this video tutorial, Aharon Rabinowitz of All Bets Are Off demonstrates its use with video footage of both crowd and individuals. In addition, some potential issues with Collapse Transformations are also addressed.
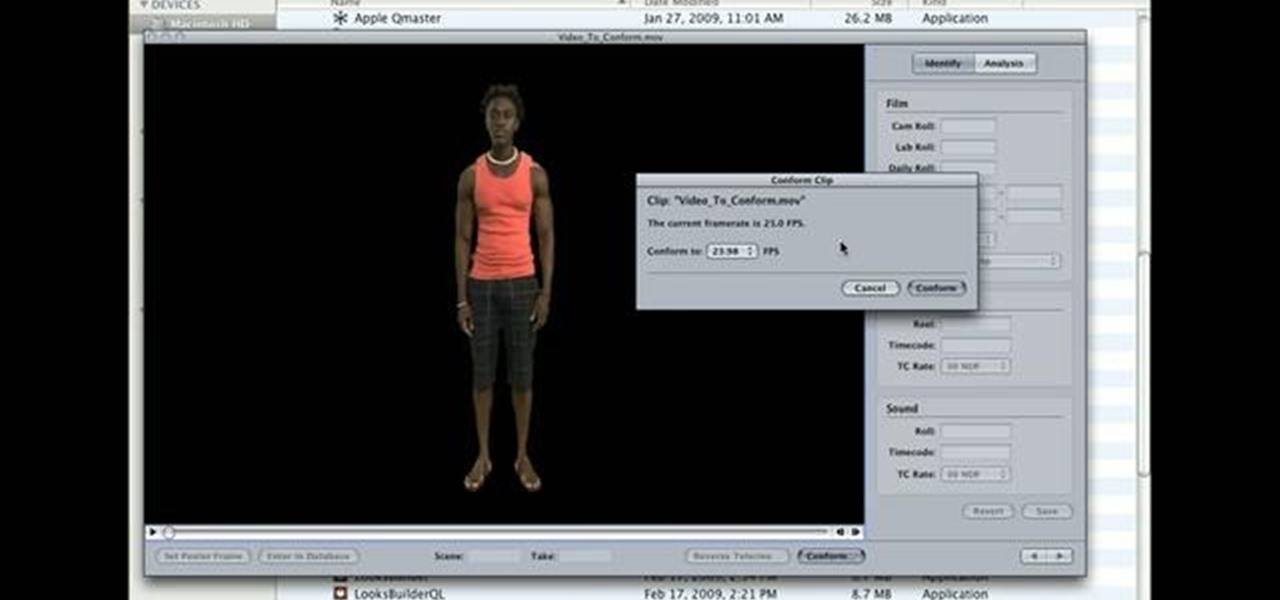
Want to convert your footage from 25 to 24 frames per second? In After Effects CS5, it's easy!
Has white balance always been a problem in your photographs? Getting the perfect color in your photos is tricky business, even on digital cameras. This video will give you the ultimate information on customizing the white balance and color temperature for your film, video footage and pictures. Ritwika teaches how to obtain accurate color balance using various custom white balance techniques.
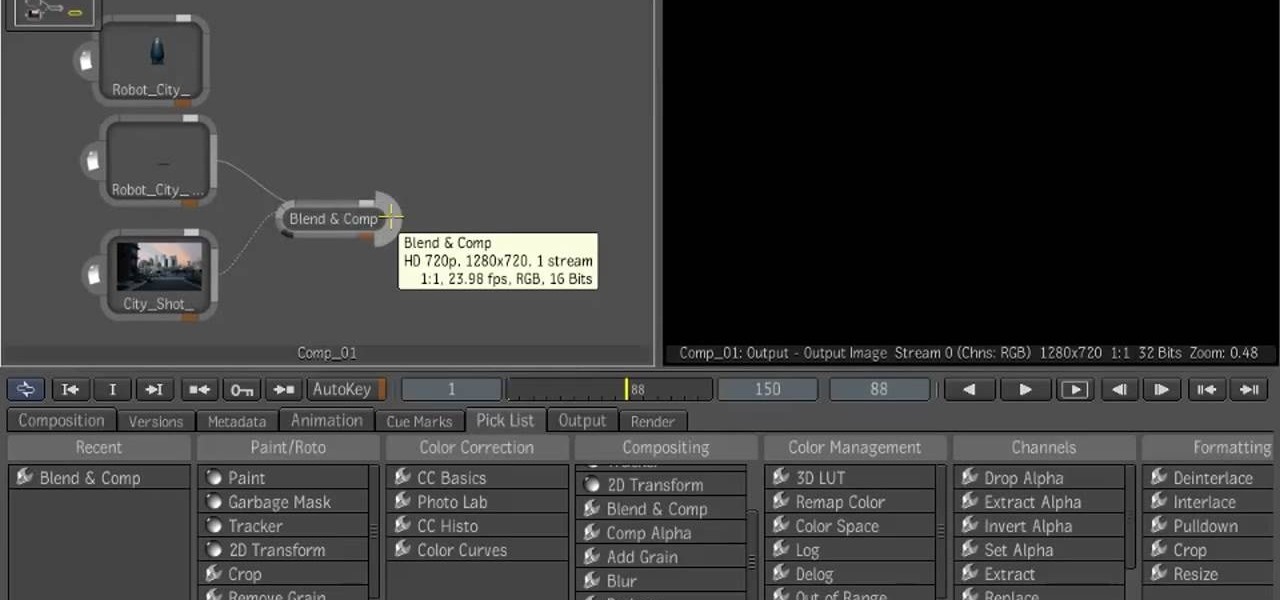
In this clip, you'll learn how to get started compositing digital footage within Autodesk Maya 2010. Whether you're new to Autodesk's popular modeling software or a seasoned 3D artist just looking to better acquaint yourself with the Maya 3D 2010 workflow, you're sure to be well served by this video tutorial. For more information, and to get started using this trick yourself, watch this free video guide.

Interested in overcranking your footage in After Effects for a slow motion effect? Let this video be your guide. Whether you're new to Adobe's popular motion graphics and compositing software or a seasoned video professional just looking to better acquaint yourself with the program and its various features and filters, you're sure to be well served by this video tutorial. For more information, including detailed, step-by-step instructions, watch this free video guide.

In this video clip, you'll learn how to treat footage with composite modes and effects in Final Cut Pro or Express. Whether you're new to Apple's Final Cut Pro non-linear video editor or just want to better acquaint yourself with the popular video editing program, you're sure to benefit from this video tutorial. For more information, including detailed, step-by-step instructions, watch this tutorial.
This After Effects user's guide offers an overview of how to color correct and grade footage within AE by using the staturation, curves and levels tools. Whether you're new to Adobe's popular motion graphics and compositing software or a seasoned video professional just looking to better acquaint yourself with the program and its various features and filters, you're sure to be well served by this video tutorial. For more information, including detailed, step-by-step instructions, watch this f...
In this video tutorial, viewers learn how to import and render footage in Adobe Final Cut Pro. To import files, begin by going to File, select Import and click on Files. Then browse for the file and click Open. Now drag the clips into the time line to edit. To render the footage, begin by selecting it. Then click on Sequence, select Render Selection and click on Both. This video also shows viewers how to cut a clip and add effects. This video will benefit those viewers who are just beginning ...
This instructional video will teach you how to enhance your footage [remove grain, bring out more color] with after effects. So enjoy this tutorial, and you don't need any additional plug ins, just the built in tools of after effects.