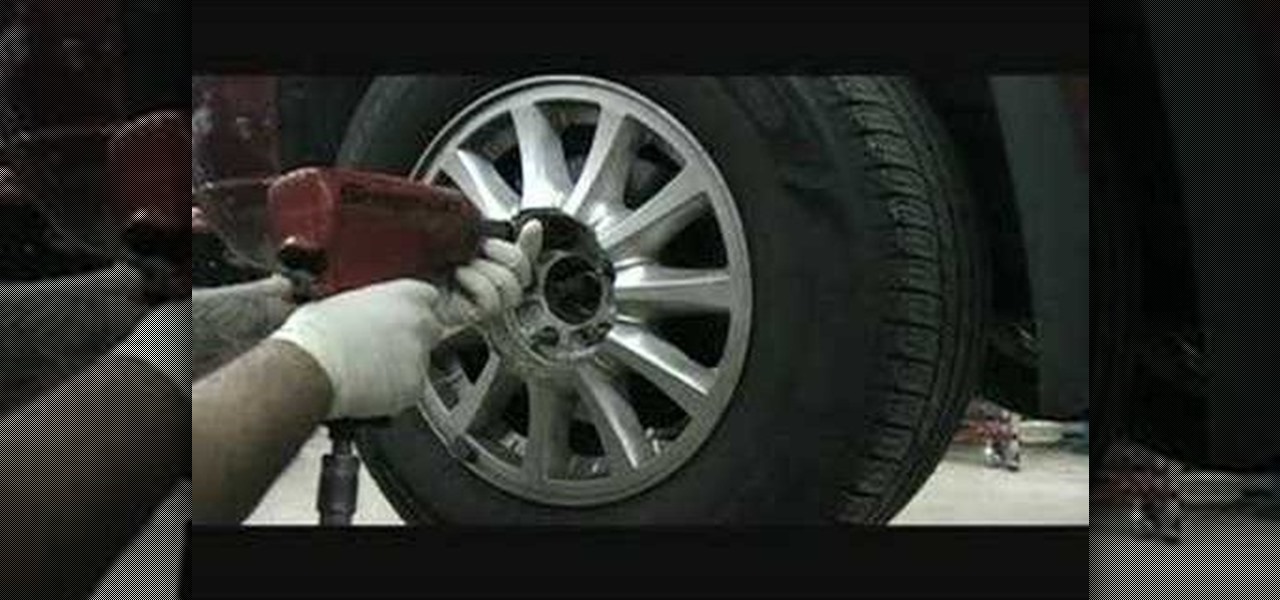
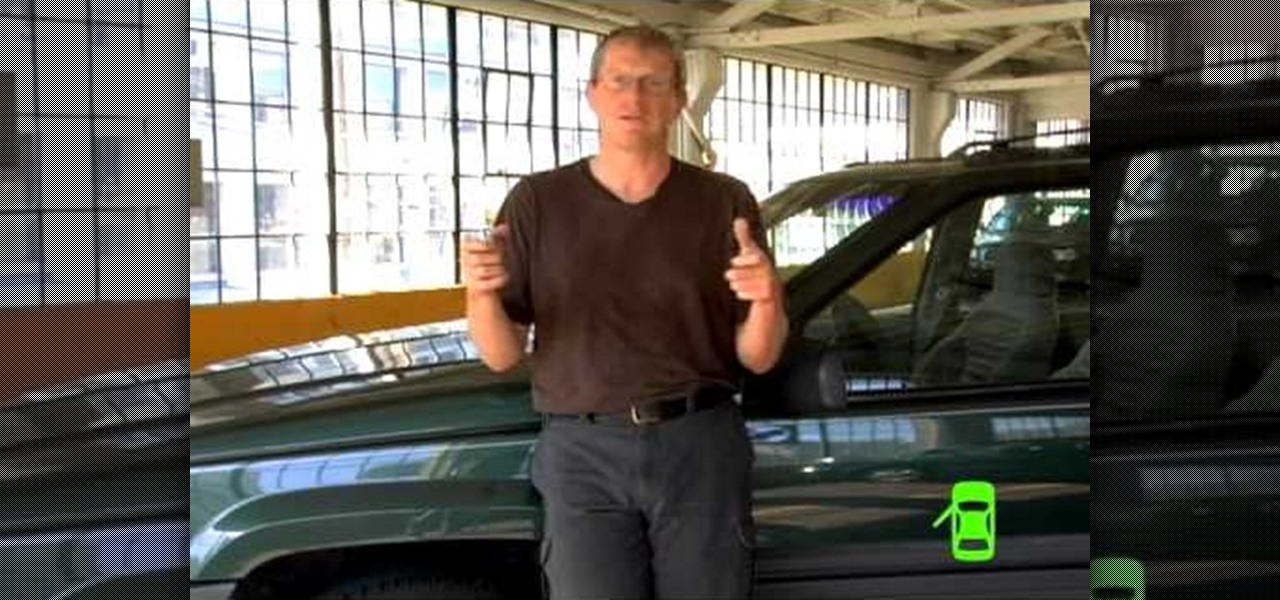
The CV (constant velocity) shafts on your car allow the axel to transfer power to the wheels without an appreciable loss in efficiency. They are widespread in front and all-wheel drive cars. Watch this video to learn how to replace broken ones yourself.

In this video, we learn how to build a LEGO pickup truck. First, you will need to lay out all the parts that you need to build the truck. This includes small and large parts that are in gray and white colors, as well as wheels. Start off by building the middle of the car, making room for the wheels to fit in. After this, start to add on the blocks that go on the back and the front to make the headlights and different features on the truck. Add on the block for the windshield, then add on the ...
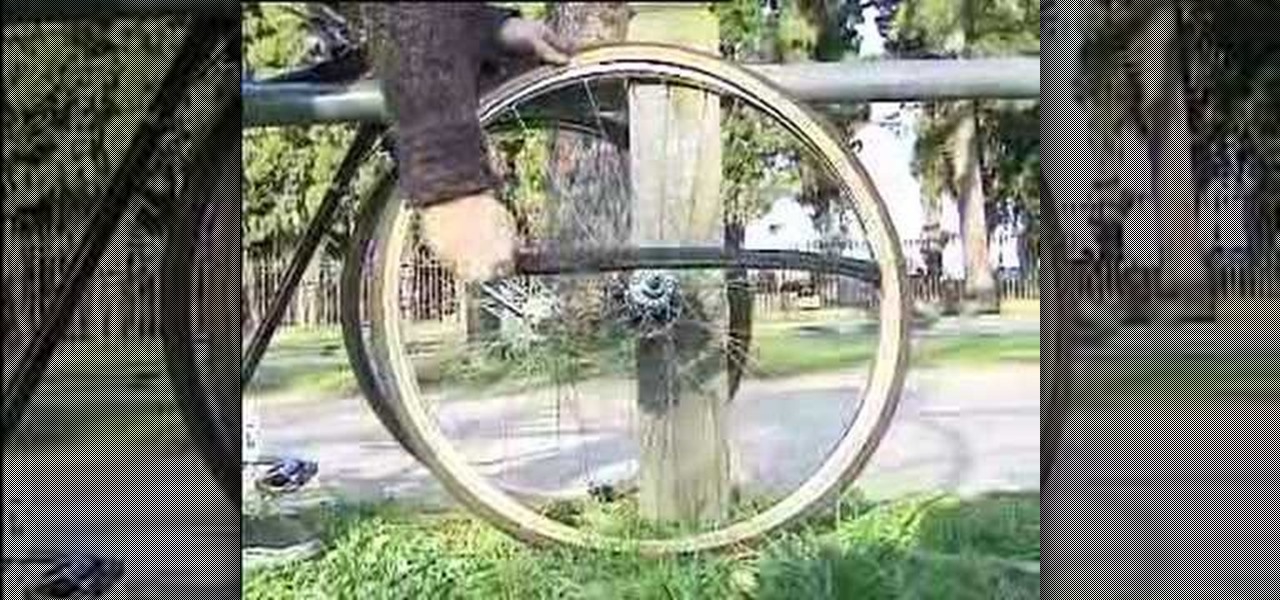
In this clip, learn the simple trick behind opening a full beer bottle with a spinning bike wheel. This is a pretty cool bar trick, that can be done at picnics, cook outs and anywhere else you might have a bike handy. Try it but be careful - the cap will shoot off pretty fast and it goes far!
Kim Parent from Drivers Side answers questions received about the diagnosis of sounds your car may make. 1. Squealing sound-Typically means brake pads need to be replaced. 2. Mechanical sound with steering wheel looseness-Probably means you have loose joints in the front of your car. Kim advises that this is a safety issue. 3. Mechanical knocking sound without steering wheel looseness-If you hear this sound when you're making turns this could mean you have a CV Joint that's worn out. Kim reco...
To make a rubber band car you will need one sheet of card stock, four paper clips, two binder clips, one plastic straw, 8 inches of dowel that fits into the straw, two pencils and one rubber band. You will also need four CDs or round pies of cardboard, tape, a ruler and a marking pen. First, unfold the paper clips. Then fold the card stock and attach the paper clips. Cut squares out of the card stock. Then, cut the straw. Attach it to the card stock. Affix the pencils to the card stock with h...

Your bike is your prized possession - it is your mode of transportation, your exercise and definitely your fashion statement. But, just because you love your bike, doesn't mean you want to destroy your outfit by riding it. Follow this tutorial and add a pretty mesh barrier to your back wheel and stop ripping and soiling your skirts.

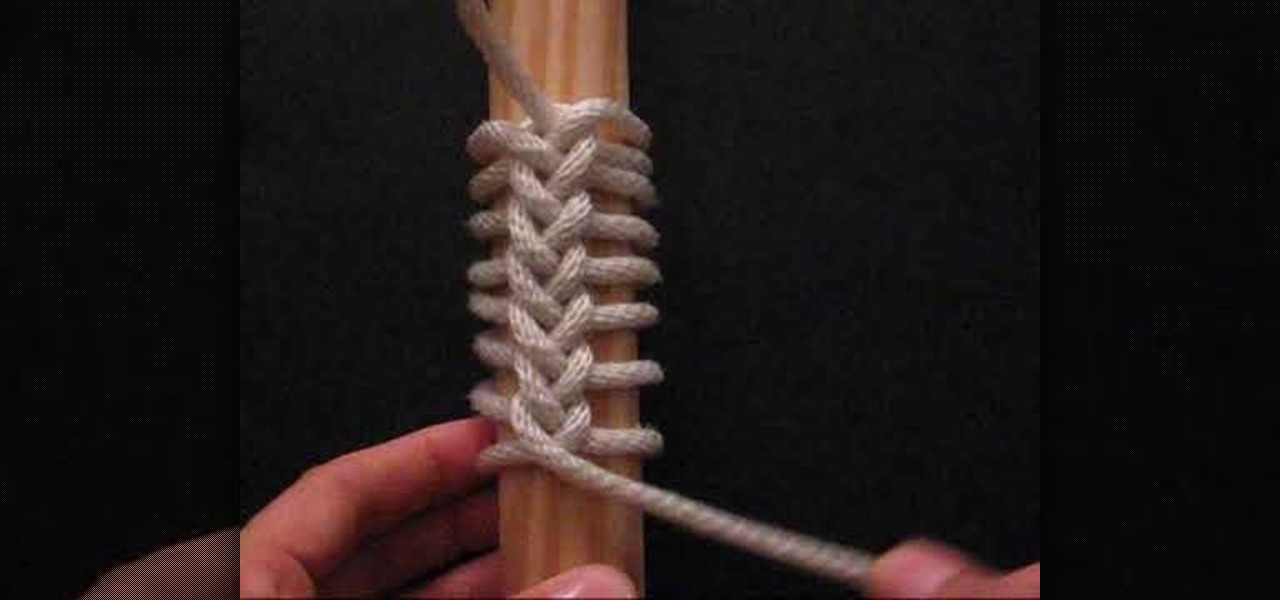
In this video, JD, from Tying It All Together, demonstrates how to tie a knot known as a "Ringbolt Hitch". This is also known as "coxcombing". This type of knot was once a common tie used by sailors to dress-up items and parts of their ships. When tying a wheel, a "Turk's Head" knot was used to cover the part of the wheel where the two ends of the ring bolt met, which would firm up the hitch, and help to keep the tied ends from unraveling. It is a nautical tradition to use this type of knot t...
Have you ever wondered how movies are made? There are many modern techniques available today to produce movies. This was not the scenario centuries back when there were no movies or films. The earliest form was the movie wheel and this video teaches you exactly how to build a movie wheel. The video is simple and instructive which even an elementary school kid will be able to understand. You can use this for your school science projects. This is one tutorial which will leave everyone spinning.
Check out this video from Sessions on using the color wheel. Better understand color relationships, color schemes and color theory. This is a great lesson for designers, artists, stylists and decorators. Create color harmony using the color wheel. Tutorial video from Sessions Online Schools of Art & Design's "Color Theory" course. Part of Sessions' Graphic, Web, Digital Arts, Marketing, and Multimedia Arts Design certificate programs.
If you're into fingerboarding, then you're going to want to watch this video tutorial to see how to improve your fingerboard skills. Watch to learn how to make your Tech Deck fingerboard wheels roll smoother. With just a little sandpaper your finger-skateboard will be smoother than you can imagine.
Lear how to replace your bike's inner tube! Remove wheel from bike. Quick release on front is easier. If you have wheel nuts you'll need some tools. Shift derailler to slack chain, then it's easy. Use a tire lever to take the outer tire. Feel along the tire to locate the puncture site.
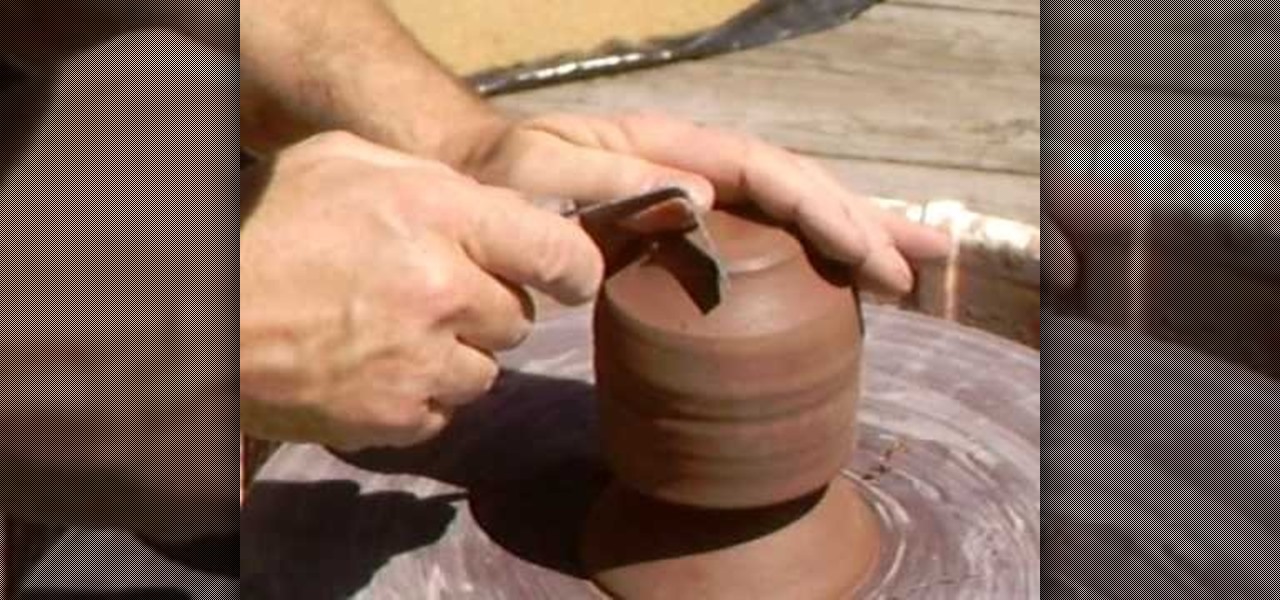
This instructional video demonstrates how to center a piece of clay on a pottery wheel. Using electric pottery wheels, a steady hand is necessary to prevent the clay from flying off center. It helps to lock one's elbows to control the clay and eventually sculpt a perfectly centered cylinder.
Peugeot 308 (2015 Europe model) in depth instructional video how to adjust seat and steering wheel reach and height so you can see the "head-up"instrument panel clearly, over the reduced diameter steering wheel.
In this video, we learn how to remove the dashboard and wheel to replace bulbs. First, remove the negative battery cable, then remove the steering wheel. Next, remove the cluster bezel, with Phillips head screwdrivers for the screws. Pull back on the bezel and remove the clips from the bottom by prying it apart. Remove the cluster next, followed by the top piece of the steering wheel joint. Once this is removed, you will be able to slide the cluster out and squeeze the cables to remove it. Fr...
English pottery instructor Simon Leach has stepped out onto his lovely deck to teach us how to trim our ceramic pots on the wheel. His example piece is small cup or pot that begins the video as plain as vanilla and ends it as a wonderfully detailed piece after only 10 minutes or so of work.
Removing a vehicle's tires and inspecting the brake rotors is possible with a few easy steps. First, remove all five lug nuts and remove the wheel from the vehicle. A power tool will easily remove the lug nuts. You now have access to the wheel so the next order of business is to lift off the wheel. Once the wheel is off the vehicle and safely set aside, return to the vehicle. You now have access to the brake pad. The final step in the process is to inspect the brake pad for thickness and abno...
So, your children have the same old boring Fisher-Price Power Wheels that all the other kids on the block have. Do you really want your child to be like all of the rest? No, I didn't think so. Turn those miniature Power Wheels, Dumar or Peg Perego vehicles into a little bit of realism, if you can handle it. All it takes is a little modification and you'll be wishing you were five again. With a few simple hacks, your son and daughter will be burning rubber, jumping curbs and burying those othe...
So, your children have the same old boring Fisher-Price Power Wheels that all the other kids on the block have. Do you really want your child to be like all of the rest? No, I didn't think so. Turn those miniature Power Wheels, Dumar or Peg Perego vehicles into a little bit of realism, if you can handle it. All it takes is a little modification and you'll be wishing you were five again. With a few simple hacks, your son and daughter will be burning rubber, jumping curbs and burying those othe...
So, your children have the same old boring Fisher-Price Power Wheels that all the other kids on the block have. Do you really want your child to be like all of the rest? No, I didn't think so. Turn those miniature Power Wheels, Dumar or Peg Perego vehicles into a little bit of realism, if you can handle it. All it takes is a little modification and you'll be wishing you were five again. With a few simple hacks, your son and daughter will be burning rubber, jumping curbs and burying those othe...
So, your children have the same old boring Fisher-Price Power Wheels that all the other kids on the block have. Do you really want your child to be like all of the rest? No, I didn't think so. Turn those miniature Power Wheels, Dumar or Peg Perego vehicles into a little bit of realism, if you can handle it. All it takes is a little modification and you'll be wishing you were five again. With a few simple hacks, your son and daughter will be burning rubber, jumping curbs and burying those othe...
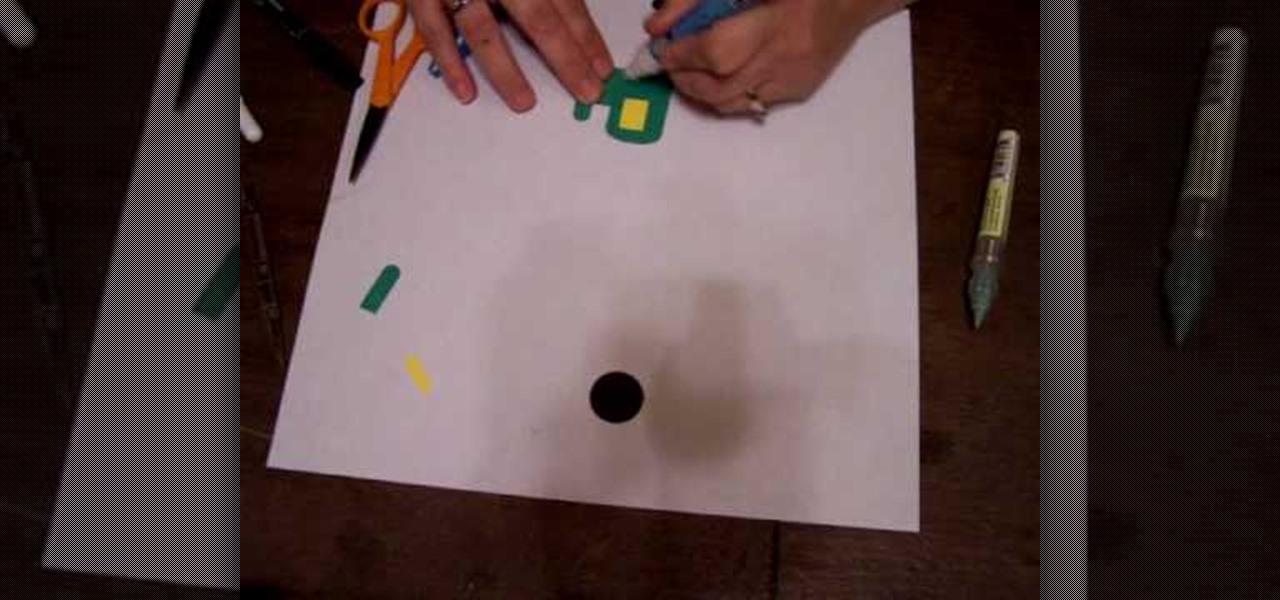
In this tutorial, we learn how to make a Tractor using Stampin' Up punches. First, you will need to punch out a black scallop circle, another black circle, two yellow circles, a yellow square, and four green square shapes. After you have these cut out, you will glue the black scallop circle to the yellow circle so it's underneath. Then, take the green piece and glue it with the other yellows to create the shape of the tractor. Glue the circles at the bottom to make the wheels, then save this ...
You can fix a frozen iPod fairly quick. All you have to do is hold the menu and action buttons until your screen goes black. The top button on the click wheel is the menu button and it says menu. The button in the center of the click wheel is the action button. When you hold both of those buttons the screen goes black after a few seconds. What it is actually doing is restarting the iPod. It will take about 55 seconds for the iPod to reboot and when it does it will work fine again.
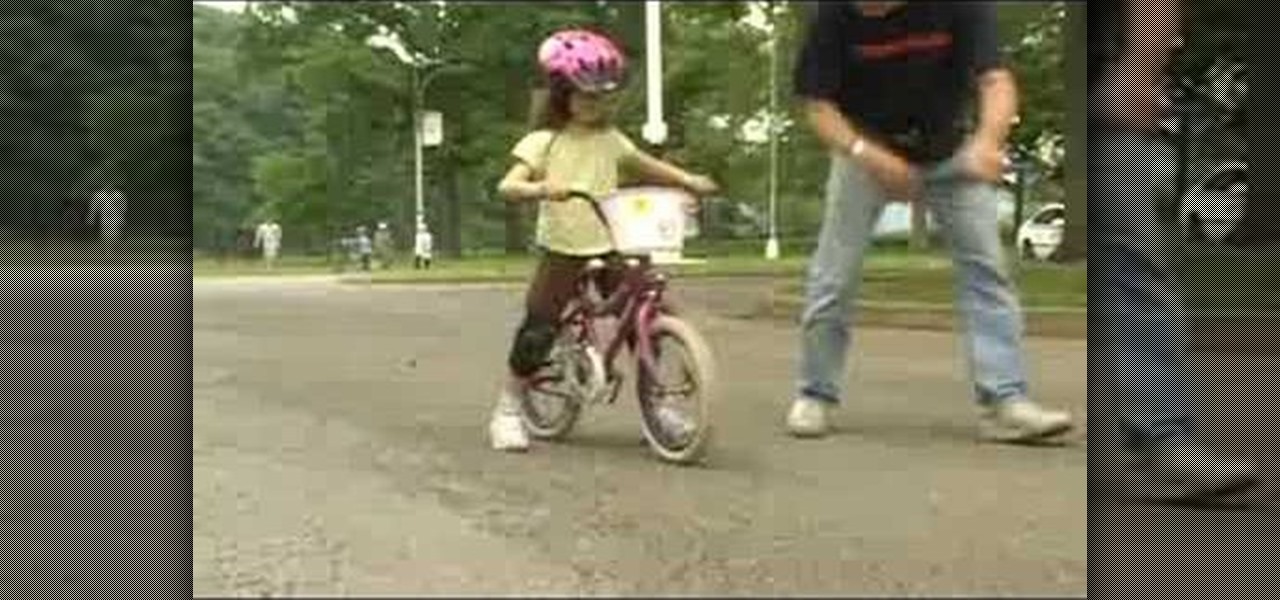
Make sure the bike is properly fit to the child. She should just be able to stand over the top bar of the frame without touching.
Build a track dolly for about £80. This is great for getting professional dolly shots when making your own films.
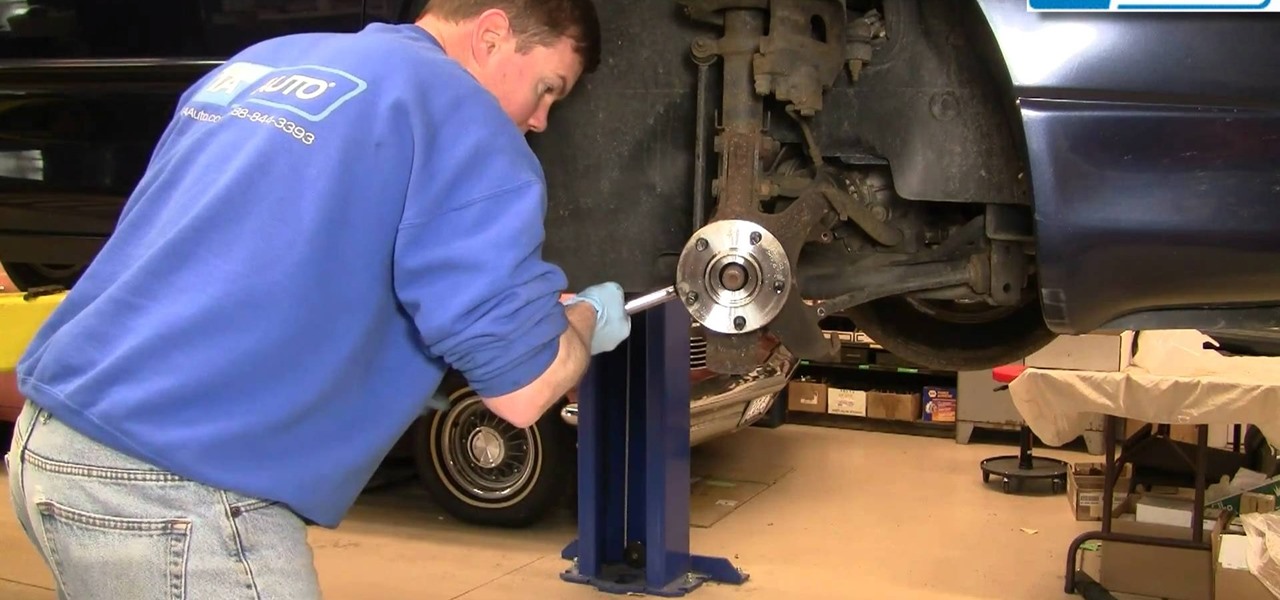
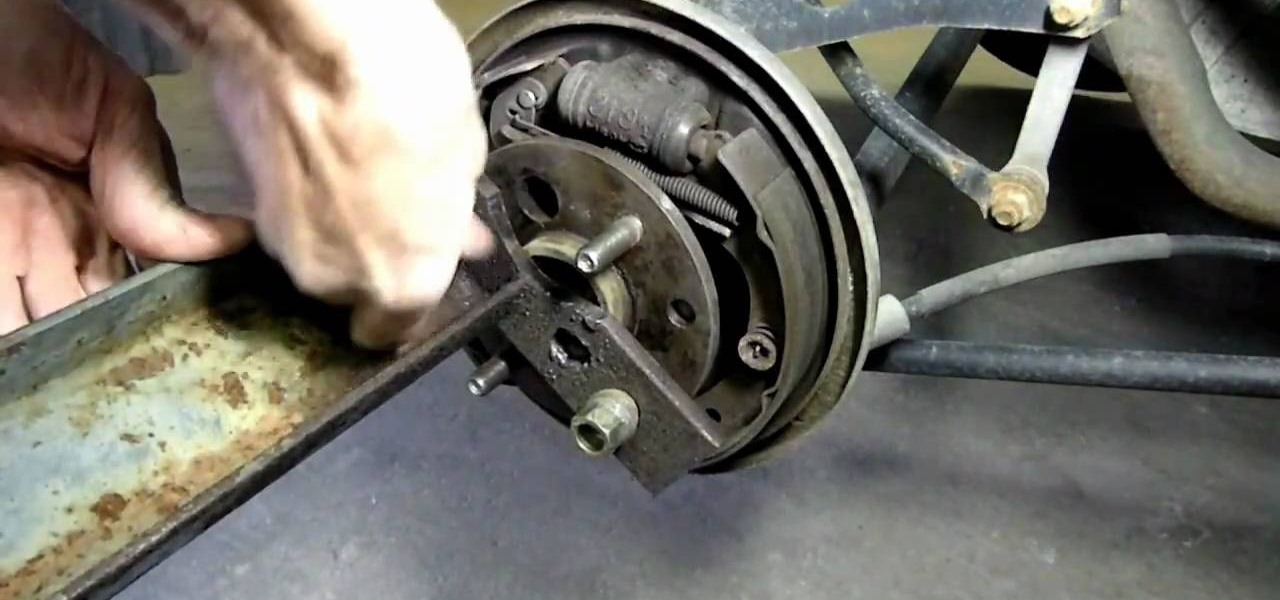
This is a step-by-step guide to removing and installing the front wheel bearing hub on a 1993-2004 Dodge Intrepid. The tools you will need are a jack and jack stands, wrenches, sockets, ratchets, a screwdriver, a hammer, a C-clamp, a torque wrench, and a breaker bar.
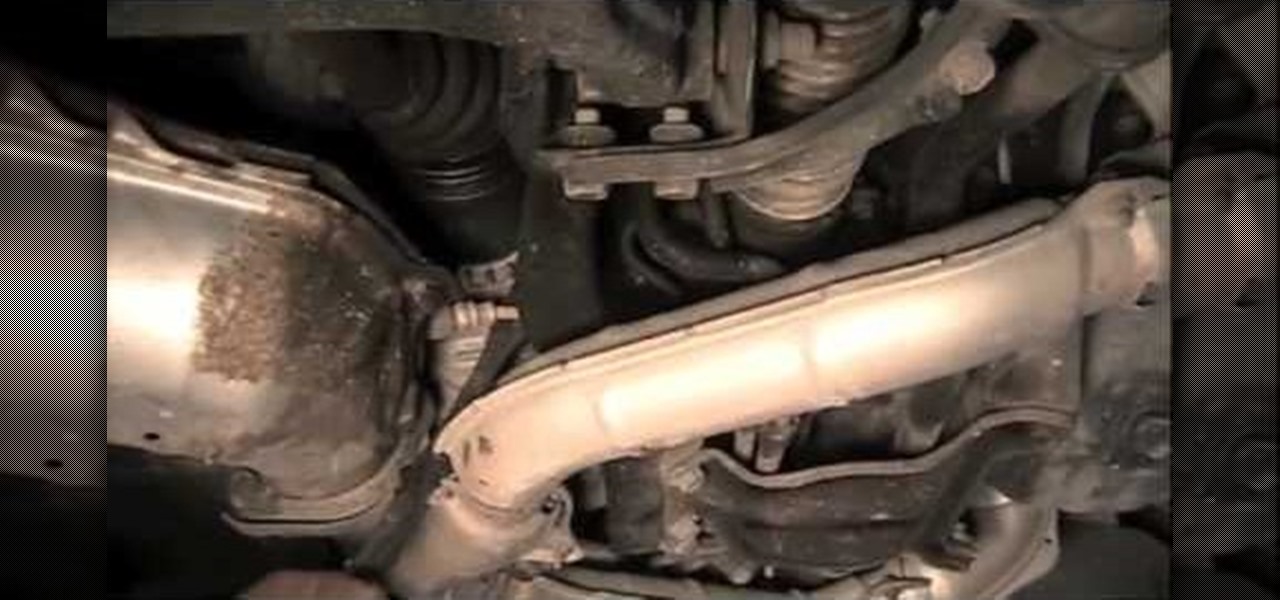
Want to replace the lower ball joint on your two-wheel Ford F150? It's easy! So easy, in fact, that this repair video can present a complete, step-by-step overview of the process in about 13 minutes. For all of the details, and to get started yourself, take a look!
If you have a broken DVD player and the tray door doesn't open when you press the button, this informative video shows you a possible quick fix to get it working again. In this scenario, the O-ring connecting the sprocket wheel with the motor has broken and snapped over use. This video shows how to open the case and access the internal sprocket wheel.
A perfect idea for a gift this holiday season! Throw a mixing bowl or ceramic serving dish on a pottery wheel. Make sure you use a non toxic glaze, with no lead in it, if you're using it to store or serve food!
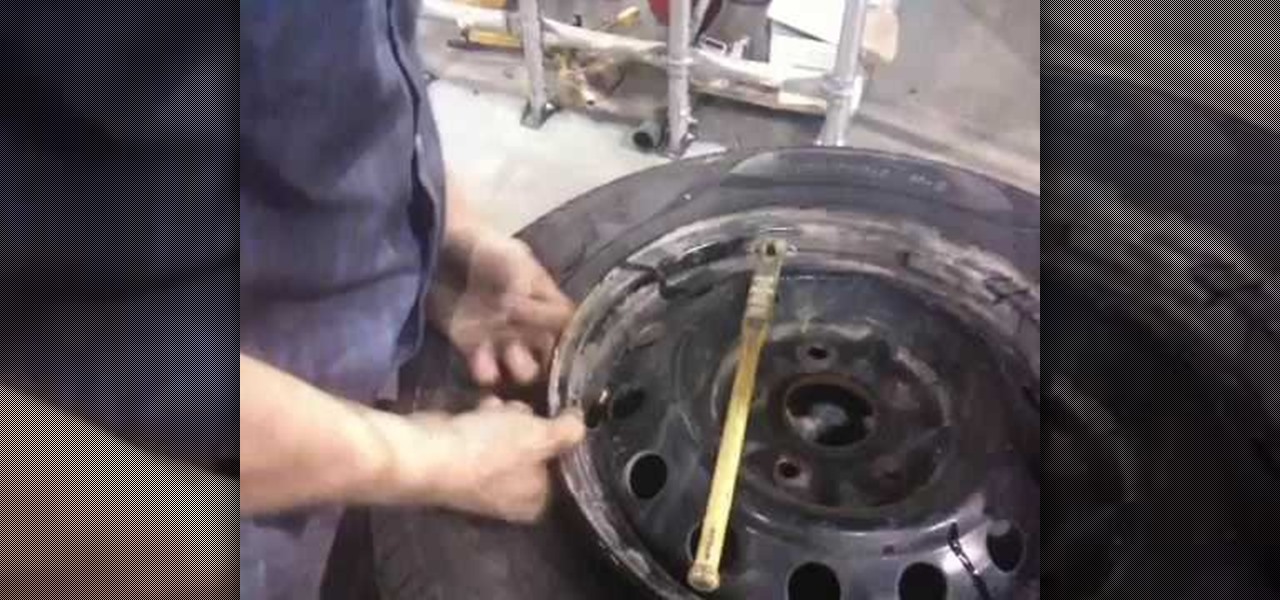
In this tutorial we learn how to change and balance a car tire. First, take the tire and remove the air out of it from all the sides. After this, remove the tire from the wheel. You will need to use a pry bar to help you remove it from the tire completely. It will help out a lot if you have a machine that will do this for you. Then, apply grease around the wheel and put the new tire on. From here, inflate the new tire while on the wheel and it will be ready to install on your vehicle.
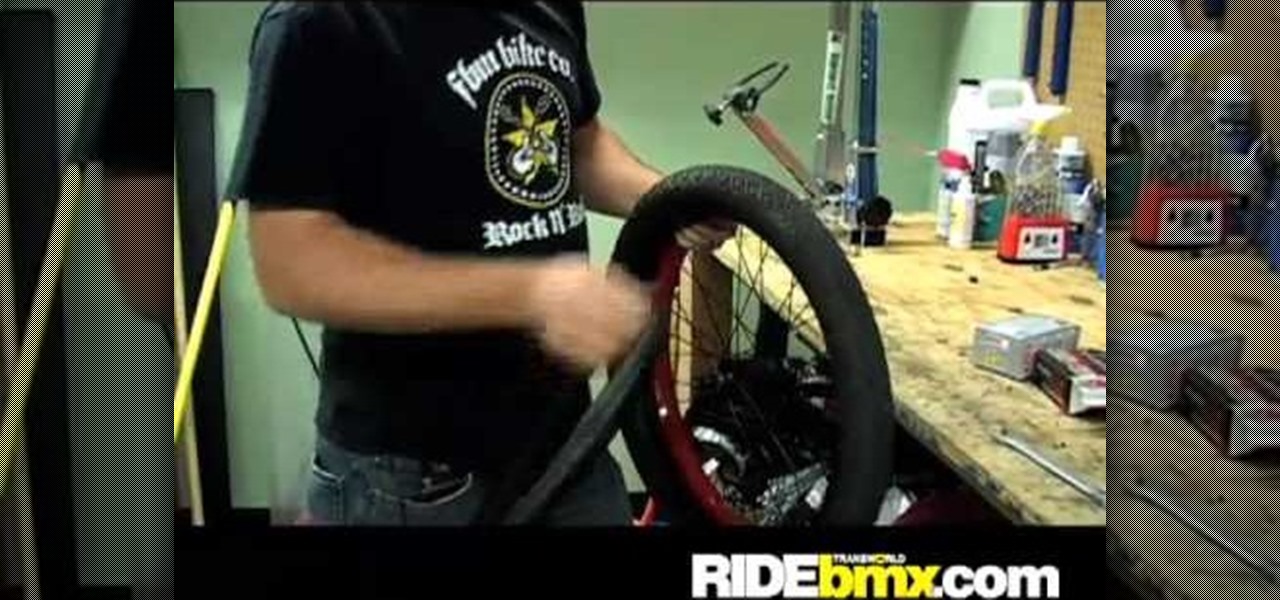
In this tutorial, we learn how to change a flat BMX tire. First, take the wheel off with a wrench. Then, let all the air out of the tire if it's not already completely out. Next, find what gave you the flat tire and make sure you remove it from the tire. After this, grab the top of the tire and pull it off of the wheel. If it's completely flat, it should be easy to take off from the rim. Work your way around until it's completely off. Then, put the new tire on and then pump it with air. After...
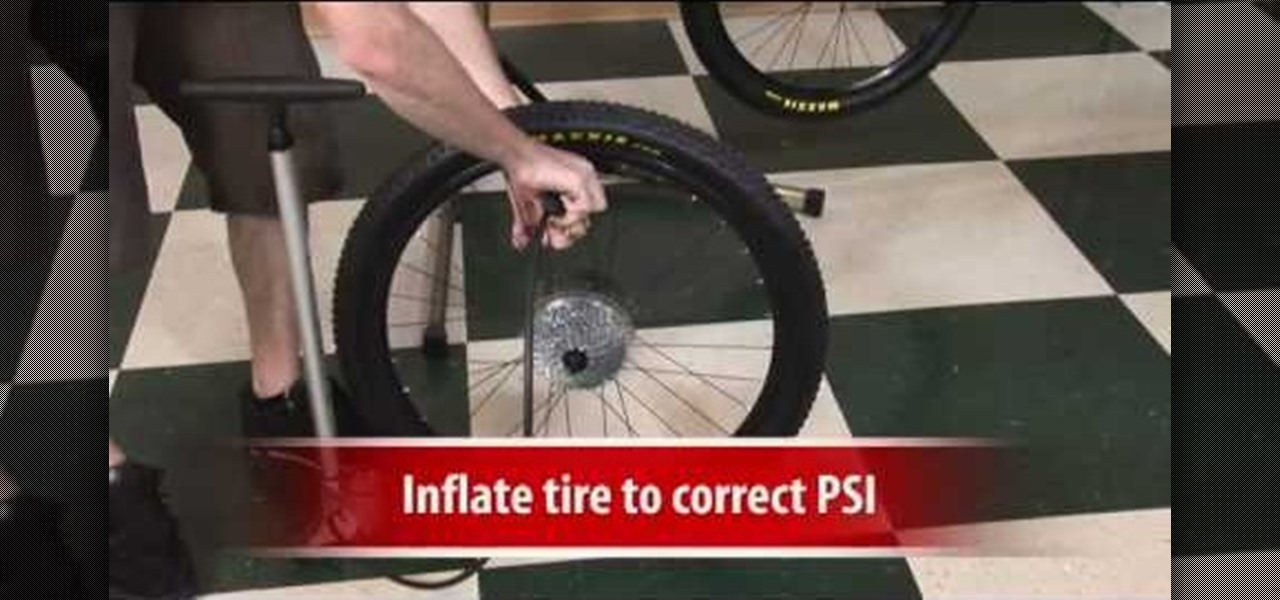
In this video, we learn how to change a mountain bike tire. Start by shifting the rear cassette to the smallest gear. Then, remove quick release and remove the wheel. After this, remove the tire with tire levers or strong fingers, then check inside the tire rim for foreign objects. Inflate the new tube slightly, then put the tire in. Put both of these inside the rim, then inflate the tire to the correct PSI. After this, install the wheel on the bike and then tighten quick release. Do the fina...
In this clip, you'll learn how to implement mouse wheel support in Silverlight. Whether you're new to Microsoft's popular web application framework or a seasoned web developer merely looking to improve your chops, you're sure to find benefit in this free MS Silverlight programming lesson. For more information, including a complete demonstration and detailed, step-by-step instructions, take a look.
If you enjoy repairing your bike yourself, greasing the wheel bearings is a pretty easy job your should learn how to do. This video will show you how to do it, ensuring that your bearings spin smoothly and keep your momentum going.
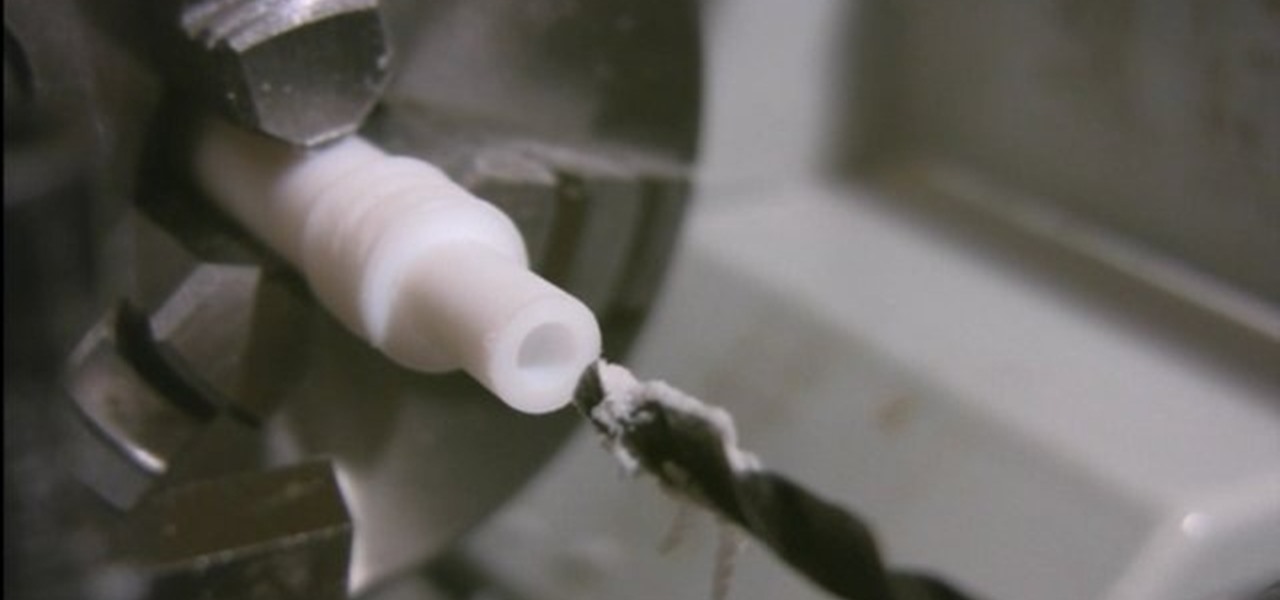
This video will show you how to create wheels for a fingerboard using a lathe. First, you should take a plastic tube and insert it into your lathe, using various drill pieces to cut down the plastic tube to the correct size. After this has been done, a drill which is attached to the lathe and adjusted to go straight through the tube can be made to create a hole through the center of the tube. You can then insert a small piece of metal into the tube in order to create the holder which will att...
In this tutorial, we learn how to tune your car in Photoshop. First, open up the image of your car and then add in a picture of different wheels. Then, place these wheels over the existing ones on the car and blend them in, then change the color as you prefer. Do this for the wheels that you are able to see on the image. After this, lower the car and add in a bumper to the front of the car, importing images in from various sources. Continue to add in parts to the vehicle, using shading and bl...
In this next video tutorial, you'll be finding out how to properly balance the wheels on your RC. Balancing them is important, just like a regular car, in making sure they work properly, don't wear out so soon, and will perform much better. It's not difficult to do and requires a few items that you will need. So good luck, pay attention, and enjoy!
If you own a Honda Accord and find out that there's a problem with your wheel bearings, then you need to pay attention to this tutorial. In the video above, you'll find out how you can easily replace the bearings with the right tools and know-how. It can be a difficult job for some, but others with more experience might have an easier time. So good luck, be safe, and enjoy!
THere are many parts of the rear derailleur on a mountain or road bike that need frequent adjustment to function properly and give you proper performance on your rides. This video will teach you how to adjust the cable tension, the jockey wheel, and the hanger of the derailleur, ensuring that the whole system is functioning smoothly and that your bike will work as well as possible.
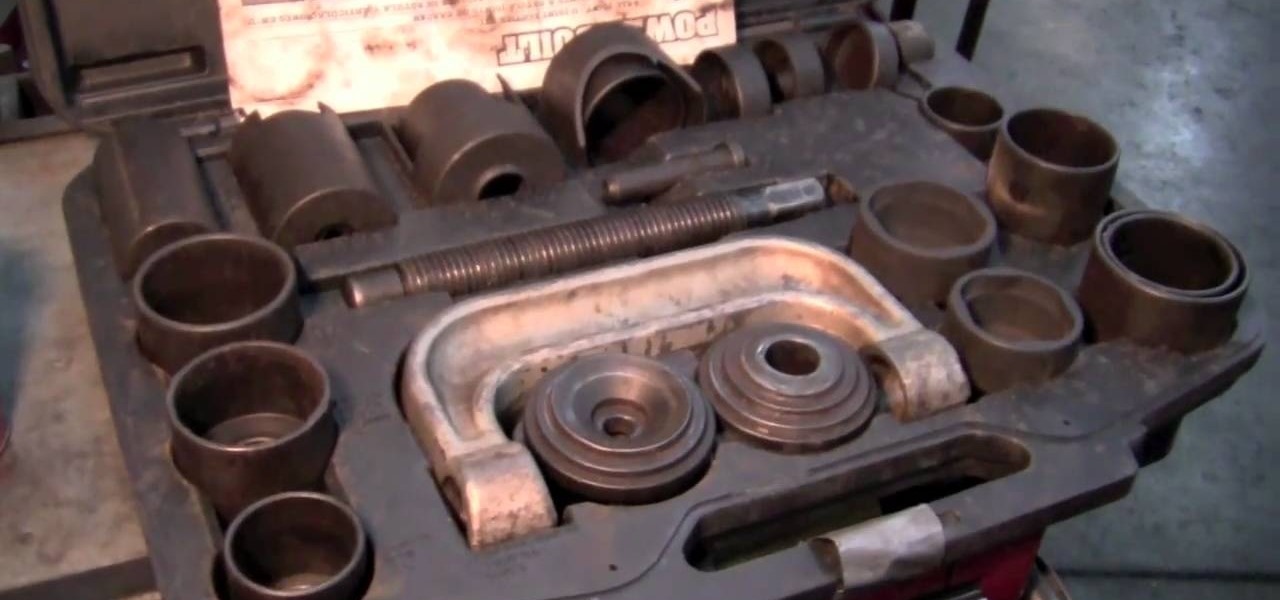
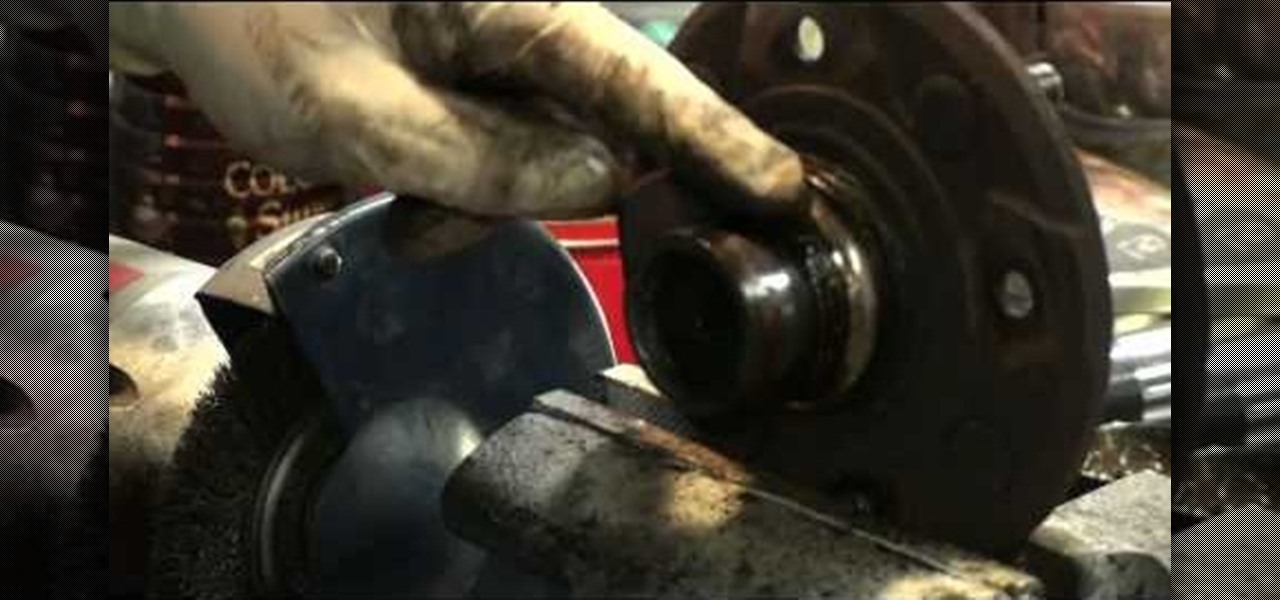
In this video Richpin explains how to remove a bolted hub wheel bearing that has gotten frozen onto the car and cannot be removed by conventional means. He explains how to recognize the problem, presents the homemade tool he uses in the repair, briefly explains how to make the tool, and then uses it in conjunction with a sledgehammer to break the bearing off of the car.
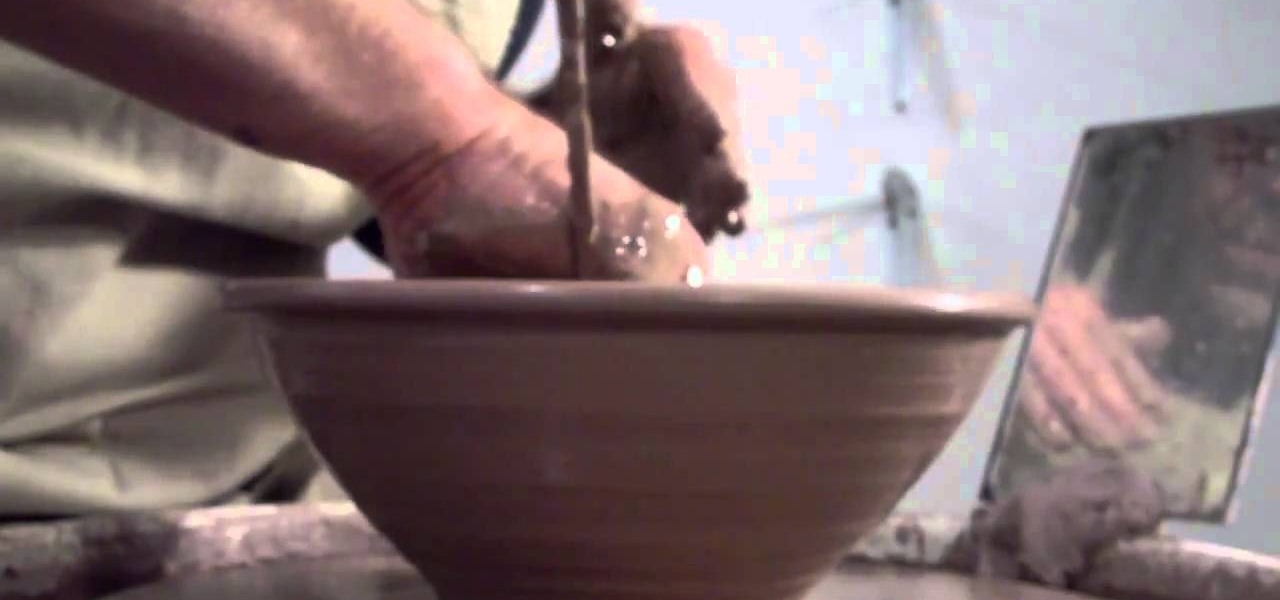
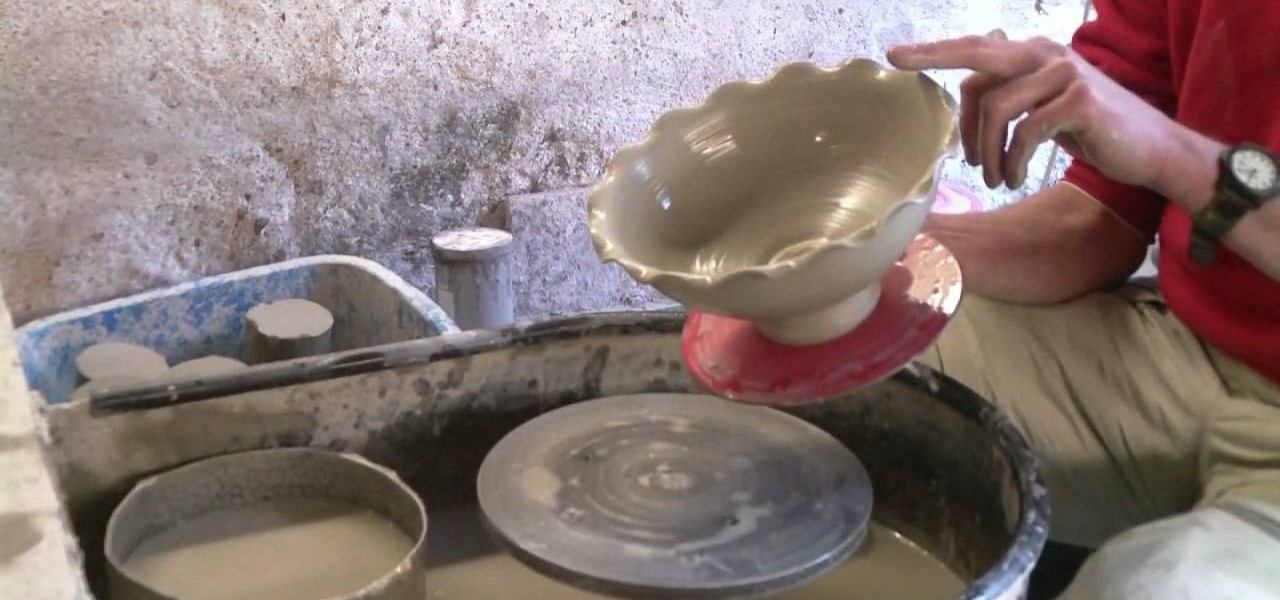
This video illustrates the method of throwing a wavy edged pottery bowl. This process comprises of the following stepsStep 1This process needs clay, pottery wheel and water in a bowl.Step 2Place the clay on the moving wheel.Step 3Now give the clay a desired shape with the help of your hands.Step 4keep wetting your hands at desired intervals and insert your fingers inside the clay so that it gives you the shape of a bowl.Step 5When your desired shape and size is ready take the clay bowl out of...