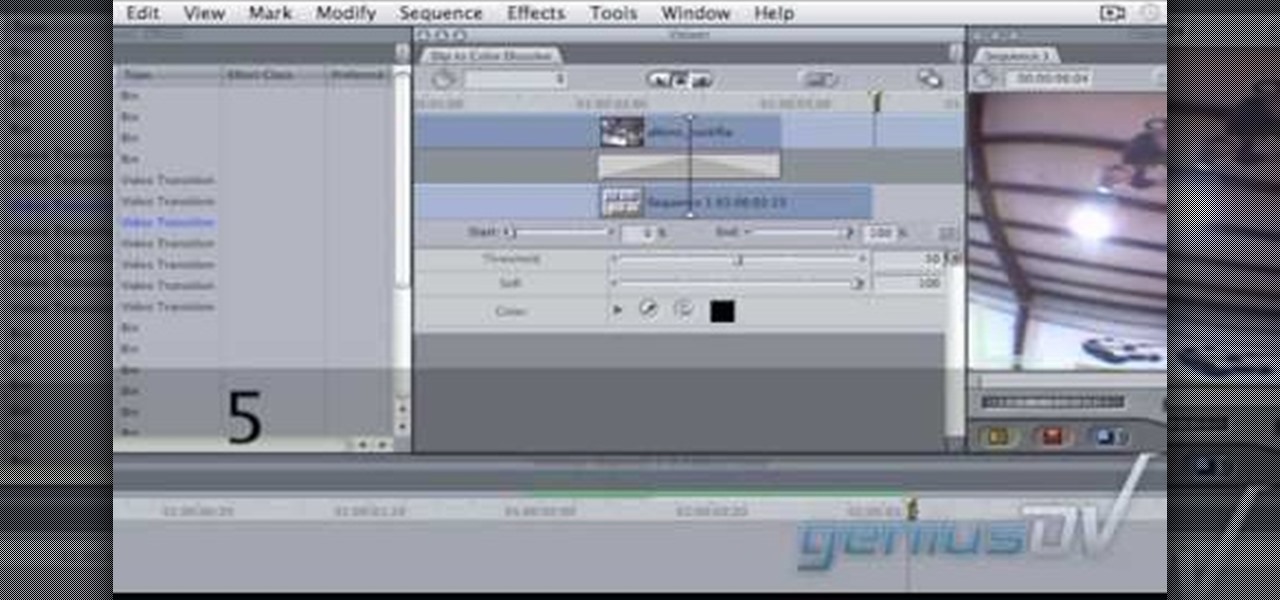
In this video tutorial, viewers learn how to create a freeze-frame effect in Adobe Final Cut Pro. Begin by placing the time line indicator to where you would like to place your freeze-frame. Press Shift and N to create the freeze-frame. The default user preference is 10 seconds. To change it, change the time and click on the insert button to splice the new freeze-frame time into the time line. Now click on the Effects tab and select the Dip to Color Dissolve under Video Transitions and Dissol...
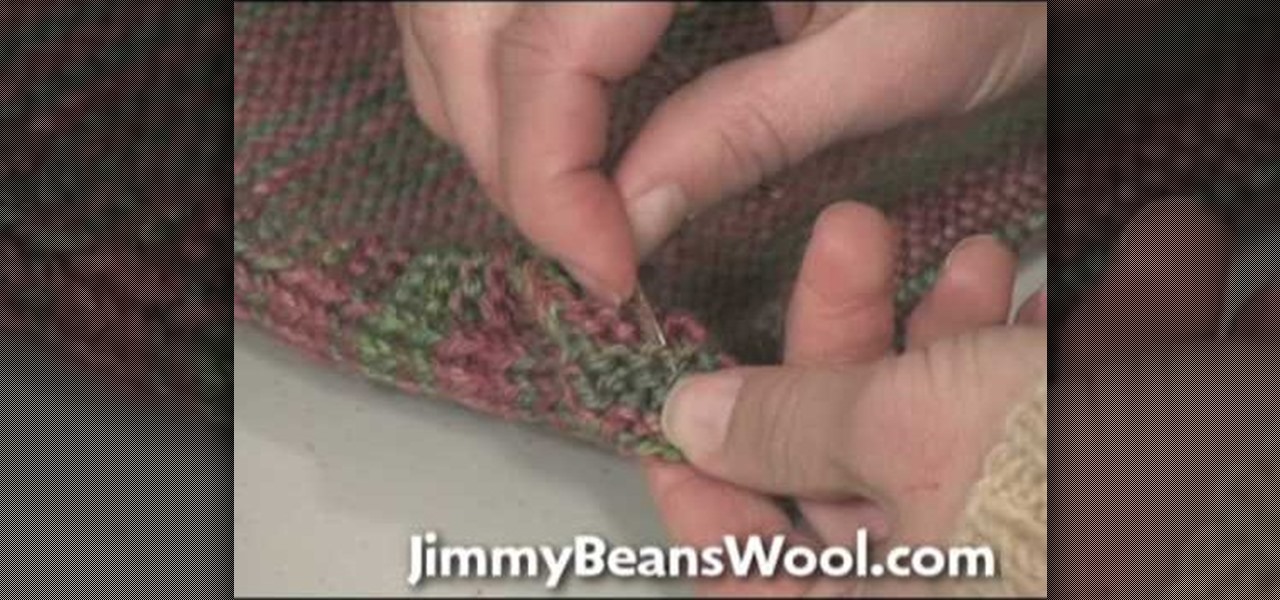
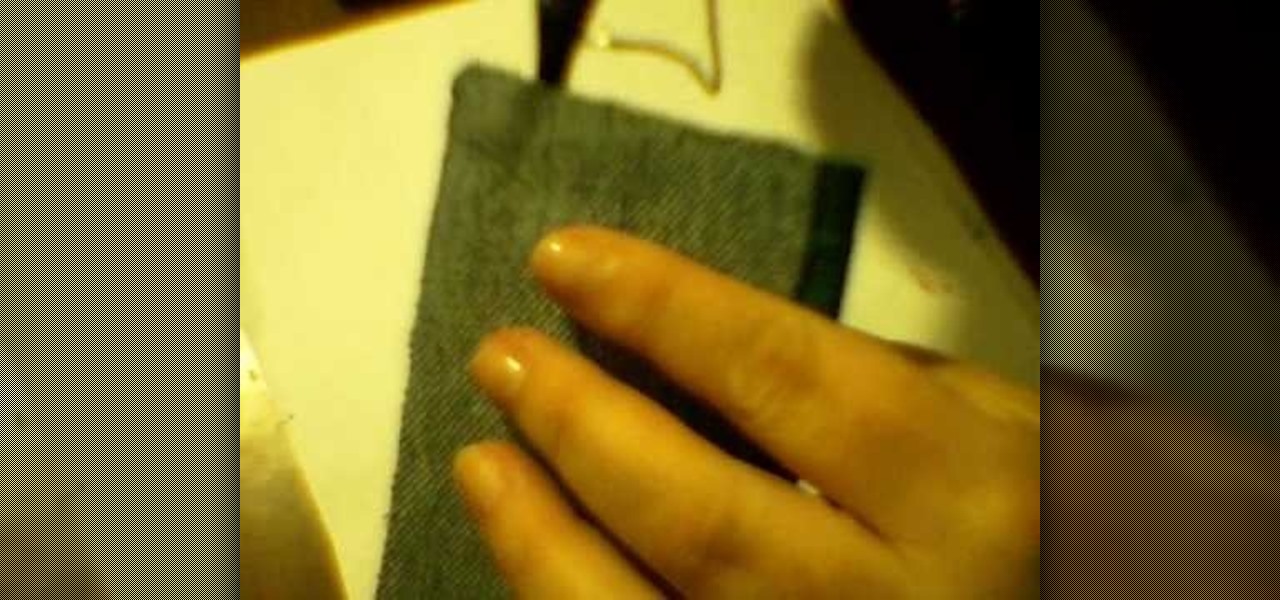
This video shows us how to weave in ends when knitting. Here are the following steps: Step 1: Take a needle specially meant for wool thread and scissor.

This is a video about how to make a greeting card in circle shape. First take the card and fold it into half. Next take the colluzle and place it on the card. Mark a circle using colluzle on the card. Cut the card on the marking and leave some space at the folding of card. Take the design paper to place on the card. Next cut the design paper in round shape. Make sure that the shape should smaller than the card you have already prepared. Next stick the design paper to card. Next take one ribbo...

Bran muffins are a warm, delicious breakfast option. They are healthy, fresh and full of fiber. In this video, learn how to make these classic treats at home, from scratch.

This video illustrate us how to make roast beef stew. Here are the following steps:Step 1: First of all take the beef and wash it properly.Step 2: Take onion, tomato, coriander and red chilies and cut them in small pieces.Step 3: Now take the beef pieces and apply curd, ginger paste, garlic paste and salt on these pieces and leave it to marinate.step 4: Now arrange these pieces on a microwave safe grill rod and arrange the cut onion tomato and coriander on the pieces.Step 4: Now set the micro...
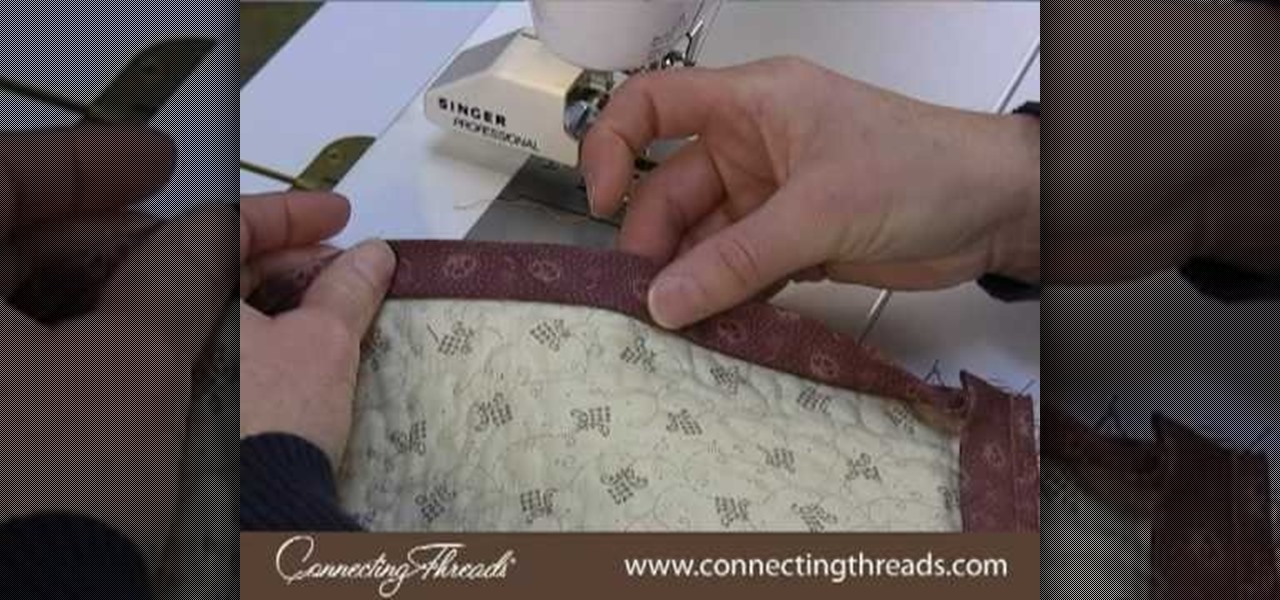
In this video we are shown how easy it is to complete the finishing join on a quilt binding. Just before the final join 6 inches of binding should be left over at the beginning and the end, while the rest of the binging should already be sewn down. The two ends of the binding should overlap by at least 6 inches. You will then need to cut the thread and remove the quilt from the machine, then measure the binding width and overlap the two pieces and cut off the excess binding to match the width...

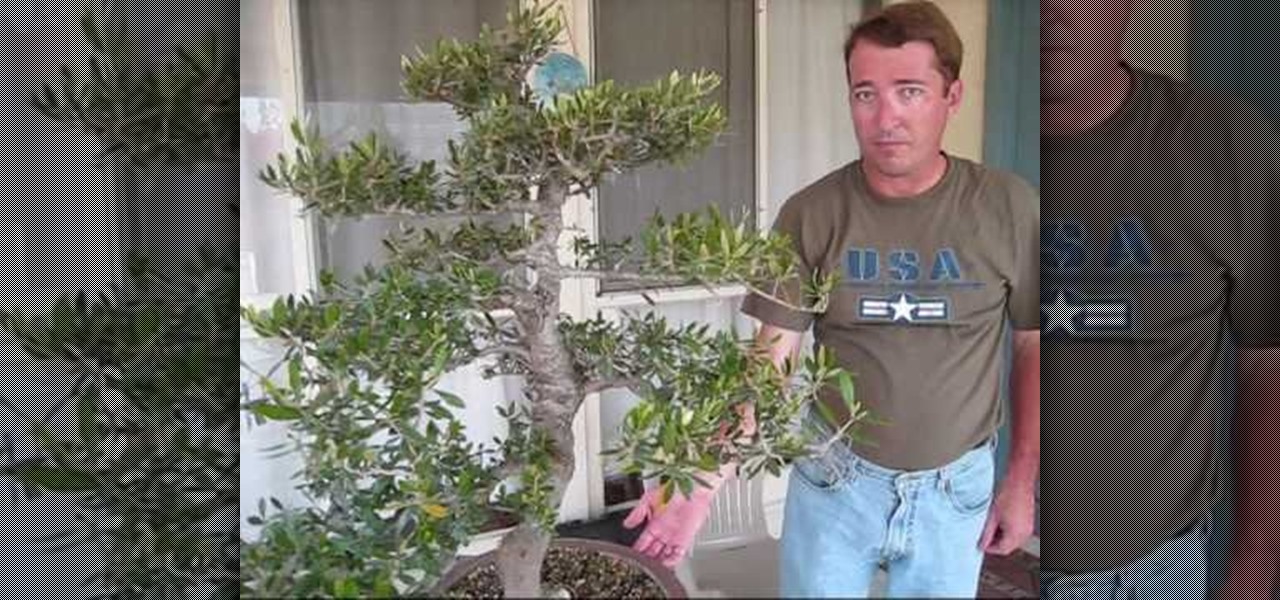
This video explains how to prune an olive bonsai tree properly. the olive tree used in the video is an europaea tree bought from an exclusive bonsai tree company. The way the tree is pruned are by cutting the tree so that that it has an upward shape to stimulate vertical growth. It is explained that a process known as "cut and grown" are used with the olive tree because it makes the tree grow much faster and produce more fruit. Any branches or leaves that are unnecessary to the vertical growt...
This illustrate us how to make paper mache mirror. Here are the following steps.Step 1:Take a piece of cardboard and make two circle on it with two different circumference.Step 2: Now cut through the outer circle as well as the inner circle to obtain the rim.Step 3 : Now take a sheet of cardboard and cut it in shape of a flower.Step 4: In the center of the sheet place the rim.Step 5: Now along the petals of the flower stick a pile of rounded newspaper.Step 6 : On this newspaper and cardboard ...
This video demonstrates how to make Asian Marinated Chicken with Rice. For this recipe, you will need an Asian marinade/salad dressing, olive oil, soy sauce, rice, frozen chicken breasts, and utensils.
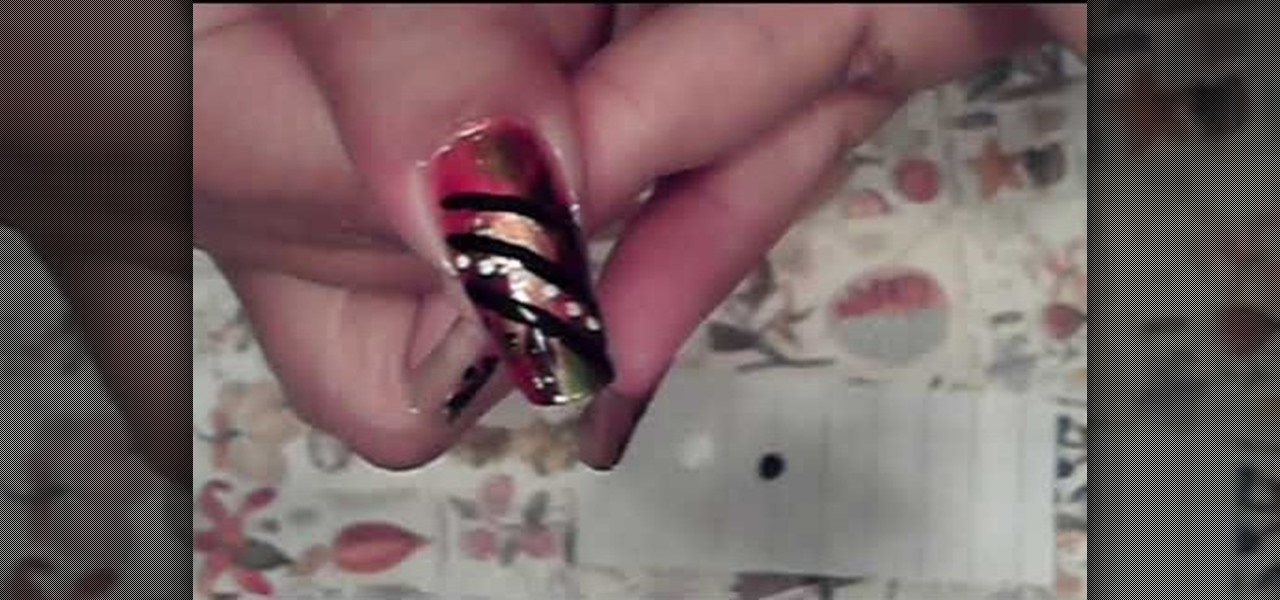
In this video you will learn how to do an autumn nail design. To start out, you will need 5 nail colors of your choice. First, you paint your nails in a background color. In this video the woman chooses Mandarin by Icing, a pretty peach color. The next color she uses is a vibrant green called Money Tree, also by Icing. Do 5 slashes with the green or other color of your choice, anywhere on the nail you want. Next she uses a gold color to paint one slash in the middle. With a dark brown color, ...
Two cans are shown to demonstrate how they can be used to boil water. The first can has a hole cut out of the bottom and one for the top. The second can is cut at the top like a cup and the bottom left whole. Its placed on top of the first can. Cotton balls and petroleum jelly are inside of the bottom can, then lit with a match. Several sticks are used as kindling to keep the fire going. After about five minutes the heat of the flame on the bottom of the top cup causes the water up top to boil.
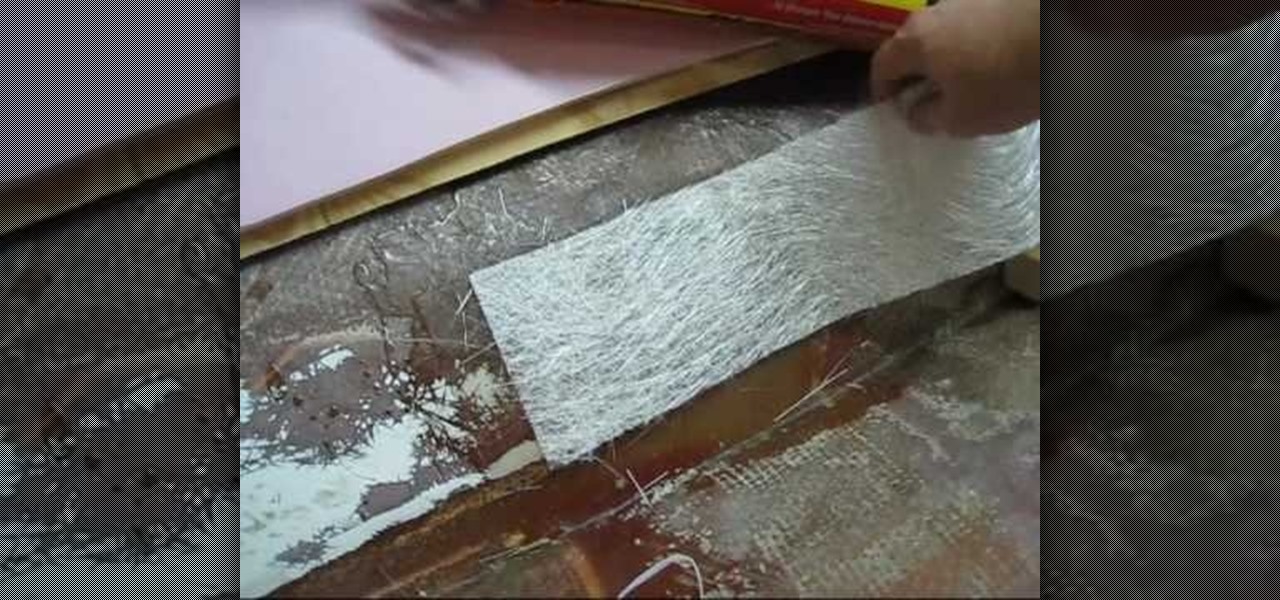
LowkeeLT demonstrates how to patch a hole in a fiberglass boat hull. First, grind around the edge of the hole to make it smooth. Make an angle that goes towards the hull so that the resin won't get caught and create air pockets. Attach kitchen wax paper to the boat as a non-stick material for the poly resin to set against. Then, put down a flexible cutting board by duct taping the two layers on the outside of the hull and pulling it taut. Attach three layers of fiberglass strips with resin to...
Digsart demonstrates how to make a wallet from a pair of blue jeans. First, with a pair of scissors he cuts out the back pocket of the jeans. You can paint the pocket with acrylic paint to give it a more sturdy feel. Once they are painted, he dries them out by placing them on plastic bottles. Once the paint is dry, he cuts a slit in the middle of the pocket, creating two sides for change and bills. Then, using a hot glue gun and Velcro, he glues the Velcro patches onto the pocket. Once the Ve...
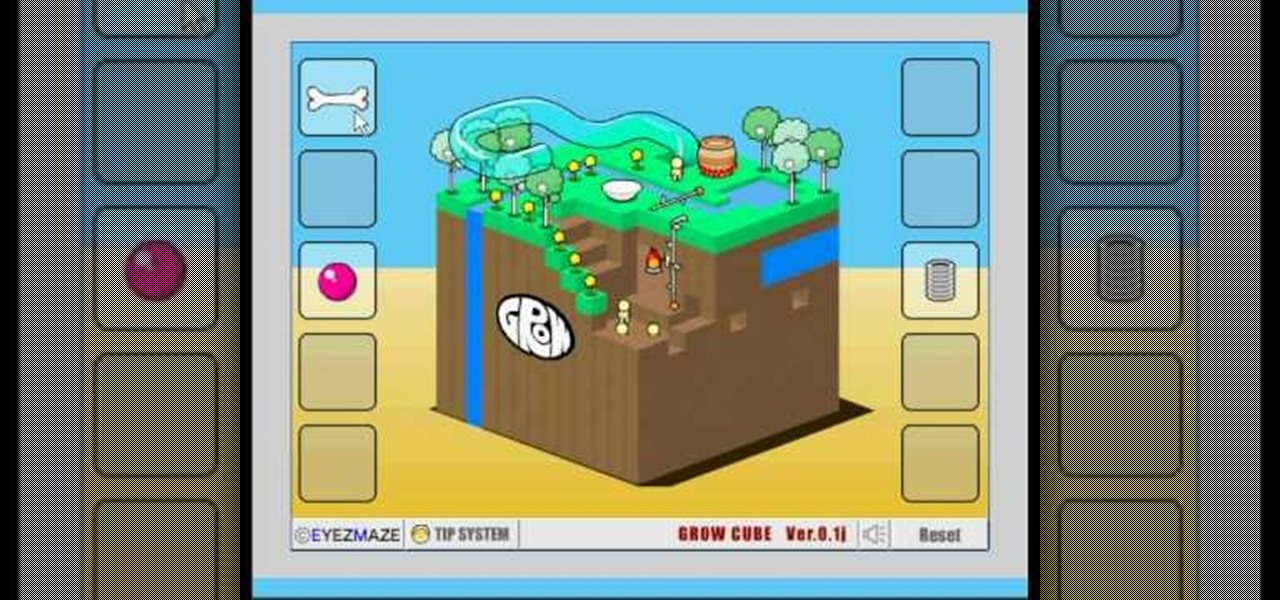
ejayejay05 shows viewers how they can beat the Grow Cube web game! First, you need to click on the person icon that is down at the right of the screen. Next, click the blue water icon that creates a pool. Now click the shapes icon with the small dots. Now you'll be a few levels up. Next, click on the clear blue cylinder icon and let the little figure work. Next, click on the fire icon and your levels should continue to increase. Your next step is to click the white bowl icon on the left of th...
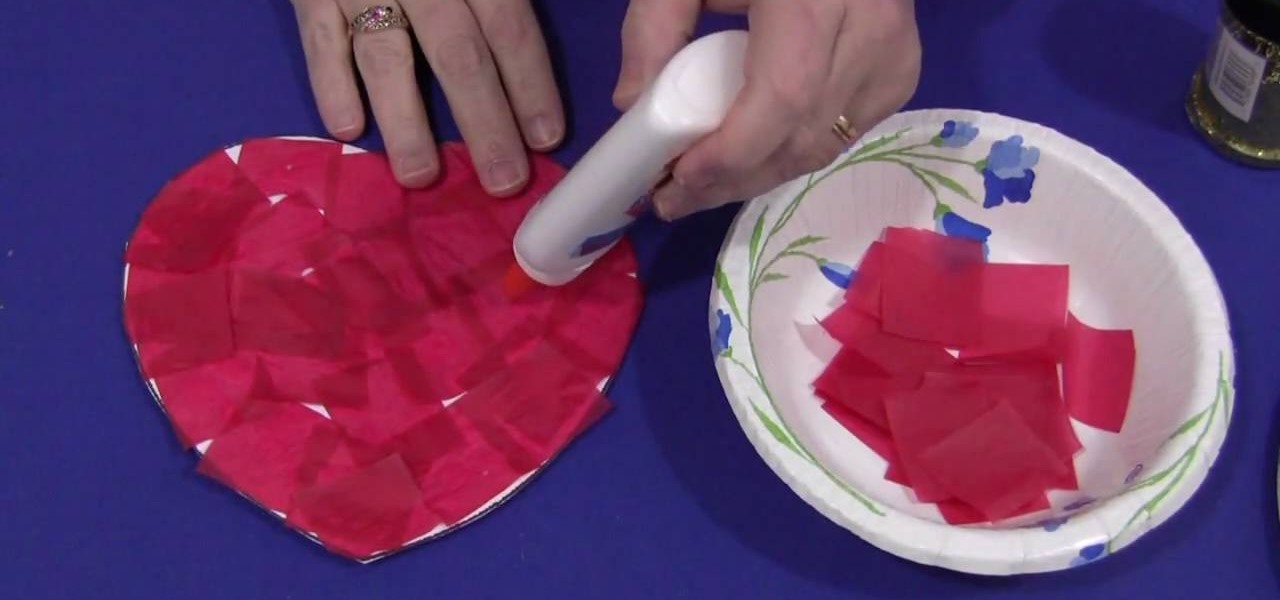
This video explains how to make a tissue paper heart with your kids. The first step taken by the instructor is to cut about thirty small tissue paper squares with the color of your choice. The instructor then takes a large piece of construction paper and cuts out a basic heart design then puts light dots of glue all over the construction paper heart. The heart is then covered in the tissue paper squares until the entire heart is evenly covered with the colored tissue squares. The last step is...
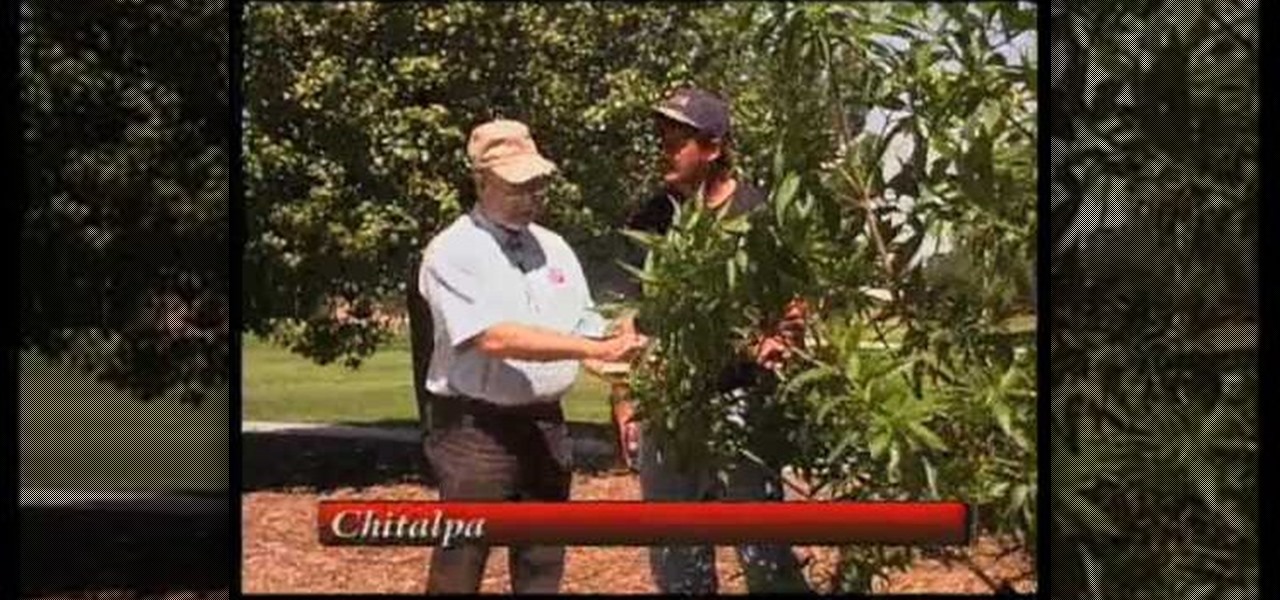
Curtis Smith, Extension Horticulturist, and Jeff Hart of the Albuquerque Parks Department discuss the types of trees that grow in Albuquerque.
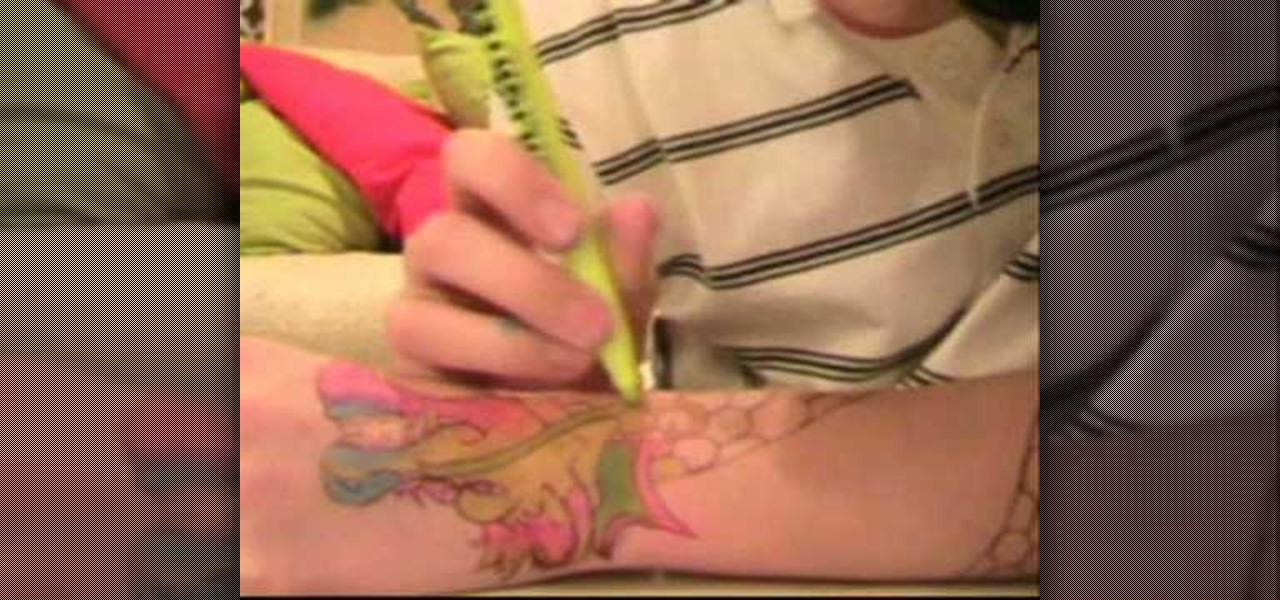
Learn how to draw a ‘Fake Tattoo’ using a ballpoint pen and some colored highlighters, by watching this video. Begin by drawing a faint design of your choice at the back of your palm, using a ballpoint pen. Darken the outlines when you are done with the image drawn. Now according to your choice, fill colors in the drawing using colored green, blue, yellow and pink highlighters. Begin with the yellow color and blend it together with the other color applied in each area, using your fingers. Use...
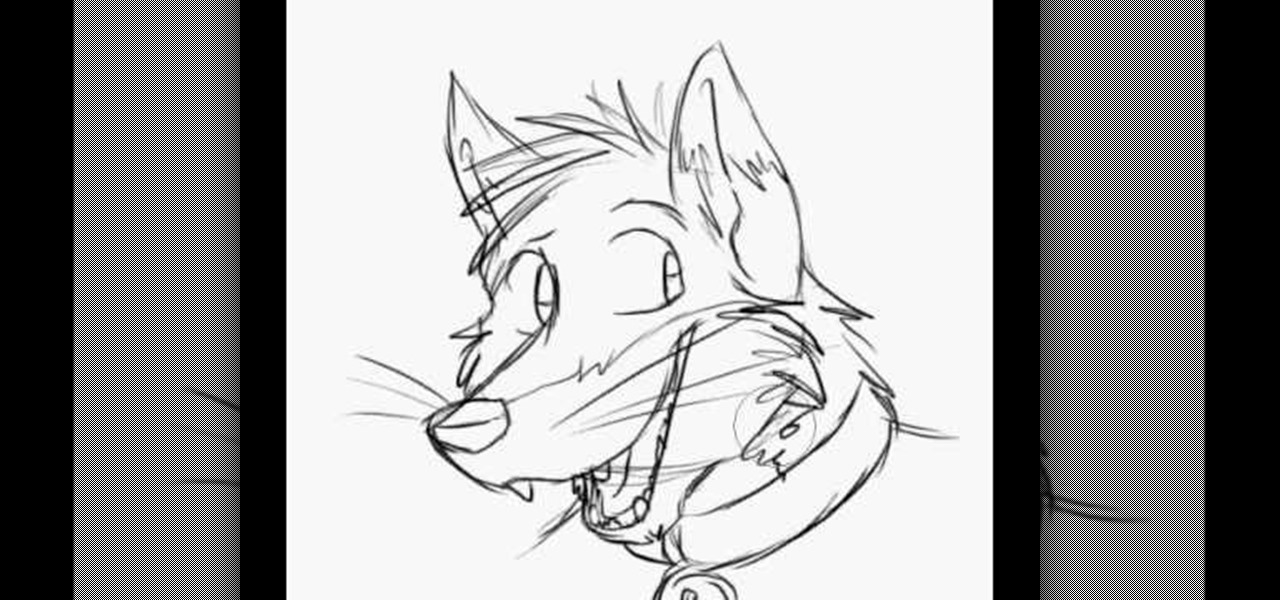
Here is an easy way to draw a cartoon fox. First draw a imperfect circle which is similar to face. Then draw ears which is curve shaped, sharp at its edges. Then draw its mouth part. The upper jaw must be bigger than the lower one. Now move to the eye part joining from the mouth part. Draw teeth and to make more attractable draw whiskers on each side. Draw an attractive belt in the neck side and in order to look real, draw hair portion on the head part and also on the side edges. Now erase th...
Man Woman Film demonstrates how to apply yellow eyeshadow to achieve a crystal clear look. First, define and extend the eyebrows with an eyebrow pencil. Then, use a white makeup stick to highlight under the brow arch. Next, use a liquid yellow eyeshadow to paint on yellow eyeshadow to the lids. Use scotch tape to mask off a defining slant on the outer edge of the eye. Apply powdered makeup over the liquid eyeshadow above and below the eye. Apply silver eyeshadow underneath the brow arch. Outl...
A simple and creative way to make your own wallet. A few folds and snips of the scissors and you've created your own pocket wallet. You can even use different color of the carton to achieve a different and unique kind. It is extremely simple, the only things you need are your hands, scissors, tape and stapler. Open the carton, flatten it out, cut, tape the cut sides, staple and apply adhesive strips. You can apply whatever color of tape you want, this can make the wallet even more personalize...
In this video, we learn how to make homemade exfoliating lip balm. You will need a jar, Chapstick, sugar and a lip gloss. First, mash up your Chapstick with a butter knife, put it into the lip balm container. After the mixture is creamy, add some lip gloss into the container and mix it together. Once this is done, add a spoonful of sugar (your preference) and mix it into your container. This lip balm is comparable to expensive store brands and a tiny fraction of the cost! Use this at night to...
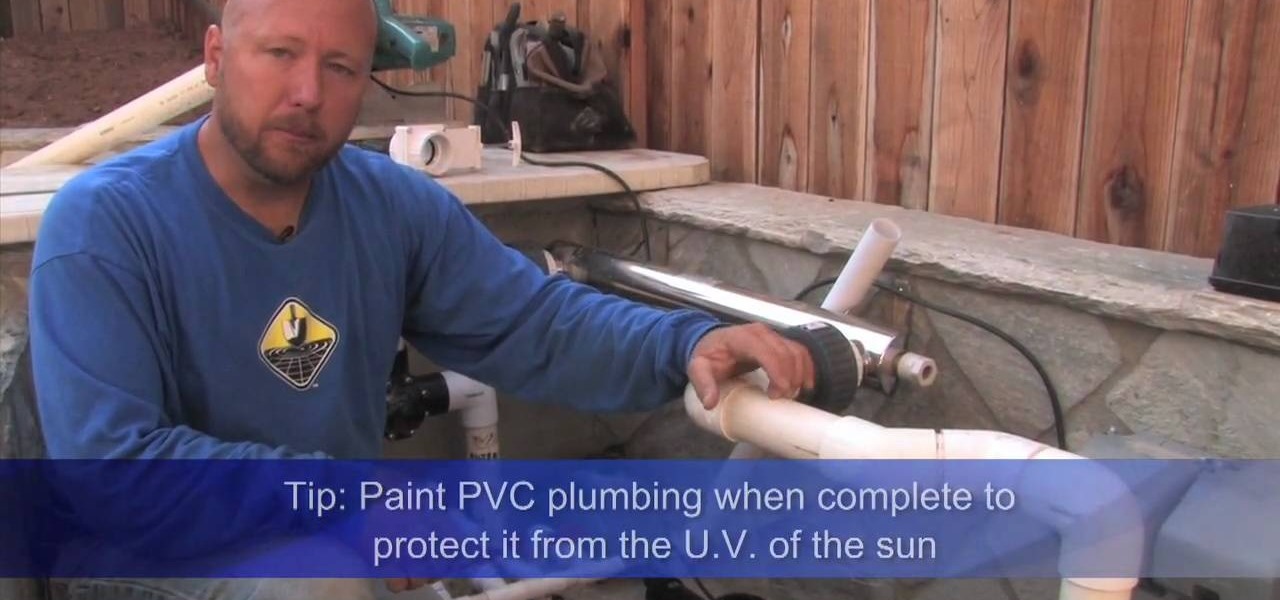
The Pond Digger demonstrates how to set up plumbing for a pond. First, sleeve all pipes coming through the cement foundation to protect the plumbing from elemental stress and provide additional flexibility. Next, use a clear primer and a clear glue to seal areas where you need a clean, finished looking product. Paint the PVC piping to protect it from the sun's UV rays and prevent from becoming brittle. If you need to do cutting, use a chop saw for a quick, clean and efficient cut. Extend the ...
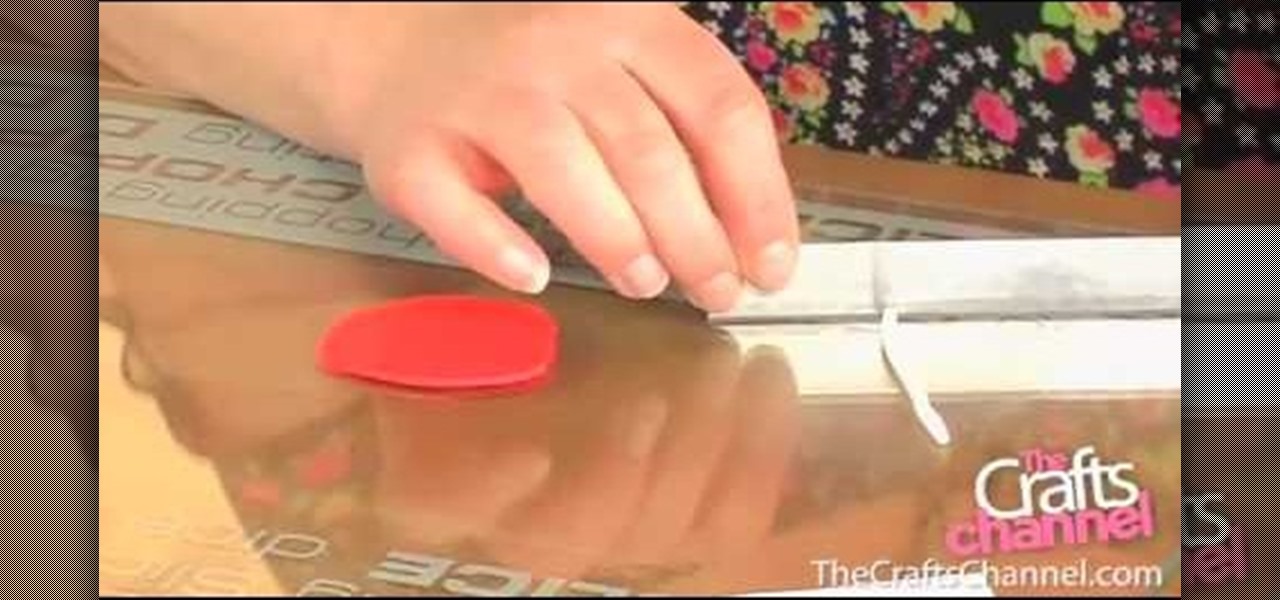
The Crafts Channel teaches viewers how they can make spotty fimo buttons! First, take a piece of fimo and roll it out to about it's a few centimeters thick. Take another color and roll this into a thin long snake shape. Then cut this long snake into lots of tiny slices. Lift them off and put them onto the surface of your rolled out clay. Next, roll over this clay and take a baking surface, cut out the clay with a circular cutter and take away the excess clay. Now with a needle, make your hole...
In this video, Arya shows how to make homemade simple oatmeal. You will need steel cut oats, a bowl, hot water, nutmeg, coriander, cinnamon, cardamom, frozen berries, honey and a spoon for this! First add a scoop of steel cut oats to a bowl and add cinnamon, cardamom, coriander and nutmeg. Then, add hot water and put it into the microwave for 4:44 at 30% power. Once it's finish, take it out of the microwave (it will be hot). You can now add frozen berries, honey and milk to your oatmeal. Let ...
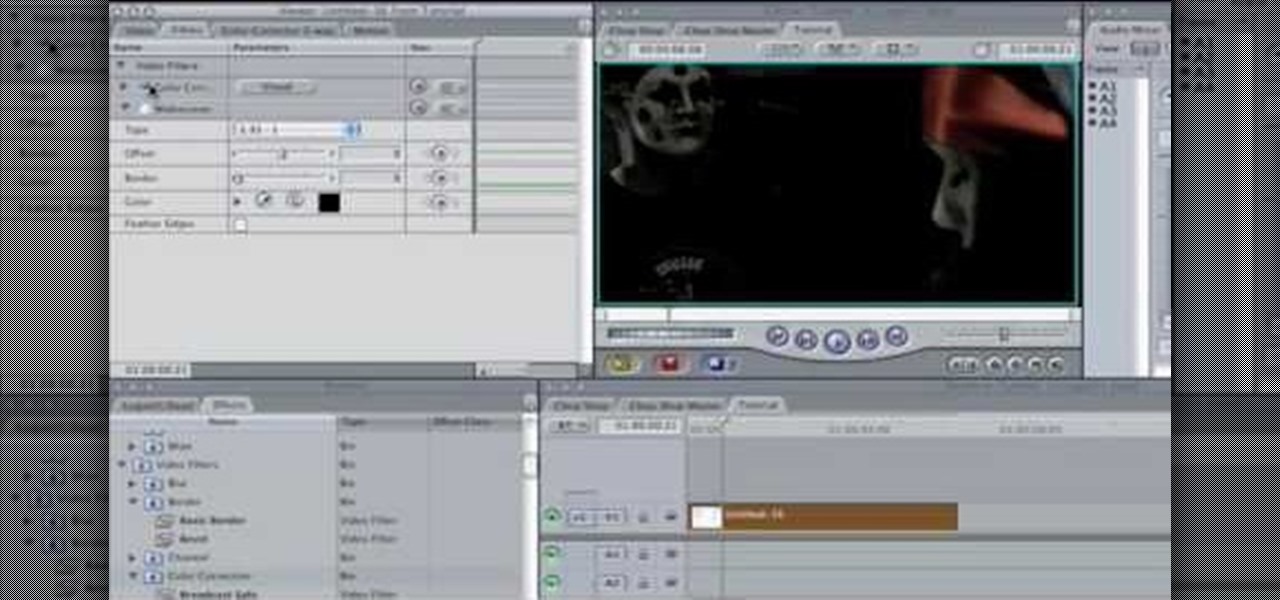
In this Software video tutorial you will learn how to apply the Film Look effect in Final Cut Pro. This is an advanced technique. This essentially takes a video and makes it look like a film. Select the video clip that you want to work with. Then select the ‘color corrector 3 way’ filter. This is under the ‘Effects’ tab. The key to any color correction is to crush the blacks. So, decrease the blacks with the slider. Then increase the whites as films have higher white level. Depending on the s...
Artbeads demonstrates how to make a simple loop using eye pins. Simple loops on head pins or eye pins are great ways to attach charms to your jewelry. To make a simple loop use chain nose pliers to make a 90 degree bend in the pin above the bead. Then, cut the wire so that there is a 3/4 inch tail on the wire. With round nose pliers, create a loop on the end of the wire. Use chain nose pliers to open and close the loop to attach it to a chain or clasp. You can also make a loop by using the ro...
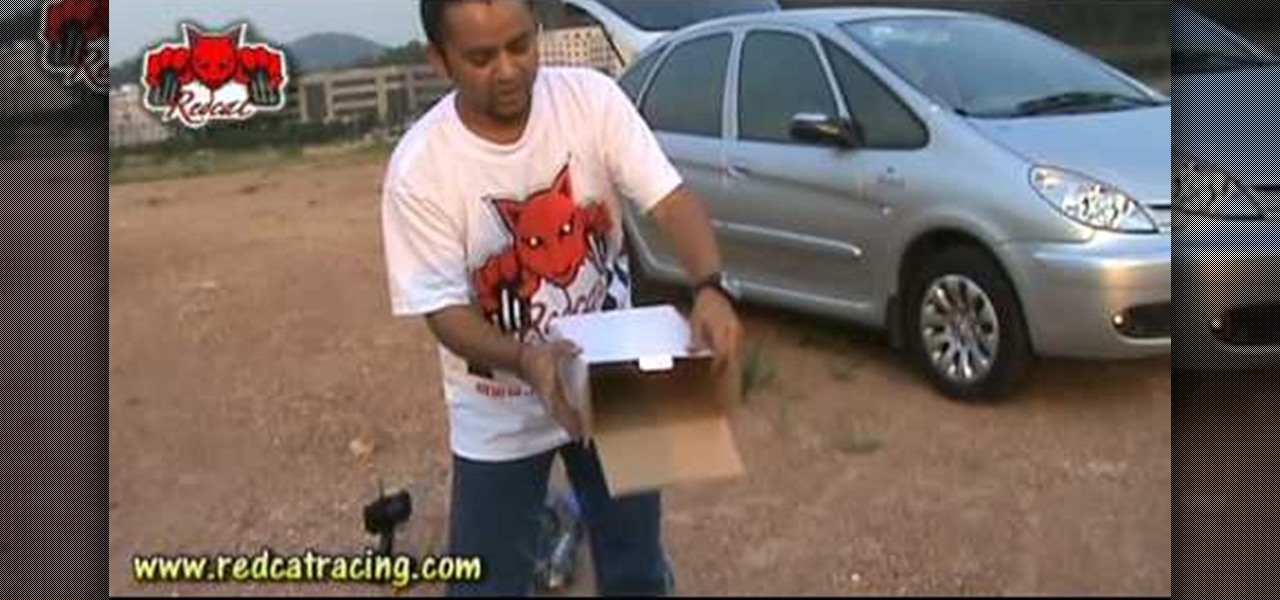
The video demonstrates how to make a great RC jump ramp free of cost. Firstly for this you have to note that you must learn to control your RC in the air because wrong landings after high jumps can cause severe damage to your RC.To make a great ramp for jumping first take a box, a small box is taken here. The same can be done on a bigger box. Then opening the box cut the lateral upsides of the box. After that just put it down and put a tape at the place it touches the box. A curve as you desi...
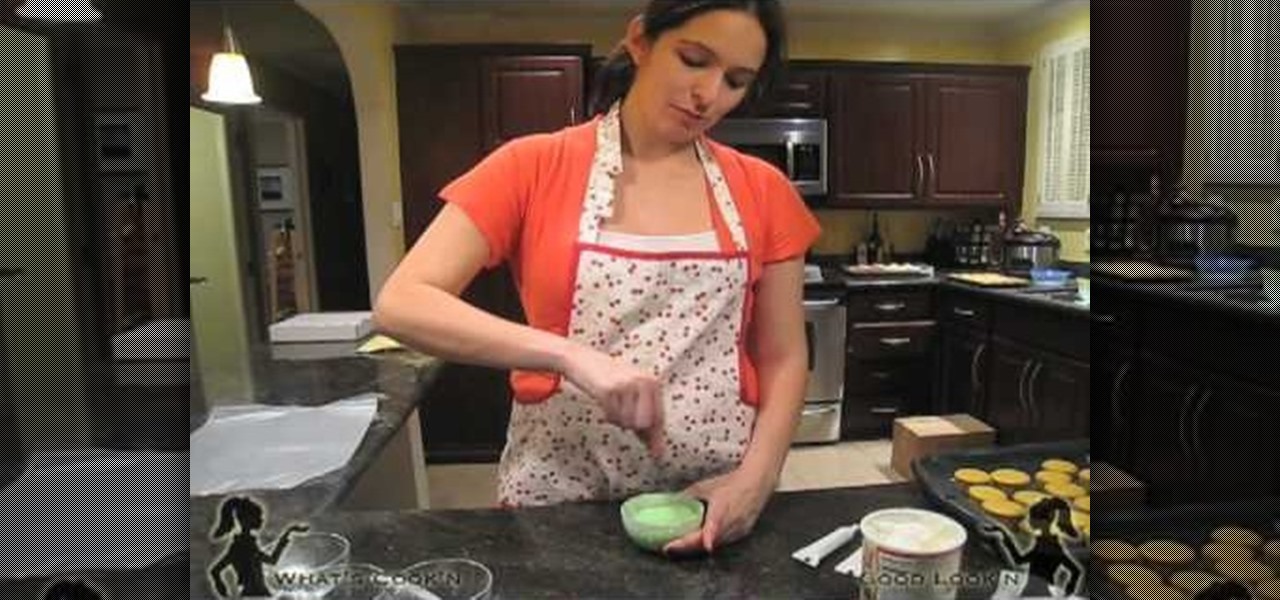
Stephannie teaches us how she prepares her "not so famous" mini cupcakes for a nephew's birthday party. After mixing up the yellow cake mix and putting it into a large plastic bag, you cut the end off the bag and squeeze the batter into cupcake cups within a pan. You should then proceed to cook them at 300 degrees F for 15 minutes until they are done. With a bit of humor Stephannie shows us how to mix food coloring into white frosting and a neat icing trick. By placing it in the microwave aft...
IShowU and Shiny White Box demonstrate how to create still image effects in Final Cut Express. First, place your scroll bar in the front of the timeline and click on the clip so that it is selected. Then, click on the motion tab in the preview window. Hit the keyframe button in the scale option. Create a keyframe also where you'd like the effect to stop on the clip. Adjust the line. When you now play the clip, the image's size will be adjusted as you have designated. You can use the same tech...
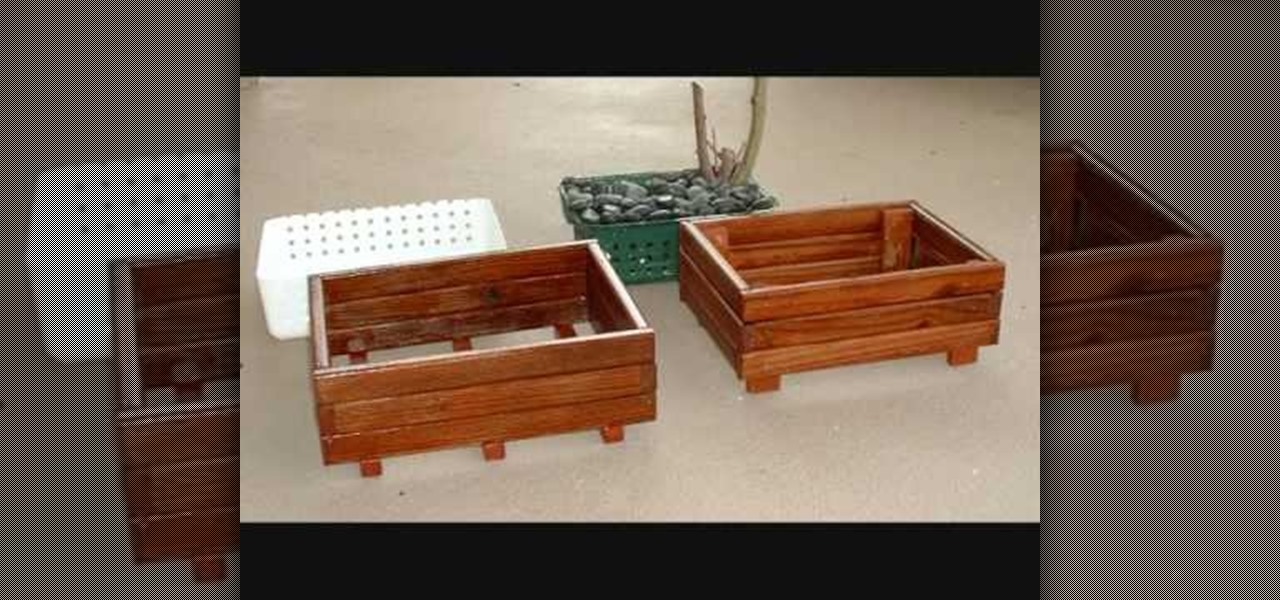
In this how-to video, you will learn how to make a wooden bonsai pot. You will need pressure treated wood made of all weather oak. You will also need a strain brush and nails. Assorted plastic bins will also be needed. Drill holes into the bottom of the plastic bin. Next, cut it to size. Cut the pieces of wood to the correct size and then line and tape them up. Next, nail the wooden pieces together. Now, place two pieces of wood on the bottom for legs. This allows air to flow beneath the pot....
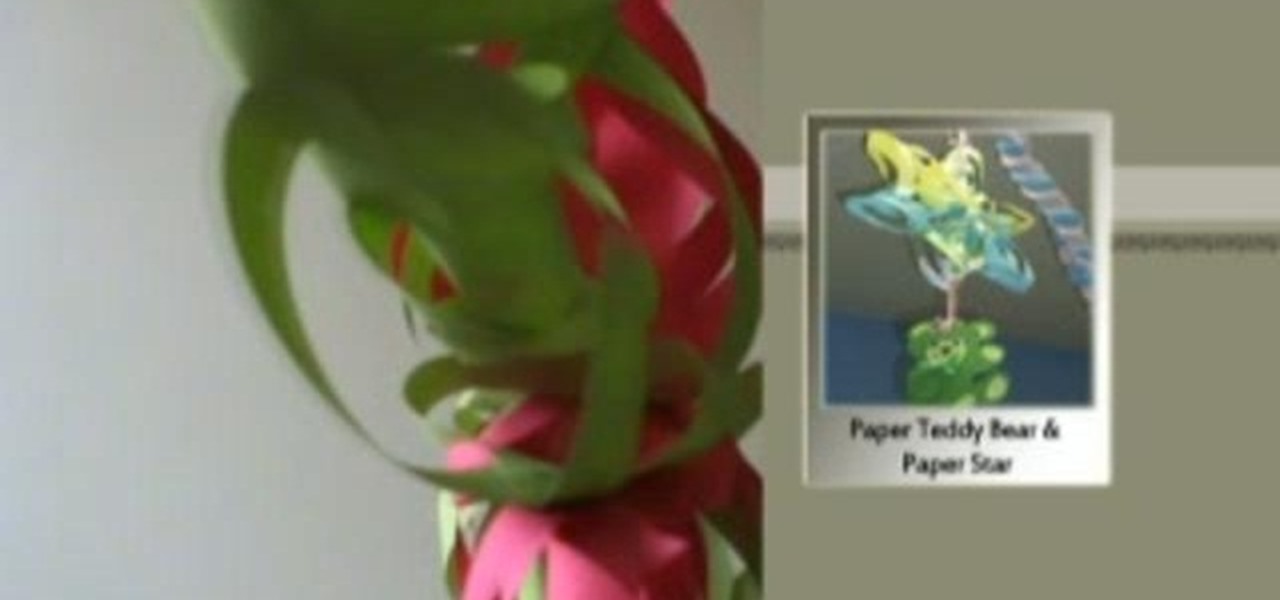
This is a great instructional video on how to make a decorative paper star. The materials you need are color papers, ruler, stapler, scissors, adhesive tape, pencil and cutting pliers. Take a paper and make a square of 20 cm side. Now fold the paper twice and get a triangular shape. Now draw four lines on it. Then cut along the lines with the help of scissors. Take the middle square and staple it. Then go to the back side and staple the ends. Repeat this process and get a star. You can make t...
Spice up dinner tonight and try making Chicken Biryani! Chicken Biryani is a traditional Indian dish that is packed with flavor. This dish is good for you and tastes amazing, so why not give it a go?
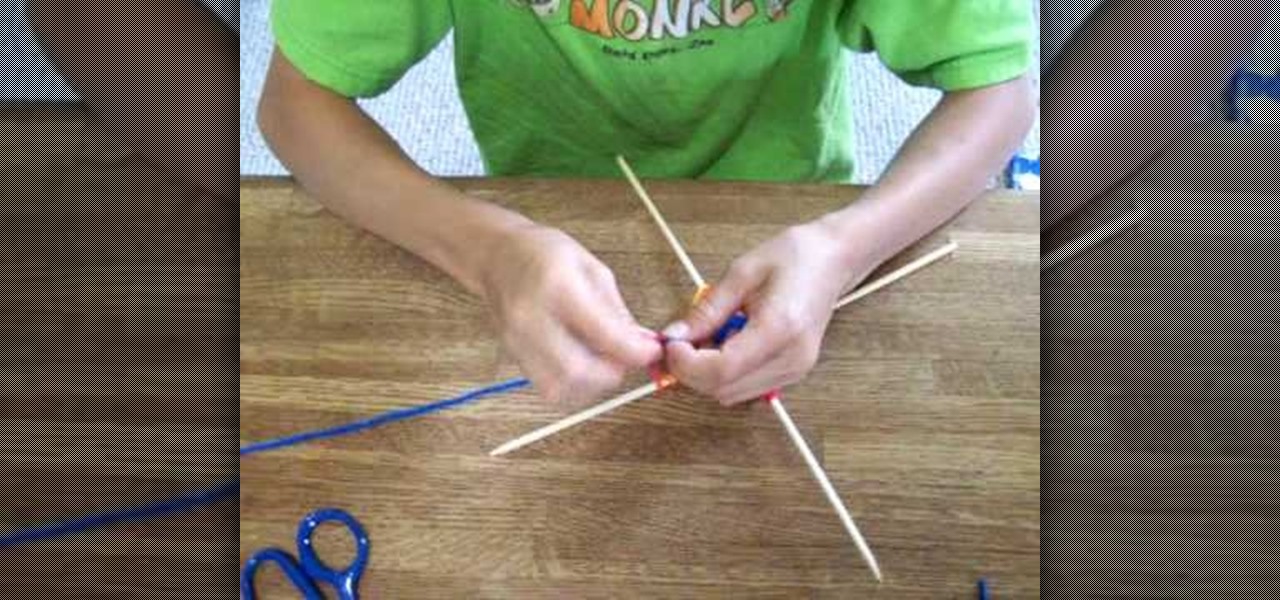
In this video and boy and a woman are showing you the steps to create a "God's Eye" or "Evil Eye". The materials that you will need are 2 sticks, yarn of your selected colors, and scissors. First, you take 2 sticks and use the yarn to knot around the middle wrapping diagonally to form a "t" shape. Then you take another piece of yarn, hold the end in the middle, and start wrapping around each stick going over one and under the next. Continue this pattern until you are done or unless you decide...
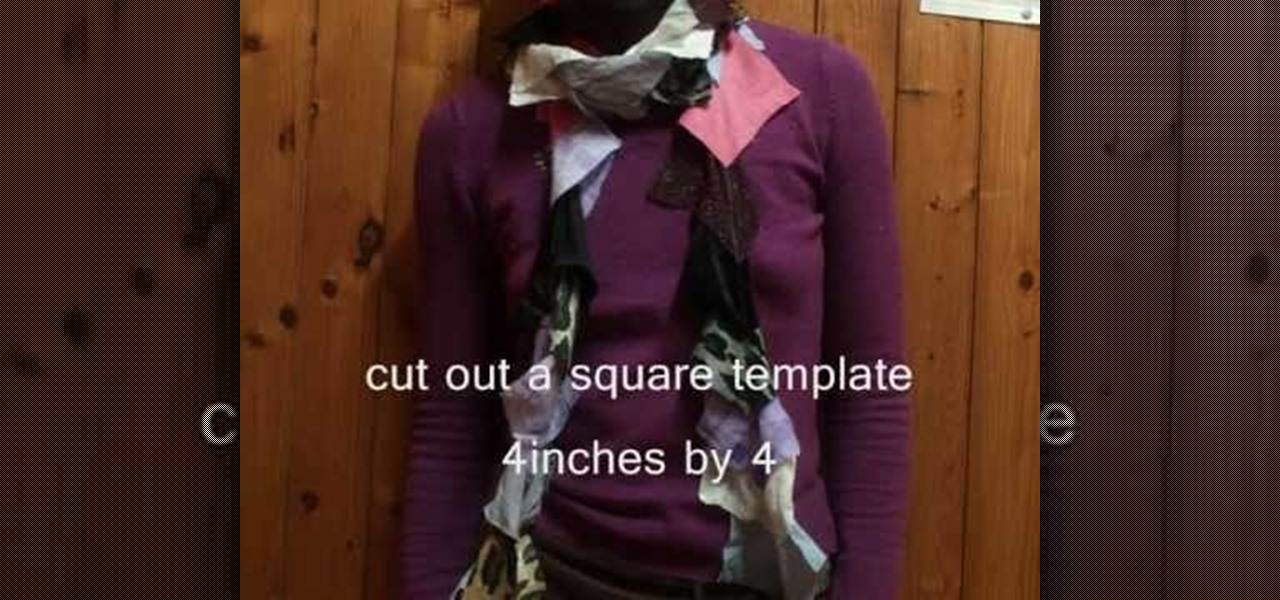
Chantelle Fashion demonstrates how to make a lucky scrap scarf. First, cut out a four inch by four inch square template. Gather all of your fabric scraps and put them in a bag. Close your eyes, think thoughts of luck and pick out a color. Use the template to cut the scrap fabric into a square. Repeat the process until you have between 60 to 70 squares. Keep the squares in the order you picked them. Layer the squares on top of each other, pinning them together. Then, sew the scarf straight dow...
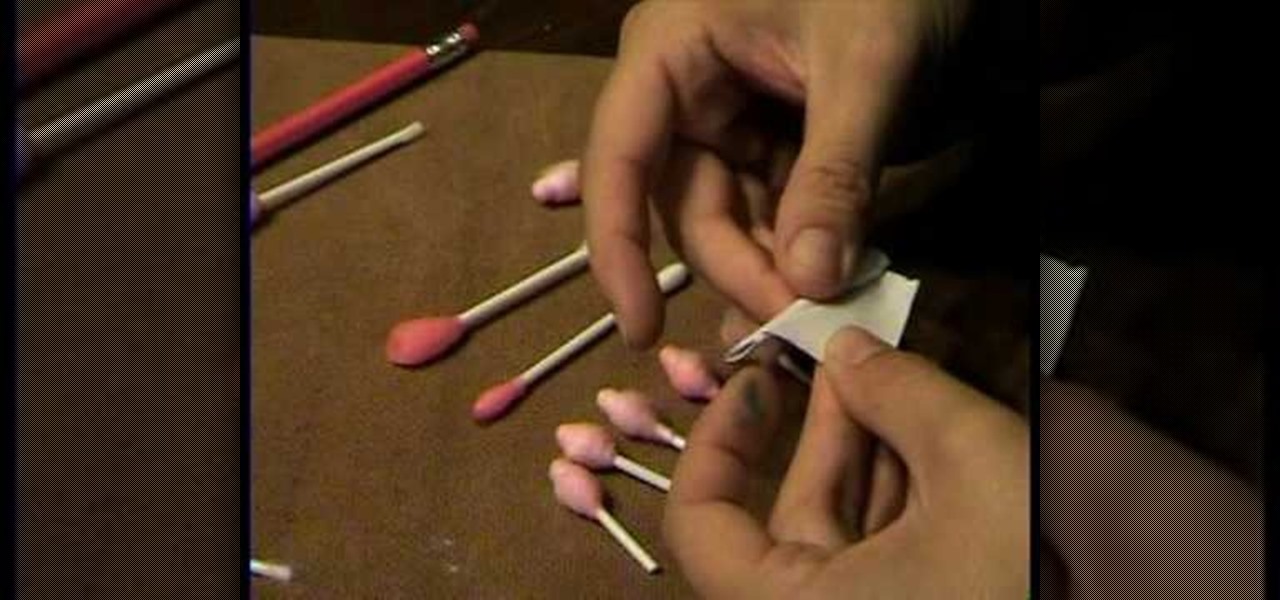
Use a q-tip (ones for little kids will have a larger base, but are not required). Put a few drops of red food coloring in a glass of water and stir it up as necessary. Dip q-tip in red water, get it nice and saturated. Remove q-tip and let sit overnight. Cut q-tip in half, then take a small rectangle of paper, apply glue from glue stick to one side, then make a small fold from a corner and roll (this may take some work). Use scissors to cut down to the correct size. Next rub q-tip's cotton si...
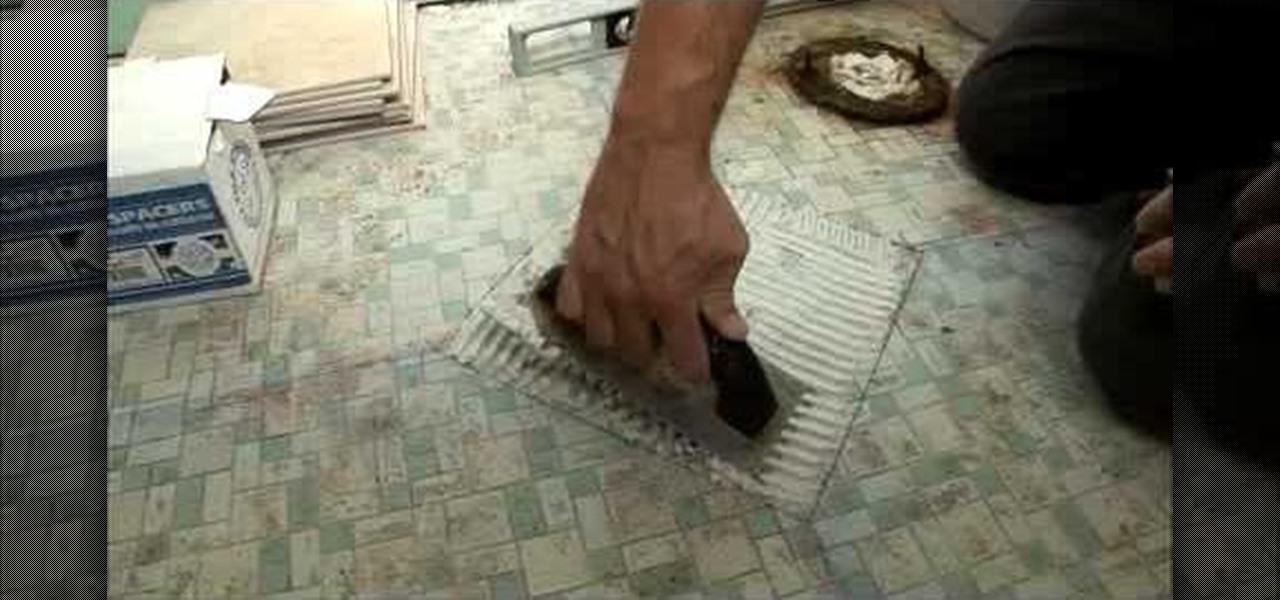
This video is from DannyLipford and covers the proper technique to lay tile in the bathroom. The first step is to lay some chalk lines to find the exact center spot of the room. The first tile will be put down diagonally so that the corners sit on the four chalk lines. Next the mastic is put down on the floor for the first tile and the tile is set into place. The process repeats itself until the tiles reach the toilet where some cuts are required. The presenter is using a portable wet saw tha...
As you apply the wrap you want the most pressure down by your toes and the least up your leg above your ankle. That keeps swelling out of your feet and back up toward the heart. Start by wrapping around the base of the foot. As you move up toward the ankle you will begin wrapping the ankle in a figure eight going around the ankle and then around the foot. You want to wrap the ankle 3-4 times to give it some good stability. Then wrap the ankle in circles around the ankle and then up the leg. Y...
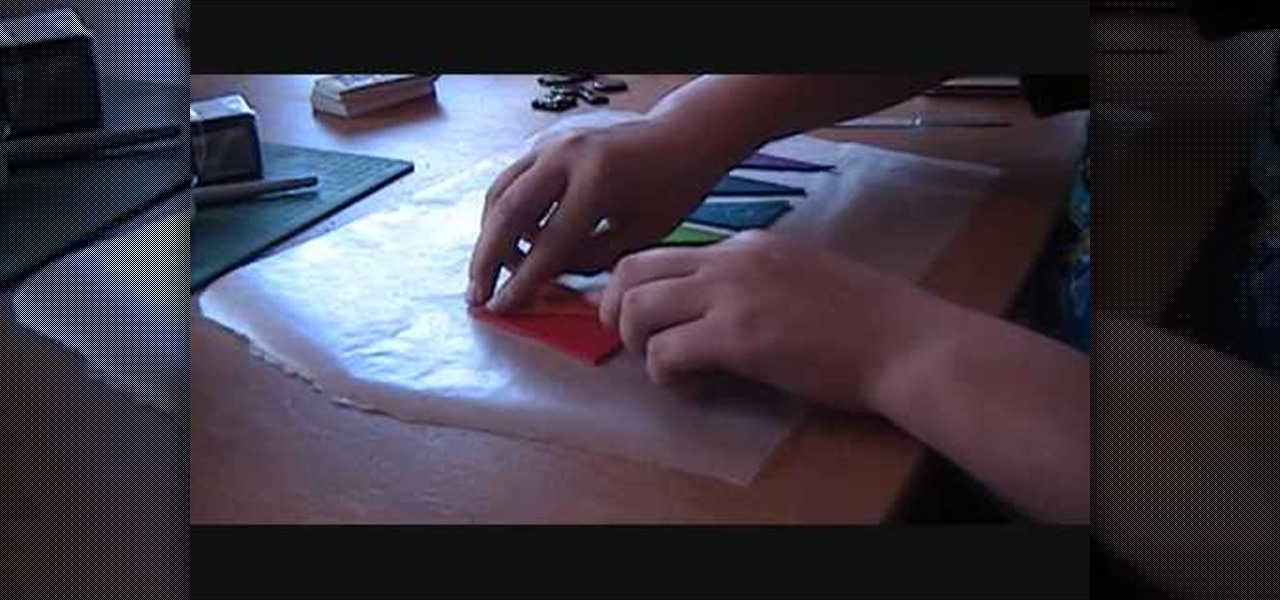
This video explains how to make a polymer clay "rainbow cane," which, amongst other things, can be used to make jewelry or pendants. First, you must run a conditioned piece of each color of clay through a pasta machine. Then, cut each color into a square, and from there cut each square diagonally, creating triangles. Arrange the triangles side by side and attach them together, so that you create a large rectangle of the colors. Run this rectangle through the pasta machine several times, until...
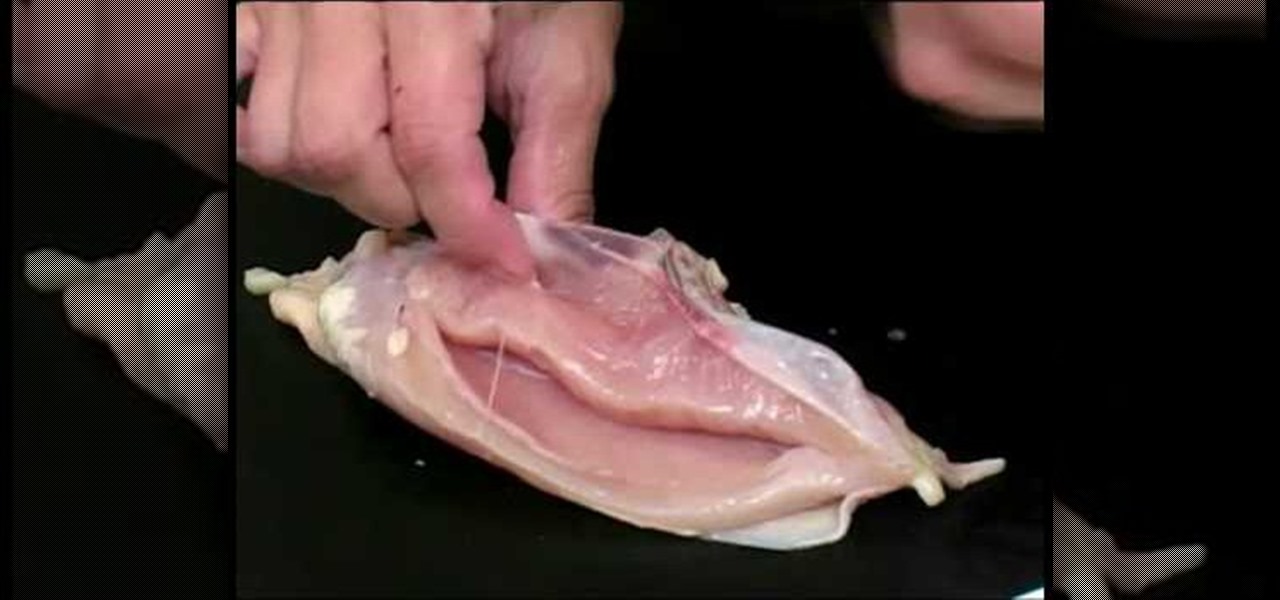
In this video it is demonstrated how to remove tenderloins from chicken breast. The tenderloin runs just beneath the breast bone it is a really nice and sweet piece of meat. It is white in color. To remove it take a chicken breast and flip it over so that you can see the breastbone. Then take a knife (or you can do it with your finger as well) and just cut across the breastbone. It is attached by a tendon so if you cut the tendon, the tenderloin comes out very easily. This is a simple way to ...
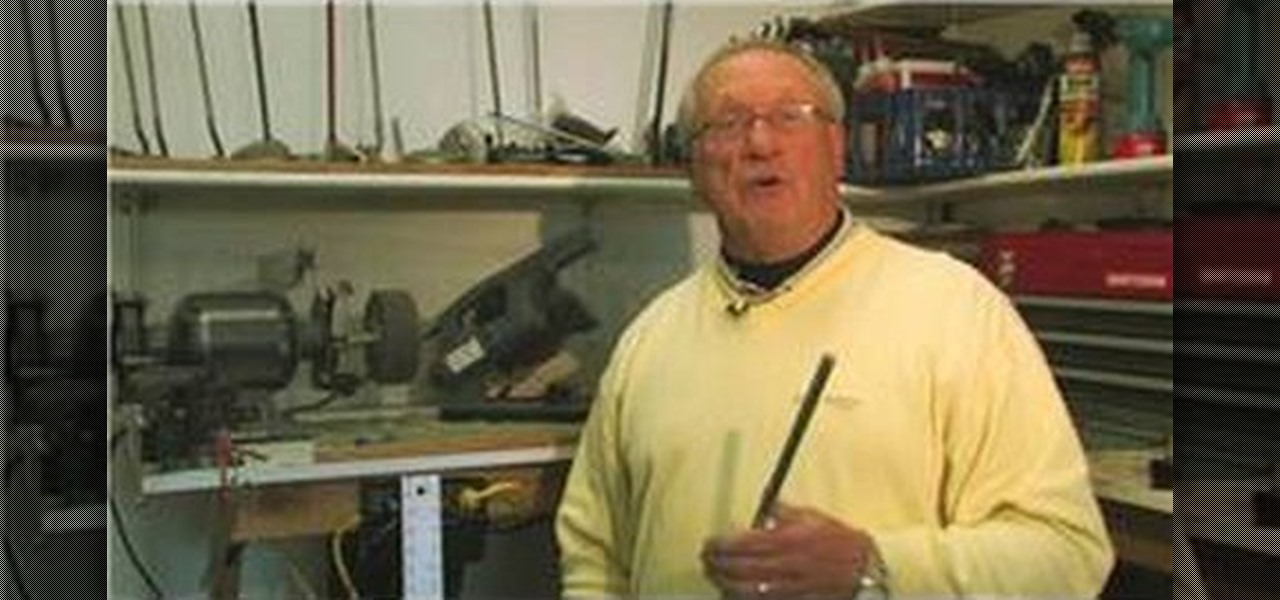
In this video tutorial, viewers learn how to trim golf club shafts. The materials required are: a golf club, yardstick, marker, chop saw and grinder/buffer. Begin by determining how long you want your golf club to be. Measure and mark where you want it to be cut. Now place the shaft in the chop saw holder and tighten it. Make sure that it's lined up with the blade and cut the shaft using the chop saw. Now smooth the rough edge with the grinder/buffer. This video will benefit those viewers who...