In this video, we learn how to make a triangular Japanese box for paper clips. You will need: 3 square pieces of paper and 1 glue stick. First, fold the square into a smaller square by making three triangles. Open up into a large triangle and fold the top down, then make a crease and open back up. Do this for all the pieces of paper, then apply the glue stick to the inside of one corner of the first square. After this, stick the next piece of paper onto this, then fold the bottom paper over t...
In this tutorial, we learn how to make mini paper square boxes. First, grab a piece of paper and fold two ends in so they touch in the middle. After this, fold the bottom up so it covers the triangles and they meet at the middle. Crease the edges, then cut down the edges on both sides where the crease is. Next, fold the sides in so you have a shape that looks like a sword. After this, fold the sides up, then fold the other sides in. When finished, push the creases in and you will form a box, ...
In this tutorial, we learn how to make a paper football for 1 dollar. First, grab your paper and fold it in half length wise. Next, make sure the crease is nice and clean, then fold it length wise once more. Now, fold one of the corners up into a triangle shape, marking the crease exact. Fold this up again and keep doing this until you get to the end. Once you reach the end, fold the other end in twice into the pocket you see. Crease this, then stand it upright and flick it with your other fi...
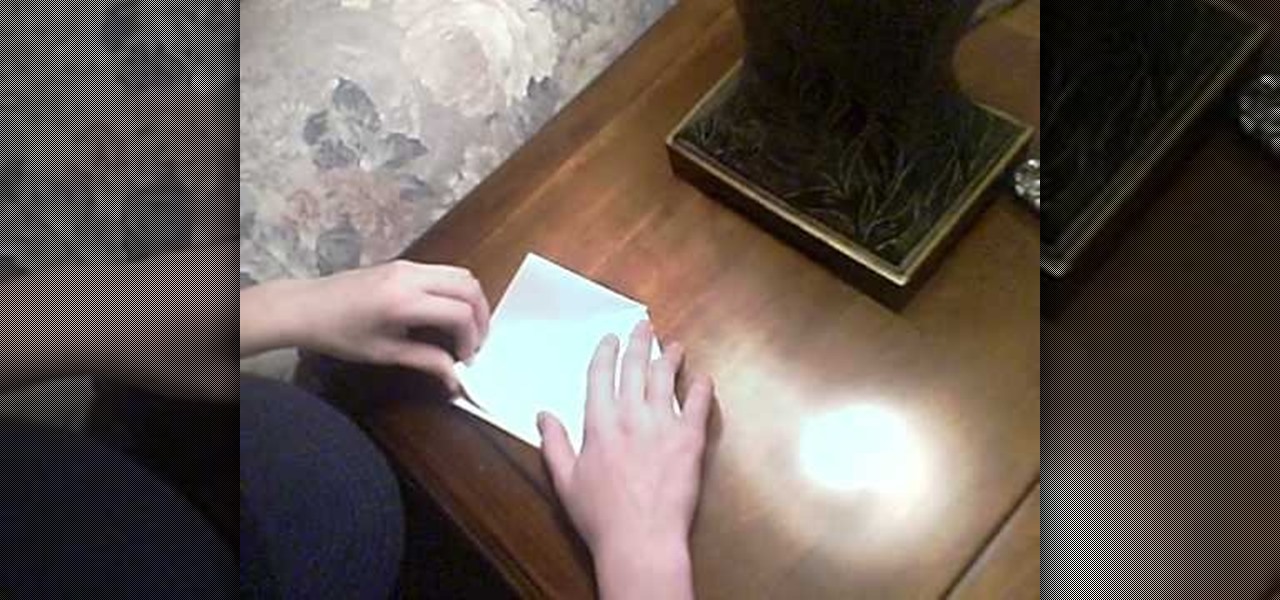
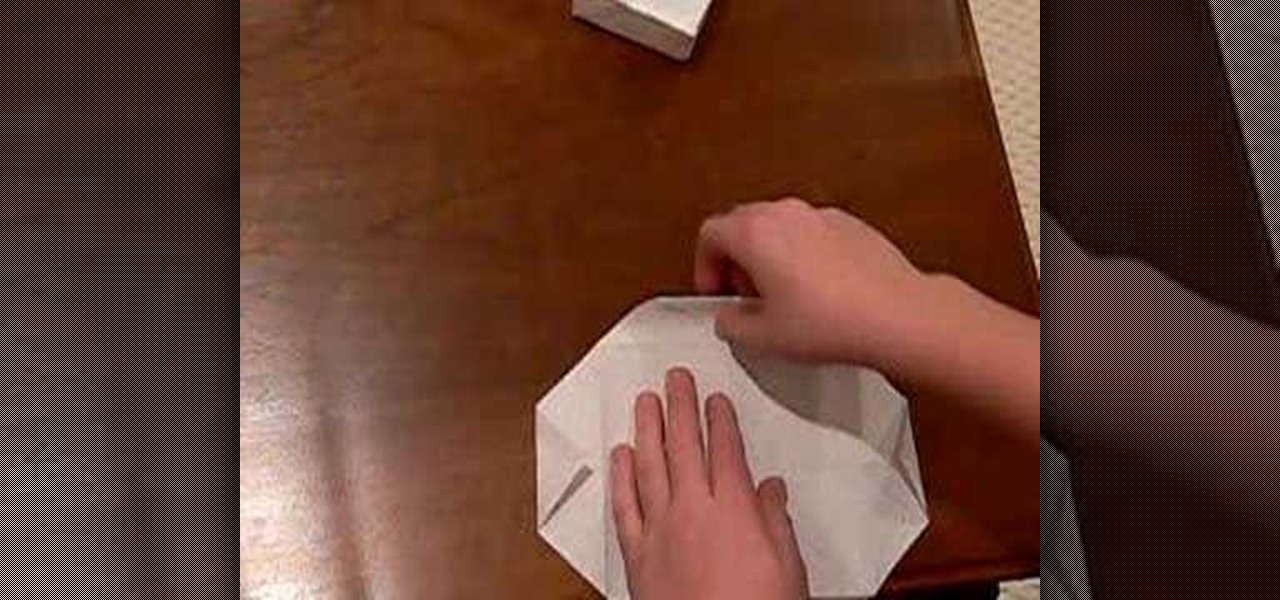
This video tutorial is in the Arts & Crafts category which will show you how to make a box out of scrap paper. Take a piece of square paper and fold it across both the diagonals to get an intersecting crease. Now fold all the points to the middle of the sheet and unfold them. Now take any point and fold it to the furthest away intersection point. Repeat with the other three sides. Then fold all the four points to the closest intersection point. Now you will see a square in the middle of the s...

Secure a square-shaped piece of paper preferably six inches long on both sides. Cut the square paper into two equal halves. Fold one piece longitudinally right at the middle. Open the fold and refold it horizontally, on the shorter side. Refold the longitudinal crease you made earlier. Then, fold both sides diagonally but facing opposite each other.
Forget Goldfish Crackers and the actual living, swimming ones. They both, one day, will disappear. The crackers will only last as long as your hunger, and the living goldfish will eventually die (or also last as long as your hunger— or your cat's hunger). But there's one goldfish that can survive the test of time— an origami paper gold fish.

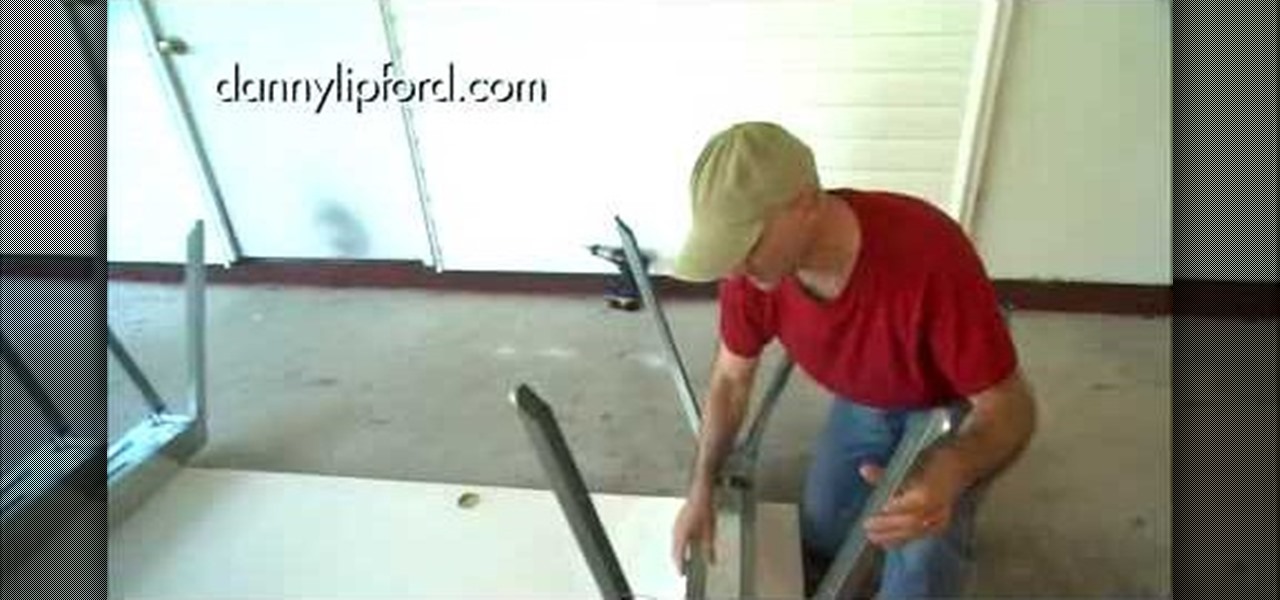
Thinking a nice workbench would make an excellent addition to your tool shed? Joe Truini from dannylipford.com shows you how to build a space saving, folding workbench for your garage or shop. Get your shed in shape with this excellent tutorial.
Convert old magazines into luck with this video guide! This video tutorial will show you how to create lucky stars from strips of old magazines using origami, the traditional Japanese folk art of paper folding. For a step-by-step overview of the entire folding process, and to get started creating your own lucky stars, watch this free video origami lesson.
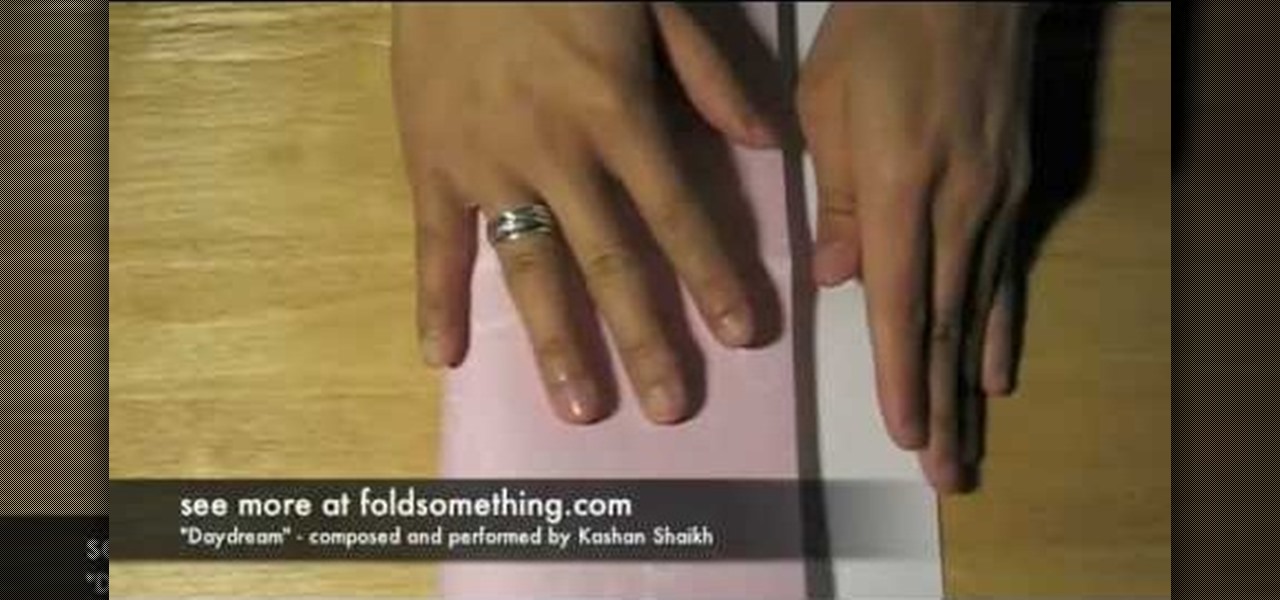
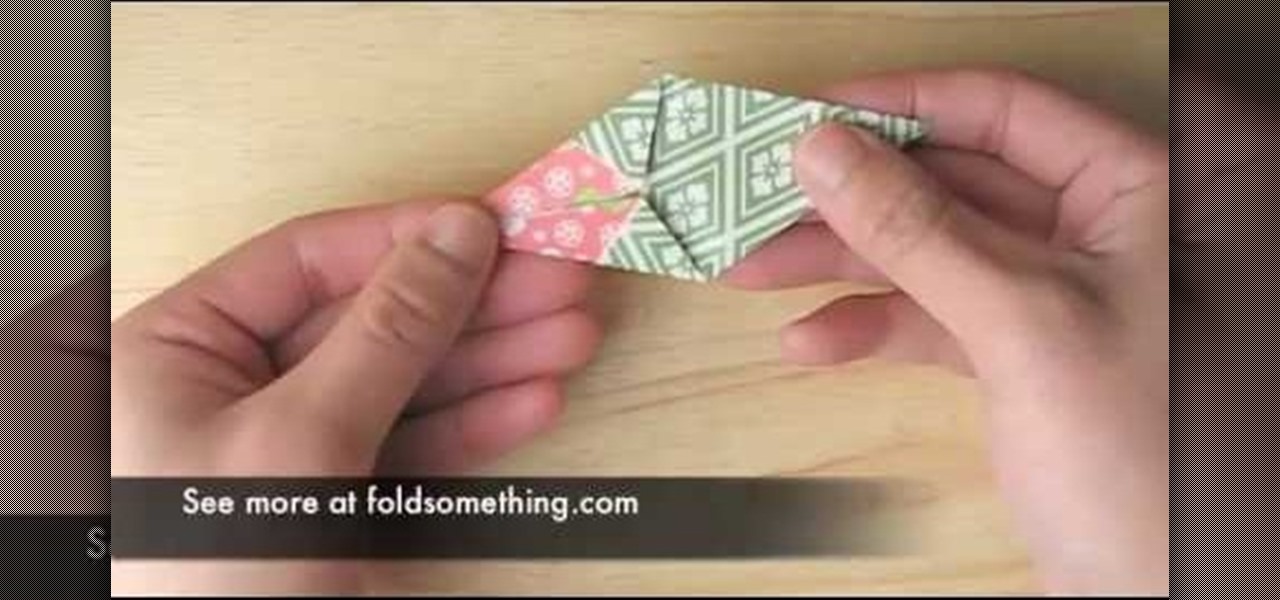
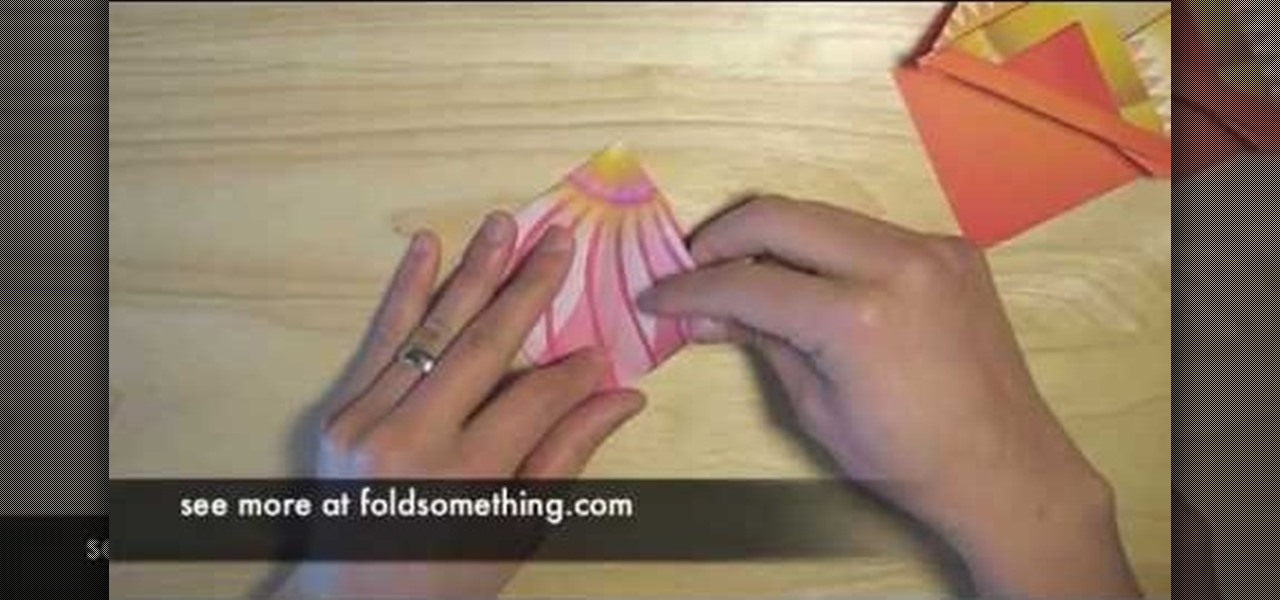
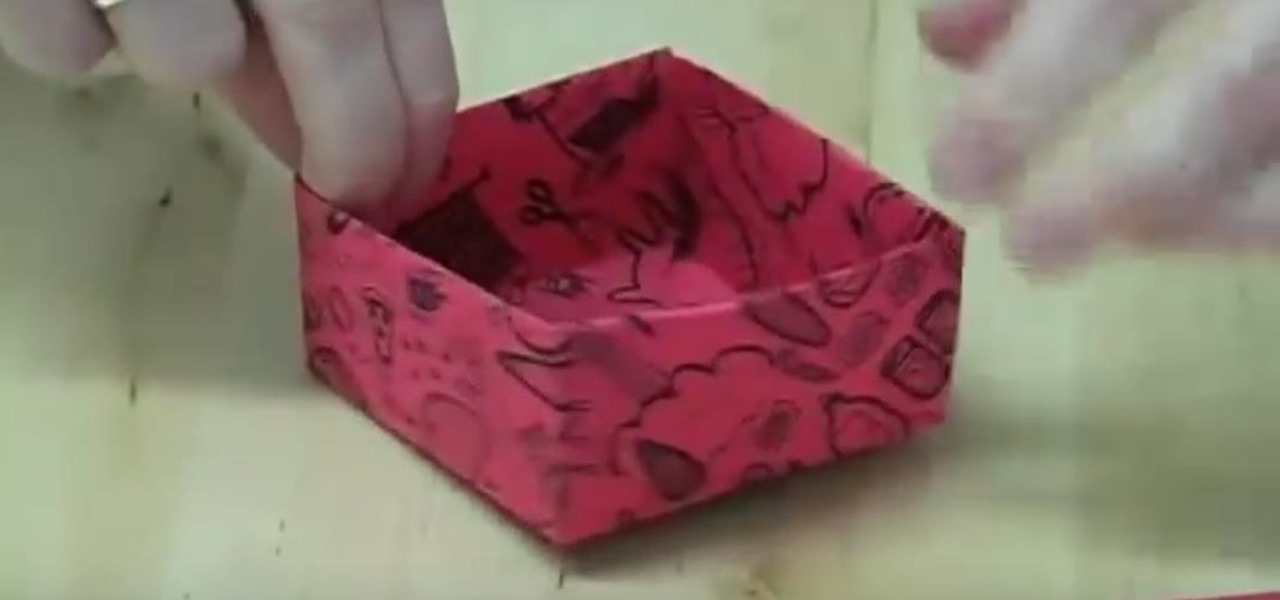
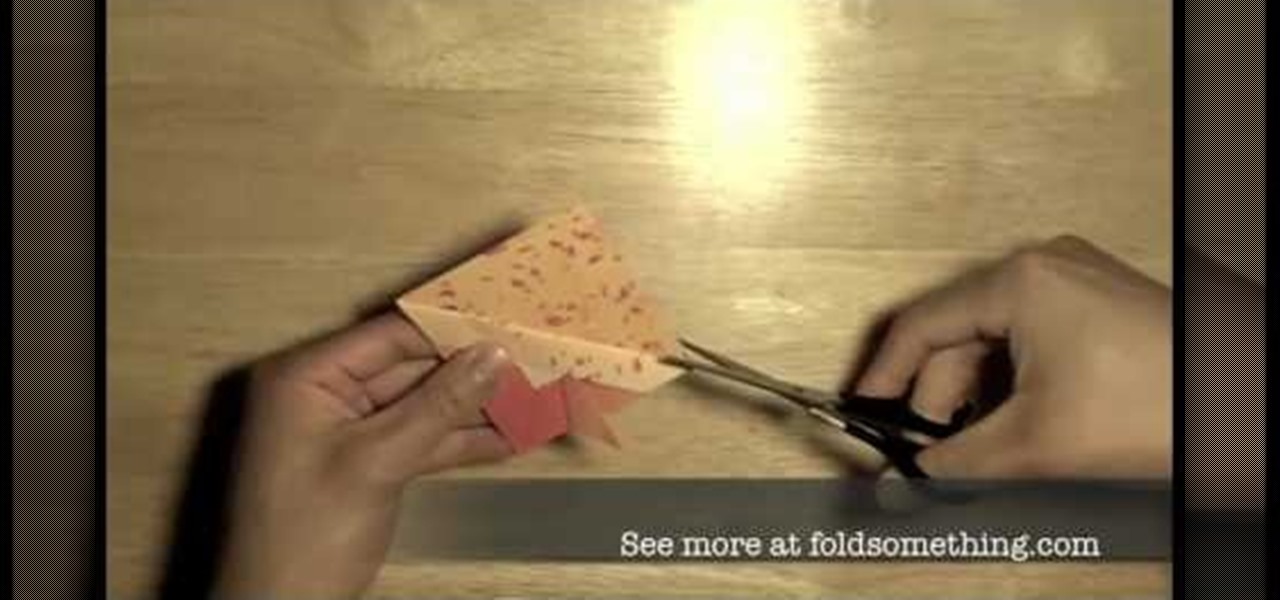
Get creative for your next holiday or birthday by giving your gift in a unique manner! This origami video shows how to make a box with a lid out of two sheets of paper. This project from Fold Something makes a great gift box for small presents.
Want to add an avian specimen to your paper menagerie? Have extra paper and time to match? This video tutorial presents a complete, step-by-step overview of how to make a crane using origami, the traditional Japanese folk art of paper folding. For more information, and to get started making your own paper birds, watch this arts-and-crafts guide.
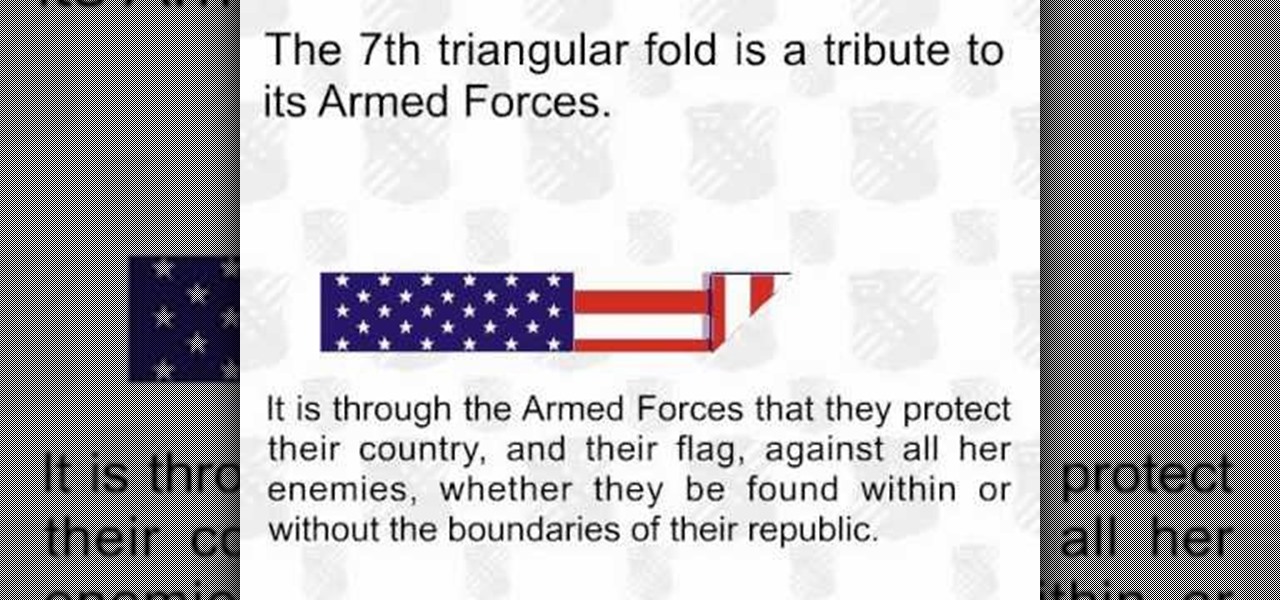
Some people believe that it is disrespectful to fold your American flag the wrong way. In this tutorial, avoid any confusion and learn how to properly fold your flag for storage or display.
You have to start by placing the handkerchief on a flat surface, you grab the center pull up and you will see all the points dangling dry your hand down and then what you need is to fold the bottom up then if you twist the hand around the handkerchief just to hold it in place . The way it should actually be folded is with the fold in behind and the puff in front but it is easier if u wrap it around your hand. The way it will be placed in the pocket is by simply pushing it down, the edge of th...
This video shows you how to make a simple paper popper in three simple steps. Take a rectangular piece of paper and fold one quarter over. Fold it over once again in the same direction. Flip the paper over and make it into a square by folding again. Open out the side just a little bit, so that you can see the fold still inside. Sweep your arm down from a height really quickly and you will hear the sound of a "crack" as the paper pops on the way down. You can do the same thing again if you ref...
If you’re in need of a fancy napkin setting then try this pleated standing fan design. It only takes seconds to make. Start by folding on inch folds back and forth. Then fold the pleating in half, flip the mess over and let it spread out naturally. You’ll need cloth napkins and it often helps to have starched napkins when doing decorative folds. This will really dress up that dinner table.
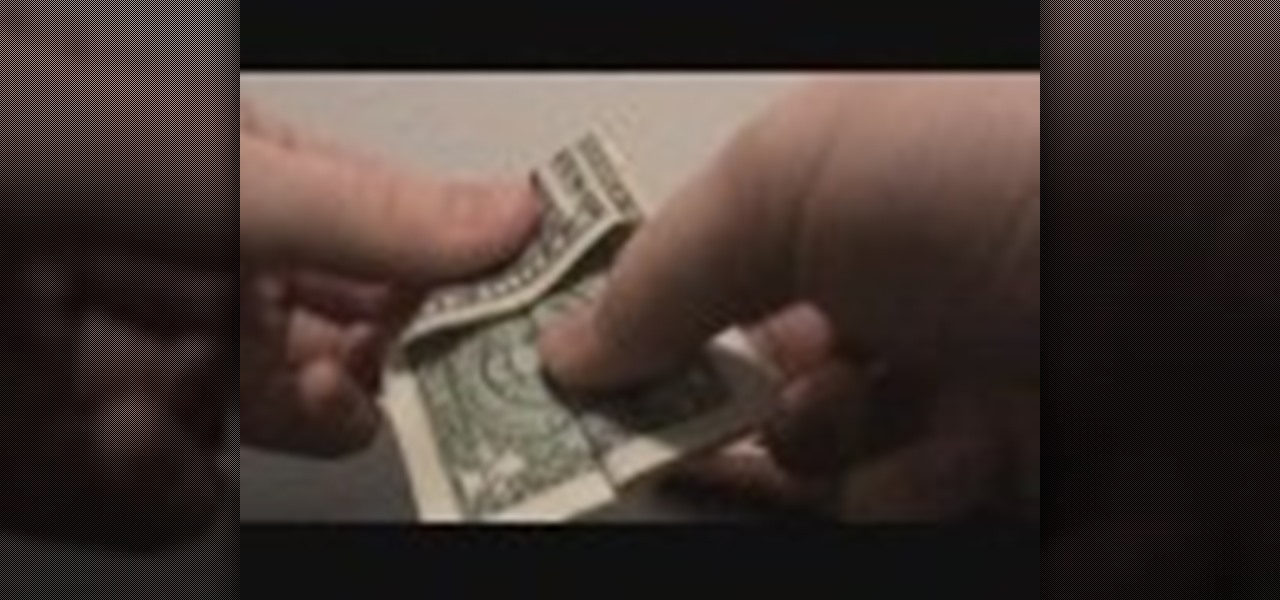
we are taught how to make a unique bow tie from an ordinary dollar bill in just a few short steps. There are no tools are supplies necessary, just your fingers and a dollar bill. Folding the bottom up, then again in half. Opening the sides it forms a 'tent' like fold on either side. Fold up bottom, fold end down. Fold the corners to the center, turn around and repeat that same motion. Pull out while grasping the middle. Flatten it out and there you have in your hand a bow tie, created in just...
This video illustrates how to make paper ninja stars. This process includes the following steps.Step 1Take a sheet of printer paper and scissor.Step 2Fold it and cut it into two halves.Step 3:Fold one half of the rectangular piece again into half.Step 4:Fold the right end diagonally.Step 5:Now fold the left end diagonally.Step 6Fold both the ends in half.Step 7Fold the other rectangular piece again into half.Step 8Fold the right end diagonally.Step 9Now fold the left end diagonally.Step 10Fol...
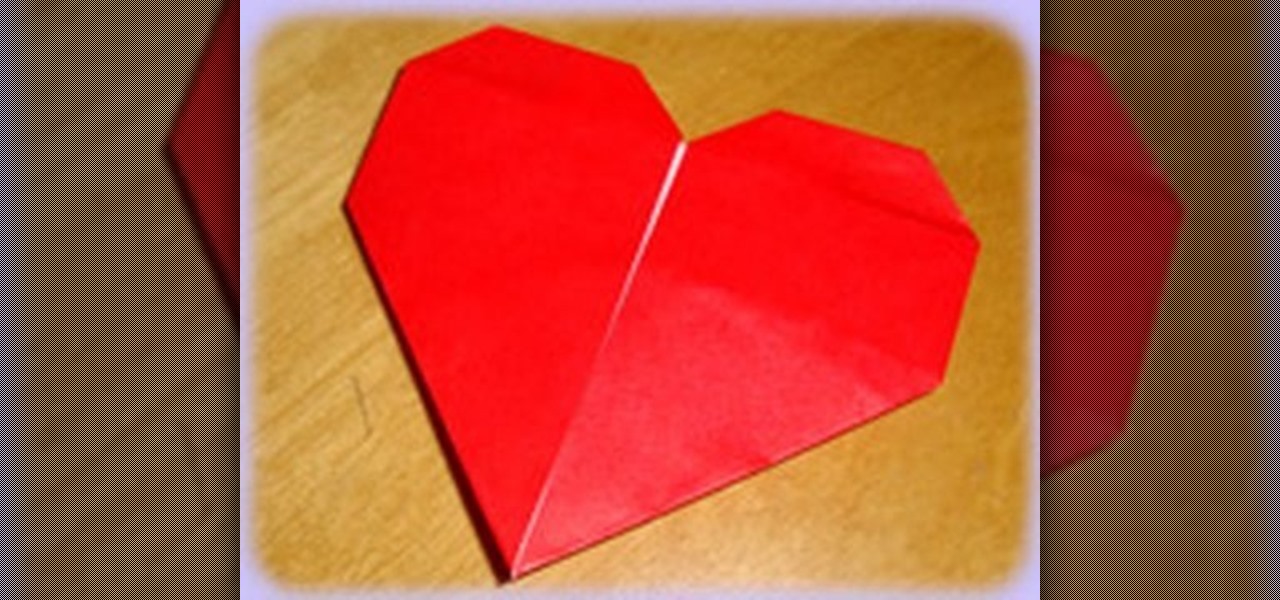
This video shows us how to fold a simple origami heart. Firstly a piece of paper is taken and is cut in the form of a square and then it is folded into half to form a rectangle. Then it is properly creased and then using a knife it is cut into two halves. Then one of the pieces which are in the form of a square is taken and is folded vertically to form a thinner rectangle. It is creased and then unfolded and then the paper is folded horizontally to form a square and it is creased and then unf...
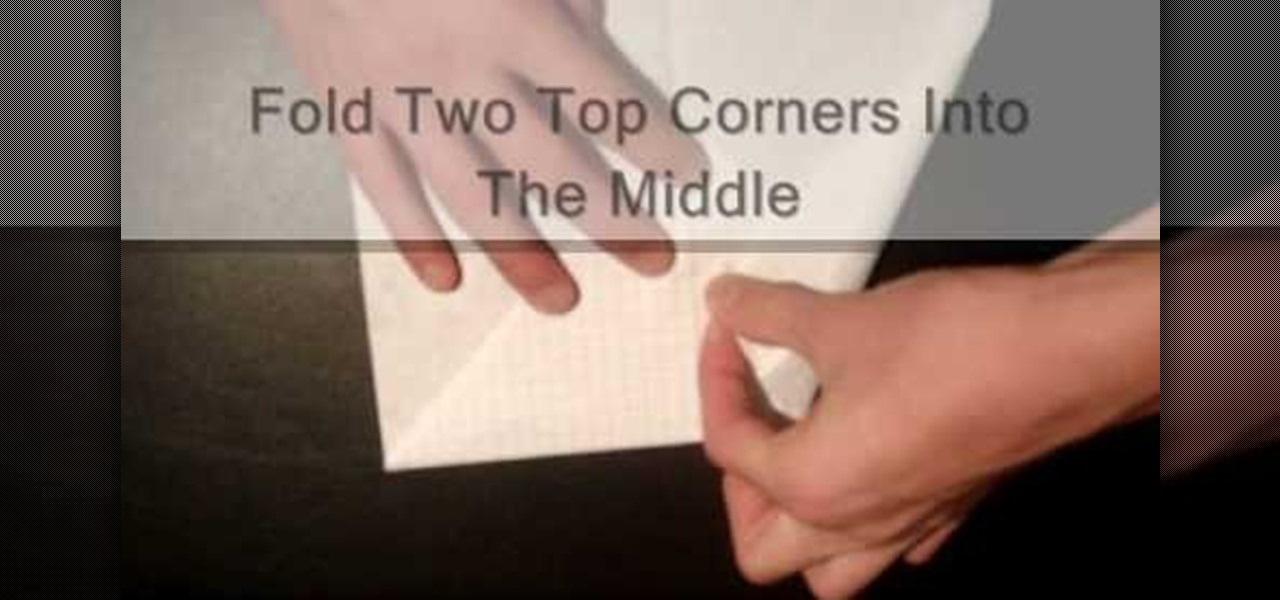
This video shows a step-by-step demonstration on how to fold a moth style paper airplane. First fold the paper in half the long way. Unfold the paper, and fold the two top corners into triangles toward the middle crease. Fold the triangle down. Fold two top corners into the middle and fold the triangle up. Fold the plane in half and fold the wings up. Flip the plane and fold the wings again. Open the plane and you're done. This demonstration is easy to follow, with words on screen, so you'll ...
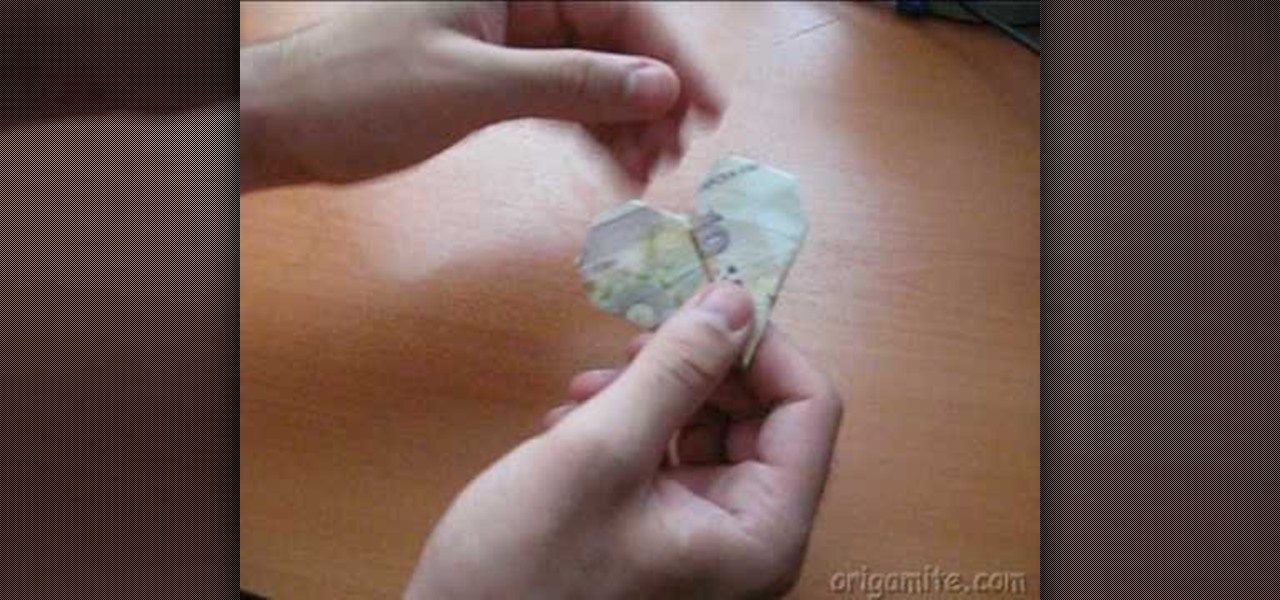
We learn an easy and fun way to make an origami heart out of a dollar bill. No supplies needed. Just the dollar bill and two capable hands. First fold up the bottom of the bill. Then fold it in half. Fold both sides into triangles bringing them to the middle. Turn over in. Fold in inside corners. Then the outside corners, rounding into a heart. Make sure the creases on the sides are well done. Flatten the paper out with palm to make it completely flat. And there in your hands you have a paper...
Folding fitted sheets is always trickier than folding a conventional rectangular sheet. First, throw the sheet onto the bed. Then use your hands to tuck all the corners in on themselves. Then lay the sheet back down and straighten it. It makes a horseshoe shape with its elastic. Then fold one corner over the top so that all your elastic hangs over one hand. With the other hand grab the other corner so you can lay it down flat in a half moon shape with all the elastic together in one place. Th...
This is a video clip about "how to make a paper box". To make the paper box get a hard sheet paper and follow the instructions. Fold the paper into a half and unfold it and fold the other ending of the paper into half. Then, fold the one corner side of the paper and make a triangle to fit the center as the right triangle and do the same procedure for the other corner side of the paper. After that, fold the bottom side of the paper upwards and repeat the same process for the rest of three corn...
This video helps us learn how to make a well-balanced paper football. Get a square paper. Fold the paper in half. Fold it again in the same direction. Fold the paper diagonally to make a triangle. Flip the triangle up so the point lines up with the left edge. Continue folding triangles up the paper until you reach near the top. Fold the top corner down so that the two points meet, making a triangle in the opposite direction. Tuck the extra paper into the pocket. Now you have a paper football.
To make a pop-up card follow the instructions below. First fold two pieces of the same size heavy card stock or construction paper in half. Use the first one for your outer card, and the other for your inner cutout card. Cut a 1-1/2 inch strip in the inner card's center and make two slits down from the fold to make the strip. Then, fold the strip inward so that the fold is inside the card and the card has a rectangular hole in the middle of the fold when closed. This will be the base to use w...
Mind you now, that using a normal rectangular piece will not give you the desired results. You must use a square piece of any size. Start by making two diagonal folds for each corner to corner cross section. Now do two hot dog folds, like wise, then take each corner and fold it into the middle so it resembles triangular tabs. Now take these tabs and once again fold them in half but up to the outside of the paper, resembling another triangle. Fold Over, and do as shown in the video for the bes...
To make a Paper Orchid you need to know the steps as follows: First fold a square sheet of origami stock paper into a triangle, bringing both points together. Use this as your flower base. Fold the paper again bringing both corners together. Rub your finger along the crease of the fold to make sure that it stays put. This step completes the triangle base. Begin making the flower base by taking the triangle base folded over twice and adding a third piece, folding it over as well to meet with t...
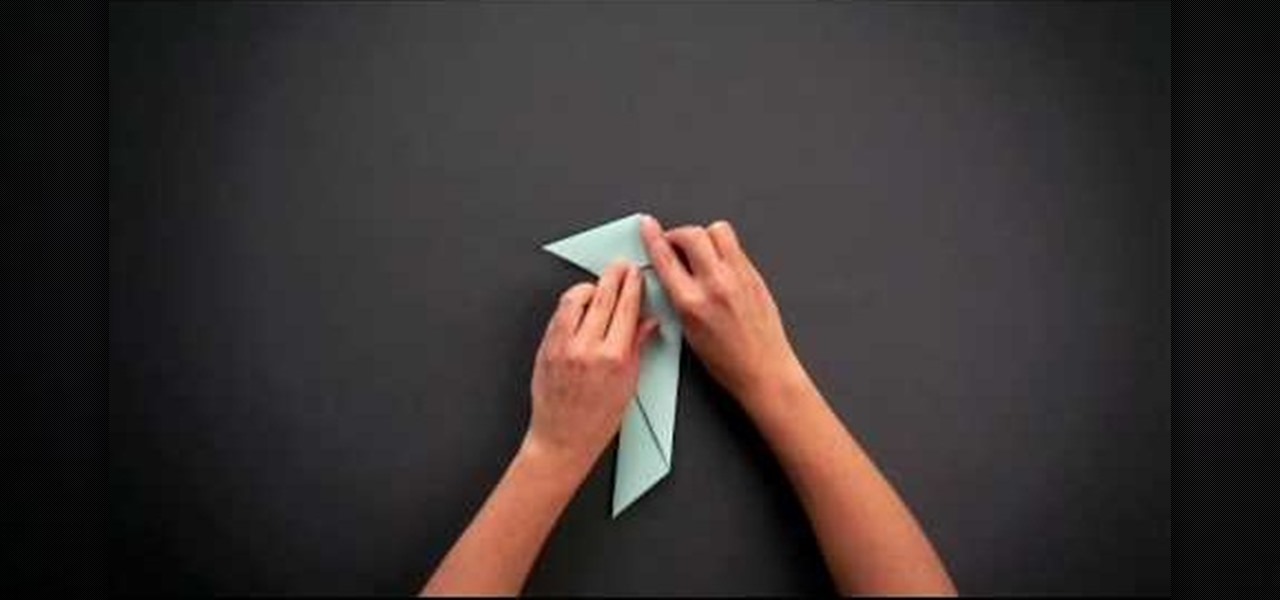
Origami is simple and fun and our host proves that right off by displaying how little we actually need material wise, to make something unique and pretty. Just two swathes of patterned paper, put flush together and a paper clip. First folding your little construction into the shape of a tiny kite It gets very precise from there. Incorporating smaller and smaller folds, but with a close-up view and a step by step explanation, this video will ensure success. After creating your unique abstract ...
In this video, Ngai Chun Cheung demonstrates how to make an origami suit jacket. He begins by folding a right triangle and tearing off the excess to make a perfect square. He folds it on both diagonals, then folds the four corners into the center. He turns the paper over and folds all four corners into the center again. Then he turns it over and again folds all four corners into the center. He turns it over and opens the four corners partially and folds them flat to make rectangles on all fou...
The ancient art of Japanese paper folding is broken down and explained clearly in this video. The video teaches how to create a beautiful bookmark of your own design from a simple single sheet of paper. The instructions use the square base as a jumping off point for showing you how to easily make a custom book mark. There are a few simple beginning steps, and after you complete those you will be able to fold and crease your way to a gorgeous custom origami book mark.
Learn to make an origami flower with just a few easy steps in this video tutorial! 1. Use an 8 inch by 11 inch piece of paper.
Fold paper in 1/2. Fold in half again into a square. Fold in half again, & again into a square about 1/16 of original size. Unfold paper. Fold marks divide paper into 16 small squares. Make 2 diagonal folds in each direction to form a big X in paper. Position paper with inside of folds facing you; fold paper in 1/2 again to form a rectangle. Using previous fold lines, fold lower 1/2 of paper in 1/2. This fold covers 1/3 of remaining visible paper. Grasp center where folds meet. Create 4 ridge...
Learn to fly... paper airplanes. In this video tutorial, John Collins, The Paper Airplane Guy, shows you how to fold and fly the Tumbling Wing paper airplane.
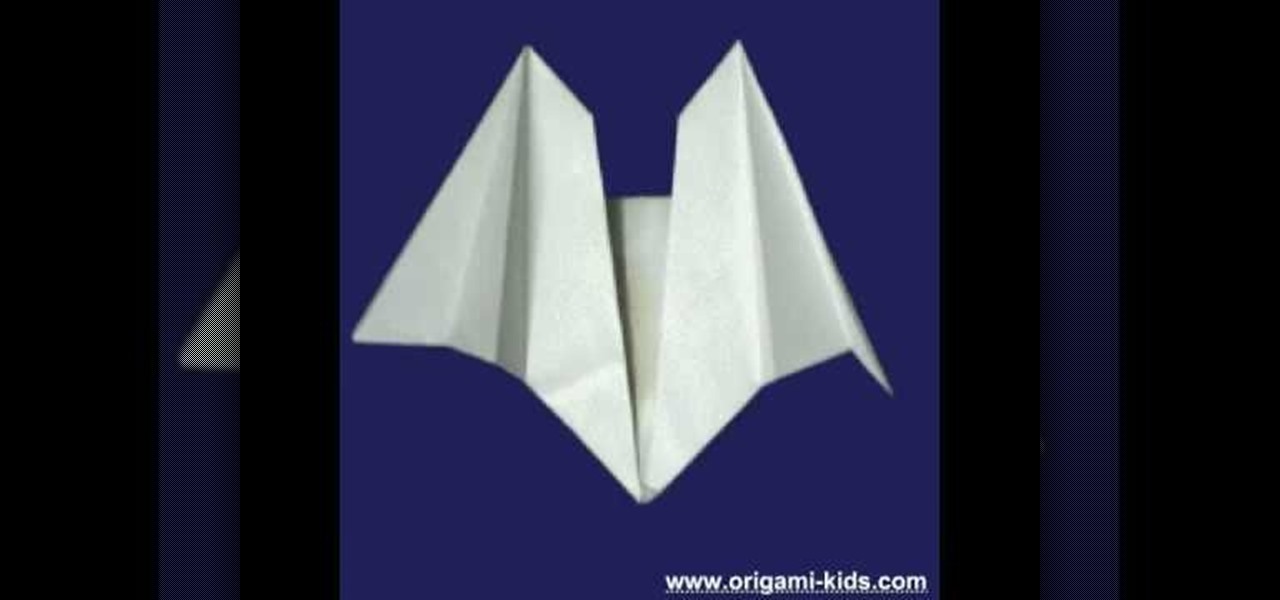
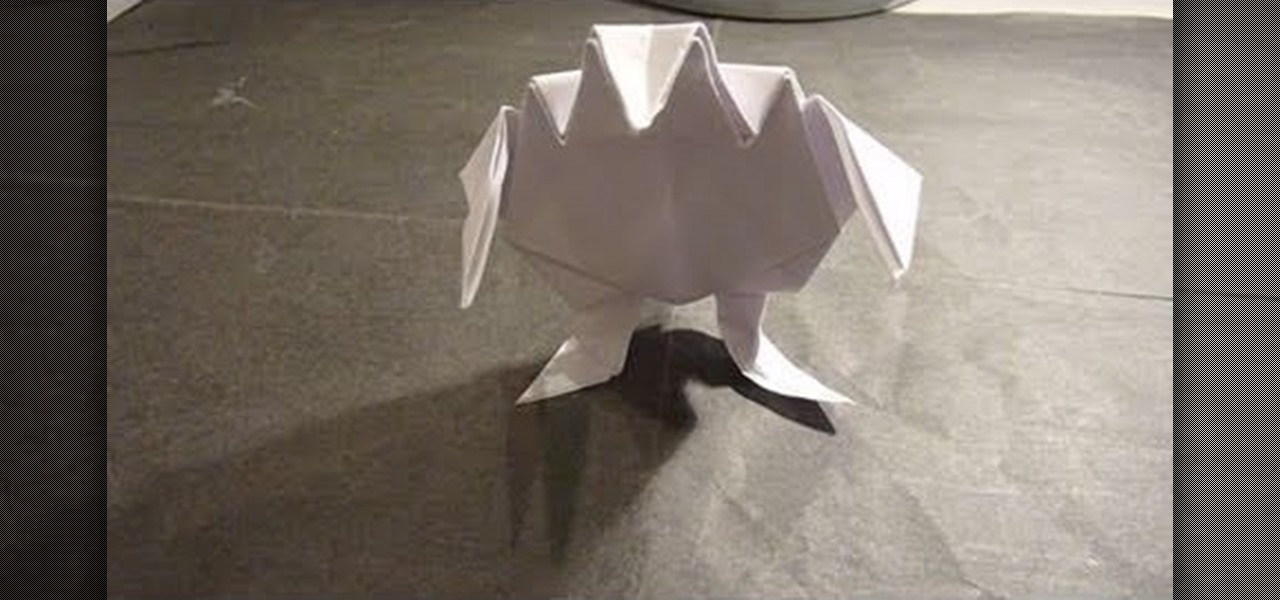
This 3D animation demonstrates how to fold the famous origami model "Hungry Bat", a great Halloween fold! Just take a piece of square paper, and fold along with this 3D animation to get the Hungry Bat! Memorize it (it's really easy!) and show off your skills at your next Halloween party - or use it as decoration, whether for your costume, or the house. Using paper that's black on one side and white on the other is most effective! The 3D animations explains how to fold the model "hungry bat" t...
Here's a quick and simple booklet that can be made out of two sheets of paper. It's great paper craft for a school project or just fun. All you need is paper and scissors. Fold both pieces of paper in half hamburger style. Use scissors to cut knotches into your fold. Fold your other piece of paper hotdog style. Follow the rest of the instructions, assemble and you have a quick and simple paper booklet.
Learn how to do balloon folding into animals, people, and objects in this free entertainment hobby video series.
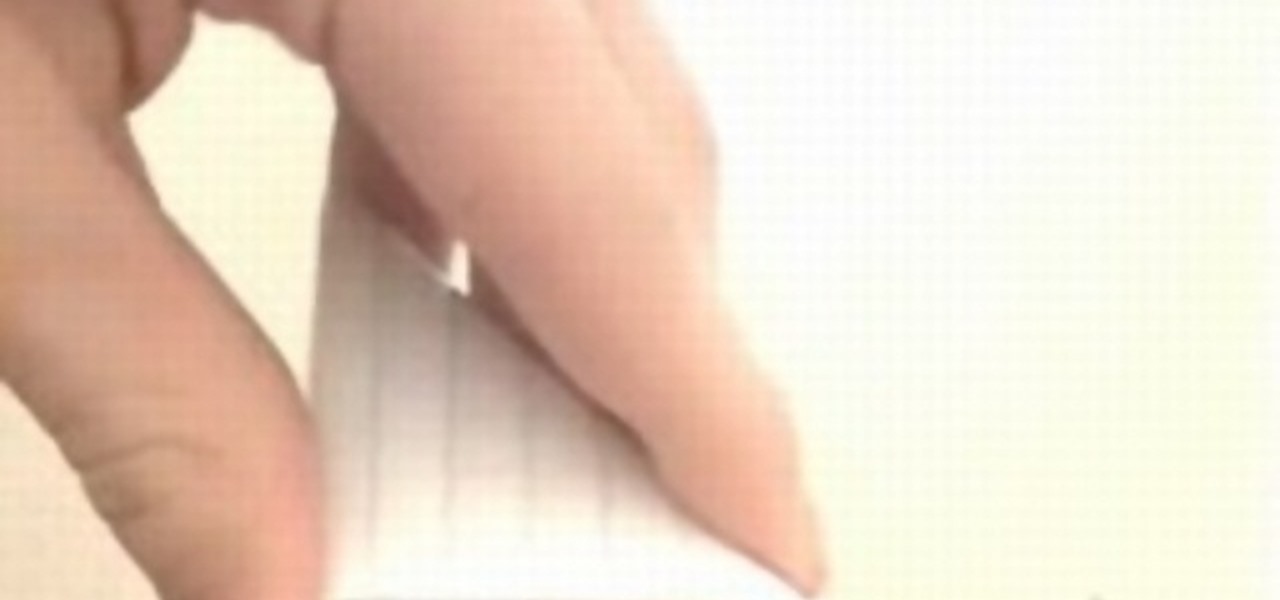
This video tutorial shows how to make an origami gift box with base, lid, and dividers. Learn how to fold this gift box using the traditional Japanese art of origami.
Robert Lang shows how to fold an origami swallow. This is an excellent video! Robert Lang is a professional origami artist, showing in museums and galleries.
Robert Lang teaches how to fold an origami duck. Quack! Robert Lang is a professional origami artist showing at museums and galleries. Perfect your origami skills with an expert.
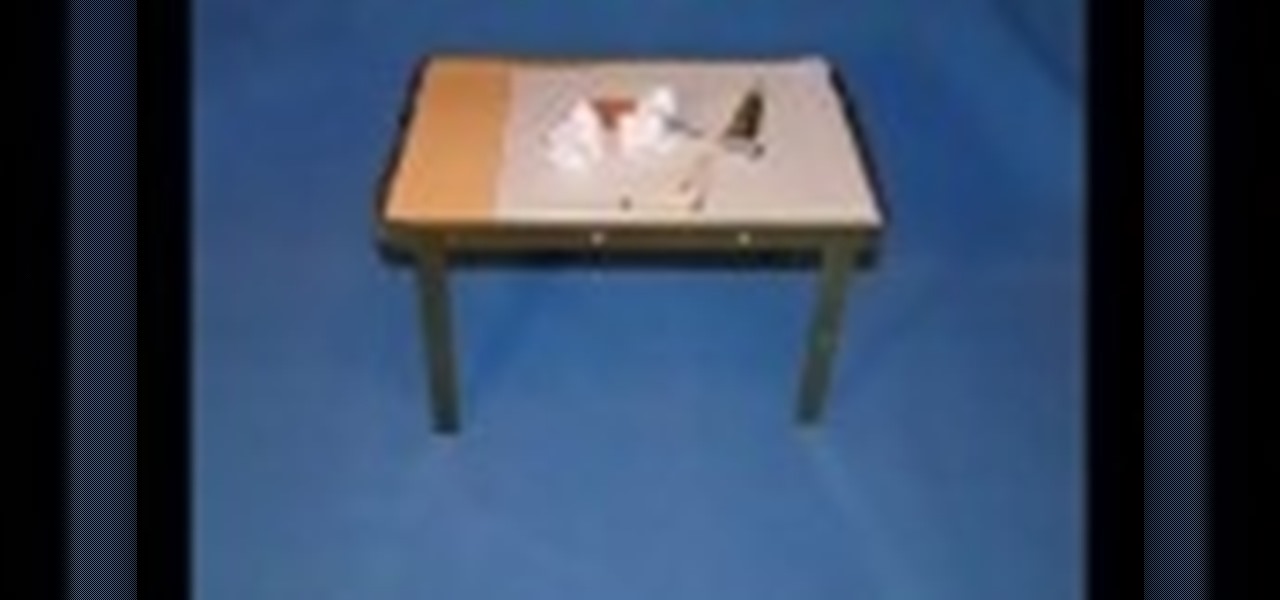
This table magically folds over to create a secret compartment. This way you don't have to clean the table off, just fold it over and use the backside.
If you've mastered the origami jumping frog already, then this is the next step on your journey to paper folding enlightenment. Take a gander at this origami tutorial to learn how to crease and fold an intermediate level origami fighting toad.
When you think of origami, you probably imagine very abstract, geometric interpretations of real-life animals and plant life, and sometimes even people and architectural monuments. But origami need not be abstract, nor does it need to be angular.