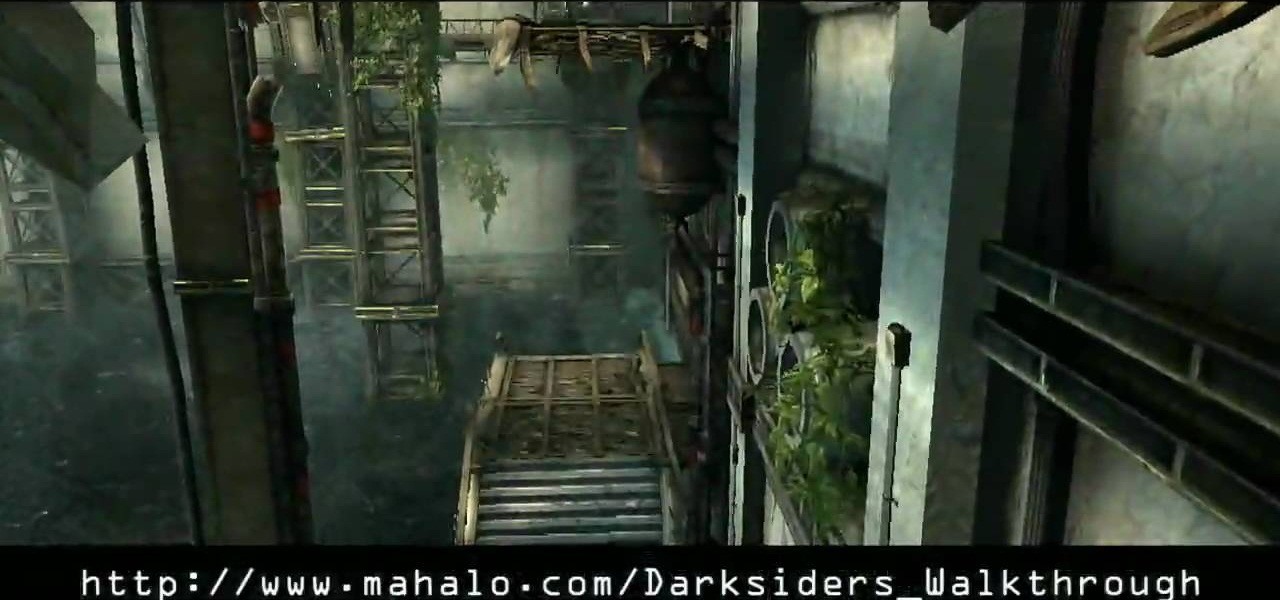
In the Xbox 360 game Darksiders, you'll eventually have to play the Iron Canopy level, which consists of The Seesaw, Webbed Floor, Two Lifts 1 Bomb, Loom Wardens, Broodmother, Silitha and Return Silitha's Heart. War will be ambushed and captured as he enters the Iron Canopy. When he comes to, you'll find him hanging from a spider web. Tap the Action button to break free. Make your way around to the left to discover a Soul Chest in hidden nook behind your starting location. Now cross the webbe...
There's plenty of action on this level of the Xbox 360 game Darksiders. In the Hollows, there's Gas Mains, Tremor Gauntlet, Three Platform Room, Turntables, Pump Room, Griever, and Chronomancer. You enter way looks to have once been a train station. As you approach the Redemption lying on the ground you'll be ambushed by the Griever. Quickly pick up Redemption and begin to alternate between rapid fire shots and charge shots. You need to aim for the blue glowing belly of the monster. Dash arou...
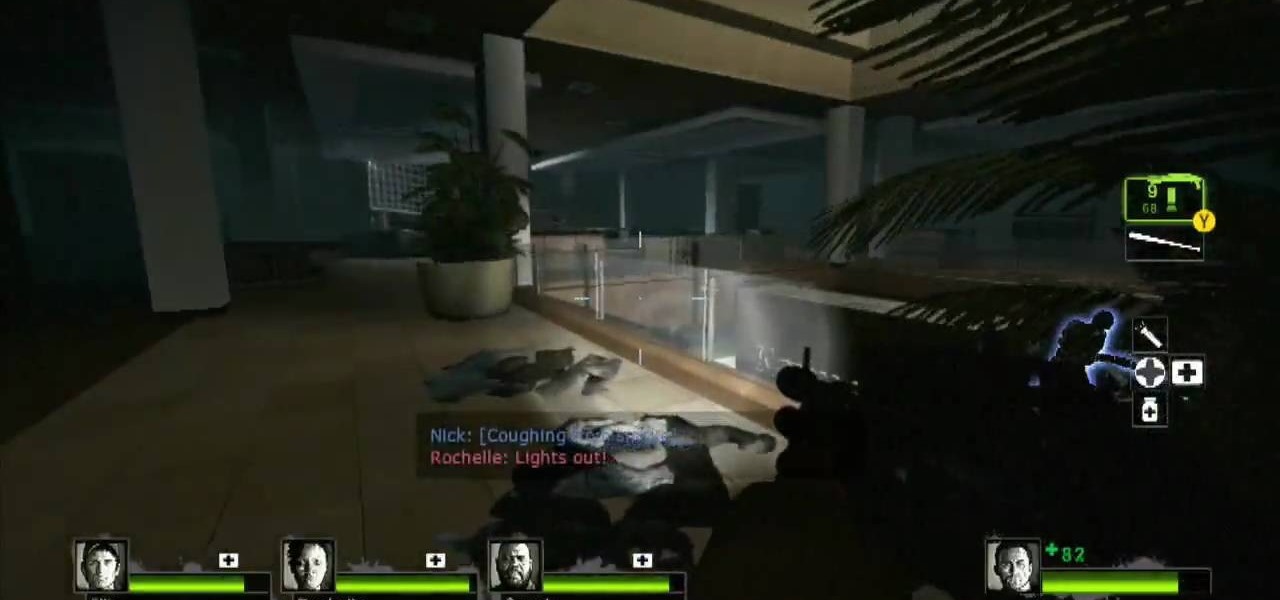
L4D2: One of the best horror video games of all time. Check out the tips and gameplay for Campaign 1: Dead Center - Mall. Restock on supplies and head out of the safehouse. Feel free to kill any zombies trying to reach in the door before you unlock it. Hang right and make your way up the giant escalator in the middle of the floor. Loop around and exit Kappel's department store. Go down the first escalator you see. Watch out for zombie attacks from the floor above. They will jump down and catc...
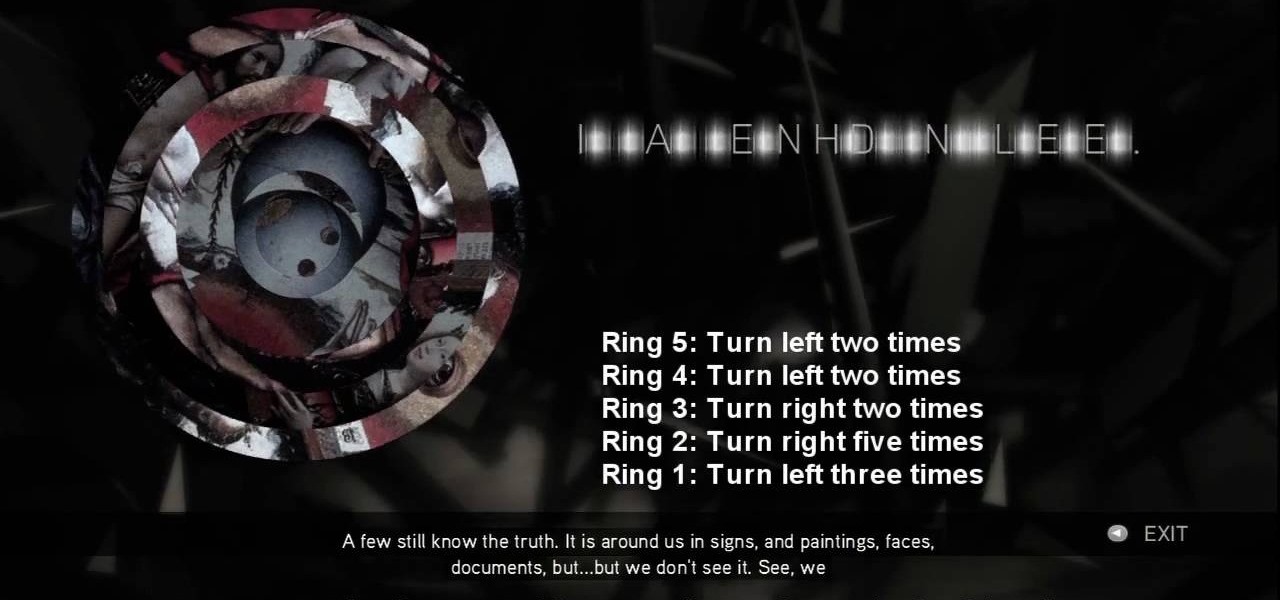
No need to figure out the 20th puzzle, entitled "The Origin of the Species", in Assassin's Creed 2. Here's the answers! Puzzle wheel: Start by turning the fifth ring right ten times, then turn the fourth ring left twice. Then rotate the third (and first) rings right twice, the second ring right five times and the first ring left three times. Image 1: Highlight the eye at the top of the painting. Code wheel puzzle: Ignore the numbers and focus on the Assassin motto: “Nothing is true, everythin...
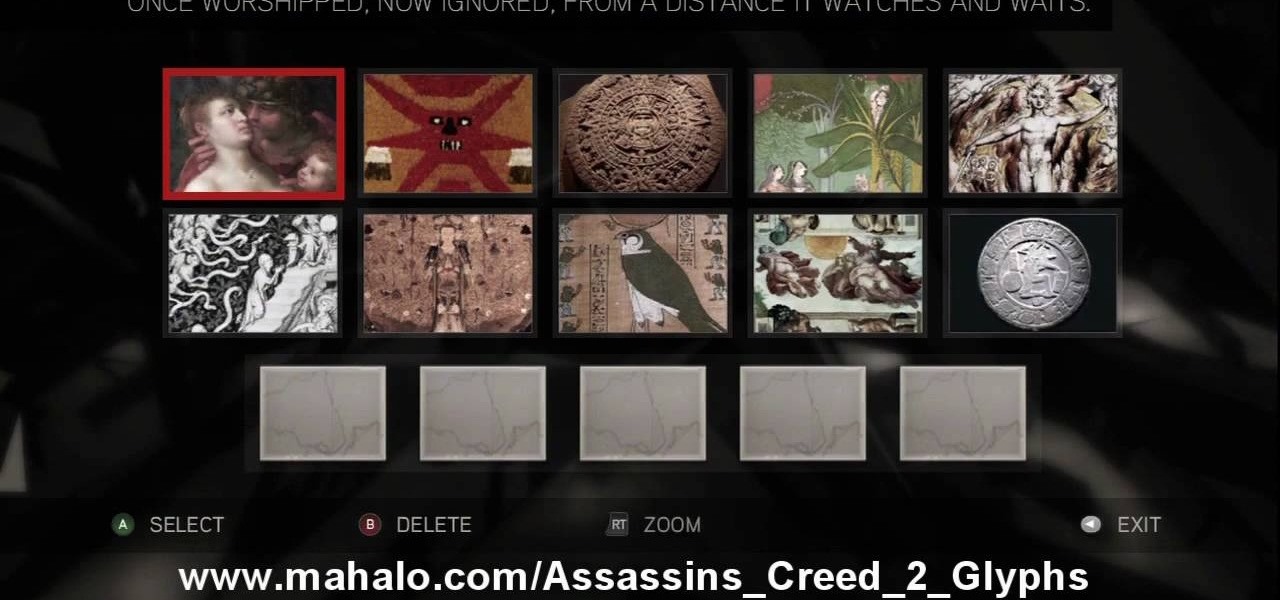
Here's the answers to the 19th puzzle, titled "The Fourth Day", in Assassin's Creed 2. Image set: What used to be worshipped by every primitive culture under the…? That’s right, the sun. Pick the five images that focus on it. Image: Find the tiny image of Earth in the lower-left quadrant of the sun. For more info, watch the whole gameplay.
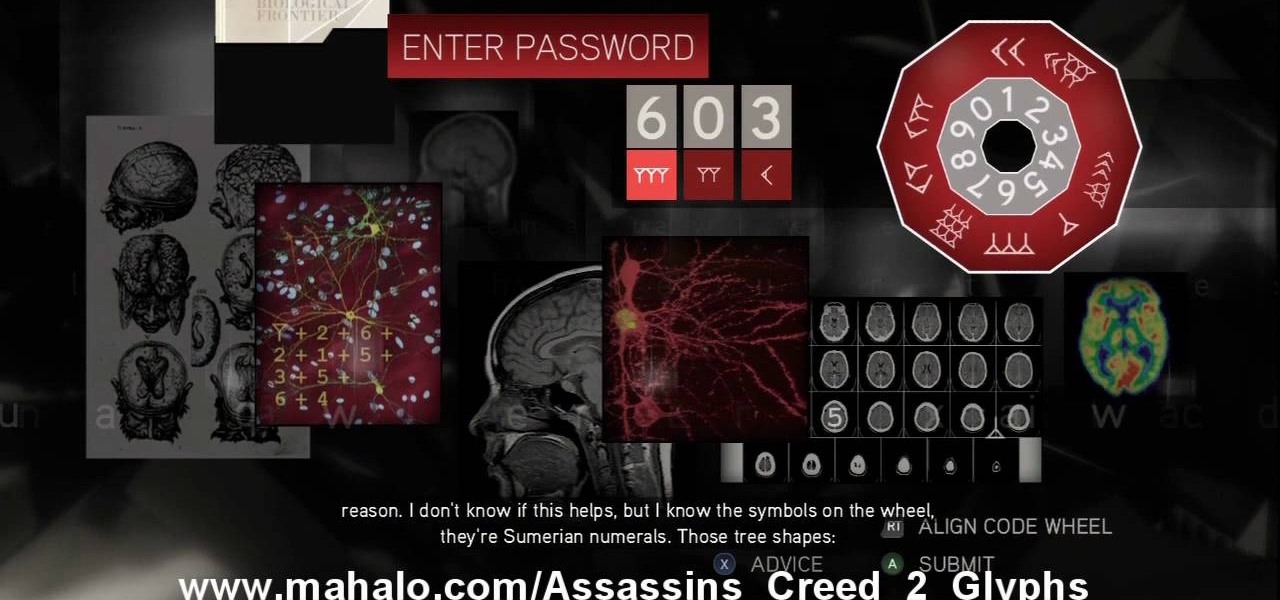
The 18th puzzle is called "Synapses". See how to solve it in Assassin's Creed 2. Code wheel puzzle: Your first clue is to line up 5 with a single tree-looking symbol. The key here is the weird-looking equation on the left, which offers a hint as to the progression of the symbols.

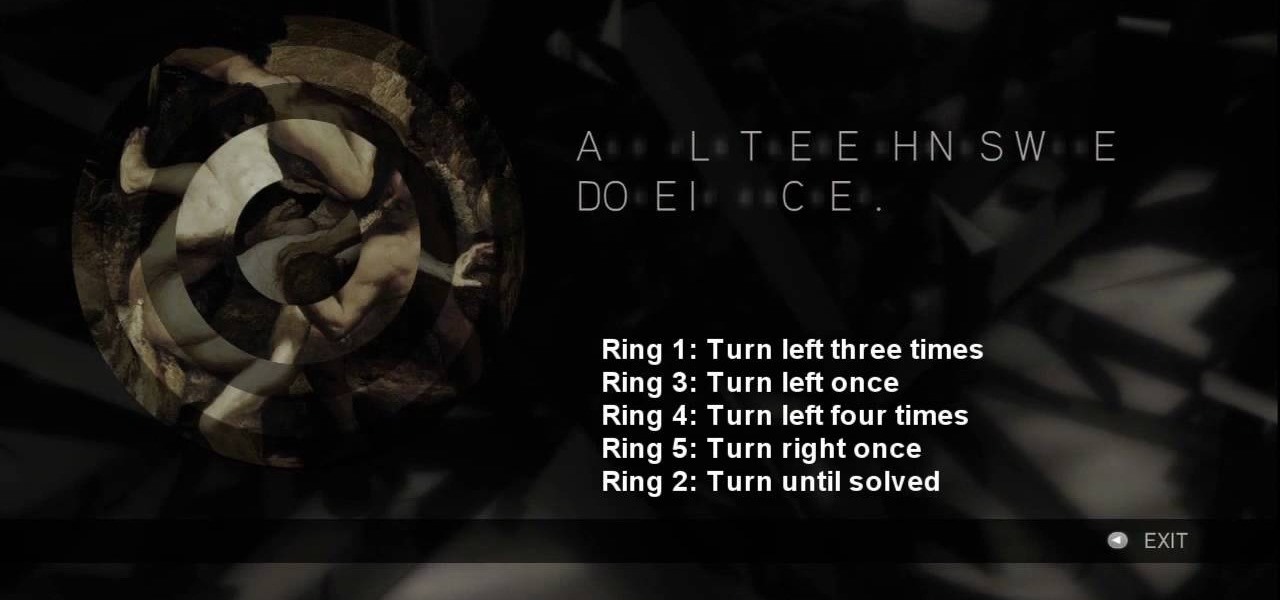
Figure out the 17th puzzle, entitled "The Bunker", in Assassin's Creed 2. Code wheel puzzle: Here’s a tricky one; your clues are “<” and “2,” and the only advice you’ll get from your handlers is that maybe there’s “something we can count” on the strange symbols. In this case that “something” is the number of times each symbol bends sharply. Don’t expect consistency across the wheel on this one; just take a look at what symbols flank the blank spaces and pick a shape with the number of bends t...
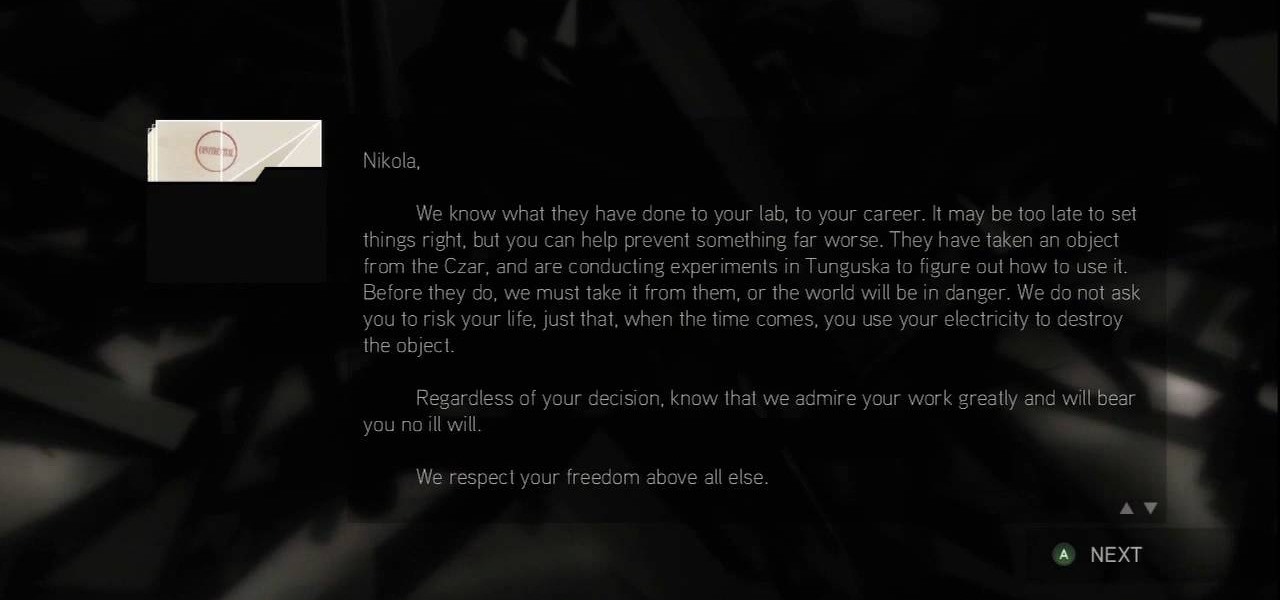
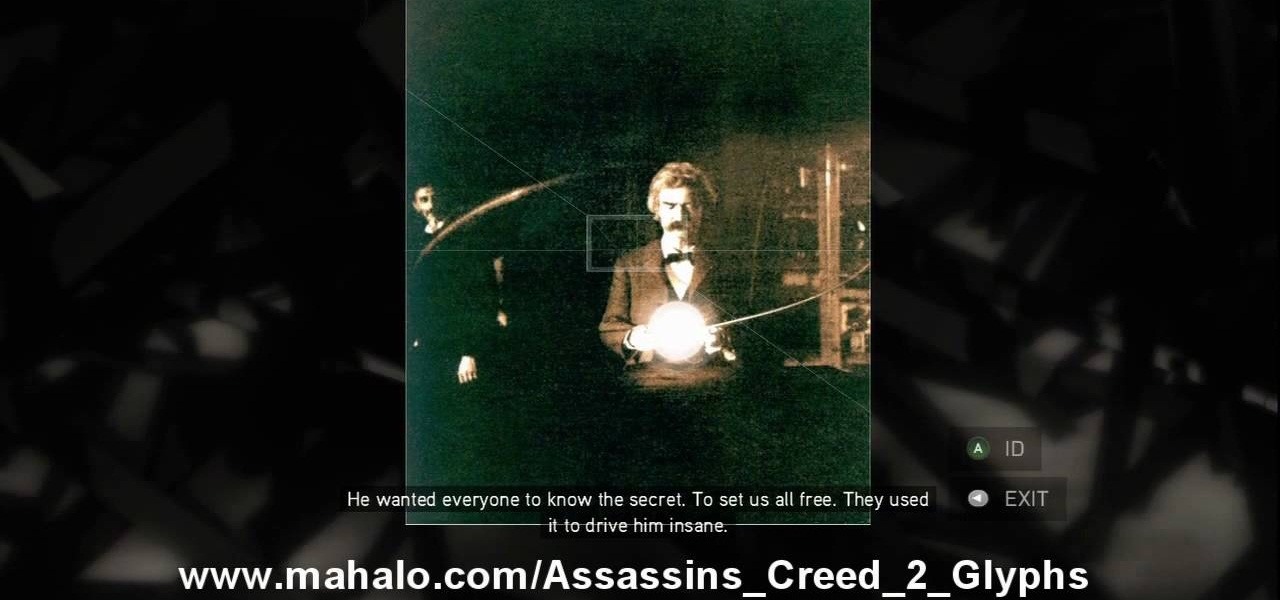
This one's pretty easy. Here's the solution to the 16th puzzle, entitled "The Cavalry", in Assassin's Creed 2. Image 1: Just move the cursor to the word “Tunguska.” Image 2: Move the cursor onto the staff and drag it onto Tesla’s photo. For more info, watch the whole gameplay.
Get all of the info on the 15th puzzle, entitled "Guardians", in Assassin's Creed 2. Puzzle wheel: Seemingly every other ring is linked here, so we’ll cut straight to the chase: Turn the third (and fourth) rings right twice, the fifth (and first) right four times, the fourth (and first) right five times, the fifth (and first) left five times and the second left five times. Finally, move the fifth (and second) rings right five times. Image: Another gimme – just move the Assassin logo over the ...
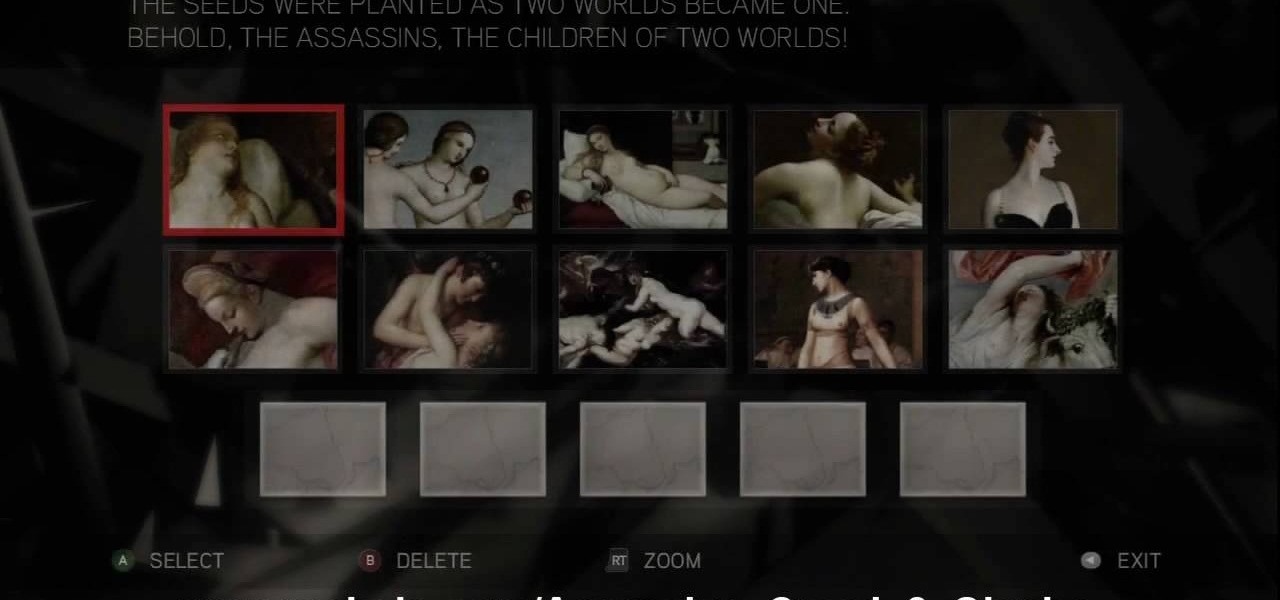
The 14th puzzle, entitled "Bloodlines", isn't really that hard in Assassin's Creed 2. Set 1: Highlight the images that depict women and gods in amorous entanglements (especially if those gods are disguised as animals). For more info, watch the whole gameplay.
Solve the challenging 13th puzzle, entitled "I Am Become Death, the Destroyer of Worlds", in Assassin's Creed 2. Code wheel puzzle: This one’s even trickier than the last one; starting with the hint that 9 (next to the tower) equals “triangle” (up and to the left from the bomb), you need to figure out which symbols would fill in the blank spots on the wheel, going by the symbols next to them. Image 1: Just hit the button. It’s not hard. Image 2: Use the Geiger-counter clicks to guide you. For...
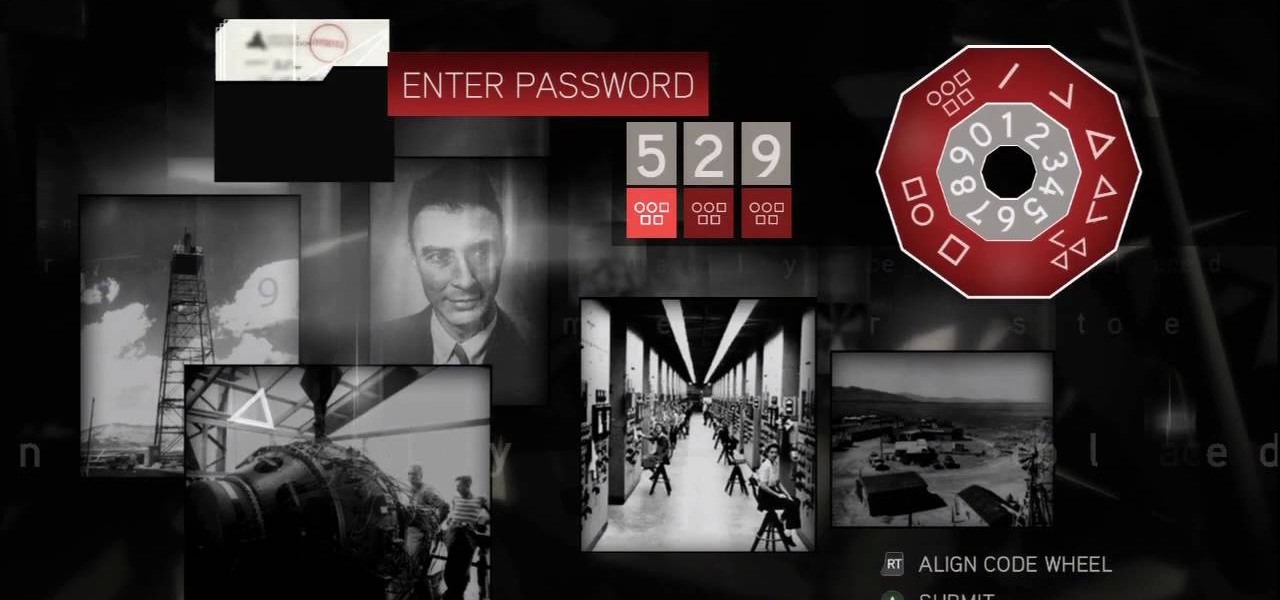
This is the 12th puzzle, entitled "Titans of Industry", in Assassin's Creed 2. Code wheel puzzle 1: The key here is in the “4=1” on the blueprint at the left of the screen. Line up the red 4 over the gray 1 and input the following code: 917240. Image 1: This one’s the opposite of the light-bulb “puzzle” from before – just move the dollar sign over the bulbs to extinguish them. Image 2: Highlight the glowing ball at the center of the image. Code wheel puzzle 2: Your hints here are the “2” on t...
Find out how to solve the 11th puzzle, entitled "The Inventor", in Assassin's Creed 2. Image 1: Just move the lightning bolt over the bulbs to bring them to life. Image 2: Highlight the area just at the base of the tower, between the two windows, to find this hidden image. Image 3: Move the pointer onto Tesla’s lap. For more info, watch the whole gameplay.
Figure out the 10th puzzle, Apollo, in Assassin's Creed 2. Image 1: Highlight the lunar lander just down and to the left of the moon. Puzzle wheel: Another linked-ring rotation puzzle. Your job here is to align all the channels; do this by moving the fifth ring to the left six times, the second ring to the left four times, the fourth ring to the right three times and the third ring to the left five times. Then snap the first ring into place. Image 2: Move the cursor down between the flag and ...
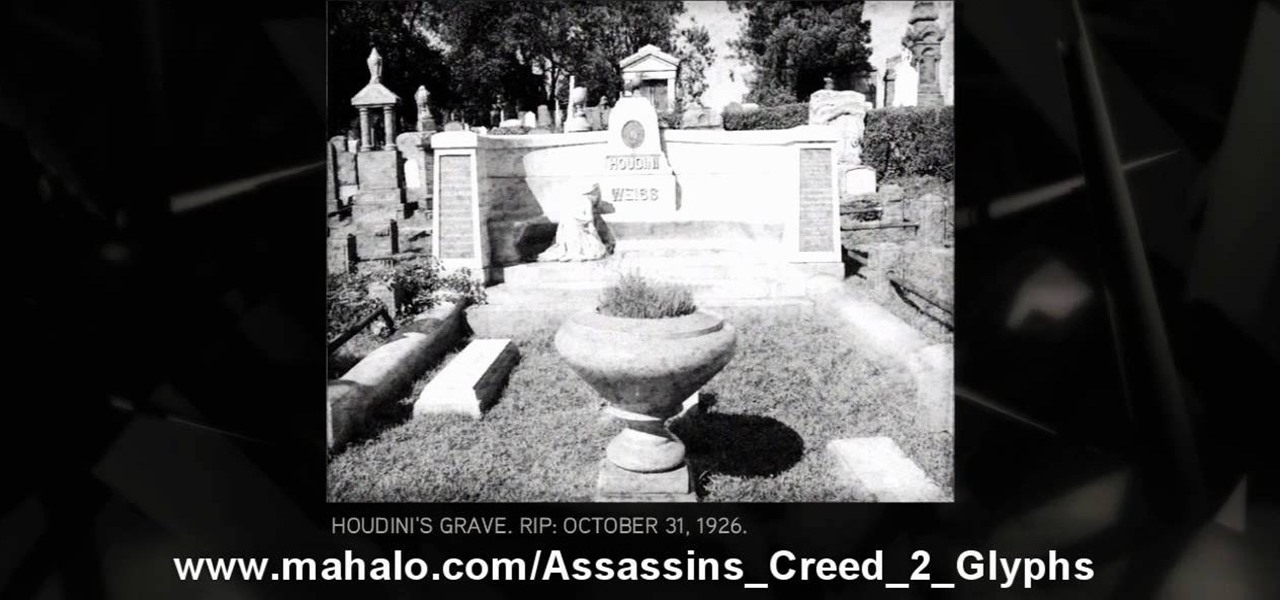
Execute the 9th puzzle, called Hat Trick, in Assassin's Creed 2. Image 1: Move the cursor onto Houdini’s torso. Image 2: Move the cursor over Gandhi’s heart. Code wheel puzzle: Your hint here is pretty obvious; there’s a big, glaring “6=1” next to Oswald’s picture. So move the red wheel so that the 6 is over the gray 1, and plug in the corresponding numbers. For more info, watch the whole gameplay.
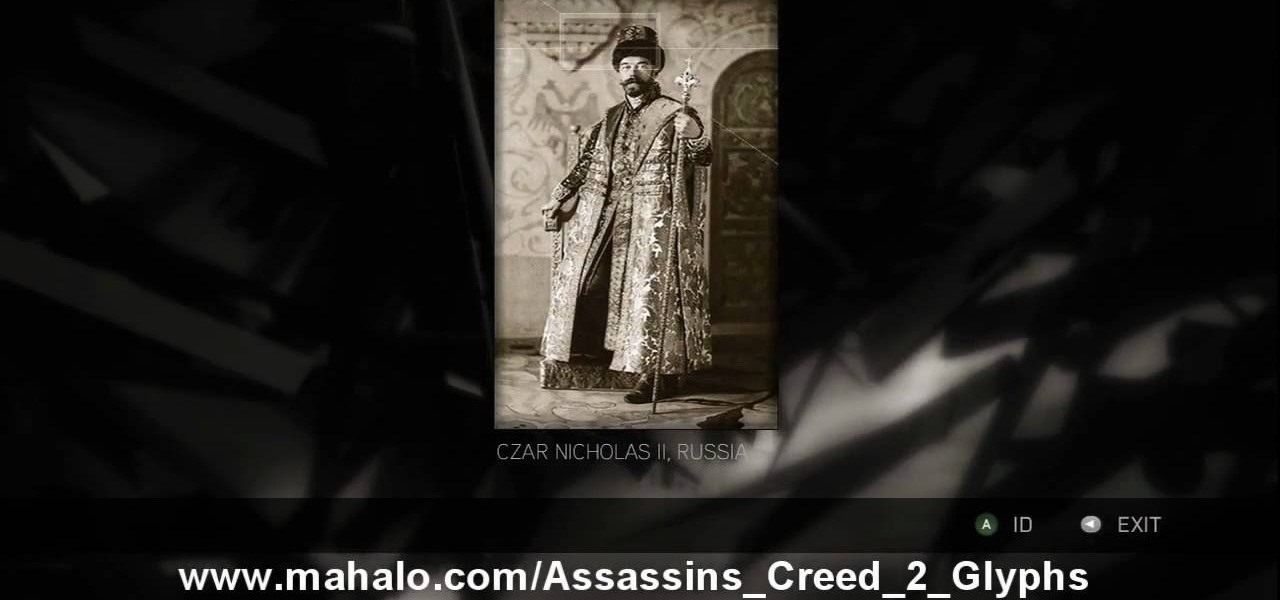
Learn about the 8th puzzle, titled Martyrs, in Assassin's Creed 2. Image 1: Highlight Czar Nicholas’ staff. Image 2: Highlight Joan of Arc’s sword. Image 3: Move the fireball to Joan of Arc’s portrait. Image 4: Move the photo of Rasputin onto Czar Nicholas’ portrait. For more info, watch the whole gameplay.
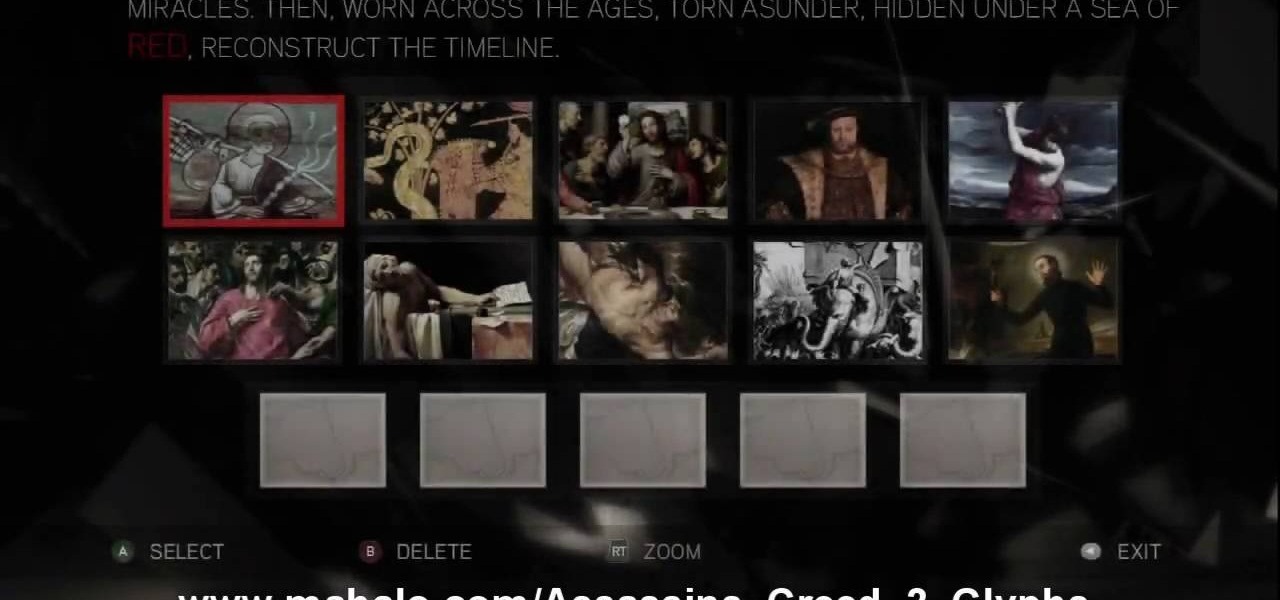
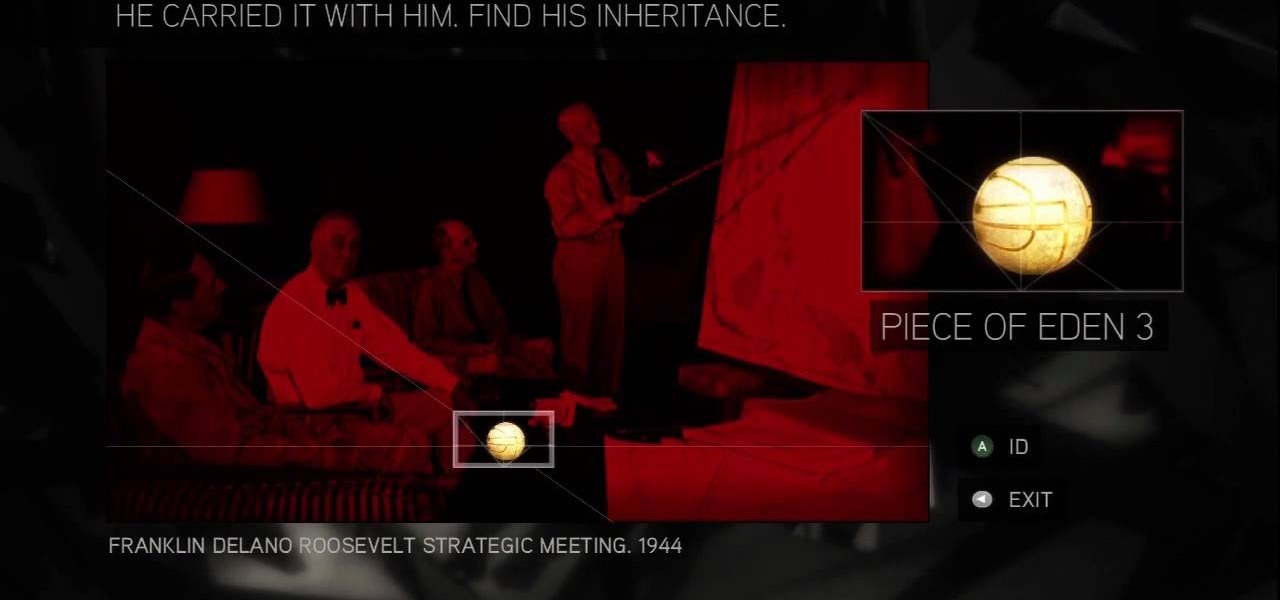
This is about the 7th puzzle in Assassin's Creed 2. Keep on seeking, and you should find… in the first image set, the key word here is "red", so pick the images in which that color shines the brightest. In the second image, highlight the area to the right of Jesus’ hips to reveal a Piece of Eden. For more info, watch the whole gameplay.
See the key to the sixth puzzle "Brothers" in Assassin's Creed 2. This is where things start to get tricky; while the first batch of ring puzzles were simple, these link some of their rings together, so that you can’t move one without moving another. For more info, watch the whole gameplay.
Find out the solution to the 5th puzzle in Assassin's Creed 2. For set one, the hint here is “cut,” so pick the five paintings that feature swords. For set two, what do the people in these paintings lean on? That’s right – pick out the images that feature staffs. For more info, watch the whole gameplay.
Get the answers to the 4th puzzle in Assassin's Creed 2. This is just another hidden-image puzzle. Find them in the barrel of the bazooka, on the helmet of the soldier crouching in the background, on a rifle held up just to the left of the officers, and in the hand of one of the monsters. For more info, watch the whole gameplay.
Find out about the third puzzle in Assassin's Creed 2. Another simple one – just highlight the spot in each image where the Apple is hiding. You can click around at random and maybe find a couple of hidden messages. For more info, watch the whole gameplay.
Try your hands at one of the first puzzles in Assassin's Creed 2. “Core?” “Pick?” That’s a dead giveaway right there. Just pick out all the paintings that contain apples. For more info, watch the whole gameplay.
Cheaters Never Prosper: But they do get quite a reputation. This is a simple mission. You need to just fight off the opponents that come at you using your bare hands. Even though you've no weapon equipped, you can still use the typical counter ability. Though you won't always KO an opponent with the first counter, repeatedly make use of the technique and you'll eventually drop the opponent.
Boys Will Be Boys: This is the very first problem for you to solve in the video game. You're dropped into your first mission, which requires you beat up a lot of dudes. Be sure to lock onto an enemy, which allows you to throw up your guard and block incoming attacks. You've got access to a counter move that's incredibly useful if you can get the timing down. Just hold up your guard and press the attack button as an enemy swings on you to put him down instantly. For more info, watch the whole ...
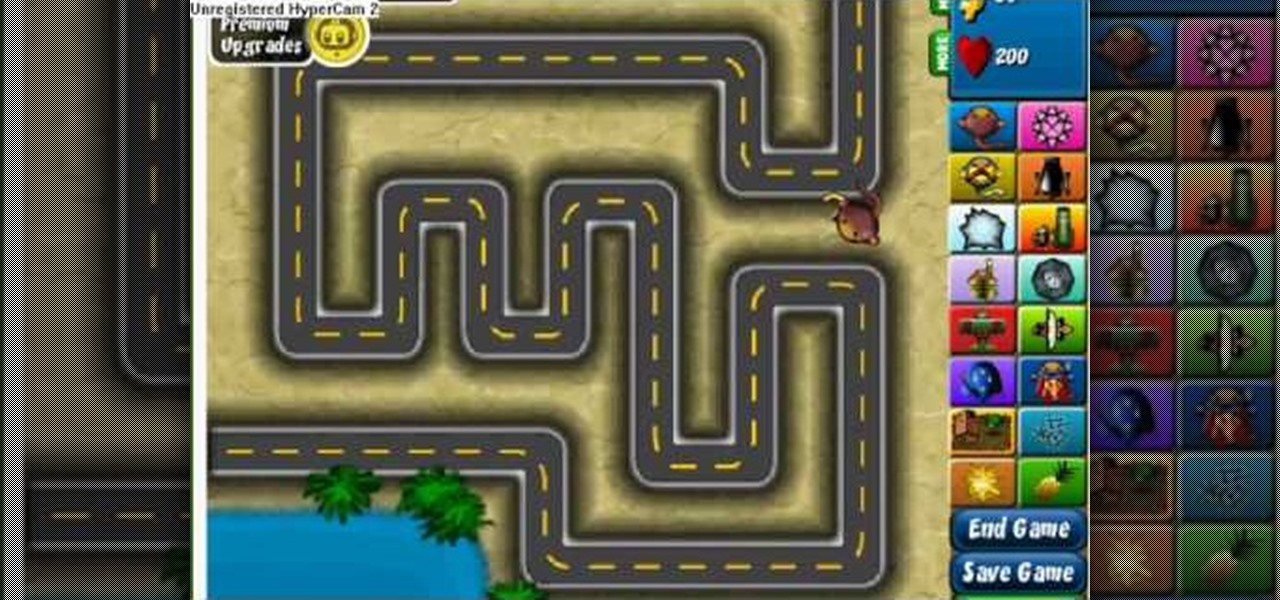
This is hacking for Bloons Tower Defense 4. Newly released, this game can't stand resistant to hacks and cheats. There's no way you can loose at Bloons!
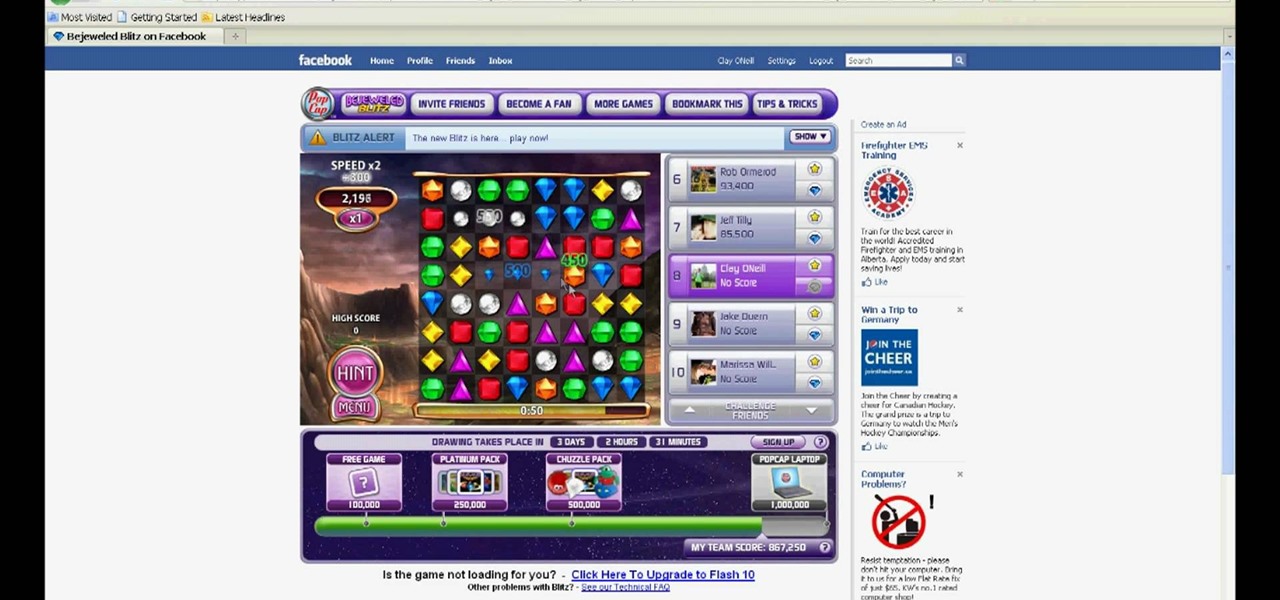
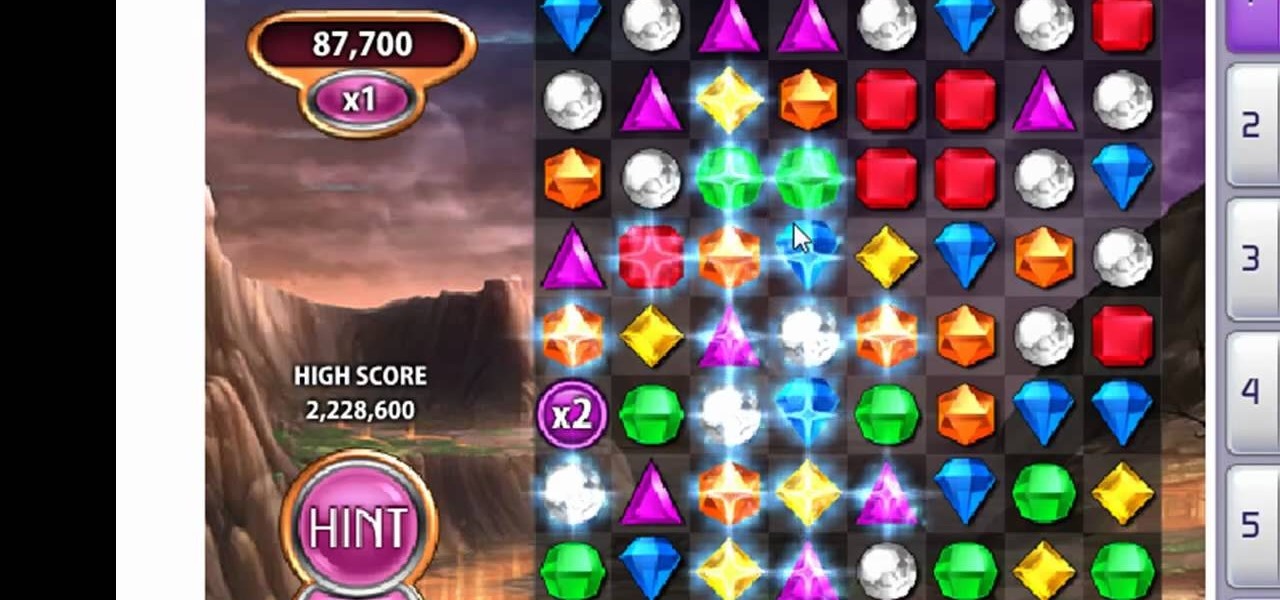
Need a simple solution to hacking the speed on Bejeweled Blitz? Come no further. There's no easier way to cheat the infamous online flash game.
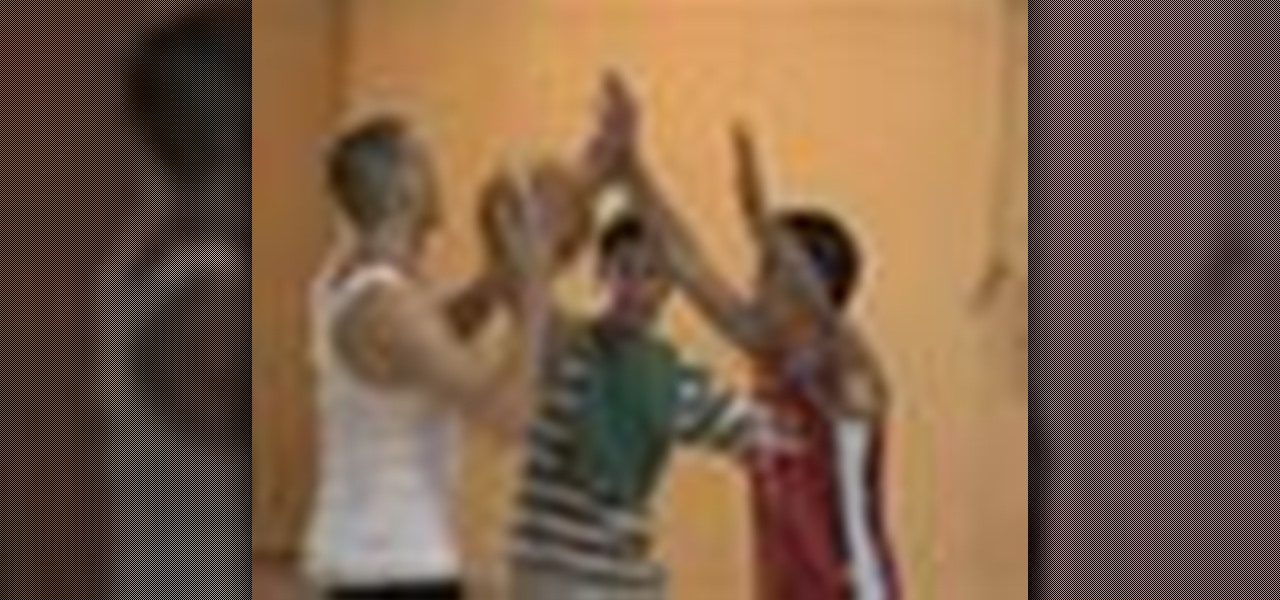
Often used to settle scores, 21 is a continuous, fast-paced version of basketball with few rules and little room for error.
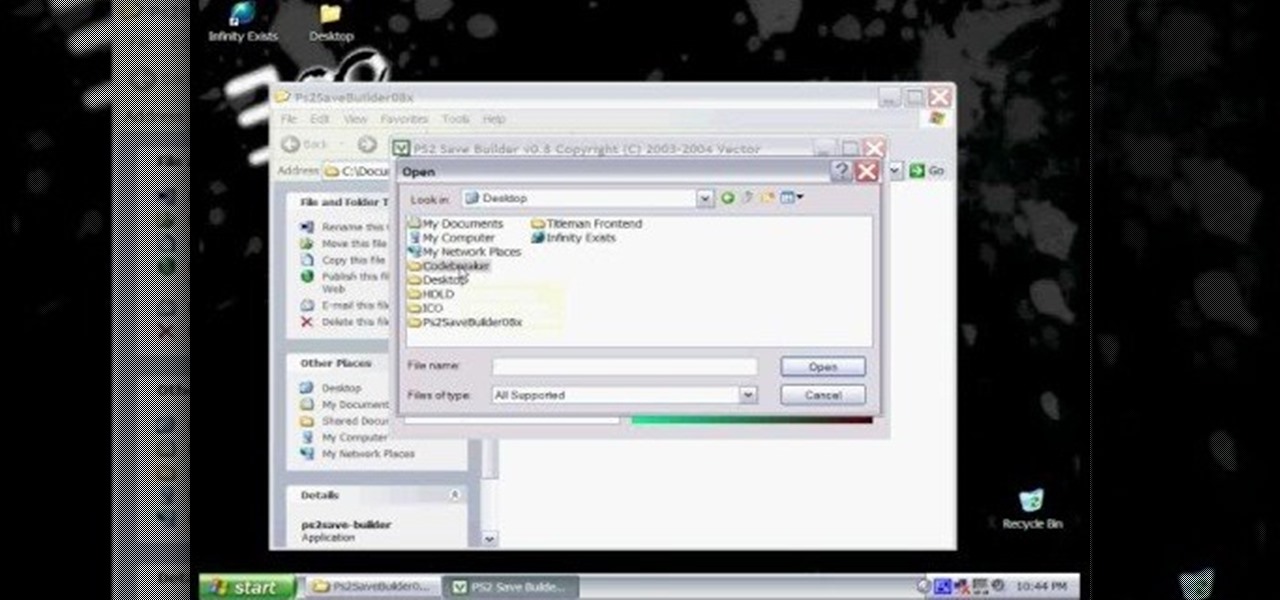
In this hacker's how-to, you'll learn how to softmod your old Playstation 2 to enable you to run third party software and how to use CogSwapLoader and HDLoader to backup your PS2 games and play them either from a burned DVD or off your hard drive. This will let you hack the PS2 to play pirated games. Remember, pirating software is illegal! This will let you unlock your PS2 to play games if you copy them from somewhere else.
Part of what makes EVE Online so much fun is the option to explore different moons, planets and asteroid belts. However, it can be dangerous. This tutorial explains the equipment you'll want and the best way to explore in a non-combat situation.
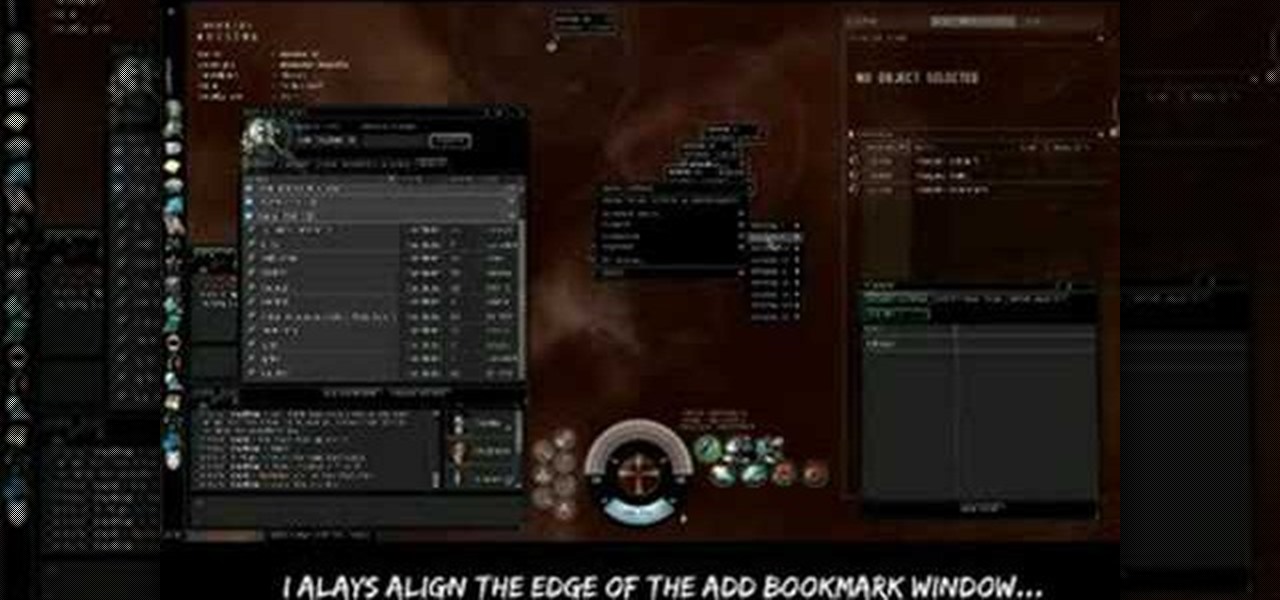
Planetary Interaction is a feature of the EVE Online expansion, Tyrannis. This video guide shows you how to use this new function. Choose your own planet, buy the command center and start exploiting its resources for your own gain!
There's no Cheat Engine involved in this Bejeweled Blitz hack. This hack relies on Firefox and a certain extension made specifically for Blitz.
Eleusis is a fun card game that is pretty easy to learn how to play. Grab a few buddies, and check out this video tutorial!
A cool glitch for Wizard101. The crate glitch. There are plenty of glitches in this game, but the crate glitch is one to look out for.
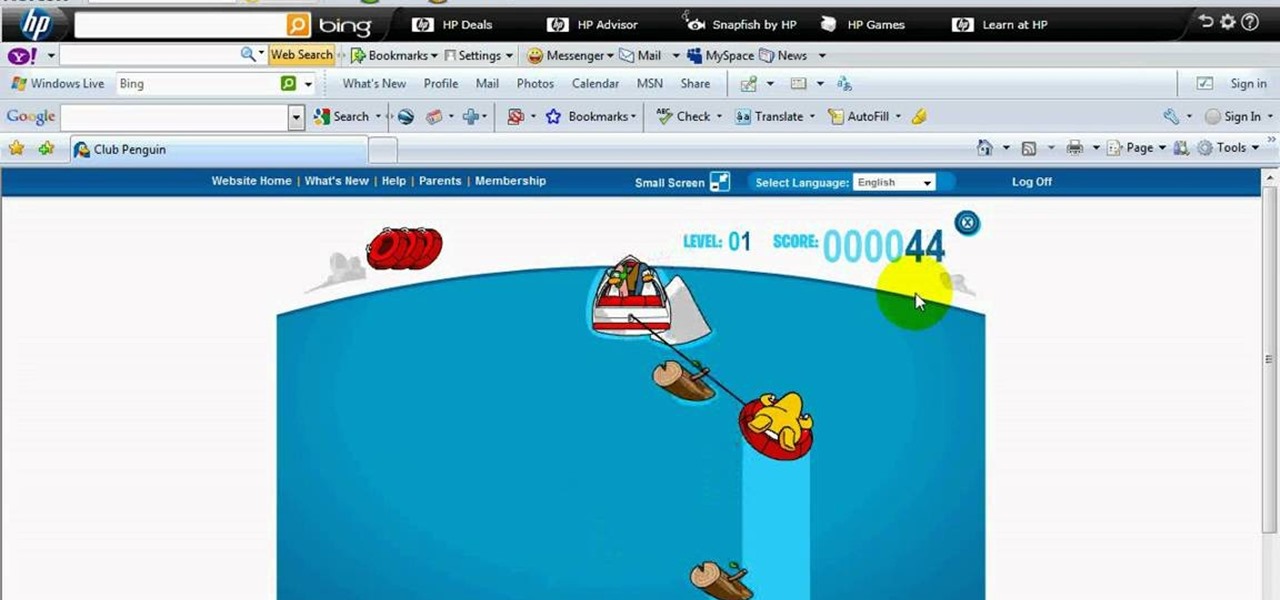
This is Cheat Engine hacking for Club Penguin. If you want more coins, you have to hack your way to them. And to hack your way to more coins, you're going to need Cheat Engine.
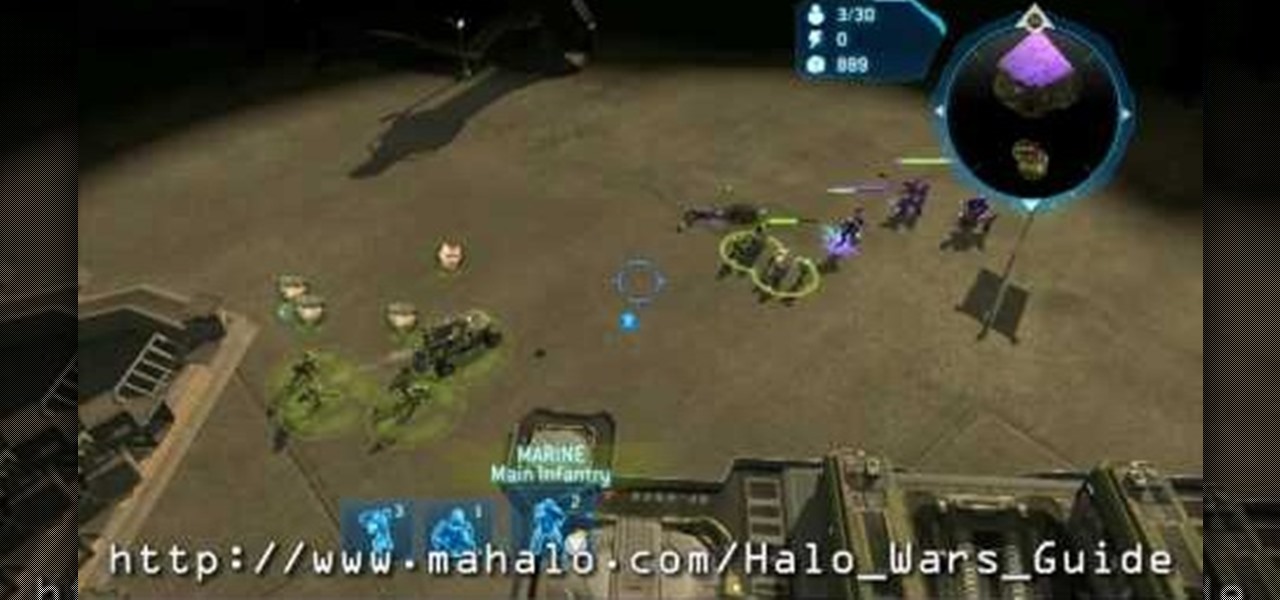
Check out this 5 part walkthrough of Halo Wars - Mission 4: Arcadia City. This is the fourth chapter in XBOX 360's Halo Wars. This walkthrough helps you beat the game and is brought to you by Mahalo Gaming.
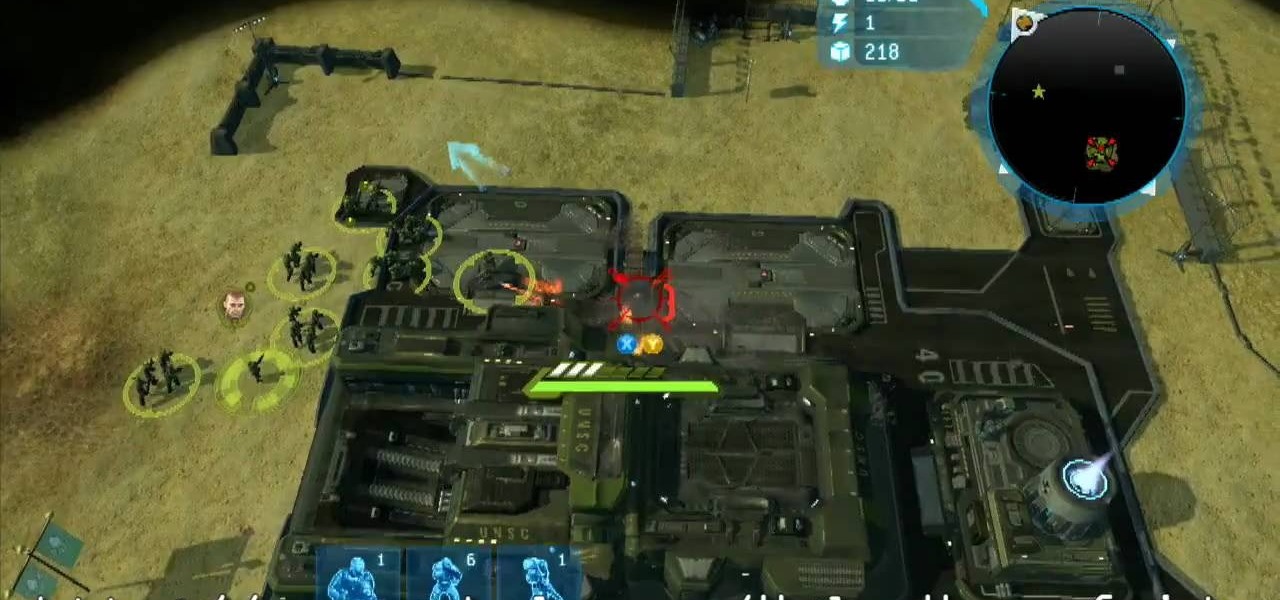
Beat Halo Wars now! Check out this walkthrough of Halo Wars - Mission 6: Dome of Light. This is a quicker way to make it through the game and beat Halo Wars. This is a production from Mahalo Gaming.
Check out this 4 part series on Halo Wars. This is a walkthrough of the Halo Wars, game for XBOX 360. This is a great way to cheat a little and beat Halo Wars before your friends. This walkthrough is brought to you by Mahalo Gaming.
Check out this 5 part series walkthrough for Halo Wars - Mission 9: The Flood. Beat Halo Wars with a little help from Mahalo Gaming's walkthrough. This is a brand new game for XBOX 360.
This walkthrough of Mission 15: Escape is the last chapter of Halo Wars. Complete Mission 15 and you'll have beat the game. This is a 6 part series walkthrough from Mahalo Gaming.
This game goes by a bunch of names: "fast and loose," "pricking the garter," "the endless chain," "the strap..." The object is simple: a chain is laid in a figure-eight configuration. One of the holes is the true center of the chain and will hold "fast," while the other will not hold, and is instead "loose". Follow along with this how-to video and learn how to perform the bar trick.